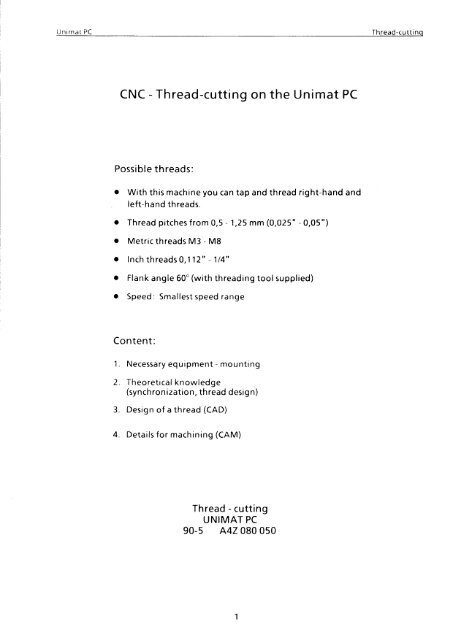
CNC - Thread-cutting on the Unimat PC - Usinages
CNC - Thread-cutting on the Unimat PC - Usinages
CNC - Thread-cutting on the Unimat PC - Usinages

Create successful ePaper yourself
Turn your PDF publications into a flip-book with our unique Google optimized e-Paper software.
<strong>Unimat</strong> <strong>PC</strong><br />
<str<strong>on</strong>g>Thread</str<strong>on</strong>g>-cutti nq<br />
<str<strong>on</strong>g>CNC</str<strong>on</strong>g> - <str<strong>on</strong>g>Thread</str<strong>on</strong>g>-<str<strong>on</strong>g>cutting</str<strong>on</strong>g> <strong>on</strong> <strong>the</strong> <strong>Unimat</strong> <strong>PC</strong><br />
Possible threads:<br />
o With this machine you can tap and thread right-hand and<br />
left-hand threads.<br />
. <str<strong>on</strong>g>Thread</str<strong>on</strong>g> pitches from 0,5 - 1,25 mm (0,025"- 0,05")<br />
. Metric threads M3 - M8<br />
o ln ch th reads 0, 112" - 114"<br />
. Flank angle 60" (with threading tool supplied)<br />
. Speed: Smallestspeed range<br />
C<strong>on</strong>tent:<br />
1. Necessary equipment - mounting<br />
2. Theoretical knowledge<br />
(synch r<strong>on</strong>izati<strong>on</strong>, thread desig n)<br />
3. Design of a thread (CAD)<br />
4. Details for machining (CnU)<br />
<str<strong>on</strong>g>Thread</str<strong>on</strong>g> - <str<strong>on</strong>g>cutting</str<strong>on</strong>g><br />
UNIMAT <strong>PC</strong><br />
90-5 A4Z 080050
1. Necessary equipment<br />
Software level 1.6<br />
<str<strong>on</strong>g>CNC</str<strong>on</strong>g> threading is possible beginning wrrn<br />
software level 'l 6. lf you have a lower software<br />
level (c<strong>on</strong>firm software level <strong>on</strong> <strong>the</strong> screen when<br />
starting up <strong>PC</strong>), new software should be obtained<br />
and installed in <strong>the</strong> pC<br />
. C<strong>on</strong>trolling proper belt tensi<strong>on</strong>:<br />
When pressrng <strong>the</strong> belt lightly with your<br />
finger, rt mrght give way approx. 3 mm.<br />
Belts that are too tight need more motor<br />
power. Belts that are too loose might move<br />
out of place<br />
Ali coerrrJh."! r.r.rvd 3!C0 Uill;SELISCU8t f.3.r.<br />
o<br />
Plug encoder cable <strong>on</strong>to pC board<br />
Encoder (Order no. 171 080)<br />
Installlno <strong>the</strong> encoder (1)<br />
o Remove tooth belt (2) and belt (3)<br />
o<br />
Mount encoder wrth bolt (4) and washer. do<br />
not trghten bolts<br />
Q x-Motor<br />
Q z-vtotor<br />
A-<br />
LJ EnCOOer<br />
. Mount belt (5) and tighten by pressing <strong>the</strong><br />
encoder downwards<br />
o Tighten bolt (4)<br />
Order numbers for spare parts<br />
Pos Ref No DIN Benennung Descripti<strong>on</strong> Designati<strong>on</strong><br />
1,4,5<br />
4<br />
5<br />
1 71 080<br />
zsR120510M5x10 DIN 912-69<br />
z5B 250530<br />
zRM 733150<br />
45,3 DtN 125<br />
MXL l50Z-3116<br />
Gr. Drehgeber<br />
Zyl i nderschrau be<br />
5chei be<br />
Zahnriemen<br />
Encoder assy.<br />
Socket head screw<br />
Washer<br />
Timing belt<br />
Ens. capteur rotatif<br />
Vis 6 pans creux<br />
R<strong>on</strong>delle<br />
Courroie crant6e
Unrmat <strong>PC</strong><br />
<str<strong>on</strong>g>Thread</str<strong>on</strong>g>-cutti nq<br />
2. Theoretical knowledge<br />
Fu ncti<strong>on</strong> of thread-cutti ng<br />
At each workpiece revoluti<strong>on</strong> <strong>the</strong> threading tool<br />
has to advance at a certain length ( = threading<br />
pitch P) For this <strong>the</strong> main spindle and <strong>the</strong> slrde<br />
feed have to be synchr<strong>on</strong>ized.<br />
Findinq of thread turn<br />
A thread is always cut in several operati<strong>on</strong>s At <strong>the</strong><br />
start command for thread-cuttrng <strong>the</strong> main<br />
spindle must have a certain angular positr<strong>on</strong>. At<br />
<strong>the</strong> start command for <strong>the</strong> next screw <strong>the</strong> main<br />
spindle must have <strong>the</strong> same angular positi<strong>on</strong>, so<br />
that <strong>the</strong> threading tool finds rts way into <strong>the</strong><br />
thread turn.<br />
<str<strong>on</strong>g>Thread</str<strong>on</strong>g> design<br />
When c<strong>on</strong>forming to standard metric<br />
a separate radius of curvature (R1) is<br />
each thread pitch.<br />
This means that for each pitch<br />
threading tool is needed<br />
5ol uti <strong>on</strong> :<br />
On this machine we use a threading<br />
radius R2 = 0,04 mm for all pitches<br />
1,25 mm<br />
l5O threads<br />
assigned to<br />
a separate<br />
tool with a<br />
from 0,5 to<br />
Disadvantage:<br />
The radius of curvature R2 does not c<strong>on</strong>form to<br />
standard. The thread turns become a little deeper,<br />
thus resulting in a smaller core diameter (see<br />
tables) than with standard threads These threads<br />
naturally can be screwed with standard screws<br />
and nuts.<br />
Svnchr<strong>on</strong>izatr<strong>on</strong> of speed and feed<br />
Y.\<br />
Hand-operated la<strong>the</strong><br />
With a hand-operated la<strong>the</strong> <strong>the</strong> slide feed is<br />
carried out from <strong>the</strong> main spindle via too<strong>the</strong>d<br />
belts, translating gear wheels and leadscrew to<br />
<strong>the</strong> l<strong>on</strong>gitudinal slide There is a closed,<br />
mechanical oower flux lf <strong>the</strong> main soindle turns<br />
slower, e.g. because of load, <strong>the</strong> main spindle<br />
turns slower at <strong>the</strong> same rate. The thread pitch<br />
always remains <strong>the</strong> same.<br />
<str<strong>on</strong>g>CNC</str<strong>on</strong>g> la<strong>the</strong><br />
The main spindle drives <strong>the</strong> encoder via a too<strong>the</strong>d<br />
belt. The encoder reports <strong>the</strong> respective speed<br />
and angular positi<strong>on</strong> of <strong>the</strong> main spindle to <strong>the</strong><br />
computer.<br />
The computer c<strong>on</strong>verts this informati<strong>on</strong> and<br />
provides <strong>the</strong> necessary impulses for start and feed<br />
speed to <strong>the</strong> feed motor of <strong>the</strong> l<strong>on</strong>gitudinal slide.
Unrmat pC<br />
<str<strong>on</strong>g>Thread</str<strong>on</strong>g>-cuttinq<br />
3. Design of a thread<br />
During <strong>the</strong> design of a thread mind <strong>the</strong> following<br />
items:<br />
<str<strong>on</strong>g>Thread</str<strong>on</strong>g> dimensi<strong>on</strong>s<br />
The threads cut in accordance with this table can<br />
be screwed with standardized screws and nuts<br />
Metrrc threads (dimensi<strong>on</strong>s in mm)<br />
<str<strong>on</strong>g>Thread</str<strong>on</strong>g> desr9nalr<strong>on</strong><br />
Pitch P<br />
Nomrnal diameter<br />
D1<br />
Bolt<br />
<str<strong>on</strong>g>Thread</str<strong>on</strong>g><br />
height H1<br />
Core diameter<br />
D2<br />
Nut<br />
<str<strong>on</strong>g>Thread</str<strong>on</strong>g><br />
height H2<br />
M3 3,00 0,337 2,459 0,285<br />
M3,5 0,5 3.50 0,416 2,850 0,3s5<br />
M4 0,7 4,00 0.490 3,242 0,414<br />
M4,5 0,75 4.50 n ( )o 1,588 0,448<br />
M5 0,8 5,00 0,55 r 4,r34 0,479<br />
M6 1,0 5,00 0,7 17 4,917 0,609<br />
M8 1 )q 8,00 0.907 6,647 0,771<br />
M 0 1q 10.00 r,r00 8,376 0,934<br />
M12 r 7< 12,00 1.285 r 0.1 06 1,098<br />
M14 2,O 1 1.835 1,257<br />
M15 2,0 13,835 tc7<br />
'<br />
M.. stands for metric standard threads<br />
lnch ihreads accordinq to .J5-standard(dimensr<strong>on</strong>s<br />
rn inch)<br />
<str<strong>on</strong>g>Thread</str<strong>on</strong>g> desrgnatr<strong>on</strong><br />
Iurns per<br />
I nch<br />
Pitch P<br />
Nomrnal drameter<br />
D1<br />
Eolt<br />
<str<strong>on</strong>g>Thread</str<strong>on</strong>g><br />
hetght H1<br />
Core diameter<br />
D2<br />
Nut<br />
<str<strong>on</strong>g>Thread</str<strong>on</strong>g><br />
height H2<br />
112 4) 40 0,0250<br />
n rrln 0,0174 0,0813 0,0147<br />
r25s) 0.0250 0.1250 0,0174 0,0943 0,0147<br />
1386) 32 0,0313 0,1380 0,0243 0,0997 0,0188<br />
1U 8) 32 0,0313 0,1540 0,0243 0 257 0,0188<br />
r90 10) 0,0417 0, r 900 0,0330 0,1389 0,0252<br />
216 12) 0.04 7 0,2160 0,0330 549 0,0252<br />
1t4 20 0.0500 0,2500 0,0386 887 0,0309<br />
)/ to 18 0,0555 0,3125 0,0447 0,2443 0,0346<br />
3/8 to 0,0525 0,3750 0,0s02 0,2983 0,0391<br />
/t to 4,0714 c,4375 0,0577 0,3499 0,0449<br />
1/2 0.0759 0,4056 0,0485<br />
9t 16 1) 0,0833 0,4603 0,0525<br />
5/8 1t 0,0909 0,5135 0,0575<br />
l' = 25.4 mm<br />
4
Unrmat <strong>PC</strong><br />
<str<strong>on</strong>g>Thread</str<strong>on</strong>g>-cuttino<br />
Chamfer<br />
Design of core diameter for bolts<br />
Start and end of a thread are usually provided . Draw <strong>on</strong>e straight line between starting point<br />
wrth a chamfer of 45" or 60'to avoid a burr during<br />
(5) and final point (E) with <strong>the</strong> correct thread<br />
thread-cu ttt ng<br />
height H1(seetable)<br />
The 30" chamfer can strll be turned with <strong>the</strong> right o Search intersecting point (X) and delete<br />
lateral tool and saves an additi<strong>on</strong>al changing of<br />
projectrng line<br />
<strong>the</strong> turning tool<br />
<str<strong>on</strong>g>Thread</str<strong>on</strong>g> lead-in - <str<strong>on</strong>g>Thread</str<strong>on</strong>g> lead-out<br />
Design of nominal diameter for nut<br />
Similar to descrioti<strong>on</strong> for core diameter of bolt<br />
At <strong>the</strong> start and end of a thread-curtrng<br />
procedure <strong>the</strong> slides (with threading tool) have to<br />
be accelerated or decelerated<br />
This accelerati<strong>on</strong> path (approx.3 mm) and<br />
declerati<strong>on</strong> path (approx l mm) has no c<strong>on</strong>stant<br />
thread pitch and <strong>the</strong>refore must be outside of <strong>the</strong><br />
<str<strong>on</strong>g>cutting</str<strong>on</strong>g> process The necessary free space for <strong>the</strong><br />
turning tool has to be taken into account during<br />
<strong>the</strong> design of <strong>the</strong> workpiece<br />
<str<strong>on</strong>g>Thread</str<strong>on</strong>g> lead-in at<br />
left-hand thread<br />
<str<strong>on</strong>g>Thread</str<strong>on</strong>g> lead-out<br />
at right-hand thread<br />
[l\nnz\ /\n lV\AAl\<br />
rrlr<br />
^14
4. Machining data<br />
Tool change<br />
Select tool for thread-<str<strong>on</strong>g>cutting</str<strong>on</strong>g> (see menu program<br />
- F3lchange tool - F6)<br />
Enter number of machine cuts<br />
After selecting <strong>the</strong> thread cycle <strong>the</strong> following<br />
message appears at <strong>the</strong> screen:<br />
Enter number of machrne cuts (10)<br />
(ENTER = accept)<br />
Right-hand thread - left-hand thread<br />
lf <strong>the</strong> tool rs at <strong>the</strong> rrght side of <strong>the</strong> thread (A) a<br />
rrght-hand thread rs cut lf you move <strong>the</strong> tool (in<br />
raprd moti<strong>on</strong>) to <strong>the</strong> left side of <strong>the</strong> thread (B) a<br />
left-hand thread is cut<br />
The recommended number of machine cuts is 10<br />
to 20 according to thread height (H).<br />
The software adjusts <strong>the</strong> feed depth so that at<br />
each cut <strong>the</strong> chip cross-secti<strong>on</strong> has <strong>the</strong> same stze<br />
The feeds are carried out <strong>on</strong>ly in X-directi<strong>on</strong>.<br />
nn<br />
Call-up thread cycle<br />
Select <strong>on</strong>e of <strong>the</strong> cycles in <strong>the</strong> menu program<br />
(F3,F4,F5)and <strong>the</strong> submenu CYCLES appears<br />
Select <strong>the</strong> thread cycle with F4<br />
<str<strong>on</strong>g>Thread</str<strong>on</strong>g> lead-rn - thread lead-out<br />
Screen message:<br />
Enter thread lead-rn = 3 000, lead-out = I 000<br />
PROGRAM<br />
(ENTER = nochange)<br />
F1<br />
F2<br />
F3<br />
F4<br />
F5<br />
F6<br />
F7<br />
F8<br />
F9<br />
F10<br />
CYCLES<br />
ROUGHING<br />
BACK OFF<br />
CONTOU R<br />
THREAD<br />
F,I RAPID<br />
F2 FEED<br />
F3 ROUGHING<br />
F4 BACK POCKI<br />
F5 FOL CONTR<br />
F6 TOOL CHNGE<br />
F7 ERASE LAST<br />
F8 ERASE PROG<br />
F9 FEED<br />
F 1O OFFSET<br />
For thread lead in a length of at least 3 mm should<br />
be entered because <strong>the</strong> slide (with thread tool)<br />
needs an accelerati<strong>on</strong> path. For thread lead-out<br />
enter approx l mm. At left-hand threads <strong>the</strong>se<br />
values must be provided with a negative sign.<br />
Rrght-hand thread
<strong>Unimat</strong> <strong>PC</strong><br />
<str<strong>on</strong>g>Thread</str<strong>on</strong>g>-cuttino<br />
Left-hand thread<br />
Acknowledge inputs<br />
I nd of 'nput<br />
(F N I t R<br />
accepted)<br />
You have two possibilitres:<br />
The thread cycle is worked off <strong>on</strong> <strong>the</strong><br />
5C ree n.<br />
I anyiey I Exit from <strong>the</strong> thread cycle. The values<br />
entered last are suggested at <strong>the</strong> next<br />
call-up of <strong>the</strong> thread cycle.<br />
<str<strong>on</strong>g>Thread</str<strong>on</strong>g> pitch<br />
Screen message:<br />
Prtch = 1 000(ENTER = nochanqe)<br />
<str<strong>on</strong>g>Thread</str<strong>on</strong>g>-<str<strong>on</strong>g>cutting</str<strong>on</strong>g> tools offered are designed for<br />
pitches of P - 0,5 - 2 mm or 11-40 turns per inch.<br />
You can see <strong>the</strong> pitches for standardized threads<br />
{rom <strong>the</strong> table of <strong>the</strong> chapter "thread<br />
dimensi<strong>on</strong>s".<br />
Notes for working off <strong>the</strong> thread cycle<br />
<strong>the</strong> machine<br />
5peed.<br />
Adjust <strong>the</strong> smallest speed range (20-300). The<br />
precise adjustment of <strong>the</strong> speed should be<br />
between 80 und 120 rpm according to pitch and<br />
should not be changed during <strong>the</strong> <str<strong>on</strong>g>cutting</str<strong>on</strong>g> process,<br />
Adjust 20o/o higher values for soft metals<br />
(aluminium, brass)<br />
Speed ad1ustment<br />
Indicate nominal and core diameter<br />
Enter nom Inal drameter element:<br />
Place <strong>the</strong> cursor to <strong>the</strong> nominal diameter and<br />
acknowledge with ENTER. The following message<br />
a ppears:<br />
IilltHrl<br />
-t grror -<br />
-,t<br />
,<br />
x J.nl<br />
Z N.$t<br />
::: t.tti<br />
r f00!<br />
x z.ml<br />
I ''t[<br />
I<br />
ltll<br />
lli'<br />
Z0-3C0 c,,,-<br />
tirfllti<br />
I lit<br />
| ,|l<br />
tt--J-<br />
I<br />
Speed c<strong>on</strong>trol I j,f;<br />
----:-?--'<br />
t<br />
NH<br />
Lp.ril<br />
'"<br />
@iJ<br />
Enter rore drameter elemenl<br />
Place <strong>the</strong> cursor to <strong>the</strong> core diameter and<br />
acknowledge with ENTER.
Unrmat <strong>PC</strong><br />
Th read-cutti no<br />
Example: Generatt<strong>on</strong> of a special screw<br />
. Unmachined part: A22,100 with bore O3,5<br />
o<br />
Drawing.<br />
cDl c..',<br />
=i ol<br />
Gr o)t<br />
rA<br />
€ll<br />
Chamfers: 1x45"<br />
lstr<br />
Roughi ng<br />
a<br />
a<br />
o<br />
o<br />
Back-off<br />
Execute c<strong>on</strong>tour cycle<br />
Select thread tool<br />
Positi<strong>on</strong> thread-<str<strong>on</strong>g>cutting</str<strong>on</strong>g> tool at <strong>the</strong> right side<br />
of <strong>the</strong> thread<br />
Select submenu "thread "<br />
trtr<br />
Cursor to nominal<br />
diameter<br />
and acknowledge<br />
with<br />
trtr<br />
Cu rsor to core<br />
diameter and<br />
acknowledge<br />
wrth l--i'l<br />
l+l<br />
rm portant<br />
During machining and particularly<br />
during thread-<str<strong>on</strong>g>cutting</str<strong>on</strong>g> <strong>the</strong> workpiece<br />
is to be supported in any<br />
case by a la<strong>the</strong> center.<br />
8
un,mat <strong>PC</strong><br />
Gewindeschnerden<br />
<str<strong>on</strong>g>CNC</str<strong>on</strong>g> - Gewindeschneiden auf der <strong>Unimat</strong> <strong>PC</strong><br />
Mogliche Gewinde:<br />
. Mit dieser Maschine k<strong>on</strong>nen Sie Rechts- und Linksqewinde<br />
auBen und innen schneiden.<br />
. Gewindesteigungen v<strong>on</strong> 0,5 - 1,25 mm (0,025"- 0,05")<br />
o Metrische Gewinde M3 - M8<br />
o Zollige Gewinde 0,112" - 114"<br />
o Flankenwinkel 60' (mit angebotenem Gewindeschneidstahl)<br />
. Drehzahl: KleinsterDrehzahlbereich<br />
Inhalt:<br />
1. Erforderliche Ausrustung - M<strong>on</strong>tage<br />
2. Theoretrsche Kenntnisse<br />
(5ynch r<strong>on</strong> isati<strong>on</strong>, Gewindeausfu h ru ng)<br />
3. K<strong>on</strong>strukti<strong>on</strong> eines Gewindes (CAD)<br />
4. Angaben zur Bearbeitung (CAM)<br />
Gewindeschneiden<br />
UNIMAT <strong>PC</strong><br />
90-5 A4Z 080 050
1. Erforderliche Ausrustung:<br />
Softwarestand 1.6<br />
<str<strong>on</strong>g>CNC</str<strong>on</strong>g> - Gewindeschneiden rst erst ab Softwarestand<br />
1.6 moglich Falls Sie einen alteren Softwarestand<br />
haben (siehe Bildschirm beim Ernschalten),<br />
mussen sre sich eine neue Software besorgen und<br />
am <strong>PC</strong> installieren<br />
r<br />
Richtrge Rremenspannung k<strong>on</strong>trollieren:<br />
8ei leichtem Druck mit dem Finger darf der<br />
Riemen ca 3 mm nachgeben.<br />
Zu fest gespannte Riemen verbrauchen zu viel<br />
Motorleistung, zu leicht gespannte Riemen<br />
k<strong>on</strong>nen uberspringen<br />
EMEI<br />
AI:. t..h:. ?..b.f.1:.n !
2. Theoretische Kenntnisse<br />
Fun kti<strong>on</strong> des Gewindesch neidens<br />
Pro Werkstuckumdrehung muB srch der<br />
Gewindestahl um eine bestimmte Lange<br />
vorschreben (- Gewindestergung p). Dazu<br />
mussen Hauptspindel und Schlittenvorschub<br />
synchr<strong>on</strong>isiert werden.<br />
Fi nden des Gewi ndeqanqs<br />
Ein Gewinde wird stets in mehreren Arbeitsgangen<br />
geschnrtten 8ei Startbefehi zum<br />
Gewindeschneiden muB die Hauptspindel eine<br />
bestrmmte Winkellage haben Bei Startbefehl<br />
zum nachsten Schnitt muB die Hauptspindel<br />
genau die selbe Winkellage haben, damit der<br />
Gewindeschneidstahl in den Gewindegang findet.<br />
Gewindeausf uh rung<br />
Ber normgerechten metrischen ISO-Gewrnden ist<br />
jeder Gewindesteigung ein eigener Rundungsradius<br />
(Rl) zugeordnet.<br />
Das bedeutet, daB fur jede Steigung ein eigener<br />
Gewi ndestahl benoti gt wi rd<br />
Losu ng :<br />
Auf dieser Maschine verwenden wir fur alle<br />
Steigungen v<strong>on</strong> 0,5 bis 1,25 mm einen<br />
Gewindestahl mit einem Radrus R2 = Q,64 6rn<br />
Nachteil:<br />
Der Rundungsradius R2 entspricht nicht der Norm.<br />
Die Gewindegange werden etwas tiefer, daraus<br />
ergibt sich ein kleinerer Kerndurchmesser (siehe<br />
Tabellen) als bei Normgewinden. Diese Gewinde<br />
k<strong>on</strong>nen naturlich mit genormten Schrauben Dzw.<br />
Muttern verSchraubt werden.<br />
Svnchr<strong>on</strong>isati<strong>on</strong> v<strong>on</strong> Drehzahl und Vorschub<br />
Hand bedi ente Drehmaschi ne<br />
Ber einer handbedienten Drehmaschine erfolgt<br />
der Schlittenvorschub ausgehend v<strong>on</strong> der Hauptspindel<br />
uber Zahnriemen, Wechselrader und Leitsprndel<br />
auf den Langsschlitten Es ist ein geschlossener,<br />
mechanischer KraftfluB gegeben.<br />
Wenn sich die Hauptspindel langsamer dreht, z.B.<br />
durch Belastung, dreht sich die Leitspindel im<br />
gleichen Verhaltnis langsamer. Die Gewindesteigung<br />
bleibt stets gleich.<br />
<str<strong>on</strong>g>CNC</str<strong>on</strong>g>-Drehmaschine<br />
Die Hauptspindel treibt uber einen Zahnrremen<br />
den Drehgeber an. Dieser meldet die jeweilige<br />
Drehzahl und Winkellage der Hauptspindel in<br />
den Rechner<br />
Der Rechner rechnet diese lnformati<strong>on</strong>en um uno<br />
grbt die notrgen lmpulse fur den Start und die<br />
Vorschubgeschwindigkeit an den Vorschubmotor<br />
des Langsschlittens.
Gewindesc<br />
3. K<strong>on</strong>struieren eines Gewindes<br />
Ber der K<strong>on</strong>struktl<strong>on</strong> etnes Gewindes rst aul<br />
folgende Punkte zu achten:<br />
Gewindeabmessu ngen<br />
Iter<br />
Dre nach dieser Tabelle geschnittenen Gewinde<br />
k<strong>on</strong>nen mtt genormten 5chrauben und Muttern<br />
verschraubt werden.<br />
Metrrsche Gewrnde (MaBe jn mm)<br />
Gewrndebezer<br />
chnung<br />
5ter gung<br />
Y<br />
Nennd urchmesser<br />
D,<br />
Bol zen<br />
6ewr ndehohe<br />
H r<br />
Kernd u rchmesser<br />
D2<br />
Mutter<br />
Gewindehohe<br />
H2<br />
M3 0,s 3,00 0,337 2.459 0,285<br />
M3,5 0,5 0,416 2.850<br />
M4 0.7 4,00 0,490 3 242<br />
M45 i. 688 0,448<br />
M5 0.8 5 .00 c lJq o,479<br />
M6 1.0 6.00 0,717 4.91 7 0.609<br />
M8<br />
M10<br />
M stent iur Metnsche NormgewrnOe<br />
l,)<br />
8,00<br />
10,00<br />
0,907<br />
1,100<br />
6,647<br />
8,376<br />
0,771<br />
0,934<br />
M12 1,75 12,00 I )eq<br />
10106 1,098<br />
M14 2,0 115J) t)I<br />
\4 16 20 3 835 257<br />
Zolliqe 6ewrnde nach US-Norrn (MaBe rn rnch)<br />
Gewrnde- i Gange pro<br />
bezerchnung I Zoil<br />
Stergu ng<br />
3ol zen<br />
Nenndurch- I Gewrndemesser<br />
Dr i nohe Hr<br />
Kernd u rch.<br />
messer Dr<br />
Mutter<br />
Gewindehohe<br />
H2<br />
112(4) i 40 0,0250 0.1120 0,0174 0,081 3 0,0147<br />
r25 (5) 40 0,0250 c. 1250 i 0.0174 0,0943 0,0147<br />
138(6) I 32 0,0313 0, r 380 c,0243 0 0997 {,0 88<br />
toq (8) 0,0313 0. 1540 c.0243 0, 257 0.0188<br />
190(l0) | 24 0,0417 0. r 900 0,0330 0, 389 0.0252<br />
216(J2) I 24 0,0417 0,2150 0.0330 0 549 0.0252<br />
1/A 20 0,05 00 0,2500 0,0386 c.1 887 0,0309<br />
5/ 16 t8 0,0555 0,3125 0,0M7 0.2443 0,0346<br />
3/8 to 0,062 s 0.3750 0,0502 0,2983 0.0391<br />
7 t15 0,0714 0.4375 c,0577 0,3499 0,04/9<br />
1 /') r3 0,0769 c..1055 0,04t|5<br />
9/16 i 12 0,0833 0,,1603 0,0s26<br />
5/8 tl 0,0909 0.5r35 0,0575<br />
l' = 25,4 mm<br />
4
<strong>Unimat</strong> <strong>PC</strong><br />
Gewindeschneiden<br />
Fase<br />
Anfang und Ende eines Gewindes werden<br />
ublicherweise mit einer Fase v<strong>on</strong> 45o oder 60'<br />
versehen, um beim Gewindeschneiden eine<br />
Gratbildung zu vermeiden<br />
Dre 30' Fase kann noch mit dem rechten<br />
Seitenstahl gedreht werden und erspart ein<br />
zusatzl r ches Wechsel n des Drehstahls<br />
K<strong>on</strong>struktr<strong>on</strong> des Kerndurchmessers fur<br />
Bolzen<br />
o<br />
o<br />
Eine Gerade zwrschen Startpunkt (S) und<br />
Endpunkt (E) mit richtiger Gewindehohe H1<br />
(siehe Tabelle) zeichnen<br />
Schnittpunkt (X) suchen und uberstehende<br />
Linien lOschen<br />
Gewindeeinlauf - Gewindeauslauf<br />
Am Anfang und Ende eines Gewindeschneidvorganges<br />
mussen die Schlitten (mit Gewindeschneidstahl)<br />
beschleuni gen bzw. verzogern.<br />
K<strong>on</strong>strukti<strong>on</strong> des Nenndurchmessers fur<br />
Mutter<br />
Gleich wre ber Kerndurchmesser fur<br />
beschrieben.<br />
Bolzen<br />
Dieser Beschleunigungsweg (ca 3mm) und<br />
Verzogerungsweg (ca 'l mm) hat keine k<strong>on</strong>stante<br />
Gewindesteigung und muB deshalb auBerhalb<br />
des Schneidvorgangs liegen. Der dazu<br />
erforderliche Freiraum fur den Drehstahl ist ber<br />
der K<strong>on</strong>struktr<strong>on</strong> des Werstucks zt)<br />
beruck si chti gen<br />
Gewindeeinlauf bei Gewindeeinlauf bei<br />
Lrnksgewinde<br />
Rechtsgewrnde<br />
k\Ann An A,^v*^^<br />
T1
4. Angaben zur Bearbeitung<br />
Werkzeugwechser<br />
Werkzeug zum Gewrndeschneiden wahlen (siehe<br />
Menu Programm - F3 / Werkzeug wechseln - F6)<br />
Rechtsgewinde - Linksgewinde<br />
Befindet sich das Werkzeug rechrs vom Gewinde<br />
(A), wrrd ein Rechtsgewinde geschnitten. Verfahren<br />
5ie das Werkzeug (im Eilgang) auf die linke<br />
Serte des Gewindes (B), wrrd ein Linksgewrnde<br />
gesch nt tten.<br />
Anzahl der Gewindeschnitte eingeben<br />
Nach Anwahl des Gewindezyklus erscheint am<br />
Bildschirm die Meldung :<br />
Anzahl der Gewrndeschnrtte (10) erngeben<br />
(€NrER = akzept ):<br />
Empfohlene Anzahl der Gewindschnitte ist je<br />
nach Gewindehohe (H) v<strong>on</strong> 10 bis 20.<br />
Dre Software teilt sich die Zustelltiefe so ein, daB<br />
bei jedem Schnitt der Spanquerschnitt gleich groB<br />
ist.<br />
Die Zustellungen erfolgen nur in X-Richtung.<br />
nn<br />
Gewi ndezykl us aufrufen<br />
lm Menu Programm einen der Zyklen(F3, F4, Fs)<br />
anwahlen und es erscheint das Untermenu<br />
ZYKLEN<br />
Mrt F4 den Gewindezvklus anwahlen.<br />
Gewindeei nlauf - Gewindeauslauf<br />
Eildschirmmeldung:<br />
Gewrndeernlauf = 3000, .auslauf = 1 000erng<br />
(ENTER = unv )<br />
F,I<br />
F2<br />
F3<br />
F4<br />
F5<br />
F6<br />
F7<br />
F8<br />
F9<br />
F10<br />
ZYKLE N<br />
SCHRUPPEN<br />
HINTERDREH<br />
KONTU R<br />
GEWINDE<br />
PROGRAMM<br />
F 1 EILGANG<br />
F2 VORSCHUB<br />
F3 SCHRUPPEN<br />
F4 HINTERDREH<br />
F5 KONTUR FOL<br />
F6 WZ WECHSEL<br />
F7 LETZ.LOSCH<br />
F8 PROG. LOSCH<br />
F9 VORSCHUB<br />
F I O OFFSET<br />
Da der Schlitten (mit Gewindestahl) einen Beschleunigungsweg<br />
benotigt, soll fur Gewindeeinlauf<br />
eine Lange v<strong>on</strong> mindestens 3 mm eingegeben<br />
werden Fur Gewindeauslauf ca. I mm eingeben.<br />
Bei Linksgewinden mussen diese Werte mit<br />
negativem Vorzeichen versehen werden.<br />
Rechtsgewinde
<strong>Unimat</strong> <strong>PC</strong><br />
Gewrndeschnelden<br />
Linksgewinde<br />
Eingaben bestdtigen<br />
I<br />
I<br />
II<br />
3<br />
r _-l<br />
ll<br />
I<br />
Ende der Erngabe (ENTtR = akzept )<br />
5ie haben zwei Moglichketten<br />
Der Gewindezyklus wird am Bildschirm<br />
abgearbeitet.<br />
Ausstieg aus dem Gewindezyklus, Die<br />
zuletzt eingegebenen Werte werden<br />
beim nachsten Aufruf des Gewindezykl<br />
us wieder vorgeschlagen.<br />
Gewindesteigung<br />
Bildschirmmeldung:<br />
Stergung = 1 000 etngeben (ENTER = unv ):<br />
Die angebotenen Gewindeschneidstahle sind ausgelegtfurStergungen<br />
v<strong>on</strong> P= 0,5- 2 mm bzw 1l-<br />
40 Gange pro Zoll<br />
Die Steigung fur Normgewinde ersehen Sie aus<br />
der Tabelle siehe Kapitel "Gewindeabmessungen"<br />
Hinweise zum Abarbeiten des Gewindezyklus<br />
auf der Maschine<br />
Drehzahl:<br />
Den kleinsten Drehzahlbereich (20-300) einstellen<br />
Die Feineinstellung der Drehzahl soll je<br />
nach Steigung zwischen 80 und 120 U/min sein<br />
und soll wahrend des Schneidvorgangs nicht<br />
verandert werden.<br />
Fur weiche Metalle (Alu, Messingl um 20o/o hohere<br />
Werte ernstellen<br />
Drehzahlernstellu ng<br />
J<br />
20-3C0 o,"-<br />
Nenn- und Kerndurchmeser angeben<br />
Element f ur Nenndurchmesser erneeben:<br />
Den Cursor zum Nenndurchmesser positi<strong>on</strong>ieren<br />
und mit ENTER bestatigen. Es erscheint die<br />
Meldung:<br />
Element flr Kerndurchmesser erneeben<br />
Den Cursor zum Kerndurchmesser positi<strong>on</strong>ieren<br />
und mit ENTER bestatigen.<br />
.<br />
t-<br />
Drehzahlk<strong>on</strong>trolle<br />
CGOI<br />
,.s I<br />
a.dl<br />
l::: L|'l<br />
i !!rEr i<br />
x t.Ni I<br />
t lg.nl<br />
It a.ill<br />
l2 aloiD<br />
i<br />
^ \ \<br />
ll flsD'll<br />
i{ D.lrgJ,ll<br />
I<br />
| 'l . ls rrrranni<br />
I i srsril. i<br />
i I l? tl^|Eltul I<br />
I I ig illlg l<br />
il ]wl
nrmat <strong>PC</strong><br />
Berspiel: Erstellen etner S<strong>on</strong>derschraube<br />
. Rohterl A 22, i00 mit Bohrung Z 3,5<br />
. Zerchnen:<br />
. I __L5* 24<br />
-..- 15 ,;<br />
@i c-l -;<br />
=h'i<br />
lE1<br />
U<br />
or)l<br />
q1i Fasen:lx45o rstr<br />
. Schruppen<br />
o<br />
Hinterdrehen<br />
. K<strong>on</strong>turfolgezyklusdurchfUhren<br />
o<br />
o<br />
Gewindestahlanwahlen<br />
Gewindestahl rechts des Gewrndes positi<strong>on</strong>reren<br />
Untermenu "Gewinde" anwahlen<br />
trtr<br />
m<br />
Cursor zum Nenndurchmesser<br />
und<br />
mit fl<br />
bestiitisen<br />
Wichtig:<br />
Beim Bearbeiten insbes<strong>on</strong>dere beim<br />
Gewindeschnerden ist das Werkstuck<br />
unbedingt mit dem Rollkorner abzustUtzen<br />
!<br />
8
Filetage <str<strong>on</strong>g>CNC</str<strong>on</strong>g> sur l'<strong>Unimat</strong> <strong>PC</strong><br />
Filetages possibles:<br />
o Avec cette machine, vous pouvez realiser des filetages et<br />
taraudages avec f ilets d droite et filets i gauche'<br />
o Pas de filetage de 0,5 a 1,25 mm (0,025"- 0,05")<br />
o Filetages metriques M3 - M8<br />
o Filetages en Pouces 0,112 " - 114"<br />
o Angle sur flanc 60'(avec outil d fileter offert)<br />
. Vitesse: Plage de vitesse la plus pettte<br />
Som maire:<br />
1.<br />
2<br />
3.<br />
4.<br />
M<strong>on</strong>tage de I'equipement necessatre<br />
C<strong>on</strong> narssances <strong>the</strong>orlq ues<br />
(synchr<strong>on</strong>isati<strong>on</strong>, realisati<strong>on</strong> du filetage)<br />
C<strong>on</strong>structi<strong>on</strong> d'un filetage (CAO)<br />
Indicatr<strong>on</strong>s c<strong>on</strong>cernant l'usinage (FAO)<br />
Filetage UNIMAT <strong>PC</strong><br />
90-s A4Z 0800s0
<strong>Unimat</strong> <strong>PC</strong><br />
Filetaqe<br />
1. Equipement necessaire:<br />
Logiciel 1.6<br />
Le filetage <str<strong>on</strong>g>CNC</str<strong>on</strong>g> n'est possible qu'd partir du<br />
logiciel I.6. 5i vous avez une versi<strong>on</strong> plus ancienne<br />
de logrcrel (voir sur l'ecran lors de la mise en<br />
marche), vous devez vous procurer un nouveau<br />
logrcrel et l'installer sur le <strong>PC</strong><br />
a<br />
C<strong>on</strong>tr6ler la tensi<strong>on</strong> correcte de la courrore:<br />
Lorsqu'<strong>on</strong> applrque une l69dre pressi<strong>on</strong> avec<br />
le dorgt, la courroie ne doit jouer que de 3 mm<br />
envr r<strong>on</strong>.<br />
Les courroies trop tendues exigent une trop<br />
grande puissance de moteur; !es courroies<br />
trop peu tendues peuvent sauter<br />
Em[[<br />
A1<br />
Capteur rotatif<br />
(No. de commande 171 080)<br />
. Brancher le cable du caoteur rotatif au tirorr<br />
<strong>PC</strong><br />
M<strong>on</strong>taqe du capteur rotatif (1):<br />
C<br />
Moteur X<br />
a<br />
o<br />
Dem<strong>on</strong>ter la roue dentee (2) et la courrore (3)<br />
M<strong>on</strong>ter le capteur rotatif avec vrs (4) et<br />
r<strong>on</strong>delles, ne pas encore bloquer les vis<br />
Placer et tendre la courrore (5) en appuyant le<br />
capteur rotatif vers le bas<br />
Bloquer la vis (4)<br />
C Moteur z<br />
C<br />
Capteurotati{<br />
Numeros de commande pour pidces de rechanqe<br />
Pos Ref No DIN Benennung Descrrptt<strong>on</strong> Designati<strong>on</strong><br />
1i4q<br />
171 080<br />
Gr Drehgeber<br />
Encoder assy<br />
Ens capteur rotati{<br />
A<br />
zsR 12 0510<br />
M5x10 DIN 912-69<br />
Zyl r ndersc hra u be<br />
Socket head screw<br />
Vis 6 pans creux<br />
z5B 25 0530<br />
45,3 DrN 125<br />
5c her be<br />
Washer<br />
R<strong>on</strong>del I e<br />
zRM 73 31 50<br />
MXL 1502-3/<br />
16<br />
Zahnrremen<br />
Trmrng belt<br />
Courroie crantee
<strong>Unimat</strong> pC<br />
Filetaqe<br />
2. C<strong>on</strong>naissances <strong>the</strong>oriques<br />
Comment faire un filetage<br />
A chaque tour de la pidce, l'outil a fileter doit<br />
avancer d'une certaine l<strong>on</strong>gueur ( - pas de<br />
filetage P). Pour ce faire, il faut synchr<strong>on</strong>iser<br />
broche principale et avance du chariot.<br />
Recherche du f ilet<br />
Un filetage est toujours realis€ en plusteurs<br />
op€rati<strong>on</strong>s. Au moment de I'instructi<strong>on</strong> de<br />
d6marrage, la broche principale doit avoir une<br />
certaine positi<strong>on</strong> angulaire. Au moment de<br />
l'instructi<strong>on</strong> de d6marrage pour la passe sutvante,<br />
la broche principale doit avoir exactement la<br />
m€me positi<strong>on</strong> angulaire afin que I'outil a fileter<br />
trouve le filet.<br />
Executi<strong>on</strong> du filetage<br />
Pour les filetages metriques aux normes l5O, un<br />
ray<strong>on</strong> d'arr<strong>on</strong>di (R1) est affectd ir chaque pas de<br />
f iletage.<br />
Ceci veut dire qu'il faut un outil propre pour<br />
chaque pas.<br />
Sur cette machrne. nous utrlis<strong>on</strong>s un outrl d fileter<br />
d'un ray<strong>on</strong> R2 = 0,04 mm pour tous les pas de 0,5<br />
a 1,25 mm.<br />
R: Rr<br />
lnc<strong>on</strong>venrent:<br />
Le ray<strong>on</strong> d'arr<strong>on</strong>di R2 ne corresp<strong>on</strong>d pas a la<br />
norme Les filets s<strong>on</strong>t un peu plus prof<strong>on</strong>ds et il en<br />
resulte un diamdtre d'6me (int6rieur) plus petit<br />
(voir tableaux) que dans les filetages standards.<br />
Ces filetages peuvent naturellement recevorr des<br />
vrs ou €<br />
/-=o.,<br />
:4----_<br />
)<br />
--!- ^J 1<br />
i+4;<br />
Tour a maniement manuel<br />
Dans un tour a maniement manuel, l'avance du<br />
chariot s'opdre a partir de la broche principale par<br />
l'rntermediaire de courroies dentees,<br />
d'engrenages et d'une broche mere sur le chartot<br />
principal ll y a delrvrance d'une force mecanique<br />
fermee. Lorsque la broche principale tourne plus<br />
lentement (par ex. sous c<strong>on</strong>trainte), la broche<br />
mdre tourne aussi plus lentement dans le meme<br />
rapport Le pas de filetage reste toulours le m€me<br />
Tour <str<strong>on</strong>g>CNC</str<strong>on</strong>g><br />
La broche princrpale entralne le capteur rotatif au<br />
moyen d'une courrore dentee Celui-ci transmet la<br />
vrtesse et la posrtr<strong>on</strong> angulaire respectives de la<br />
broche princrpale au calculateur<br />
Le calculateur c<strong>on</strong>vertit ces informati<strong>on</strong>s et d<strong>on</strong>ne<br />
les impulsi<strong>on</strong>s necessaires au d6marrage et a la<br />
vitesse d'avance au moteur d'avance du chariot<br />
l<strong>on</strong>gitudinal.
<strong>Unimat</strong> <strong>PC</strong><br />
Fr I etaqe<br />
3. C<strong>on</strong>structi<strong>on</strong> d'un filetage<br />
Lors de la c<strong>on</strong>structi<strong>on</strong> d'un filetage, il faut<br />
respecter les pornts suivants:<br />
3.1 Cotesdu filetage<br />
Les filetages realis6s d'apres les valeurs de ce<br />
tableau peuvent recevoir des vis et 6crous<br />
standards.<br />
Filetaqes metriques (cotes en mrfl)<br />
Designatr<strong>on</strong><br />
du filetage<br />
Pas P<br />
Orametre<br />
nomtnal<br />
(exterreur) Dr<br />
Bout <strong>on</strong><br />
Hauteur de<br />
filetage H1<br />
Diametre de<br />
i amg<br />
(interieur) D'<br />
E crou<br />
Hauteur de<br />
filetage H2<br />
M3 3.00 0,337 2.159 0,285<br />
M3,5 0.5 3.50 0,416 2850 0,355<br />
0,7 4,00 0,490 3 0,414<br />
M4,5 0.75 4,5 0 n q)q<br />
3.688 0,448<br />
irq<br />
0.8 5, 0 551 { ,ll 0,479<br />
\46<br />
M8<br />
1,oi5,oo 0,717 t.9i7 10,609<br />
1.25 I 8.00 i 0s07 66J7 ^i771<br />
12,00 I 1,28s I 10,106 j r,ose<br />
1 1.835<br />
1"4 rnoLque des fiietages standards rnetrreres<br />
r,retaoes en oouce5 Set<strong>on</strong> re5 norneS ame. ca ne5 /cote5 e. couce5)<br />
) esr g natr <strong>on</strong><br />
a I lr ol:-o<br />
5prres (frlersl<br />
par couce<br />
I 3our<strong>on</strong> Ecrou<br />
Pas P Fauteur ce Hauteur de<br />
frletage r2<br />
0.0188 |<br />
l90(10) | 24 1,0417 I 0,1900 I 0,0330 i 0,1389 0,0252<br />
216(12) 21 i o,oqrz 0,2160 0,0330 | 0,1549 I 0,0252<br />
' 9t16 ,,2 , 0,0833 ; I 0.i6c3 I o,oszs i<br />
i : --<br />
|<br />
-'----<br />
I<br />
5.8 " C.0909' rS13; , 0.057b L<br />
| = lf,cmm
<strong>Unimat</strong> <strong>PC</strong><br />
Fi I etaoe<br />
Chamfrein<br />
Le d€but et la fin d'un filetage,s<strong>on</strong>t en general<br />
dot6s d'un chanfrein de 45' ou 60'afin d'eviter la<br />
formati<strong>on</strong> d'une ar€te lors de la realisati<strong>on</strong> du<br />
f iletage<br />
Le chamfrein de 30' peut encore 6tre r6alise avec<br />
l'outi I droit, ce qui Ec<strong>on</strong>omise un changement<br />
suppl6mentaire de l'outil<br />
C<strong>on</strong>structi<strong>on</strong> du diametre de l'6me<br />
(interieur) pour boul<strong>on</strong><br />
o Dessiner une droite entre le point de depart (S)<br />
et le point d'extremite (E) avec hauteur de<br />
f iletage correcte H 1 (voir tableau).<br />
o Rechercher le point d'intersecti<strong>on</strong> (X) et effacer<br />
les lignes qui d6passent<br />
Entree - Sortie de filetage (Approche-<br />
Degagement)<br />
Au d€but et a la fin d'une operati<strong>on</strong> de filetage,<br />
les chariots (avec outil a fileter) doivent accelerer<br />
ou ralentrr.<br />
Cette course d'accelerati<strong>on</strong> (envir<strong>on</strong> 3 mm) ou de<br />
ralentissement (envir<strong>on</strong> 1 mm) n'a pas de pas<br />
c<strong>on</strong>stant et dort d<strong>on</strong>c se trouver hors de<br />
l'operati<strong>on</strong> de coupe L'espace lrbre necessaire<br />
pour I'outll doit €tre pris en compte lors oe ra<br />
c<strong>on</strong>cepti<strong>on</strong> de la piece<br />
Entree de filetage<br />
avec filet d gauche<br />
Entree de filetage<br />
avec filet i droite<br />
i,-t ^r**"<br />
+<br />
^TI<br />
1-il<br />
/_<br />
-l<br />
lt<br />
1<br />
C<strong>on</strong>structi<strong>on</strong> d u d ta metre nom inal<br />
(exterieur) pour ecrou<br />
Proceder comme il est d6crit pour la c<strong>on</strong>structi<strong>on</strong><br />
du diamdtre de l'6me pour boul<strong>on</strong>
nimat <strong>PC</strong><br />
4. Indicati<strong>on</strong>s pour I'usinage<br />
Changement d'outil<br />
Selecti<strong>on</strong>ner l'outil de f iletage (voir menu<br />
Programme F3 / Changement d'outil - F6)<br />
Entree du nombre de<br />
Une fois que vous avez<br />
f i letage, le message<br />
aff ichage:<br />
passes de f iletage<br />
s6lecti<strong>on</strong>nd le cycle de<br />
suivant apparait en<br />
Filet a droite - Filet d gauche<br />
5i l'outil se trouve d droite du filetage (A), il y a<br />
realicati<strong>on</strong> d'un filet a droite. Si vous deplacez<br />
I'outil (en marche rapide) sur le cote gauche du<br />
filetage (8), il y a 16alisatr<strong>on</strong> d'un filet d gauche<br />
Nombre de passes de trletage (10)<br />
(Entree = accept ):<br />
Le nombre de passes recommande est de l0 a 20<br />
suivant la hauteur du filetage (H)<br />
Le logiciel divise la prof<strong>on</strong>deur de coupe de telle<br />
sorte que la secti<strong>on</strong> de copeau demeure la m6me<br />
d chaque coupe<br />
Les avances n'<strong>on</strong>t lieu que dans la directi<strong>on</strong> X<br />
Fft<br />
Appel d'un cycle de filetage<br />
Selectr<strong>on</strong>ner dans le menu Programme I'un des<br />
cycles (F3, F4, F5) Le sous-menu CYCLES apparait<br />
Selecti<strong>on</strong>ner le cycle filetage F4<br />
Entree - Sortie de filetage<br />
(Approche - Degagement)<br />
Message sur ecran<br />
Frletaqe approche = 3 000, degagement- 1 000<br />
(tntiee - 5dns r,rrrlrl l<br />
F1<br />
F2<br />
F3<br />
F4<br />
F5<br />
F6<br />
F7<br />
F8<br />
F9<br />
F10<br />
CYCLES<br />
EBAUCHE<br />
VID POCHE<br />
CONTOU R<br />
FILETAGE<br />
PROGRAMME<br />
F1 RAPIDE<br />
F2 TRAVAIT<br />
F3 EBAUCHE<br />
F4 VID POCHE<br />
F5 SUIVR CONT<br />
F6 CHGT OUTIL<br />
F7 SUPP DERN<br />
F8 SUPPR PROG<br />
F9 AVANCE<br />
F 1O SU REPAIS<br />
Comme le chariot (avec outil a fileter) a besoin<br />
d'une course d'acceleratr<strong>on</strong>, il faut entrer une<br />
l<strong>on</strong>gueur d'au moins 3 mm pour l,approcne.<br />
Entrer envir<strong>on</strong> I mm pour le d6gagement. pour<br />
les f ilets a gauche, ces valeurs doivent Ctre entrees<br />
avec srgne negatif<br />
Filet a droite
<strong>Unimat</strong> <strong>PC</strong><br />
Frletaqe<br />
Filet a gauche<br />
Valider les entrees:<br />
frn de l'entree (des d<strong>on</strong>n6es) (Entree = valrdatr<strong>on</strong>)<br />
Vous avez deux possibilit6s:<br />
Le cycle de filetage est trait6 sur l'6cran.<br />
Sortie du cycle de filetage. Les<br />
dernidres valeurs entr6es s<strong>on</strong>t<br />
propos6es de nouveau lors du<br />
prochain appel du cycle de filetage.<br />
Pas de filetage<br />
Message sur €cran:<br />
Pas - [ntrer 1 000 (tntree = sansmodrf )<br />
Les outils offerts s<strong>on</strong>t c<strong>on</strong>(us pour des pas de P =<br />
0,5 a 2 mm ou pour 1'ld 40 spires par pouce<br />
Le pas pour filetage standard figure au chapitre<br />
" Cotes de f iletage ".<br />
C<strong>on</strong>seils pour exdcuti<strong>on</strong> du cycle de<br />
filetage sur la machine<br />
Vitesse:<br />
Regler la vitesse la plus faible (20-300) Suivant le<br />
pas, le reglage de la vitesse doit se faire entre 80<br />
et 120 trlmin et ne doit pas Otre modifiee pendant<br />
l'operatr<strong>on</strong> de coupe<br />
Pour les m6taux tendres (alu, lait<strong>on</strong>), prendre des<br />
valeurs de 20"/o plus elevees.<br />
Reglage de la vrtesse<br />
20-3C0 c,*<br />
Indiquer le drametre nominal (exterieur)<br />
et le diamritre de l'6me (interieur)<br />
Entrer I'element detrnrssant le drametre exteileur<br />
Positi<strong>on</strong>ner le curseur sur le diamdtre exteneur et<br />
valider avec ENTER. Le message suivant apparait:<br />
C<strong>on</strong>trole de la vrtesse<br />
Entrer l'element de{rnrssant le drametre Intereur<br />
Positi<strong>on</strong>ner le curseur sur le dramdtre rnteneur et<br />
valider avec ENTER.
Filetaqe<br />
Exemple: Realisati<strong>on</strong> d'une vis speciale<br />
o<br />
o<br />
Pidce brute: O 22,100 avec perqage O 3,5<br />
Dessin<br />
o<br />
o<br />
a<br />
o<br />
o<br />
a<br />
Ebauche<br />
Chamfreins: 1x45o<br />
R6al isati<strong>on</strong> de poche ( Detal<strong>on</strong>nage)<br />
Ex6cuter le cycle de suivi du c<strong>on</strong>tour<br />
Selectr<strong>on</strong>ner I'outil<br />
Positi<strong>on</strong>ner I'outil d droite du filetage<br />
Selecti<strong>on</strong>ner le sous-menu " Filetage"<br />
15<br />
*<br />
tr<br />
Frletageapproche = 3000,d6gagement = 1 000<br />
(ENTREE = sans modrf )<br />
trtr<br />
M<br />
D€placer le curseur<br />
au diamdtre<br />
ext6ri eur et<br />
valider avec<br />
I nde<br />
I pf,r'eH(F\:p11<br />
trtr<br />
u<br />
*<br />
- val'dal,u1)<br />
Deplacer le curseur<br />
au diametre<br />
interieur et<br />
vatrder auec l-tl<br />
lm porta nt<br />
Lors de l'usinage, en particulier<br />
lors du filetage, ilfaut absolurnent<br />
soutenir la pidce au moyen de la<br />
oolnte tournante.
<strong>Unimat</strong> <strong>PC</strong><br />
Roscado<br />
Roscado <str<strong>on</strong>g>CNC</str<strong>on</strong>g> en el <strong>Unimat</strong> <strong>PC</strong><br />
Roscas posibles:<br />
o C<strong>on</strong> esta m6quina Ud. puede efectuaroscas derechas e<br />
izquierdas y tanto al interior como al exterior.<br />
. Pasos de rosca de 0,5-1,25 mm (0,025"-0,05")<br />
o Roscas metricas M3 - M8<br />
o Roscas en pulgadas 0,112" - 114"<br />
. Angulo de flancos 60'(c<strong>on</strong> herramienta de roscadofrecida)<br />
. Velocidade giro: Gama minima de velocidades<br />
C<strong>on</strong>tenido:<br />
1. Equipo - m<strong>on</strong>taje requerido<br />
2. C<strong>on</strong>ocimientos teoricos<br />
(sincr<strong>on</strong>izaci<strong>on</strong>, c<strong>on</strong>fecci<strong>on</strong> de una rosca)<br />
3. C<strong>on</strong>strucci<strong>on</strong> de una rosca (CAD)<br />
4. Indicaci<strong>on</strong>es para eltrabajo (CAM)<br />
ROSCADO UNIMAT <strong>PC</strong><br />
90-5 A4Z 080 0s0
1. Equipo requerido:<br />
Estdndar de software 6.'1.<br />
El roscado <str<strong>on</strong>g>CNC</str<strong>on</strong>g> tan solo es posrble a partir del<br />
est6ndar de software 6. 1. En caso de que Ud.<br />
disp<strong>on</strong>ga de un software mds antfguo (veas en la<br />
pantalla al encender), ent<strong>on</strong>ces debera Ud<br />
adquirir un software nuevo e instalarlo en el pC.<br />
o<br />
C<strong>on</strong>trolar la tensi<strong>on</strong> correcta de la correa:<br />
Al presi<strong>on</strong>ar levemente c<strong>on</strong> el dedo la correa<br />
debe solo ceder unos 3 mm.<br />
Correas tendidas demasiado tensas c<strong>on</strong>sumen<br />
demasiada potencia del motor, correas<br />
tendidas demasiado flojas pueden saltarse<br />
Em[[<br />
r<br />
Enchufar el cable del transductor de paso en el<br />
enchufe del <strong>PC</strong><br />
Transductor de paso (No.de Rfa. 17't 080)<br />
M<strong>on</strong>tate del transductor de paso ( I ):<br />
o Desm<strong>on</strong>tar la rueda dentada (2) y la correa (3)<br />
. M<strong>on</strong>tar el transductor de paso c<strong>on</strong> los tornillos<br />
(4) y las arandeias, no apretar todavfa los<br />
tornillos<br />
. Colocar la correa (5) y tenderla mediante<br />
presi<strong>on</strong> haoa abalo del transductor de paso<br />
o Apretar tornillo (4)<br />
Q Motor X<br />
€ Motor z<br />
€ Transductor de<br />
paso<br />
N0meros de referencia para prezas de repuesto<br />
Pos. Ref. No DIN Benennung Descripti<strong>on</strong> Designati<strong>on</strong><br />
1,4,5<br />
4<br />
I 71080<br />
zSR 120510<br />
zsB 250530<br />
zRM 733150<br />
M5x10 DiN 912-6<br />
A5,3 DtN 125<br />
MXL 1 502-3/16<br />
Gr. Drehgeber<br />
Zyl i nderschrau be<br />
Sc hei be<br />
Zahnriemen<br />
Encoder assy<br />
Socket head screw<br />
Washer<br />
Timing belt<br />
Ens. capteur rotati{<br />
Vis 6 pans creux<br />
R<strong>on</strong>delle<br />
Courrore crantee
Unrmat <strong>PC</strong><br />
Roscado<br />
2. C<strong>on</strong>ociminetos teoricos<br />
Funci<strong>on</strong> del roscado<br />
La herramienta de roscado debe avanzar una<br />
cierta distancia por cada rotaci<strong>on</strong> de la pteza de<br />
trabajo ( = paso de rosca P). Para esto se deben<br />
sincr<strong>on</strong>izar el husillo principal y el avance de los<br />
carros.<br />
Hallar el paso del filete<br />
Una rosca se c<strong>on</strong>fecci<strong>on</strong>a siempre en varios ciclos<br />
de trabajo. Al efectuarse el comando de arranque<br />
el husillo principal debe enc<strong>on</strong>trarse en una clerra<br />
posici6n angular. Al efectuarse el comando de<br />
arranque para el siguiente ciclo de roscado el<br />
husillo principal debe enc<strong>on</strong>trarse exactamente<br />
en la misma posici6n angular para que la herramienta<br />
de roscado encuentre el mismo paso del<br />
filete.<br />
C<strong>on</strong>fecci<strong>on</strong> de una rosca<br />
En las roscas ISO metricas y de acuerdo c<strong>on</strong> la<br />
norma, a cada paso de la rosca se le adjudica un<br />
radio de red<strong>on</strong>dez (R 1).<br />
Esto significa que para cada paso de rosca se<br />
precisa una herramienta de roscado diferente.<br />
Remedio:<br />
En esta m5quina utilizamos para todos los pasos<br />
de rosca de 0,5 hasta 1,25 mm una herramienta de<br />
roscado c<strong>on</strong> un radio R2 = 0,04 mm.<br />
Desventaja:<br />
El radio de red<strong>on</strong>dez R2 no se ajusta a la norma.<br />
Los pasos de rosca rsultan m5s profundos por lo<br />
que el di5metro n0cleo a su vez resulta menor<br />
(veanse las tablas) que en roscas seg0n la norma<br />
Estas roscas pueden naturalmente enroscarse c<strong>on</strong><br />
tornillos o tuercas alustadas a la norma.<br />
Sincr<strong>on</strong>izaci<strong>on</strong> de revoluci<strong>on</strong>es v avance<br />
>-.N/<br />
-\>. a5--\+\<br />
^.-d>/,<br />
6l<br />
5\.<br />
Torno de operaci<strong>on</strong> manual<br />
En un torno de operaci<strong>on</strong> manual el avance de los<br />
carros se efect0a partiendo del husillo principal<br />
por medio de la correa dentada, las ruedas de<br />
cambio y el husillo patr<strong>on</strong> hacia el carro<br />
l<strong>on</strong>gitudinal Es un flulo de potencia cerrado Si<br />
p ej a causa de carga el husillo principal llegase a<br />
girar m5s lento, el husillo patr<strong>on</strong> giraria m6s lento<br />
en la misma proporci<strong>on</strong> El paso de la rosca<br />
oermanece invariado<br />
Torno <str<strong>on</strong>g>CNC</str<strong>on</strong>g><br />
El husillo principal acci<strong>on</strong>a al transductor de paso<br />
medtante una correa dentada. ESte transductor<br />
rnforma al computador sobre la respecrtva<br />
velocidad de giro asi como sobre la posrci<strong>on</strong><br />
angular del husillo principal<br />
El computador c<strong>on</strong>vierte esta informaci<strong>on</strong> y<br />
transmrte al motor paso a paso del carro<br />
l<strong>on</strong>gitudinal los impulsos necesarros para el<br />
arranque y la velocidad de avance
3. C<strong>on</strong>strucci<strong>on</strong> de una rosca<br />
Al c<strong>on</strong>struir una rosca deben tenerse en cuenta los<br />
slgutentes puntos:<br />
3.1 Dimensi<strong>on</strong>esde la rosca<br />
Tuerca<br />
La roscas roscadas segrin estas tablas pueden<br />
enroscarse c<strong>on</strong> tornillos y tuercas que se ajustan a<br />
la norma.<br />
Roscas metricas {medrdas en mm}<br />
Denominaci6n<br />
ro5ca<br />
Paso de<br />
rosca P<br />
Diametro<br />
nomrnal D1<br />
Perno<br />
Profund idad<br />
de rosca H1<br />
Dra,n etro<br />
nucleo D2<br />
Tuerca<br />
Profu nd idad<br />
d€ rOSCa H2<br />
M3 0,5 3,00 0,337 2.459 0,285<br />
M3,5 0.6 3,50 0,415 2,850<br />
M4 0,7 4,00 0,490 242 0.4 r4<br />
M4,5 0.75 4,50 0,529 3.588 0,148<br />
M5 0,8 5.00 4,134 0.479<br />
M6 tn 5,00 0,717 4,917 0,609<br />
M8 8,00 0.907 6,647 0.771<br />
M10 10.00 1,100 8.375 0,934<br />
Mr2 1.75 12,00 285 10106 1.098<br />
M14 20 1 835 t,t> t<br />
M16 2,A r 3,835 1,257<br />
M<br />
esta OOr rosca5 MetrrCaS de a6uerOO C<strong>on</strong> ,a norra<br />
Roscat en puloadas seoqn la norma US (mecrdas en n(nl<br />
n<br />
Pasos de<br />
fi I ere oor i easo Perno a,<br />
^---<br />
pur9aoa rosca P Drametro Protu ndi d ad Dra metro Prof undidad<br />
I<br />
nomrnal Dr de rosca H, nucleo D. O€ roSCd H2<br />
112 (4) 40 0,0250 0.r120 0.0174 0,0813 J 0,0147<br />
125 40 0,0250 0 250 0.0174 0,0943 I 0 0147<br />
1385) 32 0.0313 0, r 380 0,0243 0,0997 I 0,0188<br />
r64 8))32 0.03 r3 0 640 0,0243 0,1257 0,0188<br />
190 10)<br />
)A<br />
0,0417 0,1900 0.0330 0,1389 0.02 s2<br />
216 12) 24 0,0417 0,2150 0,0330 01549 | 0,02s2<br />
20 0 0500 c,2 500 0,0386 c,1887 I 0,0309<br />
5/15 I 18 0,0556 0,3125 0,0447 0.2443 0.0345<br />
5/6 o 0,0525 c.3750 0,0502 0,2983 0,0391<br />
7/16r14,C,0714<br />
0,437s1C,0s77 1c,3499 lO,OaaS<br />
1t2 ', 13 0,0759<br />
I 1056 1,J485<br />
9/16 12 I OOsrt<br />
I<br />
-------<br />
---------<br />
25.4 mm<br />
0,0575
<strong>Unimat</strong> <strong>PC</strong><br />
Roscado<br />
Chafliin<br />
Tanto el comienzo como el fin de una rosca s<strong>on</strong><br />
provistos comunmente de un chaflan de 45' o<br />
bien de 60' para evitar la formao<strong>on</strong> de una<br />
rebaba.<br />
Un chaflan de 30' puede tornearse a0n c<strong>on</strong> la<br />
herramienta lateral y ahorra asi un cambio<br />
adici<strong>on</strong>al de la cuchilla<br />
C<strong>on</strong>struccr<strong>on</strong> del diSmetro n0cleo para<br />
perno<br />
I<br />
o<br />
Trazar una recta entre el punto de partida (S)<br />
y el punto final (E) c<strong>on</strong> la profundidad<br />
correcta de rosca H 1 (ver tabla).<br />
Hallar el punto de intersecci6n (X) y borrar las<br />
I ineas sobresal i entes.<br />
Entrada y salida de rosca<br />
Al principio y al final de un procedimrento de<br />
roscado los carros (c<strong>on</strong> la herramienta de roscado)<br />
deben ser acelerados y retardados respectivamente.<br />
Este trayecto de aceleraci<strong>on</strong> (aprox 3 mm) y de<br />
retardo (aprox. 1 mm) no tiene un paso de rosca<br />
c<strong>on</strong>stante y debe por lo tanto estar fuera del ciclo<br />
de roscado. El lugar libre necesario para la cuchilla<br />
de tornear ha de tenerse en cuenta a la hora de<br />
c<strong>on</strong>struir la pieza de trabalo.<br />
I<br />
Entrada de rosca en<br />
roscados a la izquierda<br />
Entrada de rosca en<br />
roscados a la derecha<br />
l\AnAnn/\"v\<br />
C<strong>on</strong>struccr<strong>on</strong> del didmetro nominal para<br />
tu erca<br />
lgual a lo descrito para el di6metro nucleo para<br />
pernos
<strong>Unimat</strong> <strong>PC</strong><br />
Roscado<br />
4. Indicaci<strong>on</strong>es para el trabajo<br />
Cambio de herramientas<br />
Selecci<strong>on</strong>ar la herramienta de roscado (ver menu<br />
programa - F3 / cambiar herramienta - F6)<br />
Roscas derechas - roscas izquierdas<br />
5i la herramienta se encuentra a la derecha de la<br />
rosca (A), se roscard una rosca derecha. Si Ud<br />
desplaza la herramienta (en marcha veloz) sobre<br />
el lado izquierdo de la rosca (B), lo que se roscar6<br />
ser6 una rosca izquierda.<br />
Introducir el n0mero de roscados<br />
Tras haber selecci<strong>on</strong>ado el ciclo de roscado, sobre<br />
la pantalla aparece el mensaje:<br />
Nimero de roscados (10) rntroduc<br />
(€NTER = acept ):<br />
El n0mero recomendado de roscados comprende,<br />
segun la prof undidad de rosca (H), entre 10 y 20<br />
El software estipula la profundidad de avance de<br />
tal manera que en cada corte la secci6n<br />
transversal de la viruta sea de igual dimensi6n.<br />
Los avancesolo se efect0an en direcci<strong>on</strong> X,<br />
ft [r<br />
Llamar el ciclo de roscado<br />
Selecci<strong>on</strong>ar uno de los ciclos (F3, F4, F5) en<br />
menu "programa" y ent<strong>on</strong>ces aparecera<br />
submen0 CICLOS<br />
Selecci<strong>on</strong>ar c<strong>on</strong> F4 el ciclo de roscado<br />
el<br />
el<br />
Entrada de rosca - salida de rosca<br />
Mensaje en la pantalla:<br />
Entrada de rosca = 3 000, salrda = 1 000 rntrod<br />
(ENTER = rnv )<br />
F.I<br />
F2<br />
F3<br />
F4<br />
F5<br />
F6<br />
F7<br />
F8<br />
F9<br />
F10<br />
crcLos<br />
DESBASTAR<br />
DESTALONA<br />
CONTORNO<br />
ROSCADO<br />
PROGRAMA<br />
F 1 MAR.VELOZ<br />
F2 AVANCE<br />
F3 DESEASTAR<br />
F4 DESTALONA<br />
F5 sEG CONTOR<br />
F6 CAMB HERR<br />
F7 BORR. U LTIM<br />
F8 BORR PROGR<br />
F9 AVANCE<br />
F 1O OFFSET<br />
Ya que el carro (c<strong>on</strong> la herramienta de roscado)<br />
precrsa de un trayecto de aceleraci<strong>on</strong>, se debe<br />
rntroducir para la entrada de rosca un largo<br />
mfnimo de 3 mm Para la salida de rosca. introducrr<br />
aprox 1 mm. En roscas izquierdas a estos<br />
valores se les debe antep<strong>on</strong>er el signo negativo<br />
Rosca derecha
<strong>Unimat</strong> <strong>PC</strong><br />
Roscado<br />
Rosca izquierda<br />
C<strong>on</strong>fi rmar introd ucci<strong>on</strong>es<br />
l-------'--'-l<br />
Ud trene dos posibilidades:<br />
El ciclo de roscado se trabaja sobre la<br />
pantalla.<br />
Salida del ciclo de roscado. Los valores<br />
introducidos por 0ltrmo ser5n<br />
propuestos nuevamente c<strong>on</strong> la proxima<br />
llamada del ciclo de roscado.<br />
Paso de rosca<br />
Mensaje en la pantalla:<br />
Paso = 'l 000 rntroduc (FNTER = rnv )<br />
Las caracterfsticas de las herramientas de roscado<br />
ofrecidos s<strong>on</strong> apropiados para pasos de P = 05 -<br />
2 mm, o bien de l1 a 40 vueltas por pulgada.<br />
El paso para roscas seg0n la norma, las podr5<br />
deducir Ud de la tabla, v€ase capftulo<br />
"dimensi<strong>on</strong>es de la rosca"<br />
lndicaci<strong>on</strong>es para el trabajo del ciclo de<br />
roscado sobre la mdquina<br />
Velocidad de qiro:<br />
Ajustar la gama minima (20-300) de velocidades.<br />
El ajuste de precisi<strong>on</strong> de las revoluci<strong>on</strong>es deberd<br />
comprender, dependiendo del paso de rosca,<br />
entre 80 y 120 r p m y no deber5 ser variado<br />
durante el proceso de roscado<br />
Para metales blandos (aluminio, lat<strong>on</strong>) aj ustar<br />
valores aumentando un 20o/o.<br />
Z0-3C0 c,*<br />
Indicar el di5metro nominal y nucleo<br />
Introducrr elemento oara drametro nomrnal:<br />
' -<br />
C<strong>on</strong>trol de la velocidad de giro<br />
a.d3 i<br />
an<br />
'. vtt<br />
lnir<br />
1..aa,<br />
:E, iL<br />
.,43t<br />
Posrcr<strong>on</strong>ar el cursoren el diametro nominal<br />
c<strong>on</strong>firmar c<strong>on</strong> ENTERAparece el mensale:<br />
-.- -i -<br />
; t t.ii<br />
.sc :l ti:<br />
T]'-'-<br />
: .,;-i<br />
I T!4.+<br />
lntroductr elemento para drametro nu(leo<br />
1 1*lg:!:<br />
i<br />
i€ii;i<br />
: *'til<br />
Posici<strong>on</strong>ar el cursoren el di5metro n0cleo v<br />
c<strong>on</strong>firmar c<strong>on</strong> ENTER<br />
J .:itl l,<br />
I Sli!rl<br />
, i:r
Ejemplo:<br />
especial<br />
C<strong>on</strong>fecci<strong>on</strong> de un tornillo<br />
r<br />
o<br />
Pieza bruta: A 22, 100 c<strong>on</strong> perforaci<strong>on</strong> O 3,5<br />
Dibujar:<br />
1str<br />
a<br />
a<br />
a<br />
a<br />
o<br />
Desbastar<br />
Destal<strong>on</strong>ar<br />
Efectuar el ciclo de seguir c<strong>on</strong>torno<br />
Selecci<strong>on</strong>ar herramienta de roscado<br />
Posici<strong>on</strong>ar la herramrenta de roscado<br />
derecha de la rosca<br />
Selecci<strong>on</strong>ar<br />
submen0 "roscado"<br />
dld<br />
Paso = I 000 Introduc (ENTER = rnv )<br />
125<br />
tr<br />
I<br />
tr<br />
Introducrr elemento para drametrc rmtnalj<br />
v<br />
trtr<br />
m<br />
Cursor hacia el<br />
diSmetro nominal<br />
y c<strong>on</strong>firmar<br />
.<strong>on</strong> l_tl<br />
trl -E-<br />
+<br />
Frn de la rntroduccr<strong>on</strong> (ENTER = acept )<br />
Cursor hacia el<br />
l--l ot;metro nucteo<br />
y c<strong>on</strong>frrmar c<strong>on</strong> p<br />
lmportante<br />
Cuando se trabaja, sobre todo<br />
cuando se llevan a cabo roscados,<br />
la preza de trabalo ha de ser<br />
sostenrda sin falta mediante el<br />
punto giratorio!