TURRET MILLING MACHINES - Usinages
TURRET MILLING MACHINES - Usinages
TURRET MILLING MACHINES - Usinages

You also want an ePaper? Increase the reach of your titles
YUMPU automatically turns print PDFs into web optimized ePapers that Google loves.
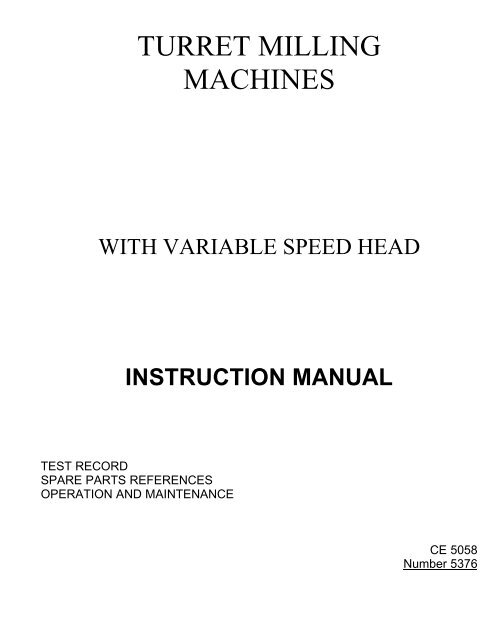
<strong>TURRET</strong> <strong>MILLING</strong><strong>MACHINES</strong>WITH VARIABLE SPEED HEADINSTRUCTION MANUALTEST RECORDSPARE PARTS REFERENCESOPERATION AND MAINTENANCECE 5058Number 5376
3620 SO. SANTA FE AVE.LOS ANGELES, CALIFORNIA 90058 U.S.A.TELEPHONE (213) 583-6808CABLE: REPUMACH("LAGUN-REPUBLIC" MACHINERY SALES DIVISION)Machine _________________serial___________________________________________________CERTIFICATEOF GUARANTEEThe builder GUARANTEES the operation of the machine for the period of SIX MONTHS and willrespond for the immediate replacement of parts against any imperfection in manufacturing.___________ of ________________197_______IMPORTANT: For this Certificate of Guarantee to be valid, It will be Necessary that the user fill In the bottom of thisdocument immediately RETURN IT TO THE FACTORY, cutting on the marked part.- - - - - - - - - - - - - - - -- - - - - - - - - - - - - - - -- - - - - - - - - - - - - - - -- - - - - - - - - - - - - - - -- - - - - - - - - - - - - - - -- - - - - - - - - - -(To be filled In by the user and RETURNED TO THE FACTORY)Machine serial # ______________________________________________________________Seller _______________________________________________City_____________________Date the machine was purchased ________________________________________________Did you level and verify the machine, attending to the tolerances indicated in the instructionmanual?Have you studied and understand the instructions for the operation of the machine?Did you find any irregularity ?.______________________________________________________________________________________________________________________________________________________________________________________X____________________________________The UserDate______________________________ADDRESS OF USER: Name of company ________________________________________________Street __________________________________________________________Town __________________________________________________________
TABLE OF CONTENTSVerification ....................................................................................................................................2Reception......................................................................................................................................3Installation and foundation ............................................................................................................4Electric checking...........................................................................................................................5Lubrication Recommended oils.....................................................................................................6Variable Speed Mechanism ..........................................................................................................7Manual operation of quill...............................................................................................................7Fine manual operation of quill.......................................................................................................8Aut6matic Clutch...........................................................................................................................8Change of the feed travel..............................................................................................................8Selection of working feeds ............................................................................................................8Mechanical work clutch.................................................................................................................9Various head positions................................................................................................................10Overarm turning and displacement .............................................................................................10Column - Knee - Table - Cross Saddle ..................................................................................10-11Clearance setting on the spindle.................................................................................................11Instructions for ordering spare parts............................................................................................12
This manual has been issued for the Turret milling machine.At the time of printing this manual, the number of parts, the assembly prints and maintenanceinstructions correspond totally to the present shape of the machine. Nevertheless, we reservethe right to alter them when improvements are introduced in the machine.MODEL FTV-2Serial Number 5374CustomerLocationTensiónCyclesHead motor-powerCooling pump powerNet weight of the machineGross weight of the machineShipping caseIMPORTANT: To obtain the maximum efficiency of the various applications of this unique typeof machine, we suggest that you request information and a brochure of tooling andaccessories from your. supplier.
Page 3RECPTIONOn receiving the machine and unpacking it, do not remove the boards of the base until it isplaced on final location.Clean the machine, removing all protections and carry out a careful examination to check ifany damage arrived in transport.INSTALLATION AND FOUNDATION1. Select a place, as free as vibrations as possible.2. Carry out the location as per the foundation drawing attached.3.For leveling the machine, use a bubble having a 0-05 mm per meter precision, and whenleveling do not use wooden wedges, but iron wedges.4.Once the machine has been leveled, make a wooden encircling and fill with cement grout.IMPORTANT.- If the machine must be installed in upper floors be sure to place it near acolumn, or on main beams.
Page 5ELECTRIC CHECKINGIt is also convenient to carry out an electric checking of the installation, fuses and the idleoperation of contactors.Also, check that the motor turning is correct; if not change the wires position in the mains.LUBRICATIONLubricate daily the-points indicated on the lubrication chart excepting the longitudinal andcross carriages, since their lubrication is carried out by means of a pump.2 to 4 strokes per day*Prime this pump when the oil level is under 1/3 on the sight.The other points daily.IMPORTANT.- Never start the machine if it has not been previously suitably lubricated.The knee must be lubricated when it is lifted on its uppermost position.Use oil sparingly.Part METHOD SHELL MOBILOIL ESSO BP KLUBERNEVER – SEEZU.S.A.DOWCORNINGMotorbearingsPACKEDSpindle bearingsCUPTELLUS29DTEMEDIUMOR 25ESSTIC 50 HL – 75 LAMORA 34Table waysHANDPUMPEDTONNA33VACTRAOIL – 2FEBISK – 53HP – 20LAMORASUPERPOLADDColumn waysGUNTONNA33VACTRAOIL – 2FEBISK – 53HP – 20LAMORASUPERPOLADDGear headCUPMOLYKOTE165 – XVariable speedpulleyT.K.N.NEVER – SEEZCAT No.NS.160DC – 44Vertical Lead ScrewGUNTONNA33VACTRAOIL – 2FEBISK – 53HP – 20LAMORASUPERPOLADDRight angle millattachmentGUNTONNA33VACTRAOIL – 2FEBISK – 53HP – 20LAMORASUPERPOLADDArbor supportGUNTONNA33VACTRAOIL – 2FEBISK – 53HP – 20LAMORASUPERPOLADDShaping headattachmentBATHNASSA79600WSUPERCYL OILCANTONALK - 140AMPERCILINDER600LAMORASUPER 240Shaping headattachment slideand bearingGUNTONNA33VACTRAOIL – 2FEBISK – 53HP – 20LAMORASUPERPOLADD
Page 7USUAL OPERATIONSAs previously stated, the machine must be totally lubricated.VARIABLE SPEED HEADVARIABLE SPEED MECHANISMSPEEDS CHANGE – a) Change your speed only when spindle rotatesb) It is a must to run your speed from the low speed of 75 UP to 4000 rpm twice a day toprevent pulley freeze.c) The head consists of a Variable Speed Head with a high and low range of speeds.d) The high-low range is obtained by a simple 2 position lever located on the right side of thehead which will supply a minimum speed of 75 and 500 rpm and a maximum of 4000 rpm.e) The variable speeds are obtained by turning the front knob located on the upper part of thehead clockwise for the higher speeds, and counter clockwise for the lower speeds. Thespeeds are shown on the front Dial plates.TEMPERATURE: It is normal for this type of mechanism to operate at high temperaturessometimes over 70 deg C. Please do not be concerned about heat.VIBRATIONS: As in every Variable Speed Mechanism a critical vibration point should appearat a particular speed. On this machine this speed appears approximately around 2860 rpm. Tostay out of this critical vibration increase or decrease your speed. Please do not be concernedabout it.IMPORTANT: Every machine leaves our factory completely checked and final inspection fromour quality control department. You should study this machine and follow instructions beforestarting operation. The factory can not be responsible for incorrect usage or neglect.MANUAL OPERATION OF THE QUILLIt is made by means of handle 388. This handle can be locked in eight different positions for abetter operation. It can be disengaged by pulling out the handle body.Once the handle has been depressed it turns to its starting point by means of a flat spiralspringREMARKSIt may be noted an unusual resistance in the handle operation, and then it is due to the factthat the brake 476 is tight.In case of such a resistance impeding to operate in any direction, it is due to the fact that theautomatic lever 407 is in engaged position, for which reason it is necessary to disengage it.
FINE MANUAL OPERATION OF QUILLPage 8The automatic engaging handle No.407 should be in engaging position, by turning theflywheel 422. Then it is possible to work even with the micrometer stops No.402, since theythemselves take care that the stopping be in the same point. The knurled button No.429 mustbe in neutral.REMARKIn case of not using this modality of work, be sure to remove the flywheel No.422 from itslocation.AUTOMATIC CLUTCHThe selection of feeds is carried out by means of the handle No.3009, which causes the wheelNo.3054 to engage with the driving worm cut on the lower portion of the driving shaft No.3013REMARKIf the automatic feed is not necessary, it is not convenient to engage the feeds.CHANGE OF THE FEED TRAVELIn the center of the control for manual fine feeds it is housed a rod the end of which drives aclutching tooth collar, by means of a bolt, engaging with two taper pinions, turning in oppositedirection, so that it promotes a change of the feed travel.These positions are ensured by means of two end channels cut on said shaft 431. The centerchannel corresponds to neutral, that is, with no feed.REMARKThis change can be carried out with the machine fully running, provided that it works idle;otherwise it is not recommended to do so because the risk of tooth breakage.SELECTION OF WORKING FEEDSThis selection is carried out by means of the selecting handle No. 3009. It consists of 3 feedsin geometrical progression to the order of L=2 with feeds of 0.04-0.08-0.16 mm per turn.;REMARKAs stated in the paragraph corresponding to the selection of feed direction as regards to thefact that the chosen feeds can be carried out when the machine is running idle, do notproceed in this manner when the machine is fully running in order to avoid damages.
MECHANICAL WORK CLUTCHINGPage 9IMPORTANT.- Before engage the work clutching, we recommend to carry out the followingtests, with the machine stopped:-.Check-that the stop threaded rod 404 moves easily by hand.- Placing the handle No.407 in engaging position, see if the micrometer nut No.402 can bepressed down easily. Also, with the handle engaged again promote a pull toward the buttonNo.429 with the helpof a screw driver, a and see if the same resistance is felt.The purpose of this test is to check if, for any reason, the greases are solidified or theanticorrosive liquid has been inserted between the die setting No.416 or in the groovebetween the stop and the washer No.413.If so, we recommend to carry out a careful cleaning.Whenever the automatic feed is used, be sure that the quill brake is not carrying out aneffective work.SERVICE.- The automatic travel of the quill is stopped in the desired point by means of thecontact of the micrometer drum No.402, fastening it firmly on the spindle by means of theknurled locknut No. 403The value of variation per line on the micrometer drum is as follows:REMARKS1/50 = 0 .02 mm or 0.001”The machine leaves our plant rated with the foreseen work momentum. In case that, at anytime, this momentum has been decreased due to spring weakening, etc. increase it in thefollowing manner:1. Remove the cover No-30372. Remove the setting screw 374 from the nut No-30353. Turn the nut No.3035 clockwise.It is also possible that no trip be carried out promoting the unlocking of the peg 394 by meansof the extracting punch No.409 due to dis-adjustement of the rocker No 411.This out-of-adjustment can be rectified by means of the screw No.410 at the precese extent, inorder to carry out a correct disengaging.CHANGE OF TOOLS AND SPEEDSIn the previous paragraphs, the several services of the machine and the manner of proceedingbefore starting the machine have been indicated.It is possible, therefore, to carry out all operations with the machine turning idle in bothdirections, in order to notice any noise of unusual operation
CHANGING THE TOOLSPage 10To loosen the clamping piece of the tool, lock the spindle by means of the cross lever No-353,turning clockwise or anti-clockwise, and once the convenable pressure has been exerted,turning upward so that it is locked, so maintaining a permanent braking.In this manner, the operator can carry out his work more easily becausehe has both hands free.VARIOUS-HEAD POSITIONSThis Head can be precisely swiveled into two separate positions from the vertical line, and willalso rotated around its column.1) Rotation Around column 360° - (Turret rotation). a) Releasefour hold down bolts and swivel ram manually around column.-A 360° scale reading is supplied on column. Reset position and tighten four hold down boltssecurely.2) Back and front . - Accurate movement is obtained by a worm gear combination; a readingscale is supplied. b) Release 3 locking or clamping bolts No.511 located on the right side ofthe ram and turn worm gear No.-500. Reset position tighten holding bolts securely.3) Right to left 45° each way . - Accurate movement obtained by a worm gear combination. Areading scale is also supplied. c) Release the four locking or clamping nuts No.432 located onthe front of the head and turn worm gear No.477 to desired position then securely tighten thefour head bolts to insure stability.TURNING THE OVERARMTURNING AND DISPLACEMENT OF THE OVERARMLoosen the four screws No.-507 and rotate with the hand, being sure that the overarm iscentered lengthwise.DISPLACEMENT OF OVERARMFor displacing the overarm loosen the hexagonal head screws No.-3156 located at the rightside and displace the overarm by means of the pinion No.-3065 with the handle provided tothis end.COLUMNCOLUMN – KNEE – TABLE – CROSS SADDLEAll the electric controls are located in the back side-of the machine - a hinged swivel doorprotects this area.Also the coolant pump to be serviced from the back by opening a bolted cover No.-3516.
KNEEPage 11The knee has travel limitations by means of two screws N0.-588 located on the column andknee, and a positioning brake operated by means of the handle No-562 located on the front.TABLEThe table travels can be limited by means of the-fixed stop No.-3089 screwed to the crosscarriage and two sliding stops in the T-groove located in the front thereof, which are fastenedin position by means of the nut No-358For braking in positioning, operate the hinged handle No.-571.CROSS SADDLEThe cross saddle carries at its right side a centralized greasing pump No 586, which providesoil for the longitudinal motion of table and cross motion of carriage. Also, it carries out thelubrication of the longitudinal and cross spindle. It has a locking brake No.571.IMPORTANT.- When working without using the table, knee or cross motions, be sure thatthese are braked.SETTING THE SADDLESAll sliding parts of the saddles carry lengthwise a setting tapered guideway, which can beoperated by means of the grooved head screw No-561, under the same denomination on thethree setting tapered guideways.OPERATIONTighten slowly the screw No.561 effecting the turning of the corresponding handle until aslight resistance in the handle turning will be noticed.CLEARANCE SETTING ON THE SPINDLEOn the dual supported nut holder No.-3085 for the longitudinal No. 594 and No.580 cross feedspindles, in the nut housings, there are fitted two nuts each separate one from other in orderto eliminate all clearances produced at the long run.To shorten this distance, use the screws No-579 and also the other crews No.578, promotingthe locking of No.-579. To remove the spindle clearances, proceed as follows.TABLELoosen and remove the left side of table No.3092 and move the latter by means of the handleNQ-3096 on the right side until being able to remove with a screw driver the stop screwsNo.578 and eliminate the clearance with the screw No.579, until obtaining a smooth andprecise turning.
CROSS SADDLEPage 12Remove the support No.3077 and move with the hand the carriage until being possible tocarry out the same operation.INSTRUCTIONS FOR ORDERING SPARE PARTSWhen ordering spare parts, please give the following information:1. Number of part and number of assembly.2. Quantity.3. Serial number of machine.If ordering any spare part not shown on the assemblies, give a detailed description and, ifpossible, send a sketch together with the quantity required and the serial number of themachine.