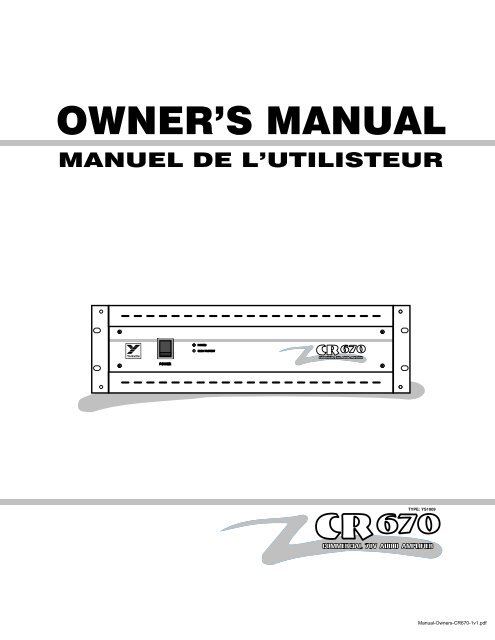
OWNER'S MANUAL - Yorkville Sound
OWNER'S MANUAL - Yorkville Sound
OWNER'S MANUAL - Yorkville Sound

You also want an ePaper? Increase the reach of your titles
YUMPU automatically turns print PDFs into web optimized ePapers that Google loves.
OWNER’S <strong>MANUAL</strong><br />
MANUEL DE L’UTILISTEUR<br />
POWER<br />
CLIP /PROTECT<br />
COMMERCIAL 70V AUDIO AMPLIFIER<br />
POWER<br />
TYPE: YS1009<br />
COMMERCIAL 70V AUDIO AMPLIFIER
IMPORTANT SAFETY INSTRUCTIONS<br />
INSTRUCTIONS PERTAINING TO A RISK<br />
OF FIRE, ELECTRIC SHOCK,<br />
OR INJURY TO PERSONS.<br />
CAUTION:<br />
TO REDUCE THE RISK OF ELECTRIC SHOCK, DO<br />
NOT REMOVE COVER (OR BACK).<br />
NO USER SERVICEABLE PARTS INSIDE.<br />
REFER SERVICING TO QUALIFIED<br />
SERVICE PERSONNEL.<br />
INSTRUCTIONS RELATIVES AU RISQUE<br />
DE FEU, CHOC ÉLECTRIQUE, OU<br />
BLESSURES AUX PERSONNES.<br />
AVIS:<br />
AFIN DE REDUIRE LES RISQUE DE CHOC ELECTRIQUE,<br />
N’ENLEVEZ PAS LE COUVERT (OU LE PANNEAU<br />
ARRIERE). NE CONTIENT AUCUNE PIECE REPARABLE<br />
PAR L’UTILISATEUR.<br />
CONSULTEZ UN TECHNICIEN QUALIFIE<br />
POUR L’ENTRETIENT.<br />
Read Instructions:<br />
The Owner’s Manual should be read and understood<br />
before operation of your unit. Please, save these<br />
instructions for future reference.<br />
Packaging:<br />
Keep the box and packaging materials, in case the unit<br />
needs to be returned for service.<br />
Warning:<br />
When using electric products, basic precautions should<br />
always be followed, including the following:<br />
Power Sources:<br />
Your unit should be connected to a power source only of the<br />
voltage specified in the owners manual or as marked on the unit.<br />
This unit has a polarized plug. Do not use with an extension cord or<br />
receptacle unless the plug can be fully inserted. Precautions should<br />
be taken so that the grounding scheme on the unit is not defeated.<br />
Hazards:<br />
Do not place this product on an unstable cart, stand, tripod, bracket or<br />
table. The product may fall, causing serious personal injury and serious<br />
damage to the product. Use only with cart, stand, tripod, bracket, or table<br />
recommended by the manufacturer or sold with the product. Follow the<br />
manufacturer’s instructions when installing the product and use mounting<br />
accessories recommended by the manufacturer.<br />
The apparatus should not be exposed to dripping or splashing<br />
water; no objects filled with liquids should be placed on the<br />
apparatus.<br />
Terminals marked with the “lightning bolt” are hazardous live;<br />
the external wiring connected to these terminals require installation<br />
by an instructed person or the use of ready made leads or cords.<br />
No naked flame sources, such as lighted candles, should be<br />
placed on the apparatus.<br />
Power Cord:<br />
The AC supply cord should be routed so that it is unlikely that it will<br />
be damaged. If the AC supply cord is damaged DO NOT<br />
OPERATE THE UNIT.<br />
Service:<br />
The unit should be serviced only by qualified service personnel.<br />
Veuillez lire le manuel:<br />
Il contient des informations qui devraient êtres comprises avant<br />
l’opération de votre appareil. Conservez S.V.P. ces instructions<br />
pour consultations ultérieures<br />
Emballage:<br />
Conservez la boite au cas ou l’appareil devait être<br />
retourner pour réparation.<br />
Warning:<br />
Attention: Lors de l’utilisation de produits électrique,<br />
assurez-vous d’adhérer à des précautions de bases<br />
incluant celle qui suivent:<br />
Alimentation:<br />
L’appareil ne doit être branché qu’à une source d’alimentation<br />
correspondant au voltage spécifié dans le manuel ou tel qu’indiqué<br />
sur l’appareil. Cet appareil est équipé d’une prise d’alimentation<br />
polarisée. Ne pas utiliser cet appareil avec un cordon de<br />
raccordement à moins qu’il soit possible d’insérer complètement les<br />
trois lames. Des précautions doivent êtres prises afin d’eviter que le<br />
système de mise à la terre de l’appareil ne soit désengagé.<br />
Hazard:<br />
Ne pas placer cet appareil sur un chariot, un support, un trépied ou une<br />
table instables. L’appareil pourrait tomber et blesser quelqu’un ou subir des<br />
dommages importants. Utiliser seulement un chariot, un support, un trépied<br />
ou une table recommandés par le fabricant ou vendus avec le produit.<br />
Suivre les instructions du fabricant pour installer l’appareil et utiliser les<br />
accessoires recommandés par le fabricant.<br />
Il convient de ne pas placer sur l’appareil de sources de flammes<br />
nues, telles que des bougies allumées.<br />
L’appeil ne doit pas être exposé à des égouttements d’eau ou des<br />
éclaboussures et qu’aucun objet rempli de liquide tel que des vases<br />
ne doit être placé sur l’appareil.<br />
Les dispositifs marqués d’une symbole “d’éclair” sont des parties<br />
dangereuses au toucher et que les câblages extérieurs connectés à<br />
ces dispositifs de connection extérieure doivent être effectivés par un<br />
opérateur formé ou en utilisant des cordons déjà préparés.<br />
Cordon d’alimentation:<br />
Évitez d’endommager le cordon d’alimentation. N’UTILISEZ PAS<br />
L’APPAREIL si le cordon d’alimentation est endommagé.<br />
Service:<br />
Consultez un technicien qualifié pour l’entretien de votre appareil.<br />
SAFE_V4.doc Version 4.0 02/11/99 11:54 AM
TYPE: YS1009<br />
INPUT TERMINAL STRIP WIRING<br />
Balanced<br />
GND<br />
Unbalanced<br />
GND<br />
* CLIP /<br />
PROTECT LED<br />
Flashing = CLIPPING<br />
or LIMITING<br />
On = PROTECT MODE*<br />
*see Owner's Manual<br />
CH<br />
A<br />
GND<br />
COMMERCIAL PROFESSIONAL 70V AUDIO AUDIO AMPLIFIER<br />
CH<br />
B<br />
A PM<br />
AUDIO PROCESSING<br />
MODULE<br />
CH<br />
A CH B<br />
AMP INPUTS<br />
DESIGNED AND MANUFACTURED BY YORKVILLE SOUND • TORONTO, CANADA<br />
Output<br />
Power Amp<br />
Limiter<br />
A<br />
Volume<br />
Inputs<br />
A PM<br />
B<br />
GAIN CONTROLS<br />
-6<br />
-6<br />
-9 -3 -9 -3<br />
LIMITER<br />
PEAK<br />
-18 -1.5 -18 -1.5<br />
0 0<br />
CH dB<br />
dB CH<br />
A<br />
B<br />
AVERAGE<br />
When operating this product, ensure that there is adequate<br />
ventilation on all sides of the chassis! Refer to Owner's Manual for details<br />
0 0-<br />
70V SPEAKER OUTPUT<br />
0 0-<br />
MIN 8-OHMS<br />
OUTPUTS ARE IN PARALLEL<br />
70V SPEAKER OUTPUT<br />
CIRCUIT<br />
BREAKER<br />
PUSH TO RESET<br />
120VAC<br />
60Hz<br />
4.5A<br />
1v5<br />
Figure 1<br />
Figure 2<br />
INTRODUCTION<br />
Your new CR670 power amplifier is designed and built to provide years of trouble free performance. The CR670<br />
is capable of powering large distributive loudspeaker systems as well as sound reinforcement loudspeakers<br />
(plenty of headroom under the hood). Like all <strong>Yorkville</strong> <strong>Sound</strong> amplifiers, it is designed to be rugged and reliable<br />
in all applications. The limiter has two modes of operation, which maintains the clarity of midrange signals, but<br />
can also provide thumping bass notes. Generous output current capability along with low distortion and high<br />
headroom performance guarantee the sonic integrity of the CR670 power amplifier.<br />
Since the CR670 has been designed and manufactured by <strong>Yorkville</strong> <strong>Sound</strong>, each unit undergoes rigorous Quality<br />
Assurance tests. Each circuit is tested by sophisticated computer controlled equipment (which is capable of identifying<br />
any deviation from the design center parameters). The final tests include a temperature cycled burn-in period.<br />
INPUTS<br />
The two input channels have independent gain controls that sum into one signal, which is amplified by the<br />
power amplifier section.<br />
Unbalanced Inputs<br />
The Combi-jack and terminal strip can be used<br />
to connect an unbalanced signal to the CR670.<br />
Follow the directions in figure 3 through 5 for<br />
the various unbalanced connections. If possible,<br />
always use balanced cables, as they will reduce<br />
the possibility of noise entering the sound system.<br />
If unbalanced cables must be used, keep the<br />
length of the cable as short as possible to minimize<br />
the amount of noise picked up by the cable.<br />
Balanced Inputs<br />
The CR670 has high quality balanced inputs with<br />
hum rejection. Three types of balanced input connectors<br />
are available. The Combi-jack input will<br />
accept a standard 1/4-inch TRS (stereo) phone plug<br />
or an XLR plug for balanced operation. The tip of<br />
the 1/4-inch TRS (stereo) phone plug and pin 2 of<br />
the XLR plug are the positive (hot) connections. A<br />
terminal strip input allows for a direct-wired connection<br />
for installation applications. Use a forked lug for<br />
a #6 screw to connect the input wires to the barrier<br />
strip. Follow the directions in figures 1 & 2 (on the<br />
sidebar) for the various balanced connections. We<br />
recommend using balanced connections wherever<br />
possible to ensure that the system is noise free.<br />
Mono Operation<br />
The CR670 is a mono amplifier. The loudspeaker<br />
load is connected across the red and white binding<br />
posts with the positive lead of the loudspeaker<br />
wire connected to the red channel binding post.<br />
Optional* M2 Input Microphone<br />
Mixer Module<br />
Adding the optional M2 Input Microphone Mixer<br />
Module can increase the versatility of a CR670. The<br />
M2 module is a two-channel microphone mixer<br />
complete with bass and treble controls. The module<br />
provides independent gain control of the two<br />
microphone inputs, allows bass and treble control<br />
of the music signal, then mixes its signal with the<br />
summed signal from input channels A and B before<br />
entering the limiter circuit.<br />
Clip<br />
Mic 1 Mic 2<br />
A PM<br />
AUDIO PROCESSING<br />
0 dB +55<br />
-12 0<br />
Designed & Manufactured by <strong>Yorkville</strong> <strong>Sound</strong> • Toronto, Canada<br />
PROFESSIONAL MODULEAUDIO AMPLIFIER<br />
Treble<br />
Mic 1 Mic 2 Bass<br />
0 dB +55<br />
Gain Gain<br />
0<br />
dB +12<br />
-12<br />
Figure 3<br />
Figure 4<br />
Figure 5<br />
Figure 6<br />
2<br />
dB +12<br />
3<br />
*The M2 module can be ordered through any <strong>Yorkville</strong> dealer. A certified service technician MUST install the M2 module.
Output<br />
Power Amp<br />
Limiter<br />
A PM<br />
Volume<br />
A<br />
B<br />
Inputs<br />
4<br />
Outputs<br />
Two types of output connectors are on the output of the CR670. Heavy duty binding posts accept a banana plug,<br />
or bare wire connection. A terminal strip output allows for a direct-wired connection for installation applications.<br />
Use a forked lug for a #6 screw to connect the loudspeaker wires to the barrier strip.<br />
The CR670 delivers up to 600 watts into an 8 ohm loudspeaker. Don't put anything less than an 8 ohm loudspeaker<br />
load across the speaker terminals or the amplifier may go into protection. Please read the section on<br />
Designing and Installing 70 volt Audio Systems in your manual.<br />
Gain Controls<br />
The CR670's gain controls are located on the back of the amplifier. This prevents<br />
tampering with the gain controls when the amplifier is rack mounted. The<br />
gain controls are calibrated in dB (decibels), corresponding to the audio voltage<br />
present at the speaker output jacks. Where many amplifiers are used in an installation,<br />
the gain controls scaled in dB allow the user to precisely set the audio<br />
output level of one CR670 amplifier relative to the other CR670 amplifier. This<br />
only works if the amplifiers are receiving the same amplitude of input audio signal.<br />
The 0db or "full" position of the gain control refers to 70 volts RMS (which<br />
equals 600 watts into 8 ohms) on the output of the amplifier when a 1.4 volt<br />
RMS voltage is present at the input jacks. Placing the gain control in the -3dB position with 1.4 volt RMS voltage present<br />
at the input jacks will result in a 49 volt signal (which equals 300 watts into 8 ohms) at the speaker output.<br />
Limiter<br />
The limiter switch located on the back panel of the amplifier changes the mode of the limiter. When the limiter<br />
switch is in the "peak" position, the limiter acts as a peak limiter with a short decay<br />
time. This allows the bass thumps in music to drive the output of the amplifier into<br />
clipping for the duration of the thump, but will not heavily clip a continuous signal<br />
like someone screaming into a microphone. When the limiter switch is in the "average"<br />
position the release time of the limiter is extended and the limiter acts more like<br />
a leveler. This mode is useful for public address applications where the full headroom<br />
of the amplifier is utilized and the quality of the voice is maintained by using<br />
the soft clipping feature of the limiter.<br />
Short Circuit Protection<br />
The CR670 is fully protected against all possible passive loudspeaker load conditions. It can operate with a "dead"<br />
short continuously without damage (however, we don't recommend that you short your CR670 "just for fun").<br />
Shorts create a lot of stress on the output devices. If a short is present on the output of the amplifier with a signal<br />
passing through the amplifier then the protect LED will illuminate continuously and the amplifier will go into<br />
"sleep mode" turning off the audio signal passing through the amplifier. After 8 seconds, the amplifier will allow<br />
the signal to pass through the amplifier and check to see if the short has been removed. If the short is still present<br />
the amplifier will go through the sleep mode cycle again. If the short has been removed, the amplifier will continue<br />
to drive the speaker.<br />
Cooling & Thermal Protection<br />
Passive cooling (this means that there isn't any fan in the amplifier) was chosen for this design to provide years<br />
of maintenance free operation. In dusty locations dirt may settle on the heatsinks. If the amplifier is permanently<br />
installed in a dusty location the heatsinks must be cleaned on a regular schedule.<br />
When operating the CR670, care should be taken to allow adequate cooling around the heatsink fins along the<br />
sides of the chassis and not to block the ventilation holes in the top and bottom covers of the chassis. The CR670<br />
was designed to run cool under normal operating conditions, but restricting the airflow around or through the<br />
amplifier could cause the amplifier to thermally shutdown.<br />
If the temperature on the heatsinks of the CR670 exceeds the safe operation temperature, then the amplifier will<br />
shutdown illuminating both protection LED's and turn off the audio signal to the speaker output jacks until the<br />
heatsink temperature drops to a safe level.<br />
Rack Mounting<br />
The CR670 was designed to mount into a standard 19-inch rack. Care must be taken to provide adequate ventilation<br />
around the amplifier. Here are some tips to ensure that the CR670 will have adequate cooling when mounted into a rack:<br />
• Leave a blank rack space above and below the amplifier when stacking equipment into the rack.<br />
• If several CR670s are stacked in a rack, in addition to the tip above, provide fan forced cooling from the bottom<br />
of the rack up through the amplifier stack.<br />
The rack itself should have adequate ventilation to the outside air. Leave the front and back of the rack as open<br />
as possible. If fans are used, draw the air in through the bottom front of the rack; drive the air up through the<br />
amplifiers, allowing the air to vent out through the top back section of the rack.<br />
Clip / Protection LED's<br />
The clip/protection LEDs on the front panel will blink to visibly indicate any signal excursion beyond the dynamic<br />
headroom of the amplifier. The clip/protection LEDs will remain on when the amplifier goes into its protection<br />
mode. The CR670 will go into protection for one of three reasons:<br />
• The power switch of the amplifier has just been turned on or off.<br />
• The amplifier has a shorted speaker load on the output of the amplifier.<br />
• The temperature on the heatsinks of the CR670 exceeds the safe operation temperature.
Design And Installation of 70 Volt Audio<br />
Systems<br />
1. When do you need a 70V system?<br />
70 volt systems are needed when there are either a large number of loudspeaker locations or the distance<br />
between the source amplifier and the loudspeakers is greater than 100 feet (30 meters).<br />
2. What do I need?<br />
First, you need an amplifier that is capable of supplying 70 volts. The CR670 will do just fine. Then,<br />
for the loudspeakers, you'll need loudspeakers with built in 70 volt step-down matching transformers,<br />
or add 70 volt step-down transformers to low impedance (4 or 8 ohm) loudspeakers. (Loudspeakers<br />
like the <strong>Yorkville</strong> C110 and C120/70 have built-in matching transformers.)<br />
3. Putting it all together<br />
a) Amplifier Power. 70V systems require a certain amount of power to distribute the signal properly.<br />
The total number of loudspeakers you can connect correlates directly to the power output (watts) of<br />
your amplifier (and the loudspeaker's 'power tap' that you have chosen on your loudspeaker's matching<br />
transformer). For example, if you're using a CR670, which is a 600 watt power amplifier, you can<br />
connect up to a maximum** of 98 loudspeakers (with transformers) by using the 5 watt power taps on<br />
their matching transformers. (600W divided by 5W = 120, less 20% as a safety margin = 98.) Now<br />
that's a lot of loudspeakers!<br />
**NOTE: it's recommended to allow approximately 15-20% as a safety margin for headroom<br />
accounting for the losses in the transformers when calculating how many loudspeakers<br />
b) Calculating Amplifier Power. The power demand of the system will depend on the total of your<br />
loudspeaker's transformer power tap selections. once you've set the power taps for each loudspeaker/<br />
transformer, just add it up. If you have to guess, guess on the high side then add about 20%. For general<br />
(quiet room) applications, about 10 watts per loudspeaker is more than adequate.<br />
c) Power Taps. 70 volt loudspeaker transformers usually have several 'power taps' (wires or solder<br />
tabs) so you can set the comparative loudness of each loudspeaker during installation. As an example,<br />
the <strong>Yorkville</strong> C110 and C120/70 loudspeakers have a rotary switch with 3 power settings as well as a<br />
straight-through setting (which bypasses the built-in transformer for conventional usage and presents an<br />
8 ohm load to the amplifier) Do not operate your CR670 with several loudspeaker in parallel when the<br />
loudspeaker's switch is set to the "straight through" setting.<br />
d) Connecting the loudspeaker transformers to the loudspeakers. If your chosen loudspeaker does not<br />
contain a 70 volt step-down transformer, then you will have to connect a transformer in series to the<br />
input terminals of the loudspeaker. The loudspeaker matching transformer should have various power<br />
tap leads (or terminals) plus one marked COM on the 'system' side (the side that connects to the<br />
amplifier). The other side of the transformer (for connection to the loudspeaker) will usually have two<br />
or three leads (or terminals), one probably marked 4 ohms, one 8 ohms and the other marked COM<br />
(or C). That is the side that you attach to the loudspeaker. Using a short length of loudspeaker cable,<br />
attach the transformer's COM lead or terminal to the negative loudspeaker terminal. Then attach the<br />
other lead (marked 8 ohms) to the positive loudspeaker terminal.<br />
e) Connecting the loudspeaker transformers to the system leads. The loudspeaker's matching transformer's<br />
COM (or C) lead should connect directly to the 'systems' COM wire. Connect the chosen transformer<br />
power tap lead to the 70 volt system live wire. Each loudspeaker connects to the 70 volt system<br />
wire in parallel. See the Diagram on last page.<br />
f) What if the loudspeakers have built-in transformers? Just connect the 70 volt system COM wire to the<br />
negative loudspeaker terminal and the 70 volt system live wire to the positive loudspeaker terminal.<br />
5
INPUT TERMINAL STRIP WIRING<br />
Balanced<br />
GND<br />
Unbalanced<br />
GND<br />
* CLIP /<br />
PROTECT LED<br />
Flashing = CLIPPING<br />
or LIMITING<br />
On = PROTECT MODE*<br />
*see Owner's Manual<br />
CH<br />
A<br />
GND<br />
COMMERCIAL PROFESSIONAL 70V AUDIO AUDIO AMPLIFIER<br />
CH<br />
B<br />
A PM<br />
AUDIO PROCESSING<br />
MODULE<br />
CH<br />
A CH B<br />
AMP INPUTS<br />
DESIGNED AND MANUFACTURED BY YORKVILLE SOUND • TORONTO, CANADA<br />
Output<br />
Power Amp<br />
Limiter<br />
A<br />
Volume<br />
Inputs<br />
A PM<br />
B<br />
GAIN CONTROLS<br />
-6<br />
-6<br />
-9 -3 -9 -3<br />
LIMITER<br />
PEAK<br />
-18 -1.5 -18 -1.5<br />
0 0<br />
CH dB<br />
dB CH<br />
A<br />
B<br />
AVERAGE<br />
When operating this product, ensure that there is adequate<br />
ventilation on all sides of the chassis! Refer to Owner's Manual for details<br />
0 0-<br />
70V SPEAKER OUTPUT<br />
0 0-<br />
MIN 8-OHMS<br />
OUTPUTS ARE IN PARALLEL<br />
70V SPEAKER OUTPUT<br />
CIRCUIT<br />
BREAKER<br />
PUSH TO RESET<br />
120VAC<br />
60Hz<br />
4.5A<br />
TYPE: YS1009 1v5<br />
Figure 1<br />
Figure 2<br />
INTRODUCTION<br />
Votre nouvel amplificateur de puissance CR670 a été conçu pour vous offrir une performance fiable pour plusieurs<br />
années à venir. Le CR670 est capable d’alimenter d’important systèmes de haut-parleurs de distribution ainsi que<br />
les systèmes de haut-parleurs pour sonorisation (grande extension dynamique). Comme tous les amplificateurs<br />
de puissance <strong>Yorkville</strong>, il a été conçu pour être robuste et fiable dans tout type d’application. Le limiteur offre<br />
deux modes d’opération, permettant de conserver la clarté de signaux de la bande médiane, tout en permettant<br />
d’obtenir des graves phénoménales. La grande capacité de courant aux sorties, le niveau de distorsion très bas et<br />
la généreuse extension dynamique garantissent l’intégrité sonore de l’amplificateur de puissance CR670<br />
Comme tous les produits fabriqués par <strong>Yorkville</strong>, le CR670 doit passer des tests rigoureux. Chaque circuit<br />
est testé par des appareils à la fine pointe de la technologie contrôlée par ordinateurs capables de détecter et<br />
d’identifier les déviations les plus petites en rapport aux paramètres originaux. Le test final inclus une période de<br />
rodage cyclique de température.<br />
ENTRÉES<br />
Les deux canaux d’entrées sont dotés de contrôles<br />
de gain indépendant qui résument en un signal, qui<br />
est ensuite amplifié par la section d’amplificateur de<br />
puissance.<br />
Entrées Asymétriques<br />
Le “Combi-jack” et la barrette de connexion<br />
peuvent êtres utilisés pour les branchements de<br />
type asymétriques. Suivez les directions telles<br />
qu’indiquées à la figure 3 à 5 pour les diverses<br />
possibilités de branchements asymétriques.<br />
Lorsque possible, nous vous recommandons de<br />
toujours utiliser des branchements symétriques<br />
pour assurer un meilleur rendement au niveau<br />
rapport signal/bruit. Lorsque vous devez utiliser<br />
des câbles asymétriques, assurez-vous qu’ils<br />
soient le plus court possible de façon à minimiser<br />
l’induction de bruit dans le système.<br />
Entrées Symétriques<br />
Le CR670 est doté d’entrées symétriques avec<br />
circuit pour éliminer le bourdonnement. Trois<br />
types de connecteurs symétriques sont utilisés.<br />
Le “Combi-jack” accepte les fiches ¼” ( stéréo)<br />
et les fiches XLR pour opération symétrique. La<br />
pointe de la prise ¼” (stéréo) et la tige 2 de la<br />
prise XLR = positif. La barrette de connexion<br />
permet le branchement direct pour installations<br />
permanentes. Utilisez des fils dotés de cosse en<br />
forme de fourche pour visse #6 pour le branchement<br />
à la barrette de connexion. Suivez les<br />
directions telles qu’indiquées à la figure 1 et 2<br />
pour les diverses possibilités de branchements<br />
symétriques. Pour assurer un meilleur rendement<br />
au niveau rapport signal/bruit, nous vous<br />
recommandons de toujours utiliser des branchements<br />
symétriques lorsque possible.<br />
Figure 3<br />
Figure 4<br />
Figure 5<br />
Figure 6<br />
Opération Mono<br />
LE CR670 est un amplificateur monophonique. La charge de haut-parleur est branchée aux bornes rouge et blanche.<br />
Le fil provenant de la tige positive du haut-parleur doit être connectée à la borne rouge de l’amplificateur.<br />
6
Output<br />
Power Amp<br />
Limiter<br />
A PM<br />
Volume<br />
A<br />
B<br />
Inputs<br />
Module Optionnel* M2 de mélange avec<br />
entrées pour microphone<br />
L’addition du module optionnel M2 de mélange avec entrée<br />
pour microphone vous permet d’accroître la polyvalence du<br />
CR670. Le module M2 est un mixeur à deux canaux pour<br />
microphone doté de contrôle de graves et d’aiguës. Il est aussi<br />
équipé de contrôle de gain indépendant pour les deux entrées<br />
pour microphone. Le module M2 vous permet de contrôler les<br />
graves et les aiguës du programme musical. Il mélange ensuite<br />
son signal avec le signal jumelé des canaux A et B d’entrées<br />
avant d’atteindre le circuit du limiteur.<br />
Sorties<br />
Le CR670 vous offre deux types de branchements pour les sorties. Les bornes super résistantes permettent<br />
l’utilisation de prise type banane ainsi que les branchements à fils dénudés. La sortie avec barrettes de connexion<br />
permet le branchement direct des fils pour les installations permanentes. Utilisez une cosse en fourche pour<br />
visse #6 pour brancher les fils de haut-parleur à la barrette de connexion.<br />
Le CR670 offre jusqu’à 600 watts dans une charge de haut-parleur de 8 ohms. Pour éviter que l’amplificateur<br />
entre en mode de protection, ne branchez rien de moins qu’une charge de haut-parleur de 8 ohms aux bornes de<br />
branchement pour haut-parleur. Nous vous prions de bien lire la section dans votre manuel intitulée “Conception<br />
et Installation d’un Système Audio 70 volts.<br />
Contrôles De Gain<br />
Les contrôles de gain du CR670 sont situés au panneau arrière de façon à<br />
empêcher l’accès lorsque l’amplificateur est monté en rack. Les contrôles<br />
calibrés en décibel correspondent aux voltages des signaux audio qui sont<br />
présents aux sorties pour haut-parleur. Lors d’utilisation à multiple amplificateur,<br />
les contrôles de gain avec échelle en dB permettrons à l’utilisateur de<br />
régler précisément, en relation avec chacun des amplificateurs, les niveaux<br />
de signal de sortie des CR670. Notez que ceci ne fonctionnera seulement que<br />
lorsque les signaux d’entrées sont de même amplitude. La position marquée<br />
“0” dB autour du contrôle de gain (position maximum) est relative à 70 volts<br />
RMS ( 600 watts dans 8 ohms) à la sortie lorsque 1.4 volts RMS est appliqué à l’entrée. Avec le contrôle de gain<br />
réglé à -3dB, 1.4 volts RMS à l’entrée vous procurera 49 volts de signal à la sortie (300 watts dans 8 ohms).<br />
Limiteur<br />
Le commutateur du limiteur situé au panneau arrière de l’amplificateur change le<br />
mode d’opération du limiteur. Lorsque à la position “peak”, le limiteur agit comme<br />
un limiteur de pointe avec un court temps d’amortissement. Cela permet aux pointes<br />
des graves d’amener la sortie de l’amplificateur en écrêtage pour la durée de la<br />
pointe, mais n’écrêtera pas beaucoup un signal continu comme par exemple lorsque<br />
quelqu’un qui cri dans un microphone.<br />
Quand le commutateur est à la position «-average-» le temps d’amortissement<br />
du limiteur est allongé et le limiteur agit comme un «-Leveler-» Ce mode est<br />
pratique lorsque le système est utilisé pour la sonorisation où la pleine extension<br />
dynamique de l’amplificateur est utilisée. La qualité des voix est alors maintenue<br />
grâce à la caractéristique d’écrêtage douce du limiteur.<br />
Designed & Manufactured by <strong>Yorkville</strong> <strong>Sound</strong> • Toronto, Canada<br />
Protection Contre Les Court Circuits<br />
Le CR670 est pleinement protégé contre toutes conditions de charge passive de haut-parleur. Il peut opérer<br />
continuellement, sans subir de dommages, avec un court-circuit (Nous vous recommandons toutefois de ne pas<br />
court-circuiter la sortie de votre CR670pour le plaisir de le faire.) Les court-circuits créent beaucoup de tension<br />
sur les appareils de sortie. Si un court-circuit est présent sur la sortie de l’amplificateur alors qu’un signal<br />
est acheminé à travers cet amplificateur, la DEL -‘’protect’’ s’illumine et l’amplificateur passe en mode “sleep ”<br />
éteignant ainsi le signal qui passe à travers l’amplificateur. Après 8 secondes, l’amplificateur permettra le passage<br />
de signal à travers l’amplificateur et vérifiera si le problème de court-circuit a été résolu. Si le court-circuit est<br />
toujours présent, l’amplificateur passera à nouveau au cycle de mode ‘’sleep’’. Si le problème de court-circuit a<br />
été résolu, l’amplificateur continuera d’acheminer le signal au haut-parleur.<br />
Refroidissement Et Protection Thermique<br />
Le refroidissement de type passif a été choisi pour ce modèle d’amplificateur. Il n’y a donc pas de ventilateur à<br />
l’intérieur. Ce type de refroidissement vous offrira une opération sans maintenance pour plusieurs années à venir.<br />
Il pourrait avoir une accumulation de poussière sur le dissipateur de chaleur si l’amplificateur est installé dans<br />
un endroit poussiéreux. Si l’amplificateur est installé de façon permanente dans un endroit poussiéreux, assurezvous<br />
que l’amplificateur est nettoyé régulièrement.<br />
Quand vous utilisez votre CR670, assurez-vous que l’aération n’est pas bloquée autour des ailettes du dissipateur<br />
de chaleur sur les côtés du châssis. De même, fait en sorte que les trous de ventilation sur le dessus et le<br />
dessous du châssis ne soient pas bloqués. Le CR670 a été conçu pour fonctionner à une température assez froide<br />
dans des conditions de fonctionnement normales. Si l’aération est restreinte autour ou à travers l’amplificateur,<br />
cela pourrait causer un arrêt de fonctionnement.<br />
Si la température des dissipateurs thermiques du CR670 excède celle d’une opération en toute sécurité,<br />
l’amplificateur cessera de fonctionner, les deux DEL de protection s’illumineront et le signal aux prises de sortie pour<br />
haut-parleur sera coupé jusqu’à ce que la température soit redescendue pour permettre l’utilisation en sécurité.<br />
Clip<br />
Mic 1 Mic 2<br />
A PM<br />
AUDIO PROCESSING<br />
Mic 1 Mic 2 Bass Treble<br />
Gain Gain<br />
0<br />
0 dB +55<br />
0 dB +55<br />
PROFESSIONAL MODULEAUDIO AMPLIFIER<br />
-12<br />
0<br />
dB +12<br />
-12<br />
2<br />
dB +12<br />
*Le module M2 peut être obtenu par l’entremise de<br />
détaillants <strong>Yorkville</strong> autorisé. Le module M2 doit<br />
être installé par un technicien qualifié de service.<br />
7
Montage en Rack<br />
Le CR670 a été conçu pour permettre le montage en rack standard de 19”. Assurez-vous de prévoir une ventilation<br />
adéquate autour de l’amplificateur. Voici quelques conseils qui assureront une ventilation adéquate lorsque<br />
votre CR670 est monté dans un rack:<br />
• Laissez un espace libre au-dessus et en dessous de l’amplificateur lorsque vous installez vos appareils dans le rack.<br />
• Si plusieurs CR670 sont montés dans le même rack, en plus du conseil ci-dessus, installez un ventilateur qui<br />
forcera le passage de l’air froid du bas vers le haut du rack à travers les amplificateurs.<br />
Le rack lui-même doit avoir une ventilation adéquate vers l’extérieur. Gardez le devant et le derrière du rack aussi ouvert que<br />
possible. Si vous utilisez des ventilateurs, l’air doit entrer par en avant au bas du rack et sortir par l’arrière, en haut du rack.<br />
Del Clip/Protection<br />
Les DEL ‘’clip/protection’’ sur le panneau avant de l’amplificateur clignoteront pour vous donner une indication<br />
visuelle de n’importe quelle excursion de signal au-delà de l’extension dynamique de l’amplificateur. Elles resteront<br />
allumées si l’amplificateur entre en mode de protection. Le CR670 peut entrer en mode de protection pour<br />
une des trois raisons qui suivent:<br />
• L’interrupteur d’alimentation vient tout juste d’être activé<br />
• Il y a un court circuit aux sorties de l’amplificateur ou sur les haut-parleurs<br />
•La température des dissipateurs thermiques du CR670 dépasse celle qui permet une opération en toute sécurité.<br />
8<br />
Conception et Installation d’un système<br />
audio 70 Volt<br />
1. Quand avez-vous besoin d’un système 70Volts?<br />
Les système 70 volts sont nécessaires quand vous avez besoin de haut-parleurs dans plusieurs endroits ou lorsque<br />
la distance entre l’amplificateur de source et les haut-parleurs est plus grande que 100 pieds (30 mètres).<br />
2. De quoi es-je besoin?<br />
En premier lieu, vous avez besoin d’un amplificateur capable de fournir 70 volts. Le CR670 conviendra parfaitement.<br />
Ensuite, pour les haut-parleurs, vous aurez besoin de haut-parleurs avec transformateur d’adaptation abaisseur 70<br />
volts intégrés. Vous pouvez aussi ajouter les transformateurs abaisseurs 70 volts aux haut-parleurs à basse impédance<br />
(4 or 8 ohms). (Les haut-parleurs <strong>Yorkville</strong> C110 et C120/70 sont équipés de transformateur d’adaptation intégré.)<br />
3. Assemblage du système<br />
a) Amplificateur de puissance. Les systèmes 70Volts nécessitent une certaine quantité de puissance pour distribuer<br />
correctement le signal. Le nombre total de haut-parleur que vous pouvez connecter correspond directement à la<br />
puissance de sortie (watts) de votre amplificateur (et la tige de puissance que vous avez choisi sur le transformateur<br />
d’adaptation du haut-parleur). Par exemple, si vous utilisez un CR670, qui est un amplificateur avec une puissance<br />
de 600 watts, vous pouvez connecter jusqu’à un maximum** de 98 haut-parleurs (avec transformateur) en<br />
utilisant les tiges de puissance de 5 watt sur leur transformateur d’adaptation. (600W divisé par 5W = 120, moins<br />
20% comme marge de sécurité = 98.) Ça fait beaucoup de haut-parleurs!<br />
**NOTE: Vous devez tenir compte des pertes dans les transformateurs lorsque vous calculez la quantité<br />
de haut-parleur qui peuvent être connectés au système. Il est recommandé d’allouer environ 15-20%<br />
comme marge de sécurité.<br />
b) Calcul de la puissance requise. La demande de puissance de votre système dépendra du total des tiges de puissance<br />
sélectionnées sur les transformateurs d’adaptation des haut-parleurs. Quand vous avez sélectionné les tiges<br />
de puissance sur chaque haut-parleur, faites l’addition des watts. Si vous devez estimer, penchez du côté le plus<br />
élevé et ajoutez ensuite 20%. Pour les applications typiques (endroits relativement silencieux), environ 10 watts<br />
par haut-parleur est généralement plus que suffisant.<br />
c) Tiges de Puissance. Les transformateurs 70 volts pour haut-parleur sont généralement équipés de plusieurs tiges<br />
de puissance (fil ou tige pour soudure) qui vous permettent de régler l’intensité sonore comparative de chaque<br />
haut-parleur durant l’installation. Par exemple, les haut-parleurs <strong>Yorkville</strong> C110 et C120/70 sont équipés d’un<br />
commutateur rotatif à 3 réglages de puissance en plus du branchement direct (le branchement direct contourne le<br />
transformateur intégré permettant ainsi l’usage conventionnel du haut-parleur. Dans ce cas, la charge que présente<br />
le haut-parleur à l’amplificateur est de 8 ohms) N’utilisez pas votre CR670 avec plusieurs haut-parleurs branchés<br />
en parallèle lorsque le commutateur du haut-parleur est à la position de branchement direct “straight through”.<br />
d) Branchement des transformateurs de haut-parleur aux haut-parleurs. Si le modèle de haut-parleur que vous<br />
avez choisi n’est pas équipé d’un transformateur abaisseur 70 volts, vous devez connecter un transformateur<br />
en série avec les tiges d’entrées du haut-parleur. Le transformateur d’adaptation du haut-parleur devrait avoir<br />
une sélection de tige de puissance (ou terminaux) avec une de tige marquée ‘’COM’’ sur le côté du système (le<br />
côté qui connecte à l’amplificateur). L’autre côté du transformateur (pour connexion au haut-parleur) consistera<br />
généralement de deux ou trois tiges (ou terminaux), une probablement marquée 4 ohms, une 8 ohms et l’autre<br />
marquée ‘’COM’’ (ou ‘’C’’). C’est le côté que vous reliez au haut-parleur. À l’aide d’un câble pour branchement<br />
à haut-parleur court, connectez la tige ‘’COM’’du transformateur au terminal négatif du haut-parleur. Connectez<br />
ensuite l’autre tige (marquée ‘’8 ohms’’) au terminal positif du haut-parleur.<br />
e) Branchement du transformateur de haut-parleur au système. La tige ‘’COM’’ (ou ‘’C’’) du transformateur<br />
d’adaptation du haut-parleur devrait être connectée directement aux fils ‘’COM’’ du système. Connectez la tige<br />
de sélection de puissance que vous avez choisi au fil ‘’LIVE’’ du système 70 volts. Chaque haut-parleur connecte<br />
parallèlement au fil du système 70 volts . Voir le Diagramme à la dernière page.<br />
f) Et si les haut-parleurs sont équipés de transformateur intégré? Connectez simplement le fil ‘’COM’’ du système<br />
70 volts au terminal négatif du haut-parleur et le fil ‘’LIVE’’ du système 70 volts au terminal positif du haut-parleur.
Specifications<br />
Continuous Power:<br />
(1 KHz, 0.1% THD)<br />
8 ohms 600 Watts 70VRMS<br />
Burst Power:<br />
(10m Sec of 1KHz, 1% THD)<br />
8 ohms 960 Watts<br />
Frequency Response: ±1 dB 50Hz - 20 KHz<br />
Hum and Noise: < -104 dB (unweighted)<br />
Distortion: 300<br />
Input Impedance: 20 K ohms Balanced<br />
10 K ohms Unbalanced<br />
Input Sensitivity: 1.4 (34dB gain) VRMS Sine<br />
Common Mode Rejection (CMRR): 54 dB minimum / 66 dB typical (at 60 Hz)<br />
Modes: Mono<br />
Power Consumption: 450 Watts (typ), 810 W (max)<br />
Protection: DC, Load, and Thermal<br />
Limiter: Selectable Peak or Average<br />
Cooling: Passive Convection<br />
Input Connectors: Terminal Strip and XLR / ¼-inch Phone (TRS) Combi-Jack<br />
Transformer: Toroidal<br />
Rack Space: 3 Spaces<br />
Size: 28 cm x 48 cm x 13 cm (DWH)<br />
11 in x 19 in x 5.25 in (DWH)<br />
Exterior Finish: Baked, Black Painted Aluminum<br />
Weight: 23 lbs. 10.5 Kg<br />
Specifications<br />
Puissance Continue:<br />
(1 KHz, 0.1% THD)<br />
8 ohms 600 Watts 70VRMS<br />
Puissance d'éclatement:<br />
(10m Sec of 1KHz, 1% THD)<br />
8 ohms 960 Watts<br />
Réponse en fréquence: ±1 dB 50Hz - 20 KHz<br />
Bruit et Bourdonnement: < -104 dB (non pondérée)<br />
Distortion:
10<br />
NOTES
WORLD HEADQUARTERS<br />
CANADA<br />
<strong>Yorkville</strong> <strong>Sound</strong><br />
550 Granite Court<br />
Pickering, Ontario<br />
L1W-3Y8 CANADA<br />
Voice: (905) 837-8481<br />
Fax: (905) 837-8746<br />
U.S.A.<br />
<strong>Yorkville</strong> <strong>Sound</strong> Inc.<br />
4625 Witmer Industrial Estate<br />
Niagara Falls, New York<br />
14305 USA<br />
Voice: (716) 297-2920<br />
Fax: (716) 297-3689