Dual Mode Precision Plunge Router - Triton Tools
Dual Mode Precision Plunge Router - Triton Tools
Dual Mode Precision Plunge Router - Triton Tools

You also want an ePaper? Increase the reach of your titles
YUMPU automatically turns print PDFs into web optimized ePapers that Google loves.
Plunging to pre-set depth<br />
• Rotate the turret until the thumbwheel at the required<br />
depth is positioned beneath the depth stop<br />
• Now, when you plunge the router, the depth stop will<br />
hit the thumbwheel and retain the router at the precise<br />
depth required<br />
with the depth of cut required (as shown on the fixed<br />
post) For example, for a cutting depth of 3mm, rotate<br />
the thumbwheel until the top is aligned with the 3mm<br />
mark on the fixed post. For a cutting depth of 1/8",<br />
rotate the thumbwheel until the top is aligned with the<br />
1/8" mark on the fixed post.<br />
3. To pre-set a second depth, repeat the procedure with<br />
the second thumbwheel<br />
OPTIONAL TEMPLATE GUIDE BUSHES<br />
An optional guide bush adaptor<br />
with seven different template<br />
guide bushes are available for<br />
template routing.<br />
This accessory kit (part<br />
no.TGA150) is available through<br />
your local <strong>Triton</strong> retailer.<br />
GB<br />
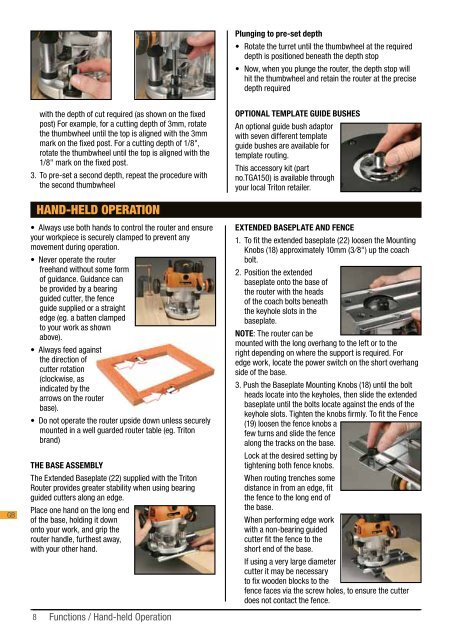
HAND-HELD OPERATION<br />
• Always use both hands to control the router and ensure<br />
your workpiece is securely clamped to prevent any<br />
movement during operation.<br />
• Never operate the router<br />
freehand without some form<br />
of guidance. Guidance can<br />
be provided by a bearing<br />
guided cutter, the fence<br />
guide supplied or a straight<br />
edge (eg. a batten clamped<br />
to your work as shown<br />
above).<br />
• Always feed against<br />
the direction of<br />
cutter rotation<br />
(clockwise, as<br />
indicated by the<br />
arrows on the router<br />
base).<br />
• Do not operate the router upside down unless securely<br />
mounted in a well guarded router table (eg. <strong>Triton</strong><br />
brand)<br />
THE BASE ASSEMBLY<br />
The Extended Baseplate (22) supplied with the <strong>Triton</strong><br />
<strong>Router</strong> provides greater stability when using bearing<br />
guided cutters along an edge.<br />
Place one hand on the long end<br />
of the base, holding it down<br />
onto your work, and grip the<br />
router handle, furthest away,<br />
with your other hand.<br />
8<br />
Functions / Hand-held Operation<br />
Extended Baseplate and Fence<br />
1. To fit the extended baseplate (22) loosen the Mounting<br />
Knobs (18) approximately 10mm (3⁄8") up the coach<br />
bolt.<br />
2. Position the extended<br />
baseplate onto the base of<br />
the router with the heads<br />
of the coach bolts beneath<br />
the keyhole slots in the<br />
baseplate.<br />
NOTE: The router can be<br />
mounted with the long overhang to the left or to the<br />
right depending on where the support is required. For<br />
edge work, locate the power switch on the short overhang<br />
side of the base.<br />
3. Push the Baseplate Mounting Knobs (18) until the bolt<br />
heads locate into the keyholes, then slide the extended<br />
baseplate until the bolts locate against the ends of the<br />
keyhole slots. Tighten the knobs firmly. To fit the Fence<br />
(19) loosen the fence knobs a<br />
few turns and slide the fence<br />
along the tracks on the base.<br />
Lock at the desired setting by<br />
tightening both fence knobs.<br />
When routing trenches some<br />
distance in from an edge, fit<br />
the fence to the long end of<br />
the base.<br />
When performing edge work<br />
with a non-bearing guided<br />
cutter fit the fence to the<br />
short end of the base.<br />
If using a very large diameter<br />
cutter it may be necessary<br />
to fix wooden blocks to the<br />
fence faces via the screw holes, to ensure the cutter<br />
does not contact the fence.