Fig. 1 - Profi-elektro.cz
Fig. 1 - Profi-elektro.cz
Fig. 1 - Profi-elektro.cz

Create successful ePaper yourself
Turn your PDF publications into a flip-book with our unique Google optimized e-Paper software.
BG when the burner has not been heated up, and the device should<br />
work on min. power (22 kW). During this time, the pump feeds<br />
the combustion chamber with approximately 1.85 kg/h of oil.<br />
CZ After 30 minutes, we may shift to max. power (30 kW), during<br />
which time the chamber is supplied with approximately 2.55 kg/h<br />
of oil.<br />
DE<br />
►►<br />
The heater is switched off by pressing Stop button on the<br />
control panel. The pump is switched off (yellow and green diodes<br />
on the control panel go off). Fan works until the temper-<br />
FI<br />
ature in the chamber falls below 35°C (Shutting off). After the<br />
temperature in the chamber has fallen below 35°C, the burner<br />
FR switches to the Stop mode.<br />
►►<br />
The heater may switch off automatically if the combustion<br />
GB chamber is overheated or in case of overflow.<br />
►►<br />
Overheating signal is generated by the bimetallic thermostat<br />
located close to the fan. Opening of joints signals that the threshold<br />
temperature has been exceeded. Control system turns the<br />
PL<br />
pump off (pump indicator, yellow diode, goes off) and overheating<br />
is signalled when a red diode on the control panel switches<br />
RU<br />
on. Fan works until the temperature in the chamber falls below<br />
35°C. After the temperature in the chamber has fallen below<br />
SE 35°C, the burner switches to the Stop mode.<br />
►►<br />
Once the heater is in the Stop mode (and even after switching<br />
off and subsequently switching on the device) the overheating<br />
signal is on. This enables the user to find out what caused<br />
SE<br />
the heater to stop.<br />
SI ►►<br />
In order to reset the overheating signal and regain normal<br />
functioning of the device, one should wait until the burner cools<br />
off completely (ventilation fan switches off) and press the button<br />
SK on the casing of bimetallic thermostat. Then press Start button,<br />
which will cause the overheating diode to go off. The heater may<br />
be switched on again.<br />
►►<br />
Overflow signal is generated by a mechanic sensor located<br />
underneath the overflow tank. Opening of joints signals that the<br />
tank is overflow. At the same time the pump is switched off, the<br />
pump indicator goes off, and the red diode signalling overflow<br />
switches on. Fan works until the temperature in the chamber<br />
falls below 35°C. After the temperature in the chamber has<br />
fallen below 35°C, the burner switches to the Stop mode. The<br />
overflow tank is to be emptied, and then Start button should be<br />
pressed, which will cause the red overflow diode to go off. The<br />
heater may be switched on again.<br />
►►►<br />
9. How to operate the heater<br />
caution!<br />
Oil must not be poured into the burner if<br />
the chamber or the pan is still hot!!! Always<br />
wait until the burner has cooled<br />
down. Non-compliance with the above warning<br />
may cause explosion of oil vapours and<br />
burns!!!<br />
How to operate the device<br />
►►<br />
Once engaged, the heater switches to desired modes depending<br />
on settings chosen by the user and information transmitted<br />
by sensors connected to the control panel.<br />
►►<br />
If necessary, water may be poured from the tank and replaced<br />
with used oil.<br />
►►<br />
Plug into the power socket (230V/50Hz).<br />
►►<br />
Pull the upper part of the cover aside and take the burner lid<br />
off, take the cylinder and the ring out (if necessary, clean thoroughly<br />
the vaporising pan and its base, the burner, cylinder and<br />
ring). Check if the vaporising pan is cool and clean, and then<br />
pour approximately 250 ml of heating or diesel oil onto it.<br />
►►<br />
Light oil using a piece of scrunched up paper that needs to<br />
be put on fire and thrown onto the vaporising pan.<br />
►►<br />
Install ring and cylinder, put the burner lid back on, close the<br />
upper part of burner’s casing.<br />
►►<br />
Press Start button on the control panel (green diode turns<br />
on).<br />
►►<br />
After approx. 10-15 minutes, depending on the temperature<br />
in the room, the fuel pump and ventilation fan will start and the<br />
yellow pump diode will turn on at the same time. The heater<br />
starts working on its minimum power 22 kW; 1.85 kg/h<br />
►►<br />
Each time Stop button is pressed followed by pressing the<br />
Start button during operation will result in switching into the<br />
Heating up mode of the burner.<br />
Shutting off<br />
►►<br />
Press Stop on the control panel (yellow diode goes off),<br />
pump stops feeding fuel onto the vaporising pan, and ventilation<br />
fan works only until the burner has cooled off.<br />
The device must not be unplugged for<br />
as long as the ventilation fan is working,<br />
this can be done only after the burner has<br />
cooled down. The burner switches off automatically.<br />
Please remember that after<br />
switching off the device, the cast-iron pan<br />
remains hotter for longer (depending on<br />
the temperature in the room) and the heater<br />
cannot be re-engaged until it cools<br />
down completely.<br />
Maintenance<br />
►►<br />
The burner requires various maintenance works. Following<br />
producer’s recommendations regarding maintenance will assure<br />
failure-free and safe functioning of the device.<br />
►►<br />
Vaporising pan and elements of the combustion chamber<br />
(cylinder, ring and lid) should be cleaned daily.<br />
►►<br />
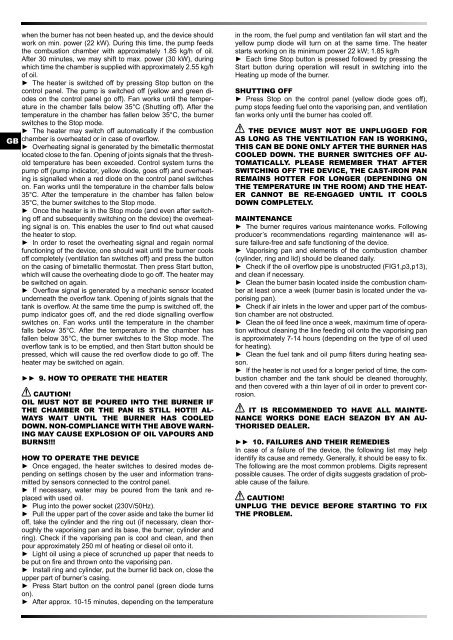
Check if the oil overflow pipe is unobstructed (FIG1,p3,p13),<br />
and clean if necessary.<br />
►►<br />
Clean the burner basin located inside the combustion chamber<br />
at least once a week (burner basin is located under the vaporising<br />
pan).<br />
►►<br />
Check if air inlets in the lower and upper part of the combustion<br />
chamber are not obstructed.<br />
►►<br />
Clean the oil feed line once a week, maximum time of operation<br />
without cleaning the line feeding oil onto the vaporising pan<br />
is approximately 7-14 hours (depending on the type of oil used<br />
for heating).<br />
►►<br />
Clean the fuel tank and oil pump filters during heating season.<br />
►►<br />
If the heater is not used for a longer period of time, the combustion<br />
chamber and the tank should be cleaned thoroughly,<br />
and then covered with a thin layer of oil in order to prevent corrosion.<br />
It is recommended to have all maintenance<br />
works done each seazon by an authorised<br />
dealer.<br />
►►►<br />
10. Failures and their remedies<br />
In case of a failure of the device, the following list may help<br />
identify its cause and remedy. Generally, it should be easy to fix.<br />
The following are the most common problems. Digits represent<br />
possible causes. The order of digits suggests gradation of probable<br />
cause of the failure.<br />
CAUTION!<br />
Unplug the device before starting to fix<br />
the problem.