Model / Modell / Model / Modele / Modello / Modelo: 81642 - C2G
Model / Modell / Model / Modele / Modello / Modelo: 81642 - C2G
Model / Modell / Model / Modele / Modello / Modelo: 81642 - C2G

You also want an ePaper? Increase the reach of your titles
YUMPU automatically turns print PDFs into web optimized ePapers that Google loves.
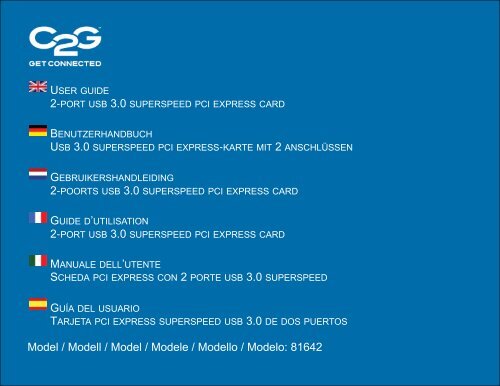
USER GUIDE<br />
2‐PORT USB 3.0 SUPERSPEED PCI EXPRESS CARD<br />
BENUTZERHANDBUCH<br />
USB 3.0 SUPERSPEED PCI EXPRESS‐KARTE MIT 2 ANSCHLÜSSEN<br />
GEBRUIKERSHANDLEIDING<br />
2‐POORTS USB 3.0 SUPERSPEED PCI EXPRESS CARD<br />
GUIDE D’UTILISATION<br />
2‐PORT USB 3.0 SUPERSPEED PCI EXPRESS CARD<br />
MANUALE DELL’UTENTE<br />
SCHEDA PCI EXPRESS CON 2 PORTE USB 3.0 SUPERSPEED<br />
GUÍA DEL USUARIO<br />
TARJETA PCI EXPRESS SUPERSPEED USB 3.0 DE DOS PUERTOS<br />
<strong>Model</strong> / <strong>Model</strong>l / <strong>Model</strong> / <strong>Model</strong>e / <strong>Model</strong>lo / <strong>Model</strong>o: <strong>81642</strong>
TABLE OF CONTENTS<br />
Overview ...............................................................................................................................................................................2<br />
Features ................................................................................................................................................................................2<br />
System Requirements ...........................................................................................................................................................2<br />
Package Contents ..................................................................................................................................................................2<br />
Driver Installation .................................................................................................................................................................3<br />
Device Installation .................................................................................................................................................................4<br />
Verify Device Installation .......................................................................................................................................................6<br />
Cables To Go One Year Warranty ...........................................................................................................................................6<br />
Technical Specifications .........................................................................................................................................................6<br />
Regulatory Compliance .........................................................................................................................................................6<br />
Important Safety Information ...............................................................................................................................................7
OVERVIEW<br />
Thank you for purchasing the 2‐Port USB 3.0 SuperSpeed PCI Express Card. The 2‐Port USB 3.0 SuperSpeed PCI<br />
Express Card adds SuperSpeed USB capabilities to your computer. Simply install this card into an available PCI slot<br />
on your computer to add two USB 3.0 SuperSpeed ports. SuperSpeed USB supports transfer rates of up to 5 Gbpsup<br />
to 10 times faster than USB 2.0. The 2‐Port USB 3.0 SuperSpeed PCI Express Card is ideal for quickly transferring<br />
large amounts of data from such devices as external hard drives, memory card readers, real‐time video cameras, and<br />
other data intensive USB devices. We recommend that you read this manual thoroughly and retain for future<br />
reference.<br />
Features:<br />
Adds two USB 3.0 A‐Male ports to a computer<br />
Connects internally via the PCI‐e connector<br />
5 Gbps signaling rate‐ 10X faster than USB 2.0<br />
Backwards compatible with USB 2.0<br />
Improved power efficiency over USB 2.0<br />
Ideal for large data transfers from external hard drives, real‐time video cameras, and other data intensive devices<br />
System Requirements<br />
Operating System: Windows 7, XP, or Vista<br />
Package Contents<br />
2‐Port USB 3.0 SuperSpeed PCI Express Card<br />
Driver CD<br />
User Guide
DRIVER INSTALLATION (For Windows XP, Vista, Windows 7)<br />
Before you install the device in your computer, you will need to install the necessary driver for proper operation.<br />
Please follow the procedure below.<br />
Note: The below setup is an example shown using a Windows XP operating system. Some screenshots may vary slightly depending<br />
on your operating system. The setup wizard is designed to step you through each part of the driver installation process successfully.<br />
Step 1<br />
Insert the CD provided with this<br />
product and click Install Driver.<br />
The following screen will appear.<br />
Click Next.<br />
Step 4<br />
Click Install to begin driver<br />
installation.<br />
The driver installation may take a few minutes.<br />
You may also get a software installation<br />
Windows security pop‐up during this time.<br />
Click Continue Anyway when it appears to<br />
complete the installation.<br />
Step 2<br />
After reading the End‐User<br />
License Agreement, please select<br />
“I accept the terms in the<br />
License Agreement” and click<br />
Next.<br />
Step 5<br />
When the installation has<br />
completed, click Finish to exit the<br />
setup wizard.<br />
Step 3<br />
Please click Browse to choose<br />
the destination folder, and<br />
then click Next.
DRIVER INSTALLATION<br />
Step 1<br />
Turn off your computer and remove the cover/panel to expose the<br />
PCI slot.<br />
Step 2<br />
Plug the 2‐Port USB 3.0 Card into the PCI slot on the computer.<br />
Step 3<br />
Replace the cover/panel and turn on your computer.<br />
When your computer starts up, a Found New Hardware Wizard will<br />
appear.<br />
Note: The following setup is an example shown using a Windows<br />
XP<br />
operating system. Some screenshots may vary slightly depending<br />
on<br />
your operating system. The setup wizard is designed to step you<br />
through each part of the driver installation process successfully.<br />
Steps 4-7 will have to be completed two times because there<br />
are<br />
two USB 3.0 ports that need to be installed and recognized.<br />
Step 4<br />
When the Found New Hardware<br />
Wizard appears, select Yes, this<br />
time only, and click Next.<br />
Step 5<br />
Choose Install the software<br />
automatically and click Next.<br />
The Windows security pop‐up may<br />
appear during this process. Click<br />
Continue Anyway to continue with<br />
the installation.<br />
Step 6<br />
Click Finish to complete the<br />
installation and exit the wizard.<br />
Step 7<br />
The Found New Hardware Wizard will appear again. Repeat steps 4‐6<br />
for second USB 3.0 port installation.
DRIVER INSTALLATION<br />
Verification:<br />
After you have completed the driver and device installation, you can go to the Device Manager to verify the product is<br />
installed and recognized properly.<br />
Windows XP Windows Vista/Windows 7<br />
<strong>C2G</strong> ONE YEAR WARRANTY<br />
At Cables To Go, we want you to be totally confident in your purchase. That is why we offer a one year warranty on<br />
this device. If you experience problems due to workmanship or material defect for the duration of this warranty, we<br />
will repair or replace this device. To request a Return Merchandise Authorization (RMA) number, contact customer<br />
service at 0800.328.2916 or www.c2g.com.<br />
<strong>C2G</strong><br />
Road 30 Hortonwood Industrial Estate,<br />
Telford, Shropshire TF1 7AB UK<br />
0800.328.2916<br />
www.c2g.com
TECHNICAL SPECIFICATIONS<br />
Product No. <strong>81642</strong><br />
Complies USB Rev. Ver. 3.0<br />
PCI Express Base Specification<br />
Connectors (Downstream)<br />
Data Speed Support<br />
Date Transfer Type Support<br />
Revision 2.0;<br />
PCI Bus Power Management Interface Specification: Revision 1.2<br />
USB 3.0 Type A x2<br />
Low‐speed (1.5Mbps)/ Full‐speed (12Mbps)/ High‐speed<br />
(480Mbps)/Super‐speed (5Gbps)<br />
Control/ Bulk/ Interrupt/ Isochoronous<br />
Power to Ports<br />
Product Weight<br />
500 mA (max.)<br />
.20 lbs<br />
REGULATORY COMPLIANCE<br />
FCC Conditions<br />
This equipment has been tested and found to comply with Part 15 of the FCC Rules. Operation is subject to the<br />
following two conditions:<br />
(1) This device may not cause harmful interference<br />
(2) This device must accept any interference received. Including interference that may cause undesired operation.<br />
CE<br />
This equipment is in compliance with the requirements of the following regulations:<br />
EN 55 022: CLASS B
IMPORTANT SAFETY INFORMATION<br />
! Do not plug the unit in any outlet that does not have enough current to allow the device to function. Refer to the<br />
specifications in this manual for power level of the unit.<br />
! Liquid:<br />
If this unit or its corresponding power adapter has had liquid spilled on or in it, do not attempt to use the unit.<br />
Do not attempt to use this product in an outdoor environment as elements such as rain, snow, hail, etc. can<br />
damage the product.<br />
! In case of a storm, it is recommended that you unplug this device from the outlet.<br />
! Avoid placing this product next to objects that produce heat such as portable heaters, space heaters, or heating<br />
ducts.<br />
! THERE ARE NO USER SERVICEABLE PARTS<br />
Do not attempt to open this product and expose the internal circuitry. If you feel that the product is defective,<br />
unplug the unit and refer to the warranty information section of this manual.<br />
©2012 <strong>C2G</strong>. Microsoft, XP, and Vista are either registered trademarks or trademarks of Microsoft<br />
Corporation in the United States and/or other countries. This product is not endorsed or manufactured by Microsoft<br />
Corporation.
INHALTSVERZEICHNIS<br />
Übersicht ........................................................................................................................................................................... 9<br />
Merkmale .......................................................................................................................................................................... 9<br />
Systemanforderungen ....................................................................................................................................................... 9<br />
Packungsinhalt ................................................................................................................................................................... 9<br />
Treiberinstallation ........................................................................................................................................................... 10<br />
Geräteinstallation ............................................................................................................................................................ 11<br />
Geräteinstallation überprüfen ......................................................................................................................................... 12<br />
Einjährige Garantie von Cables To Go ............................................................................................................................. 12<br />
Technische Daten ............................................................................................................................................................ 13<br />
Einhaltung gesetzlicher Vorschriften ............................................................................................................................... 13<br />
Wichtige Sicherheitshinweise .......................................................................................................................................... 14
ÜBERSICHT<br />
Vielen Dank, dass Sie die USB 3.0 SuperSpeed PCI Express‐Karte mit 2 Anschlüssen gekauft haben. Die USB 3.0<br />
SuperSpeed PCI Express‐Karte mit 2 Anschlüssen fügt SuperSpeed USB‐Fähigkeiten zu Ihrem Computer hinzu.<br />
Installieren Sie diese Karte einfach in einem freien PCI‐Steckplatz an Ihrem Computer und fügen Sie so zwei USB 3.0<br />
SuperSpeed‐Anschlüsse hinzu. SuperSpeed USB unterstützt Übertragungsraten bis 5 Gb/s ‐ das ist bis zu 10 Mal<br />
schneller als USB 2.0. Die USB 3.0 SuperSpeed PCI Express‐Karte mit 2 Anschlüssen ist ideal für die schnelle<br />
Übertragung großer Datenmengen von Geräten wie externen Festplatten, Speicherkartenlesern, Echtzeit‐<br />
Videokameras und anderen datenintensiven USB‐Geräten. Bitte lesen Sie dieses Handbuch sorgfältig durch und<br />
bewahren Sie es zum zukünftigen Nachschlagen auf.<br />
Merkmale:<br />
Zwei zusätzliche USB 3.0 SuperSpeed‐Anschlüsse für den Computer<br />
Anschluss intern über den PCI‐e‐Anschluss<br />
5 Gb/s Übertragungsgeschwindigkeit ‐ 10 Mal schneller als USB 2.0<br />
Abwärtskompatibel mit USB 2.0<br />
Verbesserte Energieeffizienz im Vergleich zu USB 2.0<br />
Ideal für die Übertragung großer Datenmengen von externen Festplatten, Echtzeit‐Videokameras und anderen<br />
datenintensiven Geräten<br />
Systemanforderungen<br />
Betriebssystem: Windows 7, XP oder Vista<br />
Packungsinhalt<br />
USB 3.0 SuperSpeed PCI Express‐Karte mit 2 Anschlüssen<br />
Treiber‐CD<br />
Benutzerhandbuch
TREIBERINSTALLATION (für Windows XP, Vista, Windows 7)<br />
Bevor Sie das Gerät an Ihren Computer anschließen, müssen Sie den für den ordnungsgemäßen Betrieb erforderlichen<br />
Treiber installieren. Bitte gehen Sie dabei wie folgt vor:<br />
Hinweis: Das folgende Setup dient nur als Beispiel und bezieht sich auf das Betriebssystem Windows XP. Je nach Ihrem Betriebssystem<br />
können sich einige Screenshots etwas unterscheiden. Der Setup‐Assistent soll Sie erfolgreich durch die einzelnen<br />
Teile der Treiberinstallation führen.<br />
Schritt 1<br />
Legen Sie die mit diesem Produkt<br />
mitgelieferte CD ein und klicken Sie<br />
auf Treiber installieren. Der<br />
folgende Bildschirm wird<br />
angezeigt. Klicken Sie auf Weiter.<br />
Schritt 2<br />
Bitte wählen Sie nach dem<br />
Durchlesen der<br />
Endbenutzerlizenzvereinbarung<br />
„Ich akzeptiere die Bedingungen<br />
der Lizenzvereinbarung“ und<br />
klicken anschließend auf Weiter.<br />
Schritt 4<br />
Klicken Sie auf Installieren, um mit<br />
der Treiberinstallation zu beginnen.<br />
Die Treiberinstallation kann einige Minuten<br />
dauern. In dieser Zeit kann auch ein Windows‐<br />
Sicherheits‐Popup zur Softwareinstallation<br />
erscheinen. Wenn es erscheint, klicken Sie auf<br />
„Trotzdem fortfahren“, um die Installation<br />
abzuschließen.<br />
Schritt 5<br />
Wenn die Installation<br />
abgeschlossen ist, klicken Sie auf<br />
Fertigstellen, um den Setup‐<br />
Assistenten zu beenden.<br />
Schritt 3<br />
Bitte klicken Sie auf<br />
Durchsuchen, um den<br />
Zielordner auszuwählen, und<br />
anschließend auf Weiter.
GERÄTEINSTALLATION<br />
Schritt 1<br />
Schalten Sie den Computer aus und entfernen Sie die Abdeckung, um<br />
zum PCI‐Steckplatz zu gelangen.<br />
Schritt 2<br />
Schließen Sie die USB 3.0‐Karte mit zwei Anschlüssen an einen<br />
PCISteckplatz<br />
im Computer an.<br />
Schritt 3<br />
Bringen Sie die Abdeckung wieder an und schalten Sie den Computer<br />
ein.<br />
Beim Hochfahren des Computers wird der Assistent „Neue<br />
Hardware gefunden“ angezeigt.<br />
Hinweis: Das folgende Setup dient nur als Beispiel und bezieht<br />
sich<br />
auf das Betriebssystem Windows XP. Je nach Ihrem<br />
Betriebssystem<br />
können sich einige Screenshots etwas unterscheiden. Der Setup<br />
‐<br />
Assistent soll Sie erfolgreich durch die einzelnen Teile der<br />
Treiberinstallation führen.<br />
Die Schritte 4 - 7 müssen zwei Mal durchgeführt werden, da<br />
zwei USB 3.0 - Anschlüsse installiert und erkannt werden<br />
müssen.<br />
Schritt 4<br />
Wenn der Assistent „Neue<br />
Hardware gefunden“ angezeigt<br />
wird, wählen Sie Ja, nur dieses Mal<br />
und klicken anschließend auf<br />
Weiter.<br />
Schritt 5<br />
Wählen Sie Software automatisch<br />
installieren und klicken Sie<br />
anschließend auf Weiter.<br />
Während dieses Vorgangs kann das<br />
Windows‐Sicherheits‐Popup<br />
erscheinen. Klicken Sie auf<br />
Trotzdem fortfahren, um die<br />
Installation fortzusetzen.<br />
Schritt 6<br />
Klicken Sie auf Fertigstellen, um die<br />
Installation abzuschließen und den<br />
Assistenten zu beenden.<br />
Schritt 7<br />
Der Assistent „Neue Hardware gefunden“ wird erneut angezeigt.<br />
Wiederholen Sie die Schritte 4 ‐ 6 für die Installation des zweiten USB<br />
3.0‐Anschlusses.
GERÄTEINSTALLATION<br />
Überprüfung:<br />
Nach Abschluss der Treiber‐ und Geräteinstallation können Sie zum Gerätemanager gehen, um zu überprüfen, ob das<br />
Produkt richtig installiert und erkannt wurde.<br />
Windows XP Windows Vista/Windows 7<br />
EINJÄHRIGE GARANTIE VON <strong>C2G</strong><br />
Wir bei Cables To Go möchten, dass Sie mit Ihrem Kauf vollständig zufrieden sind. Deshalb bieten wir eine einjährige<br />
Garantie auf dieses Gerät. Wenn während dieser Garantie Probleme aufgrund eines Fertigungs‐ oder Materialfehlers<br />
auftreten, reparieren oder ersetzen wir dieses Gerät. Wenden Sie sich zum Anfordern einer Return Merchandise<br />
Authorization (RMA)‐Nummer an unseren Kundenservice unter 0800.328.2916 oder www.c2g.com.<br />
<strong>C2G</strong><br />
Road 30 Hortonwood Industrial Estate,<br />
Telford, Shropshire TF1 7AB UK<br />
0800.328.2916<br />
www.c2g.com
TECHNISCHE DATEN<br />
Produktnr <strong>81642</strong><br />
Entspricht USB Rev. Ver. 3.0<br />
PCI Express Base Spezifikation<br />
Anschlüsse (nachgeschaltet)<br />
Unterstützte<br />
Datengeschwindigkeit<br />
Unterstützter Datentransfertyp<br />
Revision 2.0;<br />
PCI Bus Power Management Interface Specification: Revision 1.2<br />
USB 3.0 Type A x2<br />
Low‐speed (1.5Mbps)/ Full‐speed (12Mbps)/ High‐speed<br />
(480Mbps)/Super‐speed (5Gbps)<br />
Control/ Bulk/ Interrupt/ Isochoronous<br />
Stromversorgung der Anschlüsse<br />
Gewicht des Produkts<br />
500 mA (max.)<br />
.20 lbs<br />
EINHALTUNG GESETZLICHER VORSCHRIFTEN<br />
FCC-Bedingungen<br />
Dieses Gerät wurde auf die Einhaltung der FCC‐Bestimmungen, Teil 15 getestet. Der Betrieb unterliegt den folgenden<br />
zwei Bedingungen:<br />
(1) Dieses Gerät darf keine Störungen verursachen.<br />
(2) Dieses Gerät muss jegliche empfangenen Störungen akzeptieren. Dies gilt auch für solche Störungen, die unerwünschte Betriebszustände<br />
verursachen könnten.<br />
CE<br />
Dieses Gerät erfüllt die Anforderungen der folgenden Bestimmungen:<br />
EN 55 022: KLASSE B
WICHTIGE SICHERHEITSHINWEISE<br />
! Schließen Sie das Gerät nicht an eine Steckdose an, die nicht genug Strom für das Gerät liefert. Die entsprechenden<br />
Daten für das Gerät finden Sie in diesem Handbuch.<br />
! Flüssigkeit:<br />
Wenn auf dieses Gerät oder den dazugehörigen Netzadapter Flüssigkeiten geschüttet wurden, darf es/er nicht<br />
verwendet werden.<br />
Verwenden Sie dieses Produkt nicht im Freien, da Regen, Schnee, Hagel usw. das Produkt beschädigen können.<br />
! Ziehen Sie bei einem Gewitter den Netzstecker des Geräts.<br />
! Stellen Sie dieses Produkt nicht in der Nähe von Gegenständen auf, die Hitze erzeugen, zum Beispiel tragbare<br />
Heizgeräte, Heizöfen oder Heizungsleitungen.<br />
! ES BEFINDEN SICH KEINE VOM BENUTZER REPARIERBAREN TEILE IM GERÄT.<br />
Versuchen Sie nicht, das Produkt zu öffnen und den internen Schaltkreis freizulegen. Wenn das Produkt defekt ist,<br />
ziehen Sie den Netzstecker und sehen Sie im Abschnitt mit den Garantieinformationen in diesem Handbuch nach.<br />
©2012 <strong>C2G</strong>. Microsoft, XP und Vista sind eingetragene Marken oder Marken der Microsoft Corporation in<br />
den Vereinigten Staaten und/oder anderen Ländern. Dieses Produkt wird nicht von der Microsoft Corporation<br />
unterstützt oder gefertigt.
INHOUDSOPGAVE<br />
Overzicht.......................................................................................................................................................................... 16<br />
Onderdelen ...................................................................................................................................................................... 16<br />
Systeemvereisten ............................................................................................................................................................ 16<br />
Inhoud verpakking ........................................................................................................................................................... 16<br />
Installatie stuurprogramma ............................................................................................................................................. 17<br />
Installatie apparaat .......................................................................................................................................................... 18<br />
Installatie apparaat controleren ...................................................................................................................................... 19<br />
Cables To Go 1 jaar garantie ............................................................................................................................................ 19<br />
Technische specificaties .................................................................................................................................................. 20<br />
Naleving van de regels ..................................................................................................................................................... 20<br />
Belangrijke veiligheidsinformatie .................................................................................................................................... 21
OVERZICHT<br />
Dank u voor de aanschaf van de 2‐poorts USB 3.0 SuperSpeed PCI Express Card De 2‐poorts USB 3.0 SuperSpeed PCI<br />
Express Card voegt SuperSpeed USB‐capaciteit toe aan uw computer. Installeer gewoon deze kaart in een<br />
beschikbare PCI‐sleuf op uw computer om deze uit te breiden met twee USB 3.0 SuperSpeed‐poorten. SuperSpeed<br />
USB ondersteunt overdrachtssnelheden tot 5 Gbps‐ tot 10 maal sneller dan USB 2.0. De 2‐poort USB 3.0<br />
SuperSpeed PCI Express Card is ideaal voor het snel overzetten van grote hoeveelheden data van apparaten zoals<br />
externe harde schijven, geheugenkaartlezers, real‐time videocamera’s’ en andere gegevensintensieve USBapparaten.<br />
We raden u aan deze handleiding goed door te lezen en te bewaren voor gebruik in de toekomst.<br />
Onderdelen:<br />
Breidt uw computer uit met USB 3.0 Male‐poorten<br />
Interne aansluiting via de PCI‐e connector<br />
5 Gbps signaleringssnelheid ‐ 10X sneller dan USB 2.0<br />
Terugwaarts compatibel met USB 2.0<br />
Verbeterde energie‐efficiëntie met USB 2.0<br />
Ideaal voor het overzetten van grote hoeveelheden data van externe harde schijven, real‐time videocamera’s en<br />
andere gegevensintensieve apparaten<br />
Systeemvereisten<br />
Besturingssysteem: Windows 7, XP of Vista<br />
Inhoud verpakking<br />
2‐poorts USB 3.0 SuperSpeed PCI Express Card<br />
CD met stuurprogramma<br />
Gebruikershandleiding
INSTALLATIE STUURPROGRAMMA (Voor Windows XP, Vista, Windows 7)<br />
Voordat u het apparaat in de computer installeert, moet u het benodigde stuurprogramma installeren voor een juiste<br />
werking. Volg de onderstaande procedure.<br />
Opmerking: De onderstaande opzet is een voorbeeld met een Windows XP-besturingssysteem. Sommige screenshots kunnen iets<br />
afwijken afhankelijk van uw besturingssysteem. De setup-wizard is ontworpen om u door ieder onderdeel van de stuurprogrammainstallatie<br />
te leiden.<br />
Stap 1<br />
Plaats de cd die bij dit product is<br />
geleverd en klik op Install driver<br />
(Stuurprogramma installeren).<br />
Het volgende scherm wordt<br />
weergegeven. Klik op Next.<br />
Stap 2<br />
Selecteer, na het lezen van de<br />
gebruikerslicentieovereenkomst<br />
“I accept the terms in the<br />
License Agreement” (Ik<br />
accepteer de voorwaarden van<br />
de licentieovereenkomst) en klik<br />
op Next.<br />
Stap 4<br />
Klik op Install om te beginnen met<br />
de installatie van het<br />
stuurprogramma.<br />
Het installeren kan enkele minuten duren. U<br />
krijgt mogelijk ook een<br />
Windowsbeveiligingsmelding<br />
voor een softwareinstallatie.<br />
Klik op Toch doorgaan als dit venster<br />
verschijnt om de installatie te voltooien.<br />
Stap 5<br />
Als de installatie is afgerond, klikt u<br />
op Finish om de setup‐wizard af te<br />
sluiten.<br />
Stap 3<br />
Klik op Browse om de<br />
volgende doelmap te kiezen<br />
en klik dan op Next.
INSTALLATIE APPARAAT<br />
Stap 1<br />
Sluit uw computer af en verwijder de afscherming/het paneel om de<br />
PCI‐sleuf bloot te leggen.<br />
Stap 2<br />
Sluit de 2‐poorts USB 3.0‐kaart in de PCI‐sleuf van de computer.<br />
Stap 3<br />
Plaats de afscherming/het paneel terug en zet de computer aan.<br />
Als de computer wordt opgestart, verschijnt de wizard Found New<br />
Hardware (Nieuwe hardware gevonden).<br />
Opmerking: De volgende opzet is een voorbeeld met een<br />
Windows XP-besturingssysteem. Sommige screenshots kunnen<br />
iets afwijken afhankelijk van uw besturingssysteem. De setupwizard<br />
is ontworpen om u door ieder onderdeel van de<br />
stuurprogramma-installatie te leiden.<br />
Stappen 4-7 moeten tweemaal worden voltooid omdat er<br />
twee USB 3.0-poorten zijn die moeten worden geïnstalleerd<br />
en herkend.<br />
Stap 4<br />
Als de wizard Nieuwe hardware<br />
gevonden wordt weergegeven,<br />
selecteer u Yes, this time only (Ja,<br />
alleen deze keer) en klik u op Next.<br />
Stap 5<br />
Kies Install the software<br />
automatically (de software<br />
automatisch installeren) en klik op<br />
Next.<br />
Tijdens dit proces kan de Windowsbeveiligingsmelding<br />
worden<br />
weergegeven. Klik op Continue<br />
Anyway (Toch doorgaan) om door<br />
te gaan met de installatie.<br />
Stap 6<br />
Klik op Finish om de installatie te<br />
voltooien en de wizard af te sluiten.<br />
Stap 7<br />
De wizard Nieuwe hardware gevonden wordt weer weergegeven.<br />
Herhaal stappen 4‐6 voor de installatie van de tweede USB 3.0‐poort.
INSTALLATIE APPARAAT<br />
Controle:<br />
Nadat de installatie van het stuurprogramma en het apparaat is voltooid, kunt u naar Apparaatbeheer te gaan om te<br />
controleren of het product correct is geïnstalleerd en herkend.<br />
Windows XP Windows Vista/Windows 7<br />
<strong>C2G</strong> 1 JAAR GARANTIE<br />
Bij Cables To Go willen we dat u volledig kunt vertrouwen op uw aankoop. Daarom bieden we een garantie van een<br />
jaar op dit apparaat. Als u problemen ondervindt als gevolg van de afwerking of materiaaldefect tijdens deze<br />
garantietermijn, zullen we dit apparaat repareren of vervangen. Om een RMA‐nummer (Return Merchandise<br />
Authorization) aan te vragen, kunt u contact opnemen met klantenservice op 0800.328.2916 of www.c2g.com.<br />
<strong>C2G</strong><br />
Road 30 Hortonwood Industrial Estate,<br />
Telford, Shropshire TF1 7AB UK<br />
0800.328.2916<br />
www.c2g.com
TECHNISCHE SPECIFICATIES<br />
Productnr <strong>81642</strong><br />
Voldoet aan USB Rev. Ver. 3.0<br />
Specificatie PCI Express Base<br />
Connectors (stroomafwaarts)<br />
Ondersteuning datasnelheid<br />
Ondersteuning Datatransfertype<br />
Revision 2.0;<br />
PCI Bus Power Management Interface Specification: Revision 1.2<br />
USB 3.0 Type A x2<br />
Low‐speed (1.5Mbps)/ Full‐speed (12Mbps)/ High‐speed<br />
(480Mbps)/Super‐speed (5Gbps)<br />
Control/ Bulk/ Interrupt/ Isochoronous<br />
Stroom naar poorten<br />
Productgewicht<br />
500 mA (max.)<br />
.20 lbs<br />
NALEVING VAN DE REGELS<br />
FCC-voorwaarden<br />
Deze apparatuur is getest en voldoet aan Deel 15 van de FCC‐regels. Werking geldt onder de volgende voorwaarden:<br />
(1) Dit apparaat mag geen schadelijke storingen veroorzaken<br />
(2) Dit apparaat moet ontvangen storingen accepteren. Inclusief storingen die kunnen leiden tot een ongewenste werking.<br />
CE<br />
Deze apparatuur voldoet aan de vereisten van de volgende regels:<br />
EN 55 022: KLASSE B
BELANGRIJKE VEILIGHEIDSINFORMATIE<br />
! Sluit de unit niet aan op een contact dat onvoldoende spanning heeft om het apparaat te laten functioneren.<br />
Raadpleeg de specificaties in deze handleiding over het stroomniveau van de unit.<br />
! Vloeistof:<br />
Als op of in deze unit of de bijbehorende stroomadapter vloeistof wordt gemorst, moet u het apparaat niet gebruiken.<br />
Gebruik het product niet in een buitenomgeving aangezien zaken als regen, sneeuw, hagel enz. het product<br />
kunnen beschadigen.<br />
! In het geval van onweer wordt aangeraden het apparaat van het stopcontact te halen.<br />
! Plaats het product niet in de buurt van warmteproducerende voorwerpen zoals verplaatsbare verwarmingen,<br />
radiatoren of verwarmingsleidingen.<br />
! ER ZIJN GEEN ONDERDELEN DIE DOOR DE GEBRUIKER KUNNEN WORDEN ONDERHOUDEN<br />
Maak dit product niet open en stel het interne circuit niet bloot. Als u meent dat het product defect is, koppel de<br />
unit dan af en raadpleeg het gedeelte met de garantiegegevens in deze handleiding.<br />
©2012 <strong>C2G</strong>. Microsoft, XP en Vista zijn geregistreerde handelsmerken of handelsmerken van Microsoft<br />
Corporation in de Verenigde Staten en/of andere landen. Dit product wordt niet ondersteund of vervaardigd door<br />
Microsoft Corporation.
TABLE DES MATIERES<br />
Aperçu ............................................................................................................................................................................. 23<br />
Fonctions ......................................................................................................................................................................... 23<br />
Configuration du système ................................................................................................................................................ 23<br />
Contenu ........................................................................................................................................................................... 23<br />
Installation du pilote ........................................................................................................................................................ 24<br />
Installation du dispositif .................................................................................................................................................. 25<br />
Vérifier l’installation du dispositif .................................................................................................................................... 26<br />
Garantie d'un an de Cables To Go ................................................................................................................................... 26<br />
Caractéristiques techniques ............................................................................................................................................ 27<br />
Respect de la réglementation ......................................................................................................................................... 27<br />
Informations de sécurité importantes .............................................................................................................................. 28
APERCU<br />
Merci d’avoir acheté la carte USB 3.0 SuperSpeed PCI Express à 2 ports. La carte USB 3.0 SuperSpeed PCI Express à 2<br />
ports ajoute les capacités USB SuperSpeed à votre ordinateur. Insérez simplement cette carte dans une fente PCI de<br />
votre ordinateur pour ajouter deux ports USB SuperSpeed 3.0.<br />
La carte USB SuperSpeed prend en charge des vitesses de transfert pouvant atteindre 5 Go/s, et est donc 10 fois plus<br />
rapide que l'USB 2.0. La carte USB 3.0 SuperSpeed PCI Express à 2 ports est idéale pour transférer rapidement de<br />
grandes quantités de données à partir de dispositifs tels que des disques durs externes, des lecteurs de cartes<br />
mémoires, des caméras vidéo en temps réel, et d’autres données depuis un périphérique USB. Nous vous<br />
recommandons de lire la totalité de ce manuel et de le conserver pour vous y référer ultérieurement.<br />
Fonctions :<br />
Ajoute deux ports mâles USB 3.0 à un ordinateur<br />
Se connecte en interne par le connecteur PCI‐e<br />
Vitesse de 5 Go/seconde , 10 fois supérieure à la USB 2.0<br />
Compatibilité descendante avec l'USB 2.0<br />
Faible consommation améliorée par rapport à l'USB 2.0<br />
Idéale pour transférer de grandes quantités de données à partir d'un disque dur externe, d'une caméra vidéo en<br />
temps réel, et d'autres périphériques<br />
Configuration du système<br />
Système d’exploitation : Windows 7, XP, ou Vista<br />
Contenu<br />
Carte USB 3.0 SuperSpeed PCI Express à 2 ports<br />
CD d'installation<br />
Guide d’utilisation
INSTALLATION DU PILOTE (Windows XP, Vista, Windows 7)<br />
Avant d’installer le dispositif sur votre ordinateur, vous devez installer le pilote adéquat pour un bon fonctionnement.<br />
Veuillez suivre la procédure ci‐dessous.<br />
Remarque : ci‐dessous, un exemple de configuration à partir d’un système Windows XP. Certaines captures d’écran peuvent différer<br />
légèrement en fonction du système d'exploitation. L’assistant d’installation est conçu pour vous guider avec succès à travers<br />
chaque étape du processus d’installation du pilote.<br />
Étape 1<br />
Insérez le CD fourni avec ce produit<br />
et cliquez sur Installer le pilote.<br />
L’écran suivant apparaît. Cliquez<br />
sur Suivant.<br />
Étape 2<br />
“Lisez le contrat de licence de<br />
l’utilisateur final, puis<br />
sélectionnez « J’accepte les<br />
termes du contrat<br />
» et cliquez sur Suivant.”<br />
Étape 4<br />
Cliquez sur Installer pour<br />
commencer l’installation du pilote.<br />
L’installation du pilote peut prendre quelques<br />
minutes. Une fenêtre contextuelle de Windows<br />
sur la sécurité de l'installation du logiciel peut<br />
s'afficher. Cliquez sur « Voulez‐vous<br />
continuer » pour terminer l’installation.<br />
Étape 5<br />
Lorsque l’installation est terminée,<br />
cliquez sur Terminer pour quitter<br />
l’assistant d’installation.<br />
Étape 3<br />
Cliquez sur Parcourir pour<br />
choisir l’emplacement du<br />
dossier, puis cliquez sur<br />
Suivant.
INSTALLATION DU DISPOSITIF<br />
Étape 1<br />
Éteignez votre ordinateur puis retirez le couvercle/le panneau pour<br />
libérer la fente PCI.<br />
Étape 2<br />
Insérez la carte USB 3.0 2 ports dans la fente PCI de l’ordinateur.<br />
Étape 3<br />
Remettre le couvercle/le panneau et allumer l'ordinateur.<br />
Lors du démarrage votre ordinateur, un assistant Nouveau matériel<br />
détecté s'affichera.<br />
Remarque : ci-dessous, un exemple de configuration à partir<br />
d’un système Windows XP. Certaines captures d’écran peuvent<br />
différer légèrement en fonction du système d'exploitation.<br />
L’assistant d’installation est conçu pour vous guider avec succès<br />
à travers chaque étape du processus d’installation du pilote.<br />
Les étapes 4 à 7 devront être effectués deux fois puisque<br />
deux ports<br />
USB 3.0 doivent être installés et reconnus.<br />
Étape 4<br />
Lorsque l’assistant affiche Nouveau<br />
matériel détecté, sélectionnez Oui,<br />
cette fois seulement, puis cliquez<br />
sur Suivant.<br />
Étape 5<br />
Choisissez Installer le logiciel<br />
automatiquement puis cliquez sur<br />
Suivant.<br />
La fenêtre contextuelle de sécurité<br />
Windows peut apparaître durant le<br />
processus. Cliquez sur « Voulezvous<br />
continuer » pour continuer l’installation.<br />
Étape 6<br />
Cliquez sur Terminer pour terminer<br />
et quitter l’assistant d’installation.<br />
Étape 7<br />
Nouveau matériel détecté apparaitra une fois de plus. Répéter les<br />
étapes 4 à 6 pour l’installation du deuxième port USB 3.0.
VERIFIER L’INSTALLATION DU DISPOSITIF<br />
Vérification :<br />
Après avoir terminé l’installation du pilote et du périphérique, allez sur le gestionnaire de périphériques pour vérifier<br />
que le produit est installé correctement et reconnu.<br />
Windows XP Windows Vista/Windows 7<br />
GARANTIE D'UN AN DE <strong>C2G</strong><br />
Chez Cables To Go, nous voulons que vous soyez complètement satisfait de votre achat. C'est pourquoi vous<br />
bénéficiez d'un an de garantie sur ce périphérique. Si vous rencontrez des problèmes liés à des défauts matériels ou<br />
de fabrication pendant la durée de cette garantie, nous réparerons ou remplacerons le périphérique. Pour obtenir un<br />
numéro d'autorisation de retour de marchandise (ARM), contactez le service client au 0800.328.2916 ou demandez-le sur<br />
www.c2g.com.<br />
<strong>C2G</strong><br />
Road 30 Hortonwood Industrial Estate,<br />
Telford, Shropshire TF1 7AB UK<br />
0800.328.2916<br />
www.c2g.com
CARACTERISTIQUES TECHNIQUES<br />
N° de Produit <strong>81642</strong><br />
Conforme à rév. USB Rev. Ver. 3.0<br />
Spécifications PCI Express Base<br />
Connecteurs (descendants)<br />
Vitesse de données prise en<br />
charge<br />
Type de transfert de données<br />
pris en charge<br />
Revision 2.0;<br />
PCI Bus Power Management Interface Specification: Revision 1.2<br />
USB 3.0 Type A x2<br />
Low‐speed (1.5Mbps)/ Full‐speed (12Mbps)/ High‐speed<br />
(480Mbps)/Super‐speed (5Gbps)<br />
Control/ Bulk/ Interrupt/ Isochoronous<br />
Alimentation des ports<br />
Poids du Produit<br />
500 mA (max.)<br />
.20 lbs<br />
RESPECT DE LA REGLEMENTATION<br />
Conditions FCC<br />
Cet équipement à été testé et déclaré conforme au chapitre 15 du règlement FCC. Le fonctionnement est assujetti aux<br />
deux conditions suivantes :<br />
(1) Ce périphérique ne peut causer d’interférences nuisibles<br />
(2) Ce périphérique doit accepter toutes les interférences reçues. Y compris les interférences qui peuvent perturber le fonctionnement.<br />
CE<br />
Cet équipement est conforme aux exigences des règlements suivants :<br />
EN 55 022 : CLASSE B
INFORMATIONS DE SECURITE IMPORTANTES<br />
! Pour permettre à l'appareil de fonctionner, ne branchez pas l'unité sur une prise ne délivrant pas assez de courant.<br />
Reportez‐vous aux spécifications de ce manuel pour connaître le niveau d'alimentation de l'unité.<br />
! Liquides :<br />
Si du liquide est répandu sur ou à l'intérieur de cette unité ou son adaptateur d'alimentation correspondant, n'essayez pas de<br />
l'utiliser.<br />
N'essayez pas d'utiliser ce produit en plein air car les éléments comme la pluie, la neige, la grêle, etc. peuvent l'endommager.<br />
! En cas d'orage, il est recommandé de débrancher l'appareil de la prise.<br />
! Évitez de placer ce produit près de sources de chaleur comme les appareils de chauffage portables ou non et les<br />
conduits de chauffage.<br />
! NE CONTIENT AUCUNE PIÈCE RÉPARABLE PAR L'UTILISATEUR<br />
N'essayez pas d'ouvrir ce produit ni d'exposer ses circuits internes. Si vous pensez que ce produit est défectueux,<br />
débranchez‐le et consultez la section de ce guide sur les informations de garantie.<br />
©2012 <strong>C2G</strong>. Microsoft, XP et Vista sont des marques déposées ou des marques de Microsoft Corporation aux<br />
États‐Unis et/ou dans d'autres pays. Ce produit n'est pas approuvé ni fabriqué par Microsoft Corporation.
INDICE<br />
Panoramica ...................................................................................................................................................................... 30<br />
Funzioni ........................................................................................................................................................................... 30<br />
Requisiti di Sistema .......................................................................................................................................................... 30<br />
Contenuto della confezione ............................................................................................................................................ 30<br />
Installazione del Driver .................................................................................................................................................... 31<br />
Installazione del dispositivo ............................................................................................................................................. 32<br />
Verifica dell’installazione del dispositivo .......................................................................................................................... 33<br />
Cables To Go One un anno di garanzia ............................................................................................................................. 33<br />
Specifiche tecniche .......................................................................................................................................................... 34<br />
Conformità alle norme .................................................................................................................................................... 34<br />
Importanti informazioni sulla sicurezza ............................................................................................................................ 35
PANORAMICA<br />
Grazie per aver acquistato la scheda PCI Express con 2 porte USB 3.0 SuperSpeed. La scheda PCI Express 2 porte USB<br />
3.0 SuperSpeed aggiunge funzionalità USB SuperSpeed al computer. È sufficiente installare la scheda in uno slot PCI<br />
disponibile sul computer per aggiungere 2 porte USB 3.0 SuperSpeed. SuperSpeed USB supporta velocità di<br />
trasferimento fino a 5 Gbps ‐ una velocità 10 volte maggiore rispetto a USB 2.0. La scheda PCI Express con 2 porte<br />
USB 3.0 SuperSpeed è l’ideale per il trasferimento rapido di grandi quantità di dati da dispositivi, quali dischi rigidi<br />
esterni, lettori schede di memoria, videocamere in tempo reale e altri dispositivi USB a elevata intensità di dati.<br />
Consigliamo di leggere questo manuale nella sua interezza e di conservarlo per poterlo consultare in futuro.<br />
Funzioni:<br />
Aggiunge due porte USB 3.0 A‐Maschio a un computer<br />
Si connette internamente tramite il connettore PCI‐e<br />
Velocità di segnale 5 Gbps – 10 volte più veloce dell’USB 2.0<br />
Compatibile con USB 2.0<br />
Efficienza di alimentazione migliorata rispetto all’USB 2.0<br />
Ideale per grandi trasferimenti di dati da dischi fissi esterni, telecamere in tempo reale e altri dispositivi data<br />
intensive<br />
Requisiti di Sistema<br />
Sistema operativo: Windows 7, XP o Vista<br />
Contenuto della confezione<br />
Scheda PCI Express con 2 Porte USB 3.0 SuperSpeed<br />
CD driver<br />
Manuale dell’utente
INSTALLAZIONE DEL DRIVER (per Windows XP, Vista, Windows 7)<br />
Prima di installare il dispositivo sul computer, sarà necessario installare i driver necessari per il corretto funzionamento.<br />
Attenersi alla procedura riportata di seguito.<br />
Nota: l’esempio di procedura di installazione riportato di seguito si riferisce al sistema operativo Windows XP. Alcune schermate potrebbe<br />
variare in base al sistema operativo installato sul proprio computer. La procedura di installazione guidata è concepita per<br />
guidare correttamente l’utente in ciascuna fase del processo di installazione.<br />
Fase 1<br />
Inserire il CD fornito con il<br />
presente prodotto e fare clic su<br />
Installa driver. Verrà visualizzata<br />
la schermata riportata di seguito.<br />
Fare clic su Avanti.<br />
Fase 2<br />
Dopo aver letto il Contratto di<br />
licenza per l’utente finale,<br />
selezionare “Accetto i termini e<br />
il Contratto di licenza” e quindi<br />
fare clic su Avanti.<br />
Fase 4<br />
Fare clic su Installa per avviare<br />
l’installazione del driver.<br />
L’installazione del driver potrebbe impiegare<br />
alcuni minuti. Durante l’attesa, potrebbe anche<br />
venire visualizzata una finestra di pop‐up di<br />
protezione Windows, per verificare<br />
l’installazione del software. Fare clic su<br />
Continua comunque quando viene visualizzato,<br />
per continuare l’installazione.<br />
Fase 5<br />
Al termine dell’installazione, fare<br />
clic su Fine per uscire dall’installazione<br />
guidata.<br />
Fase 3<br />
Fare clic su Sfoglia per<br />
scegliere la cartella di<br />
destinazione e quindi fare clic<br />
su Avanti.
INSTALLAZIONE DEL DISPOSITIVO<br />
Fase 1<br />
Spegnere il computer e rimuovere il coperchio/pannello dello slot<br />
PCI.<br />
Fase 2<br />
Collegare la scheda con 2 porte USB 3.0 allo slot PCI del computer.<br />
Fase 3<br />
Rimettere il coperchio/pannello e accendere il computer.<br />
All’avvio del computer, verrà visualizzata la procedura guidata<br />
Rilevato nuovo hardware.<br />
Nota: l’esempio di procedura di installazione riportato di seguito si<br />
riferisce al sistema operativo Windows XP. Alcune schermate<br />
potrebbe variare in base al sistema operativo installato sul proprio<br />
computer. La procedura di installazione guidata è concepita per<br />
guidare correttamente l’utente in ciascuna fase del processo di<br />
installazione.<br />
Le fasi da 4 a 7 dovranno essere eseguite due volte in quando<br />
è necessario installare due porte USB 3.0 e devo essere<br />
riconosciute<br />
entrambe.<br />
Fase 4<br />
Quando viene visualizzata la<br />
procedura guidata di rivelamento di<br />
un nuovo hardware, selezionare Sì,<br />
solo per questa volta, quindi fare<br />
clic su Avanti.<br />
Fase 5<br />
Scegliere Installa il software<br />
automaticamente e fare clic su<br />
Avanti.<br />
Durante il processo potrebbe venire<br />
visualizzata la finestra di pop‐up di<br />
protezione Windows. Fare clic su<br />
Continua comunque per continuare<br />
l’installazione.<br />
Fase 6<br />
Fare clic su Fine per completare<br />
l’installazione e uscire dalla<br />
procedura guidata.<br />
Fase 7<br />
Viene visualizzata nuovamente la procedura guidata di rilevamento<br />
nuovo hardware. Ripetere le fasi da 4 a 6 per l’installazione della<br />
seconda porta USB 3.0.
INSTALLAZIONE DEL DISPOSITIVO<br />
Verifica:<br />
al termine dell'installazione del drive e del dispositivo, accedere a Gestione periferiche per verificare che il prodotto<br />
sia installato correttamente e riconosciuto.<br />
Windows XP Windows Vista/Windows 7<br />
<strong>C2G</strong> UN ANNO DI GARANZIA<br />
Alla Cables To Go, vogliamo che i nostri clienti abbiano totale fiducia nei loro acquisti. Ecco perché, su questo<br />
dispositivo offriamo una garanzia di un anno. Qualora nel corso del periodo coperto da garanzia dovessero verificarsi<br />
problemi legati alla manodopera o ai materiali utilizzati, sarà nostra cura occuparci della riparazione o della<br />
sostituzione del dispositivo. Per richiedere un numero di reso RMA (Return Merchandise Authorization), contattare il<br />
servizio di assistenza al numero 0800.328.2916 o visitare il sito web www.c2g.com.<br />
<strong>C2G</strong><br />
Road 30 Hortonwood Industrial Estate,<br />
Telford, Shropshire TF1 7AB UK<br />
0800.328.2916<br />
www.c2g.com
TECHNICAL SPECIFICATIONS<br />
Prodotto n. <strong>81642</strong><br />
Conforme a USB Rev. Rev. Ver. 3.0<br />
Specifiche di base PCI Express<br />
Connettori (Downstream)<br />
Supporto velocità dati<br />
Supporto tipo trasferimento dati<br />
Revision 2.0;<br />
PCI Bus Power Management Interface Specification: Revision 1.2<br />
USB 3.0 Type A x2<br />
Low‐speed (1.5Mbps)/ Full‐speed (12Mbps)/ High‐speed<br />
(480Mbps)/Super‐speed (5Gbps)<br />
Control/ Bulk/ Interrupt/ Isochoronous<br />
Alimentazione alle porte<br />
Peso del prodotto<br />
500 mA (max.)<br />
.20 lbs<br />
CONFORMITÀ ALLE NORME<br />
Condizioni FCC<br />
Questa strumentazione è stata sotto posta a test di collaudo ed è risultata conforme alla sezione 15 delle normative<br />
FCC. L’utilizzo è soggetto alle seguenti due condizioni:<br />
(1) Il dispositivo non deve causare interferenze dannose<br />
(2) Il dispositivo deve accettare tutte le interferenze ricevute. Incluse le interferenze che possono causare un funzionamento improprio.<br />
CE<br />
Questa strumentazione è conforme ai requisiti delle seguenti normative:<br />
EN 55 022: CLASS B
IMPORTANTI INFORMAZIONI SULLA SICUREZZA<br />
! Non collegare l'unità a prese che non dispongono di un quantitativo di corrente sufficiente a garantire il corretto<br />
funzionamento del dispositivo. Consultare le specifiche tecniche presenti in questo manuale per maggiori informazioni<br />
relative al livello energetico del dispositivo.<br />
! Liquidi:<br />
Se l'unità o il relativo alimentatore entrano in contatto con dei liquidi, non cercare di utilizzare il dispositivo. Non cercare di<br />
utilizzare il prodotto in presenza di pioggia, neve, grandine, ecc. Il dispositivo si potrebbe danneggiare.<br />
! In caso di temporale si consiglia di scollegare il dispositivo dalla presa di corrente.<br />
! Evitare di posizionare il dispositivo nelle vicinanze di oggetti che producono calore come ad esempio stufette<br />
portatili, convettori termici o condotti di riscaldamento.<br />
! IL DISPOSITIVO NON CONTIENE PARTI CHE POSSONO ESSERE RIPARATE DALL’UTENTE<br />
Non cercare di aprire il prodotto fino a scoprire i circuiti interni. Se si ritiene che il prodotto sia difettoso, scollegare<br />
l'unità e consultare la sezione informativa sulla garanzia all'interno del presente manuale.<br />
©2012 <strong>C2G</strong>. Microsoft, XP e Vista sono marchi di fabbrica o marchi registrati della Microsoft Corporation negli Stati Uniti e/o<br />
in altri paesi. Questo prodotto non è approvato o prodotto dalla Microsoft Corporation.
ÍNDICE<br />
Descripción general ......................................................................................................................................................... 37<br />
Características ................................................................................................................................................................. 37<br />
Requisitos del sistema ..................................................................................................................................................... 37<br />
Contenido del paquete .................................................................................................................................................... 37<br />
Instalación del controlador .............................................................................................................................................. 38<br />
Instalación del dispositivo ............................................................................................................................................... 39<br />
Comprobación de la instalación del dispositivo ............................................................................................................... 40<br />
Un año de garantía Cables to Go ..................................................................................................................................... 40<br />
Especificaciones técnicas ................................................................................................................................................. 41<br />
Conformidad con la normativa ........................................................................................................................................ 41<br />
Información de seguridad importante .............................................................................................................................. 42
DESCRIPCIÓN GENERAL<br />
Le agradecemos la compra de la tarjeta PCI Express SuperSpeed USB 3.0 de dos puertos. La tarjeta PCI Express<br />
SuperSpeed USB 3.0 de dos puertos añade capacidades USB SuperSpeed a su ordenador. Simplemente, instale esta<br />
tarjeta en una ranura PCI disponible de su ordenador para añadir dos puertos USB 3.0 SuperSpeed. El USB<br />
SuperSpeed soporta tasas de transferencia de hasta 5 Gbps – hasta diez veces más rápido que el USB 2.0. La tarjeta<br />
PCI Express SuperSpeed USB 3.0 de 2 puertos es ideal para la tranferencia rápida de grandes cantidades de datos<br />
desde dispositivos como discos duros externos, lectores de tarjeta de memoria, cámaras de vídeo en tiempo real y<br />
otros dispositivos USB de grandes volúmenes de datos. Le recomendamos que lea este manual detenidamente y<br />
que lo conserve para su posterior consulta.<br />
Características:<br />
Añade dos puertos macho‐A USB 3.0 a un ordenador<br />
Se conecta internamente a través de un conector PCI‐e<br />
Tasa de señalización de 5 Gbps – Diez veces mayor que USB 2.0<br />
Compatibilidad retroactiva con USB 2.0<br />
Mejora de la eficiencia del sistema de alimentación sobre el USB 2.0<br />
Ideal para grandes transferencias de datos desde discos duros externos, videocámaras y otros dispositivos con<br />
grandes cantidades de datos<br />
Requisitos del sistema<br />
Sistema operativo: Windows 7, XP, o Vista<br />
Contenido del paquete<br />
Tarjeta PCI Express SuperSpeed USB 3.0 de dos puertos<br />
CD de controlador<br />
Guía del usuario
INSTALACIÓN DEL CONTROLADOR (PARA WINDOWS XP, VISTA, WINDOWS 7)<br />
Antes de instalar el dispositivo en su ordenador, tendrá que instalar el controlador necesario para su adecuado funcionamiento. Siga el<br />
procedimiento siguiente.<br />
Nota: La configuración que se muestra a continuación es un ejemplo de muestra con el sistema operativo Windows XP. Algunas<br />
capturas de pantalla pueden variar ligeramente dependiendo de su sistema operativo. El asistente de configuración está diseñado<br />
para guiarle por cada paso del proceso de instalación del controlador.<br />
Paso 1<br />
Introduzca el CD facilitado con este<br />
producto y haga clic en Instalar<br />
controlador. Aparecerá la<br />
siguiente pantalla. Haga clic en<br />
Siguiente.<br />
Paso 2<br />
Tras leer el acuerdo de licencia<br />
del usuario final, seleccione<br />
«Acepto los términos del<br />
Acuerdo de Licencia» y haga clic<br />
en Siguiente.<br />
Paso 3<br />
Haga clic en Buscar para<br />
elegir la carpeta de destino y<br />
a continuación haga clic en<br />
Siguiente.<br />
Paso 4<br />
Haga clic en Instalar para comenzar<br />
la instalación del controlador.<br />
La instalación del controlador puede tardar<br />
unos minutos. Durante este tiempo también<br />
puede aparecer una ventana emergente de<br />
seguridad de Windows sobre la instalación de<br />
software. Haga clic en Continuar de todos<br />
modos cuando aparezca para completar la<br />
instalación.<br />
Paso 5<br />
Cuando haya finalizado la<br />
instalación, haga clic en Finalizar<br />
para salir del asistente de<br />
configuración.
INSTALACIÓN DEL DISPOSITIVO<br />
Paso 1<br />
Apague el ordenador y retire la cubierta/panel para mostrar la<br />
ranura PCI.<br />
Paso 2<br />
Conecte la tarjeta USB de dos puertos en la ranura PCI del<br />
ordenador.<br />
Paso 3<br />
Vuelva a colocar la cubierta/panel y encienda el ordenador.<br />
Paso 4<br />
Cuando aparezca el Asistente de<br />
nuevo hardware encontrado,<br />
seleccione Sí, sólo esta vez y haga<br />
clic en Siguiente.<br />
Paso 5<br />
Seleccione Instalar el software<br />
automáticamente y haga clic en<br />
Siguiente.<br />
Durante este proceso puede<br />
aparecer la ventana emergente de<br />
seguridad de Windows. Haga clic<br />
en Seguir de todos modos para<br />
continuar con la instalación.<br />
Cuando se encienda el ordenador, aparecerá el Asistente para<br />
nuevo hardware encontrado.<br />
Nota: La configuración que se muestra a continuación es un<br />
ejemplo que utiliza el sistema operativo Windows XP. Algunas<br />
capturas de pantalla pueden variar ligeramente dependiendo de<br />
su sistema operativo. El asistente de configuración está diseñado<br />
para guiarle por cada paso del proceso de instalación del<br />
controlador.<br />
Los pasos del 4 al 7 tendrán que realizarse dos veces porque<br />
se tienen que instalar y reconocer dos puertos USB 3.0.<br />
Paso 6<br />
Haga clic en Finalizar para<br />
completar la instalación y salir del<br />
asistente.<br />
Paso 7<br />
Aparecerá de nuevo el Asistente para nuevo hardware encontrado.<br />
Repetir los pasos del 4 al 6 para la instalación del segundo puerto USB<br />
3.0.
INSTALACIÓN DEL DISPOSITIVO<br />
Comprobación:<br />
tras finalizar la instalación del controlador y del dispositivo, se puede ir al Gestor de dispositivo para comprobar que el<br />
producto se ha instalado y reconocido correctamente.<br />
Windows XP Windows Vista/Windows 7<br />
UN AÑO DE GARANTÍA <strong>C2G</strong><br />
En Cables To Go queremos que confíe completamente en su compra. Esa es la razón por la que ofrecemos un año de<br />
garantía en este dispositivo. Si experimenta problemas debidos a mano de obra o defectos de material durante el periodo<br />
de validez de esta garantía, repararemos o sustituiremos este dispositivo. Para solicitar un número de autorización de<br />
devolución de mercancía, contacte con el servicio de atención al cliente en el número de teléfono 0800.328.2916 visite<br />
www.c2g.com.<br />
<strong>C2G</strong><br />
Road 30 Hortonwood Industrial Estate,<br />
Telford, Shropshire TF1 7AB UK<br />
0800.328.2916<br />
www.c2g.com
ESPECIFICACIONES TÉCNICAS<br />
N.º de producto <strong>81642</strong><br />
Cumple con la Rev USB Rev. Ver. 3.0<br />
Especificaciones básicas de PCI<br />
Express<br />
Conectores (Salida)<br />
Soporte de velocidad de datos<br />
Tipo de soporte de transferencia<br />
de datos<br />
Revision 2.0;<br />
PCI Bus Power Management Interface Specification: Revision 1.2<br />
USB 3.0 Type A x2<br />
Low‐speed (1.5Mbps)/ Full‐speed (12Mbps)/ High‐speed<br />
(480Mbps)/Super‐speed (5Gbps)<br />
Control/ Bulk/ Interrupt/ Isochoronous<br />
Alimentación de los puertos<br />
Peso del producto<br />
500 mA (max.)<br />
.20 lbs<br />
CONFORMIDAD CON LA NORMATIVA<br />
Condiciones CFC<br />
Este equipo se ha comprobado y cumple con la Parte 15 de las reglas CFC. Su funcionamiento está sujeto a las dos<br />
condiciones siguientes:<br />
(1) Este dispositivo no puede causar interferencias dañinas<br />
(2) Este dispositivo debe aceptar cualquier interferencia recibida. Incluidas interferencias que pueden causar funcionamientos indeseados.<br />
CE<br />
Este equipo cumple los requisitos de las siguientes normativas:<br />
EN 55 022: CLASE B
INFORMACIÓN DE SEGURIDAD IMPORTANTE<br />
! No conecte la unidad en una salida que no disponga de suficiente corriente como para permitir que el dispositivo<br />
funcione. Consulte en este manual las especificaciones sobre nivel de potencia de la unidad.<br />
! Líquidos:<br />
Si se han derramado líquidos sobre la unidad, en la unidad o en su correspondiente adaptador de potencia, no intente utilizar la<br />
unidad.<br />
No intente utilizar este producto en el exterior, ya que elementos como la lluvia, la nieve, el granizo, etc. pueden dañar el producto.<br />
! En caso de tormenta, se recomienda que desconecte este dispositivo del enchufe.<br />
! Evite situar este producto cerca de objetos que produzcan calor, como calefacciones portátiles, calefactores o<br />
conductos de calefacción.<br />
! NO HAY PIEZAS QUE PUEDA REPARAR EL PROPIO USUARIO<br />
No intente abrir este producto y exponer la circuitería interna. Si cree que el producto presenta algún defecto, desconecte la<br />
unidad y consulte la sección de garantía de este manual.<br />
©2012 <strong>C2G</strong>. Microsoft, XP y Windows Vista son marcas registradas o marcas comerciales de Microsoft Corporation en los Estados<br />
Unidos y/u otros países. Este producto no ha sido aprobado o fabricado por Microsoft Corporation.
For more information on this product or to check for updated drivers, manuals or frequently asked questions<br />
please visit our website.<br />
Weitere Informationen über dieses Produkt und aktualisierte Treiber, Handbücher und häufig gestellte Fragen<br />
finden Sie auf unserer Website.<br />
Ga voor meer informatie over dit product of voor bijgewerkte stuurprogramma’s, handleidingen of veel<br />
gestelde vragen naar onze website.<br />
Pour plus d'informations concernant ce produit ou pour rechercher des pilotes actualisés, des manuels ou<br />
des questions souvent posées, veuillez visiter notre site web.<br />
Per ulteriori informazioni su questo prodotto oppure per verificare la presenza di aggiornamenti di driver<br />
e manuali o per consultare le domande frequenti, visitare il nostro sito web.<br />
Para obtener más información sobre este producto o para comprobar controladores actualizados,<br />
manuales o preguntas frecuentes, visite nuestro sitio web.<br />
www.c2g.com<br />
Ver. R1.04.16.12