CANICOM_700.qxp:CANICOM 700 - Num'Axes
CANICOM_700.qxp:CANICOM 700 - Num'Axes
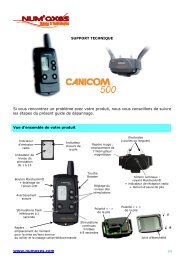
CANICOM_700.qxp:CANICOM 700 - Num'Axes

Create successful ePaper yourself
Turn your PDF publications into a flip-book with our unique Google optimized e-Paper software.
Gb - 18<br />
First use from new<br />
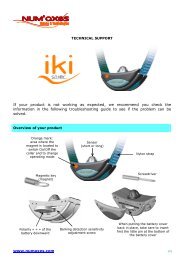
◆ Fitting the battery in the receiver collar<br />
- Unscrew the 4 screws of the top of <strong>CANICOM</strong> using a screwdriver.<br />
- Insert the battery (3V Lithium CR2) paying attention to follow polarity indicated on the battery<br />
housing (ref. Diagram 4).<br />
- A beep sound (low pitch) is emitted, indicating the correct installation of the battery.<br />
If you do not hear any beep after having inserted the battery, remove it immediately from its housing.<br />
Check the polarity before trying again.<br />
- Before putting the lid back in place, check that the rubber seal is in its groove.<br />
- Screw up the 4 screws with care (do not overtighten them).<br />
Polarity « - » of the battery Polarity « + » of the battery<br />
Diagram 4<br />
Seal<br />
◆ Activate/deactivate the remote control<br />
Remote control is supplied with battery fitted.<br />
- Activate: press for 1 second the On/Off red button ( ) located on the side of the remote control (ref.<br />
Diagram.1). Indications appear on the LCD screen.<br />
- Deactivate: press for 1 second the On/Off red button ( ) of the remote control (ref. Diagram.1). The<br />
LCD screen is off.<br />
To increase the battery life of the remote control, we recommend you to deactivate the unit if you are not<br />
using your <strong>CANICOM</strong> <strong>700</strong> for a long period.<br />
◆ Activate/deactivate the receiver collar<br />
A magnet located in the remote control is used to either switch on/off the receiver collar.