manuale di istruzioni • benutzerhandbuch owner's manual ... - Ketron
manuale di istruzioni • benutzerhandbuch owner's manual ... - Ketron
manuale di istruzioni • benutzerhandbuch owner's manual ... - Ketron
- No tags were found...

Create successful ePaper yourself
Turn your PDF publications into a flip-book with our unique Google optimized e-Paper software.
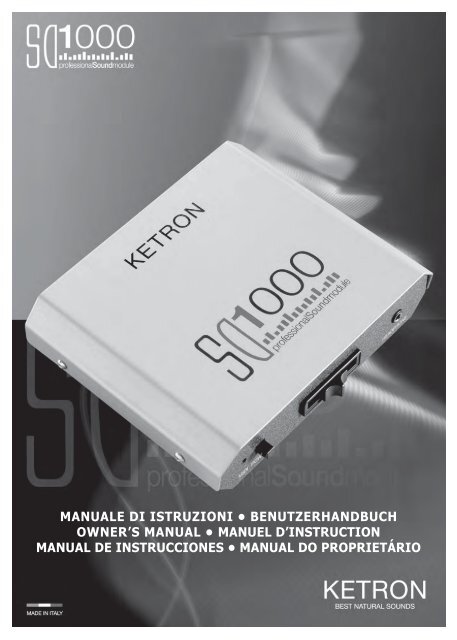
MANUALE DI ISTRUZIONI <strong>•</strong> BENUTZERHANDBUCHOWNER’S MANUAL <strong>•</strong> MANUEL D’INSTRUCTIONMANUAL DE INSTRUCCIONES <strong>•</strong> MANUAL DO PROPRIETÁRIO
SPECIFICATIONSInternal Storage: Flash Memory.USB (Mi<strong>di</strong> Connection).Sound Card: 512 Voices, 47 Drum Sets, 248 Au<strong>di</strong>o Drum Loops.Polyphony 128 note.Multitimbral 32 parts (2x16).DSP: 11 Effects, 2 x EFX Insert, 20 presets.Mi<strong>di</strong>: In, Thru.Main Out: Left/Right Stereo.Headphone.Volume Control.Optional: Bag.External Power supply 9 V.Dimensions: Width 147, Depth 109, Height 39Weight: 0.5 Kg.Specifications and appearances are subject to change without notice.
Manuale <strong>di</strong> IstruzioniIISTRUZIONI PER LA SICUREZZAISTRUZIONI RIGUARDANTI IL RISCHIO DI INCENDIO, SCOSSEELETTRICHE O DANNO ALLE PERSONE.Avvertenza: per ridurre il rischio <strong>di</strong> incen<strong>di</strong>o o scosse elettriche, non esporre lo strumento allapioggia o umi<strong>di</strong>tà.ISTRUZIONI IMPORTANTI PER LA SICUREZZA E L’INSTALLAZIONEAVVERTENZA - Usando prodotti elettrici, dovete seguire alcune precauzioni <strong>di</strong> base tra cui le seguenti:<strong>•</strong> Prima <strong>di</strong> usare lo strumento leggete attentamente il <strong><strong>manual</strong>e</strong>.<strong>•</strong> Quando lo strumento viene usato da bambini è necessaria la presenza <strong>di</strong> unadulto.<strong>•</strong> Non usate lo strumento in ambienti dove può essere soggetto a stillici<strong>di</strong>o o spruzzid’acqua, come per esempio accanto ad un lavan<strong>di</strong>no, una piscina, su una superficiebagnata etc., e non appoggiate sopra lo strumento recipienti contenenti liqui<strong>di</strong> che potrebberopenetrare al suo interno.<strong>•</strong> Lo strumento deve essere usato solo su un supporto raccomandato dal costruttore.<strong>•</strong> Non operate per lunghi perio<strong>di</strong> ad alto volume: il rumore eccessivo è dannoso per la salute.<strong>•</strong> Lo strumento deve essere <strong>di</strong>slocato in modo da consentirne una adeguata ventilazione.<strong>•</strong> Lo strumento deve essere <strong>di</strong>slocato lontano da sorgenti <strong>di</strong> calore come termosifoni, stufe etc.<strong>•</strong> Lo strumento deve essere collegato alla rete elettrica solo usando l’adattatore <strong>di</strong> rete. I dati <strong>di</strong>identificazione e <strong>di</strong> alimentazione sono sotto lo strumento.<strong>•</strong> Quando lo strumento non viene usato per lunghi perio<strong>di</strong> il cavo <strong>di</strong> alimentazione deve essere<strong>di</strong>sconnesso.<strong>•</strong> In caso <strong>di</strong> necessità, per <strong>di</strong>sconnettere lo strumento dell’alimentazione azionate l’interruttoreche si trova nella parte anteriore. Lo strumento deve essere posizionato in maniera tale chel’interruttore sia facilmente accessibile.<strong>•</strong> Lo strumento deve essere portato presso un centro assistenza se:a. L’adattatore <strong>di</strong> rete è danneggiato.b. All’interno sono caduti degli oggetti o del liquido.c. È stato esposto alla pioggia.d. Non sembra funzionare normalmente o <strong>di</strong>mostra un evidente calo <strong>di</strong> prestazioni.e. È caduto o lo chassis è danneggiato.<strong>•</strong> Non tentate <strong>di</strong> riparare da soli lo strumento; qualsiasi operazione deve essere eseguita dapersonale specializzato.CONSERVATE QUESTE ISTRUZIONI1
COME OVVIARE L’INTERFERENZA ALLA RADIO/TVQuesto strumento funziona nella banda delle ra<strong>di</strong>o frequenze e se non si installa correttamenteed in stretta osservanza delle <strong>istruzioni</strong> può causare interferenza alla ricezione <strong>di</strong> apparecchira<strong>di</strong>otelevisivi. Sebbene la progettazione sia stata effettuata secondo le norme vigenti ed abbiaprevisto ragionevoli protezioni contro tali inconvenienti, non vi sono garanzie che un simile eventonon si possa verificare. Per controllare che l’interferenza viene generata proprio dallo strumento,provate a spegnerlo e controllate se l’interferenza scompare. Poi riaccendetelo e verificate sel’interferenza si ripresenta. Una volta verificato che lo strumento è la causa dell’interferenza,adottate una delle seguenti misure:<strong>•</strong> Orientate l’antenna del ricevitore ra<strong>di</strong>o o TV.<strong>•</strong> Dislocate <strong>di</strong>versamente lo strumento rispetto al ricevitore ra<strong>di</strong>o o TV.<strong>•</strong> Allontanate lo strumento dal ricevitore.<strong>•</strong> Collegate la spina dello strumento ad un’altra presa in modo che strumento e ricevitore sianocollegati a due circuiti <strong>di</strong>versi.<strong>•</strong> Se necessario, consultate personale specializzato.ALIMENTAZIONE<strong>•</strong> Quando si collega lo strumento ad altre apparecchiature (amplificatore, mixer, altri strumentiMIDI, ecc.), assicurateVi che tutte le unità siano spente.<strong>•</strong> Leggete i consigli riguardanti l’interferenza alle Ra<strong>di</strong>o e TV.CURA DELLO STRUMENTO<strong>•</strong> Le superfici esterne dello strumento debbono essere pulite soltanto con un panno morbido edasciutto. Non usate mai, benzina <strong>di</strong>luenti o solventi in genere.ALTRE PRECAUZIONISe volete usare lo strumento in un paese estero, ed avete dei dubbi riguardante l’alimentazione,consultate precedentemente un tecnico qualificato.Lo strumento non deve essere mai soggetto a forti scosse.ADATTATORI DI RETEPer collegare questo strumento alla presa della rete elettrica, usare esclusivamente l’adattatore <strong>di</strong>rete KETRON fornito con lo strumento stesso. L’uso <strong>di</strong> altri adattatori potrebbe comportare danninei circuiti <strong>di</strong> alimentazione dello strumento. E’ pertanto <strong>di</strong> primaria importanza usare gli adattatorioriginali e chiedere del tipo giusto se doveste rior<strong>di</strong>narlo.INFORMAZIONE AGLI UTENTI“Attuazione delle Direttive 2002/95/CE, 2002/96/CE e 2003/108/CE, relative alla riduzione dell’uso <strong>di</strong>sostanze pericolose nelle apparecchiature elettriche ed elettroniche, nonchè allo smaltimento dei rifiuti”Il simbolo del cassonetto barrato riportato sull’apparecchiatura in<strong>di</strong>ca che il prodotto alla fine dellapropria vita utile deve essere raccolto separatamente dagli altri rifiuti. L’utente dovrà pertanto,conferire l’apparecchiatura giunta a fine vita agli idonei centri <strong>di</strong> raccolta <strong>di</strong>fferenziata dei rifiutielettronici ed elettrotecnici, oppure riconsegnarla al riven<strong>di</strong>tore al momento dell’acquisto <strong>di</strong> unanuova apparecchiatura <strong>di</strong> tipo ecquivalente, in ragione <strong>di</strong> uno a uno. L’adeguataraccolta <strong>di</strong>fferenziata per l’avvio successivo dell’apparecchiatura <strong>di</strong>smessa alriciclaggio, al trattamento e allo smaltimento ambientale compatibile contribuiscead evitare possibili effetti negativi sull’ambiente e sulla salute e favorisce il riciclodei materiali <strong>di</strong> cui è composta l’apparecchiatura. Lo smaltimento abusivo delprodotto da parte dell’utente comporta l’applicazione delle sanzioni amministrativepreviste.2
INTRODUZIONEGrazie per aver scelto il nuovo KETRON SD1000 Professional Sound Module.L’SD1000 rappresenta un’interessante integrazione nel settore dei moduli sonori in termini <strong>di</strong>compattezza e <strong>di</strong> prestazionali musicali. Infatti, oltre a <strong>di</strong>sporre <strong>di</strong> tutte le sonorità timbrichenecessarie per un’ottima riproduzione dei files musicali in formato General Mi<strong>di</strong> standard e Kar,l’SD1000 possiede anche ulteriori Banchi suono aggiuntivi con una incre<strong>di</strong>bile varietà <strong>di</strong> Vociorchestrali: Grand Piano Stereo su 88 note, Chitarre acustiche ed elettriche, Brass e Sassofoni <strong>di</strong>qualità unica, Organi campionati, Fisarmoniche, Bassi, Strings, Drum Sets acustici ed elettronicietc. Inoltre l’SD1000 è provvisto <strong>di</strong> una notevole quantità <strong>di</strong> Loops au<strong>di</strong>o <strong>di</strong> Batteria e Percussionisud<strong>di</strong>visi nei più <strong>di</strong>versi generi musicali, i quali certamente <strong>di</strong>fferenziano l’SD1000 da tutti gli altrimoduli similari del mercato. L’SD1000 trova il top delle sue applicazioni in abbinamento ad un playerMIDI (come ad es. KETRON MIDJAY) o a sequencers su computer (Logic®, Cubase®, Cakewalk®e altri), ma può essere collegato anche a Master keyboards o Tastiere multi-purpose (Arranger,Synth, Digital pianos, etc.).Prima <strong>di</strong> utilizzare il Vs SD1000, leggete accuratamente tutte le <strong>istruzioni</strong> per ottenere il meglio delleprestazioni e per una lunga durata dello strumento.Conservate questo <strong><strong>manual</strong>e</strong> in luogo sicuro per ulteriori future consultazioni.CONTENUTO DELLA CONFEZIONEIl package originale del Vs. SD1000 contiene il seguente materiale :a) SD1000b) Manuale d’utilizzoc) Alimentatore DC 9 VoltsOptional: Cavo Mi<strong>di</strong> to USB. Sarà in<strong>di</strong>spensabile per l’utilizzo <strong>di</strong> SD1000 con un Laptop per il fattoche appunto i computer portatili non <strong>di</strong>spongono <strong>di</strong> propria interfaccia Mi<strong>di</strong> (se non nel caso <strong>di</strong>schede aggiunte quali Firewire, USB, etc.).Questo cavo permetterà attraverso la connessione USB la comunicazione dei dati mi<strong>di</strong> dal vostrocomputer portatile al mi<strong>di</strong> In del SD1000.ACCENSIONEPer accendere SD1000 basta collegarlo alla rete utilizzando l’adattatore <strong>di</strong> rete. Il led sul pannellofrontale visualizza l’imme<strong>di</strong>ata operatività dello strumento.1 On / Off: Interruttore generale dell’SD1000. Il ledacceso in<strong>di</strong>ca che lo strumento è in funzione. In caso <strong>di</strong>attività Mi<strong>di</strong> in ingresso il led lampeggerà.2 Volume: Controllo a slider per il volume generaledell’SD1000. Questo volume agisce anche sull’uscitaHeadphone.3 Headphone: Connessione per cuffia stereo a bassaimpedenza.3
CONNESSIONI4 Mi<strong>di</strong> In / Thru: Connessione Mi<strong>di</strong> In e Thru <strong>di</strong> SD1000. Collegare il Mi<strong>di</strong> In <strong>di</strong> SD1000 al Mi<strong>di</strong> outdel computer, del Mi<strong>di</strong> player o della Master keyboard. La connessione Thru va usata per rilanciarela copia del Mi<strong>di</strong> In ad altro <strong>di</strong>spositivo (ad es. Expander). Il Thru non è <strong>di</strong>sponibile quando si usal’USB mi<strong>di</strong>. NB: Si sconsiglia l’uso delle porte mi<strong>di</strong> in contemporanea con l’USB Mi<strong>di</strong>.5 Out L / R: Uscite au<strong>di</strong>o Left e Right da collegare al mixer o amplificatore au<strong>di</strong>o.6 Power Dc In: Connessione per l’alimentatore DC 9 V <strong>di</strong> SD1000.7 USB: Connessione per il collegamento USB al computer.CONSIGLI SULL’UTILIZZAZIONEIn questo paragrafo vogliamo suggerirVi come pensiamo vada utilizzato l’SD1000 per offrirVi ilmeglio delle sue possibilità nelle applicazioni musicali.HOME STUDIO (con computer, sequencer o players esterni)In questo contesto l’SD1000 può esprimere davvero il massimo delle sue potenzialità. Può esserecollegato al vostro computer (Pc o Mac) tramite il cavo Mi<strong>di</strong> (se <strong>di</strong>sponete già <strong>di</strong> una scheda coninterfaccia Mi<strong>di</strong>) oppure tramite il cavo Mi<strong>di</strong> to Usb fornito come accessorio opzionale da KETRON.Utilizzando programmi <strong>di</strong> sequencer musicale come Cubase®, Logic®, Cakewalk® o simili sarete ingrado <strong>di</strong> inserire con successo l’SD1000 nelle Vs. elaborazioni musicali (Mi<strong>di</strong> files, Jingles, Mix Au<strong>di</strong>o,etc.) sfruttando al meglio la sua grande versatilità sonora.Nel Vs. SD1000, oltre ai timbri che ormai fanno partedei riferimenti Standard (GM) troverete altri SoundBanks con molte sonorità caratteristiche nelle famiglietra<strong>di</strong>zionali (Pianoforti, Strings, Sax, Brass etc). Masicuramente la caratteristica che contrad<strong>di</strong>stinguel’SD1000 da altri moduli sonori è data dalla presenzadegli innumerevoli Loops au<strong>di</strong>o (Drum Loops scaricabiligratuitamente dal sito www.ketron.it).Immaginate <strong>di</strong> inserire questi Loops nelle Vs creazionimusicali…essi possono arricchire, se non ad<strong>di</strong>ritturasostituire, la ritmica dei Vs. brani e potrebbero fare la<strong>di</strong>fferenza con tutto quello che avete elaborato finoranell’ambito dei Mi<strong>di</strong> files.Solo un piccolo esempio. Immaginate un Mi<strong>di</strong> file <strong>di</strong> musica caraibica, dove spesso siamo abituatiad ascoltare parti <strong>di</strong> percussioni latine poco convincenti. Applichiamo alcuni dei Pattern <strong>di</strong>sponibilinel data base dei Loops in aggiunta (o meglio in sostituzione) della traccia Drum esistente (Copy &Paste). Con pochissime operazioni saremo in grado <strong>di</strong> sostituire la struttura ritmica Mi<strong>di</strong> con Loopsau<strong>di</strong>o e il risultato sarà sorprendente.Naturalmente una volta che il Vs. file musicale sarà completato, salvandolo nel formato a voi più4
congeniale, avrete la possibilità <strong>di</strong> riprodurlo con qualsiasi sequencer o Mi<strong>di</strong> player (ad es. MIDJAYo simile) collegandolo al Vs. SD1000.L’utilizzo del laptop si fa sempre più presente nel mondo dell’entertainment musicale per lariproduzione dei Mi<strong>di</strong> files, ma spesso il vantaggio <strong>di</strong> avere una scheda musicale integrata nelcomputer viene penalizzato dal fatto che tali schede <strong>di</strong>spongono <strong>di</strong> pochi suoni e <strong>di</strong> modesta qualità.Anche in questo caso pensiamo che l’utilizzo dell’SD1000, in sostituzione delle schede interne,possa costituire una notevole opportunità.TASTIERA MIDI (Master keyboard, Arranger, Fisarmonica, etc.)L’SD1000 può essere utilizzato come modulo supplementare per arricchire la tavolozza timbricadella Vs. tastiera.Altrettanto in<strong>di</strong>cata è l’accoppiata <strong>di</strong> SD1000 con Master keyboards non provviste <strong>di</strong> suoni o conle attuali mini remote keyboards (tastiere multime<strong>di</strong>ali) sempre più spesso utilizzate nellive set. Pensiamo che un modulo sonoro cosi’ potente e <strong>di</strong> <strong>di</strong>mensioni così contenute possasicuramente entrare a far parte del Vs set up musicale.NOTE SUL FUNZIONAMENTO / TEMPLATESCome avrete già notato l’SD1000 si presenta con le connessioni esterne (descritte in precedenza),e con un unico controllo <strong>di</strong> Volume generale per le Uscite posteriori e per la Cuffia.Ovviamente tutti gli altri interventi che possono determinare una mo<strong>di</strong>fica del Timbro, del Volume,del Riverbero, degli Effetti etc. devono avvenire tramite messaggi MIDI.Per coloro che sono già a conoscenza <strong>di</strong> questo tipo <strong>di</strong> E<strong>di</strong>ting sarà sufficiente osservare la tabelladelle IMPLEMENTAZIONI MIDI dell’SD1000 per poter gestire i Suoni dello strumento in tutte lesue potenzialità.Per quelli un po’ meno esperti abbiamo messo a <strong>di</strong>sposizione nel sito www.ketron.it (scaricabiligratuitamente) una serie <strong>di</strong> files (TEMPLATES) con la configurazione della Mappa dei suoniche si possono utilizzare lavorando con i più conosciuti programmi <strong>di</strong> sequencer e notazionemusicale: Logic®, Cubase®, Cakewalk®.COME UTILIZZARE GLI AUDIO DRUM LOOPSLa Libreria necessaria per poter gestire tutti i Loops ritmici Au<strong>di</strong>o <strong>di</strong> cui è dotato l’SD1000 puòessere scaricata liberamente dal sito www.ketron.it.I files si presentano con una serie <strong>di</strong> Folders (cartelle) catalogati per tipologia musicale (Salsa, Cha,Merengue, Jazz, etc.).Si tratta in definitiva <strong>di</strong> Mi<strong>di</strong> files contenenti le informazioni per eseguire i Pattern ritmici dei variLoops contenuti nella generazione sonora dell’SD1000.Per avere un idea più chiara delle possibilità sonore che questi Loops offrono vi suggeriamo <strong>di</strong>ascoltare i Demo.mid contenuti nelle cartelle <strong>di</strong> riferimento delle <strong>di</strong>verse Cadenze musicali.Vi ricor<strong>di</strong>amo che questi pattern hanno all’interno tutte le informazioni necessarie (Program Change,Volume, etc.) per essere eseguiti imme<strong>di</strong>atamente senza ulteriori impostazioni.INFORMAZIONI IMPORTANTI SULLA SOUND LISTNella Sound List dell’ SD1000 riportata all fine <strong>di</strong> questo <strong><strong>manual</strong>e</strong> troverete appunto delle sigleaffiancate ad alcune Voices.Queste sigle vi aiuteranno a comprendere meglio il modo con il quale sono state ottenute e il loromiglior utilizzo nelle vostre produzioni musicali.5
(M): MULTIVOICE Questi suoni sono ottenuti con due o piu’ voci contemporaneamente. Unutilizzo eccessivo <strong>di</strong> Multi Voices ridurra’ la polifonia globale dell’SD1000 in modo percettibile. Alcuni<strong>di</strong> questi suoni inoltre potrebbero avere una risposta <strong>di</strong>fferente nel Panorama sonoro stereo inquanto potrebbero utilizzare timbri <strong>di</strong>fferenti associati alla posizione sinistra o destra del Pan.(ST): STEREO Questi suoni sono realmente dei suoni Stereo in quanto realizzati con due campioniper ogni nota suonata. Anche in questo caso un uso eccessivo <strong>di</strong> questi suoni causerà una riduzionedella polifonia globale dell’SD 1000.(LDM): LIVE DRUM MODELING In questi Drum sets alcuni strumenti (come lo Snare, Rimshot, Claps o altro) suonano con samples <strong>di</strong>fferenti sullo stesso timbro. Questi samples vengonoin<strong>di</strong>rizzati in modo casuale proprio per riprodurre al meglio le variabili sonore <strong>di</strong> una performanceritmica live.(FXV): EFX INSERT VOICE Le ultime 9 Voices elencate della Sound List dell’SD1000 (in fondo al<strong><strong>manual</strong>e</strong>) sono ottenute utilizzando effetti nella modalità Insert EFX (come HQ Overdrive, Chorused altro). Vi suggeriamo <strong>di</strong> usare questa caratteristica per potenziare la qualità sonora delle Vostreproduzioni musicali con SD 1000.ALTRE CARATTERISTICHEDSP: Per chi ha già avuto modo <strong>di</strong> lavorare con moduli suono multi timbrici sarà familiare sapereche la dotazione dei DSP (effetti e post trattamento sonoro) è parte integrante <strong>di</strong> questi sistemi chevanno utilizzati attraverso i vari controllers e/o Sys Exclusive.Ecco il Routing dell’SD1000:Tuttavia riteniamo interessante aggiungere che oltre alle tipiche sezioni <strong>di</strong> Reverb e Chorus troveretealtri effetti DSP quali:Rotary: con controlli <strong>di</strong> Rate, Depth.Wha Wha: Amount . Controlla l’intensita’ dell’effetto Wha sulla traccia.HQ Distortion: Type, Drive, Gain (Disponibile solo sull’Insert #1).2 x Insert EFX: Chorus, Flanger, Phaser, Tremolo, 4 Band Parametric EQ, Compressor e Delay efxN.B: Si possono utilizzare (come limite massimo) 2 Insert <strong>di</strong> tipo <strong>di</strong>fferente su tutte le tracce<strong>di</strong>sponibili.6Nella Sezione Master Control sono inoltre previsti anche i seguenti controlli:Tune: Controllo <strong>di</strong> accordatura generale del modulo (Data Value).Arabic Scale: Controllo degli intervalli per la scala araba (Data Value).Global Transposer: Trasposizione globale dello strumento (Data Value).
BenutzerhandbuchDSICHERHEITSHINWEISEHINWEISE AUF BRANDGEFAHR, STROMSCHLAGRISIKO UNDVERLETZUNGSGEFAHR.Achtung: um das Brand- und Stromschlagrisiko zu minimieren, ist das Instrument weder Regennoch Feuchtigkeit auszusetzen.WICHTIGE HINWEISE ZUR SICHERHEIT UND ZUR INSTALLATIONACHTUNG - Beim Einsatz elektrischer Geräte sind einige grundlegenden Vorsichtsmaßnahmen zubeachten, wie zum Beispiel:<strong>•</strong> Bevor das Instrument verwendet wird, bitte <strong>di</strong>e Be<strong>di</strong>enungsanleitung aufmerksam lesen.<strong>•</strong> Wenn das Instrument von Kindern benutzt wird, ist <strong>di</strong>e Anwesenheit einesErwachsenen unerläßlich.<strong>•</strong> Das Instrument ist nicht in der Nähe von Wasser zu verwenden, wie zum Beispielin der Nähe eines Waschbeckens, eines Swimmingpools oder einer nassenOberfläche.<strong>•</strong> Das Instrument darf nur auf einem Ständer verwendet werden, der vom Hersteller empfohlen wird.<strong>•</strong> Höhere Lautstärken sind auf Dauer zu vermeiden: ein zu hoher Schalldruckpegel wirktgesundheitsschädlich.<strong>•</strong> Das Instrument muß so aufgestellt werden, daß eine ausreichende Lüftung gewährleistet ist.<strong>•</strong> Das Instrument darf nicht in der Nähe von Wärmequellen wie Heizkörpern, Öfen etc. au gestellt werden.<strong>•</strong> Verwenden Sie nur das mitgelieferte Netzteil für den Stromanschluss. Die Kennzeichnung undDaten des Netzteiles befinden sich an der Unterseites des Instrumentes.<strong>•</strong> Wenn das Instrument längere Zeit nicht verwendet wird, ist das Netzkabel herauszuziehen.<strong>•</strong> Bevor Sie das Instrument vom Netzteil trennen, schalten Sie das Gerät mit dem ON/OFF Schalteran der Rückseite des Instrumentes aus.<strong>•</strong> Das Instrument muß zur nächsten Kunden<strong>di</strong>enststelle gebracht werden, wenn:a. Beschä<strong>di</strong>gungen am Netzteil oder Stecker;b. Feste Gegenstände oder Flüssigkeiten ins Innere des Instruments gefallen bzw.eingedrungen sind;c. Es im Regen stand;d. Es nicht ordnungsgemäß funktioniert oder Leistungsabfälle aufweist.e. Es fallen gelassen wurde oder das Chassis beschä<strong>di</strong>gt ist.<strong>•</strong> Versuchen Sie nicht, das Instrument selbst zu reparieren; <strong>di</strong>es hat nur durch Fachpersonal zugeschehen.DIESE SICHERHEITSHINWEISE SIND AUFZUBEWAHREN7
VORGEHENSWEISE BEI RADIO/TV – STÖRUNGENDieses Instrument arbeitet innerhalb des Ra<strong>di</strong>ofrequenzbereichs und kann, wenn es nicht korrektund unter genauer Einhaltung der Anleitungen installiert wird, zu Empfangsstörungen bei Ra<strong>di</strong>oundFernsehgeräten führen. Obwohl das Instrument den gültigen Richtlinien entsprechend geplantund obwohl Schutzvorrichtungen vorhanden sind, besteht dennoch keine Garantie dafür, daß eszu keinen Empfangsstörungen kommt. Um zu überprüfen, ob <strong>di</strong>ese wirklich von Ihrem Instrumenthervorgerufen werden, schalten Sie es bitte ab und checken, ob <strong>di</strong>e Störungen dadurch behobenwerden. Dann schalten Sie das Instrument wieder ein und prüfen, ob <strong>di</strong>e Störung wieder auftritt.Nachdem festgestellt wurde, daß <strong>di</strong>e Empfangsstörungen tatsächlich von Ihrem Instrumentverursacht werden, kann eine der folgenden Maßnahmen ergriffen werden:<strong>•</strong> Richten Sie <strong>di</strong>e Empfangsantenne des Ra<strong>di</strong>os oder Fernsehers anders aus.<strong>•</strong> Stellen Sie das Instrument in einer anderen Stellung gegenüber dem Ra<strong>di</strong>o- oder Fernsehgerät auf.<strong>•</strong> Entfernen Sie das Instrument vom Empfänger.<strong>•</strong> Schließen Sie das Instrument an eine andere Steckdose an, damit das Instrument und derEmpfänger an zwei verschiedenen Stromkreisen angeschlossen sind.<strong>•</strong> Wenn notwen<strong>di</strong>g, wenden Sie sich an einen Fachmann.ANSCHLÜSSE<strong>•</strong> Soll das Instrument an andere Geräte (Verstärker, Mixer, andere Mi<strong>di</strong>-Instrumente etc.)angeschlossen werden, überzeugen Sie sich davon, daß alle Geräte ausgeschaltet sind.<strong>•</strong> Lesen Sie <strong>di</strong>e Hinweise zu den Ra<strong>di</strong>o- und TV-Störungen.PFLEGE DES INSTRUMENTS<strong>•</strong> Die Oberflächen des Instruments sind nur mit einem trockenen, weichen Tuch zu reinigen.Verwenden Sie niemals Benzin, Verdünner oder sonstige Lösungsmittel.WEITERE VORSICHTSMAßNAHMENWenn Sie das Instrument im Ausland verwenden wollen und Zweifel bezüglich der Netzversorgung bestehen,wenden Sie sich bitte an einen Fachmann. Das Instrument darf keinen Stößen ausgesetzt werden.AC NETZTEILZum Anschluss <strong>di</strong>eses Instrumentes an eine Steckdose benötigen Sie das KETRON AC Netzteil.Werden andere Wechselstromnetzgeräte verwendet, so riskieren Sie dabei, <strong>di</strong>e LeistungskreiseIhres Instruments zu beschä<strong>di</strong>gen. Es ist von besonderer Wichtigkeit, dass ausschließlichOriginalnetzgeräte verwendet werden und beim eventuellen Nachbestellen das richtige Modellangegeben wird.BENUTZERINFORMATION“Umsetzung der Europäischen Richtlinien 2002/95/EG, 2002/96/EG und 2003/108/EG zur Beschränkungder Verwendung bestimmter gefährlicher Stoffe in Elektro- und Elektronikgeräten sowie über Elektro- undElektronik-Altgeräte.” Das Symbol der durchgestrichenen Mülltonne auf dem Gerät weist darauf hin, dass dasProdukt am Ende seines Lebenszyklus einer getrennten Abfallentsorgung zuzuführen ist. Der Benutzer mussdaher das Gerät bei den entsprechenden Sammelstellen für Elektro- und Elektronik-Altgeräte abgeben oder demHändler bei Kauf eines neuen gleichartigen Geräts zurückgeben. Die getrennte Sammlungder Altgeräte im Hinblick auf deren Recycling, Behandlung und umweltverträglicheEntsorgung trägt dazu bei, negative Auswirkung auf Umwelt und menschliche Gesundheitzu vermeiden, undfördert <strong>di</strong>e Verwertung sowie das Recyclingder Materialien, aus denensich das Gerät zusammensetzt. Die Nichtbeachtung <strong>di</strong>eser Vorschrift seitens des Benutzersunterliegt den im jeweiligen Benutzerland vorgesehenen Verwaltungsstrafen.8
EINFÜHRUNGVielen Dank für <strong>di</strong>e Wahl eines KETRON SD1000 Professional Sound Module.Das SD1000 stellt ein interessantes Angebot auf dem Gebiet der Klangmodule in SachenKompaktheit und musikalischer Leistung dar. Neben sämtlichen für eine optimale Wiedergabe vonMusikdateien in General Mi<strong>di</strong>- und Kar-Format notwen<strong>di</strong>gen Sounds verfügt das SD1000 nämlichüber weitere Klangbanken mit einer unglaublichen Vielfalt an Orchestersounds: Grand Piano Stereoüber 88 Noten, akustische und elektrische Gitarren, Blasinstrumente und Saxofone von einzigartigerQualität, gesampelte Orgeln Section, Akkordeons, Bässe, Saiteninstrumente, akustische undelektronische Drum Sets usw. Zudem ist das SD1000 mit einer beachtlichen Zahl von SchlagzeugundSchlaginstrumenten-Au<strong>di</strong>o-Loops ausgestattet, und zwar für verschiedenste Musikgenres,<strong>di</strong>e das SD1000 zweifellos von den anderen marktgängigen Modulen unterscheiden. Das SD1000findet seine Top-Applikation in Kombination mit einem MIDI Player (wie z.B. KETRON MIDJAY)oder einem Sequenzerprogramm (Logic®, Cubase®, Cakewalk® und anderen), kann aber auchan Master Keyboards oder Multi-Purpose-Klaviaturen (Arranger, Syntheziser, Digital Pianos etc.)angeschlossen werden.Bevor Sie Ihr SD1000 in Betrieb nehmen, lesen Sie sich <strong>di</strong>e Anleitung genau durch, um das Besteaus dem Gerät zu holen und eine lange Lebensdauer sicherzustellen.Bewahren Sie <strong>di</strong>eses Handbuch zum künftigen Nachschlagen sicher auf.INHALT DER VERPACKUNGDie Originalverpackung Ihres SD1000 enthält das folgende Material:a) 1 Klangmodul SD1000b) 1 Be<strong>di</strong>enungsanleitungc) 1 9 V-DC-NetzgerätOptional: Mi<strong>di</strong>-to-USB-Kabel. Dieses wird für den Einsatz des SD1000 mit einem Laptop benötigt,weil Notebooks über keine eigene Mi<strong>di</strong>-Schnittstelle verfügen (es sei denn, es werden Zusatzkartenwie Firewire, USB usw. installiert). Dieses Kabel gestattet den Mi<strong>di</strong>-Datenaustausch zwischen IhremNotebook und dem Mi<strong>di</strong> In des SD1000 über den USB-Anschluss.EINSCHALTENUm das SD1000 einzuschalten, schliessen Sie das mitgelieferte und mit dem Instrumentverbundene Netzteil einfach an eine Steckdose an. Die LED am Frontpaneel signalisiert Ihnen nun<strong>di</strong>e Betriebsbereitschaft des Geräts.1 On / Off: Ein-/Aus-Schalter des SD1000. Leuchtet <strong>di</strong>eLED, so bedeutet <strong>di</strong>es, dass das Instrument in Betrieb steht.Werden Mi<strong>di</strong>-Eingangssignale registriert, blinkt <strong>di</strong>e LED.2 Volume: Schieberegler zur Einstellung der allgemeinenLautstärke des SD1000. Diese Einstellung greift auch amHeadphone-Ausgang.3 Headphone: Anschluss für Niedrigimpedanz-Stereo-Kopfhörer.9
ANSCHLÜSSE4 Mi<strong>di</strong> In / Thru: Mi<strong>di</strong> In- und Thru-Anschluss des SD1000. Den Mi<strong>di</strong> In des SD1000 mit dem Mi<strong>di</strong>Out Ihres Computers, Mi<strong>di</strong> Players oder Master Keyboards verbinden. Der Thru-Anschluss <strong>di</strong>ent zurÜbertragung einer Kopie der Mi<strong>di</strong> In-Signale an ein anderes Gerät (z.B. Expander). Mi<strong>di</strong> Thru stehtnicht zur Verfügung solange USB Mi<strong>di</strong> Aktiv ist. Hinweis: Verwenden Sie den MIDI Anschluß nicht,solange MIDI USB aktiv ist.5 Out L / R: Au<strong>di</strong>o Left- und Right-Ausgänge, <strong>di</strong>e an den Mixer oder Au<strong>di</strong>overstärker anzuschließen sind.6 Power Dc In: Anschluss für das 9 V-DC-Netzgerät des SD1000.7 USB: USB Port für Computeranschluß.RATSCHLÄGE ZUR BENUTZUNGWir wollen hier nachstehend einige Empfehlungen zur Benutzung des SD1000 geben, damit Sieseine musikalischen Anwendungsmöglichkeiten optimal ausschöpfen können.HOME STUDIO (mit externen Computern, Sequenzern oder Playern)In <strong>di</strong>esem Zusammenhang kann in der Tat das Maximum seiner Potentialitäten genutzt werden. DasSD1000 wird an Ihren Computer (PC oder Mac) mittels Mi<strong>di</strong>-Kabel (sofern Sie bereits eine Karte mitMi<strong>di</strong>-Schnittstelle installiert haben) oder Mi<strong>di</strong>-to-USB-Kabel angeschlossen, das von KETRON aufWunsch als Zubehör geliefert wird. Unter Verwendung einer musikalischen Sequenzer-Software wieCubase ®, Logic ®, Cakewalk ® oder ähnlicher werden Sie in der Lage sein, das SD1000 gelungenin ihre Musikausarbeitungen (Mi<strong>di</strong>-Dateien, Jingles, Mix Au<strong>di</strong>o, usw.) einzubinden, wobei Sie sichseine große Klangvielfalt zunutze machen können.In Ihrem SD1000 implementiert finden Sie neben denSounds, <strong>di</strong>e nunmehr Teil der Standardreferenzen(GM) sind, weitere Klangbanken mit vielenSounds, <strong>di</strong>e charakteristisch für <strong>di</strong>e tra<strong>di</strong>tionellenInstrumentengruppen (Pianos, Strings, Sax, Brass, usw.)sind. Was aber das SD1000 von anderen Klangmodulenwesentlich unterscheidet, sind <strong>di</strong>e zahllosen Au<strong>di</strong>o-Loops (Drum Loops, <strong>di</strong>e kostenlos von unserer Websitewww.ketron.it herunter zu laden sind).Durch Einarbeitung der Loops werden IhreMusikkreationen nicht nur bereichert, sondern <strong>di</strong>egesamte Rhythmik Ihrer Stücke kann damit ersetztwerden, was sicher den Unterschied zu dem ausmacht, was Sie bisher in Mi<strong>di</strong>-Dateiumgebungrealisiert haben!Nur ein kleines Beispiel: Stellen Sie sich eine Mi<strong>di</strong>-Datei mit karaibischer Musik vor, bei der oftsüdamerikanische Schlagzeuge zu hören sind, <strong>di</strong>e wenig überzeugend klingen. Durch Anwendungder Pattern, <strong>di</strong>e in der Loop-Database vorhanden sind, kann <strong>di</strong>e Drum-Spur mit der Funktion Copy10
& Paste (Kopieren & Einfügen) ergänzt oder besser gesagt vollstän<strong>di</strong>g ersetzt werden. Mit nurwenigen Aktionen sind Sie in der Lage, <strong>di</strong>e rhythmische Mi<strong>di</strong>-Struktur durch Au<strong>di</strong>o-Loops so zuändern, dass das Ergebnis Sie überraschen wird. Nach Speicherung Ihres fertigen Songs in demvon Ihnen gewünschten Format können Sie ihn mit jedem Sequenzer oder Mi<strong>di</strong> Player (MIDJAYoder ähnliche) durch Anschluss an Ihr SD1000 wiedergeben. Laptops finden in der musikalischenUnterhaltungswelt immer stärkeren Einsatz für <strong>di</strong>e Wiedergabe von Mi<strong>di</strong>-Dateien. Häufig jedochwird der Vorteil, eine Musikkarte im Computer installiert zu haben, dadurch gemindert, dass <strong>di</strong>eseKarten über nur wenige Klänge von bescheidener Qualität verfügen. Auch <strong>di</strong>esbezüglich bietet <strong>di</strong>ezu internen Karten alternative Benutzung des SD1000 interessante Möglichkeiten.MIDI-KLAVIATUR (Master Keyboard, Arranger, Akkordeon, usw.)Das SD1000 kann als Zusatzmodul verwendet werden, um <strong>di</strong>e Klangpalette Ihrer Klaviatur zuerweitern. Ebenso angezeigt ist der Einsatz des SD1000 zusammen mit Master Keyboards ohneeigene Klangerzeugung oder mit den aktuellen Mini-Remote-Keyboards (multime<strong>di</strong>ale Klaviaturen),<strong>di</strong>e immer öfter bei Live-Sets Anwendung finden. Ein dermaßen leistungsstarkes und zugleichkompaktes Klangmodul kann sicher Teil Ihres Musik-Set-Ups werden.HINWEISE ZUM BETRIEBWie Sie bereits festgestellt haben werden, verfügt das SD1000 über außen liegende (zuvorbeschriebene) Anschlüsse und nur einen allgemeinen Lautstärkenregler für <strong>di</strong>e rückseitigenAusgänge und den Kopfhörer. Alle anderen Steuerungen, <strong>di</strong>e eine Änderung des Sounds, derLautstärke, des Halls und anderer Effekte bewirken, müssen offensichtlich über MIDI-Befehleerfolgen. Für <strong>di</strong>ejenigen, <strong>di</strong>e bereits <strong>di</strong>ese Art der Bearbeitung kennen, wird es ausreichen, <strong>di</strong>eMIDI-Implementationstabelle des SD1000 zu beachten, um <strong>di</strong>e Klänge des Instruments denPotentialitäten des Geräts entsprechend zu verwalten.Für <strong>di</strong>e weniger Kun<strong>di</strong>gen haben wir auf unserer Website www.ketron.it eine Reihe von kostenlosherunter zu ladenden Dateien mit der Konfiguration des Speicherplans der Klänge zur Verfügunggestellt, <strong>di</strong>e mit den gängigsten Sequenzer- und Notationsprogrammen verwendet werden können,vie Cubase®, Logic®, Cakewalk®.VERWENDEN VO AUDIO DRUM LOOPSDie Loops für das SD1000 stehen zum Herunterladen auf unserer Website www.ketron.it bereit.Die Dateien sind in Folders (Ordner) zusammengefasst, <strong>di</strong>e nach Musikstil (Salsa, Cha, Merengue,Jazz usw.) gegliedert katalogisiert werden.Es handelt sich dabei um Mi<strong>di</strong>-Dateien, <strong>di</strong>e sämtliche Informationen zur Ausführung der Rhythmus-Patterns der verschiedenen Loops aus der SD1000-Klangerzeugung enthalten.Damit Sie sich mehr unter den Klangmöglichkeiten <strong>di</strong>eser Loops vorstellen können, empfehlen wirIhnen <strong>di</strong>e .mid-Demos in den Referenzordnern der verschiedenen Kadenzen anzuhören.Erinnern Sie sich daran, dass <strong>di</strong>ese Patterns bereits alle notwen<strong>di</strong>gen Informationen enthalten(Program Change, Lautstärke, usw.), sodass sie sofort ohne weitere Einstellungen ausgeführtwerden können.WICHTIGE INFORMATIONEN ZUR SOUND LISTEAuf der SD1000 Sound Liste finden Sie einige Anmerkungen in Verbindung mit den Voice-Namen,<strong>di</strong>e erklären, wie <strong>di</strong>e Voices strukturiert sind:11
(M): MULTIVOICE Diese Sounds bestehen aus zwei oder mehreren gleichzeitig gepieltenVoices. Umfangreicher Einsatz von Multivoices kann eine wesentlichen Reduzierung der Polyphonieverursachen. Einige Sounds können im Stereo Panorama auch unterschiedlich wiedergegebenwerden, abhängig von der jeweiligen Zuordnung der verschiedenen Töne zu links/rechts.(ST): STEREO Diese Sounds sind echte Stereo Voices mit einer doppelten Tonaufnahmefür jede gespielte Note. Umfangreicher Einsatz von Stereosounds kann eine Reduzierung derGesamtpolyphonie verursachen.(LDM): LIVE DRUM MODELING In <strong>di</strong>esen Akustik Drumsets spielen einige Perkussions mitverschiedenen, willkürlich eingesetzten Samples und/oder Sound-Nuancen am gleichen Instrument(wie etwa bei Snare, Kantenschlag, Klatschen, Schnippen), wodurch das natürliche Feeling einerLive Drummer Performance zusätzlich intensiviert wird.(FXV): EFX INSERT VOICE Die letzten 8 Voices der SD 1000 Soundliste (am Ende <strong>di</strong>eser Anleitung)enthalten ein EFX Insert Module (wie HQ Distortion, Oberdrive, Phaser, Chorus u.a.).Eine gut eingesetzte Verwendung der EFX Inserts ermöglicht Ihnen <strong>di</strong>e Soundqualität Ihrermusikalischen Arbeit noch zusätzlich zu steigern.ANDERE EIGENSCHAFTENDSP: Wer bereits mit multitimbralen Klangmodulen gearbeitet hat, weiß, dass DSPs (<strong>di</strong>gitaleSignalprozessoren für Effekte und Nachaufbereitung der Klangsignale) Bestandteil <strong>di</strong>eser Systemesind und über <strong>di</strong>e verschiedenen Controller- u./o. Sys Exclusive-Meldungen verwaltet werden.Hier zum SD1000 Routing:12Neben den klassischen Effekten, <strong>di</strong>e damit erzeugt werden, wie Reverb, Chorus und Delay findenSie bei <strong>di</strong>esem Gerät noch weitere DSP-Fähigkeiten wie:Rotary: mit Regelung von Rate, Acceleration und Deph.Wha Wha Amount. Steuert <strong>di</strong>e Wha-Effektstärke auf der jeweiligen Spur.HQ Distortion: Type, Drive, Gain (Verfügbar nur auf Insert #1 EFX).2 x Insert EFX: Chorus, Flanger, Phaser, Tremolo, 4 Band Parametric EQ, Compressor und Delayefx.Hinweis: Sie können (mindestens) 2 verschiedene Inserts auf allen verfügbaren Spuren nutzen.Im Bereich Master Control sind zudem folgende Steuerungen vorgesehen:Tune: Regelung der allgemeinen Stimmung des Moduls (Data Value).Arabic Scale: Intervalleinstellung für <strong>di</strong>e arabische Tonleiter (Data Value).Global Transposer: Transposition des gesamten Instruments (Data Value).
Owner’s ManualGBSAFETY INSTRUCTIONSINSTRUCTIONS ABOUT RISK OF FIRE, ELECTRIC SHOCK OR INJURY TOPERSONS.Warning: to reduce the risk of fire or electric shock, do not expose this instrument to rain ormoisture.IMPORTANT SAFETY AND INSTALLATION INSTRUCTIONSWARNING - When using electrical products, some basic precautions must be followed, inclu<strong>di</strong>ngthe following:<strong>•</strong> Before using this instrument, carefully read the User’s Manual.<strong>•</strong> When the instrument is used by children, the presence of an adult is required.<strong>•</strong> Do not use the instrument near water, for example near a wash-basin, aswimmingpool, a wet surface, etc.<strong>•</strong> The instrument must be used only on supports recommended by the manufacturer.<strong>•</strong> Do not use the instrument where there is any risk of it getting splashed with water or of waterdripping on it, such as near wash basins, swimming pools or on wet surfaces etc. Do not putcontainers with water on top of the instrument.<strong>•</strong> The instrument is to be used in a position where adequate ventilation is provided.<strong>•</strong> Use the instrument far away from heat sources such as ra<strong>di</strong>ators, heaters, etc.<strong>•</strong> Use only the supplied power adaptor for connecting the instrument to the mains. Theidentification and power adaptor data are reported on the bottom of the instrument.<strong>•</strong> Disconnect the power cable if the instrument is not used for longer periods of time.<strong>•</strong> If you need to <strong>di</strong>sconnect the instrument from the power supply, use the ON/OFF switch at frontof the instrument.<strong>•</strong> The instrument must be positioned so that the ON/OFF switch is easily accessible.<strong>•</strong> Bring the instrument to an service centre in the following cases:a. Damages on the power adaptor or plug.b. Objects or liquids fallen into its inside.c. The instrument has been exposed to rain.d. Abnormal running or an evident decrease of the instrument’s performance.e. The instrument has fallen down or the enclosure has been damaged.<strong>•</strong> Never try to repair the instrument yourself. All operations must be performed by specialisedengineers.KEEP THESE INSTRUCTIONS IN A SAFE PLACE13
HOW TO AVOID RADIO/TV INTERFERENCEThis instrument operates at ra<strong>di</strong>o frequencies, and if not correctly installed accor<strong>di</strong>ng to theinstructions supplied, it may cause interference with ra<strong>di</strong>o and television reception.Though this instrument has been designed accor<strong>di</strong>ng to the applicable standards and notwithstan<strong>di</strong>ngthe reasonable protections against interference it has been equipped with, there is no guaranteethat such events will not occur. In order to check if the interference is actually caused by thisinstrument, switch it off and see if the interference <strong>di</strong>sappears.Then switch it on again and check if the interference appears again. Once you have made sure thatthe interference is originated by this instrument, take one of the following measures:<strong>•</strong> Mo<strong>di</strong>fy the instrument’s position with respect to the receiver.<strong>•</strong> Increase the <strong>di</strong>stance between the instrument and the receiver.<strong>•</strong> Connect the instrument’s plug to a <strong>di</strong>fferent outlet to make sure that the instrument and thereceiver are connected to two <strong>di</strong>fferent circuits.<strong>•</strong> If necessary, contact a specialised technician.POWER SUPPLY<strong>•</strong> Before connecting this instrument to any other equipment (amplifier, mixer, other MIDIinstruments, etc.) make sure that all units are switched off.<strong>•</strong> Read the instructions about Ra<strong>di</strong>o and TV interference.HOW TO CLEAN THIS INSTRUMENT<strong>•</strong> Use only a soft and dry cloth to clean the external surface of your instrument. Never use petrol,thinners or solvents generally speaking.OTHER PRECAUTIONSIf you wish to use your instrument abroad and if you have any doubts about the power supply,contact a qualified engineer previously.The instrument should never be subject to strong vibrations.AC POWER ADAPTORTo connect this instrument to the wall socket you will need the supplied KETRON AC Power adaptors.Use of other AC adaptors could result in damage to the instrument’s power circuit. So be sure toask for the right kind.INFORMATION FOR USERS”Observe European Directives 2002/95, 2002/96 and 2003/108 with regard to the reduced use of harmfulsubstances on electrical and electronic instruments and also observe waste <strong>di</strong>sposal regulations.”The symbol with the bin crossed out on the instrument points out that it must be separated fromother waste at the end of its useful life span and not just thrown away in the bin.The user must therefore hand the instrument over to <strong>di</strong>fferentiated waste <strong>di</strong>sposal centresauthorised to process electronic and electro-technical waste at the end of its useful life span, orgive it back to the retailer when purchasing a new similar type of device on a basis of 1-to-1 ratio.The <strong>di</strong>fferentiated <strong>di</strong>sposal of the equipment for the possible future recycling of its constructionalparts contributes in safeguar<strong>di</strong>ng the environment and human health.The user is subject to administrative fines in the case of the abusive <strong>di</strong>sposal ofthe product.14
INTRODUCTIONThank you for purchasing the new KETRON SD1000 Professional Sound Module.The SD 1000 instrument represents an interesting integration to the sector of sound modules interms of compactness and musical performance. Not only does it avail of all the sound acousticsnecessary for the perfect reproduction of musical files in General Mi<strong>di</strong> standard and Kar format,but it also has other ad<strong>di</strong>tional sound banks with an incre<strong>di</strong>ble variety of orchestral Voices: GrandPiano Stereo over 88 notes, Acoustic and electric guitars, Brass and saxophones of unique quality,sampled organs, Accor<strong>di</strong>ons, Bass, Strings, acoustic and electronic Drum Sets and so on. TheSD1000 unit is also equipped with a considerable number of au<strong>di</strong>o Drum and Percussion Loops splitupinto a very wide variety of musical styles, which definitely make SD1000 stand out from all othersimilar models on the market. The applications of SD1000 are best exploited in combination witha MIDI player (such as KETRON MIDJAY for example) or with sequencers on computer (Logic®,Cubase®, Cakewalk® and others), but it can also be connected to Master keyboards or multipurposekeyboards (Arranger, Synth, Digital pianos, etc.).Before you use your SD1000 instrument, make sure you read all the instructions carefully in orderto fully exploit its potentials and to ensure its long life.Keep this <strong>manual</strong> in a safe place for future reference.CONTENTS OF THE PACKAGEThe original package of your SD1000 instrument includes the following material:a) SD1000 unitb) Instruction <strong>manual</strong>c) DC Feeder - 9 VoltsOptional accessory: Mi<strong>di</strong> to USB cable. This is required to use SD1000 with a Laptop, due indeedto the fact that portable computers do not have their own Mi<strong>di</strong> interface (unless they are equippedwith ad<strong>di</strong>tional boards such as Firewire, USB, etc.).This cable is used for the communication of the mi<strong>di</strong> data from your portable computer withthe Mi<strong>di</strong> In of SD1000 via the USB connection.TURNING ONTo turn the SD1000 unit on, simply connect the feeder supplied with the instrument to the mains.The LED on the front panel lights up to point out that the instrument is working.1 On / Off: Main ON/OFF switch of the SD1000instrument. When the LED lights up, it points out thatthe instrument is working. The LED will flash if there isany Mi<strong>di</strong> In activity.2 Volume: Slider that controls the general volumeof SD1000. This volume also affects the Headphoneoutput.3 Headphone: Connection for stereo headphoneswith low impedance.15
CONNECTIONS4 Mi<strong>di</strong> In / Thru: Mi<strong>di</strong> In and Thru connection of SD1000. Connect the Mi<strong>di</strong> In of SD1000 to theMi<strong>di</strong> out of the computer, of the Mi<strong>di</strong> player or of the Master keyboard. The Thru connection is usedto send a copy of the Mi<strong>di</strong> In to another device (i.e.:Expander). Mi<strong>di</strong> Thru not available when USBmi<strong>di</strong> is active. Advice: Do not use mi<strong>di</strong> port while mi<strong>di</strong> Usb is active.5 Out L / R: Left and Right au<strong>di</strong>o outputs to be connected to the mixer or au<strong>di</strong>o amplifier.6 Power Dc In: Connection for the DC 9 V feeder of SD1000.7 USB: USB port for computer connection.ADVICE ON USING THE INSTRUMENTIn this section we show you how we think you should use SD1000 to fully exploit its performancein musical applications.HOME STUDIO (with computer, sequencer or external players)In this context, SD1000 is able to express its performance to the best. It can be connected toyour computer (Pc or Mac) via the Mi<strong>di</strong> cable (if you already have a board with Mi<strong>di</strong> interface) orvia the Mi<strong>di</strong> to Usb cable supplied as an optional accessory by KETRON. Using musical sequencerprograms such as Cubase®, Logic®, Cakewalk® or similar you will be able to successfully integrateSD1000 in your musical elaborations (Mi<strong>di</strong> files, Jingles, Au<strong>di</strong>o Mix etc.) exploiting its amazing soundversatility in the best way possible.Your SD1000 not only offers the sounds that are bynow part of the GM standard references but you willalso find other Sound Banks with many characteristicsounds in the tra<strong>di</strong>tional families (Piano, Strings, Sax,Brass, etc.).The main feature that definitely <strong>di</strong>stinguishes SD1000from other sound modules is the presence of thenumerous au<strong>di</strong>o Loops (Drum Loops that you candownload free of charge from our Internet site: www.ketron.it). Just imagine if you add these Loops to yourmusical creations... these can enrich, if not indeedreplace, the rhythm of your songs and they could makethe <strong>di</strong>fference with everything that you have elaboratedup to now in the sphere of Mi<strong>di</strong> files! Just a quick example: Think of a Mi<strong>di</strong> file of Caribbean music,where you often hear not very convincing parts of Latin percussions.Apply some of the Patterns available in the data base of the ad<strong>di</strong>tional Loops (or rather replacementloops) of the existent Drum track (Copy & Paste). In just a few steps you will be able to replace theMi<strong>di</strong> rhythmic structure with au<strong>di</strong>o Loops and the result will be amazing.Once your musical file is complete and you have saved it in the format that your prefer, you16
can naturally play it back with any type of sequencer or Mi<strong>di</strong> player (i.e.: MIDJAY or similar) byconnecting it to your SD1000. The use of laptops has become more and more popular in the worldof musical entertainment to play back Mi<strong>di</strong> files.The advantage of having a musical board integrated in the computer is however often penalised bythe fact that such boards only avail of a few sounds and of rather modest quality.In this case again, we think that the use of SD1000 instead of built-in boards offers a considerableopportunity.MIDI KEYBOARD (Master keyboard, Arranger, Accor<strong>di</strong>on, etc.)SD1000 can be used as a supplementary module to enrich the sound palette of your keyboard.Another ideal solution is that of coupling SD1000 with Master keyboards without sounds or withcurrent mini remote keyboards (multime<strong>di</strong>a keyboards) that are used increasingly in the live set-up.We are sure that such a powerful and compact sound module will certainly become part of yourmusical set-up.OPERATING NOTESAs you will have already noticed, the SD1000 unit has external connections (described previously)and one general volume control for the rear outputs and for the headphones.Obviously everything else that may mo<strong>di</strong>fy the Sound, the Volume, the Reverb, the Effects etc. mustbe performed via MIDI messages.For those who are already familiar with this type of E<strong>di</strong>ting procedure, simply observe the tableof MIDI implementations of SD1000 to be able to manage the Sounds of the instrument in all itspotentials.For those who are still learning, we have prepared a set of files on our Internet site www.ketron.it (that you can download free of charge) with the configuration of the Map of sounds that canbe used to work with the most commonly used sequencer programs and musical notes, such asCubase®, Logic®, Cakewalk®.HOW TO USE AUDIO DRUM LOOPSYou can download the Drum Loops for SD1000 from our Internet site www.ketron.itThe files appear with a set of Folders, which are catalogued per type of music (Salsa, Cha, Merengue,Jazz, etc.). These are actually Mi<strong>di</strong> files that contain information on how to play the rhythm Patternsof the various Loops contained in the sound generation of SD1000.To better understand the sound possibilities that these loops offer, we suggest that you listen to theDemo.mid files within the reference folders of the various musical rhythms.We remind you that these patterns contain all the information necessary (program change, volume,etc.) to be played imme<strong>di</strong>ately without any other settings.IMPORTANT INFORMATIONS ON SOUND LISTOn SD 1000 Sound List (on the bottom of this guide) you’ll find some remarks associated with theVoices name which explain how the voices are structured:(M): MULTIVOICE These sounds are obtained with two or more voices played simultaneously.An extensive use of multi voices will cause an important polyphony reduction. Also some soundsmay have a <strong>di</strong>fferent voice response on stereo panorama due to the <strong>di</strong>fferent tones associated onleft or right pan address.17
(ST): STEREO These sounds are true stereo voices obtained with a double tone slot for each noteplayed. An extensive use of stereo sound will reduce the global polyphony.(LDM): LIVE DRUM MODELING On these acoustic drum sets some percussions plays randomlywith <strong>di</strong>fferent samples and/or sound nuances on the same instrument (such as Snare , Rim shot ,Claps, Snap), thus enhancing the natural feel of a live drummer’s performance.(FXV): EFX INSERT VOICE The latest 8 Voices of SD1000 Sound List (on the bottom of thisguide) are obtained applying an EFX insert module (such HQ Distortion, Overdrive, Phaser, Chorusand others). A smart use of the EFX Inserts will permit you to raise the sound quality of yourmusical works.OTHER FEATURESDSP: For those of you who have already worked with multi-timbre sound modules, you will alreadyknow that the DSP’s (effects and sound post-treatment) are integral part of these systems, whichare used via the various controllers and/or Sys Exclusive.Here is SD1000 Routing:However, you will be interested to know that together with the typical sections of Reverb andChorus , you will also find other DSP effects, such as:Rotary: with Rate and Depth controls.Wha Wha: Amount. This controls the intensity of the Wha effect on the track.HQ Distortion: Type, Drive, Gain (Available only on Insert #1 EFX).2 x Insert EFX: Chorus, Flanger , Phaser , Tremolo , 4 Band Parametric EQ , Compressor and Delay efx.Advice: You could use (at most) 2 <strong>di</strong>fferent Insert an all available tracks.The Master Control section also envisages the following controls:Tune: This controls the general tune of the module (Data Value).Arabic Scale: This controls the intervals for the Arabic scale (Data Value).Global Transposer: Global transposition of the instrument (Data Value).18
Manuel d’instructionFCONSEILS DE SECURITEINSTRUCTIONS CONCERNANT LES RISQUES D’INCENDIE, LES DECHARGESELECTRIQUES OU LES RISQUES D’ACCIDENTS PERSONNELS.Conseil: pour éviter les risques d’incen<strong>di</strong>e ou de décharges électriques, n’exposez pas l’instrumentà la pluie ou à l’humi<strong>di</strong>té.C0NSEILS IMPORTANTS DE SECURITE ET D’INSTALLATIONAVIS - oute utilisation de produits électriques exige que l’on prenne des précautions fondamentalesdont les principales sont énumérées ci-dessous:<strong>•</strong> Avant d’utiliser cet instrument, lisez attentivement le mode d’emploi.<strong>•</strong> L’instrument ne peut être utilisé par des enfants que sous le contrôle d’un adulte.<strong>•</strong> N’utilisez pas l’instrument au voisinage de l’eau comme par exemple près d’unévier, d’une piscine, sur une surface mouillée, etc.<strong>•</strong> Cet instrument ne peut être utilisé que monté sur un support agréé par le fabricant.<strong>•</strong> Ne jouez pas trop longtemps à plein volume: le bruit excessif est nuisible à la santé.<strong>•</strong> Placez l’instrument de manière à ce qu’il soit bien ventilé.<strong>•</strong> Placez l’instrument loin de sources de chaleur telles que ra<strong>di</strong>ateurs, poêles etc.<strong>•</strong> L’instrument doit être connecté au réseau électrique en utilisant seulement l’adaptateur secteur.Les caractéristiques d’identification et d’alimentation sont sous l’instrument.<strong>•</strong> Si vous n’utilisez pas votre instrument pendant de longues périodes, débranchez le câbled’alimentation.<strong>•</strong> En cas de nécessité, pour déconnecter l’instrument de l’alimentation actionner l’interrupteur quise trouve sur la partie arrière.<strong>•</strong> Pour brancher votre instrument à la ligne électrique, utilisez le câble fourni. Vous trouverez lesdonnées d’identification et d’alimentation sur le fond de l’instrument.<strong>•</strong> Si vous n’utilisez pas votre instrument pendant de longues périodes, débranchez le câble d’alimentation.<strong>•</strong> Attention à ne pas faire tomber d’objets ou de liquides à l’intérieur du châssis.<strong>•</strong> N’hésitez pas à porter votre instrument dans un service après-vente:a. L’adaptateur secteur est endommagé.b. Si des objets ou du liquide sont tombés à l’intérieur.c. S’il a été exposé à la pluie.d. S’il ne semble pas fonctionner correctement ou s’il est moins performant.e. S’il est tombé ou si son châssis est endommagé.<strong>•</strong> Ne tentez pas de réparer vous-même votre instrument; faites toujours appel à unprofessionnel.CONSERVEZ CES INSTRUCTIONS19
COMMENT RESOUDRE LE PROBLEME DES PARASITES RADIO/T.V.Cet instrument fonctionne sur la même bande que les fréquences ra<strong>di</strong>o et s’il n’est pas installécorrectement et conformément aux instructions fournies, il peut perturber la réception des appareilsra<strong>di</strong>o et télé. Bien qu’il ait été conçu conformément aux réglementations existantes en la matièreet bien que des protections adéquates aient été prévues contre ces inconvénients, il n’est pasexclu que des problèmes de ce genre puissent se produire. Pour vérifier si les parasites sont bienprovoqués par l’instrument, contrôlez si quand vous l’éteignez, les perturbations <strong>di</strong>sparaissent.Rallumez-le ensuite et si c’est votre instrument qui cause les parasites, procédez comme suit:<strong>•</strong> Orientez l’antenne de votre récepteur ra<strong>di</strong>o ou TV.<strong>•</strong> Changez l’instrument de place par rapport au récepteur ra<strong>di</strong>o ou TV.<strong>•</strong> Eloignez l’instrument du récepteur.<strong>•</strong> Branchez la fiche de l’instrument dans une autre prise de manière à ce que l’instrument et lerécepteur soient connectés à deux circuits <strong>di</strong>fférents.<strong>•</strong> Si besoin est, consultez un professionnel.ALIMENTATION<strong>•</strong> Quand vous connectez votre instrument à d’autres appareils (amplificateur, mixer, autresinstruments MIDI, etc.), veillez à ce que toutes les unités soient éteintes.<strong>•</strong> Lisez les conseils concernant le problème des parasites Ra<strong>di</strong>o et TV.SOIN DE L’INSTRUMENT<strong>•</strong> Les surfaces externes de l’instrument doivent être nettoyées avec un chiffon doux et sec.N’utilisez jamais d’essence, de <strong>di</strong>luants ou de solvants en général.AUTRES PRECAUTIONSSi vous désirez utiliser votre instrument dans un pays étranger et que vous avez des doutes aupoint de vue type d’alimentation, consultez auparavant un technicien qualifié. L’instrument ne doitjamais subir de fortes secousses.ADAPTATEUR SECTEURPour connecter cet instrument à la prise de courant électrique, utiliser exclusivement l’adaptateursecteur KETRON fourni avec l’instrument. L’utilisation d’autres adaptateurs pour le courant alternatifpourrait endommager les circuits de puissance de l’instrument. Par conséquent, il est très importantd’utiliser les adaptateurs originaux et de demander le type approprié si vous devez le commanderà nouveau.INFORMATIONS AUX UTILISATEURS“Mise en œuvre des Directives 2002/95/CE, 2002/96/CE et 2003/108/CE, relatives à la limitation del’utilisation de certaines substances dangereuses dans les équipements électriques et électroniques, ainsiqu’à l’élimination des déchets.” Le symbole de la poubelle barrée d’une croix apposé sur l’équipementin<strong>di</strong>que que le produit, au terme de sa vie utile, doit être collecté séparément par rapport aux autres déchets.L’utilisateur devra, par conséquent, porter l’équipement qui est arrivé au terme de sa vie utile aux centres decollecte sélective des déchets électroniques et électrotechniques, ou bien il devra le rendre au revendeur aumoment de l’achat d’un nouvel équipement du même type, en raison de un contre un. Lacollecte sélective appropriée en vue de l’acheminement uccessif de l’équipement mis aurebut vers le recyclage, le traitement et l’élimination respectant l’environnement contribueà éviter de possibles effets néfastes sur l’environnement et la santé et favorise le recyclagedes matériaux dont est composé l’équipement. L’élimination non autorisée du produit dela part de l’utilisateur entraîne l’application des sanctions administratives prévues.20
INTRODUCTIONMerci pour avoirs choisi le nouveau KETRON SD1000 Professional Sound Module.Le SD1000 représent e une intégration intéressante dans le secteur des modules sonores en termesde performances musicales grâce à son aspect compact. En fait, en plus de toutes les sonoritéstimbriques dont il <strong>di</strong>spose en vue d’une excellente reproduction des fichiers musicaux sous le formatGeneral Mi<strong>di</strong> standard et Kar, le SD1000 possède également des Banques de son ad<strong>di</strong>tionnellesavec une incroyable variété de Voix orchestrales: Grand Piano Stereo sur 88 notes, Guitaresacoustiques et électriques, Cuivres et Saxophones d’une qualité unique, Orgues échantillonnés,Accordéons, Basses, Strings, Drum Sets acoustiques et électroniques etc. En outre le SD1000 estpourvu d’une quantité remarquable de Loops au<strong>di</strong>o de Batterie et Percussions sub<strong>di</strong>visées dansles genres musicaux les plus <strong>di</strong>vers, lesquels permettent certainement au SD1000 de se <strong>di</strong>stinguerde tous les autres modules similaires présents sur le marché. Les applications du SD1000 peuventêtre exploitées au maximum si on l’associe à un player MIDI (comme par ex. le KETRON MIDJAY)ou à des séquenceurs sur or<strong>di</strong>nateur (Logic®, Cubase®, Cakewalk® et d’autres), mais on peutle raccorder également à des claviers Maîtres ou à des Claviers à fonctions multiples (Arrangeur,Synthétiseur, pianos Numériques, etc.).Avant d’utiliser Votre SD1000, nous vous prions de lire attentivement toutes les instructions dansle but d’obtenir les meilleures performances possibles et d’assurer une longue vie à l’instrument.Conserver soigneusement ce mode d’emploi en vue d’ultérieures consultations futures.CONTENU DU PACKLe pack original de Votre SD1000 ntient le matériel suivant:a) SD1000b) Mode d’ emploic) Alimentateur DC 9 VoltsMatériel Optionnel: Câble Mi<strong>di</strong> to USB. Il sera in<strong>di</strong>spensable en vue de l’utilisation du SD1000avec un or<strong>di</strong>nateur portable car ces derniers ne <strong>di</strong>sposent pas d’une interface Mi<strong>di</strong> (à moins que l’onn’ait installé des cartes tels que Firewire, USB, etc). Ce câble permettra, à travers la connexion USB,de communiquer des données mi<strong>di</strong> à partir de votre or<strong>di</strong>nateur vers le mi<strong>di</strong> In du SD1000.MISE SOUS TENSIONPour allumer le SD1000 il suffit de connecter l’adaptateur secteur Le led sur le panneau frontalin<strong>di</strong>que que l’instrument est prêt immé<strong>di</strong>atement en vue du fonctionnement.1 On / Off: Interrupteur général du SD1000. Le ledallumé in<strong>di</strong>que que l’instrument est en marche. En casd’activité Mi<strong>di</strong> in entrée le led clignotera .2 Volume: Contrôle par curseur pour le volume duSD1000. Ce volume agit aussi sur la sortie Headphone.3 Headphone: Connexion pour casque stéréo à faibleimpédance.21
CONNEXIONS4 Mi<strong>di</strong> In / Thru: Connexion Mi<strong>di</strong> In et Thru de SD1000. Raccorder le Mi<strong>di</strong> In de SD1000 auMi<strong>di</strong> out de l’or<strong>di</strong>nateur, du Mi<strong>di</strong> player ou du clavier Maître. Il faut utiliser la connexion Thru pourrelancer la copie du Mi<strong>di</strong> In à un autre <strong>di</strong>spositif (par ex. Expandeur). Le Thru n’est pas <strong>di</strong>sponiblelorsque l’on utilise l’USB mi<strong>di</strong>.NB: Il est déconseillé d’utiliser les ports mi<strong>di</strong> en collaboration avec l’USB Mi<strong>di</strong>.5 Out L / R: Sorties au<strong>di</strong>o Left et Right à raccorder au mélangeur ou à l’amplificateur au<strong>di</strong>o.6 Power Dc In: Connexion pour l’alimentateur DC 9 V du SD1000.7 USB: Port USB pour connexion à l’or<strong>di</strong>nateur.CONSEILS EN VUE DE L’UTILISATIONDans ce paragraphe nous avons l’intention de Vous suggérer comment il faut utiliser, selon nos,le SD1000 afin que celui-ci puisse Vous offrir le mieux de ses possibilités lors des applicationsmusicales.HOME STUDIO (avec or<strong>di</strong>nateur, séquenceur ou players externes)Dans ce contexte le SD1000 peut vraiment exprimer le maximum de ses potentialités. Il peut êtreraccorder à votre or<strong>di</strong>nateur (Pc ou Mac) à l’aide du câble Mi<strong>di</strong> (si vous <strong>di</strong>sposez déjà d’une carteavec interface Mi<strong>di</strong>) ou bien à l’aide du câble Mi<strong>di</strong> to Usb fourni comme accessoire optionnel parKETRON. Si vous utilisez des programmes de séquenceur musical tels que Cubase®, Logic®,Cakewalk® ou semblables), vous serez en mesure d’introduire avec succès le SD1000 dans vostraitements musicaux (fichiers Mi<strong>di</strong>, Jingles, Mix Au<strong>di</strong>o, etc.) en exploitant au mieux sa grandeversatilité musicale.Dans Votre SD1000, outre aux timbres qui fontdésormais partie des références Standard (GM) voustrouverez d’autres Sound Banks avec beaucoup desonorités caractéristiques des familles tra<strong>di</strong>tionnelles(Pianos, Strings, Saxophone, Cuivres etc). Maiscertainement la caractéristique qui <strong>di</strong>stingue leSD1000 par rapport à d’autres modules est liée à laprésence d’innombrables Loops au<strong>di</strong>o (Drum Loopstéléchargeables gratuitement sur le site www.ketron.it). Imaginez que vous introduisez ces Loops dans Voscréations musicales... ces dernieres peuvent enrichir,ou même remplacer, la rythmique de Vos morceaux etpourraient faire la <strong>di</strong>fférence par rapport à tout ce que avez élaboré jusqu’à maintenant dans lecadre des fichiers Mi<strong>di</strong>! Un seul petit exemple. Imaginez un fichier Mi<strong>di</strong> de musique caraïbe, oùsouvent nous sommes habitués à écouter des parties de percussions latines peu convaincantes.Nous allons appliquer certains des Patterns <strong>di</strong>sponibles en les ajoutant (ou encore mieux en les22
emplaçant) à la piste Drum Existante (Copier & Coller). A travers quelques opérations nous serons enmesure de remplacer la structure rythmique Mi<strong>di</strong> par des Loops au<strong>di</strong>o et le résultat sera surprenant.Naturellement une fois que Votre fichier musical sera complété, si vous le sauvegardez sous leformat qui vous plaît le plus, vous pourrez le reproduire à l’aide de n’importe quel séquenceur ouMi<strong>di</strong> player (par ex. MIDJAY ou un autre semblable) en le raccordant à Votre SD1000. On a remarquéque l’or<strong>di</strong>nateur portable est toujours plus utilisé dans le monde du <strong>di</strong>vertissement musical pourla reproduction des fichiers Mi<strong>di</strong>. Mais souvent même si on <strong>di</strong>spose d’une carte son intégrée dansl’or<strong>di</strong>nateur, on remarque que ces cartes présentent peu de sons et d’une qualité modeste. Mêmedans ce cas nous pensons que l’utilisation du SD1000, à la place des cartes internes, peut constituéune remarquable opportunité.CLAVIER MIDI (clavier Maître, Arrangeur, Accordéon, etc.)On peut utiliser le SD1000 come module supplémentaire pour enrichir la palette des timbres deVotre clavier. L’association du SD1000 au claviers Maîtres n’étant pas pourvus de sons ou auxactuels claviers ‘mini remote’ (claviers multimé<strong>di</strong>as) toujours plus utilisés dans le live set sont toutaussi in<strong>di</strong>quées. Nous estimons qu’un module sonore si puissant et aux <strong>di</strong>mensions si réduites peutcertainement faire partie de Votre panoplie musicale.REMARQUES SUR LE FONCTIONNEMENTComme vous aurez déjà remarqué le SD1000 se présente avec les connexions externes (décrites cidessus),et avec un seul contrôle de Volume général pour les Sorties postérieures et pour le Casque.Il est évident que toutes les autres interventions pouvant déterminer une mo<strong>di</strong>fication du Timbre,du Volume, du Réverb, des Effets etc. doivent avoir lieu à travers des messages MIDI.Pour ceux qui connaissent déjà ce type d’E<strong>di</strong>tion il suffira d’observer le tableau des implémentationsMIDI du SD1000 pour pouvoir gérer les Sons de l’instrument dans toutes ses potentialités.Pour ceux qui sont un peu moins expérimentés nous avons mis à leur <strong>di</strong>sposition sur le site www.ketron.it (téléchargeables gratuitement) une série de fichiers avec la configuration de la Mappe dessons que l’on peut utiliser lorsqu’on travaille avec les programmes de séquenceur et de notationmusicale les plus connus, comme Cubase®, Logic®, Cakewalk® ou semblables.COMMENT UTILISER LES AUDIO DRUM LOOPSOn peut télécharger les Drum Au<strong>di</strong>o Loops pour SD1000 sur le site www.ketron.it. Les fichiers seprésentent à travers une série de Folders (dossiers) classés par typologie musicale (Salsa, Cha,Merengue, Jazz, etc.).Il s’agit en fait de fichiers Mi<strong>di</strong> contenant les informations pour exécuter les Patterns rythmiques des<strong>di</strong>vers Loops contenus dans la génération sonore du SD1000.Pour avoir une idée plus claire des possibilités sonores que ces loops offrent nous vous conseillonsd’écouter les Demo .mid contenus dans les dossiers se référant aux <strong>di</strong>verses Cadences musicales.Nous vous rappelons que ces patterns contiennent toutes les informations nécessaires (programchange, volume, etc.) pour êtres exécutés immé<strong>di</strong>atement sans aucun besoin de réglagesultérieurs.INFORMATIONS IMPORTANTES SUR LA LISTE DES SONSDans la liste des sons du SD1000 (à la fin de ce manuel) vous trouverez quelques remarquesassociées à quelques Voices. Ces remarques vous aideront à mieux comprendre la manière aveclaquelle elles ont été obtenues pour une meilleure utilisation dans vos prestations musicales.23
(M): MULTIVOICE Ces sons sont obtenus avec deux ou plusieurs voix en même temps. Uneutilisation excessive de celles-ci réduira la polyphonie globale du SD1000 de manière sensible.Quelques-uns de ces sons pourraient avoir une réponse <strong>di</strong>fférente dans le Panorama stéréo sonoreen utilisant des timbres <strong>di</strong>fférents associés à la position gauche ou droite du Panoramique.(ST): STÉRÉO Ces sons sont réellement stéréo car ils ont été réalisés avec deux timbres pourchaque notes jouée. Dans ce cas aussi un usage excessif de ces sons causera une réduction de lapolyphonie globale du SD1000.(LDM): LIVE DRUM MODELING Dans ces Drum sets quelques instruments (comme le Snare,Rim shot, Claps ou autre) jouent avec des samples <strong>di</strong>fférents sur le même timbre. Ces samples sontadressés de manière aléatoire pour reproduire au mieux les variables sonores d’une performancelive rythmique.(FXV): EFX INSERT VOICE Les 9 dernières Voices énumérés dans la liste des sons du SD1000 (àla fin de ce manuel ) sont obtenues en utilisant des effets (comme HQ Overdrive, Chorus et autre)dans le mode Insert EFX pour vous donner un exemple des potentialités sonores du SD1000.AUTRES CARACTÉRISTIQUESDSP: Ceux qui ont déjà eu l’occasion de travailler avec ces modules de sons multi-timbriquessavent bien que la dotation des DSP (effets et post-traitement sonore) fait partie intégrante de cessystèmes qui doivent être utilisés à travers les <strong>di</strong>vers contrôleurs et / ou Sys Exclusive.Ici le routage du SD1000:Cependant il nous semble intéressant d’ajouter que, outre aux sections typiques de Reverb etChorus , vous trouverez d’autres effets DSP tels que:Rotary: avec des contrôles de Rate et Depth.Wha Wha: Amount. Contrôle l’intensité de l’effet Wha sur la piste.HQ Distortion: Type, Drive, Gain (Disponible seulement sur l’Insert #1).2 x Insert EFX: Chorus, Flanger , Phaser , Tremolo , 4 Band Parametric EQ , Compressor et Delay efx.N.B: Il est possible d’utiliser (comme limite maximum) 2 Inserts de type <strong>di</strong>fférent sur toute les pistes<strong>di</strong>sponibles.Dans la Section Master Control on a prévu en outre les contrôles suivants:Tune: Contrôle d’accordement général du module (Data Value).Arabic Scale: Contrôle des intervalles pour l’échelle arabe (Data Value).Global Transposer: Transposition globale de l’instrument (Data Value).24
Manuel de InstruccionesEMEDIDAS DE SEGURIDADINSTRUCCIONES RELACIONADAS CON LOS RIESGOS DE INCENDIO,DESCARGAS ELÉCTRICAS O DAÑOS A LAS PERSONAS.Advertencia: para reducir los riesgos de incen<strong>di</strong>o o de descargas eléctricas, no exponga elinstrumento a la lluvia o humedad.INSTRUCCIONES IMPORTANTES PARA LA SEGURIDAD Y LA INSTALACIÓNADVERTENCIA - Al utilizar aparatos eléctricos Ud. debe seguir algunas precauciones básicas como:<strong>•</strong> Antes de utilizar el instrumento lea atentamente el <strong>manual</strong>.<strong>•</strong> Cuando el instrumento sea utilizado por niños se recomienda la presencia de un adulto.<strong>•</strong> No use el instrumento en ambientes donde pueda estar expuesto a goteo o salpicadurasde agua, como por ejemplo al lado de un lavabo, una piscina, en una superficie mojada etc., y noapoye sobre el instrumento recipientes con líquidos que podrían penetrar en su interior.<strong>•</strong> El instrumento debe ser utilizado sólo sobre un soporte recomendado por el fabricante.<strong>•</strong> No utilice el aparato durante mucho tiempo a elevado volumen: el sonido demasiado alto esperju<strong>di</strong>cial para la salud.<strong>•</strong> El instrumento se debe colocar en una posición que permita su adecuada ventilación.<strong>•</strong> El instrumento se debe ubicar lejos de fuentes de calor como termosifones, estufas, etc.<strong>•</strong> El aparato debe estar conectado a la red eléctrica me<strong>di</strong>ante el cable de alimentación deladaptador de datos <strong>di</strong>identificazione y el poder están bajo el instrumento.<strong>•</strong> Cuando el instrumento no se utilice durante un período de tiempo prolongado, se debedesconectar el cable de alimentación.<strong>•</strong> En caso de necesidad, para desconectar el interruptor de alimentación del instrumento deaccionamiento que se encuentra en la parte delantera. Deberá colocar el instrumento para poderacceder fácilmente a <strong>di</strong>cho interruptor.<strong>•</strong> L’instrumento deberá enviarse a un centro de asistencia técnica cuando:a. El adaptador de red y ‘dañado.b. Hayan caído objetos o algún líquido dentro del instrumento.c. Haya sido expuesto a la lluvia.d. Parezca no funcionar normalmente o demuestre una evidente <strong>di</strong>sminución de sus prestaciones.e. Se haya caído o la caja esté dañada.<strong>•</strong> No intente reparar el instrumento Ud. mismo; cualquier tipo de operación debe ser efectuadapor personal especializado.CONSERVE ESTAS INSTRUCCIONES25
ANULACIÓN DE INTERFERENCIAS DE RADIO/TVEste instrumento funciona en la banda de las ra<strong>di</strong>ofrecuencias y si no se instala correctamente yrespetando estrictamente las instrucciones puede causar interferencias en la recepción de aparatosde ra<strong>di</strong>o y televisión. No obstante el <strong>di</strong>seño se haya efectuado siguiendo las normas vigentes yprevea efectivas protecciones contra tales inconvenientes, no existen garantías de que un eventosimilar no pueda producirse. Para verificar que la interferencia está generada por el instrumentomismo, pruebe a apagarlo y controle si la interferencia desaparece. Luego vuelva a encenderloy verifique que el instrumento sea la causa de la interferencia, en ese caso, adopte una de lassiguientes me<strong>di</strong>das:<strong>•</strong> Cambie la orientación de la antena del receptor ra<strong>di</strong>o o TV.<strong>•</strong> Cambie la posición del instrumento respecto al receptor ra<strong>di</strong>o o TV.<strong>•</strong> Aleje el instrumento del receptor.<strong>•</strong> Conecte el instrumento a otra toma para que el instrumento y el receptor estén conectados ados circuitos <strong>di</strong>ferentes.<strong>•</strong> Si fuera necesario, consulte personal especializado.ALIMENTACIÓN<strong>•</strong> Cuando se conecta el instrumento a otros equipos (amplificador, mixer, otros instrumentosMIDI, etc.), verifique que todas las unidades estén apagadas.<strong>•</strong> Lea los consejos sobre interferencias de Ra<strong>di</strong>o y TV.CUIDADOS DEL INSTRUMENTO<strong>•</strong> Las superficies externas del instrumento se deben limpiar solamente con un paño suave y seco.No utilice nunca bencina o <strong>di</strong>solventes en general.OTRAS PRECAUCIONESSi desea utilizar el instrumento en un país extranjero y tiene dudas sobre la alimentación eléctrica,consulte precedentemente un técnico especializado. El instrumento no se debe someter nunca afuertes sacu<strong>di</strong>das.ADAPTADOR DE REDPara conectar el equipo a la alimentación de CA, utilice sólo el adaptador de corriente suministradocon el instrumento KETRON decir lo mismo. El uso de otros adaptadores para corriente alterna podríaprovocar daños en los circuitos de potencia del instrumento. Por consiguiente, es fundamental usarlos adaptadores originales y pe<strong>di</strong>r el tipo correcto en caso de tener que pe<strong>di</strong>rlo de nuevo.INFORMACIONES PARA LOS USUARIOS”Actuación de las Directivas 2002/95/CE, 2002/96/CE y 2003/108/CE sobre restricciones a la utilizaciónde determinadas sustancias peligrosas en aparatos eléctricos y electrónicos y sobre residuos de aparatoseléctricos y electrónicos.” El símbolo del contenedor de basura tachado in<strong>di</strong>ca que el producto alfinal de su ciclo de vida está sujeto al principio de recogida selectiva de los equipos eléctricos yelectrónicos. Por consiguiente, el usuario deberá entregar el aparato al final de su ciclo de vidaa centros de recogida selectiva de los residuos electrónicos y electrotécnicos, o devolverlo al<strong>di</strong>stribuidor al comprar un aparato nuevo de tipo equivalente, sin pagar nadapor la entrega. La recogida selectiva adecuada para efectuar el tratamiento y laeliminación posterior del aparato de forma compatible con el me<strong>di</strong>o ambientecontribuye a evitar posibles efectos negativos sobre el me<strong>di</strong>o ambiente y sobrela salud y favorece el reciclaje de los materiales que componen el aparato. Laeliminación ilegal del producto por parte del usuario comporta la aplicación de lassanciones administrativas contempladas.26
INTRODUCCIÓNLe damos las gracias por haber elegido el nuevo KETRON SD1000 Professional Sound Module.El SD1000 representa una integración interesante en el campo de los módulos sonoros en cuantoa <strong>di</strong>mensiones y a prestaciones musicales se refiere. De hecho, junto a todas las sonoridadestímbricas necesarias para obtener una reproducción óptima de los ficheros musicales en el formatoGeneral Mi<strong>di</strong> standard y Kar, el SD1000 presenta también otros Bancos de sonido a<strong>di</strong>cionales conuna increíble variedad de Voces de orquesta: Grand Piano Stereo en 88 notas, Guitarras acústicas yeléctricas, Brass y Saxófonos de calidad única, Órganos muestreados, Acordeones, Bajos, Strings,Drum Sets acústicos y electrónicos, etc. Además el SD1000 cuenta con una importante cantidadde Loops au<strong>di</strong>o de Batería y Percusiones sub<strong>di</strong>vi<strong>di</strong>dos en los géneros musicales más <strong>di</strong>versificados,los cuales, sin lugar a dudas, <strong>di</strong>ferencian el SD1000 respecto a los restantes módulos similarescomercializados en la actualidad. El top de las aplicaciones del SD1000 es combinarlo con unreproductor MIDI (como por ejemplo KETRON MIDJAY) o con sequencers en PC (Logic®, Cubase®,Cakewalk® y otros), aunque puede conectarse también con Master keyboards, o teclados multipurpose(Arranger, Synth, Digital pianos, etc.).Antes de utilizar su SD1000, lea detenidamente todas las instrucciones para obtener las mejoresprestaciones y una larga duración del instrumento.Guarde este <strong>manual</strong> en un lugar seguro para consultarlo posteriormente.CONTENIDO DEL PAQUETEEl paquete original de su SD1000 contiene el siguiente material:a) SD1000b) Manual de usoc) Alimentador DC 9 VoltsOpcional: Cable Mi<strong>di</strong> para USB. Es in<strong>di</strong>spensable para usar el SD1000 con un Laptop porque,precisamente, los ordenadores portátiles no tienen una interfaz Mi<strong>di</strong> propia (a no ser en casode tarjetas a<strong>di</strong>cionales: Firewire, USB, etc.).Este cable permitirá me<strong>di</strong>ante la conexión USB la comunicación de los datos mi<strong>di</strong> de suordenador portátil con el mi<strong>di</strong> In del SD1000.ENCENDIDOPara encender el SD1000, sólo debe conectar el alimentador de la dotación a la corriente. El led enel panel delantero muestra el inme<strong>di</strong>ato funcionamiento del instrumento.1 On / Off: Interruptor general del SD1000. El ledencen<strong>di</strong>do in<strong>di</strong>ca que el instrumento está funcionando.En caso de presencia de señales Mi<strong>di</strong> en entrada, el ledparpadeará.2 Volume: Control con slider para el volumen generaldel SD1000. Este volumen influye también en la salidaHeadphone.3 Headphone: Conexión para auriculares estéreocon baja impedancia.27
CONEXIONES4 Mi<strong>di</strong> In / Thru: Conexión Mi<strong>di</strong> In y Thru de SD1000. Conecte el Mi<strong>di</strong> In de SD1000 al Mi<strong>di</strong> outdel PC, del Mi<strong>di</strong> player o del Master keyboard. La conexión Thru se usa para enviar la copia del Mi<strong>di</strong>In a otro <strong>di</strong>spositivo (por ej. Expander). El Thru no está ‘<strong>di</strong>sponible cuando se utiliza el mi<strong>di</strong> USBNota: No se recomienda el uso de puertos MIDI en conjunto con el Mi<strong>di</strong> USB.5 Out L / R: Salidas au<strong>di</strong>o Left y Right para conectar al mixer o a un amplificador au<strong>di</strong>o.6 Power Dc In: Conexión para el alimentador DC 9 V de SD1000.7 USB: Puerto USB para conexión a la computadora.CONSEJOS PARA LA UTILIZACIÓNEn este párrafo queremos aconsejarle cómo utilizar el SD1000 para ofrecerle las mejoresposibilidades en las aplicaciones musicales.HOME STUDIO (con ordenadores, sequencers o reproductores externos)En este marco el SD1000 puede alcanzar verdaderamente sus máximas potencialidades. Puedeconectarlo a su ordenador (Pc o Mac) me<strong>di</strong>ante el cable Mi<strong>di</strong> (si tiene ya una tarjeta con interfazMi<strong>di</strong>) o bien me<strong>di</strong>ante el cable Mi<strong>di</strong> to Usb, suministrado como accesorio opcional por parte deKETRON. Utilizando programas de sequencer musical (tales como Cubas®, Logic®, Cakewalk®o similares) podrá ingresar con éxito el SD1000 en sus elaboraciones musicales (Ficheros Mi<strong>di</strong>,Jingles, Mix Au<strong>di</strong>o, etc.) aprovechando al máximo su gran versatilidad sonora.En su SD1000, junto a los timbres que son parte delas referencias estándares (GM), hallará algunos SoundBanks con numerosas sonoridades características en lasfamilias tra<strong>di</strong>cionales (Pianos, Strings, Sax, Brass, etc.).Aunque seguramente la característica que destaca elSD1000 en relación a otros módulos sonoros son losinnumerables Loops au<strong>di</strong>o (drum loops que puedebajarse gratuitamente de la página web www.ketron.it). Imagínese que puede introducir estos Loops ensus creaciones musicales ... ¡éstos pueden enriquecer,y hasta sustituir, la rítmica de sus piezas y podríanmarcar la <strong>di</strong>ferencia con todo lo elaborado hasta ahoraen el campo de los ficheros Mi<strong>di</strong>!Solamente un pequeño ejemplo. Imagínese un fichero Mi<strong>di</strong> de música caribeña, que nos tiene tanacostumbrados a oír partes de percusiones latinas no demasiado buenas. Aplicamos algunos de losPatterns <strong>di</strong>sponibles en la base de datos de los Loops a<strong>di</strong>cionales (o mejor aún en sustitución) dela pista Drum existente (copy & paste).Con poquísimas operaciones podremos sustituir la estructura rítmica Mi<strong>di</strong> con Loops au<strong>di</strong>o y elresultado será sorprendente.28
Naturalmente, tras completar su fichero musical, guardándolo en el formato que elija podráreproducirlo con cualquier sequencer o Mi<strong>di</strong> player (por ej. MIDJAY o similar) conectándolo a suSD1000. La utilización del laptop es cada vez mayor en el mundo del entertainment musical para lareproducción de los ficheros Mi<strong>di</strong>. Aunque la ventaja de <strong>di</strong>sponer de una tarjeta musical integrada enel ordenador suele penalizarse porque <strong>di</strong>chas tarjetas tienen pocos sonidos y de calidad modesta.Aunque en este caso pensamos que la utilización del SD1000, para sustituir las tarjetas internas,puede representar una gran oportunidad.TECLADO MIDI (Master keyboard, Arranger, Acordeón, etc.)El SD1000 puede utilizarse como un módulo suplementario para enriquecer la gama tímbrica de suteclado. Igualmente in<strong>di</strong>cada resulta la combinación del SD1000 con Master keyboards no dotadosde sonidos o con los actuales mini remote keyboards (teclados multime<strong>di</strong>a), cada día más utilizadosen el live set. Pensamos que un módulo sonoro tan potente y con <strong>di</strong>mensiones tan contenidaspuede, sin lugar a dudas, entrar a formar parte de su set up musical.NOTAS SOBRE EL FUNCIONAMIENTOComo habrá notado el SD1000 se presenta con las conexiones externas (descritas anteriormente),y con un único control de Volumen general para las salidas traseras y para los auriculares.Obviamente, todas las demás intervenciones que pueden determinar una mo<strong>di</strong>ficación del Timbre,del Volumen, del Reverbero, de los Efectos, etc deben producirse me<strong>di</strong>ante mensajes MIDI.Para las personas que conozcan ya este tipo de E<strong>di</strong>ting será suficiente observar la tabla de lasimplementaciones MIDI del SD1000 para poder utilizar los Sonidos del instrumento aprovechandotodas sus potencialidades.Para los menos expertos hemos puesto a <strong>di</strong>sposición en la página web www.ketron.it una seriede ficheros con la configuración del Mapa de los sonidos (que puede bajarse gratuitamente) quese pueden utilizar trabajando con los programas más conocidos de sequencers y notas musicales,como Cubase®, Logic®, Cakewalk® o similares.CÓMO UTILIZAR LOS AUDIO DRUM LOOPSPuede bajarse los Drum Loops para el SD1000 de la página web www.ketron.it.Los ficheros se presentan con una serie de Folders (carpetas) catalogadas por tipología musical,(Salsa, Cha, Merengue, Jazz, etc.).En definitiva se trata de ficheros Mi<strong>di</strong> que contienen las informaciones para realizar los Patternsrítmicos de los <strong>di</strong>ferentes loops contenidos en la generación sonora del SD1000.Para aclararnos las ideas sobre las posibilidades sonoras que estos loops ofrecen, le sugerimoseschuchar los Demo.mid contenidos en las carpetas de referencia de las <strong>di</strong>ferentes Cadenciasmusicales.Le recordamos que estos patterns contienen en su interior todas las informaciones necesarias(program change, volumen, etc.) para ejecutarlos inme<strong>di</strong>atamente sin ulteriores configuraciones.INFORMACIÓN IMPORTANTE SOBRE LA LISTA DE SONIDOSEn la lista de sonidos del SD1000 (que se encuentra al final de este <strong>manual</strong> encontrarás algunasobservaciones asociadas con el nombre de sonido), a continuación vemos unas siglas que explican cómose estructuran estos sonidos y nos permitirán una optima utilización de nuestra reproducción musical.(M): MULTIVOICE estos sonidos se obtienen con dos o más voces simultáneamente.29
Un uso excesivo de las voces múltiples reducirá la polifonía del SD1000. Además, algunos sonidospueden tener una respuesta de voz <strong>di</strong>ferente en el panorámico estéreo debido a los <strong>di</strong>ferentessonidos asociados en <strong>di</strong>rección izquierdo o derecho.(ST): STEREO Estos sonidos son verdaderas voces estéreo obtenidos con dos sonidos para cadanota tocada. Un uso excesivo del sonido estéreo reducirá la polifonía del SD1000.(LDM): DRUM LIVE MODELO En estos Set de batería algunas percusiones (por ejemplo, Snare,Rim shot, Claps, y otros) suenan con <strong>di</strong>ferentes muestras , estos sonidos con <strong>di</strong>ferentes muestrasvarían el matiz de sonido en el mismo instrumento, aumentando así la sensación de estar tocandouna batería natural en <strong>di</strong>recto.(FXV): EFX INSERT VOICE Los últimos 9 Sonidos de la Lista del SD1000 (en la parte final deeste <strong>manual</strong>) son realizados utilizando efectos (por ejemplo, Distorsión HQ, Phaser, Chorus y otros).Un uso inteligente de las inserciones EFX le permitirá mo<strong>di</strong>ficar la calidad del sonido y obtener unapersonalizada reproducción de sus obras musicales.OTRAS CARACTERÍSTICASDSP: Quienes hayan trabajado anteriormente con módulos de sonido multitímbricos sabrán que ladotación de los DSP (efectos y post tratamiento sonoro) es parte integrante de estos sistemas quese utilizan me<strong>di</strong>ante los <strong>di</strong>ferentes controllers y/o Sys Exclusive.SD1000 Direccionamiento:Sin embargo, consideramos interesante aña<strong>di</strong>r que, junto a las típicas secciones de Reverb,Y Chorus , hallará otros efectos DSP:Rotary: con controles de Rate y Depth.Wha Wha: Amount. Controla la intensidad del efecto Wha en la pista.HQ Distortion: Type, Drive, Gain (Disponible sólo sull’Insert # 1 EFX).2 x Insert EFX: Chorus, Flanger, Phaser, Tremolo, 4 Band Parametric EQ, Compressor e Delay efxNota: Se puede usar (como un límite superior) 2 Inserte un tipo <strong>di</strong>ferente de todas las pistas<strong>di</strong>sponibles.La sección Master Control contempla también los siguientes controles:Tune: Control de acorde general del módulo (Data Value).Arabic Scale: Control de los intervalos para la escala árabe (Data Value).Global Transposer: Transposición global del instrumento (Data Value).30
Manual do ProprietárioPINSTRUÇÕES PARA A SEGURANÇAINSTRUÇÕES RELATIVAS AO RISCO DE INCÊNDIO, CHOQUES ELÉCTRICOOU DANOS PESSOAIS.Advertência: para reduzir o risco de incên<strong>di</strong>o ou choques eléctricos, não exponha o instrumentoà chuva nem à humidade.INSTRUÇÕES IMPORTANTES PARA A SEGURANÇA E A INSTALAÇÃOADVERTÊNCIA - Ao utilizar aparelhos eléctricos, é preciso respeitar algumas precauções básicas,nomeadamente:<strong>•</strong> Antes de utilizar o aparelho, leia com atenção o <strong>manual</strong>.<strong>•</strong> Quando o aparelho for utilizado por crianças, é necessária a presença de umadulto.<strong>•</strong> Não utilize o aparelho nas proximidades de água, como por exemplo: uma lavabo,uma piscina, sobre chão molhado etc.<strong>•</strong> O aparelho deve ser utilizado somente sobre um suporte recomendado pelo fabricador.<strong>•</strong> Não trabalhe durante longos períodos com alto volume : o ruído excessivo é nocivo para asaúde.<strong>•</strong> O aparelho deve ser colocado de maneira que permita uma adequada ventilação.<strong>•</strong> O aparelho deve ser colocado longe de fontes de calor tais como aquecimento, fornos etc.<strong>•</strong> O aparelho deve ser ligado à rede eléctrica somente me<strong>di</strong>ante o cabo fornecido. Os dados deidentificação e para a alimentação estão no fundo do aparelho.<strong>•</strong> Quando o aparelho não for utilizado por longos períodos, o cabo de alimentação deve serremovido da tomada.<strong>•</strong> Em caso de necessidade de desligar o instrumento do transformador, use primeiro o botão ON/OFF na parte de trás do instrumento.<strong>•</strong> A aparelho deve ser levado para um centro de assistência técnica se:a. O Transformador de corrente está avariado.b. Tiver caído dentro objectos ou um líquido.c. Tiver sido exposto à chuva.d. Parecer que não está a funcionar normalmente ou demostrar um evidente pioramentodos desempenhos.e. Tiver caído ou o chassis danificar-se.<strong>•</strong> Não tente consertar sozinho o aparelho; todas as operações devem ser efectuadas por pessoalespecializado.GUARDE ESTAS INSTRUÇÕES31
COMO EVITAR AS INTERFERÊNCIAS EM RÁDIO/TVEste aparelho funciona na faixa de frequências de rá<strong>di</strong>o e se não for instalado correctamente eestreitamente em obe<strong>di</strong>ência das instruções, poderá causar interferências à recepção de aparelhosrá<strong>di</strong>o e televisores. Apesar do projecto ter sido efectuado em conformidade com as normas emvigor e de haver razoáveis protecções contra estes inconvenientes, não há garantias de que talevento não possa verificar-se. Para verificar se a interferência é realmente gerada pelo aparelho,desligue-o e controle se a interferência desaparece.Em seguida, ligueo novamente e depois de ter verificado que este aparelho é a causa da interferência,adopte uma das seguintes me<strong>di</strong>das:<strong>•</strong> Mude a orientação da antena do receptor rá<strong>di</strong>o ou televisor.<strong>•</strong> Mude a posição do aparelho em relação ao receptor rá<strong>di</strong>o ou televisor.<strong>•</strong> Afaste o aparelho do receptor.<strong>•</strong> Ligue a ficha do aparelho a uma tomada <strong>di</strong>ferente, de maneira que o aparelho e o receptorestejam ligados a dois circuitos <strong>di</strong>ferentes.<strong>•</strong> Se for necessário, consulte pessoal especializado.ALIMENTAÇÃO<strong>•</strong> Quando for coligar na alimentação este aparelho ou outra aparelhagem (amplificador, mixer,outros aparelhos MIDI etc.), certifique-se de que todas as unidades estão desligadas.<strong>•</strong> Leia os conselhos relativos à interferência a Rá<strong>di</strong>o e TV.CUIDADOS COM O APARELHO<strong>•</strong> As superfícies exteriores do aparelho devem ser limpadas somente com um pano macio eenxuto. Nunca utilize benzina, <strong>di</strong>luentes nem solventes em geral.OUTRAS PRECAUÇÕESSe desejar utilizar o aparelho num país estrangeiro, e tiver dúvidas sobre a alimentação, primeiroconsulte um técnico qualificado. Este aparelho nunca deve ser agitado forte.TRANSFORMADOR DE CORRENTEPara ligar o instrumento á corrente eléctrica usar somente o transformador de corrente KETRON,que é fornecido com o instrumento.O uso de outros adaptadores para corrente alternada poderia provocar danos nos circuitos depotência do instrumento. Portanto, é de importância fundamental utilizar os adaptadores originaise pe<strong>di</strong>r o tipo correcto caso tivesse que fazer uma encomenda.INFORMAÇÃO PARA OS UTILIZADORES“Aplicação das Directivas 2002/95/CE, 2002/96/CE e 2003/108/CE, relativas à redução do uso desubstâncias perigosas nos equipamentos eléctricos e electrónicos, assim como à eliminação dos resíduos.”O símbolo com o contentor de lixo barrado com uma cruz aplicado no equipamento significa que oproduto no final da respectiva vida útil deve ser tratado separadamente do lixo doméstico. Portanto,o utilizador deverá entregar o aparelho, no fim da vida útil do mesmo, aos centros apropriados detriagem de resíduos electrónicos e electrotécnicos, ou devolvê-los ao revendedor no momento dacompra de um novo aparelho equivalente, na razão de um a um. A adequadarecolha <strong>di</strong>ferenciada para o encaminhamento sucessivo do aparelho à reciclagem,ao tratamento e ao escoamento ambientalmente compatível contribui para evitarpossíveis efeitos negativos sobre o ambiente e a saúde e favorece a reciclagemdos materiais que compõem o aparelho. A eliminação ilegal do aparelho por partedo utilizador implica a aplicação das sanções administrativas previstas.32
INTRODUÇÃOMuito obrigado por te escolhido o novo KETRON SD1000 Professional Sound Module.O SD1000 representa uma interessante integração no sector dos módulos sonoros em termos decompacidade e de performances musicais. De facto, além de possuir todas as sonoridades tímbricasnecessárias para uma óptima reprodução dos ficheiros musicais no formato General Mi<strong>di</strong> standarde Kar, o SD1000 possui também Bancos de som a<strong>di</strong>cionais com uma incrível variedade de Vozesorquestrais: Grand Piano Stereo em 88 notas, Guitarras acústicas e eléctricas, Brass e Saxofones dequalidade única, Órgãos amostrados, Acordeões, Baixos, Strings, Drum Sets acústicos e eléctricosetc.. Demais, o SD1000 está apetrechado com uma notável quantidade de Loops au<strong>di</strong>o de Bateriae Percussões sub<strong>di</strong>vi<strong>di</strong>dos nos mais <strong>di</strong>versos géneros musicais, os quais certamente <strong>di</strong>ferenciamo SD1000 de todos os outros módulos semelhantes existentes no mercado. O SD1000 encontrao top das suas aplicações associado a um player MIDI (tal como por ex. KETRON MIDJAY) ou asequencers no computador (Logic®, Cubase®, Cakewalk® e outros), mas também pode serconectado a Master keyboards ou Teclados multi-purpose (Arranger, Synth, Digital pianos, etc.).Antes de utilizar o seu SD1000, leia com atenção todas as instruções, para obter o melhor dasperformances e para uma longa duração do instrumento.Guarde este <strong>manual</strong> num lugar seguro para consentir ulteriores futuras consultas.CONTEÚDO DO PACKAGEO package original do seu SD1000 contém o seguinte material:a) SD1000b) Manual de utilizaçãoc) Alimentador DC 9 VoltsOpcional: Cabo Mi<strong>di</strong> via USB. Será in<strong>di</strong>spensável para a utilização de SD1000 com um Laptop pelofacto que, os computadores portáteis não possuem uma sua interface Mi<strong>di</strong> (se não no caso deplacas a<strong>di</strong>cionadas tais como Firewire, USB, etc.).Este cabo permitirá, através da conexão USB, a comunicação dos dados mi<strong>di</strong> do seu computadorportátil para o mi<strong>di</strong> In do SD1000 .LIGAÇÃOPara ligar o SD1000 é suficiente conectar o alimentador fornecido à rede. O led no painel frontalvisualiza a ime<strong>di</strong>ata funcionalidade do instrumento.1 On / Off: Interruptor geral do SD1000. O led acesoin<strong>di</strong>ca que o instrumento está em funcionamento. Se sãopresentes sinais Mi<strong>di</strong> na entrada o led piscará.2 Volume: Controlo de slider para o volume geraldo SD1000. Este volume age também na saídaHeadphone.3 Headphone: Conexão para auscultador stereo debaixa impedância.33
CONEXÕES4 Mi<strong>di</strong> In / Thru: Conexão Mi<strong>di</strong> In e Thru <strong>di</strong> SD1000. Ligar o Mi<strong>di</strong> In de SD1000 ao Mi<strong>di</strong> out docomputador, do Mi<strong>di</strong> player ou do Master keyboard. A conexão Thru deve ser utilizada para enviara cópia do Mi<strong>di</strong> In para outro <strong>di</strong>spositivo (por ex. Expander) Mi<strong>di</strong> Thru não é <strong>di</strong>sponivel quando seusa USB MIDI. AVISO: NÃO USAR A PORTA MIDI ENQUANTO O MIDI USB É ACTIVO.5 Out L / R: Saídas au<strong>di</strong>o Left e Right a serem ligadas ao mixer ou amplificador au<strong>di</strong>o.6 Power Dc In: Conexão para o alimentador DC 9 V de SD1000.7 USB: Porta USB para ligação ao computador.CONSELHOS PARA A UTILIZAÇÃONeste parágrafo queremos sugerir-lhe como pensamos que deva ser utilizado o SD1000, paraproporcionar-lhe o melhor das suas possibilidades nas aplicações musicais.HOME STUDIO (com computador, sequencer ou players externos)Neste contexto o SD1000 pode exprimir verdadeiramente o máximo das suas potencialidades.Pode ser ligado ao seu computador (Pc ou Mac) através do cabo Mi<strong>di</strong> (se possuir já uma placacom interface Mi<strong>di</strong>), ou então, através do cabo Mi<strong>di</strong> via Usb fornecido como acessório opcionalda KETRON. Utilizando programas de sequencer musical como Cubase®, Logic®, Cakewalk® ousemelhantes) está em con<strong>di</strong>ções de inserir com sucesso o SD1000 nas suas execuções musicais (Mi<strong>di</strong>files, Jingles, Mix Au<strong>di</strong>o, etc.) usufruindo no melhor dos modos da sua grande versatilidade sonora.No seu SD1000, além dos timbres que já fazem partedas referências Standard (GM), irá encontrar outrosSound Banks com muitas sonoridades típicas nasfamílias tra<strong>di</strong>cionais (Pianos , Strings , Sax , Brass etc).Mas, com certeza, a característica que <strong>di</strong>stingue oSD1000 dos outros módulos sonoros é a presença dosinumeráveis Loops au<strong>di</strong>o (Drum Loops que podem serdescarregados gratuitamente do site www.ketron.it.).Imagine de inserir estes Loops nas suas criaçõesmusicais...esses podem enriquecer, se não até mesmosubstituir, a rítmica dos seus trechos e poderiam fazera <strong>di</strong>ferença com tudo aquilo que executou até agora noâmbito dos Mi<strong>di</strong> files! Apenas um pequeno exemplo.Imagine um Mi<strong>di</strong> file de música caraíba, em que frequentemente estamos habituados a ouvir partesde percussões latinas pouco convincentes. A<strong>di</strong>cione alguns dos Pattern <strong>di</strong>sponíveis na data base dosLoops (ou melhor substitua) da pista Drum existente (Copy & Paste). Com pouquíssimas operaçõesestará em con<strong>di</strong>ções de substituir a estrutura rítmica Mi<strong>di</strong> com Loops au<strong>di</strong>o e o resultado serásurpreendente. Naturalmente uma vez que o seu ficheiro musical estará completado, guardando noformato que lhe for mais conveniente, terá a possibilidade de reproduzi-lo com qualquer sequencer34
ou Mi<strong>di</strong> player (por ex. MIDJAY ou semelhantes) ligando-o ao seu SD1000. A utilização do laptop écada vez mais presente no mundo do entretimento musical para a reprodução dos Mi<strong>di</strong> files. Mas,frequentemente, a vantagem de ter uma placa musical integrada no computador é penalizada pelofacto que tais placas <strong>di</strong>spõem de poucos sons e de baixa qualidade. Também neste caso pensamosque a utilização do SD1000, em substituição das placas internas, possa constituir uma excelenteoportunidade.TECLADO MIDI (Master keyboard, Arranger, Acordeão, etc.)O SD1000 pode ser utilizado como módulo suplementar para enriquecer a palete tímbrica do seuteclado.Muito in<strong>di</strong>cada é também a associação de SD1000 com Master keyboards não dotados de sonsou com os actuais mini remote keyboards (teclados multimé<strong>di</strong>a) cada vez mais utilizados no liveset. Pensamos que um módulo sonoro tão potente e de <strong>di</strong>mensões tão reduzidas possa de certezaentrar a fazer parte do seu set up musical.NOTAS SOBRE O FUNCIONAMENTOComo terá notado o SD1000 apresenta-se com as conexões externas (descritas anteriormente), ecom um único controlo de Volume geral para as Saídas traseiras e para o Auscultador.Naturalmente, todas as outras intervenções que podem determinar uma mo<strong>di</strong>ficação do Timbre, doVolume, da Reverberação, dos Efeitos, etc. devem ser feitas através de mensagens MIDI. Para osque já conhecem este tipo de E<strong>di</strong>ting será suficiente observar a tabela das implementações MIDI doSD1000 para poder gerir os Sons do instrumento em todas as suas potencialidades. Para os menosexperientes pusemos à <strong>di</strong>sposição no site www.ketron.it (podem ser descarregados gratuitamente)uma série de ficheiros com a configuração do Mapa dos sons que se podem utilizar trabalhando comos mais conhecidos programas de sequencer e notação musical (Cubase®, Logic®, Cakewalk®).COMO UTILIZAR OS AUDIO DRUM LOOPSOs Drums Au<strong>di</strong>o Loops para SD1000 podem ser descarregados do site www.ketron.it. Os ficheirosapresentam-se com uma série de Folders (pastas) catalogados por tipo musical (Salsa, Cha,Merengue, Jazz, etc.). Trata-se, em resumo, de Mi<strong>di</strong> files que contêm as informações para executaros Pattern rítmicos dos vários Loops contidos na geração sonora do SD1000. Para ter uma ideiamais clara das possibilidades sonoras que estes loops oferecem, sugerimos-lhe de ouvir osDemo.mid contidos nas pastas de referência das <strong>di</strong>versas Cadências musicais.Recordamos-lhe que estes patterns possuem no seu interior todas as informações necessárias(program change, volume, etc.) para serem executados ime<strong>di</strong>atamente sem ulteriores definições.IMPORTANTES INFORMAÇÕES SOBRE A LISTA DE SONSNa lista de sons do SD1000 (no fim deste <strong>manual</strong>) encontrará algumas siglas associadas ás“voices”.Estas siglas explicam como as “voices” são estruturadas, para uma melhor utilização na v/produçãomusical.(M): MULTIVOICE Este som é obtido com duas ou mais vozes tocando em simultâneo. Um usoexcessivo da MULTIVOICES, pode causar uma importante redução polifónica. Também alguns sonspoderão ter uma resposta de voz <strong>di</strong>ferente, se forem usados num panorama stereo.35
(ST): STEREO Este som é verdadeiramente STEREO, obtido com o dobro das pistas de afinaçãopara cada nota.Um uso excessivo do STEREO, reduzirá a polifonia global de SD1000.(LDM): LIVE DRUM MODELING Neste set de baterias acústicas, alguns instrumentos depercussão (como snare, rim shot, claps, snap) tocam com <strong>di</strong>ferentes timbres, ou <strong>di</strong>ferentes nuancesno mesmo instrumento, ralçando a sensação de uma actuação ao vivo.(FXV): EFX INSERT VOICE As últimas 8 vozes da lista do SD1000 (no fim deste <strong>manual</strong>), sãoobtidas utilizando os efeitos (como: HQ Overdrive, Chorus e outros).Uma maneira inteligente de usar EFX, permite gerir a qualidade sonora dos trabalhos musicais.OUTRAS CARACTERÍSTICASDSP: Para que já trabalhou com módulos de som multi tímbricos será familiar saber que a dotaçãode DSP (efeitos e post tratamento sonoro) é parte integrante destes sistemas que devem serutilizados através dos vários controllers e / ou Sys Exclusive.Aqui está o caminho SD1000:Todavia, pensamos que seja interessante acrescentar que além das típicas secções de Reverb,e Chorus irá encontrar outros efeitos DSP, tais como:Rotary: com controlos de Rate e Depth.Wha Wha: Amount. Controla a intensidade do efeito Wha na pista.HQ Distortion: Type, Drive, Gain, (Disponivel só quando inserido #1 EFX).2 x Insert EFX: Chorus, Flanger , Phaser , Tremolo , 4 Band Parametric EQ , Compressor e Delay efx.AVISO: PODE UTILIZAR (no máximo) 2 DIFERENTES “INSERT” EM TODAS AS PISTASDISPONIVEIS.Na Secção Master Control também estão previstos os seguintes controlos:Tune: Controlo da afinação geral do módulo (Data Value).Arabic Scale: Controlo dos intervalos para a escala árabe (Data Value).Global Transposer: Transposição global do instrumento (Data Value).36
TECHNICAL TABLES
SD 1000 SOUND LISTVOICE BANK A (Control Change 0, Value = 0)P. Ch. Name RemarkP. Ch. Name RemarkP. Ch. Name Remark1 Grand Piano St2 Rock Piano St3 Electric St4 Honky-tonk St5 El.Piano16 El.Piano27 Harpsichord8 Clavi9 Celesta10 Glockenspiel11 MusicBox12 Vibraphone13 Marimba14 Xylophone15 Tubular bells16 Dulcimer17 Rotary18 Percussive19 Rock Organ20 Church21 Theatre22 Musette23 Harmonica24 Bandoneon25 Nylon26 Steel M27 Jazz28 Clean29 Muted30 Overdrive31 Distorted32 Harmonics33 Acoustic34 Finger35 Picked36 Fretless37 Slap Bass138 Slap Bass239 Synbas140 Synbas241 Violin42 Viola43 Cello44 Contrabass45 Tremolo46 Pizzicato47 Harp48 Timpani49 Strings Ens. St50 SlowStrings St51 SynStrings152 SynStrings253 Choir Aah St, M54 Voice Ooh55 Synth Voice56 Hits57 Trumpet58 Trombone59 Tuba60 Muted Tpt61 French Horn62 Brass Sect.63 SynBrass164 SynBrass265 Altosoft66 Contralto67 Tenor Sax68 Bariton Sax69 Oboe70 Engl.Horn71 Bassoon72 Clarinet73 Piccolo74 Flute75 Recorder76 Pan Flute77 Bottle78 Shakuhashi79 Whistle80 Ocarina81 Square82 Sawtooth83 Calliope84 Chiff85 Charang86 Voice St87 Fifth88 Bass&Lead89 Fantasy St90 Warm St91 New Age92 Space93 Soft94 Metal St95 Halo96 Sweep97 Ice Rain98 Soundtrack99 Crystal100 Atmosphere101 Brightness102 Goblin103 Echodrops104 Startheme105 Sitar106 Banjo107 Shamisen108 Koto109 Kalimba110 Bagpipe111 Fiddle112 Shanai113 Tinkle bell114 Agogo115 Steeldrum St116 Woodblock117 Taiko118 Melotom119 Syntom120 Reverse121 Fret Noise122 Breath123 Seashore124 Bird125 Telephone126 Helicopter127 Applause128 Gunshot
VOICE BANK B (Control Change 0, Value = 1)P. Ch. Name Remark P. Ch. Name RemarkP. Ch. Name Remark1 Jingle2 Dark Grand St3 House St4 Suitcase5 Mark6 Funk Dx7 Fm Tine8 DX Piano9 ToyPad10 Orch. Bell11 Mallet12 Short Vibe13 Karimba14 Etnowood15 Metallophone16 Windchimes17 Rotor Fast18 Jazz Organ19 Drawbar20 Positive21 French Musette22 Francaise23 Cassotto24 Tango25 Classic26 Folk27 Funk Strat28 60’ Stopped29 Muted velo30 Vintage31 12 Strings32 Solidbody33 WarmBass34 Folk Bass35 MuteBass36 Deep Bass37 Precision38 Reso Bass39 Saw Bass40 House Bass41 Philarmonic42 Quartet43 GlockString44 OctaStrings145 OctaStrings246 Marcato47 String&Fall St48 Slow Arcos St49 Bowed Strings St50 Dark Strings St51 Dah52 Classic Choir53 Men_Doo54 Girl_Doo St55 Laah56 Voices57 Swing Tpt58 Cornet59 Euphonium60 Miles Tpt61 Flughorn62 Stereo Brass St63 GrowBras64 Octabrass65 Soprano66 Circus Sax67 Lounge Tenor68 Growl Sax69 Melo Trumpet70 Horn Swell71 Trumpets St72 Soft Trombones St73 Latin Flute St74 Pop Flute75 Andes76 Voice Flute77 Analogs St78 Flanger79 Brightpad80 Wiring St81 Wow St82 Polysynth St83 Trance St84 Wave85 Rave Bass86 Modular Bass St87 Percussive Bass St88 Wild Bass St89 2nd Perc90 3th Perc91 Power Fast92 Tonebar93 Dark B394 Jimmy Org.95 Lower 8’ - 4’96 Jazzy97 Pop Strat98 Telecast99 Strato100 Texas101 Western102 Fingerpick103 5th Stops104 Wha guitar105 Hawaian106 Mandolin107 Django108 ClassicFx109 Pedalsteel110 Rock&Roll111 Reed 8’112 Fisa 8’113 Gategroup St114 Amazing St115 Housesynth St116 Resonance117 Key Lead St118 Juno Synth St119 Obx Poly St120 JX Brass121 Alarm&Sirene122 Jet123 Pfif&Jew_Harp124 Rain125 Vocals126 Thunder127 Train128 Sweep
VOICE BANK C (Control Change 0, Value = 10)P. Ch. Name Remark P. Ch. Name RemarkP. Ch. Name Remark1 Piano&Strings St, M2 Grand&Pad St, M3 Octapiano St4 Electropad M5 Msk6 StagePno7 Rodes8 Elopiano9 FM Layer10 Chinese Bell11 Stereochrom12 Bright Vibes13 Toy Box14 Mbira15 XMas Bell16 FM Marimba17 Pop Organ18 Gospel19 Power Slow20 Principale21 Dry Organ22 Alpen23 Bellow24 Steirisch25 DynaFolk26 CountryFx27 Humbuck28 StratoFx29 Ac. Stereo St30 Acid31 Plucked32 Flamenco33 Acoustic Bass34 Bass&Guit135 Oberbas136 RetroBass37 Fusion38 Oberbas239 Pedalbass40 Bass&Guit 241 Slow Violin42 Electric Violin43 Chamber44 Tzivago45 Staccato St, M46 String Fall St47 Harp&Orchestra St, M48 Symphony St, M49 Full Ensemble St, M50 Digistring51 Disco Strings St, M52 Country Violin53 Tuuh54 Ooh Girls55 Aah Girls St56 Choir57 Tbones&Cornet St, M58 Slide Trombone59 Dixie Tpt60 Open Horn St61 Brass Fall Off62 Horn Pad St, M63 Multi Brass St, M64 Brass Cool St, M65 Altosax66 Jazz Alto67 Alto Straight68 Rock Sax69 Superhorn St, M70 Tpt Slide Up St71 Dry Trumpet72 Trumpet Section M73 Open Trombones St, M74 Irish Flute75 Staccato Flute76 Asian Flute77 Fife78 Ethnic Flute79 Staccato Whistle80 Pipe81 Solo Dance St82 Juicy83 Drama84 O<strong>di</strong>ssey85 Minimug M86 Attack St, M87 Phantom M88 Soloist St, M89 Warmness90 Explorer91 Choral M92 Cyber St, M93 Magic M94 Glockpad95 Stream96 Digi Pro97 UsPad98 Bottled Air99 Bellvox100 DigiPad St101 Syntax St102 Bright Analog St, M103 Aura Pad M104 Acoustic Dream St, M105 Tres106 Banjo 5 String107 Futozao108 Hackbrett109 Paraguayan Harp110 Short Mandolin111 Harp Glissando112 Bouzuki113 Tinkles114 Triangle115 Tambora116 Claves117 Ac.Tom118 Brushtom119 Snare120 Crash121 Scratch1122 Scratch2123 Scratch3124 Scratch4125 Scratch5126 FxSlap127 Laser128 Wind
VOICE BANK D (Control Change 0, Value = 11)P. Ch. Name Remark1 Layered Piano M2 Latin Piano St, M3 Fm Thin4 Rdx Operator M5 Twin Electro M6 Stage Mix M7 Huge FM M8 Digitine St, M9 Glasshouse St, M10 Fantasyland St, M11 Italian Positive12 Principale&Octave M13 Full Organ M14 ChorusB315 Hot Organ16 16-8-517 Pipe Octave18 Tonewheel M19 Movie Organ M20 Fast Drawbars M21 Carousel Org M22 Diatonic M23 Blues Harp24 Conservatory M25 Classic Bright26 Thin Folk27 Jazz Octave M28 Muted Wha29 Rock Strat30 Str Power31 Valve Lead M32 Smooth Electro M33 Strat&Folk M34 Open Country St, M35 Golden Steel M36 Cntry Detune37 Acoust. Picking M38 Twin Folk M39 Gipsy40 Brazilian41 Rockabilly42 Funk Bass43 Maxipick44 Ooh Mix St45 Duh Group M46 Dah Quartet M47 Lah Trio M48 Vocal_Praise M49 Cinema Strings50 Score M51 AahMix St52 Humming53 Lah Choir St, M54 Lah Mello Choir M55 Church Choir M56 Night Vocals57 Mmh58 Boom&Uap59 Horn Crescendo M60 Emperor Brass St, M61 Dry Tenor62 Sax Club63 Swing Tenor64 Baritone65 Glenn Sax M66 Boogie Sax M67 Octasax M68 Countie Sax M69 Sax Section M70 Saxes M71 Billy Sax M72 Pop Sax M73 Lute74 Mandola75 Latin Harp76 Portuguese77 Fingered&Slide78 Fingered Gtr79 Finger Slap80 Planet81 Rock Synth M82 Chuck St, M83 Smooth Lead St, M84 Synth Plug St, M85 Subbass86 Synvoice87 Deep Jazz88 Memory Synth89 Evolution90 Sideral St, M91 North Wire St, M92 Blowing St, M93 Aural St, M94 Velvet St, M95 Etnovox St, M96 Whisper M97 Evopad St, M98 Plucking St, M99 Mallet Area St, M100 80’s Pad St, M101 Fluty Pad St, M102 Nylon Theme St, M103 BottledChoir104 Brass Hits St, M105 Southern Harp M106 Ungarian Zither M107 Alpen Choir M108 Mallet World M109 Country&Western M110 StereoFolk St, M111 Alpen Musette112 Jazz Accor<strong>di</strong>on113 Bright Musette M114 335 Jazz115 Smooth_Bass116 Funky Muted117 Country Gtr118 Nylon_slide119 Power Guit120 Clean Chorus FX121 Tremolo Mark FX122 Phase Electro FX123 Organ Overdrive FX124 Metal FX125 Distorted FX126 Crunch FX127 Jazz Combo St, M, FX128 Echolead St, FXRemark:ST = Stereo VoiceM = Multi VoiceFX = Fx Insert Voice
SOUND FAMILY MAPPIANO CHROMATIC ORGANBank Prg.Ch SoundBank Prg.Ch SoundBank Prg.Ch Sound0 1 Grand Piano0 3 Electric1 2 Dark Grand0 4 Honky-tonk10 5 Msk0 5 El.Piano10 6 El.Piano21 6 Funk Dx1 5 Mark0 8 Clavi0 2 Rock Piano10 3 Octapiano1 1 Jingle10 1 Piano&Strings1 3 House1 4 Suitcase1 7 Fm Tine1 8 DX Piano10 4 Electropad0 7 Harpsichord10 2 Grand&Pad11 1 Layered Piano11 2 Latin Piano10 6 StagePno10 7 Rodes10 8 Elopiano11 3 Fm Thin11 4 Rdx Operator11 5 Twin Electro11 6 Stage Mix11 7 Huge FM10 9 Fm_Layer11 8 Digitine11 121 Tremolo Mark11 122 Phase Electro0 12 Vibraphone0 13 Marimba0 14 Xylophone0 9 Celesta0 10 Glockenspiel0 11 MusicBox0 15 TubularBells1 13 Karimba1 9 ToyPad0 113 Tinkle bell1 10 Orch. Bell1 11 Mallet1 12 Short Vibe1 14 Etnowood1 15 Metallophone1 16 Windchimes10 10 Chinese Bell10 11 Stereochrom10 12 Bright Vibes10 13 Toy Box10 14 Mbira10 15 XMas Bell10 16 FM Marimba11 9 Glasshouse11 10 Fantasyland10 19 Power Slow0 18 Percussive0 19 Rock Organ0 21 Theatre1 20 Positive1 91 Power Fast1 96 Jazzy1 19 Drawbar1 17 Rotor Fast0 20 Church1 92 Tonebar1 93 Dark B31 94 Jimmy Org.1 18 Jazz Organ10 17 Pop Organ10 18 Gospel0 17 Rotary10 20 Principale10 21 Dry Organ11 11 Italian Positive11 12 Principale&Octave11 13 Full Organ11 14 ChorusB311 15 Hot Organ11 16 16-8-511 17 Pipe Octave11 18 Tonewheel11 19 Movie Organ11 20 Fast Drawbars11 21 Carousel Org1 95 Lower 8’ - 4’1 89 2nd Perc1 90 3th Perc11 87 Deep Jazz11 123 Organ Overdrive
ACCORDIONBank Prg.Ch Sound0 22 Musette0 23 Harmonica0 24 Bandoneon1 21 French Musette1 22 Francaise1 23 Cassotto1 24 Tango10 22 Alpen10 23 Bellow10 24 Steirisch11 22 Diatonic11 23 Blues Harp11 24 Conservatory11 111 Alpen Musette11 112 Jazz Accor<strong>di</strong>on11 113 Bright Musette1 111 Reed 8’1 112 Fisa 8GUITARBank Prg.Ch Sound0 25 Nylon0 26 Steel0 27 Jazz0 28 Clean0 30 Overdrive1 27 Funk Strat1 26 Folk1 99 Strato1 30 Vintage1 32 Solidbody1 25 Classic10 29 Ac. Stereo1 105 Hawaian1 107 Django0 31 Distorted11 26 Thin Folk11 30 Str Power1 110 Rock&Roll1 102 Fingerpick0 29 Muted1 28 60’ Stopped1 29 Muted velo1 31 12Strings1 97 Pop Strat1 98 Telecast1 100 Texas1 101 Western1 103 5th Stops1 104 Wha guitar1 108 ClassicFx1 109 Pedalsteel10 25 DynaFolk10 26 CountryFx10 27 Humbuck10 28 StratoFx10 30 Acid10 31 Plucked10 32 Flamenco11 25 Classic Bright11 27 Jazz Octave11 28 Muted Wha11 29 Rock Strat11 31 Valve Lead11 32 Smooth Electro11 33 Strat&Folk11 34 Open Country11 35 Golden SteelBank Prg.Ch Sound11 36 Cntry Detune11 37 Acoust. Picking11 38 Twin Folk11 39 Gipsy11 40 Brazilian11 41 Rockabilly11 114 335 Jazz11 116 Funky Muted11 117 Country Gtr11 118 Nylon_slide11 119 Power Guit11 120 Clean Chorus0 32 Harmonics11 110 StereoFolk11 124 Metal11 125 Distorted11 126 Crunch11 127 Jazz Combo11 77 Fingered&Slide11 78 Fingered Gtr11 76 Portuguese
STRINGS / CHOIRBank Prg.Ch Sound0 49 Strings Ens.1 49 Bowed Strings0 41 Violin0 42 Viola0 47 Harp1 47 String&Fall0 53 Choir Aah0 54 Voice Ooh0 55 Synth Voice1 53 Men_Doo1 55 Laah1 51 Dah0 46 Pizzicato0 43 Cello0 50 SlowStrings10 41 Slow Violin0 44 Contrabass0 51 SynStrings11 54 Girl_Doo1 52 Classic Choir1 56 Voices10 53 Tuuh10 54 Ooh Girls10 55 Aah Girls0 52 SynStrings20 45 Tremolo0 48 Timpani1 41 Philarmonic1 42 Quartet1 43 GlockString10 56 Choir11 51 AahMix11 52 Humming11 53 Lah Choir11 54 Lah Mello Choir11 55 Church Choir1 44 OctaStrings11 45 OctaStrings21 46 Marcato1 48 Slow Arcos1 50 Dark Strings10 42 Electric Violin11 56 Night Vocals11 57 Mmh11 44 Ooh Mix11 45 Duh Group11 46 Dah QuartetBank Prg.Ch Sound11 47 Lah Trio10 43 Chamber10 44 Tzivago10 45 Staccato10 46 String Fall10 47 Harp&Orchestra10 48 Symphony10 49 Full Ensemble10 50 Digistring10 51 Disco Strings10 52 Country Violin11 49 Cinema Strings11 48 Vocal_Praise11 107 Alpen Choir11 58 Boom&Uap11 86 Synvoice0 56 HitsBRASSBank Prg.Ch Sound0 62 Brass Sect.0 57 Trumpet0 58 Trombone0 60 Muted Tpt0 63 SynBrass11 62 Stereo Brass1 57 Swing Tpt10 60 Open Horn1 60 Miles Tpt10 59 Dixie Tpt1 61 Flughorn1 70 Horn Swell1 71 Trumpets1 72 Soft Trombones0 64 SynBrass21 63 GrowBras1 59 Euphonium10 61 Brass Fall Off10 70 Tpt Slide Up10 63 Multi Brass0 59 Tuba0 61 French Horn1 58 Cornet1 64 Octabrass1 69 Melo Trumpet10 57 Tbones&Cornet10 58 Slide Trombone10 62 Horn Pad10 64 Brass Cool10 69 Superhorn10 71 Dry Trumpet10 72 Trumpet Section10 73 Open Trombones11 59 Horn Crescendo11 60 Emperor Brass11 104 Brass Hits
SAX / FLUTEBank Prg.Ch Sound1 67 Lounge Tenor0 66 Contralto0 68 Bariton Sax0 65 Altosoft10 66 Jazz Alto0 72 Clarinet0 74 Flute0 76 Pan Flute1 76 Voice Flute0 79 Whistle1 73 Latin Flute1 74 Pop Flute0 67 Tenor Sax0 69 Oboe10 65 Altosax1 65 Soprano1 66 Circus Sax1 68 Growl Sax1 75 Andes10 74 Irish Flute0 73 Piccolo0 75 Recorder0 77 Bottle0 78 Shakuhashi0 70 Engl.Horn0 71 Bassoon10 67 Alto Straight10 68 Rock Sax11 61 Dry Tenor11 62 Sax Club0 80 Ocarina10 75 Staccato Flute10 76 Asian Flute10 77 Fife10 78 Ethnic Flute10 79 Staccato Whistle11 63 Swing Tenor11 64 Baritone11 65 Glenn Sax11 66 Boogie Sax11 67 Octasax11 68 Countie Sax10 80 Pipe11 73 Lute11 69 Sax Section11 70 Saxes11 71 Billy Sax11 72 Pop SaxPADBank Prg.Ch Sound0 89 Fantasy0 90 Warm0 91 New Age0 92 Space0 93 Soft0 94 Metal0 95 Halo0 96 Sweep0 97 Ice Rain0 98 Soundtrack0 99 Crystal0 100 Atmosphere0 101 Brightness0 102 Goblin0 103 Echodrops0 104 Startheme1 77 Analogs1 78 Flanger1 79 Brightpad10 89 Warmness10 90 Explorer10 91 Choral10 92 Cyber10 93 Magic10 94 Glockpad10 95 Stream10 96 Digi Pro10 97 UsPad10 98 Bottled Air10 99 Bellvox10 100 DigiPad10 101 Syntax10 103 Aura Pad10 104 Acoustic Dream11 80 Planet11 89 Evolution11 90 Sideral11 91 North Wire11 92 Blowing11 93 Aural11 94 Velvet11 95 Etnovox11 96 Whisper11 97 Evopad11 98 Plucking11 99 Mallet Area11 100 80’s PadBank Prg.Ch Sound11 102 Nylon Theme11 103 BottledChoir11 101 Fluty Pad10 102 Bright Analog11 50 Score
SYNTHBank Prg.Ch Sound1 83 Trance1 113 Gategroup1 114 Amazing1 115 Housesynth1 117 Key Lead1 118 Juno Synth1 119 Obx Poly10 81 Solo Dance1 80 Wiring1 81 Wow1 82 Polysynth1 116 Resonance1 120 JX Brass1 84 Wave10 82 Juicy0 85 Charang10 84 O<strong>di</strong>ssey10 85 Minimug10 86 Attack11 84 Synth Plug0 81 Square0 82 Sawtooth0 83 Calliope0 84 Chiff10 83 Drama0 86 Voice0 87 Fifth0 88 Bass&Lead10 87 Phantom10 88 Soloist11 81 Rock Synth11 82 Chuck11 83 Smooth Lead11 88 Memory Synth11 128 EcholeadETHNICBank Prg.Ch Sound0 106 Banjo0 111 Fiddle0 110 Bagpipe10 108 Hackbrett0 105 Sitar1 106 Mandolin10 109 Paraguayan Harp0 108 Koto0 115 Steeldrum10 107 Futozao10 106 Banjo 5 String10 110 Short Mandolin0 109 Kalimba0 107 Shamisen0 112 Shanai10 111 Harp Glissando0 16 Dulcimer10 105 Tres10 112 Bouzuki11 74 Mandola11 105 Southern Harp11 106 Ungarian Zither11 108 Mallet World11 109 Country&Western11 75 Latin Harp0 114 Agogo0 116 Woodblock0 117 Taiko0 118 Melotom0 119 Syntom10 113 Tinkles10 114 Triangle10 115 Tambora10 116 Claves10 117 Ac.Tom10 106 Brushtom10 111 Snare10 110 Crash0 108 Reverse
BASS / SFXBank Prg.Ch Sound0 32 Acoustic0 33 Finger0 34 Picked0 35 Fretless0 36 Slap Bass10 38 Synbas11 35 Deep Bass1 32 WarmBass1 86 Percussive Bas1 39 House Bass10 32 Acoustic Bass10 33 Bass&Guit110 34 Oberbas11 37 Reso Bass1 38 Saw Bass0 37 Slap Bass20 39 Synbas21 33 Folk Bass1 34 MuteBass1 36 Precision1 84 Rave Bass1 85 Modular Bass1 87 Wild Bass10 35 RetroBass10 36 Fusion10 37 Oberbas210 38 Pedalbass10 39 Bass&Guit 211 41 Funk Bass11 42 Maxipick11 78 Slap11 84 Subbass11 114 Smooth_Bass1 120 Alarm&Sirene1 121 Jet1 122 Pfif&Jew_Harp1 123 Rain1 124 Vocals1 125 Thunder1 126 Train1 127 Sweep0 122 Seashore0 123 Bird0 124 Telephone0 125 Helicopter0 126 Applause0 127 Gunshot10 120 Scratch1Bank Prg.Ch Sound10 121 Scratch210 122 Scratch310 123 Scratch410 124 Scratch510 125 FxSlap10 126 Laser10 127 Wind0 120 Fret Noise0 121 BreathDRUM SETSP. Ch. Name Remark1 Standard 1 (SD) LDM *2 Standard 2 (SD) LDM *3 Standard 1 LDM4 Standard 2 LDM8 Room LDM9 Folk (SD) LDM *10 Acoustic (SD) LDM *11 Jazz (SD) LDM *12 Stu<strong>di</strong>o LDM13 Folk LDM14 Acoustic LDM15 Jazz LDM17 Rock 1 LDM18 Rock 2 LDM23 Disco 124 Disco 225 House (SD) *26 Techno (SD) *27 Techno28 House 129 House 230 Rap (SD) *31 Hip Hop 133 Heavy_Pop (SD) LDM *34 Heavy_Pop LDM35 Electro36 Hip Hop 241 Swing (SD) *42 Brush 1 (SD) LDM *43 Brush 2 LDM44 Swing45 Brush 1 LDMP. Ch. Name Remark49 Orchestra50 Latin (SD) LDM *51 Light Pop52 Industrial53 Dance 154 Dance 255 Street56 R&B58 Contemporary59 Analog 160 Analog 261 New Soul62 Garage63 Vocal 1 LDM64 Vocal 2 LDMLDM = Live Drum Modeling<strong>•</strong> = SD compatibility
AUDIO DRUM LOOPS# CC=0 Value=41 Afro_12 Afro_23 Afro_34 Afro_45 Afro_56 Bachata_a7 Bachata_b8 Bachata_c9 Bachata_d10 Batucada_a11 Batucada_b12 Bluegrass13 Bolero_a14 Bolero_b15 Bolero_c16 Bongo_1_t17 Bongo_bachat118 Bongo_bachat219 Bongo_bolero120 Bongo_bolero221 Bongo_cha22 Bongo_salsa23 Bossa_a24 Bossa_b25 Bossa_c26 Bossa_Cabasa27 Bossa_Shaker28 Brush_1_t29 Brush_fast30 Brush_me<strong>di</strong>um31 Brush_slow132 Brush_slow233 Brush_slow334 Brush_slow435 Cabaza_136 Cabaza_237 Cabaza_338 Cabaza_439 Cajon40 Chacha_a41 Chacha_b42 Chacha_c43 Chacha_d44 Chacha_e45 Chacha_f46 Clap_2_447 Clap_4_4# CC=0 Value=448 Clap_6_849 Clap _Dance50 Clap _Gipsy151 Clap _Gipsy252 Clap_Shuffle53 Conga_1_t54 Conga_2_t55 Conga_3_t56 Conga_4_t57 Conga_5_t58 Conga_6_t59 Conga_7_t60 Conga_ballad61 Conga_bolero162 Conga_bolero263 Conga_bossa64 Conga_cha165 Conga_cha266 Conga_mambo67 Conga_mereng168 Conga_mereng269 Conga_rumba70 Conga_salsa171 Conga_salsa272 Conga_salsa373 Conga_samba_174 Conga_samba_275 Cowbell_salsa176 Cowbell_salsa277 Cowbell_cha178 Cowbell_cha279 Cumbia_a80 Cumbia_b81 Cumbia_c82 Cumbia_d83 Cumbia_e84 Dance_185 Dance_286 Dance_387 Dance_488 Dance_589 Dance_690 Dance_791 Dance_892 Dance_kick1a93 Dance_kick2a94 Dance_kick3a# CC=0 Value=495 Dance_kick4a96 Dance_kick5a97 Dance_kick6a98 Dance_kick7a99 Dance_kick8a100 Flamenco_a101 Flamenco_b102 Flamenco_c103 Flamenco_d104 Flamenco_e105 Flamenco_f106 Flamenco_g107 Gipsy_1108 Gipsy_2109 Guajira_a110 Guajira_b111 Guira_1112 Guira_2113 Guira_bachat1114 Guira_bachat2115 Guira_mereng1116 Guira_mereng2117 Guiro_cha118 Guiro_cumbia119 Guiro_mereng120 Guiro_salsa121 Hihat 8_1122 Hihat 8_2123 Hihat 16_1124 Hihat 16_2125 Hihat swing1126 Hihat swing2127 Hihat swing3128 Hihat_shuffle1129 Hihat_shuffle2130 Hiphop_1131 Hiphop_2132 House_1133 House_2134 House_3135 House_4136 House_5137 House_6138 House_7139 House_8140 House_kick1a141 House_kick2a
AUDIO DRUM LOOPS# CC=0 Value=4142 House_kick3a143 House_kick4a144 House_kick5a145 House_kick6a146 House_kick7a147 Jazzrock_a148 Jazzrock_b149 Jigs150 Latin_dance1151 Latin_dance2152 Mambo_a153 Mambo_b154 Mambo_c155 Marac_bolero1156 Marac_bolero2157 Marac_bolero3158 Marac_bossa159 Marac_cha160 Marac_cumbia161 Marac_mereng162 Marac_salsa1163 Marac_salsa2164 Maracas_1165 Maracas_1_t166 Maracas_2167 Maracas_2_t168 Maracas_3169 Maracas_4170 Maracas_5171 Merengue_a172 Merengue_b173 Merengue_c174 Merengue_d175 Merengue_e176 Merengue_f177 Pandero_1178 Pandero_2179 Pandero_1_t180 Pandero_2_t181 Pasodoble182 Popdown_a183 Popdown_b184 Popfunk_a185 Popfunk_b186 Popjazz_a187 Popjazz_b188 Popjazz_c# CC=0 Value=4189 Popjazz_d190 Popjazz_e191 Popjazz_f192 R&blues_a193 R&blues_b194 R&blues_c195 Rap196 Reels197 Ride_1_t198 Ride_fast1199 Ride_fast2200 Ride_me<strong>di</strong>um201 Ride_shuffle202 Ride_slow203 Rock_a204 Rock_b205 Salsa_a206 Salsa_b207 Salsa_c208 Salsa_d209 Salsa_e210 Salsa_f211 Salsa_g212 Samba_a213 Samba_b214 Samba_c215 Samba_Cabaza216 Samba_d217 Samba_Shaker218 Shaker_1219 Shaker_1_t220 Shaker_2221 Shaker_2_t222 Shaker_3223 Shaker_4224 Shaker_5225 Shaker_6226 Shuffle_a227 Shuffle_b228 Shuffle_c229 Snap230 Street_1231 Street_2232 Swing_a233 Swing_b234 Swing_c235 Tambora# CC=0 Value=4236 Tambourine_8_1237 Tambourine_8_2238 Tambourine_8_3239 Tambourine_12_1240 Tambourine_12_2241 Tambourine_16_1242 Tambourine_16_2243 Tambourine_16_3244 Tambourine_16t245 Tambourine_24246 Tambourine_shuffle247 Triplet248 UrbanEFX LIST# EFX NAME1 Chorus 12 Chorus 23 Phaser 14 Phaser 25 Flanger 16 Flanger 27 Tremolo 18 Tremolo 29 Delay 110 Delay 211 EchoPan12 Rotor Slow13 Rotor Fast14 Organ Overdrive15 Valve Distortion16 Power Distortion17 Metal Distortion18 Tweed Amp Simulator19 British Amp Simulator20 Jazz Amp Simulator
SD1000 MIDI MIDI IMPLEMENTATIONDetailed MIDI Implementation1.1 EFX Insert EffectsNRPNHighNRPNLowDescriptionInsert MFX Mix Controls3xh 21h Input gain, 0 to 7Fh3xh 22h Lo-cut filter frequency: 0 = ~20Hz, till 7Fh = ~300Hz3xh 23h Hi-cut filter frequency: 0 = ~1.5KHz,...100=~6KHz, till 7Fh = OFF3xh 2Bh Output panning, 0 to 7Fh (main output left/right mix, 0=left, till 7Fh=right)3xh 2Ch Output Front/Rear Mix, 0 to 7Fh (0 = only Front, 40h = both, till 7Fh = only Rear)3xh 2Dh Send to Global Reverb: 0=~ –oo, 1=~ -42dB, 127=~ 0dB3xh 2Eh Send to Global Chorus: 0=~ –oo, 1=~ -42dB, 127=~ 0dBInsert MFX Compressor/Limiter Controls3xh 40h Compressor Preset (see below)3xh 41h Compressor ON/OFF: =0 OFF, else ON3xh 42h Attack time: 0=fast attack (0.1ms), … 60=1ms, …100=10ms, till 127=slow attack(100ms), exp. curve3xh 43h Release time: 0=fast release (10ms), … 60=100ms, … 100=1s, till 127=slow release(~5s), exp. curve3xh 44h Threshold: 0=-42.3, 1=-42dB, 2=-41.66dB, 7Eh=-0.33dB, 7Fh=0dB3xh 45h Ratio: 127=1:128, 126=2:128 (1:64), 125=3:128, … 64=64:128 (1:2), … 0=1:13xh 46h Boost (applied on signal after compression): 127= x8 … 64=x4 … 32=x2 … 0 = x13xh 47h Knee: 0=Hard Knee else Soft KneeInsert MFX Distortion Controls3xh 60h Distortion Preset (see below)3xh 61h Distortion ON/OFF: =0 OFF, else ON3xh 62h Pre Gain: 0=OFF, 1 = -42dB till 127 = 0dB3xh 63h Type: 0=Tube, 1=asymmetric parabolic1, 2=asymmetric parabolic23xh 64h Low Pass Filter frequency: 0 = closed 0Hz , till 127 = open 8kHz3xh 65h Low Pass Filter resonance: 0 = no resonance, till 127 = max resonance3xh 66h Post Gain: 0=OFF, 1 = -42dB till 127 = 0dB3xh 67h Drive: 0 till 7 (0 to +42dB)3xh 68h RC type low pass filter value: 0=closed 0Hz, till 127 = open 24kHzInsert MFX Parametric Equalizer Controls3xh 70h Equalizer Preset (see below)3xh 71h Parametric Equalizer: ON/OFF : 0=OFF, else ON3xh 72h Low band gain: 0=-12dB, 64=0dB, 127=+12dB3xh 73h Low-Mid band gain: 0=-12dB, 64=0dB, 127=+12dB3xh 74h High-Mid band gain: 0=-12dB, 64=0dB, 127=+12dB3xh 75h High band gain: 0=-12dB, 64=0dB, 127=+12dB3xh 76h Low band frequency: 0=40Hz, till 127=1.5KHz3xh 77h Low-Mid band frequency: 0=40Hz, till 127=2,5KHz3xh 78h High-Mid band frequency: 0=40Hz, till 127=10KHz3xh 79h High band frequency: 0=500Hz, til127=2KHz3xh 7Ah Low-Mid band Q: 0=1.0 ... 64=2.0... 127=20.03xh 7Bh High-Mid band Q: 0=1.0 ... 64=2.0... 127=20.0Insert MFX Chorus/Flanger/Phaser/Tremolo/Rotary Controls3xh 30h Chorus/Flanger/Phaser/Tremolo/Rotary Preset (see below)3xh 31h Effect level, 0 to 7Fh3xh 32h Chorus/Flanging delay time: 0 = 1ms, till 127 = 30ms1
3xh 33h Chorus/Flanging feedback, 0 to 7Fh3xh 34h Chorus/Flanging/Short-Delay high pass filter on input: 0 = no filter to 1.2 kHz3xh 35h HDAMP: high frequency filter on delay feedback, , 0 to 7Fh = 0 to 100 %3xh 36h Modulation rate: 0 = ~0,023 Hz, ...64=~0,89Hz, till 127 = ~5,8 Hz (~1Hz to ~20Hz forTremolo)3xh 37h Modulation depth, 0 to 7Fh3xh 38h Tremolo modulation shape: 0 = triangle, till 127 = square3xh 39h Rotary speed: 0=slow, 1=fast (only for Rotary preset # 23)Insert MFX Delay Controls3xh 58h Delay Preset, 0..4 (off, mono1, mono2, stereo1, stereo2)3xh 59h Delay ON/OFF, 0 = OFF, else ON3xh 5Ah Delay Mode, 0=mono, 1=stereo3xh 5Bh Delay PreLP, 0 to 7Fh3xh 5Ch Delay Level, 0 to 7Fh3xh 5Dh Delay Time, 0 to 7Fh = 0 to 1365ms3xh 5Eh Delay Feedback, 0 to 7Fh3xh 5Fh HDAMP: high frequency filter on delay feedback, , 0 to 7Fh = 0 to 100 %Some presets have been predefined for each of the 5 Insert Effects blocks: Compressor, , Distortion, Mod-FX(Chorus etc) and Delay. Presets are selected through MIDI NRPN messages.1.2 Compressor/Limiter PresetsPreset is selected by using MIDI NRPN 3x40h, with value = preset number, from 0 to 8NbNamePreset Default valuesAttack Release Threshold Ratio Boost0 NO COMPRESSION 64 0 127 0 0COMPRESSOR1 COMPR 1: -18dB 2:1 64 0 73 64 242 COMPR 2: -15dB 3:1 64 0 82 84 323 COMPR 3: -18dB 5:1 64 0 73 100 484 COMPR 4: -21dB 7:1 64 0 64 110 485 COMPR 5: -24dB 12:1 64 0 55 117 64LIMITER6 LIMITER 1: -6dB 64 0 109 127 07 LIMITER 2: -12dB 64 0 91 127 08 LIMITER 3: -18dB 64 0 73 127 0Notes:Preset value for Compressor Knee value is always 0 (Hard Knee).2
1.3 Distortion PresetsPreset is selected by using MIDI NRPN 3x60h, with value = preset number, from 0 to 13Preset Default valuesHi-CutNb NameRC LP Low LevDrive Type Filter Post Gain Pre GainFilter CutFrequencyOFF0 OFF 0 0 127 127 127 127 0TUBE DISTORTION1 TUBE DIST Low 1 3 1 100 60 64 127 12 TUBE DIST Low 2 4 2 80 50 64 127 23 TUBE DIST Me<strong>di</strong>um 1 5 1 70 40 64 127 24 TUBE DIST Me<strong>di</strong>um 2 5 2 70 40 64 127 35 TUBE DIST High 1 6 1 60 40 64 127 36 TUBE DIST High 2 6 2 60 40 64 127 3SPECIAL DISTORTION7 SMOOTH OD 6 6 50 30 64 80 38 DISTORTION 7 1 40 30 64 127 39 CRUNCH 5 5 60 40 64 80 310 FUZZ 6 7 80 40 64 127 311 GRUNGE 5 4 110 40 64 127 212 METAL 8 3 40 40 64 127 413 MESS 10 0 80 30 64 127 4Notes:Preset value for Hi-Cut Filter Q is always 0.1.4 Parametric Equalizer PresetsPresets are selected by using MIDI 3x70h, with value = preset number, from 0 to 13NbNameGainLowGainLowMidGainHighMidGainHighPreset Default ValuesFreq Freq FreqLow Low HighMid MidFreqHighQualityLowMidQualityHighMid0 Flat 64 64 64 64 40 24 64 127 0 641 JC Clean 80 30 90 64 40 20 50 60 0 802 Acoustic 90 20 110 64 40 26 113 50 30 1003 Black Panel 80 40 90 64 40 28 30 40 0 404 Brit Combo 60 80 80 64 100 64 7 127 0 305 Tweed 64 30 80 64 50 42 28 60 100 206 Stack Classic 64 20 85 64 80 40 30 40 20 407 Metal 64 50 100 64 80 50 35 127 0 708 R-Fier 64 20 70 64 80 30 30 80 30 509 Dyna Amp 64 20 75 64 40 32 25 127 64 5010 Crunch 64 75 30 64 40 10 8 127 20 7011 VO Drive 64 64 90 64 40 20 30 127 64 6012 BG Lead 64 64 70 64 40 20 64 127 64 6413 MS HiGain 64 80 50 64 40 10 6 127 80 703
1.5 Chorus/Flanger/Phaser/Tremolo/Rotary PresetsPreset is selected by using MIDI NRPN 3x30h, with value = preset number, from 0 to 23Preset Default ValuesNb NameChorus ChorusVolume Delay Feedback HdamphRate Depth0 OFF 0 / / / / /1 Chorus Light 1 56 20 0 0 40 302 Chorus Light 2 56 40 0 0 30 303 Chorus Me<strong>di</strong>um 1 64 26 0 0 45 404 Chorus Me<strong>di</strong>um 2 64 60 0 0 35 505 Chorus Deep 1 64 64 0 0 40 706 Chorus Deep 2 64 80 0 0 45 907 Chorus Fast 1 64 30 0 0 70 108 Chorus Fast 2 64 60 0 0 60 209 Resonant Chorus 64 30 80 0 40 2010 Long Time Chorus 64 100 0 0 20 2011 Flange Light 64 8 32 0 30 3012 Flange Me<strong>di</strong>um 72 13 72 0 40 8013 Flange Slow Deep 72 2 50 0 20 9014 Flange Deep 72 6 100 0 50 10015 Phaser Light 64 0 80 0 50 5016 Phaser Me<strong>di</strong>um 64 0 90 0 60 8017 Phaser Slow Deep 64 0 100 0 20 11018 Phaser Fast 64 0 40 0 120 6019 Tremolo Slow 64 0 0 0 20 6020 Tremolo Me<strong>di</strong>um 1 64 0 0 20 40 7021 Tremolo Me<strong>di</strong>um 2 64 0 0 40 60 9022 Tremolo Fast 64 0 0 60 100 11023 Rotary Slow 90 30 0 0 50 20Note:Preset value for Pre-High-pass-Filter is always 0 (off).4
2.0 HQ DistortionHQ Distortion Top Level Controls3Dh 00h Distortion ON/OFF: =0 OFF, else ON3Dh 01h Noise Reduction: 0..43Dh 02h Booster: 0..33Dh 03h Type (Preset): 0..7 = OFF, Warm-Drive, Overdrive, Cry, Distortion, Metal, Max-Saturation, Fuzz (using Preset parameter below)3Dh 04h Drive: 0..1273Dh 05h Tone: 0..127 (using PEQ parameters below)3Dh 06h Level (Post-Gain): 0..127HQ Distortion Preset Parameter Controls (see note below)3Dh 10h Input High Pass Cutoff): 0..1273Dh 11h Input High Pass Mode: 0..23Dh 12h Bias Level): 0..1273Dh 13h Input Low Pass Cutoff): 0..1273Dh 14h Input Low Pass Mode: 0..73Dh 15h Type (internal): 0-223Dh 16h Pre-Gain: 0..127 (should be set normally to 127, Distortion drive amount should be set by“Drive” parameter, NRPN 3D04h)3Dh 17h PEQ Freq low): 0..1273Dh 18h PEQ Gain low): 0..64..127 = -12..0..+12dB3Dh 1Ah PEQ Freq high): 0..1273Dh 1Bh PEQ Gain high): 0..64..127 = -12..0..+12dBHQ Distortion Routing Controls3Dh 7Fh Routing switch of Distortion block: 0 = default, else input on MIC2IN (DAAD4R) 0Note: details about the HQ Distortion Preset Parameters Controls please see de<strong>di</strong>cated Distortion Library moduledocumentation.5
3. MIDI Implementation2 ports of 16 channels are provided for a total of 32 channels. MIDI Message “F5 nn” is used to switchbetween the two ports (nn=1 or 2).MIDI Message HEX Code DescriptionNOTE ON 9nH kk vv Mi<strong>di</strong> channel n(0-15) note ON #kk(1-127), velocity vv(1-127). vv=0means NOTE OFFNOTE OFF 8nH kk vv Mi<strong>di</strong> channel n(0-15) note OFF #kk(1-127), vv is don’t care.PITCH BEND EnH bl bh Pitch bend as specified by bh|bl (14 bits)Maximum swing is +/- 1 tone (power-up). Can be changed using« pitch bend sensitivity ». Center position is 00H 40H.PROGRAMCHANGECnH ppProgram (patch) change. Specific action on channel 10 (n=9) : selectdrumset. Refer to sounds / drumset list. Drumsets can be assigned toother channels (see SYSEX MIDI channel to part assign and part torhythm allocation)vv pressure value. Effect set using Sys. Ex. 40H 2pH 20H-26HCHANNEL DnH vvAFTERTOUCHCTRL 00 BnH 00H cc Bank select : Refer to sounds list. No action on drumsetCTRL 01 BnH 01H cc Modulation wheel. Rate and maximum depth can be set using SYSEXCTRL 05 BnH 05H cc Portamento time.CTRL 06 BnH 06H cc Data entry : provides data to RPN and NRPNCTRL 07 BnH 07H cc Volume (default=100)CTRL 10 BnH 0AH cc Pan (default=64 center)CTRL 11 BnH 0BH cc Expression (default=127)CTRL 64 BnH 40H cc Sustain (damper) pedalCTRL 65 BnH 41H cc Portamento ON/OFFCTRL 66 BnH 42H cc Sostenuto pedalCTRL 67 BnH 43H cc Soft pedalCTRL 71 BnH 47H cc TVF Resonnance mo<strong>di</strong>fy (same as nrpn 0121h)CTRL 72 BnH 48H cc Env release time mo<strong>di</strong>fy (same as nrpn 0166h)CTRL 73 BnH 49H cc Env attack time mo<strong>di</strong>fy (same as nrpn 0163h)CTRL 74 BnH 4AH cc TVF cutoff freq mo<strong>di</strong>fy (same as nrpn 0120h)CTRL 75 BnH 4BH cc Env decay time mo<strong>di</strong>fy (same as nrpn 0164h)CTRL 76 BnH 4CH cc Vibrato rate mo<strong>di</strong>fy (same as nrpn 0108h)CTRL 77 BnH 4DH cc Vibrato depth mo<strong>di</strong>fy (same as nrpn 0109h)CTRL 78 BnH 4EH cc Vibrato delay mo<strong>di</strong>fy (same as nrpn 010Ah)CTRL 84 BnH 54H vv Portamento controlCTRL 91 BnH 5BH vv Reverb send level vv=00H to 7FH
CTRL 93 BnH 5DH vv Chorus send level vv=00H to 7FHCTRL 98 BnH 62H vv NRPN lowCTRL 99 BnH 63H vv NRPN highCTRL 100 BnH 64H vv RPN lowCTRL 101 BnH 65H vv RPN highCTRL 120 BnH 78H 00H All sound off (abrupt stop of sound on channel n)CTRL 121 BnH 79H 00H Reset all controllersCTRL 123 BnH 7BH 00H All notes offCTRL 126 BnH 7EH 00H Mono onCTRL 127 BnH 7FH 00H Poly on (default power-up)CTRL CC1 BnH ccH vvH Assignable Controller 1. cc=Controller number (0-5Fh), vv=Controlvalue (0-7Fh). Control number (ccH) can be set on CC1CONTROLLER NUMBER (Sys. Ex 40 1x 1F). The resulting effect isdetermined by CC1 controller function (Sys.Ex. 40 2p 40-4A)CTRL CC2 BnH ccH vvH Assignable Controller 2. cc=Controller number (00h-5Fh), vv=controlvalue (0-7Fh). Control number can be set on CC2 CONTROLLERNUMBER (Sys.Ex. 40 1x 20). The resulting effect is determined byCC2 controller function (Sys.Ex.40 2p 50-5A).RPN 0000H BnH 65H 00H 64H00H 06H vvPitch bend sensitivity in semitones (default=2)RPN 0001HRPN 0002HNRPN 0108HNRPN 0109HNRPN 010AHNRPN 0120HNRPN 0121HNRPN 0163HNRPN 0164HNRPN 0166HStandard SysexBnH 65H 00H 64H01H 06H vvBnH 65H 00H 64H02H 06H vvBnH 63H 01H 62H08H 06H vvBnH 63H 01H 62H09H 06H vvBnN 63H 01H 62H0AH 06H vvBnh 63H 01H 62H20H 06H vvBnH 63H 01H 62H21H 06H vvBnh 63H 01H 62H63H 06H vvBnH 63H 01H 62H64H 06H vvBnH 63H 01H 62H66H 06H vvF0H 7EH 7FH 09H01H F7HFine tuning in cents (vv=00 -100, vv=40H 0, vv=7FH +100Coarse tuning in half-tones (vv=00 -64, vv=40H 0, vv=7FH +64Vibrate rate mo<strong>di</strong>fy (vv=40H -> no mo<strong>di</strong>f)Vibrate depth mo<strong>di</strong>fy (vv=40H -> no mo<strong>di</strong>f)Vibrate delay mo<strong>di</strong>fy (vv=40H -> no mo<strong>di</strong>f)TVF cutoff freq mo<strong>di</strong>fy(vv=40H -> no mo<strong>di</strong>f)TVF resonance mo<strong>di</strong>fy (vv=40H -> no mo<strong>di</strong>f)Env. attack time mo<strong>di</strong>fy(vv=40H ->no mo<strong>di</strong>f)Env. decay time mo<strong>di</strong>fy(vv=40H -> no mo<strong>di</strong>f)Env. release time mo<strong>di</strong>f(vv=40H ->no mo<strong>di</strong>f)General MIDI reset (note 4)
Standard SysexSYSEXSYSEXSYSEXSYSEXSYSEXSYSEXSYSEXSYSEXSYSEXSYSEXSYSEXSYSEXSYSEXF0H 7FH 7FH 04H01H 00H ll F7HF0H 26H 7BH 0CH00H 00H vv F7HF0H 41H 00H 42H12H 40H 00H 04Hvv xx F7HF0H 26H 7BH 07H00H vv F7HF0H 26H 7BH 39H00H vv F7HF0H 26H 7BH 30H00H vv F7HF0H 26H 7BH 71H1FH vv 00H F7HF0H 26H 7BH 1AH1pH vv efx F7HF0H 41H 00H 42H12H 40H 00H 7FH00H xx F7HF0H 26H 7BH 0EH00H 00H F7HF0H 26H 7BH 00H00H vv F7HF0H 26H 7BH 02H00H vv F7HF0H 26H 7BH 01H00H vv F7HF0H 26H 7BH 03H00H vv F7HMaster volume (ll=0 to 127, default 127) (note 4). Not reset by GSresetMaster tune (default vv= 40H ) -100.vv=0 to +100. vv= 7FH.Master volume (default vv=7FH) (note 4)Not reset by GS reset.Master Transposer (default vv=40H, no transpose) (note 4)Master pan (default vv=40H, center) (note 4)MIDI Port vv=0H (Channels 00H - 0FH), 01H (Channels 10H -1FH)Vv= Round Robin. 0= OFF , 1= OnLoad EXF Channel , p= Channel ( 00H-0FH) , vv=(00H-13H)00H : Chorus1 01H : Chorus202H : Phaser103H : Phaser204H : Flanger1 05H : Flanger206H : Tremolo1 07H : Tremolo208H : Delay109H : Delay20AH : Echo Pan 0BH : Rotor Slow0CH : Rotor Fast 0DH : Organ Overdrive*0EH : Valve Distortion* 0FH : Power Distortion*10H : Metal Distortion* 11H : Tweed Amp. Simulator12H : British Amp. 13H : Jazz Amp. SimulatorSimulatorvv= 7FH ( off)efx= 3AH ( EFX 1) , 3BH ( EFX 2)*=available only on EFX 1GS reset (note 4)GM reset (note 4)Reverb type (vv=0 to 7), default = 03H10H : Room111H : Room212H : Room313H : Hall114H : Hall215H : Plate16H : Delay17H : Pan delay(note 5)Reverb master level, default = 32 (note 5)Chorus type (vv=0 to 7), default = 02H10H : Chorus1 11H : Chorus212H : Chorus3 13H : Chorus414H : Feedback 15H : Flanger16H : Short delay 17H : FB delay(note 5)Chorus master level, default = 26 (note 5)
SYSEXF0H 26H 7BH 0FH00H 0pH vv F7HPart to rhythm allocation, p is part (0 to 15), vv is 00 (sound part) or01 (rhythm part).This SYSEX allows a part to play sound or drumset. There is nolimitation of the number of parts playing drumset.SYSEXSYSEXSYSEXSYSEXSYSEXSYSEXSYSEXSYSEXSYSEXSYSEXSYSEXSYSEXSYSEXSYSEXSYSEXF0H 41H 00H 42H12H 40H 1pH 40Hv1 v2 ... v12 xx F7HF0H 41H 00H 42H12H 40H 1pH 1FHvv xx F7HF0H 41H 00H 42H12H 40H 1pH 20Hvv xx F7HF0H 41H 00H 42H12H 40H 2pH 00Hvv xx F7HF0H 41H 00H 42H12H 40H 2pH 01Hvv xx F7HF0H 41H 00H 42H12H 40H 2pH 02Hvv xx F7HF0H 41H 00H 42H12H 40H 2pH 03Hvv xx F7HF0H 41H 00H 42H12H 40H 2pH 04Hvv xx F7HF0H 41H 00H 42H12H 40H 2pH 05Hvv xx F7HF0H 41H 00H 42H12H 40H 2pH 06Hvv xx F7HF0H 41H 00H 42H12H 40H 2pH 10Hvv xx F7HF0H 41H 00H 42H12H 40H 2pH 11Hvv xx F7HF0H 41H 00H 42H12H 40H 2pH 12Hvv xx F7HF0H 41H 00H 42H12H 40H 2pH 14Hvv xx F7HF0H 41H 00H 42H12H 40H 2pH 15Hvv xx F7HScale tuning, p is part (0 to 15), v1 to v12 are 12 semi-tones tuningvalues (C, C#, D, ... A#, B), in the range -64 (00H)0 (40H) +63(7FH) cents.This SYSEX allows non chromatic tuning ofthe musical scale on a given part.Default v1, v2, ... ,v12 = 40H,40H,...,40H (chromatic tuning).Scale tuning has no effect if the partis assigned to a rhythm channel or if the sound played is not ofchromatic type.(note 3)CC1 Controller number (00-5FH) (default = 10H) (note 3)CC2 Controller number (00-5FH) (default = 11H) (note 3)Mod pitch control (-24,+24 semitone) (default = 40H) (note 3)Mod tvf cutoff control (default = 40H) (note 3)Mod Amplitude control (-100%-+100%) (default=40H) (note 3)Mod lfo1 rate control (default = 40H). n is don’t care. Rate iscommon on all channelsMod lfo1 pitch depth (0-600 cents) (default=0AH) (note 3)Mod lfo1 tvf depth (default = 0H) (note 3)Mod lfo1 tva depth (0-100%) (default = 0H) (note 3)Bend pitch control (-24,+24 semitone) (default = 42H) (note 3)Bend tvf cutoff control (default = 40H) (note 3)Bend Amplitude control (-100%-+100%) (default=40H) (note 3)Bend lfo1 pitch depth (0-600 cents) (default=00H) (note 3)Bend lfo1 tvf depth (default = 0H) (note 3)
SYSEXF0H 41H 00H 42H12H 40H 2pH 16Hvv xx F7HSYSEXF0H 41H 00H 42H12H 40H 2pH 20Hvv xx F7HSYSEXF0H 41H 00H 42H12H 40H 2pH 21Hvv xx F7HSYSEXF0H 41H 00H 42H12H 40H 2pH 22Hvv xx F7HSYSEXF0H 41H 00H 42H12H 40H 2pH 24Hvv xx F7HSYSEXF0H 41H 00H 42H12H 40H 2pH 25Hvv xx F7HSYSEXF0H 41H 00H 42H12H 40H 2pH 26Hvv xx F7HSYSEXF0H 41H 00H 42H12H 40H 2pH 40Hvv xx F7H– SYSEX F0H 41H 00H 42H12H 40H 2pH 41Hvv xx F7HSYSEXF0H 41H 00H 42H12H 40H 2pH 42Hvv xx F7HSYSEXF0H 41H 00H 42H12H 40H 2pH 44Hvv xx F7HSYSEXF0H 41H 00H 42H12H 40H 2pH 45Hvv xx F7HSYSEXF0H 41H 00H 42H12H 40H 2pH 46Hvv xx F7HSYSEXF0H 41H 00H 42H12H 40H 2pH 50Hvv xx F7HSYSEXF0H 41H 00H 42H12H 40H 2pH 51Hvv xx F7HSYSEXF0H 41H 00H 42H12H 40H 2pH 52Hvv xx F7HSYSEXF0H 41H 00H 42H12H 40H 2pH 54Hvv xx F7HSYSEXF0H 41H 00H 42H12H 40H 2pH 55Hvv xx F7HBend lfo1 tva depth (0-100%) (default = 0H) (note 3)CAF pitch control (-24,+24 semitone) (default = 40H) (note 3)CAF tvf cutoff control (default = 40H) (note 3)CAF Amplitude control (-100%-+100%) (default=40H) (note 3)CAF lfo1 pitch depth (0-600 cents) (default=00H) (note 3)CAF lfo1 tvf depth (default = 0H) (note 3)CAF lfo1 tva depth (0-100%) (default = 0H) (note 3)CC1 pitch control (-24,+24 semitone) (default = 40H) (note 3)CC1 tvf cutoff control (default = 40H) (note 3)CC1 Amplitude control (-100%-+100%) (default=40H) (note 3)CC1 lfo1 pitch depth (0-600 cents) (default=00H) (note 3)CC1 lfo1 tvf depth (default = 0H) (note 3)CC1 lfo1 tva depth (0-100%) (default = 0H) (note 3)CC2 pitch control (-24,+24 semitone) (default = 40H) (note 3)CC2 tvf cutoff control (default = 40H) (note 3)CC2 Amplitude control (-100%-+100%) (default=40H) (note 3)CC2 lfo1 pitch depth (0-600 cents) (default=00H) (note 3)CC2 lfo1 tvf depth (default = 0H) (note 3)
SYSEXF0H 41H 00H 42H12H 40H 2pH 56Hvv xx F7HCC2 lfo1 tva depth (0-100%) (default = 0H) (note 3)Notes :1. NRPN sen<strong>di</strong>ng method : CTRL#99=high byte, CTRL#98=low byte, CTRL#6=vv. Example : NRPN0108h = 40h -> CTRL#99=1, CTRL#98=8, CTRL#6=64.2. x or xx means « don’t care »3. Cross system exclusive :Address can be 040h xxh xxh or 050h xxh xxhIf addresse=040h xxh xxh : system exclusive applies to mi<strong>di</strong> port 1 (mi<strong>di</strong> channels 0-Fh) ifreceived on mi<strong>di</strong> port1 , applies to mi<strong>di</strong> port 2 (mi<strong>di</strong> channels 10-1Fh) if received on mi<strong>di</strong> port 2.If addresse=050h xxh xxh, cross system exclusive : applies to port 2 if received on port1, appliesto port 1 if received on port24. Non cross system exclusive applying only on receiving port :System exclusive applies to mi<strong>di</strong> port 1 (mi<strong>di</strong> channels 0-Fh) if received on mi<strong>di</strong> port1.System exclusive applied to mi<strong>di</strong> port 2 (mi<strong>di</strong> channels 10-1Fh) if received on mi<strong>di</strong> port2.5. Non cross system exclusive applying on both ports :System exclusive will be applied to all mi<strong>di</strong> channels (0-1Fh). Can be received on port 1 or port 2in<strong>di</strong>fferently.This is the case for all system exclusive concerning reverb and chorus because reverb and chorusare the same for both ports 1 and 2.
KETRON s.r.l. - Via G. Taliercio, 7 - 60131 - Ancona - Italyph.: +39 071 285 771 - Fax +39 071 2857748e-mail: ketron@ketron.it - web:www.ketron.it