SUPPORT.NINTENDO.COM SUPPORT.NINTENDO.COM
SUPPORT.NINTENDO.COM SUPPORT.NINTENDO.COM
SUPPORT.NINTENDO.COM SUPPORT.NINTENDO.COM

Create successful ePaper yourself
Turn your PDF publications into a flip-book with our unique Google optimized e-Paper software.
Nintendo of America Inc.<br />
P.O. Box 957<br />
Redmond, WA 98073-0957 U.S.A.<br />
www.nintendo.com<br />
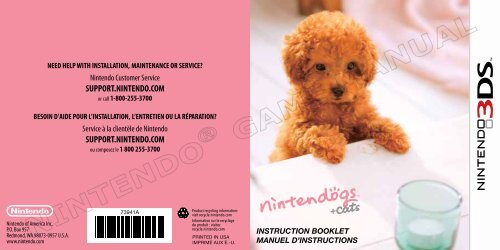
NEED HELP WITH INSTALLATION, MAINTENANCE OR SERVICE?<br />
Nintendo Customer Service<br />
<strong>SUPPORT</strong>.<strong>NINTENDO</strong>.<strong>COM</strong><br />
or call 1-800-255-3700<br />
BESOIN D’AIDE POUR L’INSTALLATION, L’ENTRETIEN OU LA RÉPARATION?<br />
Service à la clientèle de Nintendo<br />
<strong>SUPPORT</strong>.<strong>NINTENDO</strong>.<strong>COM</strong><br />
ou composez le 1 800 255-3700<br />
73941A<br />
Product recycling information:<br />
visit recycle.nintendo.com<br />
Information sur le recyclage<br />
du produit : visitez<br />
recycle.nintendo.com<br />
PRINTED IN USA<br />
IMPRIMÉ AUX É.-U.<br />
INSTRUCTION BOOKLET<br />
MANUEL D’INSTRUCTIONS
PLEASE CAREFULLY READ THE <strong>NINTENDO</strong> 3DSTM OPERATIONS MANUAL BEFORE USING YOUR<br />
SYSTEM, GAME CARD OR ACCESSORY. THIS MANUAL CONTAINS IMPORTANT HEALTH AND SAFETY<br />
INFORMATION.<br />
IMPORTANT SAFETY INFORMATION: READ THE FOLLOWING WARNINGS BEFORE YOU OR YOUR<br />
CHILD PLAY VIDEO GAMES.<br />
WARNING - 3D FEATURE ONLY FOR CHILDREN 7 AND OVER<br />
Viewing of 3D images by children 6 and under may cause vision damage.<br />
Use the Parental Control feature to restrict the display of 3D images for children 6 and under. See the Parental Controls section in the<br />
Nintendo 3DS Operations Manual for more information.<br />
WARNING - SEIZURES<br />
• Some people (about 1 in 4000) may have seizures or blackouts triggered by light flashes or patterns, and this may occur while they<br />
are watching TV or playing video games, even if they have never had a seizure before.<br />
• Anyone who has had a seizure, loss of awareness, or other symptom linked to an epileptic condition should consult a doctor before<br />
playing a video game.<br />
• Parents should watch their children play video games. Stop playing and consult a doctor if you or your child has any of the following<br />
symptoms:<br />
Convulsions Eye or muscle twitching Loss of awareness<br />
Altered vision Involuntary movements Disorientation<br />
To reduce the likelihood of a seizure when playing video games:<br />
1. Sit or stand as far from the screen as possible.<br />
2. Play video games on the smallest available television screen.<br />
3. Do not play if you are tired or need sleep.<br />
4. Play in a well-lit room.<br />
5. Take a 10 to 15 minute break every hour.<br />
WARNING - EYESTRAIN AND MOTION SICKNESS<br />
Playing video games can result in eyestrain after a sustained period of time, and perhaps sooner if using the 3D feature. Playing video<br />
games can also result in motion sickness in some players. Follow these instructions to help avoid eyestrain, dizziness, or nausea:<br />
• Avoid excessive play. It is recommended that parents monitor their children for appropriate play.<br />
• Take a 10 to 15 minute break every hour, or every half hour when using the 3D feature, even if you don’t think you need it. Each<br />
person is different, so take more frequent and longer breaks if you feel discomfort.<br />
• If your eyes become tired or sore while playing, or if you feel dizzy or nauseated, stop and rest for several hours before playing again.<br />
• If you continue to have any of the above symptoms, stop playing and see a doctor.<br />
WARNING - REPETITIVE MOTION INJURIES<br />
Playing video games can make your muscles, joints, or skin hurt. Follow these instructions to avoid problems such as tendinitis,<br />
carpal tunnel syndrome or skin irritation:<br />
• Avoid excessive play. Parents should monitor their children for appropriate play.<br />
• Take a 10 to 15 minute break every hour, even if you don’t think you need it.<br />
• When using the stylus, you do not need to grip it tightly or press it hard against the screen. Doing so may cause fatigue or<br />
discomfort.<br />
• If your hands, wrists, or arms become tired or sore while playing, or if you feel symptoms such as tingling, numbness, burning or<br />
stiffness, stop and rest for several hours before playing again.<br />
• If you continue to have any of the above symptoms or other discomfort during or after play, stop playing and see a doctor.<br />
WARNING - BATTERY LEAKAGE<br />
The Nintendo 3DS contains a rechargeable lithium ion battery pack. Leakage of ingredients contained within the battery pack, or the<br />
combustion products of the ingredients, can cause personal injury as well as damage to your Nintendo 3DS. If battery leakage occurs,<br />
avoid contact with skin. If contact occurs, immediately wash thoroughly with soap and water. If liquid leaking from a battery pack<br />
comes into contact with your eyes, immediately flush thoroughly with water and see a doctor.<br />
To avoid battery leakage:<br />
• Do not expose battery to excessive physical shock, vibration, or liquids.<br />
• Do not disassemble, attempt to repair, or deform the battery.<br />
• Do not dispose of battery pack in a fire.<br />
• Do not touch the terminals of the battery or cause a short between the terminals with a metal object.<br />
• Do not peel or damage the battery label.<br />
WARNING - RADIO FREQUENCY INTERFERENCE<br />
The Nintendo 3DS can emit radio waves that can affect the operation of nearby electronics, including cardiac pacemakers.<br />
• Do not operate the Nintendo 3DS within 9 inches of a pacemaker while using the wireless feature.<br />
• If you have a pacemaker or other implanted medical device, do not use the wireless feature of the Nintendo 3DS without first<br />
consulting your doctor or the manufacturer of your medical device.<br />
• Observe and follow all regulations and rules regarding use of wireless devices in locations such as hospitals, airports, and on<br />
board aircraft. Operation in those locations may interfere with or cause malfunctions of equipment, with resulting injuries to<br />
persons or damage to property.
The Official Seal is your<br />
assurance that this product is<br />
licensed or manufactured by<br />
Nintendo. Always look for this<br />
seal when buying video game<br />
systems, accessories, games<br />
and related products.<br />
NEED HELP PLAYING A GAME?<br />
For game play assistance, we recommend using your<br />
favorite Internet search engine to find tips for the game<br />
you are playing. Some helpful words to include in the<br />
search, along with the game’s title, are: “walk through,”<br />
“FAQ,” “codes,” and “tips.”<br />
IMPORTANT LEGAL INFORMATION<br />
This Nintendo game is not designed for use with any unauthorized device.<br />
Use of any such device will invalidate your Nintendo product warranty. Copying of<br />
any Nintendo game is illegal and is strictly prohibited by domestic and international<br />
intellectual property laws. “Back-up” or “archival” copies are not authorized and are<br />
not necessary to protect your software. Violators will be prosecuted.<br />
© 2011 Nintendo. Trademarks are property of their respective owners.<br />
Nintendo 3DS is a trademark of Nintendo. © 2011 Nintendo.<br />
THIS GAME CARD WILL WORK ONLY WITH THE<br />
<strong>NINTENDO</strong> 3DS TM VIDEO GAME SYSTEM.<br />
StreetPass TM<br />
Swap Mii and pet info, 3D photos<br />
and items with other players<br />
ALLOWS AUTOMATIC SEARCH AND INFORMATION<br />
EXCHANGE WITH OTHER <strong>NINTENDO</strong> 3DS SYSTEMS.<br />
SpotPassTM Receive Mii and pet<br />
info, 3D photos, and items<br />
ALLOWS INFORMATION EXCHANGE BETWEEN THE<br />
<strong>NINTENDO</strong> 3DS SYSTEM AND A WIRELESS HOTSPOT.<br />
This product uses the LC Font by Sharp Corporation. LCFONT, LC Font and the LC logo<br />
mark are trademarks of Sharp Corporation.<br />
WARRANTY & SERVICE INFORMATION<br />
You may need only simple instructions to correct a problem with your product. Try our website at support.nintendo.com or call our<br />
Consumer Assistance Hotline at 1-800-255-3700, rather than going to your retailer. Hours of operation are 6 a.m. to 7 p.m., Pacific Time,<br />
Monday - Sunday (times subject to change). If the problem cannot be solved with the troubleshooting information available online or over the<br />
telephone, you will be offered express factory service through Nintendo. Please do not send any products to Nintendo without contacting us first.<br />
HARDWARE WARRANTY<br />
Nintendo of America Inc. (“Nintendo”) warrants to the original purchaser that the hardware product shall be free from defects in material<br />
and workmanship for twelve (12) months from the date of purchase. If a defect covered by this warranty occurs during this warranty period,<br />
Nintendo will repair or replace the defective hardware product or component, free of charge.* The original purchaser is entitled to this warranty<br />
only if the date of purchase is registered at point of sale or the consumer can demonstrate, to Nintendo’s satisfaction, that the product was<br />
purchased within the last 12 months.<br />
GAME & ACCESSORY WARRANTY<br />
Nintendo warrants to the original purchaser that the product (games and accessories) shall be free from defects in material and workmanship for<br />
a period of three (3) months from the date of purchase. If a defect covered by this warranty occurs during this three (3) month warranty period,<br />
Nintendo will repair or replace the defective product, free of charge.*<br />
SERVICE AFTER EXPIRATION OF WARRANTY<br />
Please try our website at support.nintendo.com or call the Consumer Assistance Hotline at 1-800-255-3700 for troubleshooting information and<br />
repair or replacement options and pricing.*<br />
*In some instances, it may be necessary for you to ship the complete product, FREIGHT PREPAID AND INSURED FOR LOSS OR DAMAGE, to<br />
Nintendo. Please do not send any products to Nintendo without contacting us first.<br />
WARRANTY LIMITATIONS<br />
THIS WARRANTY SHALL NOT APPLY IF THIS PRODUCT: (a) IS USED WITH PRODUCTS NOT SOLD OR LICENSED BY <strong>NINTENDO</strong> (INCLUDING, BUT<br />
NOT LIMITED TO, NON-LICENSED GAME ENHANCEMENT AND COPIER DEVICES, ADAPTERS, SOFTWARE, AND POWER SUPPLIES); (b) IS USED FOR<br />
<strong>COM</strong>MERCIAL PURPOSES (INCLUDING RENTAL); (c) IS MODIFIED OR TAMPERED WITH; (d) IS DAMAGED BY NEGLIGENCE, ACCIDENT, UNREASONABLE<br />
USE, OR BY OTHER CAUSES UNRELATED TO DEFECTIVE MATERIALS OR WORKMANSHIP; OR (e) HAS HAD THE SERIAL NUMBER ALTERED, DEFACED OR<br />
REMOVED.<br />
ANY APPLICABLE IMPLIED WARRANTIES, INCLUDING WARRANTIES OF MERCHANTABILITY AND FITNESS FOR A PARTICULAR PURPOSE, ARE<br />
HEREBY LIMITED IN DURATION TO THE WARRANTY PERIODS DESCRIBED ABOVE (12 MONTHS OR 3 MONTHS, AS APPLICABLE). IN NO EVENT SHALL<br />
<strong>NINTENDO</strong> BE LIABLE FOR CONSEQUENTIAL OR INCIDENTAL DAMAGES RESULTING FROM THE BREACH OF ANY IMPLIED OR EXPRESS WARRANTIES.<br />
SOME STATES DO NOT ALLOW LIMITATIONS ON HOW LONG AN IMPLIED WARRANTY LASTS OR EXCLUSION OF CONSEQUENTIAL OR INCIDENTAL<br />
DAMAGES, SO THE ABOVE LIMITATIONS MAY NOT APPLY TO YOU.<br />
This warranty gives you specific legal rights. You may also have other rights which vary from state to state or province to province.<br />
Nintendo’s address is: Nintendo of America Inc., P.O. Box 957, Redmond, WA 98073-0957 U.S.A.<br />
This warranty is only valid in the United States and Canada.<br />
REV–R
Contents<br />
08 Your First Puppy<br />
16 Life with Your Puppy<br />
20 Caring for Your Pets<br />
22 Interacting with Your Puppy<br />
23 Life with Your Kitten<br />
24 Your Journal<br />
26 StreetPass<br />
30 More Fun Stuff You Can Do<br />
32 Manuel en français<br />
There are three versions of<br />
Nintendogs + Cats.<br />
Every puppy and kitten breed can be<br />
unlocked with any version of the game<br />
by progressing through the game or by<br />
StreetPass<br />
06<br />
feature.<br />
Thank you for purchasing the<br />
Nintendogs + Cats game. Before<br />
you play, be sure to read and<br />
understand this instruction<br />
booklet. Keep it in a handy place<br />
for easy reference.<br />
Nintendogs + Cats uses the<br />
Nintendo 3DS system clock. Be<br />
aware that changing the system<br />
clock will temporarily affect your<br />
Nintendogs + Cats progress.<br />
When caring for living dogs and<br />
cats, the trainer holds ultimate<br />
responsibility for their survival<br />
and well-being. The pets in<br />
Nintendogs + Cats don’t age<br />
and always remain puppies and<br />
kittens, unlike real puppies and<br />
kittens. If you are thinking about<br />
getting a real pet, be sure to<br />
consult with your family about<br />
whether you’re ready for that<br />
responsibility.<br />
07
08<br />
1<br />
It all begins at the kennel, where you’ll go to pick out<br />
the perfect pup to take home with you.<br />
First Step<br />
Make sure that the power on the Nintendo 3DS<br />
system is off, then insert the Nintendogs + Cats Game Card securely in the<br />
Game Card slot until you hear it click. Next, turn on your Nintendo 3DS<br />
system. Tap the Nintendogs + Cats icon on the Nintendo 3DS HOME<br />
Menu, and then tap Start to go to the kennel.<br />
Quick tip!<br />
Get Started at the Kennel<br />
If you’re continuing a game you’ve<br />
already started playing, just tap Start<br />
on the HOME Menu to head straight to<br />
your home.<br />
2 Which<br />
Puppy Will You Choose?<br />
The kennel is full of great puppies looking for a good<br />
home. When you touch the puppy silhouette on the lower<br />
screen (Touch Screen) using your stylus, you’ll notice that<br />
you are petting the dog that appears on the top screen.<br />
Move the Circle Pad to change your view and see the<br />
puppy from different angles.<br />
How to Choose Your Puppy<br />
After you pet the puppy for a while, you’ll be allowed to<br />
pick any dog available at the kennel. If you pick out a breed and coat color<br />
you like, you’ll see a selection of those pups up close. When you see the one<br />
you want, tap Choose This Dog.<br />
Quick tip!<br />
The next time you go to the kennel,<br />
you’ll be able to pick out a kitten!<br />
09
3<br />
Take Your Puppy Home<br />
It takes a while for a new puppy to get used to a new home. Tap the icon on the<br />
Touch Screen to call your puppy over, and then give it lots of attention and love.<br />
After a while, your puppy will calm down.<br />
Quick tip!<br />
Sometimes you don’t have to touch to call your puppy over. If you bring your<br />
face close to the screen or whistle to get your dog’s attention, your puppy may come<br />
running over to you!<br />
Note: the system’s inner-facing camera (see page 20) is used for facial recognition<br />
and will not be used for other purposes.<br />
10 11<br />
4 Give<br />
Your Puppy a Name<br />
Once your puppy has calmed down, it’s time to give it a name.<br />
Call Your Puppy’s Name<br />
Face your puppy and call out its new name a few times.<br />
Your puppy will remember its name in the same tone of<br />
voice and volume you use the first time, so be sure to say<br />
it the same way every time.<br />
Take Note of Your Puppy’s Name<br />
Once your puppy learns its name, you should make a<br />
note of it by entering the name using the keyboard on the<br />
Touch Screen. Touch the letters to spell<br />
out your dog’s name, then tap OK when OK<br />
you’re done.<br />
Caution!<br />
The name you use here will be made public and shared with other owners via<br />
StreetPass (see page 26). Be careful not to use offensive language or personally<br />
identifying information.
12<br />
Is Your Dog Having a Hard Time<br />
Learning Its Name?<br />
When your puppy understands you, a will appear. If your puppy<br />
doesn’t understand, a will appear. You’ll need to say the name<br />
multiple times before your puppy learns it.<br />
When repeating your dog’s name, be sure to use the same volume<br />
and tone of voice. After saying your dog’s name multiple times, you<br />
may accidentally find yourself leaning closer to the microphone than<br />
recommended, speaking too loudly, or changing your tone. Keep these<br />
tips in mind when you are teaching your dog its name:<br />
• Make sure you are about 6 inches away from the microphone.<br />
• Use your normal speaking volume.<br />
• Use the same name every time. Don’t use nicknames or draw out the<br />
last syllable of the name.<br />
• Pronounce the name clearly from start to end.<br />
• Until your puppy has learned its name, don’t hand your game to another<br />
player once you’ve started.<br />
5 Teach<br />
Your Puppy to Sit Down<br />
After you bond with your puppy by calling its name and petting it, you’ll be able<br />
to start teaching it tricks. Training your pup to do tricks is a fun and rewarding<br />
activity you can do together.<br />
How to Teach Your Puppy to Sit Down<br />
When your dog is able to start learning tricks, you’ll be<br />
prompted with a sequence that will show you how to<br />
teach it to sit down. Read the instructions on the screen<br />
and then say “sit down,” repeating it as many times as<br />
necessary until your dog learns the command. You can<br />
read the instructions by tapping Help. One thing to keep<br />
in mind: when teaching voice commands, avoid long<br />
pauses between words as this can confuse your puppy.<br />
Quick tip!<br />
Help<br />
After your puppy has learned how to sit down, you’ll<br />
be able to view tutorials on a variety of other tricks by<br />
tapping Tricks on your puppy’s status screen (see page 21).<br />
13
6<br />
After Learning “Sit Down”<br />
Once your puppy has learned to sit down,<br />
you’ll be able to go out and play with all of the<br />
game’s features.<br />
To learn how to care for your puppy and about your home, see pages 20-21.<br />
Saving Your Game<br />
To save the current condition of your pets, home, and<br />
items, tap the Save icon on your main home screen.<br />
Whenever you stop playing the Nintendogs + Cats<br />
game, always be sure to tap the Save button to save<br />
your progress.<br />
Save<br />
Closing the System<br />
Close your Nintendo 3DS system at any time while playing<br />
Nintendogs + Cats to pause play and reduce battery-power<br />
consumption. When you open your system, you’ll resume your game<br />
where you left off. While the system is closed, StreetPass <br />
(see page 26) and SpotPass (see page 30) will remain active.<br />
Entering Sleep Mode<br />
Press the POWER Button and tap Sleep Mode to close<br />
Nintendogs + Cats and put your system into Sleep Mode, which<br />
helps to reduce battery-power consumption. While the system is<br />
in Sleep Mode, StreetPass (see page 26) and SpotPass (see page 30)<br />
will remain active.<br />
NOTE: When you press the POWER Button, your Nintendogs + Cats<br />
game will immediately close, and all unsaved data will be lost. Always<br />
save your game before pressing the POWER Button (see page 14).<br />
14 15
Life with<br />
Your Puppy<br />
(At Home)<br />
Give Your Puppy<br />
Something to Eat or Drink<br />
If your pet gets hungry or<br />
thirsty, please feed it and give<br />
it something to drink. Check<br />
your pet’s status screen<br />
(see page 21) to see<br />
if it is hungry or thirsty.<br />
Play with Toys and<br />
Accessories<br />
It’s fun to play with toys<br />
and dress up your pets with<br />
accessories. If you call your<br />
pup’s name after throwing a toy,<br />
it just might fetch it for you.<br />
Brush and Shampoo<br />
Your Dog<br />
If you notice that your pet is<br />
looking a little dirty, you can<br />
give it a good brushing or even<br />
a bath and shampoo.<br />
Take Photos<br />
Tap the icon or press the<br />
L or R Buttons to take 3D<br />
photos of your pets. You can<br />
view the photos you take in<br />
Nintendo 3DS Camera from<br />
your system’s HOME Menu.<br />
Use Your Journal<br />
From the journal (see page 24),<br />
you can communicate<br />
with other owners via<br />
StreetPass (see page 26).<br />
Arrange Furniture<br />
If you place furniture like a<br />
sofa or bed in your room,<br />
your pets may hop on and<br />
take a nap.<br />
Play Music<br />
Pick out your favorite<br />
music and let it play in the<br />
background. Your pets might<br />
react to the music in fun and<br />
interesting ways, depending<br />
on the song.<br />
16 17
Life with Your Puppy (Going Out)<br />
Go for a Walk<br />
When taking your puppy out for a walk, you can give the leash a tug to signal where you<br />
want it to go. There are lots of places you can discover when you’re out for a walk, including<br />
the park, café, gym, or shops. And if you select the Pedometer feature, close your system, and<br />
carry it around with you as you go about your day, each step you take counts toward taking<br />
your pup for a walk.<br />
Enter Competitions<br />
Your dog can only enter the same competition twice per day. If you try to adjust the<br />
Nintendo 3DS system clock, you won’t be able to enter competitions for a while.<br />
Disc Competition<br />
In this competition, you’ll toss a flying disc, and your puppy<br />
has to catch it and bring it back. The farther away your pup<br />
catches it, the more points you earn!<br />
Lure Coursing<br />
In this race, you reel in a lure to lead your puppy to the finish line. Fastest to the finish wins!<br />
Obedience Trial<br />
Your pup can show off the tricks it has mastered within a time limit. This competition makes<br />
use of the AR Cards included with your Nintendo 3DS system.<br />
Go Shopping<br />
You can buy things from a variety of shops. Need money?<br />
Don’t worry–you’ll earn prize money when you win competitions.<br />
You’ll also find items during walks that you can sell at the<br />
Secondhand Shop to earn money.<br />
Pet Supply<br />
Accessories<br />
Interior Designs<br />
Secondhand<br />
Shop<br />
Buy food and drink, toys, and other things here.<br />
Here you can buy fun and stylish accessories for your pup.<br />
You can try them on before you buy.<br />
Here you can buy furniture for your room or even order a<br />
complete renovation of your entire home in a new style.<br />
At this shop, you can sell unwanted items. You can also trade in<br />
materials that your puppy finds during walks for more useful stuff!<br />
Buy a new puppy or kitten here.<br />
You can keep up to three dogs or cats at home. If you can’t<br />
take care of a pet for any reason, you can always drop off or<br />
“donate” it here. Once you donate a pet, you can never get it<br />
back, so be sure this is what you want before you do it.<br />
18 19<br />
Kennel<br />
Pet Hotel
Inner-facing<br />
Camera<br />
Top Screen<br />
Change your view.<br />
Microphone<br />
Caring for Your Pets<br />
In your home, you can play with your puppy or kitten,<br />
take care of them, or just see what they’re up to.<br />
Snap a photo of what’s happening in your room (pictured on the<br />
top screen). The photos you take will be saved to an SD card and<br />
can be viewed in Nintendo 3DS Camera from the HOME Menu.<br />
If you need to delete your save data, start your system, and when the Nintendogs + Cats<br />
title screen appears, simultaneously press and hold down .<br />
Data that has been deleted cannot be recovered, so be careful!<br />
20 21<br />
Camera<br />
Your Puppy or Kitten The view will focus on the pet you tap.<br />
Status Info<br />
Call (see page 22)<br />
Save (see page 14)<br />
Journal (see page 24)<br />
Supplies<br />
Go Out (see page 18) Take your puppy out.<br />
Tap this icon to take a photo of whatever is pictured on<br />
the top screen.<br />
Tap this icon to view detailed status information.<br />
Tap this button to call your pup or kitten over to you.<br />
If you’ve tapped a specific pet icon first, that pet will<br />
come to you.<br />
Save your current progress, including your puppy<br />
and kitten, the state of your room, and items.<br />
Tap to view the journal screen.<br />
View your items, and select items you want to use.
Interacting with Your Puppy<br />
This screen appears after you tap the Call button and your pet has come<br />
over. To pet your puppy or kitten, use your stylus to rub its silhouette on the<br />
Touch Screen. If the brush or treat icons are displayed, you can tap them to<br />
use those items.<br />
Back (see page 20)<br />
Go back to the<br />
main home screen.<br />
Silhouette<br />
Rub your puppy or<br />
kitten’s silhouette to<br />
pet it.<br />
Camera<br />
Touch or press L/R<br />
to take a photo.<br />
Treat<br />
Touch to give your pet<br />
a treat. Touch to<br />
change the currently<br />
selected treat.<br />
Brush<br />
Touch to brush your<br />
pet’s coat. Touch to<br />
change to a different<br />
type of brush, if you<br />
have one.<br />
Life with Your Kitten<br />
Kittens are different from puppies in so<br />
many ways!<br />
Choose a Kitten<br />
The kennel also has lots of kittens. Once you’ve<br />
taken home your first puppy, kittens will be<br />
available to choose from at the kennel.<br />
About Kittens<br />
Kittens are different from puppies--they don’t<br />
come over to you as much. Cats can be a<br />
little bit aloof sometimes. You also can’t teach<br />
them tricks, so just let them wander around<br />
and do what they like. Sometimes they’ll find<br />
interesting items and bring them to you.<br />
Taking Care of Your Kitten<br />
When your kitten gets hungry, feed it kitten<br />
food. Kittens love climbing to high places,<br />
so if you buy tall furniture, they’ll be happy.<br />
22 23
24<br />
Your Journal<br />
You can communicate with other owners via StreetPass using the journal.<br />
Using the Journal for the First Time<br />
The first time you open your journal, you’ll be prompted to create a new journal<br />
save file on your SD Card and register Nintendogs + Cats for StreetPass on your<br />
system. If you don’t create this save file, you won’t be able to use StreetPass or<br />
even use the journal at all.<br />
To activate StreetPass, you’ll need to read and agree to the User Agreement.<br />
For more information about the User Agreement, please refer to the<br />
System Settings.<br />
Journal Screen Controls<br />
When you open your journal, you’ll see this<br />
screen to the right. You can use your stylus<br />
to take notes in your journal too.<br />
Eraser<br />
Drag and slide over notes you’ve written to erase them.<br />
Owner Info<br />
With the owner–information feature, you can select your Mii, set a present<br />
to hand out, select a photo you’ve taken, and enter a short message to<br />
the world. The message you enter is public and can be seen by all users of<br />
StreetPass. Please do not include personal information, offensive language,<br />
or any content that may be illegal or infringe upon the rights of others.<br />
StreetPass Info<br />
Tap to see information about an owner you’ve encountered in StreetPass.<br />
You can even meet up with their puppies or kittens at the park.<br />
If you haven’t made a Mii character in the Mii Maker application, your<br />
nickname won’t appear in your owner info. Once you create your own Mii<br />
and set it on the Owner Info screen, your name will appear.<br />
25
StreetPass<br />
What You Can Do with StreetPass<br />
When you’ve had a successful StreetPass exchange, here are some of the<br />
things that will happen:<br />
Your owner information, pets, and a preselected photo and<br />
present are sent to the other owner.<br />
From your journal, you can view another owner’s<br />
information and receive a present from them.<br />
Tap Meet Up at the Park to meet up with that owner and<br />
their pet and play together at the park.<br />
If you meet a lot of owners via StreetPass, more types of<br />
puppies may become available in the kennel.<br />
If you carry your system with you when you go out, you<br />
can share portions of your Nintendogs + Cats experience<br />
with other players and interact with their puppies or<br />
kittens using the StreetPass feature.<br />
Once you’ve connected via StreetPass with a particular owner, you won’t<br />
be able to exchange with them again for a while.<br />
26 27
How to Use StreetPass<br />
To use StreetPass, follow these instructions.<br />
Open Your Journal (see page 24)<br />
Open your journal and register Nintendogs + Cats for use with StreetPass on<br />
your system.<br />
Set Your Owner Information<br />
Open your journal and set your Miicharacter, photo, message, and present.<br />
You’ll only be able to send photos taken in-game of your dog or cat.<br />
Carry Your System Around with You<br />
Simply close your system and carry it around with you when you are out and<br />
about. When you come into contact with other Nintendogs + Cats owners also<br />
using StreetPass, your system will exchange game data with them.<br />
To use StreetPass, you’ll need to have your system powered on and wireless<br />
communications enabled.<br />
After a Successful StreetPass Exchange<br />
When you’ve successfully exchanged game data with<br />
another owner, you’ll see a sticker in your journal<br />
(see page 25). You can tap that sticker to see<br />
information about the owner.<br />
To Stop Using StreetPass<br />
If you want to stop using StreetPass, go to System<br />
Settings, select , tap StreetPass Management,<br />
tap the Nintendogs + Cats icon, and then tap<br />
Deactivate StreetPass.<br />
Once you’ve deactivated StreetPass, you can register it again from the journal.<br />
28 29
30<br />
More Fun Stuff You Can Do<br />
Playing with AR Cards<br />
If you select the AR Camera from your room’s supplies screen,<br />
you can use AR Cards to make your puppy or kitten appear in<br />
your world! You can take 3D photos, and if it’s a puppy, you<br />
can have it perform tricks.<br />
Using AR Cards<br />
AR Cards are included with your Nintendo 3DS system. For more<br />
information about safety and proper use of AR Cards, refer to your<br />
system’s operations manual.<br />
Using SpotPass<br />
If you register Nintendogs + Cats for SpotPass on your system, your<br />
system can automatically search for and connect to a wireless Internet<br />
access point and download special items. A sticker will be placed in your<br />
journal when you’ve received SpotPass data. Just like StreetPass, you can<br />
register and start using SpotPass through the journal, and deactivate it in<br />
your Notifications from your system’s HOME Menu. For more information<br />
about the equipment required for SpotPass, Internet settings, and the<br />
User Agreement, refer to the system’s operations manual.<br />
About Wireless Game Play<br />
During wireless game play, if communication seems to be affected by other electronic<br />
devices, move to another location or turn off the interfering device. You may need to<br />
reset the power on the Nintendo 3DS system and start the game again.<br />
• To play wireless Nintendo 3DS games over the Internet, you must first configure your<br />
Nintendo 3DS to connect to the Internet. See the Internet Settings section in the<br />
Nintendo 3DS Operations Manual.<br />
• To complete the setup, you will need access to a wireless broadband Internet<br />
connection. You may need to use a PC to access and configure the settings of your<br />
wireless network.<br />
• Wireless game play uses more battery power than other game play. You may prefer to<br />
use the AC adapter to prevent running out of power during wireless game play or<br />
when connected to the Internet.<br />
• You can also connect to the Internet at Nintendo Zone locations or selected<br />
Internet hot spots.<br />
To protect your privacy, do not give out personal information such as last name,<br />
phone number, birth date, age, school, e-mail address, or home address when<br />
communicating with others.<br />
The Nintendo 3DS Service User Agreement that governs Nintendo 3DS online game<br />
play and sets forth the Nintendo 3DS Privacy Policy is available in the Nintendo 3DS<br />
Operations Manual, on the Nintendo 3DS by accessing the Internet Settings section of<br />
System Settings, or online at support.nintendo.com/useragreement/nintendo3ds.
VEUILLEZ LIRE ATTENTIVEMENT LE MODE D’EMPLOI DE LA CONSOLE <strong>NINTENDO</strong> 3DSTM AVANT D’UTILISER<br />
VOTRE CONSOLE, UNE CARTE DE JEU OU UN ACCESSOIRE. CE MODE D’EMPLOI CONTIENT DES INFORMATIONS<br />
IMPORTANTES SUR LA SANTÉ ET LA SÉCURITÉ.<br />
INFORMATIONS IMPORTANTES SUR LA SÉCURITÉ : LISEZ LES AVERTISSEMENTS SUIVANTS AVANT QUE VOUS OU<br />
VOTRE ENFANT NE JOUIEZ À UN JEU VIDÉO.<br />
AVERTISSEMENT - Fonction 3D destinée uniquement aux enfants de 7 ans et plus<br />
Le visionnement d’images en 3D par des enfants de 6 ans et moins peut causer des problèmes de vision.<br />
La fonction de contrôle parental est disponible pour restreindre l’affichage et le visionnement de telles images. Pour plus de détails, consultez<br />
la section sur le contrôle parental dans le mode d’emploi de la console Nintendo 3DS.<br />
AVERTISSEMENT - Danger d’attaque<br />
• Même si elles n’ont jamais connu de tels problèmes auparavant, certaines personnes (environ 1 sur 4 000) peuvent être victimes d’une<br />
attaque ou d’un évanouissement déclenché par des lumières ou motifs clignotants, et ceci peut se produire pendant qu’elles regardent la<br />
télévision ou s’amusent avec des jeux vidéo.<br />
• Toute personne qui a été victime d’une telle attaque, d’une perte de conscience ou de symptômes reliés à l’épilepsie doit consulter un<br />
médecin avant de jouer à des jeux vidéo.<br />
• Les parents doivent surveiller leurs enfants pendant que ces derniers jouent avec des jeux vidéo. Arrêtez de jouer et consultez un médecin,<br />
si vous ou votre enfant présentez les symptômes suivants :<br />
Convulsions Tics oculaires ou musculaires Perte de conscience<br />
Problèmes de vision Mouvements involontaires Désorientation<br />
Pour diminuer les possibilités d’une attaque pendant le jeu :<br />
1. Tenez-vous aussi loin que possible de l’écran.<br />
2. Jouez sur l’écran de télévision le plus petit disponible.<br />
3. Ne jouez pas si vous êtes fatigué ou avez besoin de sommeil.<br />
AVERTISSEMENT - Fatigue oculaire et nausée<br />
4. Jouez dans une pièce bien éclairée.<br />
5. Interrompez chaque heure de jeu par<br />
une pause de 10 à 15 minutes.<br />
Jouer à des jeux vidéo pendant une longue période de temps peut causer une fatigue oculaire et peut arriver plus rapidement si vous utilisez<br />
la fonction 3D. Pour certains joueurs, jouer à des jeux vidéo peut également causer la nausée. Suivez ces instructions pour éviter la fatigue<br />
oculaire, les étourdissements ou la nausée :<br />
• Évitez de jouer pendant une longue période de temps. Il est conseillé aux parents de surveiller la durée des séances de jeu de leurs enfants.<br />
• Prenez une pause de 10 à 15 minutes toutes les heures, ou à chaque 30 minutes si vous utilisez la fonction 3D, même si vous croyez ne pas<br />
en avoir besoin. Chaque personne est différente, alors prenez une pause plus ou moins longue en cas de malaise.<br />
• Si vos yeux sont fatigués ou douloureux, ou si vous êtes étourdi ou nauséeux, cessez de jouer et reposez-vous pendant plusieurs heures<br />
avant de recommencer à jouer.<br />
• Si l’un de ces symptômes persiste, cessez de jouer et consultez un médecin.<br />
AVERTISSEMENT - Blessures dues aux mouvements répétitifs<br />
Les jeux vidéo peuvent irriter les muscles, les poignets ou la peau. Veuillez suivre les instructions suivantes afin d’éviter des problèmes tels que<br />
la tendinite, le syndrome du tunnel carpien, ou l’irritation de la peau :<br />
• Évitez les périodes trop longues de jeu. Les parents devront s’assurer que leurs enfants jouent pendant des périodes adéquates.<br />
• Même si vous ne croyez pas en avoir besoin, faites une pause de 10 à 15 minutes à chaque heure de jeu.<br />
• Lorsque vous utilisez le stylet, il n’est pas nécessaire de le serrer ou d’appuyer trop fort sur l’écran. Cela risqué d’entraîner gêne ou fatigue.<br />
• Si vous éprouvez de la fatigue ou de la douleur au niveau des mains, des poignets ou des bras, ou si vous ressentez des symptômes tels que<br />
des fourmillements, engourdissements, brûlures ou courbatures, cessez de jouer et reposez-vous pendant plusieurs heures avant de jouer<br />
de nouveau.<br />
• Si vous ressentez l’un des symptômes mentionnés ci-dessus ou tout autre malaise pendant que vous jouez ou après avoir joué, cessez de<br />
jouer et consultez un médecin.<br />
AVERTISSEMENT - Écoulement du liquide de la batterie<br />
Le Nintendo 3DS contient une batterie rechargeable au lithium-ion. L’écoulement des ingrédients contenus dans la batterie ou la combustion<br />
de ces ingrédients peuvent causer des blessures et endommager votre Nintendo 3DS. Si l’écoulement du liquide de la batterie survient, évitez<br />
tout contact avec la peau. Dans le cas d’un contact avec la peau, lavez immédiatement et abondamment la surface contaminée avec de l’eau<br />
savonneuse. Dans le cas d’un contact du liquide de la batterie avec les yeux, rincez immédiatement et abondamment avec de l’eau et consultez<br />
un médecin.<br />
Pour éviter l’écoulement de la batterie :<br />
• N’exposez pas la batterie à des liquides ou à des vibrations et des chocs excessifs.<br />
• Ne désassemblez pas la batterie et ne tentez pas de la réparer ou de la déformer.<br />
• Ne jetez jamais la batterie dans le feu.<br />
• Ne touchez pas aux bornes de la batterie et ne causez pas de court-circuit entre ces points de connexion avec un objet de métal.<br />
• Ne retirez pas et n’endommagez pas l’étiquette de la batterie.<br />
AVERTISSEMENT - Interférence avec les fréquences radio<br />
Le Nintendo 3DS peut émettre des ondes radio pouvant affecter le fonctionnement d’appareils électroniques à proximité, incluant les<br />
stimulateurs cardiaques.<br />
• N’utilisez pas le Nintendo 3DS à moins de 23 cm d’un stimulateur cardiaque lorsque la fonction sans fil est activée.<br />
• Si vous possédez un stimulateur cardiaque ou tout autre appareil médical implanté, n’utilisez pas la fonction sans fil du Nintendo 3DS<br />
avant d’avoir consulté votre médecin ou le fabricant de l’appareil médical.<br />
• Respectez tous les règlements concernant l’utilisation des appareils sans fil dans des endroits tels que les hôpitaux, les aéroports et à bord<br />
des avions. Leur fonctionnement dans ces endroits peut interférer avec l’équipement ou provoquer un dysfonctionnement, ce qui pourrait<br />
causer des blessures ou des dommages matériels.
Ce sceau officiel est votre<br />
garantie que le présent produit<br />
est agréé ou manufacturé par<br />
Nintendo. Cherchez-le toujours<br />
sur les boîtes lorsque vous<br />
achetez des consoles de jeux<br />
vidéo, des accessoires, des jeux<br />
et d’autres produits apparentés.<br />
BESOIN D’AIDE POUR JOUER?<br />
Si l’information que vous recherchez n’est pas offerte sur la<br />
Power Line, vous pouvez utiliser votre moteur de recherche<br />
préféré sur Internet pour trouver des conseils du jeu auquel<br />
vous jouez. Quelques mots utiles à inclure dans votre<br />
recherche, ainsi que le nom du jeu, sont : « FAQ », « Foire<br />
aux questions », « codes » et « conseils ».<br />
INFORMATIONS LÉGALES IMPORTANTES<br />
Ce jeu Nintendo n’est pas conçu pour être utilisé avec un appareil non autorisé. L’utilisation d’un<br />
tel appareil invalidera votre garantie Nintendo. Copier un jeu Nintendo est illégal et strictement<br />
interdit par les lois domestiques et internationales régissant la propriété intellectuelle. Les copies<br />
de « secours » ou « d’archivage » ne sont pas autorisées et ne sont pas nécessaires pour protéger<br />
vos logiciels. Tout contrevenant sera poursuivi.<br />
CETTE CARTE DE JEU N’EST <strong>COM</strong>PATIBLE QU’AVEC<br />
LA CONSOLE DE JEUX VIDÉO <strong>NINTENDO</strong> 3DS TM .<br />
StreetPassTM Échangez des infos sur vos Mii et<br />
animaux, photos 3D et objets<br />
PERMETS DE CHERCHER D’AUTRES CONSOLES<br />
<strong>NINTENDO</strong> 3DS ET ÉCHANGER DES INFORMATIONS<br />
AVEC CELLES-CI.<br />
SpotPassTM Téléchargez des infos sur les Mii<br />
et animaux, photos 3D et objets<br />
PERMETS L’ÉCHANGE D’INFORMATIONS ENTRE LE<br />
<strong>NINTENDO</strong> 3DS ET LES POINTS D’ACCÈS SANS FIL.<br />
RENSEIGNEMENTS SUR L’ENTRETIEN ET LA GARANTIE<br />
Certains problèmes pourraient être facilement résolus à l’aide de quelques instructions simples. Avant de retourner chez votre<br />
détaillant, visitez notre site Internet à support.nintendo.com, ou appelez le service à la clientèle au 1 800 255-3700. Nos heures<br />
d’ouverture sont de 6 h à 19 h, heure du Pacifique, du lundi au dimanche (heures sujettes à changement). Si le problème ne peut pas être résolu<br />
en consultant le soutien technique en ligne ou au téléphone, Nintendo vous offrira un service de réparation express. Veuillez nous contacter<br />
avant d’expédier tout produit chez Nintendo.<br />
GARANTIE SUR LES APPAREILS<br />
Nintendo of America Inc. (« Nintendo ») garantit à l’acheteur original que l’appareil ne connaîtra aucun défaut de matériel ou de main-d’œuvre<br />
pour une période de douze (12) mois suivants la date d’achat. Si un tel défaut couvert par la présente garantie se produit durant cette période,<br />
Nintendo réparera ou remplacera sans frais le produit défectueux.* L’acheteur original sera couvert par cette garantie seulement si la date<br />
d’achat est enregistrée à un point de vente ou si le client peut démontrer, à la satisfaction de Nintendo, que le produit a été acheté au cours des<br />
12 derniers mois.<br />
GARANTIE SUR LES JEUX ET ACCESSOIRES<br />
Nintendo garantit à l’acheteur original que le produit (jeu ou accessoire) ne connaîtra aucun défaut de matériel ou de main-d’œuvre pour une<br />
période de trois (3) mois suivants sa date d’achat. Si un tel défaut couvert par la présente garantie se produit durant cette période de trois (3)<br />
mois, Nintendo réparera ou remplacera sans frais le produit défectueux.*<br />
ENTRETIEN APRÈS ÉCHÉANCE DE LA GARANTIE<br />
Veuillez visiter notre site Internet à support.nintendo.com ou appeler le service à la clientèle au 1 800 255-3700 pour des informations sur le<br />
dépannage et la réparation, ou pour les options de remplacement ainsi que leurs prix.*<br />
*Dans certains cas, il peut s’avérer nécessaire d’expédier le produit chez Nintendo. LES FRAIS DE TRANSPORT DOIVENT ÊTRE PAYÉS ET LE PRODUIT<br />
DOIT ÊTRE ASSURÉ CONTRE LES DOMMAGES ET LES PERTES. Veuillez nous contacter avant d’expédier tout produit chez Nintendo.<br />
LIMITES DE LA GARANTIE<br />
LA PRÉSENTE GARANTIE SERA NULLE SI LE PRODUIT : (a) EST UTILISÉ AVEC D’AUTRES PRODUITS QUI NE SONT NI VENDUS, NI SOUS LICENCE DE<br />
<strong>NINTENDO</strong> (Y <strong>COM</strong>PRIS, MAIS SANS S’Y LIMITER, LES APPAREILS D’AMÉLIORATION ET DE COPIE DE JEUX, LES ADAPTATEURS, LES LOGICIELS ET LES<br />
BLOCS D’ALIMENTATION NON AUTORISÉS); (b) EST UTILISÉ À DES FINS <strong>COM</strong>MERCIALES (Y <strong>COM</strong>PRIS LA LOCATION); (c) A ÉTÉ MODIFIÉ OU ALTÉRÉ;<br />
(d) A ÉTÉ ENDOMMAGÉ PAR CAUSE DE NÉGLIGENCE, D’ACCIDENT, D’UTILISATION ABUSIVE OU TOUTE AUTRE CAUSE QUI NE SERAIT PAS RELIÉE À DU<br />
MATÉRIEL DÉFECTUEUX OU À LA MAIN-D’ŒUVRE; OU (e) SON NUMÉRO DE SÉRIE A ÉTÉ MODIFIÉ, EFFACÉ OU RENDU ILLISIBLE.<br />
TOUTES LES GARANTIES IMPLICITES, Y <strong>COM</strong>PRIS LES GARANTIES DE QUALITÉ MARCHANDE ET D’ADÉQUATION À UN USAGE PARTICULIER, SONT<br />
LIMITÉES AUX PÉRIODES DE GARANTIE DÉCRITES CI-DESSUS (12 MOIS OU 3 MOIS, SELON LE CAS). <strong>NINTENDO</strong> NE SERA EN AUCUN CAS TENU<br />
RESPONSABLE DES DOMMAGES ACCIDENTELS OU INDIRECTS RÉSULTANT D’UNE INFRACTION À TOUTE STIPULATION EXPLICITE OU IMPLICITE DES<br />
GARANTIES. CERTAINS ÉTATS OU PROVINCES NE PERMETTENT PAS LA LIMITATION DE LA DURÉE D’UNE GARANTIE IMPLICITE, NI L’EXCLUSION DES<br />
DOMMAGES ACCIDENTELS OU INDIRECTS. DANS UN TEL CAS, LES LIMITES ET EXCLUSIONS MENTIONNÉES CI-DESSUS NE S’APPLIQUENT PAS.<br />
La présente garantie vous donne des droits légaux spécifiques. Vous pourriez également posséder d’autres droits qui varient d’un État ou d’une<br />
province à l’autre.<br />
L’adresse de Nintendo est : Nintendo of America Inc., P.O. Box 957, Redmond, WA 98073-0957 U.S.A.<br />
La présente garantie n’est valide qu’aux États-Unis et au Canada.<br />
REV–R
Table des matières<br />
38 Votre premier chiot<br />
46 Vivre avec votre chiot<br />
50 Prendre soin de votre chiot<br />
52 Interactions avec votre chiot<br />
53 Vivre avec votre chaton<br />
54 Votre carnet<br />
56 StreetPass<br />
60 Plus de choses, plus de plaisir!<br />
Voici les trois versions de<br />
Nintendogs + Cats.<br />
Chaque version vous permettra de<br />
déverrouiller toutes les races de chiots<br />
et chatons en progressant dans le jeu<br />
ou en utilisant StreetPass.<br />
36<br />
Nous vous remercions d’avoir fait<br />
l’achat de Nintendogs + Cats.<br />
Avant de commencer à jouer,<br />
veuillez prendre connaissance des<br />
instructions de ce mode d’emploi.<br />
Gardez-le à la main pour le<br />
consulter facilement.<br />
Veuillez noter que Nintendogs +<br />
Cats utilise l’horloge de la console<br />
Nintendo 3DS. Changer l’heure<br />
ou la date de cette horloge aura<br />
un effet temporaire sur votre<br />
progression dans le jeu.<br />
Dans la vraie vie, c’est le maître<br />
qui est responsable d’assurer leur<br />
bien-être. Dans Nintendogs + Cats,<br />
les animaux ne vieillissent jamais :<br />
ils demeurent toujours des chiots<br />
et des chatons. Si vous pensez que<br />
vous aimeriez avoir un vrai animal,<br />
discutez-en avec votre famille pour<br />
déterminer si vous êtes prêt à en<br />
assumer la responsabilité.<br />
37
38<br />
1<br />
Votre belle aventure commence au chenil, où vous<br />
choisirez le chiot parfait qui vous accompagnera<br />
à la maison.<br />
Pour commencer<br />
Assurez-vous d’abord que la console Nintendo 3DS est éteinte. Insérez la<br />
carte de jeu Nintendogs + Cats dans la fente prévue à cet effet jusqu’à ce<br />
que vous entendiez le « clic », puis allumez la console. Touchez l’icône<br />
Nintendogs + Cats dans le menu HOME Nintendo 3DS et touchez enfin<br />
Démarrer pour vous rendre au chenil.<br />
Astuce!<br />
Première visite au chenil<br />
Si vous voulez reprendre une partie<br />
interrompue, touchez Démarrer dans<br />
le menu HOME et vous retournerez<br />
directement dans votre maison.<br />
2 Quel<br />
chiot choisir?<br />
Le chenil est rempli de chiots adorables qui aimeraient<br />
bien se trouver un chez-soi. Lorsque vous appuyez sur la<br />
silhouette du chiot sur l’écran inférieur (écran tactile) à<br />
l’aide de votre stylet, vous remarquerez que vous flattez le<br />
chien qui apparaît sur l’écran supérieur. Déplacez le pad<br />
circulaire pour changer de plan et voir le chiot sous un<br />
angle différent.<br />
Comment choisir votre chiot<br />
Une fois au chenil, sélectionnez la race et le type de pelage qui vous plait.<br />
Pour choisir un animal, flattez-le d’abord pendant un certain temps, puis<br />
appuyez ensuite sur Choisir ce chiot.<br />
Astuce!<br />
La prochaine fois que vous irez au<br />
chenil, vous pourrez choisir un chaton!<br />
39
3<br />
Emmener votre chiot à la maison<br />
Votre chiot aura besoin de temps pour s’habituer à son nouvel environnement.<br />
Touchez à l’écran tactile pour l’appeler et lui donner beaucoup d’attention<br />
et d’amour. Vous verrez, après un certain temps, votre chiot se calmera.<br />
Astuce!<br />
Vous n’avez pas à toucher votre écran pour appeler votre chiot. Pour attirer son<br />
attention, approchez tout simplement votre visage près de l’écran ou encore appuyez<br />
sur le sifflet au centre de l’écran inférieur. Votre chiot courra sûrement vers vous!<br />
Note : L’appareil photo numérique intérieur de la console (voir page 50) est utilisé<br />
pour la reconnaissance faciale et ne sera pas utilisé à d’autres fins.<br />
40 41<br />
4 Donner<br />
un nom à votre chiot<br />
Vous pourrez donner un nom à votre chiot lorsqu’il se sera calmé.<br />
Nommer votre chiot<br />
Placez-vous devant votre chiot et dites le nom que vous<br />
avez choisi à plusieurs reprises, à haute voix. Votre chiot<br />
se souviendra de son nom si vous utilisez le même ton de<br />
voix et le même volume que vous avez utilisé la première<br />
fois. Assurez-vous donc de le dire de la même façon<br />
chaque fois.<br />
Prendre en note le nom de votre chiot<br />
Lorsque votre chiot reconnaît son nom, notez-le avant de<br />
l’oublier. Utilisez tout simplement le clavier sur l’écran<br />
tactile puis appuyez sur OK lorsque vous<br />
avez terminé. OK<br />
Attention!<br />
Le nom utilisé ici sera rendu public et partagé avec d’autres utilisateurs via<br />
StreetPass (voir page 54). Veillez à ne pas utiliser un langage offensant ou des<br />
informations personnelles.
42<br />
Votre chiot a-t-il de la difficulté à<br />
reconnaître son nom?<br />
Si votre chiot comprend ce que vous dites, une apparaîtra. Par contre,<br />
s’il ne comprend pas, un apparaîtra. Vous aurez besoin de dire son<br />
nom à plusieurs reprises avant qu’il apprenne son nom.<br />
Lorsque vous répétez le nom de votre chien, il est préférable d’utiliser le<br />
même volume et le même ton de voix que vous avez utilisé la première<br />
fois. Après avoir répété son nom à plusieurs reprises, vous risquez de vous<br />
retrouver plus près du microphone que recommandé, de parler trop fort<br />
ou encore de changer votre ton. Voici quelques conseils pour vous aider :<br />
• Assurez-vous de garder une distance d’environ quinze centimètres du<br />
microphone.<br />
• Gardez un volume normal lorsque vous parlez.<br />
• Utilisez le même nom chaque fois. N’utilisez pas de surnom ou<br />
n’écourtez pas la dernière syllabe de son nom.<br />
• Veillez à ce que votre prononciation soit la plus claire possible.<br />
• Jusqu’à ce que votre chiot ait appris son nom, ne laissé pas un autre<br />
joueur toucher à votre jeu à un autre joueur.<br />
5 Montrer<br />
à votre chiot à s’asseoir<br />
Votre chiot est maintenant devenu votre petit compagnon. Il adore se faire flatter<br />
et vient à vous lorsque vous l’appelez par son nom. Vous serez capable de lui<br />
apprendre des tours. L’entraînement est une activité amusante et enrichissante<br />
que vous pouvez faire ensemble.<br />
Comment montrer à votre chiot à s’asseoir<br />
Une fois que votre chiot est prêt à apprendre des tours,<br />
une séquence vous montrera comment lui enseigner<br />
la commande « assis ». Suivez les instructions qui<br />
apparaissent à l’écran, puis dites « assis ». Vous devrez<br />
répéter la commande jusqu’à ce que votre chiot l’ait<br />
apprise. Il est préférable d’éviter de faire de longues<br />
pauses entre les mots d’une commande, car cela pourrait<br />
déboussoler votre chiot. Pour obtenir des instructions,<br />
touchez Aide.<br />
Aide<br />
Astuce!<br />
Bonne nouvelle! Votre chiot connaît le tour « assis ».<br />
Vous pouvez maintenant lui apprendre d’autres tours.<br />
Accédez au statut de votre chiot pour consulter les guides<br />
de dressage en appuyant sur « Liste des tours » (voir<br />
page 51).<br />
43
6<br />
Après avoir appris comment<br />
« s’asseoir »<br />
Une fois que votre chiot a appris à s’asseoir, vous<br />
pourrez faire des sorties et vous amuser avec<br />
toutes les fonctionnalités du jeu.<br />
Pour savoir comment prendre soin de votre chiot et de votre maison,<br />
consultez p. 50 et 51<br />
Sauvegarder votre partie<br />
Pour sauvegarder l’état actuel de vos animaux, de votre<br />
maison ou des articles que vous vous êtes procurés,<br />
appuyez sur l’icône Sauvegarder, qui se trouve sur<br />
l’écran principal. Assurez-vous de sauvegarder votre<br />
progression avant de quitter Nintendogs + Cats.<br />
Sauvegarder<br />
Fermeture de la console<br />
Vous pouvez fermer votre console Nintendo 3DS à tout moment<br />
pendant la partie Nintendogs + Cats pour interrompre la partie<br />
sans la quitter ou réduire la consommation d’énergie de la batterie.<br />
Lorsque vous ouvrirez votre console, vous reprendrez votre partie<br />
là où vous l’avez laissé. Bien que la console soit fermée, StreetPass<br />
(voir page 56) et SpotPass (voir page 60) demeurent activés.<br />
Passer en mode veille<br />
Pour activer le mode veille de la console Nintendo 3DS et ainsi<br />
réduire la consommation d’énergie de la batterie, appuyez sur<br />
POWER et touchez Mode veille à l’écran. Lorsque la console est<br />
en mode veille, StreetPass (voir page 56) et SpotPass (voir page 60)<br />
demeurent activés.<br />
NOTE : Lorsque vous appuyez sur POWER, vous quittez<br />
immédiatement Nintendogs + Cats et toutes les données non<br />
sauvegardées seront perdues. Assurez-vous donc de sauvegarder<br />
votre partie avant d’appuyer sur POWER (voir page 44).<br />
44 45
Vivre avec<br />
votre chiot<br />
(À la maison)<br />
Donner à boire ou à<br />
manger à votre chiot<br />
Si votre animal a faim ou soif,<br />
veuillez le nourrir et lui donner<br />
à boire. Accédez au statut de<br />
votre chiot (voir page 51) pour<br />
vérifier s’il a faim ou soif.<br />
S’amuser avec<br />
des jouets et des<br />
accessoires<br />
Votre chiot adorera s’amuser<br />
avec des jouets et porter<br />
différents accessoires. Lancez<br />
lui un jouet et il ira le chercher<br />
pour vous.<br />
Brosser et toiletter<br />
votre chiot<br />
Si le poil de votre chiot est<br />
sale, brossez-le ou donnez-lui<br />
un bain. Rien de mieux qu’un<br />
petit toilettage!<br />
Prendre des photos<br />
Touchez l’icône ou<br />
appuyez sur L ou R pour<br />
prendre une photo 3D de votre<br />
animal. Vous pouvez visionner<br />
les photos prises avec votre<br />
appareil photo numérique à<br />
partir du menu HOME.<br />
Utilisez votre carnet<br />
À partir du carnet<br />
(voir page 54), vous pouvez<br />
communiquer avec d’autres<br />
maîtres via StreetPass<br />
(voir page 56).<br />
Placer des meubles<br />
Si vous placez un divan ou un<br />
lit dans votre chambre, votre<br />
animal pourra monter dessus<br />
et faire une sieste.<br />
Écouter de la musique<br />
Choisissez votre chanson<br />
préférée et écoutez-la en<br />
arrière-plan. Vos animaux se<br />
mettront peut-être à danser!<br />
46 47
Vivre avec votre chiot (Sortir)<br />
Faire une promenade<br />
Lorsque vous faites une promenade avec votre chiot, tirer sur la laisse pour lui montrer dans<br />
quelle direction vous voulez aller. Lors de vos sorties, vous découvrirez plusieurs endroits<br />
intéressants tels que le parc, le café, le centre d’entraînement et les magasins. Si vous<br />
sélectionnez la fonction podomètre, chaque pas comptera comme une promenade avec votre<br />
chiot. Fermez tout simplement votre console et emmenez-la avec vous!<br />
Participer aux compétitions<br />
Votre chiot peut seulement participer à deux compétitions par jour. Si vous essayez d’ajuster<br />
l’horloge de la console Nintendo 3DS, vous ne serez pas capable de participer à des<br />
compétitions pendant un certain temps.<br />
Concours de disque<br />
Dans cette compétition, vous devez lancer un disque volant<br />
que votre chiot doit attraper. Plus le chiot attrape le disque<br />
loin de vous, plus il marque de points!<br />
Course sur leurre<br />
Dans cette course, votre chiot poursuit un leurre que vous devez ramener jusqu’à la ligne<br />
d’arrivée. Le chiot le plus rapide à franchir la ligne d’arrivée gagne!<br />
Concours d’obéissance<br />
Votre chiot doit montrer les tours qu’il a maîtrisés dans un temps alloué. Cette compétition<br />
utilise les AR Card (incluses avec votre console Nintendo 3DS).<br />
Aller magasiner<br />
Vous pouvez acheter des articles dans différents magasins. Besoin<br />
d’argent? Ne vous inquiétez pas. Vous en gagnerez quand vous<br />
remporterez des compétitions. Vous trouverez également des<br />
articles lors de vos promenades que vous pourrez ensuite vendre<br />
à la boutique d’occasion.<br />
Fournitures<br />
d’animaux<br />
Accessoires<br />
Boutique déco<br />
Boutique<br />
d’occasion<br />
Achetez de la nourriture, quelque chose à boire, des jouets et<br />
d’autres articles.<br />
Vous pouvez acheter des accessoires amusants et élégants<br />
pour votre chiot. Vous pouvez même les essayer avant de les<br />
acheter.<br />
Vous pouvez acheter des meubles ou rénover complètement<br />
votre maison pour lui donner un tout nouveau style.<br />
Dans cette boutique, vous pouvez vendre des objets non<br />
désirés. Vous pouvez également échanger les objets que votre<br />
chiot trouve lors de ses promenades pour des objets plus utiles!<br />
C’est ici que vous pouvez acheter un chiot ou un chaton.<br />
Vous pouvez garder jusqu’à trois chiots ou chatons à la<br />
maison. Si vous ne pouvez pas prendre soin d’un animal<br />
pour une raison quelconque, vous pouvez toujours le déposer<br />
ici ou le « donner ». Vous ne pourrez plus revoir un animal<br />
que vous avez donné, alors soyez sûr que c’est ce que vous<br />
voulez avant de le faire.<br />
48 49<br />
Chenil<br />
Pension
Appareil photo<br />
numérique intérieur<br />
Écran supérieur<br />
Changer de plan.<br />
Microphone<br />
Prendre soin de vos animaux<br />
Dans votre maison, vous pouvez jouer avec votre chiot ou<br />
votre chaton, prendre soin de lui ou simplement le regarder.<br />
Prenez une photo de votre pièce à tout moment (image sur<br />
l’écran supérieur). Les photos seront sauvegardées sur la carte<br />
SD. Vous pouvez visionner les photos dans l’appareil photo<br />
Nintendo 3DS accessible depuis le menu HOME.<br />
Appareil photo<br />
Votre chiot ou<br />
votre chaton<br />
Information sur<br />
le statut<br />
Appeler<br />
(voir page 52)<br />
Sauvegarder<br />
(voir page 44)<br />
Carnet (voir page 54)<br />
Inventaire<br />
Sortir (voir page 48)<br />
Touchez l’icône pour prendre une photo de l’écran<br />
supérieur à tout moment.<br />
L’accent sera mis sur l’animal que vous touchez.<br />
Cliquez sur cette icône pour afficher les informations<br />
détaillées de votre animal.<br />
Sélectionnez l’animal que vous désirez appeler et<br />
touchez au bouton central. Votre chiot ou votre chaton<br />
viendra vers vous.<br />
Sauvegardez votre progression en cours, y compris celle<br />
de votre chiot ou de votre chaton, les changements<br />
apportés dans votre maison ainsi que les différents<br />
objets que vous avez acquis.<br />
Touchez cette icône pour afficher le carnet.<br />
Voir vos articles et sélectionner ceux vous souhaitez<br />
utiliser.<br />
Emmener votre chiot faire une balade.<br />
Pour effacer vos données de sauvegarde, démarrez votre console et à partir de l’écran de<br />
titre Nintendogs + Cats , appuyez simultanément sur et maintenez enfoncé.<br />
Une fois effacées, les données de votre fichier de sauvegarde ne peuvent pas être récupérées.<br />
50 51
Interagir avec votre chiot<br />
Cet écran apparaît après avoir appelé votre animal. Utilisez votre stylet pour<br />
flatter la silhouette de votre chiot ou de votre chaton sur l’écran tactile. Vous<br />
pouvez également utiliser la brosse et les friandises lorsqu’elles apparaissent<br />
à l’écran.<br />
Retour (voir page 50)<br />
Retourner à l’écran<br />
principal.<br />
Silhouette<br />
Pour flatter votre<br />
chiot ou votre<br />
chaton, utilisez la<br />
silhouette.<br />
Appareil photo<br />
Touchez l’icône à<br />
l’écran ou appuyez<br />
sur L ou R pour<br />
prendre une photo.<br />
Icône friandise<br />
Touchez pour<br />
changer de friandises.<br />
Brosse<br />
Touchez pour<br />
utiliser une brosse<br />
différente. Vous<br />
pourrez utiliser cette<br />
fonction seulement<br />
si vous en possédez<br />
plusieurs.<br />
Vivre avec votre chaton<br />
Les chatons sont uniques en leur genre!<br />
Choisir un chaton<br />
Vous aurez le choix de plusieurs chatons au<br />
chenil seulement lorsque vous vous serez bien<br />
occupé de votre chiot.<br />
Parlons chatons…<br />
Les chatons sont différents des chiots, ils<br />
sont très indépendants. Vous ne pouvez pas<br />
leur apprendre de tours. Laissez-les donc<br />
se promener et faire ce qu’ils veulent. Ils<br />
trouveront peut-être des objets intéressants<br />
et vous les rapporteront!<br />
Prendre soin de votre chaton<br />
Lorsque votre chaton a faim, nourrissez-le. Les<br />
chatons aiment les hauteurs. Si vous achetez de<br />
grands meubles, ils seront heureux.<br />
52 53
54<br />
Votre carnet<br />
Vous pouvez communiquer avec d’autres maîtres via StreetPass en utilisant<br />
votre carnet.<br />
Utilisation du carnet pour la première fois<br />
La première fois que vous ouvrez votre carnet, vous serez invité à créer un<br />
nouveau fichier de sauvegarde sur votre carte SD et à enregistrer Nintendogs<br />
+ Cats dans la liste StreetPass de votre console. Si vous ne créez pas ce fichier<br />
de sauvegarde, vous ne serez pas capable d’utiliser StreetPass ou même<br />
d’utiliser le carnet.<br />
Pour activer StreetPass, vous aurez besoin de lire et d’accepter les termes de<br />
la version la plus récente du contrat d’utilisation des services Nintendo 3DS.<br />
Pour plus d’informations, consultez les paramètres de la console.<br />
Écran du carnet<br />
Voici l’écran que vous verrez lorsque vous<br />
ouvrez votre carnet. Vous pouvez utiliser votre<br />
stylet pour prendre des notes dans celui-ci.<br />
Efface<br />
Utilisez-la pour effacer des notes que vous avez écrites.<br />
Information du maître<br />
Avec la fonction « information du maître », vous pouvez sélectionner un<br />
Mii, choisir un cadeau, sélectionner une photo que vous avez prise et entrez<br />
un court message. Le message que vous entrez est public et peut être vu par<br />
tous les utilisateurs de StreetPass. Veillez à ne pas utiliser d’informations<br />
personnelles ni de termes pouvant choquer la sensibilité d’autres utilisateurs<br />
ou porter atteinte aux droits d’autrui.<br />
StreetPass<br />
Utile pour voir les informations sur le maître que vous avez rencontrées dans<br />
StreetPass. Vous pouvez même rencontrer leurs chiots ou leurs chatons au parc.<br />
Si vous n’avez pas créé de Mii dans MiiMaker , votre pseudonyme<br />
n’apparaîtra pas dans les informations du maître. Créez-en un et ajoutez-le<br />
dans l’écran information du maître.<br />
55
StreetPass<br />
Que pouvez-vous faire avec StreetPass?<br />
Voici ce qui peut arriver lorsque vous faites un échange en utilisant<br />
StreetPass :<br />
Vos informations, les informations de vos animaux, votre<br />
photo présélectionnée et votre cadeau seront envoyés aux<br />
autres maîtres.<br />
Dans votre carnet, vous pouvez voir les informations des<br />
autres maîtres ainsi que les cadeaux qu’ils vous offrent.<br />
Touchez Rendez-vous au parc pour rencontrer un maître<br />
et son animal. Vos animaux pourront jouer ensemble.<br />
Plus vous faites de rencontres StreetPass, plus vous aurez<br />
le choix de race de chiens au chenil.<br />
Emportez votre console quand vous sortez. Partagez<br />
votre expérience Nintendogs + Cats avec d’autres joueurs.<br />
Rencontrez leurs chiots ou leurs chatons en utilisant la<br />
fonction StreetPass.<br />
Une fois que vous êtes connecté via StreetPass avec un maître, vous ne<br />
serez pas capable d’échanger avec lui pendant un certain temps.<br />
56 57
Comment utilise-t-on StreetPass?<br />
Pour utiliser StreetPass, suivez les instructions suivantes.<br />
Ouvrez votre carnet (voir page 54)<br />
Ouvrez votre carnet et enregistrez Nintendogs + Cats dans la liste StreetPass de<br />
votre console.<br />
Entrez les informations du maître<br />
Ouvrez votre carnet et choisissez un Mii, une photo, un cadeau et écrivez votre<br />
message. Vous pourrez seulement envoyer des photos prises pendant la partie.<br />
Emportez votre console partout<br />
Il suffit de rabattre le couvercle de votre console et de l’emporter partout. Entrez<br />
en contact avec d’autres maîtres Nintendogs + Cats utilisant également StreetPass<br />
et échangez automatiquement des données avec eux.<br />
Pour utiliser StreetPass, vous console doit être allumée et la<br />
communication sans fil doit être activée.<br />
Échange de StreetPass réussie.<br />
Quoi faire maintenant?<br />
Lorsque vous avez réussi à échanger des données avec<br />
un autre maître, un autocollant apparaîtra dans votre<br />
carnet (voir page 55). Touchez-lui pour obtenir plus<br />
d’informations sur le maître.<br />
Pour cesser d’utiliser StreetPass<br />
Si vous voulez cesser d’utiliser StreetPass, à partir des<br />
paramètres de la console, touchez gestion StreetPass,<br />
appuyez sur l’icône Nintendogs + Cats puis appuyez sur<br />
Désactiver StreetPass.<br />
Vous pourrez inscrire StreetPass à nouveau à partir de votre carnet.<br />
58 59
60<br />
Encore plus de plaisir!<br />
Amusez-vous avec les AR Card<br />
Votre chiot ou votre chaton sera plus vivant que jamais grâce aux<br />
AR Card! Sélectionnez l’appareil photo numérique RA à partir<br />
de l’écran de votre inventaire. Vous pouvez prendre des photos<br />
3D et si c’est un chiot, vous pouvez lui faire exécuter des tours.<br />
Utilisation des AR Card<br />
Les AR Card sont incluses avec votre console Nintendo 3DS. Pour plus<br />
d’informations sur la sécurité et l’utilisation des AR Card, consultez le<br />
mode d’emploi de votre console.<br />
Utilisation de SpotPass<br />
Si vous inscrivez Nintendogs + Cats dans la liste SpotPass sur votre console,<br />
vous pourrez automatiquement vous connecter à un point d’accès à Internet<br />
pour télécharger des objets spéciaux. Un autocollant sera placé dans votre<br />
carnet lorsque les données SpotPass seront reçues. De même, vous pouvez<br />
inscrire le jeu dans la liste SpotPass et utiliser cette fonction à partir de<br />
votre carnet. SpotPass peut être désactivé à partir du menu HOME de<br />
votre console. Pour plus d’informations sur les équipements nécessaires<br />
pour utiliser SpotPass, les paramètres Internet et le contrat d’utilisation des<br />
services, consultez le mode d’emploi de votre console.<br />
Session de jeu sans fil<br />
Si la communication semble perturbée par d’autres appareils électroniques au cours<br />
d’une partie sans fil, changez d’endroit ou éteignez les appareils qui interfèrent. Vous<br />
devrez peut-être avoir besoin de réinitialiser votre console Nintendo 3DS et démarrer le<br />
jeu à nouveau.<br />
• Avant de jouer une partie via Internet, configurez d’abord les paramètres Internet de<br />
votre console Nintendo 3DS. Consultez la section des paramètres Internet dans le<br />
mode d’emploi de la console Nintendo 3DS.<br />
• Vous devez avoir accès à une connexion Internet haute vitesse sans fil. Il se pourrait<br />
que vous ayez à configurer les paramètres de votre réseau sans fil sur un ordinateur.<br />
• La console consomme plus d’énergie en mode sans fil. Il est donc préférable de la<br />
garder branchée avec le bloc d’alimentation pour éviter d’épuiser la batterie au cours<br />
d’une partie ou d’une session sur Internet.<br />
• Vous pouvez également vous connecter à Internet via les Nintendo Zone ou certains<br />
points d’accès à Internet.<br />
Pour protéger votre vie privée, ne donnez pas de renseignements personnels tels que<br />
votre nom, votre numéro de téléphone, votre date de naissance, votre âge, le nom de<br />
votre école, votre adresse électronique ou adresse postale lorsque vous communiquez<br />
avec les autres.<br />
Le contrat d’utilisation des services Nintendo 3DS qui régit le jeu en ligne du Nintendo<br />
3DS et énonce la Politique de confidentialité est disponible dans le mode d’emploi de<br />
la console Nintendo 3DS, dans les paramètres Internet de la console Nintendo 3DS, ou<br />
encore en ligne à support.nintendo.com/useragreement/nintendo3ds.
Notes