Nintendo Wii U Quick Start Guide (PDF)
Nintendo Wii U Quick Start Guide (PDF)
Nintendo Wii U Quick Start Guide (PDF)

Create successful ePaper yourself
Turn your PDF publications into a flip-book with our unique Google optimized e-Paper software.
<strong>Quick</strong> <strong>Start</strong> <strong>Guide</strong><br />
From setup to gameplay<br />
Basic Setup<br />
Configuring Your System<br />
Using Game Discs<br />
IMPORTANT INFORMATION<br />
Please read the separate <strong>Wii</strong> U Operations Manual and built-in electronic<br />
manuals for a complete description of features and procedures.<br />
After setup, select (Health & Safety Information) on the <strong>Wii</strong> U Menu to<br />
read important information about the safe use of the <strong>Wii</strong> U system<br />
and components.<br />
If this product will be used by children, an adult should assist with setup and<br />
configuration of the system. The ability to use certain features or content can<br />
be restricted by Parental Controls. See manuals for more information.
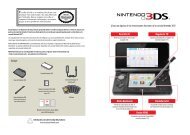
Getting <strong>Start</strong>ed: Check Set Contents<br />
There are two versions of the <strong>Wii</strong> U system: the Basic Set and the Deluxe Set. See the diagrams below for<br />
a list of components included in each set.<br />
Basic Set<br />
<strong>Wii</strong> U console (1)<br />
[WUP-001(02)]<br />
<strong>Wii</strong> U Console AC<br />
Adapter (1)<br />
[WUP-002(USA)]<br />
Deluxe Set<br />
<strong>Wii</strong> U console (1)<br />
[WUP-101(02)]<br />
<strong>Wii</strong> U Console AC<br />
Adapter (1)<br />
[WUP-002(USA)]<br />
<strong>Wii</strong> U Console<br />
Stands (2)<br />
[WUP-009]<br />
<strong>Wii</strong> U GamePad (1)<br />
[WUP-010(USA)]<br />
<strong>Wii</strong> U GamePad AC<br />
Adapter (1)<br />
[WUP-011(USA)]<br />
<strong>Wii</strong> U GamePad (1)<br />
[WUP-010(USA)]<br />
<strong>Wii</strong> U GamePad AC<br />
Adapter (1)<br />
[WUP-011(USA)]<br />
Sensor Bar (1)<br />
[RVL-014]<br />
<strong>Wii</strong> U GamePad<br />
Stylus (1)<br />
[WUP-015]<br />
Sensor Bar (1)<br />
[RVL-014]<br />
<strong>Wii</strong> U GamePad<br />
Stylus (1)<br />
[WUP-015]<br />
<strong>Wii</strong> U GamePad<br />
Cradle (1)<br />
[WUP-014]<br />
Both sets include the following items:<br />
• <strong>Quick</strong> <strong>Start</strong> <strong>Guide</strong> (1)<br />
• <strong>Wii</strong> U Operations Manual (1)<br />
• May include other printed materials<br />
High Speed HDMI<br />
Cable (1)<br />
[WUP-008]<br />
High Speed HDMI<br />
Cable (1)<br />
[WUP-008]<br />
<strong>Wii</strong> U GamePad<br />
Stand (1)<br />
[WUP-016]<br />
Please read the <strong>Wii</strong> U Operations Manual for details on<br />
setup and use of these components.
Basic Setup<br />
First review the Console Setup and Connection <strong>Guide</strong>lines below, and then connect the included <strong>Wii</strong> U<br />
GamePad AC adapter as shown in the illustration.<br />
After confirming that the battery LED is lit orange, proceed to step on the next page.<br />
Before setting up your system, charge the <strong>Wii</strong> U GamePad<br />
The battery LED lights up orange during charging and will turn off<br />
when the battery is fully charged.<br />
When charging is complete, first unplug the AC adapter from the AC<br />
outlet, then unplug it from the controller by carefully pulling the plug<br />
straight out from the controller.<br />
For best results, charge in an area with a temperature of 50°-95°F<br />
(10°-35°C).<br />
The <strong>Wii</strong> U GamePad Cradle (Deluxe Set only) can also be used to charge the GamePad (see Charging the<br />
<strong>Wii</strong> U GamePad in the <strong>Wii</strong> U Operations Manual).<br />
Console Setup and Connection <strong>Guide</strong>lines<br />
Please use the following guidelines when setting up your system. After setup is complete, be sure to<br />
select (Health & Safety Information) on the <strong>Wii</strong> U Menu to read important information about proper<br />
use of the <strong>Wii</strong> U system and components.<br />
• The console has intake and exhaust vents designed to maintain adequate ventilation. Do not operate<br />
the console in any location where these vents may become covered or obstructed, for example, on<br />
carpet or in a tightly enclosed space. Keep vents clear of any dust or other foreign material.<br />
• Do not store the <strong>Wii</strong> U console in a humid place, on the floor, or in any location where it may collect<br />
dirt, dust, lint, etc.<br />
• Make sure all connections to the system are made carefully and inserted into the correct locations only.<br />
Hold plugs straight when inserting them into sockets. Make sure that the AC-adapter plug is completely<br />
inserted into the wall outlet.<br />
• When disconnecting any plugs from the console or wall outlet, first turn the <strong>Wii</strong> U console off. Then<br />
carefully pull by the plug itself rather than by the cord.<br />
• Do not expose the <strong>Wii</strong> U console, components, or accessories to extreme heat or cold.<br />
• Do not locate the console on top of other AV equipment.<br />
120V
Connecting the Console to a TV<br />
First make sure that your TV is turned off, then connect the HDMI cable and the AC adapter in the<br />
order illustrated below.<br />
• Place the <strong>Wii</strong> U console at least 4” (10 cm) away from walls or other surfaces that may block<br />
ventilation.<br />
• For best picture quality, use the included HDMI cable to connect your <strong>Wii</strong> U console to the TV.<br />
If Your TV has No HDMI Port<br />
TV<br />
HDMI Port<br />
HDMI cable<br />
Check the connections on your TV and then see the table below for other<br />
cable options for connecting your <strong>Wii</strong> U console.<br />
• Current <strong>Wii</strong> system owners can switch the cables plugged into the AV<br />
Multi Out Connector on the back of the <strong>Wii</strong> console to the same<br />
connector on the back of the <strong>Wii</strong> U system.<br />
Optional cables (sold separately) compatible with <strong>Wii</strong> U:<br />
AC Adapter<br />
<strong>Wii</strong> AV Cable [RVL-009] <strong>Wii</strong> Component Video Cable [RVL-011]<br />
120V
Placing the Sensor Bar<br />
The sensor bar is required when using the <strong>Wii</strong> Remote or <strong>Wii</strong> Remote Plus controllers with your<br />
<strong>Wii</strong> U system (some software titles do not require a sensor bar). Follow the instructions below to<br />
install the sensor bar.<br />
If you have a <strong>Wii</strong> system:<br />
You can insert the sensor bar you are using with the <strong>Wii</strong> console into the<br />
connector on the back of <strong>Wii</strong> U console.<br />
If you don’t have a <strong>Wii</strong> system:<br />
Please follow the steps below to set up the sensor bar that came with<br />
your system.<br />
Insert the sensor bar into the connector on the back of the <strong>Wii</strong> U console.<br />
Remove the white mounting paper from the back of the sensor bar, and<br />
then place the sensor bar either on the TV or under it (on the TV stand).<br />
Placement <strong>Guide</strong>lines<br />
• Place the sensor bar parallel to the TV screen,<br />
and align the center of the sensor bar with the<br />
center of the TV screen.<br />
Placing the Console Vertically<br />
Insert the tabs on the side of the console into the slots in the <strong>Wii</strong> U<br />
console stands (Deluxe Set only).<br />
IMPORTANT: Make sure the console stands do not cover the vents on<br />
the side of the console.<br />
• Place the sensor bar laying flat and jutting out a<br />
little bit in front of the TV or the TV stand.<br />
• Place the sensor bar as close as possible to the<br />
screen.<br />
Configuring Your System
MAA-WUP-S-USZ/E-C0<br />
When you use your <strong>Wii</strong> U system for the first time, it will be necessary to pair the GamePad with your<br />
console, and you will need to configure some initial settings such as the date, time, and the display setting<br />
to use on your TV.<br />
Configuring Your System<br />
Turn the TV and <strong>Wii</strong> U console on, then select the<br />
correct input setting for your TV or AV component<br />
If you are using the HDMI cable, after changing the input setting<br />
it may take a moment until an image is displayed on the TV<br />
screen, depending on your TV model.<br />
• If the console does not power on or the image does not<br />
appear on the TV, check to make sure the console is connected<br />
correctly. (See Connecting the Console to a TV on<br />
the front side of this <strong>Quick</strong> <strong>Start</strong> <strong>Guide</strong>.)<br />
• More information on input settings is available at<br />
support.nintendo.com/consumer/inputselects.html<br />
Turn the GamePad on<br />
• If the unit is still charging (the battery LED is lit), operate<br />
it with the AC adapter connected until the GamePad is<br />
fully charged.<br />
Pair the GamePad with the <strong>Wii</strong> U Console<br />
Press the SYNC Buttons on the <strong>Wii</strong> U console and GamePad to pair them, as shown below.<br />
Press the SYNC Button on the <strong>Wii</strong> U console.<br />
Use the GamePad stylus to press the SYNC Button on the back of the controller.
Enter the symbols shown on the TV screen in order,<br />
starting from the left, on the GamePad.<br />
• If the GamePad screen is off, press and then the<br />
SYNC Button on the GamePad.<br />
The pairing is completed when <strong>Wii</strong> U GamePad is<br />
now ready to use appears.<br />
If the symbol entry screen appears again, please check<br />
the symbols that appear on the TV and carefully enter<br />
them again.<br />
If a screen like the one on the right is shown on the TV, press<br />
the SYNC Button on the <strong>Wii</strong> U console again and start over<br />
from step above.<br />
• Make sure you are close enough to the console and move<br />
closer if necessary.<br />
Follow the On-Screen Instructions<br />
Examples of symbols<br />
Tap symbol to enter.<br />
If you can't use the Touch Screen or it does not respond properly:<br />
If a screen protector (optional accessory, sold separately) has been installed on the Touch Screen,<br />
check to see if it is misaligned or if there are air bubbles, dirt, or dust trapped between the screen<br />
protector and the surface of the screen.<br />
Try removing it and using the Touch Screen again. If it operates correctly, either try reattaching the<br />
screen protector, carefully following the instructions included with it, or avoid using one.<br />
NOTE: If using an optional screen protector, please use <strong>Wii</strong> U GamePad screen protectors officially<br />
licensed by <strong>Nintendo</strong>.
Main Settings<br />
Date and Time<br />
TV/TV Remote<br />
Feature<br />
Internet<br />
Add User<br />
(Settings)<br />
Parental<br />
Controls<br />
The screen will display a description<br />
of the setting you are currently<br />
configuring.<br />
You can scroll the<br />
explanation on the TV<br />
screen up or down.<br />
The settings screen will appear on the GamePad screen. Tap the<br />
selections to configure your settings.<br />
You can also operate the screen with the following controls.<br />
• L Stick: Item selection<br />
• +Control Pad: Item selection<br />
• A/B/X/Y Buttons: On-screen button selection<br />
When the <strong>Wii</strong> U Menu appears on the screen, settings are complete<br />
(screen shown for illustration purposes only, actual screen<br />
may vary.)<br />
System settings can be changed later —please see the <strong>Wii</strong> U Operations Manual for more information.
Using Game Discs<br />
You can use either <strong>Wii</strong> U or <strong>Wii</strong> Game Discs in the <strong>Wii</strong> U console.<br />
• Tap (Health & Safety Information) on the <strong>Wii</strong> U Menu review to read important information about the<br />
safe use of the <strong>Wii</strong> U system and components.<br />
Pairing <strong>Wii</strong> Remote controllers with the <strong>Wii</strong> U Console<br />
You can also use <strong>Wii</strong> Remote controllers to play<br />
games on the <strong>Wii</strong> U (see game packaging and<br />
manuals for more information). To use a <strong>Wii</strong><br />
Remote with your <strong>Wii</strong> U console, you must first<br />
pair it with the console.<br />
Press the SYNC Button on the <strong>Wii</strong> U console and then the SYNC Button on the <strong>Wii</strong> Remote. Follow the<br />
on-screen instructions to complete the process.<br />
• Some models of the <strong>Wii</strong> Remote allow you to press the SYNC Button<br />
without removing the <strong>Wii</strong> Remote jacket or battery cover, using a protrusion<br />
on the wrist strap.<br />
Insert a Game Disc<br />
Insert a disc with the label side facing up. If the console is<br />
placed in vertical orientation, insert a disc with the label side<br />
facing to the right.<br />
Tap the Software Icon<br />
If you insert a <strong>Wii</strong> Game Disc, the <strong>Wii</strong> Menu will appear on<br />
the screen.<br />
For more information, see the manual for the game you<br />
are playing.<br />
In addition to disc-based software, the <strong>Wii</strong> U system lets you enjoy downloadable<br />
software, the Internet, and many other entertainment choices.<br />
Enjoy your <strong>Wii</strong> U system!
For <strong>Wii</strong> Owners:<br />
Transferring data from <strong>Wii</strong> to <strong>Wii</strong> U<br />
You can transfer software, saved game data, and other data from your <strong>Wii</strong> console to your <strong>Wii</strong> U console.<br />
In addition to the <strong>Wii</strong> U system, you will need the following items before transferring:<br />
• A <strong>Wii</strong> system<br />
• An SD or SDHC Memory Card (with at least 512 MB of free space)<br />
• A broadband Internet connection<br />
NOTE: See the <strong>Wii</strong> Operations Manual - Channels & Settings for details on Internet connections for the<br />
<strong>Wii</strong> console.<br />
Data You Can Transfer<br />
You can transfer the data shown at the<br />
right only. All data that can be transferred<br />
will be transferred at one time, so<br />
you are unable to select which data to<br />
transfer.<br />
Transferring Overview<br />
After connecting both consoles to the Internet and downloading the free transfer software for each<br />
system from the <strong>Wii</strong> Shop Channel, the data transfer is done using an SD card.<br />
• Please review Transferring System Data in the <strong>Wii</strong> U Operations Manual for more information.<br />
• Follow the detailed on-screen instructions in the transfer software to complete the operation.<br />
Downloading the Transfer Software<br />
• <strong>Wii</strong> Software Save Data<br />
<strong>Wii</strong>Ware and Save Data<br />
Transferring the Data Using SD Cards<br />
Trademarks are property of their respective owners. <strong>Wii</strong> U is a trademark of <strong>Nintendo</strong>. © 2012 <strong>Nintendo</strong>. 77131A<br />
•<br />
•<br />
Virtual Console titles and Save Data<br />
Add-on Content<br />
• <strong>Wii</strong> Points<br />
<strong>Wii</strong> Shop Channel Account Activity<br />
•<br />
Other • Mii Characters