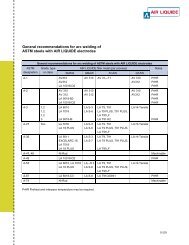
M 132 - M 172 - BLUESHIELD
M 132 - M 172 - BLUESHIELD
M 132 - M 172 - BLUESHIELD
- No tags were found...

You also want an ePaper? Increase the reach of your titles
YUMPU automatically turns print PDFs into web optimized ePapers that Google loves.
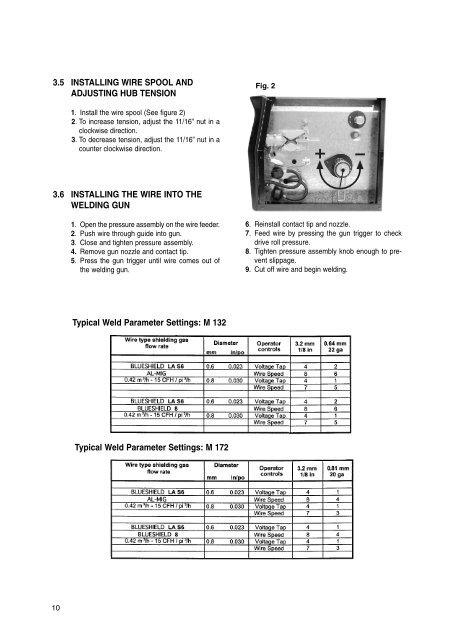
3.5 INSTALLING WIRE SPOOL ANDADJUSTING HUB TENSIONFig. 21. Install the wire spool (See figure 2)2. To increase tension, adjust the 11/16” nut in aclockwise direction.3. To decrease tension, adjust the 11/16” nut in acounter clockwise direction.3.6 INSTALLING THE WIRE INTO THEWELDING GUN1. Open the pressure assembly on the wire feeder.2. Push wire through guide into gun.3. Close and tighten pressure assembly.4. Remove gun nozzle and contact tip.5. Press the gun trigger until wire comes out ofthe welding gun.6. Reinstall contact tip and nozzle.7. Feed wire by pressing the gun trigger to checkdrive roll pressure.8. Tighten pressure assembly knob enough to preventslippage.9. Cut off wire and begin welding.Typical Weld Parameter Settings: M <strong>132</strong>Typical Weld Parameter Settings: M <strong>172</strong>10