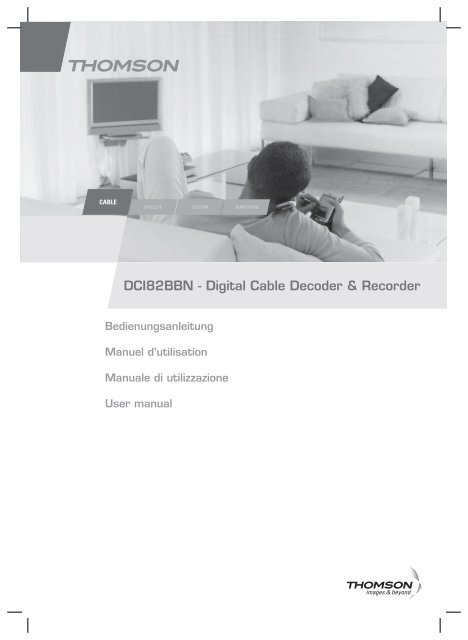
DCI82BBN ‡ Digital Cable Decoder & Recorder - Evard
DCI82BBN ‡ Digital Cable Decoder & Recorder - Evard
DCI82BBN ‡ Digital Cable Decoder & Recorder - Evard

You also want an ePaper? Increase the reach of your titles
YUMPU automatically turns print PDFs into web optimized ePapers that Google loves.
�����<br />
���������<br />
�������������������������������������������<br />
�������������������<br />
��������������������<br />
������������������������<br />
�����������<br />
������� �����������
Einführung<br />
Urheberrechte<br />
© 2008 Thomson SA. Alle Rechte vorbehalten. Wiederveröffentlichung und Wiederverteilung der<br />
Thomson-Inhalte, einschließlich durch Framing oder sonstige Mittel, ist ohne vorherige schriftliche<br />
Erlaubnis durch die Thomson SA verboten. 'THOMSON' und das Thomson-Logo sind eingetragene<br />
Warenzeichen und Warenzeichen der Thomson SA.<br />
Sonstige Warenzeichen und geschützte Technologie<br />
HDMI, das HDMI-Logo und High-Definition Multimedia Interface sind Warenzeichen oder eingetragene<br />
Warenzeichen von HDMI Licensing LLC.<br />
Dieses Produkt beinhaltet Technologie, die urheberrechtlich durch U.S.-Patente und sonstige Rechte<br />
am geistigen Eigentum geschützt ist. Die Nutzung der urheberrechtlich geschützten Technologie bedarf<br />
der Erlaubnis von Macrovision und ist ausschließlich für die Anzeige zuhause und sonstige begrenzte<br />
Anzeige bestimmt, sofern Macrovision keine anderweitige Erlaubnis erteilt. Rückentwicklung oder<br />
Entassemblieren sind verboten.<br />
Alle sonstigen Firmen- oder Produktnamen sind entweder Warenzeichen oder eingetragene Warenzeichen<br />
ihrer rechtmäßigen Inhaber.<br />
Haftungsausschluss<br />
Thomson behält Sich das Recht vor, die in diesem Dokument vorkommenden technischen Daten und<br />
Bilder jederzeit und ohne Vorankündigung zu ändern. Die Informationen in diesen Anweisungen sind<br />
daher nicht vertraglich bindend.<br />
Inhalt<br />
Einführung ............................................... 1<br />
Inhalt ........................................................ 1<br />
Hinweise zur Sicherheit ......................... 2<br />
Über den HD-<strong>Decoder</strong> ........................... 4<br />
Was ist HD? .........................................................4<br />
Wie funktioniert HD? .......................................4<br />
Was brauchen Sie für HD-Dienste? ...............4<br />
Anschlüsse .............................................. 5<br />
Inhalt der Verpackung ........................................5<br />
Bedienelemente vorne am Gerät ...................5<br />
Anschlusselemente hinten am Gerät .............6<br />
Anschlüsse an den Fernseher ..........................6<br />
Sonstige Verbindungen .......................................7<br />
Einlegen der Smartcard .....................................8<br />
Einlegen der Batterien .......................................8<br />
Fernbedienung .....................................................9<br />
Schnelle Installation .............................. 10<br />
Alltäglicher Gebrauch .......................... 11<br />
Ein- und ausschalten ....................................... 11<br />
Kanalwechsel .................................................... 11<br />
Navigationstipps ............................................... 11<br />
Verwendung der Menüs ................................. 11<br />
Verwendung von Zapping/Info-Banner ....... 12<br />
Verwendung des Mini-Guide ......................... 12<br />
Menüs ..................................................... 13<br />
Übersicht der Menüs ...................................... 13<br />
Kanäle ..................................................... 14<br />
Liste der Kanäle ............................................... 14<br />
Kanal-Organizer............................................... 14<br />
Kanalliste aktualisieren ................................... 15<br />
Meine Dienste........................................ 16<br />
Program Guide ................................................. 16<br />
Timer ..................................................... 17<br />
Setup ...................................................... 18<br />
Sprachen ............................................................ 18<br />
Optionen ........................................................... 18<br />
Elternkontrolle ................................................. 19<br />
Verbindung ........................................................ 19<br />
Bildformat.......................................................... 20<br />
Installation ......................................................... 22<br />
Access rights .......................................... 22<br />
Change CA PIN ............................................... 22<br />
Maturity rating ................................................. 23<br />
Hauptfunktionen ................................... 24<br />
Fehlerbehebung .................................... 25<br />
Glossar ................................................... 26<br />
Programmieren der Fernbedienung ... 27<br />
Vor dem Starten .............................................. 27<br />
Direkteingabeprogrammierung .................... 27<br />
Automatische Suche ....................................... 27<br />
Wiederherstellung der Werkseinstellungen .. 28<br />
Aufzeichnungsfunktion .......................... 29<br />
Direktaufzeichnung ......................................... 29<br />
Zeitlich verschobene Aufzeichnung ............ 29<br />
Time Shift ......................................................... 30<br />
Aufzeichnungskonflikte ..................................... 30<br />
Bibliothek ............................................... 31<br />
Zugriff auf die Titelbibliothek ........................ 31<br />
Bibliothek, verfügbare Befehle ..................... 31<br />
Individuelle Gestaltung der Titel ................. 32<br />
TV-Codes ..................................................I<br />
1<br />
DE
Hinweise zur Sicherheit<br />
Sicherer Betrieb des Geräts<br />
Der <strong>Decoder</strong> wurde in Übereinstimmung mit europäischen Sicherheitsnormen gebaut. Dennoch sind<br />
einige Sicherheitsvorschriften zu beachten, um einen sicheren Betrieb zu gewährleisten.<br />
Lesen Sie dieses Handbuch und besonders die unten aufgeführten Sicherheitsanweisungen aufmerksam<br />
durch. Falls Sie danach noch Fragen zu Installation, Betrieb oder Sicherheit des <strong>Decoder</strong>s haben, wenden<br />
Sie sich bitte an Ihren Kundendienst.<br />
Vermeiden von Stromschlagrisiko<br />
� ������� ��� ��� ������� ��� ���������� ����� ��� ��� �� ������ ������ ����������� ���� ���<br />
diesen trennen. Vermeiden Sie jeden Kontakt mit 230 Volt AC-Stromversorgung. Dies kann zum<br />
Tod oder zu einem schweren Stromschlag führen.<br />
� ������ ��� ��� ������� ��� �������� ����� ��� ������ ��� ��� ����� ��� ����� ���������������<br />
durch den zuständigen Kundendienst reparieren.<br />
� ������� ��� ����� ��� ��������� ����� ������� ����������� �� ���� ������� �� ��������<br />
� ���������� ��� ��� ���������������� ��� �������� ������ ������� ��� ��� ����� ����� ��� ���������<br />
Oberflächen wie z.B. einen Teppich.<br />
� ������� ��� ������ ��� ��� �������� ��� ��������� ���� �� ��� ����� ������� ���� ����� ���������<br />
Kerzen oder Flüssigkeitsbehälter). Spritzen Sie keine Flüssigkeit auf das Gerät. Sollte ein Gegenstand<br />
oder Flüssigkeit in den <strong>Decoder</strong> gelangen, stecken Sie das Gerät sofort aus, und wenden Sie sich<br />
an den Kundendienst.<br />
� ������� ��� ��� ������� ����� �� ����� ���� �� ��� �� ���� ����� ���� ���� ������ ���� ���<br />
<strong>Decoder</strong> ist bei Raumtemperatur unter 45°C und einer maximalen Luftfeuchtigkeit von 75 % zu<br />
betreiben.<br />
� ��� ���������� ��� �������� ��� ������� ��� ��������� ��� ��� ������� ��� ��������� ��<br />
trennen.<br />
� ������ ��� ���� ��� ��������� ������ ���������� ���� �� ��� ����� ������� ���������� �� �������<br />
Anschluss an die Stromversorgung<br />
� ��� ������� ��� ��� ��� ������� ��� ���� ��� �� �� ���������<br />
� ���� ��� ��������� ����������� ������� ���� �������������� ������� ������ ������ ��� ����<br />
bitte an den Kundendienst.<br />
Sicherstellung optimaler Leistung<br />
� ������ ��� � ��� �� �� ����� �� ��� ������� ������ �� ���� ������������ ������� ��� ������<br />
sicherzustellen.<br />
� ������� ��� ��� ������� ����� ��� ���� ����� ����������<br />
� �������� ��� ��� �������� ��� �������� ��� ���������� ��������� ������� ���� ���� ��������<br />
oder scheuernde Produkte. Reinigen Sie die Lüftungsöffnungen regelmäßig.<br />
2<br />
10 cm<br />
10 cm<br />
10 cm<br />
7 cm
Umweltinformationen<br />
� ��� ��������� ��������� ����������� ����������� ��� ��� ������ ������������� ��������� ���<br />
die Batterien nicht im Hausmüll sondern bringen Sie verbrauchte Batterien zu einer speziellen<br />
Sammelstelle.<br />
� ���� ��� ��� ��������� ������� ���� ����� �������� ����� ���� ������� �������� ��� ��� ���<br />
Standby. So sparen Sie Strom.<br />
Technische Daten<br />
Betriebsspannung 230 VAC / 50Hz<br />
Nennstromverbrauch < 46 W<br />
�� ������� ������� � �� �<br />
�� ������� �������� � � �<br />
������� ����� �������� ��� ��<br />
����������� �� � � � �� ���� ���� 391 x 65 x 291 mm<br />
Betriebstemperaturbereich 5 – 45°C<br />
Lagertemperaturbereich -25 – 70°C<br />
Batterie der Fernbedienung 2 x AAA<br />
Konditioneller Zugang ISO7816 - CONAX<br />
Festplatte 160 Go<br />
Anschlüsse<br />
HDMI-Ausgang HDMI-Anschluss Typ A<br />
RF-Eingang IEC60169-2 Buchse<br />
RF-Ausgang IEC60169-2 Stecker<br />
TV Scart<br />
VCR Scart<br />
������������� �� ��� �� ���������� �������������<br />
������������ ������������� � ������� ��� ������ ������������ ���������<br />
Analoge Bauteile - YPrPb RCA-Buchse<br />
USB 2.0 – A-type<br />
Ethernet RJ45 – IEEE 802.3<br />
Bedeutung der Symbole<br />
Dieses Symbol auf dem Gerät garantiert, dass es den europäischen Richtlinien 73/23/<br />
EEC, 89/336/EEC, 93/68/EEC für Sicherheit, elektromagnetischer Verträglichkeit bzw.<br />
Kennzeichnung entspricht.<br />
Dieses Symbol soll den Benutzer auf unisolierte “gefährliche Spannung” im Gehäuse<br />
des Geräts aufmerksam machen. Diese Spannung reicht aus, um einen Stromschlag zu<br />
verursachen.<br />
Dieses Symbol soll den Benutzer auf wichtige Anweisungen für Betrieb und Wartung<br />
des Geräts aufmerksam machen.<br />
3<br />
DE
Über den HD-<strong>Decoder</strong><br />
Vielen Dank, dass Sie sich für den Kauf dieses Geräts der Baureihe 8000 entschieden haben.<br />
Dieses Gerät der neuen Generation von Thomson ������� ���� ��� ���� ��������� �����������������<br />
die Ihnen Fernsehen in Spitzenqualität ermöglicht!<br />
Dank der neuesten HD-Technologie ist Ihr Gerät der Baureihe 8000 bereit für den neuesten Standard<br />
und ist außerdem kompatibel mit dem traditionellen SD-Standard.<br />
Was ist HD?<br />
������������ ������������� ��� ����������������� ���� �������� ���� ���������������<br />
Bilddefinition mit einer Pixelbreite von 720 und einer Pixelhöhe von 576 im Format PAL oder Secam.<br />
Zwischenzeilenabtastung bedeutet, dass jede zweite Zeile bei jeder Bildabtastung aktualisiert wird.<br />
Diese Definition reicht für Bildschirme mit Kathodenröhre aus. Jedoch verschlechtert sich auf den<br />
großen Plasma- und LCD-Bildschirmen die Bildqualität. Um diese Abbildungsqualität zu verbessern,<br />
wurde das HD-Format mit einer Bilddefinition von bis zu 1920 Pixelbreite mal 1080 Pixelhöhe<br />
entwickelt.<br />
Die Differenz zwischen SD- und HD-Bildern ist für den Zuschauer offensichtlich. HD sorgt für<br />
Schärfe, Details und visuellen Komfort. Das Anschauen von Dokumentarfilmen, Sportsendungen oder<br />
Filmen wird HD zu einer neuen Erfahrung, vergleichbar mit dem Übergang vom Schwarzweiß- zum<br />
Farbfernsehen.<br />
Wie funktioniert HD?<br />
Die Bilddefinition wird in Pixeleinheiten gemessen. Je höher die Pixelanzahl desto besser sind Qualität<br />
��� �������� ���� ��������� ������� ��� ���� ������� ��� ���� ������ ���������� ����������� ������<br />
Tabelle unten). Was mit SD verschwommen und undeutlich war, erscheint mit HD automatisch scharf<br />
und detailliert.<br />
4<br />
TV<br />
Auflösung<br />
(Pixelanzahl x Zeilenanzahl)<br />
HD-Kompatibilität<br />
Standardfernseher 720x576 Nein<br />
HD-fähig 1280x720p Ja<br />
HD-fähig 1920x1080i Ja<br />
Volle HD 1920x1080p Ja<br />
Was brauchen Sie für HD-Dienste?<br />
Um Programme in HD-Qualität zu genießen, brauchen Sie:<br />
� ����� �������������<br />
� ����� �����������<br />
� ��� ���������� ������ �������������� �� ��� ������� �� ��� ��������� ��������������<br />
� ��� �������������� �����������<br />
Am besten benutzen Sie einen Fernseher, der die Kennzeichnung “HD Ready” oder “Full HD” hat.<br />
Fragen Sie gegebenenfalls Ihren Fachhändler, ob Ihr Fernseher über HD-Funktionen verfügt.<br />
Entdecken Sie die Technologie von morgen mit dem neuen Thomson HD-<strong>Decoder</strong>!<br />
Wenn Ihr Fernseher hat weder einen HDMI- noch einen DVI-Anschluss, Sie können<br />
über das mitgelieferte Scart-Kabel weiterhin alle Fernsehprogramme in<br />
<strong>Digital</strong>e Standardqualität sehen.
Anschlüsse<br />
Inhalt der Verpackung<br />
Scart-Kabel<br />
���� ���� �� �� �<br />
�<br />
<strong>Decoder</strong>-Aufzeichnungsgerät<br />
Benutzer-handbuch<br />
Benutzer handbuch<br />
Bedienelemente vorne am Gerät<br />
Standby /<br />
Ein-Aus<br />
Menu: öffnet<br />
und schliesst<br />
das Menü<br />
���� ���� �� �� �<br />
Exit: beendet<br />
alle Menüs<br />
OK:<br />
bestätigt<br />
eine Wahl<br />
�<br />
dient zum Navigieren nach<br />
links, oben, unten<br />
und rechts in den Menüs<br />
�������������������������������������������<br />
�������������������<br />
��������������������<br />
������������������������<br />
�����������<br />
Display: Zeigt die Uhrzeit sowie<br />
��� ������ ��� �������� � )<br />
���� ������������ � --) an.<br />
�� ��������<br />
�������<br />
Braune Netzwerk-LED ein/aus:<br />
Netzwerkaktivität ein/aus<br />
Rote LED:<br />
Bestätigt die<br />
Aufzeichnung<br />
Fernbedienung<br />
mit Batterien<br />
Netzkabel<br />
Smartcard-Einschub<br />
�� ��������<br />
�������<br />
Rot/Grün Standby-LED:<br />
Standby / Ein-Aus<br />
5<br />
DE
Anschlusselemente hinten am Gerät<br />
Anschlüsse an den Fernseher<br />
6<br />
ETH:<br />
Ethernet-Datenanschluss.<br />
RF Out:<br />
Antennenausgang.<br />
����� ������<br />
RF In:<br />
Antenneneingang.<br />
USB:<br />
USB port.<br />
Reset:<br />
setzt das Modem zurück.<br />
���<br />
�����<br />
HDMI:<br />
HDMI-Anschluss.<br />
�������<br />
�����<br />
�<br />
�<br />
DIGITAL AUDIO-Ausgänge:<br />
elektrisch/koaxial S/P-DIF.<br />
��<br />
��<br />
�<br />
����� ����������<br />
L / R-Ausgänge: linke und rechte<br />
analoge Audioausgänge.<br />
1. Ihr Fernseher ist “HD ready” oder “Full HD”<br />
Dieser Anschluss erlaubt die beste Bildqualität. <strong>Digital</strong>es<br />
Video und Audio werden über das HDMI-Kabel übertragen.<br />
Sie brauchen dann nur ein HDMI-Kabel, um den HDMI-<br />
Anschluss auf dem <strong>Decoder</strong> mit dem Fernseher zu<br />
verbinden.<br />
2. Ihr Fernseher hat nur einen DVI-I-Anschluss<br />
In diesem Fall wird nur Video über den DVI-Anschluss<br />
übertragen. Sie können jedoch analoges Audio über den<br />
Audio-RCA empfangen.<br />
Sie brauchen:<br />
� � ��������������� �� ��� �������������� ��� ���<br />
<strong>Decoder</strong> mit dem DVI-I-Anschluss auf dem Fernseher zu<br />
verbinden.<br />
� � ����� ���� �� ��� ������ ��� ������� ������<br />
Analogausgänge auf dem <strong>Decoder</strong> mit den<br />
Audioeingängen auf dem Fernseher zu verbinden.<br />
Einige Fernsehgeräte haben eine DVI-Schnittstelle, die das HDCP-Protokoll nicht<br />
respektiert. Diese Geräte können die HD-Dienste nicht anzeigen.<br />
��<br />
���<br />
YPrPb: analoge<br />
Videokomponenten.<br />
VCR/DVD Scart-Ausgang.<br />
TV<br />
SCART-Ausgang.<br />
�������������<br />
�������<br />
Stromanschluss.
Sonstige Verbindungen<br />
3. Ihr Fernseher hat weder einen HDMI- noch einen<br />
DVI-Anschluss<br />
Sie können die HD-Programme sehen, aber nicht in HD-<br />
Qualität.<br />
Sie können über das mitgelieferte Scart-Kabel weiterhin<br />
alle Fernsehprogramme in <strong>Digital</strong>qualität sehen.<br />
� �<br />
�<br />
������������ ��� ��� �������� ������ ������������� ��� ����� ������������ ��� ��� �� ������������ ���<br />
dem <strong>Decoder</strong>.<br />
� Siehe Seite 6.<br />
� Verbinden Sie das Netzkabel mit dem Netzanschluss auf dem <strong>Decoder</strong> und dem Stromnetz.<br />
Schließen Sie das Netzkabel erst an das Stromnetz an, nachdem alle<br />
Antennenverbindungen korrekt ausgeführt sind.<br />
Vermindung mit dem VCR/DVD-Player<br />
Benutzen Sie ein SCART-Kabel, um den VCR SCART-<br />
Ausgang auf dem <strong>Decoder</strong> mit AV1/EXT1/AUX1 auf Ihrem<br />
VCR- oder DVD-Player zu verbinden.<br />
Um VCR- und DVD-Player an den <strong>Decoder</strong> anzuschließen,<br />
�������� ��� ��� ����������� ������ �������������� �� ���<br />
DVD-Player mit dem VCR zu verbinden.<br />
Über das Scart empfängt der VCR nur analoges Video, und Sie können nicht in<br />
HD aufnehmen.<br />
7<br />
DE
Verbindung mit Ihren Hi-Fi-Systeme<br />
Einlegen der Smartcard<br />
8<br />
���� ���� �� �� �<br />
�<br />
�� ��������<br />
�������<br />
Halten Sie die Smartcard mit dem goldenen Chip nach unten vor den Einschub. Schieben Sie die Karte<br />
so weit in den Einschub wie ohne Forcieren möglich ist.<br />
Einlegen der Batterien<br />
Abbildung 2: Batterien einlegen *<br />
�������� ��� ��� ���� ����������� ������ �� ��� L/R<br />
AUDIO-Ausgänge auf dem <strong>Decoder</strong> mit den L/R AUDIO-<br />
Eingängen auf Ihrem Hi-Fi-System zu verbinden. So ist der<br />
Klang über Ihre Hi-Fi-Anlage besser.<br />
Hinweis: Audiobuchsen sind meistens farblich gekennzeichnet:<br />
Weiß für Links und Rot für Rechts.<br />
Verbindung von Audio Video-Verstärker oder Heimkinosystem<br />
Um einen noch besseren Klang von Ihrem <strong>Decoder</strong> zu<br />
��������� �������� ��� ��� ��������� �������������� ������<br />
Koaxkabel, um die SPDIF-Buchse auf dem <strong>Decoder</strong><br />
mit dem DIGITAL AUDIO-Eingang auf dem Verstärker/<br />
Heimkinosystem zu verbinden.<br />
Hinweis: Meistens liefern die koaxialen (so genannten<br />
elektrischen) und die optischen Audioverbindungen ähnliche<br />
Ergebnisse. Der Unterschied liegt in der Art des verwendeten<br />
Kabels. Ein Koaxkabel ist preiswerter aber ist anfälliger für<br />
externe Störungen von anderen Haushaltsgeräten.<br />
� ��������� ��� ����� ������������� ������������� ���� ����<br />
und alte Batterie zusammen. Benutzen Sie keine ladbaren<br />
Batterien.<br />
� �� ���� ��������� �� ���������� �������� ��� ���<br />
Polaritätsmarkierungen im Batteriefach. Benutzen Sie nur<br />
Batterien vom oben angegebenen Typ. Entsorgen Sie alte<br />
Batterien nicht in einem Feuer und laden Sie sie nicht wieder<br />
auf.<br />
� ���� ��� ��� ������������� ������� ���� ����� ���������<br />
nehmen Sie die Batterien heraus.<br />
* Beachten Sie bitte die einschlägigen Umweltvorschriften. Bevor Sie Batterien oder Akkus entsorgen, fragen Sie Ihren<br />
Händler nach Recycling und ob er sie für Sie entsorgen kann.
Fernbedienung<br />
Schaltet in den<br />
<strong>Decoder</strong>-Modus<br />
Schaltet in den Fernseher-<br />
Modus<br />
Stellt die Lautstärke leiser<br />
oder lauter<br />
Schaltet Audio auf stumm /<br />
stellt die vorige Audiolautstärke<br />
wieder her<br />
Geht zum vorigen Bildschirm<br />
oder zum Anzeigemodus zurück<br />
Erlaubt Navigieren nach<br />
oben/unten/links/rechts<br />
in den Menüs<br />
Wählt im Menü<br />
angezeigte Funktionen<br />
Ruft Video-on-Demand-<br />
Service auf*<br />
Wählt den AUX-Videomodus<br />
auf dem Fernseher<br />
������ ��� ��������������<br />
Programmführer<br />
Zugang zu Radiokanälen<br />
Hinweis: Um Audio auf einem Programm oder einem Kanal zu ändern, drücken Sie<br />
�/<br />
die / gelbe Taste. Prüfen Sie,<br />
ob das Symbol angezeigt wird. Wenn ja, wählen Sie es mithilfe der Pfeiltasten aus, und wählen Sie mit den<br />
Pfeiltasten �/� eine Sprache.<br />
*/** Diese Funktion wird zu einem späteren Zeitpunkt auf dem <strong>Decoder</strong> aktiviert.<br />
�<br />
Schaltet zwischen Strom<br />
und Standby um.<br />
������ ��� ����<br />
Schaltet zum nächsten/vorigen<br />
Kanal um<br />
Zugang zu den Kanallisten<br />
Verlässt alle Menüs<br />
In Menüs, bestätigt<br />
eine Wahl. Im normalen<br />
Anzeigemodus, öffnet das<br />
TV-Banner<br />
Zugang zu zusätzlichen<br />
Informationen zum gewählten<br />
Programm<br />
Für direkte Eingabe einer<br />
������ ����� ����� �����<br />
Kanalnummer<br />
Zugang zu Teletext-Information<br />
Nur für PVR-Gebrauch<br />
Zugang zu interaktiven Diensten**<br />
9<br />
DE
Schnelle Installation<br />
Für schnelle Installation, führen Sie die 4 folgenden Schritte aus:<br />
� ������ ���� �� ��� ������� ��� ��� ����� � ����������� ������������� ����<br />
� ������� ��� ��� ����� auf der Universalfernbedienung.<br />
Nach ein paar Sekunden wird eine Liste der Menüsprachen am Bildschirm angezeigt.<br />
�/<br />
1. Menü Language<br />
� ������ ��� ���� ������� �������� ������� �������� �������� ��� ��� ������<br />
OK.<br />
und drücken Sie<br />
Eine Willkommensmeldung wird am Bildschirm angezeigt.<br />
� ������� ��� OK, um zum Menü mit den Zeitzoneneinstellungen zu wechseln.<br />
2. Menü Time zone setting<br />
� ��� ������������ ����������� ��� ��������� ������� ��� OK.<br />
� ����� ������ ��� ��� ���������� �������� ��� ��� ������������ ��� ������� ��� OK.<br />
Für die Schweiz, wählen Sie Berlin, Bern, Rom.<br />
3. Menü Eco-standby<br />
� �� �� ������������ ����� �� ������� ������ ��� Ja und drücken Sie OK.<br />
� ����� ������ ��� Nein und drücken Sie OK.<br />
Das Installationsmenü wird am Bildschirm angezeigt.<br />
Hinweis: Thomson unterstützt globales Energiesparen von Konsumgeräten und bietet hierfür<br />
den Modus Eco-Standby auf seinen HD-<strong>Decoder</strong>n. Diese Funktion reduziert den Energieverbrauch auf weniger<br />
als 3 Watts im Standby-Modus. Wenn diese Funktion aktiviert ist, sind keine Netzwerkdaten oder Software-<br />
Upgrades auf dem <strong>Decoder</strong> verfügbar, aber Aufnahmezeiten bleiben aktiv- und können über den Scart-Ausgang<br />
ausgeführt werden.<br />
4. Installationsmenü<br />
Die Fernseh- und Radiokanalsuche beginnt automatisch<br />
10<br />
�<br />
� �� ���� Netzwerk-Installation zu starten, drücken<br />
Sie OK und rufen Sie manuell die Installationsoptionen<br />
�������� ������� ���������� ������ ����� �����������<br />
auf. Drücken Sie OK, um die Installationsparameter zu<br />
übernehmen.<br />
Um festzustellen, welche Parameter Sie eingeben müssen,<br />
beziehen Sie sich auf die Informationen, die Sie von Ihrem<br />
Netzbetreiber erhalten haben.<br />
� ����� ������ ��� Automatisch scan mit den Pfeiltasten<br />
�/� und drücken Sie OK.<br />
Beachten Sie, dass dieser Parameter erfahrenen<br />
Benutzern vorbehalten ist.<br />
Hinweis: Eine Statusleiste zeig Ihnen den Fortschritt der Kanalsuche. Die Kanalsuche kann mehrere Minuten<br />
dauern.
5. Kanalsuche<br />
� ������ ���� ��� ��� ���������� ������������� ���� ��� ������� ��� OK.<br />
Sie sehen jetzt Fernsehen in digitaler Qualität!<br />
�� �� ��������� ��� ��� ��� ��������������� ��� �������� ������������������������ ��� �����<br />
usw.…) benutzen, lesen Sie das nächste Kapitel über Alltäglicher Gebrauch!<br />
Alltäglicher Gebrauch<br />
Ein- und ausschalten<br />
Drücken Sie die Taste auf der Fernbedienung, um das Gerät ein- oder auszuschalten.<br />
Hinweis: Wenn Sie das Gerät längere Zeit nicht benutzen, ziehen Sie den Netzstecker heraus, um Strom zu<br />
sparen.<br />
Kanalwechsel<br />
Drücken Sie die Taste P+/-, um zum nächsten/vorigen Kanal zu wechseln, oder geben Sie die<br />
Kanalnummer über die Zifferntasten auf der Fernbedienung ein, und drücken Sie OK.<br />
Navigationstipps<br />
Lesen Sie stets die Hilfsleiste unten an Ihrem Bildschirm.<br />
� In m Menü werden EPG, Banner und Kanalliste, Anweisungen zur Verfügbarkeit weiterer<br />
Funktionen und zu aktiven Fernbedienungstasten am Bildschirm angezeigt.<br />
� �� ���� ����������� ����������� ������� ��� ��� ����� LIST.<br />
� �� ���������� �������� ��� ������������������������ ��� ��� �������� anzuzeigen, drücken<br />
Sie die / gelbe Taste.<br />
� Für Zugang zum elektronischen Programmführer, drücken Sie die Taste GUIDE.<br />
� ��� ������ �� ��� ������������� ������� ��� ��� ����� VOD.<br />
� ��� ���������� �������� ������ ��� ������������� ������� ��� ��� ����� RADIO.<br />
� ��� ������ �� ��������� ������� ��� ��� ����� TXT im Fernsehmodus.<br />
� ��� ������������ ����� ���������� ��� ����� ����������� ������������� ���������� und Format<br />
des Fernseher, Banner-Ausblendung), folgen Sie Hauptmenü/4 Einstellunge, geben Sie Ihren<br />
PIN-Code ein, und wählen Sie Anschluss ����������� ��� ��������� ��� ������ ��� �����������<br />
TV/VCR-Ausgangssignal usw.…) oder Optionen ����������� ��� ������������������ oder Skin<br />
der Benutzeroberfläche).<br />
Um unsere Politik kontinuierlicher Verbesserung zu nutzen, beachten Sie, dass für dieses Gerät ein<br />
Upgrade durch Download “over the air” möglich ist.<br />
Verwendung der Menüs<br />
1. Drücken Sie die Taste MENU<br />
�/<br />
auf der Fernbedienung, um die Menü-Hauptseite zu öffnen.<br />
2. Benutzen Sie die Tasten zum Navigieren in einer Liste und �/��zum Einstellen einer Auswahl.<br />
3. Drücken Sie OK, um das Untermenü zu öffnen.<br />
4. Drücken Sie die Taste BACK, um zum vorigen Bildschirm zurückzugehen, oder EXIT, um zum<br />
Anzeigemodus zurückzukehren.<br />
�<br />
11<br />
DE
Verwendung von Zapping/Info-Banner<br />
Das Zapping-Banner liefert grundlegende Informationen zu aktuellen und nächsten Programmen:<br />
Uhrzeit und Datum, Kanalnummer, Kanalname, Programmtitel und verstrichene Zeit, Start- und Endzeit<br />
des Programms usw.<br />
Das Informationbanner ������� ������������ ������������� ����������� �����������������<br />
Programmgenres usw..) und eine Zusammenfassung des gewählten Programms.<br />
Zum Anzeigen des Zapping-Banner<br />
1. Drücken Sie einmal die Taste i / gelb.<br />
12<br />
Hinweis: Wenn Sie zu einem anderen Kanal wechseln, wird automatisch ein grundlegendes Zapping-Banner<br />
angezeigt. Um die Anzeigedauer des Banners zu ändern, gehen Sie zu Hauptmenü/4 Einstellungen/<br />
Optionen, und wählen Sie Anzeigedauer des Banners.<br />
Um das Informationsbanner anzuzeigen<br />
2. Drücken Sie erneut die / gelbe Taste.<br />
Sie erhalten detaillierte Informationen zum aktuellen Programm.<br />
Um Informationen zum nächsten Programm auf dem gewählten Kanal anzuzeigen, drücken Sie die<br />
Taste .<br />
�<br />
Um das Zapping-/Informationsbanner zu verlassen<br />
3. Drücken Sie die Taste EXIT einmal.<br />
Verwendung des Mini-Guide<br />
Mithilfe des Mini-Guide können Sie ohne zu zappen sehen, was auf anderen Kanälen läuft.<br />
Um den Mini-Guide zu benutzen<br />
1. Drücken Sie die / gelbe Taste einmal.<br />
Prüfen Sie, ob Mini-Guide markiert ist. Sonst wählen Sie ihn mit den Tasten<br />
2. Drücken Sie die Tasten �/� für virtuelles Zappen in der aktuellen Kanalliste.<br />
�<br />
�/ aus.<br />
Sie erhalten Informationen zum aktuellen oder nächsten Programm oder zum ausgewählten Kanal.<br />
Hinweis: Um zu einem aktuellen Programm auf einem anderen Kanal umzuschalten, wählen Sie den Kanal und<br />
drücken Sie die Taste OK.
Menüs<br />
Übersicht der Menüs<br />
���������<br />
� ������<br />
� ����� �������<br />
� ����������<br />
� ��������������<br />
� �������������<br />
� �������������<br />
������<br />
�����������<br />
������������� ��� ������<br />
����� �������<br />
���������������<br />
����������<br />
����� ����� ��������<br />
����� ����� �������<br />
���� ����� �������<br />
����� ����� ����������<br />
�������������<br />
��������<br />
��������<br />
���������������<br />
���������<br />
������������<br />
���� ���������<br />
�������������<br />
�������<br />
��������������<br />
��������������<br />
���� �����������<br />
�����������<br />
���� ���������<br />
���� �������������<br />
��� �<br />
������������� ��� ������<br />
����� ���������<br />
���� ���������<br />
���� �����������<br />
��� �<br />
��������������<br />
�����������������<br />
����������� ��� ��������������<br />
����� ��� ����������������<br />
�������� ��������� ���<br />
��������������������<br />
��������������<br />
���������<br />
�����������<br />
�������<br />
�������� ���<br />
�����������������������<br />
������<br />
�������������<br />
������� ��� �����<br />
�����������������������<br />
Detaillierte Informationen zu Kanälen, dem elektronischen Programmführer und einigen Einstellparametern<br />
finden Sie auf den folgenden Seiten.<br />
13<br />
DE
Kanäle<br />
Liste der Kanäle<br />
Über dieses Menü erhalten Sie Zugang zu allen Kanallisten: die Liste All TV und Ihre Favoritenlisten.<br />
Sie können den Listeninhalt einsehen und die gerade angezeigte Liste ändern.<br />
Zugang zur Kanalliste<br />
1. Drücken Sie die Taste MENU.<br />
2. Mit den Tasten �<br />
und wählen Sie 1 Sender und drücken Sie OK.<br />
3. Mit den Tasten �<br />
und wählen Sie Senderliste und drücken Sie OK.<br />
14<br />
�<br />
�<br />
Hinweis: Für einen direkten Zugang zur Senderliste, drücken Sie die Taste LIST auf der Fernbedienung.<br />
Listeninhalt anzeigen<br />
Um den Inhalt einer Liste anzuzeigen, markieren Sie die Liste mit den Tasten �<br />
und<br />
Sie die Taste OK.<br />
�<br />
und drücken<br />
Zum Navigieren in der Kanalliste, benutzen Sie die Tasten �<br />
und .<br />
Zum Wechseln zu einem Kanal, den Sie sehen wollen, markieren Sie den Kanal mit den Tasten<br />
und und drücken Sie die Taste OK. Die Liste, die Sie zuletzt benutzt haben, wird als aktuelle<br />
Liste eingestellt.<br />
Um in den Seiten der Kanalliste zu blättern, benutzen Sie die Tasten � und �.<br />
�<br />
�<br />
Kanalliste verlassen<br />
Zum Verlassen des Untermenüs mit der Kanalliste, drücken Sie die Taste EXIT.<br />
Kanal-Organizer<br />
Mithilfe des Kanal-Organizers können Sie Favoritenlisten erstellen und die verschiedenen Listen ändern:<br />
umbenennen, neu ordnen oder eine Liste entfernen, Kanäle hinzufügen/entfernen,<br />
Kanäle sperren/freigeben usw…<br />
Zugang zum Kanal-Organizer<br />
1. Drücken Sie die Taste MENU.<br />
2. Mit den Tasten �<br />
und wählen Sie 1 Sender und drücken Sie OK.<br />
3. Mit den Tasten �<br />
und wählen Sie Organisierung der Sender, geben Sie Ihren PIN ein,<br />
und drücken Sie OK.<br />
�<br />
�<br />
Eine neue Liste erstellen<br />
Um eine neue Favoritenliste zu erstellen, markieren Sie Liste erstellen mit den Tasten �<br />
und<br />
und drücken Sie OK.<br />
Schritt 1. Benutzen Sie die Pfeiltasten, um den Listennamen zu ändern, und drücken Sie OK zur<br />
Bestätigung.<br />
Schritt 2. Wählen Sie die Art der Liste, die Sie erstellen wollen: Fernseh- oder Radiokanäle.<br />
Schritt 3. Wählen Sie die existierende Kanalliste, von der Sie eine neue Liste erstellen wollen.<br />
Schritt 4. Entfernen Sie Kanäle aus der neuen Liste oder fügen Sie Kanäle hinzu mit der Taste OK<br />
auf dem gewählten Kanal.<br />
Drücken Sie BACK oder EXIT, um die neue Liste zu validieren.<br />
�<br />
�
Eine Liste ändern/löschen<br />
Um eine Liste zu ändern oder zu löschen, markieren Sie diese mit den Tasten �<br />
und und<br />
drücken Sie OK. Ein Menü mit den verschiedenen Optionen wird am Bildschirm angezeigt.<br />
1. Um den Listennamen zu ändern, wählen Sie die erste Option und drücken Sie OK.<br />
Dann benutzen Sie die Pfeiltasten, um den vorgegebenen Namen zu ändern.<br />
Drücken Sie die Taste BACK , um Ihre Einstellungen zu speichern.<br />
2. Um die Liste zu ändern, wählen Sie die zweite Option und drücken Sie OK.<br />
Dann benutzen Sie die Taste OK zum Hinzufügen oder Entfernen des gewählten Kanals aus der<br />
Favoritenliste.<br />
Drücken Sie die Taste BACK , um Ihre Einstellungen zu speichern.<br />
3. Um Kanäle zu sperren/freizugeben, wählen Sie die dritte Option und drücken Sie OK.<br />
Dann benutzen Sie die Taste OK zum Sperren oder Freigeben des gewählten Kanals aus der<br />
Favoritenliste.<br />
Drücken Sie die Taste BACK um Ihre Einstellungen zu speichern.<br />
�<br />
�<br />
4. Um die Liste neu zu ordnen, wählen Sie die vierte Option und drücken Sie OK.<br />
Wählen Sie den Kanal, der neu geordnet werden soll, in der Liste mit den Tasten<br />
Dann drücken Sie OK.<br />
und .<br />
Benutzen Sie die Tasten<br />
bewegen.<br />
und , um den Kanal an die bevorzugte Position in der Liste zu<br />
Drücken Sie OK , um die Position zu bestätigen. Die Liste wurde automatisch geändert.<br />
Drücken Sie die Taste BACK , um Ihre Einstellungen zu speichern.<br />
�<br />
5. Um die Liste zu löschen, wählen Sie die letzte Option auf der Liste und drücken Sie OK.<br />
Um das entfernen der Liste zu bestätigen, markieren Sie “Ja, Löschen bestätigen”<br />
mit der Taste �<br />
und drücken Sie OK zweimal.<br />
Um das Entfernen zu annullieren, drücken Sie OK.<br />
Drücken Sie die Taste BACK , um Ihre Einstellungen zu speichern.<br />
Den Kanal-Organizer beenden<br />
Um den Kanal-Organizer zu beenden, drücken Sie die Taste EXIT.<br />
Kanalliste aktualisieren<br />
Bei der ersten Installation sucht der <strong>Decoder</strong> nach Kanälen im Netzwerk. Wenn später neue Kanäle<br />
verfügbar werden oder Kanäle umbenannt, unterdrückt oder geändert werden, aktualisiert der<br />
<strong>Decoder</strong> automatisch die Liste alle Sender.<br />
�<br />
�<br />
15<br />
DE
Meine Service<br />
Fernsehprogramm<br />
��� ���������� ��������� ����� ����� ���������� �� ����� ����������� ��� ��� ��� ������ ��� ���<br />
gerade sehen, gespielt wird, und zwar bis zu 7 Tagen im voraus. Dafür ist im EPG eine Suchfunktion<br />
integriert: zu wissen, welche Filme an diesem Abend auf allen Kanälen gesendet werden, ist kinderleicht!<br />
Zugang zur Kanalliste<br />
1. Drücken Sie die Taste MENU.<br />
2. Mit den Tasten �<br />
und wählen Sie 2 Meine Service und drücken Sie OK.<br />
3. Mit den Tasten �<br />
und wählen Sie Fernsehprogramm und drücken Sie OK.<br />
16<br />
�<br />
�<br />
Hinweis: Drücken Sie die Taste GUIDE für kurzen Zugang zum Programmführer.<br />
Um den Guide zu benutzen<br />
Zum Navigieren durch die Zeitscheiben und Tage, benutzen Sie die Tasten �<br />
und .<br />
Um den Programmführer eines anderen Kanals anzuzeigen, benutzen Sie die Tasten P+/- .<br />
Um zu einem gerade gesendeten Programm auf einem anderen Kanal zu wechseln, markieren sie das<br />
Programm mithilfe der Pfeiltasten, drücken Sie OK und wählen Sie Dieses Programm anzeigen.<br />
Um einen Timer für ein später gesendetes Programm einzustellen, markieren Sie das Programm<br />
mithilfe der Pfeiltasten und drücken Sie OK. Sie können eine Erinnerung, eine täglich wiederholte<br />
���������� ���� ��� ���� ��� ��� �������� �������� ���������� ������ ���� ����� ���<br />
Um mehr Informationen zu einem Programm zu erhalten, markieren Sie es und drücken Sie die /<br />
gelbe Taste.<br />
Um in Seiten zu blättern, benutzen Sie die Tasten �<br />
und .<br />
Um die Suchfunktion zu benutzen<br />
Drücken Sie die Taste GUIDE einmal im Programmführer.<br />
Das Menü der Suchfunktion wird angezeigt.<br />
Sie können durch den Programmführer stöbern, indem Sie einen Programmnamen, ein Datum,<br />
eine Periode, ein Thema und/oder eine Anzeigeart benutzen.<br />
Um Suchkriterien zu wählen, benutzen Sie die Pfeiltasten und drücken Sie OK , um die Suche zu<br />
beginnen.<br />
Um den EPG zu verlassen<br />
Um den Programmführer zu verlassen, drücken Sie die Taste EXIT.<br />
�<br />
�
Timer<br />
Im Timer-Menü können Sie einen neuen Timer einstellen, eine Option auswählen oder die Liste<br />
eingestellter Timer einsehen.<br />
Drei Arten von Timern können eingestellt werden<br />
� Reminder: Die Erinnerung bezieht sich nicht auf ein Programm. Der Benutzer kann eine<br />
beliebige Nachricht eingeben, an die er während des Fernsehens erinnert werden will.<br />
� Memo: Memo weckt den <strong>Decoder</strong> auf, wenn er im Standby-Modus ist.<br />
� <strong>Recorder</strong>: Der Aufnahme-Timer dient zum Aufrufen der Videoaufnahme über den Scart-Ausgang.<br />
Für Erinnerungen und Memos, wenn der <strong>Decoder</strong> nach Ablauf der Zeit im Power-on-Modus<br />
ist, bleibt die Bestätigungsfrage 1 Minute lang stehen. Danach wird automatisch zum gewählten<br />
Service gewechselt.<br />
Wichtig: Vergessen Sie nicht; den neuen Timer zu speichern!<br />
Zugang zu Timern<br />
1. Drücken Sie die Taste MENU.<br />
2. Mit den Tasten �<br />
and wählen Sie 3 Timer, geben Sie Ihren PIN ein, und drücken Sie OK.<br />
�<br />
Folgende Optionen sind verfügbar<br />
� Timeroption: Zum Aktivieren/Deaktivieren des Timers und zum Wählen der Alarmzeit, bevor<br />
ein Reminder erfolgt.<br />
� Timerprogrammierung: um manuell reminder, memo und recorder zu erstellen.<br />
� Timerliste: um zuvor erstellte Reminder anzuzeigen oder zu löschen.<br />
� Liste der Timer-Konflikte: Um sich überlappende Konflikttimer zu unterdrücken.<br />
Timer-Menü verlassen<br />
Um das Timer-Menü zu verlassen, drücken Sie die Taste EXIT.<br />
17<br />
DE
Setup<br />
Sprachen<br />
�������� �������� ������ ��� ����������� ��� ���������� ����������� ������ ����� ���<br />
entsprechende Track existiert).<br />
Zugang zu Spracheinstellungen<br />
1. Drücken Sie die Taste MENU.<br />
2. Mit den Tasten �<br />
und wählen Sie 4 Einstellungen, Geben Sie Ihren PIN ein, und drücken<br />
Sie OK.<br />
18<br />
�<br />
Eine Sprache ändern<br />
1. Mit den Tasten �<br />
und wählen Sie die Sprache für Menus, Audio oder Untertitel.<br />
2. Drücken Sie die Taste � und �, um eine eingestellte Sprache zu bestätigen.<br />
�<br />
Das Menü für Spracheinstellung verlassen<br />
Um die Spracheinstellungen zu verlassen, drücken Sie die Taste EXIT.<br />
Optionen<br />
Im Bildschirm “options” sind folgende Einstellungen möglich:<br />
� Anzeigedauer des Banners: 3 bis 10 Sekunden oder immer angezeigt<br />
� Einstellung der Zeitzonen<br />
� Ansicht: blau, grün oder rot<br />
� Lautstärke*: gleiche oder unabhängige Lautstärke<br />
� Transparenz der Anzeige einstellen<br />
� Eco-Standby: aktivieren/deaktivieren<br />
* Wenn Sie gleiche Lautstärke wählen, stellt der <strong>Decoder</strong> die Lautstärke für alle Fernseh-<br />
und Radiokanäle auf dieselbe Stufe ein.<br />
Wenn Sie eine unabhängige Lautstärke wünschen, können Sie diese für jeden Kanal individuell<br />
einstellen. Der <strong>Decoder</strong> liest die zuletzt benutzte Lautstärkeeinstellung für den gewählten Kanal.<br />
Zugang zum Optionenmenü<br />
1. Drücken Sie die Taste MENU.<br />
2. Mit den Tasten �<br />
und wählen Sie 4 Einstellungen und geben Sie Ihren PIN ein.<br />
3. Mit den Tasten �<br />
und wählen Sie Optionen und drücken Sie OK.<br />
�<br />
�<br />
Eine Option ändern<br />
1. Mit den Tasten �<br />
und wählen Sie das Element, das Sie ändern wollen.<br />
2. Drücken Sie die Tasten � und �, um Ihre Wahl zu treffen.<br />
�<br />
Das Optionenmenü verlassen<br />
Um das Optionenmenü zu verlassen, drücken Sie die Taste EXIT.
Elternkontrolle<br />
Im Untermenü <strong>Decoder</strong> können Sie den PIN-Code ändern, den <strong>Decoder</strong> sperren/freigeben und die<br />
Elternkontrolle aktivieren/deaktivieren, indem Sie ein Rating-Limit einstellen.<br />
Standardmäßig wird die Elternkontrolle beim Limit von 18 Jahren und älter aktiviert.<br />
Zugang zur Elternkontrolle<br />
1. Drücken Sie die Taste MENU.<br />
2. Mit den Tasten �<br />
und wählen Sie 4 Einstellungen, dann drücken Sie OK.<br />
Ein PIN-Code schützt den Zugang. Geben Sie Ihren 4stelligen PIN-Code ein.<br />
3. Mit den Tasten �<br />
und wählen Sie Kindersicherung, dann drücken Sie OK.<br />
�<br />
�<br />
PIN-Code des <strong>Decoder</strong>s ändern<br />
��������� ���������� ��� �������� ����� �������� ��������� ��� ������� ����� ��� ���������<br />
Identification Number). Vorgegeben ist die Nummer 0000. Wir empfehlen, diese Nummer zu<br />
ändern.<br />
Wichtig: Halten Sie den PIN geheim, aber verlieren Sie ihn nicht!<br />
1. Wählen Sie PIN-Code ändern und drücken Sie OK.<br />
2. Geben Sie den neuen PIN-Code mithilfe der Zifferntasten ein.<br />
3. Bestätigen sie dann den neuen PIN-Code durch nochmalige Eingabe.<br />
Hinweis: Um den CA PIN zu ändern, siehe Seite 22.<br />
<strong>Decoder</strong> sperren<br />
1. Wählen Sie Sperrung des <strong>Decoder</strong>s<br />
2. Mit den Tasten � und � können Sie Kanäle sperren bzw. freigeben.<br />
Altersgrenze<br />
1. Wählen Sie Altersgrenze<br />
2. Mit den Tasten � und � wählen Sie die bevorzugte Altersgrenze für Programme.<br />
Das Menü für Elternkontrolle verlassen<br />
Um das Menü für Elternkontrolle zu verlassen, drücken Sie die Taste EXIT.<br />
Verbindung<br />
Im Menü Connection können Sie Fernseherformate, Audio- und Videoformate und HD-Auflösungen<br />
einstellen.<br />
Zugriff auf das Menü<br />
1. Drücken Sie die Taste MENU.<br />
2. Mit den Tasten �<br />
und wählen Sie 4 Einstellungen, dann drücken Sie OK.<br />
3. Mit den Tasten �<br />
und wählen Sie Anschluss, dann drücken Sie OK.<br />
�<br />
�<br />
19<br />
DE
Einstellungen ändern<br />
Benutzen Sie die Pfeiltasten, um Einstellungen im Menü Connection zu ändern. Unten sind die<br />
möglichen Werte für jedes Element aufgeführt.<br />
20<br />
TV format: 4/3, 16/9<br />
Image adjustment: für 4/3: pan & scan, letter box, full screen<br />
für 16/9: pillar box, zoom 16/9, zoom 14/9, stretched<br />
TV scart mode: CVBS + RGB* , CVBS, SVHS<br />
VCR Scart mode: CVBS, SVHS<br />
Video format: PAL, SECAM<br />
Audio format: audio PCM, digital audio<br />
HDMI device information**: connected, not connected<br />
YPrPb: disabled, enabled<br />
HD resolution***: automatic, manual<br />
If manual: 720x576p, 1280x720p, 1920x1080i<br />
Das Menü Connection verlassen<br />
Um dieses Menü zu verlassen, drücken Sie die Taste EXIT.<br />
* CVBS + RGB ist die empfohlene Einstellung für beste Bildqualität auf TV Scart-Eingang.<br />
** Dieser Parameter gibt an, ob der HDMI-Connector benutzt wird.<br />
*** Für einen Fernseher, der nicht HD-fähig ist, ist 720x576p zu bevorzugen. Für einen HD ready-Bildschirm ist<br />
1280x720p für HD-Programme zu bevorzugen. Für einen Bildschirm mit Full HD, sind folgende zewi Einstellungen<br />
zu bevorzugen: 1280x720p oder 1920x1080i.<br />
Bildformat<br />
Originalbild im Format 16/9<br />
Anzeige von 16/9-Bild auf einem 4/3 Fernseher:<br />
Letter-box Pan & Scan
Originalbild im Format 4/3<br />
Anzeige von 4/3-Bild auf einem 16/9-Fernseher:<br />
Briefkasten<br />
16/9 Zoom<br />
����� ��� ������� �������� ����� ���������<br />
Gedehnt<br />
21<br />
DE
Installation<br />
Über dieses Menü können Sie die Installationsparameter manuell eingeben oder eine neue Kanalsuche<br />
starten. Zwei Installationsarten sind verfügbar:<br />
� scanning: Der Parameter kann automatisch eingestellt werden. Drücken Sie OK, um die Abtastung<br />
zu beginnen.<br />
� network installation: Mit dieser Installationsart können Sie manuell die Frequenz oder die Modulationsart<br />
eingeben.<br />
Nur erfahrene Benutzer sollten mit diesem Menü arbeiten.<br />
Zugang zum Installationsmenü<br />
1. Drücken Sie die Taste MENU.<br />
2. Mit den Tasten �<br />
und wählen Sie 4 Einstellungen, geben Sie ihren PIN ein, und drücken Sie OK.<br />
3. Mit den Tasten �<br />
und wählen Sie Installation, dann drücken Sie OK.<br />
Zugriffsrechte<br />
Über dieses Untermenü erhalten Sie Informationen zu Ihrem aktuellen Abonnements, verfügbaren<br />
Tokens, und Sie können das Alterslimit ändern.<br />
� Das Menü Abostatus informiert über Berechtigungsperioden für jeden allgemeinen Kanal.<br />
� Im Menü Eventstatus (1) werden alle PPV-Kaufprogramme aufgeführt.<br />
� Das Menü Creditstatus (1) informiert über Tokens von jedem verfügbaren kauf, einschließlich<br />
Debet- und Kreditinformationen auf jedem Programm, das Token benutzen muss.<br />
(1) Diese Funktion ist mit der Funktion Pay Per View verknüpft. Beachten Sie, dass PPV auf Ihrem Netz möglicherweise<br />
nicht verfügbar ist.<br />
PIN-Code der Verschlüsselungskennung ändern<br />
Über dieses Untermenü können Sie den PIN-Code der Smartcard ändern.<br />
Wichtig: Der CA PIN oder Smartcard-Code ist nicht derselbe wie der PIN des <strong>Decoder</strong>s. Vorgegeben ist die<br />
Nummer 1234. Wir empfehlen unbedingt, diese Nummer zu ändern.<br />
� � �<br />
Zugang zum Menü Change CA PIN<br />
1. Drücken Sie die Taste MENU.<br />
2. Mit den Tasten und wählen Sie 5 Informationen, dann drücken Sie OK.<br />
3. Mit den Tasten und wählen Sie Zugriffsrechte dann drücken Sie OK.<br />
4. Mit den Tasten<br />
drücken Sie OK.<br />
und wählen Sie PIN-Code der Verschlüsselungskennung ändern, dann<br />
5. Geben Sie den alten PIN-Code mithilfe der Zifferntasten ein.<br />
6. Geben Sie den neuen PIN-Code mithilfe der Zifferntasten ein.<br />
7. Bestätigen Sie den neuen PIN-Code durch nochmalige Eingabe.<br />
Hinweis: Um den PIN des <strong>Decoder</strong>s zu ändern, siehe Seite 19.<br />
22<br />
�<br />
�<br />
Einen Parameter ändern<br />
1. Mit den Tasten �<br />
und wählen Sie den Parameter, den Sie ändern wollen.<br />
2. Drücken Sie die Taste � und �, um Ihre bevorzugte Einstellung zu wählen, oder benutzen Sie die<br />
Zifferntasten auf der Fernbedienung, um den neuen Parameter einzugeben.<br />
�<br />
Das Installationsmenü verlassen<br />
Um dieses Menü zu verlassen, drücken Sie die Taste EXIT.<br />
�<br />
�<br />
�
Das Menü CA PIN verlassen<br />
Um dieses Menü zu verlassen, drücken Sie die Taste EXIT.<br />
Altersgrenzen<br />
In diesem Untermenü können Sie die zulässige Altersgrenze zum Ansehen von Programmen einstellen.<br />
Vier Kategorien sind definiert:<br />
� G für allgemeine Zuschauer<br />
� PG für Elternkontrolle<br />
� A für über 18<br />
� X für Erotik<br />
G hat die niedrigste Altersgrenze.<br />
� � �<br />
Zugang zu Maturity rating<br />
1. Drücken Sie die Taste MENU.<br />
2. Mit den Tasten und wählen Sie 5 Informationen, dann drücken Sie OK.<br />
3. Mit den Tasten und wählen Sie Zugriffsrechte, dann drücken Sie OK.<br />
4. Mit den Tasten und wählen Sie Altersgrenzen, dann drücken Sie OK.<br />
Sie können die aktuelle Maturity rating-Einstellung für Ihren <strong>Decoder</strong> anzeigen.<br />
�<br />
�<br />
�<br />
Maturity rating ändern<br />
1. Wählen Sie Hauptmenü/5 Informationen/Zugriffsrechte/Altersgrenzen, dann drücken Sie<br />
OK.<br />
2. Mit den Tasten � und � wählen Sie Ihre bevorzugte Einstellung.<br />
3. Geben Sie Ihren CA PIN ein, um die neue Einstellung zu bestätigen.<br />
Das Menü Maturity rating verlassen<br />
Um dieses Menü zu verlassen, drücken Sie die Taste EXIT key.<br />
23<br />
DE
Hauptfunktionen<br />
Baureihe 8000<br />
� ������ �������� ������ ������� ��� ��������� �� ������������<br />
Verbindungen<br />
� ������������������<br />
� ��� ����� ��������������<br />
� ���������� ������� ��������� �������������<br />
� � ��������� ����� ���������� ��� ��� ����� �������<br />
Software<br />
� ������ ��� �������������<br />
� ������������������� ����� �� �������� �������� �� ���������� ���������� ������������ �������<br />
��� ������������ ����� ��� ������ �� ������ ������� ������<br />
� ��������������� ��� ��� �� � ����������������<br />
� ��� ����������� ������� ������ ��� ������ ������ ����� ��� �� �������� ������<br />
� ������������������ ���� ��������������� ��� ��������� �����������<br />
� ��� ������������������������������ ��� �������������<br />
� ������� ��� � ������������� ��� � �������������������<br />
� ��������������� ������� ������������<br />
� ����� ����������<br />
� ���������������� ����� ��� �����<br />
Zubehör<br />
� ������������� ��� ����������<br />
� ���������<br />
� ������������<br />
� ����������������<br />
Hergestellt unter Lizenz von Dolby Laboratories.<br />
“Dolby” und das Doppel-D-Symbol sind Warenzeichen von Dolby Laboratories.<br />
24<br />
Dieses Symbol bedeutet, dass Ihr kaputtes Gerät nicht im Hausmüll sondern gesondert entsorgt<br />
werden muss. Die EU hat ein spezielles System für Sammeln und Recycling eingerichtet, für das die<br />
Hersteller verantwortlich sind.<br />
Dieses Gerät wurde mit Material und Bauteilen von hoher Qualität konzipiert und hergestellt. Diese können<br />
recycled und wiederverwendet werden. Elektrogeräte können Bauteile enthalten, die für den Betrieb des Geräts<br />
erforderlich sind aber die eine Gefahr für die Gesundheit und die Umwelt werden können, wenn Sie nicht<br />
vorschriftsmäßig entsorgt werden. Werfen Sie also kaputte Geräte nicht mit dem Hausmüll weg.<br />
Als Besitzer des Geräts müssen Sie es zu einer Entsorgungsstelle bringen oder es beim Kauf eines neuen Geräts<br />
beim Hersteller abgeben.<br />
� Wenn Sie ein professioneller Benutzer sind, halten Sie sich an die Anweisungen Ihres Lieferanten.<br />
� Wenn Ihnen das Gerät vermietet oder in Obhut gegeben wird, wenden Sie sich an Ihren Service Provider.<br />
Helfen Sie uns, die Umwelt, in der wir leben, zu schützen!
Fehlerbehebung<br />
Nicht alle Bild- oder Klangprobleme werden durch einen Defekt im <strong>Decoder</strong> verursacht. Wenn Störungen<br />
auftreten, während Sie das Gerät benutzen, stecken Sie es aus, warten Sie ein paar Sekunden, und<br />
stecken Sie es dann wieder ein.<br />
Wichtig: Öffnen Sie das Gehäuse nie selbst.<br />
Problem Mögliche Ursache Lösungsvorschlag<br />
<strong>Decoder</strong> funktioniert<br />
anscheinend nicht, und<br />
vorne am Gerät leuchtet<br />
kein Licht.<br />
<strong>Decoder</strong> funktioniert<br />
anscheinend nicht,<br />
und vorne am Gerät<br />
leuchtet das Standby-<br />
Licht rot.<br />
<strong>Decoder</strong> funktioniert<br />
anscheinend nicht, und<br />
vorne am Gerät leuchtet<br />
das grüne Licht.<br />
Am Bildschirm sind<br />
Störungen zu sehen.<br />
Die Fernbedienung funktioniert<br />
nicht.<br />
Sie haben Ihren PIN<br />
vergessen.<br />
Die Menüs und Banner<br />
sind in einer Sprache,<br />
die Sie nicht verstehen.<br />
Der <strong>Decoder</strong> wird nicht mit<br />
Strom versorgt.<br />
Das Gerät ist abgeschaltet.<br />
Der <strong>Decoder</strong> ist nicht korrekt<br />
an andere Geräte<br />
angeschlossen oder ist nicht<br />
korrekt eingerichtet.<br />
Fernseher ist nicht auf<br />
Anzeige digitaler Kabelkanäle<br />
geschaltet.<br />
Der Fernseher ist nicht<br />
korrekt getuned<br />
Die Batterien sind erschöpft<br />
oder verkehrt eingelegt.<br />
Ein Objekt blockiert die<br />
Übertragung zwischen<br />
Fernbedienung und <strong>Decoder</strong><br />
box.<br />
Die Fernbedienung ist nicht im<br />
richtigen Modus.<br />
Eine Menüsprache ist<br />
eingestellt, die Sie nicht<br />
verstehen.<br />
Stellen Sie sicher, dass das Gerät korrekt an die<br />
Stromversorgung angeschlossen und eingeschaltet<br />
ist. Prüfen Sie, ob die Steckdose Strom führt<br />
����� ����� ����������� ����� �������<br />
Drücken Sie vorne am Gerät oder auf der<br />
Fernbedienung.<br />
Prüfen Sie, ob alle Verbindungen korrekt sind<br />
������ ����� ���<br />
Prüfen Sie, ob Ihr Fernseher an das Stromnetz<br />
angeschlossen und eingeschaltet ist.<br />
Wenn der <strong>Decoder</strong> über ein HDMI-Kabel an<br />
den Fernseher angeschlossen ist, versuchen Sie,<br />
den entsprechenden AV-Kanal am Fernseher<br />
einzustellen.<br />
Prüfen Sie, ob der Fernseher korrekt für den<br />
������� ������� ��� ������ ����� ����������<br />
Informationen entnehmen Sie dem Benutzerhandbuch<br />
des Fernsehgeräts.<br />
Prüfen Sie die Batterien und ersetzen Sie sie<br />
gegebenenfalls.<br />
Stellen Sie sicher, dass Sie die Fernbedienung<br />
direkt auf den Fernseher richten und kein Objekt<br />
zwischen ihm und dem <strong>Decoder</strong> ist. Das IR-Empfangslicht<br />
vorne am <strong>Decoder</strong> muss blinken, wenn<br />
Sie eine Taste auf der Fernbedienung drücken.<br />
Wählen Sie andernfalls den “AV-Eingang” Ihres<br />
Fernsehers<br />
Drücken Sie die Taste DECODER , um den<br />
<strong>Decoder</strong> zu steuern.<br />
Rufen Sie Ihren Service Provider an.<br />
Sie können die Menüsprache wie folgt ändern:<br />
1. Drücken Sie MENU.<br />
2. Drücken Sie dreimal die Pfeiltaste ab dem<br />
obersten Element.<br />
3. Drücken Sie OK und geben Sie Ihren PIN ein.<br />
4. Drücken Sie OK.<br />
5. Drücken Sie die Taste � oder �, bis Sie die<br />
gewünschte Sprache sehen.<br />
6. Drücken Sie die Taste BACK oder EXIT , um<br />
die neue Sprache zu speichern.<br />
Lässt sich das Problem nicht oder nicht zufrieden stellend lösen, wenden Sie sich bitte an Ihren Service<br />
Provider.<br />
�<br />
25<br />
DE
Glossar<br />
DVI Ein <strong>Digital</strong> Video Interface schafft eine digitale Verbindung mit hoher Bandbreite zwischen<br />
einer Videoquelle und einem Fernsehgerät. Audio wird separat getragen<br />
EPG Ein Electronic Programme Guide liefert Informationen zu aktuellen und nächsten<br />
Fernsehprogrammen. Der EPG dient zum anzeigen von Fernsehprogrammen in den nächsten<br />
����� ���� �� � ���� �� ������� �� ���� ������� ��� ������������� ����� �������� �����<br />
Auswahl eines Events im Programmführer oder zum leichten Suchen nach Fernsehprogram-<br />
���� ��� ��� ��� ���������� ��� ����� ������� ���� ����� ��������� ������������� �����<br />
verfügbar.<br />
HDMI Ein High Definition Multimedia interface ähnlich wie ein HD-Scart-Kabel eine digitale<br />
Verbindung mit hoher Bandbreite für Video und Audio. HDMI stellt sicher, dass das beste Vi-<br />
��������� ��� ��� ������ ����������� ��� ������ ����� ������� ���� �������� ���� �����primiertes<br />
Video und Mehrkanal-Audio über ein einzelnes Kabel an den Fernseher gesendet.<br />
HDCP High bandwidth <strong>Digital</strong> Content Protection ������ ��� ��� �����������������������<br />
das in HD-Displays und –Empfängern eingebaut ist. Es verhindert unerlaubtes Duplizieren<br />
und Verteilen des urheberrechtlich geschützten Inhalts.<br />
HD HD ����� ���������� ����� ��� ���� ������� �� ������� �������� ��� ����� ���������� ����sung<br />
von 720p bis 1080p.<br />
LCD Liquid Crystal Displays sind eine Form von Flachbild-Fernsehern. Sie bestehen aus<br />
zwei transparenten Scheiben, zwischen denen eine Flüssigkristalllösung eingeschlossen ist.<br />
Dadurch ordnen sich die Kristalle so an, dass kein Licht durch sie dringen kann. Jedes der<br />
Kristalle dient als Blende, die Licht entweder durchlässt oder es blockiert, Das Muster aus<br />
transparenten und dunklen Kristallen formt das Bild.<br />
Pixels Pixels ist das Kürzel für “Picture Element”. Pixel sind die kleinsten Datenbits in einem Videobild.<br />
Je mehr Pixel ein Bild enthält, desto höher ist die Auflösung.<br />
Plasma Plasma-Display entsteht durch Tausende winziger Röhren, gefüllt durch ionisiertes Gas im<br />
Plasmazustand.<br />
SPDIF Der Name bedeutet Sony/Philips <strong>Digital</strong> Interface Format, weil diese beiden Firmen<br />
die ersten Designer des S/PDIF-Format sind.<br />
720p 720p bedeutet, die vertikale Auflösung des Fernsehbilds ist 720 Zeilen? P bezieht sich auf<br />
progressive Abtastung.<br />
1080i 1080i bedeutet, die vertikale Bildauflösung beträgt 1080 Zeilen. i bezieht sich auf Interlaced<br />
�������� ��������������������������<br />
26
Programmieren der Fernbedienung<br />
Zum Lieferumfang des <strong>Decoder</strong>s gehört eine Universalfernbedienung, mit der Sie sowohl den <strong>Decoder</strong><br />
als auch Ihren Fernseher steuern können. Die Bedienfunktionen des <strong>Decoder</strong>s sind in der Fernbedienung<br />
vorprogrammiert, und die Fernbedienung kann sofort zur Steuerung des <strong>Decoder</strong>s benutzt werden. Um<br />
den Fernseher mit der Universalfernbedienung zu steuern, gehen Sie folgendermaßen vor:<br />
Vor dem Starten<br />
1. Schalten Sie Ihr Fernsehgerät ein.<br />
2. ������ ��� �� ���� ������ ��������� ��� ���� ��� ������� ��� ��� ���������� ����� ��������������<br />
Wichtig: Wenn der Hersteller Ihres Fernsehgeräts nicht in der Liste aufgeführt ist, gehen Sie direkt zur<br />
Programmierung automatische Suche.<br />
Direkteingabeprogrammierung<br />
Hersteller von Fernsehgeräten haben eventuell mehrere Codes für dieselbe Marke. Wenn Sie nicht<br />
wissen, welcher Marke Ihr Fernseher entspricht, wiederholen Sie die drei folgenden Schritte, und<br />
probieren Sie alle Fernsehercode des Herstellers aus, bis Sie den richtigen gefunden haben.<br />
1. Drücken Sie die Taste TV und halten Sie diese fest, bis Sie mit der Eingabe Ihres vierstelligen<br />
Codes fertig sind.<br />
2. Drücken Sie nacheinander jede Nummerntaste.<br />
� ��� ���� ������ ������� ������ ��� ��� ������������� ������ ��� ��� �������������� �����<br />
� Ist eine Ziffer ungültig, blinkt die LED 3 Mal, sie schaltet ab, und die Direkteingabeprogrammierung<br />
wird abgebrochen. Drücken Sie die Taste , um den Fernseher einzuschalten, und geben Sie den<br />
vierstelligen Code nochmals ein.<br />
Bei Eingabe des korrekten Codes schaltet die LED ein.<br />
3. Lassen Sie die Taste TV los.<br />
Hinweis: Wenn Ihnen die Direkteingabeprogrammierung nicht gelungen ist, versuchen Sie es mit der zweiten<br />
Methode: automatische Suche.<br />
Automatische Suche<br />
Wenn Ihr Fernseherhersteller nicht in der Codeliste aufgeführt ist, benutzen Sie die automatische<br />
Suchmethode.<br />
1. Drücken und halten Sie die Taste TV auf der Universalfernbedienung.<br />
2. Drücken und halten Sie die Taste , bis das grüne Licht leuchtet, dann lassen Sie die TV- und<br />
-Taste los.<br />
3. Drücken Sie PLAY und lassen Sie wieder los, dann warten Sie 5 Sekunden. Wiederholen Sie dies,<br />
bis Ihr Gerät abschaltet.<br />
4. Drücken Sie REW und lassen Sie wieder los, dann warten Sie 2 Sekunden. Wiederholen Sie dies,<br />
bis Ihr Gerät wieder Einschaltet.*<br />
5. Um zu beenden und die neue Tabelle zu speichern, drücken und halten Sie STOP bis das grüne ausgeht.<br />
6. Um zu beenden ohne die Codesuche zu speichern, drücken Sie EXIT. Das grüne Licht geht aus.<br />
7. Erfolgt keine Eingabe, wird die Codesuche nach fünf Minuten abgebrochen, und die zuletzt<br />
benutzte Tabelle ist wieder aktiv. Das grüne Licht geht aus.<br />
*Wenn Ihr Fernsehgerät zwischen EIN und AUS mit einer Taste ON / STANDBY umschalten kann, drücken Sie PLAY<br />
auf der Universalfernbedienung, und wenn Ihr Gerät abschaltet, drücken Sie REW, bis das Gerät wieder einschaltet.<br />
Falls Ihr Gerät nicht mit einer einzigen Taste zwischen EIN und AUS umschalten kann, drücken Sie PLAY. Wenn Ihr<br />
Gerät abschaltet, schalten Sie es mit der Tast vorn am Fernsehgerät wieder ein, dann drücken Sie REW auf der<br />
Universalfernbedienung, bis das Gerät wieder einschaltet.<br />
27<br />
DE
Wiederherstellung der Werkseinstellungen<br />
Mithilfe dieses Verfahrens können Sie die Werkseinstellungen des Geräts wiederherstellen. Dabei wird<br />
jede von Ihnen vorgenommene Programmierung gelöscht.<br />
28<br />
1. Drücken und halten Sie die Taste EXIT bis Sie den Code eingegeben haben.<br />
2. Geben Sie den dreistelligen Code ein: 000<br />
� ����� ��� ���� ��������� ������ ��������� ������ ��� ��� � ��� ��� �������� ���� ���<br />
Nach Eingabe der dritten 0, schaltet sich die LED 1 bis 2 Sekunden lang ein.<br />
Nun arbeitet die Fernbedienung wieder mit den Werkseinstellungen.
Aufzeichnungsfunktion<br />
��� ������� ������� ���� ����� ������������ ���� ��� ��������� ����� ��������� ��� ��� ���������<br />
��������� ��� ��� ��������� ����������������������� ��� ���������� ������ ��� ������ ���� ����������gramme<br />
auf der 160 Gb großen Festplatte speichern, so wie Sie es mit einem getrennten DVD-<strong>Recorder</strong><br />
machen würden.<br />
��� �������������� ��������� ��� ����� ����������� ������ �� ����� �������������� ���������� ������chert.<br />
Die Bibliothek vereinfacht die Suche und Verwaltung der Aufzeichnungen.<br />
��� ��� ������� ���� ��� �������� ���������� ��� ��� ������� �������� ��������� ����� ����������pielen<br />
eines Titels, Programmieren von Aufzeichnungen, Schreibschutz von Titeln, Bibliothek, usw.).<br />
Mit den Aufzeichnungsfunktionen Ihres PVR können Sie:<br />
� ��� �������� ������������ ������� ��� ��� ������� �������� ���� ����������<br />
� ��� �������� ������������ ������� ��� ����� ��� ��� ���������� ��������������� ����� ����������<br />
� ������� ��� ������������ ����� ��������� ��� ������� �������� ������� ��� ����������<br />
Funktion zeitverschoben anschauen.<br />
Direktaufzeichnung<br />
Zur Aufzeichnung des laufenden Programms müssen Sie ein Mal auf die REC-Taste der Fernbedienung drücken.<br />
In dem angezeigten Menü müssen Sie dann die angegebene Aufzeichnungsdauer bestätigen oder ändern.<br />
Eine rote LED an der Vorderseite Ihres <strong>Decoder</strong>s bestätigt den Beginn der Aufzeichnung. Zum Beenden der<br />
Aufzeichnung drücken Sie bitte auf die STOP-Taste.<br />
Zeitlich verschobene Aufzeichnung<br />
(Programmierung)<br />
�� ���� ������������ �� ������������� ������ ��� ��� ������������� ����������������� ����� ������-<br />
��� ���� ��� ��������������� �Timer setting) benutzen, wenn das aufzuzeichnende Programm nicht in<br />
der EPG-Übersicht erscheint.<br />
Aufzeichnung mittels der Programmübersicht<br />
(EPG)<br />
1. Drücken Sie auf die EPG-Taste.<br />
2. Die Programmübersicht des gewählten Senders wird angezeigt.<br />
3. Wählen Sie ein aufzuzeichnendes Programm.<br />
4. Drücken Sie auf EPG um zu den Optionen zu gelangen.<br />
5. Folgen Sie der auf dem Bildschirm angezeigten Anleitung.<br />
Programmierte Aufzeichnung<br />
Zeigen Sie das Menü an und wählen Sie My Scheduler �����������������<br />
Wählen Sie die entsprechenden Optionen anhand der Tasten , .<br />
� Mit Timer option ������������������� ������ ��� ���� ��������������<br />
ein- oder ausschalten und ein Alarmsignal bestimmen, das vor dem Beginn des<br />
Programms erklingt.<br />
� Mit Timer set ������������ ��� ��������������� ������ ��� ��� ���� ����<br />
Programmierung vornehmen und ein Alarmsignal für den Programmbeginn<br />
erstellen.<br />
� Mit Timer list ������ ��� ����������������� ������ ��� ��� ����� �����<br />
Programmierungen anzeigen und Programmierungen daraus löschen. Sie können<br />
hier auch ein Alarmsignal löschen.<br />
� Mit Conflict timer list �������� ��������� ��� ��������������������� ������<br />
Sie eine Programmierung löschen, die sich mit einer anderen überschneidet.<br />
�<br />
�<br />
program guide M T W T F S S<br />
301 ARTE TODAY<br />
13:00 NEWS<br />
15:00 SPORT<br />
main menu<br />
1 My Channels<br />
2 My Services<br />
3 My Recordings<br />
4 My Scheduler<br />
5 My Set up<br />
6 Information<br />
My Scheduler<br />
timer options<br />
timer set<br />
timer list<br />
conflict timer set<br />
29<br />
DE
Time shift (Aufzeichnung in einen Bufferspeicher)<br />
Die Funktion Time Shift ermöglicht es Ihnen, das Programm, das Sie anschauen, auf Pause zu schalten,<br />
damit Sie zum Beispiel einen Telefonanruf beantworten können. Sie können dementsprechend gestört<br />
werden, ohne auch nur eine Sekunde Ihres Programms zu verpassen. Ihr <strong>Decoder</strong> verfügt zu diesem<br />
Zweck über einen Bufferspeicher, in dem bis zu 2 Stunden des zuletzt angeschauten Senders gespeichert<br />
werden können.<br />
Um das laufende Programm auf Pause zu schalten, müssen Sie auf die PAUSE-Taste der Fernbedienung<br />
drücken. Die Bilder frieren ein. Um das Programm dort fortzusetzen, wo Sie es unterbrochen hatten,<br />
drücken Sie bitte auf die Taste PLAY. Das Programm wird dann ab dort abgespielt, wo Sie es unterbrochen<br />
haben, aber die Bilder sind im Verhältnis zum tatsächlichen Ablauf des laufenden Programms<br />
zeitlich versetzt.<br />
Aufzeichnungskonflikte<br />
In bestimmten Fällen kann Ihr PVR nicht sofort auf Ihre Aufzeichnungsanforderung reagieren, da diese<br />
sich mit einer anderen Anforderung überschneidet. In anderen Fällen kann es sich auch um eine Inkonsistenz<br />
zwischen zwei Programmierungen handeln. Falls ein Problem auftritt, wird ein Warnungsfenster<br />
eingeblendet, das Ihnen eine Lösung vorschlägt.<br />
Aufzeichnungskonflikte treten meistens auf, wenn:<br />
30<br />
� ���� ������������������������ �������� ������� ��� ����� ������� ��� ������� �������� ��������net.<br />
Ihr PVR kann immer nur ein Programm gleichzeitig aufzeichnen.<br />
� ���� ���������������� ���� �������������� ��� ���� ������ �������������� �������� ����� ���<br />
erste abgeschlossen ist.<br />
� ����� ���� �������� ������ ������������� ��� ��� ���������� ���� ��� ������ ���� ����� �������� ��<br />
Speicherplatz frei zu machen.<br />
� ��� ������������� ����� ��� ������������ ����������� ��� ������ ��������
Bibliothek<br />
��� �������������� ��������� ��� ����� ����������� ������ �� ����� �������������� ���������� ������chert,<br />
anhand derer Sie sie leichter wiederfinden können.<br />
Zugriff auf die Titelbibliothek<br />
1. Zeigen Sie das Hauptmenü an und wählen Sie PVR und anschließend Record Library.<br />
2. Wählen Sie die entsprechenden Titel anhand der Tasten , .<br />
My library 14/07/08 21:45<br />
80 % disk space available<br />
Title date duration<br />
Title 1 10/05/08 01 h 52 mn<br />
Title 2 12/05/08 02 h 05 mn<br />
Title 3 01/06/08 00 h 32 mn<br />
Title 4 03/06/08 01 h 47 mn<br />
Title 5 06/06/08 01 h 36 mn<br />
Title 6 07/06/08 00 h 13 mn<br />
Title 7 08/06/08 00 h 28 mn<br />
Title 8 14/06/08 01 h 15 mn<br />
Title 9 24/06/08 02 h 25 mn<br />
Title 10 10/07/08 00 h 05 mn<br />
Title 11 14/07/08 00 h 38 mn<br />
���������<br />
�<br />
�<br />
1 Defaulteinstellung : Name des Senders, Aufzeichnungsdatum, Anfangszeit<br />
2 : Die Elternkontrolle ist eingeschaltet (Der Titel kann nur nach Eingabe eines Kennworts abgespielt werden),<br />
: Der Schutz gegen versehentliches Löschen ist eingeschaltet,<br />
Bibliothek, verfügbare Befehle<br />
Die zur Nutzung Ihrer aufgezeichneten Titel verfügbaren Tasten sind im Folgenden aufgeführt.<br />
Einstellung der Lautstärke<br />
Zurück<br />
� Uhrzeit und Datum.<br />
� Verbleibender Speicherplatz auf der Festplatte.<br />
� �������������� ��� ����� � ��������������� ���� �������danzeige<br />
ausgehend von einem Bild aus drücken Sie<br />
bitte auf die PLAY-Taste).<br />
� Liste der aufgezeichneten Titel 1 in der Bibliothek<br />
������ ����� ��� �������� ������ 2 ).<br />
Ton ausschalten<br />
Beenden<br />
Navigationsund<br />
Bestätigungstaste<br />
Abspielen, Schneller<br />
Vorwärts- / Rücklauf, Stopp, Pause<br />
31<br />
DE
Individuelle Gestaltung der Titel<br />
Wenn eine Aufzeichnung beendet ist, können Sie folgende Einstellungen vornehmen:<br />
� ��� ����� ����� ��������������� ������� ��������.<br />
� ��� ������������ ������� ���� �������������<br />
� ���� ����� ��������<br />
� ����� ����� �����������<br />
Einen Titel schützen<br />
Um eine Aufzeichnung zu schützen wählen Sie bitte Protect Record und bestätigen anschließend mit<br />
OK.<br />
Einen Titel löschen<br />
Um eine Aufzeichnung zu löschen wählen Sie bitte Delete Record und bestätigen anschließend mit<br />
OK.<br />
Alle Titel löschen<br />
Um alle Aufzeichnungen zu löschen wählen Sie bitte Delete all Records und bestätigen anschließend<br />
mit OK.<br />
Einen Titel umbenennen<br />
Um den Titel einer Aufzeichnung zu ändern wählen Sie bitte Rename Record im Menü Bearbeiten<br />
und bestätigen anschließend mit OK. Benutzen Sie die Zifferntasten der Fernbedienung um den Titel<br />
Ihrer Wahl aus einzelnen Buchstaben zusammenzusetzen. Verfahren Sie wie bei der Tastatur Ihres<br />
Mobiltelefons.<br />
32<br />
<strong>DCI82BBN</strong> / RST - EPHEME / AVRIL 2008
Introduction<br />
Droits d’auteur<br />
© 2008 Thomson SA. Tous droits réservés. Le contenu de Thomson ne peut faire l’objet d’aucune<br />
réédition ou redistribution, y compris par cadrage ou autres moyens similaires sans l’accord écrit<br />
préalable de Thomson SA. 'THOMSON' et le logo Thomson sont des marques déposées et des marques<br />
commerciales de Thomson SA.<br />
Autres marques et technologie de protection<br />
HDMI, le logo HDMI et High-Définition Multimedia Interface (Interface multimédia haute définition) sont<br />
des marques commerciales ou des marques déposées de HDMI Licensing LLC.<br />
Ce produit incorpore une technologie de protection des droits d’auteur protégée par les droits de certains<br />
brevets américains et par d’autres droits de propriété intellectuelle. L’utilisation de cette technologie de<br />
protection des droits d’auteur doit être autorisée par Macrovision et n’est destinée qu’à des utilisations<br />
individuelles ou limitées, sauf autorisation expresse contraire de Macrovision. Il est interdit de procéder<br />
à toute ingénierie inverse ou tout désassemblage. Tout autre nom de société ou de produit sont soit des<br />
marques commerciales soit des marques déposées par leurs détenteurs respectifs.<br />
Avertissement<br />
Thomson se réserve le droit de modifier les caractéristiques et les photos mentionnées dans ce<br />
document à tout moment et sans avis préalable. Par conséquent, les informations contenues dans ce<br />
manuel ne sont pas contractuelles.<br />
Table des matières<br />
Introduction ............................................. 1<br />
Table des matières .................................. 1<br />
Recommandations de sécurité .............. 2<br />
A propos de votre décodeur HD ........... 4<br />
Qu’est-ce que la HD ? .......................................4<br />
Comment la HD fonctionne-t-elle ? ..............4<br />
De quoi avez-vous besoin pour profiter<br />
des services de la HD ? .....................................4<br />
Raccordements ....................................... 5<br />
Contenu du colis ................................................5<br />
Commandes sur la face avant ..........................5<br />
Raccordements sur la face arrière .................6<br />
Raccordement à un téléviseur .........................6<br />
Autres raccordements ......................................7<br />
Insertion de la smartcard .................................8<br />
Insertion des piles ..............................................8<br />
Télécommande ...................................................9<br />
Installation rapide ................................. 10<br />
Utilisation au quotidien ........................ 11<br />
Mettre en position marche/arrêt ................. 11<br />
Changer de chaîne .......................................... 11<br />
Indications pour la navigation ....................... 11<br />
Utiliser les menus ............................................ 11<br />
Utiliser le bandeau zapping/info .......................12<br />
Utiliser le Mini-Guide ..................................... 12<br />
Menus ..................................................... 13<br />
Diagrammes des menus ................................. 13<br />
Chaînes ................................................... 14<br />
Liste des chaînes .............................................. 14<br />
Organiseur des chaînes .................................. 14<br />
Mise à jour de la liste des chaînes ............... 15<br />
Mes services ........................................... 16<br />
Guide des programmes .................................. 16<br />
Alarmes .................................................. 17<br />
Réglage ................................................... 18<br />
Langues .............................................................. 18<br />
Options .............................................................. 18<br />
Contrôle parental ............................................ 19<br />
Connexion ........................................................ 19<br />
Format d'image ................................................ 20<br />
Installation ......................................................... 22<br />
Droits d’accès ....................................... 22<br />
Changer le CA PIN ......................................... 22<br />
Classification par catégories d’âge .............. 23<br />
Fonctions principales ............................ 24<br />
Guide de dépannage ............................. 25<br />
Glossaire ................................................ 26<br />
Programmation de la télécommande .. 27<br />
Avant de commencer ..................................... 27<br />
Programmation par entrée directe ............. 27<br />
Recherche automatique ................................. 27<br />
Retour à la configuration initiale .................... 28<br />
Fonctions d'enregistrement .................. 29<br />
Enregistrement immédiat .............................. 29<br />
Enregistrement différé .................................. 29<br />
Time Shift ......................................................... 30<br />
Conflits d'enregistrement ................................ 30<br />
Bibliothèque ........................................... 31<br />
Accéder à la bibliothèque des titres ........... 31<br />
Bibliothèque, Commandes utilisables ........ 31<br />
Personnalisation des Titres .......................... 32<br />
Codes des téléviseurs .............................I<br />
1<br />
FR
Recommandations de sécurité<br />
Pour utiliser l’équipement en toute sécurité<br />
Votre décodeur a été fabriqué conformément aux normes de sécurité européennes mais certaines<br />
précautions doivent être prises afin de garantir un fonctionnement correct.<br />
Il est important de lire entièrement ce manuel, en particulier les consignes de sécurité ci-dessous. En<br />
cas de doutes sur l’installation, le fonctionnement ou la sécurité du décodeur, veuillez contacter notre<br />
Service client.<br />
Pour éviter tout risque de choc électrique<br />
� ���������� �� �������� �� �� ����� ���������� ����� �� �� ��������� � ��� �� �� ������������<br />
tout autre équipement. Evitez tout contact avec des prises de 230 Volt CA, ce qui risquerait d’être<br />
mortel ou de provoquer un grave choc électrique.<br />
� �� ������� ��� �� ����� �� ��������� �� ��� �� ����������� �� ��������� ��������� �� ������� ������<br />
pour le faire réparer ou examiner.<br />
� ������������� ����� ����� ���� ��� ���������� �� ������� �� ����������� �� �� ����������<br />
� �� ������� ��� ��� ������� �� ����������� �� �������� � �� �� ����� ��� ��� ��� �������� ���<br />
stables comme un tapis.<br />
� �� ����� ���� ��� �� �������� ��� ������ ������ �� ������ � ����������� ���� ������ ������� ��<br />
récipient contenant du liquide). Ne l’éclaboussez pas avec du liquide. Si un objet ou du liquide<br />
pénètre à l'intérieur du décodeur, débranchez-le immédiatement et contactez le Service client.<br />
� �� ��������� ��� �� �������� ���� ��� ���������� ������������� ������� ������ �� �������<br />
Ce décodeur est prévu pour fonctionner à une température ambiante inférieure à 45°C et à un<br />
niveau d’humidité maximum de 75%.<br />
� �� ��� �������� �� ��� ���������� �� ���������� �� �������� �� �� ����� ���������� ����� ���<br />
l’antenne du poste de télévision.<br />
� ������� ��� ������ ����������� ��� �� ������� ���������� ��� ��������� �����������<br />
Pour raccorder le décodeur à la prise électrique<br />
� �� �������� ��� ����� ���� ����������� ���� �� ���� ��� �����<br />
� �� ��� �� ����� ��� �� �� ����������� �� ����� �� �� ������������� �������� ��������� �� �������<br />
client.<br />
Pour garantir des performances optimales<br />
� ������� � � �� �� ������ �� �������� ��� �� �������� ��� ����������� �������� �� ���������<br />
� ����� �������� ����� �������� ����������������<br />
� ���� �������� �� ��������� �������� �� ������� ����� ������ �� ���� ���� ������� �� ��������� ��<br />
produit abrasif. Nettoyez les orifices de ventilation régulièrement.<br />
2<br />
10 cm<br />
10 cm<br />
10 cm<br />
7 cm
Informations environnementales<br />
� ��� ����� ��������� ��������� ���������� ����������� ��� �������� ���������������� �� ��� �����<br />
pas avec d'autres articles. Prenez soin de les jeter dans les points de collecte prévus à cet effet.<br />
� �� ���� ���������� ��� ���������� ������� ��� ������ ������� �� ������� �� ������ �� ��� ��������� ��<br />
le mettre en veille afin d’économiser l’énergie.<br />
Caractéristiques techniques<br />
Tension de fonctionnement 230 VCA / 50Hz<br />
Consommation de tension nominale < 46W<br />
Consommation électrique en veille (active) < 25W<br />
Consommation électrique en veille (passive) < 3W<br />
Poids (sans accessoires) 2,7kg<br />
Dimensions (L x H x P) sans pied<br />
Gamme des températures<br />
391 x 65 x 291 mm<br />
de fonctionnement 5 – 45°C<br />
Gamme des températures de stockage -25 – 70°C<br />
Type de piles de la télécommande 2 x AAA<br />
Accès conditionnel ISO7816 - CONAX<br />
Disque dur 160 Go<br />
Connexions<br />
Sortie HDMI Connecteur HDMI de type A<br />
Entrée RF IEC60169-2 femelle<br />
Sortie RF IEC60169-2 mâle<br />
Téléviseur Péritel<br />
Magnétoscope Péritel<br />
Sortie audio (G et D) RCA femelle (IEC60268-11)<br />
Sortie audio – S/P-DIF RCA femelle (supports IEC60958)<br />
Composants analogiques - YPrPb RCA femelle<br />
USB 2.0 – type A<br />
Ethernet RJ45 – IEEE 802.3<br />
Signification des symboles<br />
Ce symbole sur votre appareil garantie que votre produit est conforme aux Directives<br />
européennes 73/23/EEC, 89/336/EEC, 93/68/EEC sur, respectivement, la sécurité, la<br />
compatibilité électromagnétique et le marquage.<br />
Ce symbole avertit l’utilisateur de la présence de “tension dangereuse” non isolée à<br />
l’intérieur du produit pouvant être d’amplitude suffisante pour comporter un risque<br />
de choc électrique.<br />
Ce symbole avertit l’utilisateur de la présence de consignes importantes de<br />
fonctionnement et de maintenance (entretien) qui accompagnent le produit.<br />
3<br />
FR
A propos de votre décodeur HD<br />
Nous vous remercions d’avoir choisi le 8000 Series, la nouvelle génération Thomson de boîtier<br />
décodeur enregistreur câble HD. Grâce à sa fonction Haute Définition (HD), vous serez parmi les<br />
premiers à profiter de la TV en qualité supérieure !<br />
Equipé de la toute dernière technologie HD, votre 8000 SERIES est prêt pour la toute dernière norme<br />
et également compatible avec la norme traditionnelle de définition standard.<br />
Qu’est-ce que la HD ?<br />
Aujourd’hui, la télévision à définition standard propose une définition d’images entrelacée de 720 pixels<br />
de large par 576 pixels de haut avec les formats PAL ou Secam. L’entrelacement indique qu’une ligne<br />
sur deux est rafraîchie à chaque passage du balayage de l'image. Cette définition est suffisante pour<br />
les écrans à tube cathodique. Néanmoins, avec la commercialisation des grands écrans Plasma et LCD,<br />
la qualité de l’image est détériorée. Les études pour améliorer cette qualité d’image ont conduit à la<br />
création du format HD avec une définition d’image pouvant atteindre jusqu’à 1920 pixels de large par<br />
1080 pixels de haut.<br />
La différence entre les images en définition standard et HD est évidente pour le spectateur. La<br />
Haute Définition offre plus de définition, de détails et un meilleur confort visuel. Pour regarder<br />
des documentaires, du sport ou des films, la HD devient une nouvelle expérience, comparable à la<br />
transition entre la télévision noir et blanc et la télévision couleur.<br />
Comment la HD fonctionne-t-elle ?<br />
La définition d’image se mesure en unités de pixel. Plus le nombre de pixels est élevé, plus la qualité et<br />
la définition de l’image sont élevées. La Haute Définition est basée sur deux normes qui proposent des<br />
résolutions beaucoup plus élevées (voir tableau ci-dessous). Ainsi, ce qui était flou et imprécis avec la<br />
définition standard semble automatiquement net et détaillé avec la HD.<br />
4<br />
TV<br />
Résolution<br />
(Nb Pixels x Nb lignes)<br />
Compatibilité HD<br />
TV standard 720x576 Non<br />
HD Ready 1280x720p Oui<br />
HD Ready 1920x1080i Oui<br />
Full HD 1920x1080p Oui<br />
De quoi avez-vous besoin pour profiter des services de la HD ?<br />
Pour profiter des programmes en qualité Haute Définition, il vous faut :<br />
� �� ���������� ��<br />
� �� ������� �������� ��<br />
� ��� ����� ���� ���� �������� ���� ��������� �� ������� �������� � �� ����������<br />
� ������������ ����������<br />
L’idéal serait d’utiliser un téléviseur étiqueté “HD Ready” ou “Full HD”. Sinon, renseignez-vous<br />
auprès de votre revendeur afin de savoir si votre poste de télévision possède une fonction HD.<br />
Découvrez la technologie de demain grâce au nouveau boîtier décodeur HD de Thomson !<br />
Si votre téléviseur n’a ni port HDMI ni port DVI, vous pouvez toujours profiter de tous<br />
les programmes télévisés en qualité numérique standard en utilisant la prise péritel<br />
fournie.
Raccordements<br />
Contenu du colis<br />
���� ���� �� �� �<br />
Prise péritel<br />
���� ���� �� �� �<br />
�<br />
�<br />
Boîtier décodeur enregistreur<br />
Commandes sur la face avant<br />
Mise en veille /<br />
Marche.<br />
Menu :<br />
ouvre/ferme<br />
le menu<br />
Exit : quitte<br />
tous les menus<br />
OK :<br />
confirme une<br />
sélection<br />
Guide d’utilisation<br />
permet la navigation à<br />
gauche, en haut, en bas, à<br />
droite dans les menus<br />
Afficheur : affiche<br />
l’heure, le numéro de<br />
la chaîne ( ) ou de la<br />
radio ( --)<br />
�� ��������<br />
�������<br />
�������������������������������������������<br />
�������������������<br />
��������������������<br />
������������������������<br />
�����������<br />
Voyant DEL ambre :<br />
activité du réseau on/off<br />
Voyant DEL rouge :<br />
confirme<br />
l'enregistrement<br />
Télécommande et piles<br />
Cordon d’alimentation<br />
Fente Smartcard<br />
�� ��������<br />
�������<br />
Voyant DEL rouge/vert :<br />
mise en veille/marche<br />
5<br />
FR
Raccordements sur la face arrière<br />
Raccordement à un téléviseur<br />
6<br />
ETH:<br />
port d’accès Ethernet.<br />
RF Out:<br />
sortie d’antenne.<br />
����� ������<br />
RF In:<br />
entrée d’antenne.<br />
USB:<br />
port USB.<br />
Reset:<br />
réinitialise le modem.<br />
���<br />
�����<br />
HDMI:<br />
port HDMI.<br />
�������<br />
�����<br />
�<br />
�<br />
Sorties DIGITAL AUDIO :<br />
électrique/coaxiale S/P-DIF.<br />
��<br />
��<br />
�<br />
����� ����������<br />
Sorties L / R : sorties audio<br />
analogiques gauche et droite.<br />
1. Votre téléviseur est “HD ready” ou “Full HD”<br />
Ce raccordement garantie la meilleure qualité d’image. Les<br />
signaux vidéo et audio numériques sont diffusés grâce à la<br />
prise HDMI.<br />
Vous n’avez besoin que d’une prise HDMI pour raccorder<br />
le port HDMI à votre boîtier décodeur et à votre<br />
téléviseur.<br />
2. Votre téléviseur ne possède qu'un port DVI-I<br />
Dans ce cas, seule la vidéo est diffusée par le port DVI.<br />
Néanmoins, vous pouvez toujours recevoir un signal audio<br />
analogique via le RCA audio.<br />
Vous aurez besoin :<br />
� ����� ����� �������� ���� ��������� �� ���� ���� �<br />
votre boîtier décodeur et le port DVI-I à votre poste de<br />
télévision.<br />
� ���� ��� ����� ���� ��������� ��� ������� �����<br />
analogiques gauche et droite de votre boîtier décodeur<br />
aux entrées audio sur votre poste de télévision.<br />
Certains postes de télévision sont dotés d’une interface DVI qui ne respecte pas le<br />
protocole HDCP. Ces téléviseurs ne pourront pas afficher les services HD.<br />
��<br />
���<br />
YprPb : composants<br />
vidéo analogiques.<br />
Sortie péritel<br />
Magnétoscope/DVD.<br />
Sortie<br />
péritel TV.<br />
�������������<br />
�������<br />
Entrée électrique.
Autres raccordements<br />
Raccordement à un magnétoscope/lecteur DVD<br />
3. Votre téléviseur n’a ni port HDMI ni port DVI<br />
Vous pourrez regarder des programmes HD mais pas en<br />
qualité HD.<br />
Vous pouvez toujours profiter de tous les programmes<br />
télévisés en qualité numérique en utilisant la prise péritel<br />
fournie.<br />
� �<br />
�<br />
���Raccordez la prise RF (non fournie) de votre câble d’entrée au connecteur marqué RF IN sur votre<br />
boîtier décodeur.<br />
��Voir page 6.<br />
���Raccordez le cordon d’alimentation à votre boîtier décodeur et branchez-le dans une prise<br />
électrique.<br />
Branchez le cordon d’alimentation dans la prise uniquement lorsque tous les<br />
raccordements d’antenne ont été correctement réalisés.<br />
Utilisez une prise péritel pour raccorder la sortie VCR<br />
SCART sur votre boîtier décodeur à AV1/EXT1/AUX1 sur<br />
votre magnétoscope ou lecteur DVD.<br />
Pour raccorder à la fois le magnétoscope et le lecteur DVD<br />
au boîtier décodeur, utilisez une prise péritel (non fournie)<br />
pour brancher le lecteur DVD au magnétoscope.<br />
Via la prise péritel, le magnétoscope recevra uniquement la vidéo analogique et vous<br />
ne pourrez pas enregistrer en HD.<br />
7<br />
FR
Raccordement à un système haute fidélité<br />
Utilisez une paire de prises stéréo phono (RCA) pour<br />
raccorder les sorties L/R AUDIO sur votre boîtier<br />
décodeur aux entrées L/R AUDIO sur votre appareil haute<br />
fidélité. Vous pourrez ainsi profiter d’un son de meilleure<br />
qualité avec votre chaîne hi-fi.<br />
Insertion de la smartcard<br />
En tenant votre smartcard avec la puce dorée tournée vers le bas, face à la fente, introduisez-la dans la<br />
fente aussi loin que possible sans forcer.<br />
Insertion des piles<br />
Figure 2: Insertion des piles *<br />
8<br />
Remarque : les prises audio sont généralement identifiées par<br />
des couleurs. Blanc pour gauche et rouge pour droite.<br />
Raccordement à un amplificateur vidéo et audio ou système «Home Cinema»<br />
���� ���� �� �� �<br />
�<br />
Pour obtenir un meilleur son de votre boîtier décodeur,<br />
utilisez un cordon phono audio coaxiale numérique<br />
(électrique) pour raccorder la prise SPDIF de votre<br />
boîtier décodeur à l’entrée DIGITAL AUDIO de votre<br />
amplificateur AV / système de «Home Cinema».<br />
Remarque : dans la plupart des cas, les connexions coaxiales<br />
(également appelées électriques) et audio optiques offrent<br />
des résultats similaires ; la seule différence étant dans le type<br />
de câble utilisé. Le câble coaxial est le moins cher des deux,<br />
mais peut subir des interférences externes provenant d’autres<br />
appareils ménagers.<br />
�� ��������<br />
�������<br />
� �� �������� ��� ���������� ����� �� ����� �� �� ��������� �����<br />
avec des anciennes. N’utilisez pas de piles rechargeables.<br />
� ��� �������� ���� ������ ������������ �������� ��� ���������<br />
indiquées à l’intérieur du logement des piles. Remplacez-les<br />
uniquement par le type de piles précisé ci-dessus. Ne les jetez<br />
pas au feu ou ne les rechargez pas.<br />
� �� ���� �� ������� ��� �������� �� ������������ ������� ���<br />
longue période, retirez les piles.<br />
* Veuillez respecter l’environnement et les réglementations actuelles. Avant de jeter des piles ou des accumulateurs,<br />
demandez à votre détaillant s’ils sont soumis à un recyclage spécial et s’il les acceptera pour les mettre au rebut.
Télécommande<br />
Règle la télécommande<br />
en mode décodeur.<br />
Règle la télécommande<br />
en mode TV.<br />
Augmente/diminue<br />
le volume du son.<br />
Coupe le son / restaure le<br />
volume sonore précédent.<br />
Revient en arrière à l’écran<br />
précédent ou retourne<br />
en mode visionnage.<br />
Permet la navigation haut/bas/<br />
gauche/droite dans les menus.<br />
Sélectionne les fonctions<br />
affichées dans le menu.<br />
Lance le service<br />
de Vidéo à la Demande.*<br />
Sélectionne le mode vidéo<br />
auxiliaire sur la TV.<br />
Ouvre le Guide électronique<br />
des programmes.<br />
Accède aux chaînes radio.<br />
Conseil : pour modifier le son d’un programme ou d’une chaîne, appuyez sur le bouton<br />
�/<br />
jaune / . Vérifiez que le<br />
symbole s’affiche. Si tel est le cas, sélectionnez cet élément à l’aide des boutons et sélectionnez la langue<br />
préférée à l’aide des touches �/�.<br />
*/**Cette fonction sera activée plus tard sur votre boîtier décodeur.<br />
Alterne entre le mode marche et<br />
la mise en veille.<br />
�<br />
Ouvre le menu<br />
Bascule sur la chaîne<br />
précédente/suivante..<br />
Accède aux listes des chaînes.<br />
Quitte tous les menus.<br />
Dans les menus, confirme<br />
un choix/sélection. En mode<br />
de visionnage normal,<br />
ouvre le bandeau TV.<br />
Accède aux informations<br />
supplémentaires sur le<br />
programme sélectionné.<br />
Permet de saisir directement<br />
un numéro, ex. un code PIN,<br />
un numéro de chaîne<br />
Accède aux<br />
informations du télétexte.<br />
Uniquement pour l’utilisation<br />
d’un magnétoscope numérique.<br />
Accède aux services<br />
interactifs.**<br />
9<br />
FR
Installation rapide<br />
Pour une installation rapide, veuillez suivre les 4 étapes ci-dessous :<br />
� ������� ��� ����� ������� �������� ��� �������� ����� ������� �� ���� ��<br />
� ������� ��� �� ������ de votre télécommande pour allumer votre poste.<br />
Après quelques secondes, une liste de langues s’affiche sur l’écran.<br />
1. Menu langue<br />
� ������������ ����� ������ ���������� ��������� ���������������� � ������ ��� �������<br />
appuyez sur OK.<br />
Un message de bienvenue s'affiche sur l'écran.<br />
� ������� ��� �� ������ OK pour passer au menu de réglage du fuseau horaire.<br />
2. Menu de réglage du fuseau horaire<br />
� ���� �� ������� ����������� �� ������ �������� ������� ��� OK.<br />
� ������ ������������ ����� ������ ������� �� ��������� ��� ������� �� ��������� �� ������� ��� OK.<br />
Pour la Suisse, veuillez sélectionner Berlin, Bern, Rome.<br />
3. Menu «Eco-standby»<br />
� ���� ���������� �� ��������� �� ���� ������� ������������ Oui et appuyez sur OK.<br />
� ������ ������������ Non et appuyez sur OK.<br />
Le menu mode d’installation s’affiche sur l’écran.<br />
Remarque: Thomson contribue à l’économie d’énergie mondiale des équipements de consommation en offrant<br />
le mode « Standby basse consommation » sur ses boîtiers décodeurs HD. Cette fonction permet de réduire la<br />
consommation d’énergie du décodeur à moins de 3 Watts en mode veille. Lorsque cette fonction est activée,<br />
les données du réseau ou la mise à niveau logicielle ne seront pas disponibles sur le boîtier décodeur mais les<br />
minuteries de l’enregistreur resteront actives pour permettre le lancement des enregistrements via la sortie péritel.<br />
4. Menu installation<br />
La recherche des chaînes TV et radio commence automatiquement.<br />
10<br />
�<br />
�/ et<br />
� ���� �������� ��� ������������ Réseau, appuyez sur OK<br />
et entrez manuellement les sous-paramètres d’installation<br />
(numéro de réseau, fréquence, débit de symboles,<br />
modulation). Appuyez sur OK pour valider le paramètre<br />
d’installation.<br />
Pour savoir quel paramètre vous devez saisir, veuillez<br />
vous reporter aux informations communiquées par votre<br />
opérateur de réseau.<br />
� ������ ������������ �������� Automatique à l’aide des<br />
boutons �/� et appuyez sur OK.<br />
Veuillez noter que ce paramètre ne doit être utilisé que<br />
par un utilisateur expérimenté.<br />
Conseil : une barre de progression vous tient informé du degré d'avancement de la recherche des chaînes.<br />
Cette dernière peut prendre plusieurs minutes.<br />
5. Recherche des chaînes<br />
� �������� ��� �� �������� ��� ������� ���� ������� �� ������� ��� OK.<br />
Vous regardez, à présent, la télévision en qualité numérique !<br />
Pour apprendre à utiliser les principales fonctionnalités de votre boîtier décodeur (changer de chaîne,<br />
utiliser les menus, etc.), veuillez lire le chapitre suivant sur l’utilisation au quotidien.
Utilisation au quotidien<br />
Mettre en position on/off (marche/arrêt)<br />
Appuyez sur la touche de votre télécommande pour allumer ou éteindre votre poste.<br />
Remarque : si vous ne comptez pas utiliser votre appareil pendant une longue période, nous vous conseillons de<br />
le débrancher afin d’économiser de l’énergie.<br />
Changer de chaîne<br />
Appuyez sur la touche P+/- pour basculer sur la chaîne suivante/précédente ou saisissez le numéro de<br />
la chaîne à l’aide des touches numériques de la télécommande et appuyez sur le bouton OK.<br />
Indications pour la navigation<br />
Lisez toujours la barre d’aide affichée en bas de votre écran.<br />
� ���� �� ����� ������ �� ������� �� �� ����� ��� �������� ��� ������������ ��� �� ������������� ��<br />
fonctionnalités supplémentaires et sur les touches actives de la télécommande sont données à<br />
l’écran.<br />
� ���� ����her toutes les listes de chaînes, appuyez sur la touche LIST.<br />
� ���� ��������er les options disponibles comme les sous-titres, les options audio sur le programme,<br />
appuyez sur la touche / jaune.<br />
� ���� ���éder au Guide électronique des programmes, appuyez sur la touche GUIDE.<br />
� ���� ������� ��� �������� �� ����� � �� �������� ������� ��� �� ������ VOD.<br />
� ���� �������� ����� �� ���� ����� �� ��� ������� ��� �� ������ RADIO.<br />
� ���� ������� �� ���������� ������� ��� �� ������ TXT dans le mode TV.<br />
� ���� ��������r votre récepteur avec vos préférences personnelles (comme la résolution et le<br />
format TV, la temporisation du bandeau), veuillez suivre Menu principal/4 Configuration,<br />
entrez votre code Pin et sélectionnez Branchement (pour régler la résolution et le format TV,<br />
signal de sortie TV/Magnétoscope, etc.) ou Options (pour régler la temporisation du bandeau<br />
ou l’habillage de l’interface utilisateur).<br />
Pour bénéficier de notre politique d’amélioration continue, veuillez noter que ce boîtier décodeur peut<br />
être mis à niveau par téléchargement par liaison radio.<br />
Utiliser les menus<br />
1. Appuyez sur la touche<br />
�/<br />
MENU de votre télécommande pour ouvrir la page principale des menus.<br />
2. Utilisez les touches pour naviguer dans une liste et les touches �/� pour faire une sélection.<br />
3. Appuyez sur OK pour ouvrir le sous-menu.<br />
4. Appuyez sur le bouton BACK pour revenir à l’écran précédent ou sur EXIT pour retourner en<br />
mode de visionnage.<br />
�<br />
11<br />
FR
Utiliser le bandeau zapping/info<br />
Le bandeau zapping donne des informations sommaires sur les programmes en cours et suivants :<br />
heure et date, numéro de la chaîne, nom de la chaîne, titre du programme et temps écoulé, heure de<br />
début et de fin du programme, etc.<br />
Le bandeau information fournit des informations détaillées (options de programme disponibles,<br />
genres de programme, etc.) ainsi qu’un synopsis du programme sélectionné.<br />
Pour afficher le bandeau zapping<br />
1. Appuyez une fois sur la touche / jaune.<br />
Conseil: un bandeau zapping sommaire s’affiche automatiquement lorsque vous passez sur une autre chaîne.<br />
Pour modifier la durée d’affichage du bandeau zapping, allez dans Menu principal/4 Configuration/Options<br />
et sélectionnez Durée d'affichage du bandeau.<br />
Pour afficher le bandeau information<br />
2. Appuyez de nouveau sur la touche / jaune.<br />
Des informations détaillées sont fournies sur le programme en cours.<br />
Pour afficher les informations sur le programme suivant de la chaîne choisie, appuyez sur la touche<br />
Pour sortir du bandeau zapping/information<br />
3. Appuyez une fois sur la touche EXIT.<br />
Utiliser le Mini-Guide<br />
Grâce au Mini-Guide vous pouvez voir ce qu’il y a sur les autres chaînes sans zapper.<br />
Pour utiliser le mini-guide<br />
1. Appuyez une fois sur la touche / jaune.<br />
�/ Mini-Guide doit être en surbrillance. Sinon, sélectionnez-le à l'aide des boutons .<br />
2. Appuyez sur les flèches �/� pour zapper virtuellement dans la liste actuelle des chaînes.<br />
Des informations s’affichent sur le programme en cours et suivant de la chaîne sélectionnée.<br />
Conseil : pour passer à un programme en cours sur une autre chaîne, sélectionnez la chaîne et appuyez sur le<br />
bouton OK.<br />
12<br />
�<br />
.<br />
�
Menus<br />
Diagrammes des menus<br />
���� ���������<br />
� �������<br />
� ��� ��������<br />
� ������������<br />
� �������������<br />
� �������������<br />
� ������������<br />
�������<br />
����� �� �������<br />
������������ ��� �������<br />
��� ��������<br />
����� ��� ����������<br />
������������<br />
�������� �� �����<br />
��������� �� �����<br />
��������� ���� ��� ������<br />
�������� �� �����<br />
�������������<br />
�������<br />
�������<br />
�������� ��������<br />
�����������<br />
������������<br />
������� �� ������<br />
������������<br />
��������<br />
������� �� ������<br />
������ �������<br />
����������� ������<br />
����� �� �������<br />
������ ��� ������� ��<br />
������ ��� ������� ��<br />
��������<br />
��� �<br />
������������ ��� �������<br />
����� ��� �����<br />
������ ��� ������� ��<br />
������ ��� �������� �����<br />
��� �<br />
�������������<br />
������ �� �������������<br />
������� �� �� �������������<br />
����� ��� ��������������<br />
����� ��� �������� �����<br />
��������������<br />
������ �������<br />
���� �� ������������<br />
���� �� �����������<br />
����������<br />
�������� �� ���� ���<br />
������� ������������<br />
��������������<br />
��� ������� �����<br />
� ������ �� �������<br />
������������ �����<br />
Pour obtenir des informations détaillées sur les chaînes, le guide électronique des programmes, la minuterie<br />
et certains paramètres de réglage, reportez-vous aux pages suivantes.<br />
13<br />
FR
Chaînes<br />
Liste des chaînes<br />
Ce menu donne accès à toutes les listes de chaînes : la liste All TV et vos listes favorites. Vous pouvez<br />
visualiser le contenu des listes et modifier la liste actuellement visualisée.<br />
Pour accéder à la liste des chaînes<br />
1. Appuyez sur la touche MENU.<br />
2. À l’aide des touches �<br />
et , sélectionnez 1 Chaînes et appuyez sur OK.<br />
3. À l’aide des touches �<br />
et , sélectionnez liste de chaînes et appuyez sur OK.<br />
14<br />
�<br />
�<br />
Conseil : pour accéder directement à la liste des chaînes, appuyez sur la touche LIST de votre<br />
télécommande.<br />
Pour afficher le contenu des listes<br />
Pour afficher le contenu d’une liste, mettez-la en surbrillance à l’aide des touches �<br />
et<br />
et appuyez sur la touche OK.<br />
Pour naviguer dans la liste des chaînes, utilisez les touches �<br />
et ,<br />
Pour passer à une chaîne que vous voulez regarder, mettez la chaîne en surbrillance à l’aide des<br />
touches �<br />
et et appuyez sur la touche OK. La liste que vous utilisiez en dernier deviendra votre<br />
liste actuelle.<br />
Pour tourner les pages dans la liste des chaînes, utilisez les touches � et �.<br />
�<br />
Pour sortir de la liste des chaînes<br />
Pour sortir du sous-menu liste des chaînes, appuyez sur la touche EXIT.<br />
Organiseur des chaînes<br />
L’organiseur des chaînes permet de créer des listes favorites et de modifier les autres listes :<br />
renommer, réorganiser ou supprimer une liste, ajouter/supprimer des chaînes, verrouiller/déverrouiller<br />
des chaînes, etc.<br />
Pour accéder à l’organiseur des chaînes<br />
1. Appuyez sur la touche MENU.<br />
2. À l’aide des touches �<br />
et<br />
3. À l’aide des touches �<br />
et<br />
et appuyez sur OK.<br />
�<br />
�<br />
�<br />
�<br />
, sélectionnez 1 Chaînes et appuyez sur OK.<br />
, sélectionnez Organisation des chaînes saisissez votre code pin<br />
Pour créer une nouvelle liste<br />
Pour créer une nouvelle liste favorite, mettez en surbrillance Créer une liste à l’aide des<br />
touches �<br />
et et appuyez sur OK.<br />
Étape 1. Utilisez les flèches pour modifier le nom générique de la liste et appuyez sur OK pour<br />
confirmer.<br />
Étape 2. Sélectionnez le type de liste à créer : chaînes TV ou radio.<br />
Étape 3. Sélectionnez la liste de chaînes existante à partir de laquelle vous voulez créer la nouvelle liste.<br />
Étape 4. Supprimez des chaînes depuis / ajoutez des chaînes à la nouvelle liste à l'aide du bouton<br />
OK sur la chaîne sélectionnée.<br />
Appuyez sur BACK ou EXIT pour valider la nouvelle liste.<br />
�
Pour modifier/supprimer une liste<br />
Pour modifier ou supprimer une liste, mettez-la en surbrillance à l’aide des touches �<br />
et<br />
puis appuyez sur OK. Un menu avec les différentes options s’affiche à l’écran.<br />
1. Pour modifier le nom de la liste, sélectionner le premier élément et appuyez sur OK.<br />
Puis utilisez les touches de direction pour changer le nom préréglé.<br />
Appuyez sur la touche BACK pour sauvegarder vos réglages.<br />
2. Pour modifier la liste, sélectionnez le deuxième élément et appuyez sur OK.<br />
Puis utilisez la touche OK pour ajouter ou supprimer la chaîne sélectionnée de votre liste favorite.<br />
Appuyez sur la touche BACK pour sauvegarder vos réglages.<br />
3. Pour verrouiller/déverrouiller des chaînes, sélectionnez le troisième élément et appuyez sur<br />
OK.<br />
Puis utilisez la touche OK pour verrouiller ou déverrouiller la chaîne sélectionnée de votre liste<br />
favorite.<br />
Appuyez sur la touche BACK pour sauvegarder vos réglages.<br />
4. Pour réorganiser la liste, sélectionnez le quatrième élément et appuyez sur OK.<br />
Sélectionnez la chaîne à réorganiser dans la liste à l’aide des touches �<br />
et .<br />
Puis appuyez sur OK.<br />
Utilisez les touches �<br />
et pour déplacer la chaîne jusqu’à son nouvel emplacement dans la liste.<br />
Appuyez sur OK pour confirmer l’emplacement. La liste est modifiée automatiquement.<br />
Appuyez sur la touche BACK pour sauvegarder vos réglages.<br />
�<br />
5. Pour effacer la liste, sélectionnez le dernier élément sur la liste et appuyez sur OK.<br />
Pour confirmer la suppression de la liste, mettez en surbrillance “Yes, confirm deletion” à l’aide<br />
de la touche �<br />
et appuyez deux fois sur OK.<br />
Pour annuler la suppression, appuyez sur OK.<br />
Appuyez sur la touche BACK pour sauvegarder vos réglages.<br />
Pour sortir de l’organiseur des chaînes<br />
Pour sortir de l’organiseur des chaînes, appuyez sur la touche EXIT.<br />
Mise à jour de la liste des chaînes<br />
Au cours de la première installation, le boîtier décodeur recherche les chaînes présentes dans le<br />
réseau. Si par la suite de nouvelles chaînes sont disponibles ou renommées, supprimées ou modifiées, le<br />
boîtier décodeur mettra automatiquement à jour la liste de toutes les chaînes.<br />
�<br />
�<br />
15<br />
FR
Mes services<br />
Guide des programmes<br />
Le Guide électronique des programmes (EPG) vous permet de connaître les émissions de la chaîne<br />
que vous êtes en train de regarder jusqu’à 7 jours à l’avance. Par conséquent, l’EPG intègre un outil de<br />
recherche : savoir quels films seront diffusés le soir même sur toutes les chaînes de télévision devient<br />
un jeu d’enfant !<br />
Pour accéder à la liste des chaînes<br />
1. Appuyez sur la touche MENU.<br />
2. À l’aide des touches �<br />
et , sélectionnez 2 Mes services et appuyez sur OK.<br />
3. À l’aide des touches �<br />
et , sélectionnez Guide des programmes puis appuyez sur OK.<br />
16<br />
�<br />
�<br />
Conseil : appuyez sur le bouton GUIDE pour accéder rapidement au guide des programmes.<br />
Pour utiliser le guide<br />
Pour naviguer parmi les créneaux horaires et les jours, utilisez les touches �<br />
et .<br />
Pour afficher le guide des programmes d’une autre chaîne, utilisez les touches P+/-.<br />
Pour passer à un programme en cours diffusé sur une autre chaîne, mettez en surbrillance le programme<br />
à l’aide des touches de direction, appuyez sur OK et sélectionnez Visionner ce<br />
programme.<br />
Pour régler une minuterie sur un programme qui sera diffusé plus tard, mettez en surbrillance le<br />
programme à l’aide des touches de direction et appuyez sur OK. Vous pouvez alors choisir de mettre<br />
un rappel unique ou quotidien, ou d’ajouter un mémo au programme sélectionné (voir également<br />
page 7).<br />
Pour obtenir plus d’informations sur un programme, mettez-le en surbrillance et appuyez sur la<br />
touche / jaune.<br />
Pour tourner les pages, les touches � et �.<br />
Pour utiliser l’outil de recherche<br />
Appuyez une fois sur GUIDE dans le guide des programmes.<br />
Le menu outil de recherche s’affiche.<br />
Vous pouvez naviguer dans le guide des programmes en sélectionnant un nom de programme, une<br />
date, une heure, un thème ou/et un type de visionnage.<br />
Pour sélectionner vos critères de recherche, utilisez les touches de direction et appuyez sur OK<br />
pour commencer la recherche.<br />
Pour sortir du guide<br />
Pour sortir de l’EPG, appuyez sur la touche EXIT.<br />
�
Alarmes<br />
Dans le menu minuterie, vous pouvez régler une nouvelle minuterie, sélectionnez une option ou<br />
affichez la liste de réglage de la minuterie.<br />
Trois types d'alarmes peuvent être réglés<br />
� Rappel : le rappel ne porte pas sur un programme. L’utilisateur peut entrer tout message dont il<br />
veut se souvenir tout en regardant la télévision.<br />
� Mémo : le mémo vous permet de « réveiller » le décodeur s’il est en veille.<br />
� Enregistreur : la minuterie de l’enregistreur vous permet de lancer l’enregistrement vidéo via la<br />
sortie péritel.<br />
Pour les rappels et les mémos, si le décodeur est allumé lorsque la minuterie arrive à terme,<br />
la question de confirmation restera à l’écran pendant 1 minute. Ce temps écoulé, il passera<br />
automatiquement au service spécifié.<br />
Important : n’oubliez pas de sauvegarder votre nouvelle minuterie !<br />
�<br />
Pour accéder aux alarmes<br />
1. Appuyez sur la touche MENU.<br />
2. À l’aide des touches<br />
OK.<br />
et , sélectionnez 3 Alarmes, entrez votre code pin et appuyez sur<br />
�<br />
Les options suivantes sont disponibles<br />
� option des alarmes : pour activer/désactiver la minuterie et pour sélectionner l’heure de<br />
l’alarme avant qu’apparaisse le rappel.<br />
� définition des alarmes : pour créer manuellement un rappel, un mémo et un enregistreur.<br />
� liste des alarmes : pour revoir et supprimer les rappels créés auparavant.<br />
� liste des conflits entre les alarmes : pour supprimer les minuteries en conflit qui se chevauchent<br />
les unes sur les autres.<br />
Pour sortir du menu minuterie<br />
Pour sortir du menu minuterie, appuyez sur la touche EXIT.<br />
17<br />
FR
Réglage<br />
Langues<br />
�� ����� �� ��� �� ��� ������� ��� ����������� ������� ���� ������ �� �������� ����������������� ��<br />
Italien (si la piste correspondante existe).<br />
Pour accéder au réglage de la langue<br />
1. Appuyez sur la touche MENU.<br />
2. À l’aide des touches �<br />
et , sélectionnez 4 Configuration, entrez votre code pin et appuyez<br />
sur OK.<br />
18<br />
�<br />
Pour modifier une langue<br />
1. À l’aide des touches �<br />
et , sélectionnez le menu, le son ou la langue des sous-titres..<br />
2. À l’aide des touches � et �, pour confirmer une langue.<br />
�<br />
Pour sortir du menu réglage de la langue<br />
Pour sortir du menu de réglage de la langue, appuyez sur la touche EXIT.<br />
Options<br />
Le but de l’écran “options” est de régler :<br />
� durée d'affichage du bandeau : 3 à 10 secondes ou toujours affiché<br />
� configuration des fuseaux horaires<br />
� apparence du décodeur : bleu, vert ou rouge<br />
� volume*: volume commun ou indépendant<br />
� configurer la transparence de l'écran<br />
� Mode Standby basse consommation : activer / désactiver<br />
* Si vous choisissez « volume commun », le boîtier décodeur réglera tous les volumes des chaînes de TV et de radio<br />
au même niveau.<br />
Si vous choisissez « volume indépendant », vous aurez la possibilité de régler le niveau du volume de chaque chaîne<br />
selon vos préférences. Le boîtier du décodeur récupère le dernier réglage du volume utilisé sur la chaîne sélectionnée.<br />
Pour accéder au menu option<br />
1. Appuyez sur la touche MENU.<br />
2. À l’aide des touches �<br />
et , sélectionnez 4 Configuration, et entrez votre code pin.<br />
3. À l’aide des touches �<br />
et , sélectionnez Options, et appuyez sur OK.<br />
�<br />
�<br />
Pour modifier une option<br />
1. À l’aide des touches �<br />
et , sélectionnez l'élément à modifier.<br />
2. Appuyez sur les touches � et � pour faire votre sélection.<br />
�<br />
Pour sortir du menu option<br />
Pour sortir du menu option, appuyez sur la touche EXIT.
Contrôle parental<br />
Le sous-menu <strong>Decoder</strong> PIN vous permet de changer le code PIN, verrouiller/déverrouiller le décodeur<br />
et activer/désactiver le contrôle parental en définissant une limite d’âge.<br />
Par défaut, le contrôle parental est activé avec une limite d’âge de 18 ans.<br />
Pour accéder au Contrôle parental<br />
1. Appuyez sur la touche MENU.<br />
2. À l’aide des touches �<br />
et , sélectionnez 4 Configuration, puis appuyez sur OK.<br />
Un code PIN protège l’accès. Saisissez votre code PIN à 4 chiffres.<br />
3. À l’aide des touches �<br />
et<br />
�<br />
�<br />
, sélectionnez Contrôle parental, puis appuyez sur OK.<br />
Pour changer le code PIN du décodeur<br />
Certaines fonctions du boîtier décodeur (ex. le verrouillage du décodeur) nécessite l’entrée d’un<br />
numéro d’identification personnel (PIN). Le numéro par défaut est 0000. Nous vous recommandons<br />
fortement de changer ce numéro.<br />
Important : gardez votre code PIN secret, et ne le perdez pas !<br />
1. Sélectionnez Modifier le code PIN et appuyez sur OK.<br />
2. Entrez le nouveau PIN à l’aide des boutons numériques.<br />
3. Enfin, confirmez le nouveau PIN en le saisissant à nouveau.<br />
Remarque : pour changer le CA PIN, voir page 22.<br />
Pour verrouiller le décodeur<br />
1. Sélectionnez Verrouillage du décodeur<br />
2. À l’aide des touches de direction � et �, verrouillez/déverrouillez des chaînes.<br />
Limite d’âge<br />
1. Sélectionnez Seuil de classification<br />
2. À l’aide des touches de direction � et �, sélectionnez la limite d’âge souhaitée pour<br />
le visionnage des programmes.<br />
Pour sortir du menu Contrôle parental<br />
Pour sortir du menu contrôle parental, appuyez sur la touche EXIT.<br />
Connexion<br />
Le menu connexion vous permet de régler principalement les formats TV, les formats audio et vidéo et<br />
les résolutions HD.<br />
� �<br />
Pour accéder au menu connexion<br />
1. Appuyez sur la touche MENU.<br />
2. À l’aide des touches et , sélectionnez 4 Configuration, puis appuyez sur OK.<br />
3. À l’aide des touches et , sélectionnez Branchement, puis appuyez sur OK.<br />
�<br />
�<br />
19<br />
FR
Pour modifier les réglages de connexion<br />
Utilisez les touches de direction pour modifier les réglages de connexion. Ci-dessous figurent les<br />
valeurs possibles pour chaque élément.<br />
20<br />
Format TV : 4/3, 16/9<br />
Réglage de l’image : en 4/3 : recadrage automatique, ext. image 14:9, plein écran<br />
en 16:9 : ext. image 16:9, zoom 16:9, zoom 14:9, étiré<br />
Mode péritel TV : CVBS + RGB* , CVBS, SVHS<br />
Mode péritel VCR : CVBS, SVHS<br />
Format vidéo : PAL, SECAM<br />
Format audio : audio PCM, audio numérique<br />
Information sur le dispositif HDMI** : connecté, non connecté<br />
YPrPb : activé, désactivé<br />
Résolution HD*** : automatique, manuelle<br />
Si manuelle : 720x576p, 1280x720p, 1920x1080i<br />
Pour sortir du menu connexion<br />
Pour sortir de ce menu, appuyez sur la touche EXIT.<br />
* CVBS + RGB est le réglage recommandé pour une image de la meilleure qualité sur une entrée péritel TV.<br />
** Ce paramètre indique que le connecteur HDMI est utilisé.<br />
*** Sur un téléviseur qui n’est pas compatible HD, préférez le réglage 720x576p. Si vous disposez d’un écran HD<br />
ready, préférez le réglage 1280x720p pour les programmes en HD. Si vous disposez d’un écran full HD, utilisez l’un<br />
des deux réglages : 1280x720p ou 1920x1080i.<br />
Format d'image<br />
Image originale au format 16/9<br />
Affichage d’une image16/9 sur un téléviseur 4/3 :<br />
Ext. image 14:9<br />
Recadrage automatique
Image originale au format 4/3<br />
Affichage d’une image 4/3 sur un téléviseur 16/9 :<br />
Ext. image 16:9<br />
zoom 16/9<br />
(le haut et le bas de l’image sont coupés)<br />
Étiré<br />
21<br />
FR
Installation<br />
Ce menu permet d’entrer manuellement les paramètres d’installation ou de commencer une nouvelle<br />
recherche des chaînes. Deux types d’installation sont disponibles :<br />
� balayage : le paramètre peut être réglé automatiquement. Appuyez sur OK pour démarrer le balayage.<br />
� ������������ �� ������ � ����� ������������ ���� ������ �������� ������������ �� ��������� �� ��<br />
type de modulation. Ce menu ne doit être utilisé que par des utilisateurs expérimentés.<br />
� �<br />
Pour accéder au menu installation<br />
1. Appuyez sur la touche MENU.<br />
2. À l’aide des touches<br />
sur OK.<br />
et , sélectionnez 4 Configuration, entrez votre code pin et appuyez<br />
3. À l’aide des touches et , sélectionnez Installation, puis appuyez sur OK.<br />
22<br />
�<br />
�<br />
Pour modifier un paramètre<br />
1. À l’aide des touches �<br />
et , sélectionnez le paramètre à modifier.<br />
2. Appuyez sur les touches � et � pour sélectionner votre préférence ou utilisez les boutons<br />
numériques de la télécommande pour entrer le nouveau paramètre.<br />
�<br />
Pour sortir du menu installation<br />
Pour sortir de ce menu, appuyez sur la touche EXIT.<br />
Droits d’accès<br />
Le sous-menu « droits d’accès » vous permet d’obtenir des informations sur votre abonnement, sur les<br />
jetons disponibles, et de changer la classification par catégories d’âge.<br />
� Le menu État de l'abonnement vous informe sur la période des droits sur chaque chaîne générale.<br />
� Le menu État de l'événement (1) liste tous les programmes à la carte achetés.<br />
� Le menu État des jetons (1) vous informe sur les jetons de chaque porte-monnaie disponible, y<br />
compris leurs informations de débit et de crédit pour chaque programme nécessitant des jetons<br />
pour être regardés.<br />
(1) Cette fonction est liée à la fonction à la carte. Notez que les programmes à la carte peuvent ne pas être<br />
disponibles sur votre réseau.<br />
Changer le CA PIN<br />
Ce sous-menu vous permet de changer le code PIN de la smartcard.<br />
Important : le code CA PIN ou code de la smartcard est différent du code PIN du décodeur. Le numéro par<br />
défaut est 1234. Nous vous recommandons fortement de changer ce numéro.<br />
� � �<br />
Pour accéder au changement du CA PIN<br />
1. Appuyez sur la touche MENU.<br />
2. À l’aide des touches et , sélectionnez 5 informations puis appuyez sur OK.<br />
3. À l’aide des touches et , sélectionnez Droits d'accès puis appuyez sur OK.<br />
4. À l’aide des touches<br />
appuyez sur OK.<br />
et , sélectionnez Modifier le code PIN d'accès conditionnel puis<br />
5. Entrez l’ancien PIN à l’aide des boutons numériques<br />
6. Entrez le nouveau PIN à l’aide des boutons numériques.<br />
7. Enfin, confirmez le nouveau PIN en le saisissant à nouveau.<br />
�<br />
�<br />
�<br />
Remarque : pour changer le code PIN du décodeur, voir page 19
Pour sortir du menu CA PIN<br />
Pour sortir du menu CA PIN, appuyez sur la touche EXIT.<br />
Classification par catégories d’âge<br />
Ce sous-menu vous permet d’afficher et de changer la classification par catégories d’âge.<br />
Quatre catégories de maturité sont définies :<br />
� � ���� ����� ������<br />
� �� ���� �� ��� �� ���� �����������<br />
� � ���� ���� �� �� ���<br />
� � ���� ��������<br />
G étant la classification de maturité la plus basse.<br />
Pour accéder à la classification par catégories d’âge<br />
� � �<br />
1. Appuyez sur la touche MENU.<br />
2. À l’aide des touches<br />
3. À l’aide des touches<br />
4. À l’aide des touches<br />
OK.<br />
et<br />
et<br />
et<br />
, sélectionnez 5 informations puis appuyez sur OK.<br />
, sélectionnez Droits d'accès puis appuyez sur OK.<br />
, sélectionnez Classification par tranche d'âge puis appuyez sur<br />
Vous pouvez visualiser la classification par catégorie d’âge actuellement appliquée à votre décodeur.<br />
�<br />
�<br />
�<br />
Pour modifier la classification par catégories d’âge<br />
1. Sélectionnez Menu principal/5 Informations/Droits d'accès/Classification par tranche<br />
d'âge puis appuyez sur OK.<br />
2. À l’aide des touches � et �, sélectionnez votre classification préférée.<br />
3. Entrez votre CA PIN pour valider le nouveau réglage.<br />
Pour sortir du menu de classification par catégories d’âge<br />
Pour sortir de ce menu, appuyez sur la touche EXIT.<br />
23<br />
FR
Fonctions principales<br />
8000 Series<br />
� ������� �������� ������ � ����� ����� ��� �������� � ������� �� �� �� �� ������� �� �<br />
Connexions<br />
� ��������� �����<br />
� ������� ����� ��������� �<br />
� ������ ����� ��������� ��������<br />
� � ������ ������� � ������� ���������� ���������� �� ������� ������������ �������<br />
Logiciel<br />
� ���������� �� ��������� ���<br />
� ����� ������������ ���������� ��������� ����������������� �� �������� ��� �������� � ������� �����<br />
de 256 couleurs.<br />
� ���������� ��� ������� ���� ������� � ������ ����������<br />
� ����� ������������ ��� ���������� ���� ������������ ��� ����������� �� ����� �� �� ������� ��<br />
sur les évènements de plusieurs jours.<br />
� ������� �������������� �� ������� �������� �� ��������� �� �������<br />
� ������������ ���� ������������ ��������� �� ��������� ����� ������<br />
� ��������� �� � ����� �������� �� �� � ������� �� ����������� ����������<br />
� �������� �������� ��� �� ���� ��� �� ���������<br />
� ���������� ������������<br />
� ���� � ������ ���������� ��� ������� ������<br />
Accessoires<br />
� ������������ � ������<br />
� ������ �������������� �����������<br />
� ����� ��������<br />
� ����� ��������������<br />
Fabriqué sous licence des Laboratoires Dolby.<br />
Le terme « Dolby » et le sigle double D sont des marques commerciales des Laboratoires Dolby.<br />
24<br />
Ce symbole indique que votre appareil électronique hors service doit être recyclé séparément et ne<br />
doit pas être mélangé avec les déchets ménagers. L’Union européenne a mis en œuvre un système de<br />
collecte et de recyclage spécifiques dont sont responsables les fabricants.<br />
Cet appareil a été conçu et fabriqué avec des matériaux et des composants de haute qualité qui peuvent<br />
être recyclés et réutilisés. Les appareils électriques et électroniques sont susceptibles de contenir des pièces<br />
qui, nécessaires à leur bon fonctionnement, peuvent néanmoins s’avérer dangereuses pour la santé humaine et<br />
l’environnement si elles ne sont pas gérées ou mises au rebut correctement. Par conséquent, veuillez ne pas jeter<br />
votre appareil hors service avec les déchets ménagers.<br />
Si vous êtes le propriétaire de l’appareil, vous devez le ramener au site de collecte local approprié ou dans un<br />
point de vente dans le cadre d’un achat d’un produit équivalent.<br />
� Si vous êtes un professionnel, veuillez suivre les instructions de votre fournisseur.<br />
� Si vous louez l’appareil ou si vous en avez la charge, veuillez contacter votre fournisseur de services.<br />
Aidez-nous à protéger l’environnement dans lequel nous vivons !
Guide de dépannage<br />
Tous les problèmes d'image ou de son ne sont pas causés par une défaillance de votre boîtier décodeur.<br />
�� ����� �������� �� �������� �� ����� ��������� �������������� �������� �������� �������� ����<br />
rebranchez-le.<br />
Important : n’ouvrez jamais l'appareil vous-même.<br />
Problème Raison possible Solution<br />
Votre boîtier décodeur ne<br />
semble pas fonctionner, et<br />
aucun voyant ne s’allume<br />
sur la face avant.<br />
Votre boîtier décodeur ne<br />
semble pas fonctionner, et<br />
le voyant de veille sur la<br />
face avant est rouge.<br />
Votre boîtier décodeur ne<br />
semble pas fonctionner, et<br />
le voyant de veille sur la<br />
face avant est vert.<br />
Des interférences<br />
apparaissent à l’écran<br />
La télécommande ne<br />
fonctionne pas.<br />
Vous avez oublié votre<br />
code PIN.<br />
Les menus et les<br />
bandeaux sont dans<br />
une langue que vous ne<br />
comprenez pas.<br />
Votre boîtier décodeur n’est<br />
pas alimenté.<br />
Votre boîtier décodeur est<br />
éteint.<br />
Votre boîtier décodeur n’est<br />
pas correctement raccordé à<br />
vos autres équipements ou vos<br />
autres équipements ne sont pas<br />
correctement configurés.<br />
Votre TV n’est pas basculé sur<br />
les chaînes câblées numériques.<br />
Vérifiez que le cordon d’alimentation est correctement<br />
branché et que la source d’alimentation<br />
est activée. Vérifiez que la prise électrique murale<br />
est alimentée (essayez de brancher une lampe).<br />
Appuyez sur sur la face avant de votre<br />
télécommande.<br />
Vérifiez tous les raccordements (voir page 7).<br />
Vérifiez que votre téléviseur est branché et qu’il<br />
est allumé.<br />
Si votre boîtier décodeur est connecté à votre<br />
TV via une prise HDMI, essayez de sélectionner<br />
la chaîne AV appropriée sur votre TV.<br />
Votre TV n’est pas bien réglé. Vérifiez que votre TV est correctement réglé à<br />
votre boîtier décodeur (voir page 5). Pour plus<br />
d’informations, reportez-vous au guide d’utilisation<br />
de votre TV.<br />
Les piles sont vides ou mal<br />
mises.<br />
La télécommande est mal<br />
orientée.<br />
La télécommande universelle<br />
n’est pas réglée sur le bon mode.<br />
La langue des menus a été<br />
changée.<br />
Vérifiez les piles et changez-les si nécessaire.<br />
Vérifiez que vous pointez la télécommande<br />
directement sur le décodeur et que rien ne se<br />
trouve entre elle et le décodeur. Le voyant lumineux<br />
de réception sur la face avant du décodeur<br />
doit clignoter chaque fois que vous appuyez sur<br />
un bouton de la télécommande. Si tel n’est pas<br />
le cas, essayez de sélectionner l’entrée AV de<br />
votre TV.<br />
Appuyez sur la touche DECODER pour commander<br />
le décodeur.<br />
Appelez votre fournisseur de services.<br />
Pour changer la langue des menus :<br />
1. Appuyez sur MENU.<br />
2. Appuyez trois fois sur �� ���������� ���<br />
le premier élément.<br />
3. Appuyez sur OK et entrez votre code pin.<br />
4. Appuyez sur OK.<br />
5. Appuyez sur � ou � jusqu’à ce que vous<br />
voyiez votre langue.<br />
6. Appuyez sur BACK ou EXIT<br />
pour sauvegarder la nouvelle langue.<br />
Si malgré tout, le problème n’est pas résolu ou que les mesures suivantes n'apportent aucun résultat<br />
satisfaisant, veuillez consulter votre fournisseur de services.<br />
�<br />
25<br />
FR
Glossaire<br />
DVI Une interface vidéo numérique fournit une connexion numérique à large bande passante<br />
entre une source vidéo et un téléviseur. L’audio est transporté séparément.<br />
EPG Un Guide électronique des programmes fournit des informations sur les programmes<br />
télévisés en cours et suivants. L’EPG permet de connaître les programmes des prochains<br />
jours (jusqu’à 7 jours selon la chaîne), de programmer un enregistrement en sélectionnant<br />
un évènement depuis le guide ou de rechercher facilement des programmes télévisés. Les<br />
menus EPG sont principalement fournis avec les boîtiers décodeurs numériques et les<br />
enregistreurs vidéo numériques (DVR).<br />
HDMI Une interface multimédia haute définition (High Definition Multimedia interface)<br />
est semblable à un câble péritel haute définition, une connexion numérique à large bande<br />
passante pour la vidéo et l’audio. HDMI garantie l’envoie du meilleur signal vidéo depuis la<br />
source (signal HD) jusqu’à l’écran (LDC, Plasma, DLP). Elle le fait en envoyant des données<br />
non compressées (vidéo et audio multi-voix) au téléviseur par le biais d’un seul câble.<br />
HDCP High bandwidth <strong>Digital</strong> Content Protection (HDCP) que l’on pourrait traduire par<br />
« Protection des contenus numériques haute définition » est un système de protection des<br />
droits d’auteur qui est intégré dans les écrans et les récepteurs HD. Il empêche la duplication<br />
et la distribution non autorisées de contenu avec copyright.<br />
HD HD (Haute définition) fournit une qualité d’affichage plus élevée avec une résolution<br />
verticale entre 720p et 1080p.<br />
LCD La technologie Liquid Crystal Displays est une des formes de téléviseurs à écran plat.<br />
Ils sont composés de deux plaques parallèles transparentes entre lesquelles est coincée une<br />
fine couche de liquide contenant des molécules (cristaux liquides). Des tensions électriques<br />
passent dans le liquide – provoquant l’alignement des cristaux afin que la lumière ne passe<br />
pas au travers. Chacun des cristaux agit comme un volet, laissant passer ou bloquant la<br />
lumière. Le motif des cristaux transparents et foncés forme l’image.<br />
Pixels Le mot “pixel” est l’abréviation de “picture element”. Les pixels représentent les plus petits<br />
éléments constitutifs d’une image numérique. Plus il y a de pixels dans une image, plus la<br />
résolution est élevée.<br />
Plasma Un écran à plasma est créé par des milliers de tubes minuscules remplis d’un gaz ionisé à<br />
l’état de plasma.<br />
SPDIF Cette abréviation correspond à Sony/Philips <strong>Digital</strong> Interface Format, les deux sociétés<br />
à l’origine du format S/PDIF.<br />
720p 720p indique que la résolution verticale de l’image du téléviseur est de 720 lignes.<br />
Le P correspond à “Progressive scanning” (balayage progressif).<br />
1080i 1080i indique que la résolution verticale de l’image est de 1080 lignes et correspond<br />
à « Interlaced scanning » (balayage entrelacé).<br />
26
Programmation de la télécommande<br />
Votre boîtier décodeur est livré avec une télécommande universelle qui peut commander votre<br />
décodeur et votre poste de télévision. Pour utiliser le boîtier décodeur aucune programmation<br />
��������� ����� ���������� � �� ������������ ��� ����� � ��������� �� ��������� ���� ���������<br />
votre téléviseur à l’aide de la télécommande universelle, veuillez suivre les étapes suivantes :<br />
Avant de commencer<br />
1. Allumez votre téléviseur.<br />
2. Allez à la fin de ce guide pour trouver le(s) code(s) à chiffres correspondant au fabricant de votre<br />
téléviseur.<br />
Important : si vous ne trouvez pas le fabricant de votre téléviseur dans la liste, allez directement<br />
à la programmation de la recherche automatique.<br />
Programmation par entrée directe<br />
Les fabricants de téléviseurs peuvent avoir plusieurs codes pour la même marque. Si vous ne savez pas lequel<br />
correspond à votre téléviseur, répétez les trois étapes suivantes en essayant tous les codes du fabricant<br />
jusqu’à ce que vous trouviez le bon.<br />
1. Appuyez sur le bouton TV et maintenez-le enfoncé jusqu’à ce que vous ayez terminé de taper votre<br />
code à 4 chiffres.<br />
2. Appuyez sur chaque bouton l’un après l’autre.<br />
� �� �� ������� ��� ������� �� ������ ��� ����� ������� ��������� �� ��������������<br />
� �� �� ������� ��� ��������� �� ������ ��� �������� � ����� �������� �� �� ������������� ��� ������ �������<br />
est abandonnée. Appuyez sur le bouton pour allumer votre poste de télévision et entrez à nouveau<br />
le code à 4 chiffres. Une fois le code correct entré, le voyant DEL s’allume.<br />
3. Relâchez le bouton TV.<br />
Remarque : si vous n’avez pas réussi à utiliser la programmation par entrée directe, essayez la seconde<br />
méthode : la recherche automatique.<br />
Recherche automatique<br />
Si vous ne trouvez pas le fabricant de votre téléviseur dans le code des téléviseurs, utilisez la méthode de<br />
recherche automatique.<br />
1. Appuyez et maintenez le bouton TV de la télécommande universelle enfoncé.<br />
2. Appuyez et maintenez le bouton enfoncé jusqu’à ce que le voyant vert s’allume, puis relâchez les<br />
boutons TV et .<br />
3. Appuyez sur PLAY et relâchez, puis attendez 5 secondes. Recommencez jusqu’à ce que l’appareil<br />
s’éteigne.<br />
4. Appuyez sur REW et relâchez, puis attendez 2 secondes. Recommencez jusqu’à ce que l’appareil<br />
s’allume.**<br />
5. Pour quitter et sauvegarder le nouveau tableau, appuyez sur STOP et maintenez-le enfoncé jusqu’à ce<br />
que le voyant vert s’éteigne.<br />
6. Pour quitter sans sauvegarder la recherche des codes, appuyez sur EXIT. Le voyant vert s’éteindra.<br />
7. Si aucune entrée n’est faite, la recherche des codes s’interrompra au bout de cinq minutes<br />
et le dernier tableau utilisé sera sauvegardé par défaut. Le voyant vert ne s’éteindra pas.<br />
*Si votre téléviseur peut alterner entre les modes ON et OFF à l’aide d’une touche ON / STANDBY, appuyez alors<br />
sur PLAY à l’aide de la télécommande universelle et lorsque l’appareil s’éteint, appuyez sur REW jusqu’à ce que<br />
l’appareil se rallume. Si votre téléviseur ne peut pas alterner entre les modes ON et OFF à l’aide d’une seule touche,<br />
appuyez alors sur PLAY. Lorsque votre appareil s’éteint, rallumez-le à l’aide du bouton situé sur le devant de votre<br />
téléviseur, puis appuyez sur REW sur la télécommande universelle jusqu’à ce que l’appareil s’éteigne.<br />
27<br />
FR
Retour à la configuration initiale<br />
Cette procédure reconfigurera la télécommande selon les paramètres par défaut et effacera toute<br />
programmation.<br />
28<br />
1. Appuyez sur le bouton EXIT et maintenez-le enfoncé jusqu’à ce que vous ayez terminé de taper<br />
le code de chiffres.<br />
2. Entrez le code à 3 chiffres : 000<br />
- Si un chiffre est invalide, le voyant DEL clignotera 3 fois puis s’éteindra.<br />
Une fois le troisième 0 tapé, le voyant DEL s’allumera pendant 1 à 2 secondes.<br />
Votre télécommande est alors remise à la configuration initiale.
Fonctions d’enregistrement<br />
Votre décodeur possède un PVR intégré. Le PVR (Personal Video <strong>Recorder</strong>) est l’acronyme anglais<br />
désignant un enregistreur numérique à disque dur (HDD). Vous pourrez donc enregistrer des programmes<br />
TV sur le disque dur de 160 Go de capacité tout comme vous le faites avec un enregistreur DVD<br />
séparé.<br />
Les enregistrements (appelés également Titres) sont classés dans une bibliothèque électronique. La<br />
bibliothèque facilite la recherche et la gestion de vos enregistrements.<br />
Le PVR possède les mêmes fonctions que la plupart des enregistreurs (enregistrement d’un titre, lecture<br />
d’un titre, programmation d’un enregistrement, protection d’un titre, bibliothèque, …).<br />
Avec les fonctions d’enregistrements de votre PVR, vous pourrez :<br />
� ����������� �� ��������� ������� ��� ���� �� �������� �� ����� �� �������<br />
� ����������� �� ��������� ������� ��� ���� �������� �� ����� ���������� ��� �� ������ ����<br />
� �������� �� ��������� �� ������� ����� � �� �������� ���� ����� ������� ���������������� ����<br />
autre programme.<br />
Enregistrement immédiat<br />
Pour enregistrer le programme en cours, appuyez une fois sur la touche REC de la télécommande.<br />
Dans le menu qui apparaît, confirmez ou modifiez le temps d’enregistrement indiqué. Un voyant rouge<br />
�������� �� ������ �� ����� �������� ���� �������� �� ����� �� ������������������������ ���������trement<br />
en appuyant sur la touche STOP.<br />
Enregistrement différé (programmation)<br />
Pour programmer un enregistrement vous pouvez utiliser le guide électronique des programmes (EPG) ou le<br />
menu de programmation (Timer setting) si le programme à enregistrer ne figure pas dans le guide EPG.<br />
Enregistrement via le guide des programmes<br />
(EPG)<br />
1. Appuyez sur la touche EPG.<br />
2. Le guide des programmes de la chaîne sélectionnée apparaît.<br />
3. Sélectionnez un programme à enregistrer.<br />
4. Appuyez sur EPG pour accéder aux options.<br />
5. Suivez les indications à l’écran.<br />
Enregistrement programmé<br />
Affichez le menu et choisissez My Scheduler<br />
�/<br />
(Programmation).<br />
Sélectionnez les options avec les touches .<br />
� Timer option (Option de programmation) permet d’activer ou de<br />
désactiver une programmation et de définir une alarme avant le début<br />
d’un programme.<br />
� Timer set (Réglage de la programmation) permet de programmer<br />
manuellement une programmation et de créer une alarme avant le<br />
début.<br />
� Timer list (Liste des programmations) permet de consulter la liste<br />
de vos programmations et d’en supprimer. Permet de supprimer une<br />
alarme.<br />
� Conflict timer list (Liste des conflits entre programmations) permet<br />
de supprimer une programmation qui en chevauche une autre.<br />
�<br />
program guide M T W T F S S<br />
301 ARTE TODAY<br />
13:00 NEWS<br />
15:00 SPORT<br />
main menu<br />
1 My Channels<br />
2 My Services<br />
3 My Recordings<br />
4 My Scheduler<br />
5 My Set up<br />
6 Information<br />
My Scheduler<br />
timer options<br />
timer set<br />
timer list<br />
conflict timer set<br />
29<br />
FR
Time shift (enregistrement dans une mémoire tampon)<br />
La fonction Time Shift permet de mettre en pause le programme que vous regardez pour répondre,<br />
par exemple, à un appel téléphonique. Vous pouvez par conséquent être dérangé sans perdre une<br />
seconde du programme.Votre décodeur dispose à cette fin d’une mémoire tampon dans laquelle sont<br />
conservées 2 heures d’images de la dernière chaîne regardée.<br />
Pour mettre en pause le programme en cours, appuyez sur la touche PAUSE de la télécommande. Les<br />
images se figent. Pour reprendre le programme là où vous l’aviez laissé, appuyez sur la touche PLAY.<br />
Le programme reprend là où vous l’aviez laissé mais les images sont différées (décalées dans le temps)<br />
par rapport au déroulement du programme en cours.<br />
Conflits d’enregistrement<br />
Dans certains cas votre PVR ne pourra pas répondre immédiatement à votre demande d’enregistrement<br />
car elle entre en conflit avec une autre opération en cours. Dans d’autres cas il s’agira d’une<br />
incohérence entre deux programmations. En cas de problème, un écran d’avertissement apparaîtra afin<br />
de vous proposer une solution.<br />
Ces conflits d’enregistrement correspondent le plus souvent à :<br />
30<br />
� ��� ������� ���������������� ����� ����� �������������� ��� �� ����������� ��� �� ���� ����gistrer<br />
qu’un programme à la fois.<br />
� �� ������������� �� ���� �������������� ����� ��� ������� ��� ������� �������������<br />
qui commencerait avant la fin de la première.<br />
� ��� ������������� ������������� ��� �� ��� � ���� �� ����� ��� �� ������ �������� ����� ������� ���<br />
titres afin de libérer de la place.<br />
� ��� ���� � ���� �� ��������� �� ����� ��� ��� �� �������������� �������� ��������
Bibliothèque<br />
Les enregistrements (appelés également Titres) sont classés dans une bibliothèque électronique qui<br />
vous permet de les retrouver plus facilement.<br />
Accéder à la Bibliothèque des Titres<br />
1. Affichez le menu principal et choisissez PVR<br />
�/<br />
puis Record Library.<br />
2. Sélectionnez les titres avec les touches .<br />
My library 14/07/08 21:45<br />
80 % disk space available<br />
Title date duration<br />
Title 1 10/05/08 01 h 52 mn<br />
Title 2 12/05/08 02 h 05 mn<br />
Title 3 01/06/08 00 h 32 mn<br />
Title 4 03/06/08 01 h 47 mn<br />
Title 5 06/06/08 01 h 36 mn<br />
Title 6 07/06/08 00 h 13 mn<br />
Title 7 08/06/08 00 h 28 mn<br />
Title 8 14/06/08 01 h 15 mn<br />
Title 9 24/06/08 02 h 25 mn<br />
Title 10 10/07/08 00 h 05 mn<br />
Title 11 14/07/08 00 h 38 mn<br />
���������<br />
1 Par défaut : Nom de la chaîne, date d’enregistrement, Heure de début<br />
2 : Contrôle parental activé (saisie d’un code obligatoire pour lire le titre),<br />
: Protection contre la suppression accidentelle activée,<br />
�<br />
Bibliothèque, Commandes utilisables<br />
Les touches utilisables pour l’exploitation de vos titres enregistrés sont détaillées ci-dessous.<br />
Réglage du Volume sonore<br />
Retour<br />
� Heure et date.<br />
� Capacité restante sur le disque dur.<br />
� Fenêtre de visualisation des titres / Panneau de<br />
contrôle d’exploration (pour la lecture plein écran à<br />
partir d’une image, appuyez sur la touche PLAY).<br />
� Liste des titres 1 enregistrés en Bibliothèque (nom, date<br />
et heure, statut 2 ).<br />
Coupure du son<br />
Sortie<br />
Touches de navigation<br />
et de confirmation<br />
Lecture, Avance / Retour Rapide / Stop,<br />
Arrêt sur image<br />
31<br />
FR
Personnalisation des Titres<br />
Lorsqu’un enregistrement est terminé vous pouvez réaliser les opérations suivantes :<br />
� �������� �� ����� ������ ������������.<br />
� ��������� �� ������� �����������������<br />
� ��������� ���� ��� �������<br />
� �������� �� ������<br />
Protéger un titre<br />
Pour protéger un enregistrement, sélectionnez Protect Record puis confirmez avec OK<br />
Supprimer un titre<br />
Pour supprimer un enregistrement, sélectionnez Delete Record puis confirmez avec OK<br />
Supprimer tous les titres<br />
Pour supprimer tous les enregistrements, sélectionnez Delete all Records puis confirmez avec OK<br />
Renommer un titre<br />
Pour changer le titre d’un enregistrement, sélectionnez Rename Record dans le menu d’édition puis<br />
confirmez avec OK. Utilisez les touches numérotées de la télécommande pour composer, lettre par<br />
lettre, le titre de votre choix. Procéder comme vous le feriez avec un clavier de téléphone mobile.<br />
32<br />
<strong>DCI82BBN</strong> / RST - EPHEME / AVRIL 2008
Introduzione<br />
Copyright<br />
© 2008 Thomson SA. Tutti i diritti riservati. La ripubblicazione o ridistribuzione dei contenuti di Thomson,<br />
incluso tramite framing o sistemi analoghi, è vietata senza il previo consenso scritto di Thomson SA.<br />
'THOMSON' e il logo Thomson sono marchi e marchi registrati di Thomson SA.<br />
Altri marchi e protezione della tecnologia<br />
HDMI, il logo HDMI e High-Definition Multimedia Interface sono marchi o marchi registrati di HDMI<br />
Licensing LLC.<br />
Questo prodotto include la tecnologia di protezione del copyright che è protetta da alcuni brevetti USA<br />
e altri diritti di proprietà. L’utilizzo della presente tecnologia di protezione del copyright deve essere<br />
autorizzato da Macrovision, ed è inteso per uso personale a domicilio ed altri usi di visione limitati se non<br />
diversamente autorizzato da Macrovision. E’ vietata la decompilazione o lo smontaggio.<br />
Tutti gli altri nomi di società o di prodotti sono marchi o marchi registrati dei rispettivi proprietari.<br />
Declinazione di responsabilità<br />
THOMSON si riserva il diritto di modificare le specifiche e le immagini riportate in questo documento<br />
in qualsiasi momento e senza preavviso. Le informazioni contenute in questo manuale non hanno valore<br />
contrattuale.<br />
Sommario<br />
Introduzione ............................................ 1<br />
Sommario ................................................ 1<br />
Consigli di sicurezza ............................... 2<br />
Presentazione del decoder HD ............. 4<br />
Che cos’è l’HD? ..................................................4<br />
Come funziona l’HD? ........................................4<br />
Cosa occorre per poter approfittare<br />
della qualità HD? .................................................4<br />
Collegamenti .......................................... 5<br />
Contenuto della confezione.............................5<br />
Comandi del pannello frontale ........................5<br />
Collegamenti del pannello posteriore ...........6<br />
Collegamenti con il televisore .........................6<br />
Altri collegamenti ...............................................7<br />
Inserimento della smart card ...........................8<br />
Inserimento delle batterie ................................8<br />
Telecomando .......................................................9<br />
Installazione rapida ............................... 10<br />
Uso quotidiano ...................................... 11<br />
Accendere/spegnere ....................................... 11<br />
Cambiare canale .............................................. 11<br />
Elementi di navigazione .................................. 11<br />
Utilizzo dei menu ............................................ 11<br />
Uso dei banner per zapping e informazioni ...12<br />
Uso della mini guida ........................................ 12<br />
Menu ....................................................... 13<br />
Schema dei menu............................................. 13<br />
Canali ..................................................... 14<br />
Lista dei canali .................................................. 14<br />
Organizzazione dei canali .............................. 14<br />
Aggiornamento lista dei canali ...................... 15<br />
Servizi disponibili .................................. 16<br />
Guida dei programmi ...................................... 16<br />
Avvisi ...................................................... 17<br />
Impostazioni .......................................... 18<br />
Lingue ................................................................. 18<br />
Opzioni .............................................................. 18<br />
Controllo parentale ........................................ 19<br />
Connessione ..................................................... 19<br />
Formato d'immagine ....................................... 20<br />
Installazione ...................................................... 22<br />
Accesso condizionato .......................... 22<br />
Cambiare il PIN della smart card ................ 22<br />
Limite d’età ....................................................... 23<br />
Caratteristiche principali ..................... 24<br />
Soluzione dei problemi ......................... 25<br />
Glossario ................................................ 26<br />
Programmazione del telecomando .... 27<br />
Prima di iniziare ............................................... 27<br />
Programmazione con inserimento diretto<br />
dei dati ............................................................... 27<br />
Ricerca automatica .......................................... 27<br />
Ripristino dei valori predefiniti in fabbrica .... 28<br />
Funzioni di registrazione ....................... 29<br />
Registrazione immediata ................................ 29<br />
Registrazione differita ................................... 29<br />
Time Shift ......................................................... 30<br />
Conflitti di registrazione .................................. 30<br />
Biblioteca ................................................ 31<br />
Accedere alla biblioteca dei titoli ................ 31<br />
Biblioteca, Comandi utilizzabili .................... 31<br />
Personalizzazione dei titoli ........................... 32<br />
Codici TV...................................................I<br />
1<br />
IT
Consigli di sicurezza<br />
Precauzioni per l’uso dell’apparecchio<br />
Il vostro decoder è stato fabbricato in conformità alle norme europee in materia di sicurezza, tuttavia<br />
deve essere utilizzato con cura per garantire un funzionamento sicuro.<br />
È importante leggere integralmente questo manuale d’uso e, in modo particolare, i consigli di sicurezza<br />
che seguono. Se avete qualsiasi dubbio riguardo all’installazione, all’uso o alla sicurezza del decoder, siete<br />
pregati di contattare il Servizio Assistenza Clienti.<br />
Come evitare il rischio di scosse elettriche<br />
� ���������� �� ������� ����� ����� �� �������� ����� �� ��������� �� ������� � �� ���������� ���<br />
qualsiasi altro apparecchio. Evitare qualsiasi contatto con la corrente a 230 volt: potrebbe essere<br />
letale o provocare una grave scossa elettrica.<br />
� ��� ��������� �� ��������� ��� �������� �� ���� �� ����������������� ���������� �� ��������<br />
Assistenza per riparazioni o consigli.<br />
� ��� �������� ����� ������� ����� �������� ����� ������� ��� ��������� ����� ����� �����<br />
� ��� ������� �� ������� �� ������������ ��� �������� ��� ������ ������������� �� �������� ���������<br />
come un tappeto.<br />
� ��� ���������� ������ ��� ������� ��� �������� ������� � ��� ������ ������� ���������������� ����<br />
������� ������� ������ � ����������� �� ������������ ��������� ������ ������� �������������������<br />
un oggetto o un liquido penetra all’interno del decoder, scollegare immediatamente l’apparecchio<br />
dalla presa di corrente e contattare il Servizio Assistenza.<br />
� ��� ���������� �� ������� �� �� ����� �������������� ������ ������ � ��� ������� �������� ��<br />
decoder è stato progettato per funzionare ad una temperatura inferiore ai 45°C e con un tasso<br />
d'umidità massimo del 75%.<br />
� �� ���� �� ��������� �� ���������� �� ���������� �� ������� ����� ����� �� �������� ������<br />
l’antenna dal televisore.<br />
� ��� �� ��� �� ����� �� �������� ��� ���������� ����������� �� ���� �� ����� ���������� �������������<br />
velocemente in caso di bisogno.<br />
Collegamento alla presa di corrente<br />
� ������ ������� �������� ��� �������� ��������� ����� �����<br />
� �� ����� �� ������ �������� ���� ������ ����� �� ��������� ���� ����� � �� ���� �� ������������� �����<br />
pregati di consultare il Servizio Assistenza.<br />
Per un funzionamento ottimale<br />
� �������� � � �� �� �� ������ ������� �� ������� ��� ��������� ��� ����� ������������<br />
dell’apparecchio.<br />
� ��������� ������ �� ������� �� ��������� ������������<br />
� ��� ������ �� �������� ����� �� ����� �������� �������� � ������ ����� �������� ���������� �<br />
abrasivi. Pulire regolarmente le aperture di ventilazione.<br />
2<br />
10 cm<br />
10 cm<br />
10 cm<br />
7 cm
Ambiente<br />
� �� �������� ���������� ������ �������� ���������� ��� ��������� ����������� ��� ������� ��<br />
batterie insieme agli altri rifiuti. Abbiate cura di gettarle negli appositi punti di raccolta.<br />
� �� ��� ���������� �� ���������� ��� �� ����� ����� ��������� ������� �� ������� ����� ������� ��<br />
spegnere l'interruttore generale dell'apparecchio. Questo permetterà di risparmiare energia.<br />
Specifiche tecniche<br />
�������� �� ������������� ��� � ���� � ����<br />
Consumo nominale < 46W<br />
������� �� ������� �������� � ���<br />
������� �� ������� ��������� � ��<br />
���� ������ ����������<br />
Dimensioni ���������� � ������� � ���������<br />
�����<br />
senza supporto ��� � �� � ��� ��<br />
����������� �� ������������� � � ����<br />
����������� �� ���������� ��� � ����<br />
�������� ��� ����������� � � ���<br />
Accesso condizionato ISO7816 - CONAX<br />
Disco duro 160 Go<br />
Collegamenti<br />
Uscita HDMI Connettore HDMI tipo A<br />
Ingresso RF IEC60169-2 femmina<br />
Uscita RF IEC60169-2 maschio<br />
�� �����<br />
����������������� ����� �����<br />
������ ����� �� � �� ��� ������� �������������<br />
������ ����� �������� � ��� � ��� ��� ������� ��������� � ���������<br />
Componenti analogici - YPrPb RCA femmina<br />
��� ��� � ���� �<br />
�������� ���� � ���� �����<br />
Significato dei simboli<br />
Questo simbolo sul vostro apparecchio garantisce che questo articolo è conforme alle<br />
direttive europee 73/23/CEE, 89/336/CEE, 93/68/CEE sulla sicurezza, la compatibilità<br />
elettromagnetica e la marcatura.<br />
Questo simbolo serve ad avvertire l’utente della presenza di “tensione pericolosa” non<br />
isolata all’interno del prodotto, sufficiente per poter costituire un rischio di scossa<br />
elettrica.<br />
Questo simbolo serve ad avvertire l’utente che al prodotto è allegata della documentazione<br />
importante relativa al funzionamento e alla manutenzione dell’apparecchio.<br />
3<br />
IT
Presentazione del decoder HD<br />
Grazie per aver scelto un 8000 Series, la nuova generazione di decoder registratori Thomson con<br />
���� ��� ������ ���� ��� ������� ���� ���������� ����� ������ � ����� �� ����������� �� ����������� TV<br />
di primissima qualità!<br />
Dotato dell’ultima tecnologia HD, il vostro apparecchio 8000 SERIES è adeguato al nuovo standard, ma<br />
anche compatibile con lo standard tradizionale SD.<br />
Che cos’è l’HD?<br />
���� �� ���������� �������� ���� ��� �� ��� �� ������� ��� � ������ ������� ��� �����������<br />
���������� ������������� �� ��� � ��� ������ ������������������ ������� ��� ��� �������� ���������<br />
dell’immagine l’aggiornamento coinvolga alternativamente le sole linee pari o dispari del fotogramma.<br />
Questa risoluzione è sufficiente per gli apparecchi a tubi catodici. Tuttavia con la diffusione dei televisori<br />
a grande schermo piatto, con tecnologia Plasma e LCD, la qualità dell’immagine risulta inferiore. La<br />
ricerca per il miglioramento della qualità dell’immagine ha portato alla creazione del formato HD con<br />
��� ����������� ������������� �� ���� � ���� ������<br />
La differenza fra le immagini SD e HD è evidente per qualsiasi utente. L’Alta Definizione offre nitidezza<br />
di visione, ricchezza di dettagli e comfort visivo. Nella visione di documentari, sport e film, l’HD diventa<br />
������������� ������ ������������ �� ��������� ����� �� �� ������ � ���� � ������ � �������<br />
Come funziona l’HD?<br />
�� ���������� ������������� �� ������ �� ���� �� ������ ��� ���� � �� ������ �� ������ �������� ���� �� �������<br />
e la nitidezza dell’immagine. L’Alta Definizione è basata su due norme che consentono risoluzioni molto<br />
��� ������� ������� ������� ��� ������� �� ������������ ������ ��� �������� �������� � ��������� ��� ��<br />
sistema SD, apparirà nitido e dettagliato con l’HD.<br />
4<br />
TV<br />
Risoluzione<br />
(N° Pixel x N° linee)<br />
Compatibilità<br />
HD<br />
�������� �� ������� No<br />
HD Ready ��������� Si<br />
HD Ready ���������� Si<br />
Full HD ���������� Si<br />
Cosa occorre per poter approfittare della qualità HD?<br />
Per approfittare pienamente dei programmi in Alta Definizione occorre avere:<br />
� �� ���������� ��<br />
� �� ������� �� �������� ����� ��<br />
� �� ���� ���� ���� �������� ��� ��������� �� ������� ��� ���� ��<br />
� �� �������� ������������<br />
Idealmente occorrerà utilizzare un televisore con etichetta “HD Ready” o “Full HD”. In caso contrario,<br />
verificate presso il vostro fornitore se il vostro televisore dispone delle funzionalità HD.<br />
�������� �� ���������� ��� ������ ��� �� ����� ������� ��� �� �� Thomson!<br />
Se il vostro televisore non dispone di porte HDMI o DVI, potrete tuttavia<br />
approfittare di tutti i programmi televisivi in qualità digitale standard usando il cavo<br />
scart fornito.
Collegamenti<br />
Contenuto della confezione<br />
Cavo scart<br />
���� ���� �� �� �<br />
�<br />
<strong>Decoder</strong> registratore<br />
Manuale d’uso<br />
Comandi del pannello frontale<br />
Standby / in<br />
funzione<br />
���� ���� �� �� �<br />
����� ������<br />
tutti i menu<br />
Menu: OK:<br />
apre/chiude conferma<br />
il menu una selezione<br />
�<br />
consentono di navigare<br />
� ��������� ��� ���� ������<br />
all’interno dei menu<br />
Display: visualizza l’ora, il<br />
������ ��� ������ � � �<br />
����� ����� � ���<br />
�������������������������������������������<br />
�������������������<br />
��������������������<br />
������������������������<br />
�����������<br />
�� ��������<br />
�������<br />
��� ������ ����� ��������<br />
attività in rete on/off<br />
Indicatore LED<br />
rosso: conferma la<br />
registrazione<br />
Telecomando<br />
con batterie<br />
Cavo d’alimentazione<br />
Smartcard slot<br />
�� ��������<br />
�������<br />
Indicatore luminoso:<br />
rosso -> in standby,<br />
verde -> in funzione<br />
5<br />
IT
Collegamenti del pannello posteriore<br />
Raccordements sur la face arrière<br />
Collegamenti con il televisore<br />
6<br />
RF Out:<br />
uscita antenna.<br />
ETH:<br />
porta ethernet.<br />
����� ������<br />
RF In:<br />
ingresso antenna.<br />
USB:<br />
porta USB.<br />
Reset:<br />
ripristina il modem.<br />
���<br />
�����<br />
HDMI:<br />
porta HDMI.<br />
�������<br />
�����<br />
�<br />
�<br />
Uscite AUDIO DIGITALI:<br />
elettrica/coassiale S/P-DIF.<br />
��<br />
��<br />
�<br />
����� ����������<br />
Uscite L / R: uscite audio analogiche<br />
sinistra e destra.<br />
1. La vostra TV è “HD ready” o “Full HD”<br />
Questo tipo di collegamento assicura la migliore qualità<br />
di immagine. I segnali digitali video e audio sono trasmessi<br />
attraverso il connettore HDMI.<br />
Tutto ciò che vi occorre è un cavo HDMI per collegare<br />
�� ����� ���� ��� ������ ������� ��� � ������ ��� ������<br />
televisore.<br />
2. La vostra TV ha solo una porta DVI-I<br />
In questo caso, solo il segnale video è trasmesso attraverso<br />
�� ����� ������������ ������ �������� �� ������� �����<br />
analogico mediante un cavo audio RCA.<br />
Saranno necessari:<br />
� � ���� �������� ��� ��������� �� ����� ���� ���<br />
������� ��� �� ����� ����� ��� �����������<br />
� � ���� ����� ��� ��� ��������� �� ������ ����������<br />
sinistra e destra del decoder agli ingressi audio del<br />
televisore.<br />
Alcuni televisori hanno un’interfaccia DVI che non rispetta il protocollo HDCP.<br />
Questi televisori non possono visualizzare le funzionalità HD.<br />
��<br />
���<br />
YPrPb: componenti<br />
video analogici.<br />
Uscita scart<br />
��� ��������<br />
Uscita scart<br />
��� ���<br />
�������������<br />
�������<br />
Ingresso alimentazione.
ne.<br />
Altri collegamenti<br />
3. La vostra TV non dispone di porte HDMI o DVI<br />
Potrete guardare dei programmi HD, ma non con la qualità<br />
HD.<br />
Potrete tuttavia approfittare di tutti i programmi televisivi<br />
in qualità digitale usando il cavo scart fornito.<br />
� �<br />
�<br />
������������ �� ���� �� ���� �������� ����� ������ ������� ��� ���������� ���������� �� ���������������<br />
dall’etichetta RF IN del decoder.<br />
�������� ������ ��<br />
���Collegare il cavo d’alimentazione nell’ingresso alimentazione del decoder e inserire la spina nella<br />
presa di corrente.<br />
Inserire la spina della corrente nella presa solo quando avrete già effettuato<br />
correttamente tutti i collegamenti dell’antenna.<br />
Collegamenti con il videoregistratore/lettore DVD<br />
Usare un cavo SCART per collegare l’uscita VCR SCART<br />
��� ������� ��� ��� ������������� ��� ��� � ��� �������<br />
����<br />
��� ��������� ��� �� ��� ��� �� ������� ��� �� ������� ����<br />
����� �� ���� ����� ���� �������� ��� ��������� �� �������<br />
��� �� ������������������<br />
Via Scart, il VCR riceve solo segnali video analogici e non potrà registrare in HD.<br />
7<br />
IT
Collegamenti con l’impianto Hi-Fi<br />
Inserimento della smart card<br />
8<br />
���� ���� �� �� �<br />
�<br />
�� ��������<br />
�������<br />
Tenere la carta davanti alla fessura con il chip dorato rivolto verso il basso. Inserire la carta nella fessura<br />
fino a quando è possibile, senza forzare.<br />
Inserimento delle batterie<br />
Figura 2: Inserimento delle batterie *<br />
����� ��� ��� �� ������� ����� ��� ��������� �� ������<br />
L/R AUDIO ��� ������� ��� ���� �������� ��� �����<br />
dell’impianto Hi-Fi. Questo vi consentirà di avere una<br />
qualità del suono superiore attraverso il vostro impianto<br />
Hi-Fi.<br />
Nota: Le prese audio generalmente sono contrassegnate da<br />
colori. Il bianco è usato per la sinistra e il rosso per la destra.<br />
Collegamenti con l’amplificatore audio video o l'home cinema<br />
��� �������� �� ����� ������ �������� ��� ������� ����<br />
����� �� ���� �������� ��������� ����������� ����� ���� ���<br />
collegare la presa SPDIF ��� ������� ��� ������������<br />
AUDIO DIGITALE del vostro amplificatore<br />
���������������<br />
Nota: Nella maggior parte dei casi le connessioni coassiali e<br />
audio ottiche danno risultati simili; l'unica differenza risiede nel<br />
tipo di cavo usato. Il cavo coassiale è il più economico fra i due,<br />
ma può essere soggetto ad interferenze esterne provenienti dagli<br />
altri apparecchi domestici.<br />
� ��� ��������� ������� ���� �� �������� � �������� ������� � ������<br />
Non usare batterie ricaricabili.<br />
� ��� ������� ��������� ������� �� ����������� ��������� �� ��������<br />
indicate all’interno del vano batterie. Sostituire solo con il tipo<br />
di batterie sopra specificate. Non gettare le batterie nel fuoco e<br />
non ricaricarle.<br />
� �� ��� �� �������� �� ����������� ��� �� ����� �����������������<br />
le batterie.<br />
* ���������� ���������� � �� ������ ����� �� ������ ��� �� ���� �� ��� ������������� ����������� ������ �� ������ ������������<br />
per sapere se sono o no oggetto di riciclaggio speciale e se può incaricarsi di recuperarli.
Telecomando<br />
Attiva il telecomando in<br />
modalità decoder.<br />
Attiva il telecomando<br />
�� �������� ���<br />
Alza/abbassa il volume<br />
dell’audio.<br />
Disattiva l’audio/lo ripristina<br />
al volume impostato<br />
precedentemente.<br />
Torna allo schermo precedente<br />
o ritorna alla modalità visione.<br />
Permette di navigare su/giù/<br />
a sinistra/a destra nei menu.<br />
Permettono di selezionare<br />
le voci presenti nel menu.<br />
Attiva il servizio<br />
����� �� ��������<br />
Seleziona la sorgente<br />
����� ����� ���<br />
Apre la Guida elettronica<br />
dei programmi.<br />
Permette di accedere<br />
ai canali radio.<br />
Nota: Per modificare l’audio di un programma o di un canale,<br />
�/<br />
premere il tasto giallo/ Verificare se è presente il<br />
simbolo . Se sì, selezionare questo simbolo con i tasti e selezionare la lingua preferita usando i tasti �/�.<br />
*/**Questa funzione sarà poi attivata sul decoder.<br />
�<br />
Permette di passare<br />
dalla modalità standbya quella di<br />
funzionamento e viceversa.<br />
Apre il menu<br />
Permette di passare al canale<br />
successivo/precedente.<br />
���������� �� ����� ��� �������<br />
Chiude tutti i menu.<br />
All’interno dei menu, permette<br />
di confermare una voce/<br />
selezione. In modalità visione,<br />
���� �� ������ ���<br />
���������� ������������<br />
aggiuntive sul programma<br />
selezionato.<br />
Permettono di inserire<br />
direttamente un numero<br />
���� ������� �� ���<br />
� �� ������ ��� ��������<br />
���������� �� ���������<br />
Comandi del videoregistratore.<br />
Permette di accedere<br />
ai servizi interattivi.**<br />
9<br />
IT
Installazione rapida<br />
Per eseguire un’installazione rapida, seguire le 4 tappe che seguono:<br />
� ��������� ��� �� ������� ��� ��������� ������������� ���� ������ �� ������ ��<br />
� ������� �� ����� del telecomando per accendere l’apparecchio.<br />
Dopo pochi secondi, sullo schermo appare una lista con le opzioni di lingua per i menu.<br />
1. Lingua dei menu<br />
� ����������� ��� ������ ��������� ��������� ��������� �������� ����������� � �����<br />
e premere OK.<br />
Sullo schermo appare un messaggio di benvenuto.<br />
� ������� �� ����� OK per passare al menu per la selezione del fuso orario.<br />
2. Selezione del fuso orario<br />
� ��� �������������� ���������� ��� ���� ������� ������� OK.<br />
� ����������� ����������� �� ���� ������ ��� � ����� �� ��������� � ������� OK.<br />
Per la Svizzera si prega di selezionare Berlino, Berna, Roma.<br />
3. Modalità standby con risparmio energia<br />
� ��� ����������� ������� ����� �������� �������� ����������� Si e premere OK.<br />
� ����������� ����������� No e premere OK.<br />
Il menu di modalità d’installazione appare sullo schermo.<br />
Nota: Thomson contribuisce al risparmio globale di energia degli apparecchi domestici proponendo la modalità<br />
“Stand-by ecologico” nei suoi decoder HD. Questa funzionalità consente di ridurre il consumo di energia del<br />
decoder a meno di 3 Watt in modalità standby. Quando questa funzionalità è attivata, i dati della rete o gli<br />
aggiornamenti software non sono disponibili sul decoder, ma il timer del registratore resta attivo per permettere<br />
di lanciare le registrazioni mediante l'uscita Scart.<br />
4. Installazione<br />
�� ������� ��� ������ �� � ����� ������ ����������������<br />
10<br />
� ��� ������� ���������������� Rete, premere OK ed<br />
�������� ����������� � �������������� ������� �����<br />
���������� �������� �� ������������� �������������<br />
Premere OK per confermare il parametro d’installazione.<br />
Per sapere quale parametro dovete inserire, siete pregati<br />
di consultare le informazioni fornite dal vostro operatore<br />
di rete.<br />
� �� ������������ ����������� �� ��������� Automatica<br />
utilizzando i tasti �/� e premere OK. Si prega di notare<br />
che questo parametro dovrebbe essere usato solo dagli<br />
������ ��� ��������<br />
Nota: una barra di progressione vi permette di verificare lo stato di avanzamento della ricerca. La ricerca dei<br />
canali può richiedere diversi minuti.<br />
5. Ricerca dei canali<br />
� ��������� ��� � ������ �� ������� ��� ������ � ���������� � ������� OK.<br />
������ ������ �������� �� �� ��� �� ������� ���������<br />
��� �������� �� ����� �� ���������� ������������ ��� ������ ������� ��� ��������� � ������� ����� � �����<br />
������ ����� ������� �� ������� �� �������� �������� �������� ����Uso quotidiano!<br />
� �/
Uso quotidiano<br />
Accendere/spegnere<br />
Premere il tasto del telecomando per accendere o spegnere l’apparecchio.<br />
Nota: Se non usate l’apparecchio per un certo periodo di tempo si raccomanda disinserire la presa dalla corrente<br />
per risparmiare energia.<br />
Cambiare canale<br />
Premere il tasto P+/- per passare al canale successivo/precedente o inserire il numero del canale<br />
usando i tasti numerici del telecomando e premere OK.<br />
Elementi di navigazione<br />
Leggere sempre la barra di aiuto che appare sulla parte inferiore dello schermo.<br />
� ��� ����� �� ����� ����������� ��� ���������� �� ������ � �� ����� ��� ������� �� ���������� �����<br />
disponibilità di ulteriori funzionalità e sui tasti attivi del telecomando compaiono sullo schermo.<br />
� ��� ������������ �� ����� �� ����� � ������� ������� �� ����� LIST.<br />
� ��� ������������ �� ������� ����������� ���� � ����������� � �� ������� ����� ��� ����������<br />
premere il tasto / giallo.<br />
� ��� �������� ���� ����� ����������� ��� ���������� ������� �� ����� GUIDE.<br />
� ��� �������� �� ������� ��� ������ �� �������� ������� �� ����� VOD.<br />
� ��� ������� ����� �������� �� � ������ ����� � ���������� ������� �� ����� RADIO.<br />
� ��� ������������ �� ��������� ������� �� ����� TXT �� �������� ���<br />
� ��� ��������� �� ������ ���������� ��������� ��� ���������� ����� �� ����������� � �� ������� ���<br />
�� ������ �� ��������������� ��� �������� ������� Menu principale/4 Configurazione, inserite<br />
il Pin e selezionate Collegamento ���� ����������� �� ����������� � �� ������� ��� �� �������<br />
�������� ������ ����� ������ Opzioni ���� ��������� �� ������ �� ��������������� ��� ������<br />
� ��������� ������� ���������������� ��������<br />
Per permettervi di usufruire dei continui miglioramenti apportati ai nostri articoli, l'insieme degli<br />
strumenti d'impostazione è aggiornabile via internet.<br />
Utilizzo dei menu<br />
1. Per aprire il menu<br />
�/<br />
principale premere il tasto MENU del telecomando.<br />
2. Usare i tasti per navigare in una lista e i tasti �/� per selezionare una voce.<br />
3. Per aprire un sottomenu premere OK.<br />
4. Per tornare allo schermo precedente premere il tasto BACK oppure EXIT per tornare alla<br />
modalità visione.<br />
�<br />
11<br />
IT
Uso dei banner per zapping e informazioni<br />
Lo zapping banner fornisce delle informazioni di base sul programma corrente e i successivi: orario e<br />
data, numero del canale, nome del canale, titolo del programma e tempo trascorso, orario d’inizio e fine<br />
del programma, ecc.<br />
Il banner informativo �������� ������������ ����������� �������� �� ��������� ������������ ������ ���<br />
���������� ����� �� �� ��������� ��� ��������� ������������<br />
Per visualizzare lo zapping banner<br />
1. Premere una volta il tasto / giallo.<br />
Nota: uno zapping banner essenziale viene visualizzato automaticamente quando vi sintonizzate su un<br />
nuovo canale. Per modificare la durata di visualizzazione dello zapping banner andare in Menu principale/4<br />
Configurazione/Opzioni e selezionare Durata di visualizzazione del banner.<br />
Per visualizzare il banner informativo<br />
2. Premere di nuovo il tasto / giallo.<br />
������� ������������ ������������ ����������� ��� ��������� ���������<br />
Per visualizzare le informazioni sul programma successivo sul canale selezionato, premere il tasto<br />
Per rimuovere il banner zapping/informativo<br />
3. Premere una volta il tasto EXIT.<br />
Uso della mini-guida<br />
Grazie alla mini-guida potrete vedere cosa si vede sugli altri canali senza passare da uno all'altro.<br />
Per usare la mini-guida<br />
1. Premere una volta il tasto / giallo.<br />
��������� ��� �� ���� Mini-guida sia evidenziata. In caso contrario, selezionarla usando i tasti<br />
2. Premere i tasti �/� per uno zapping virtuale nella lista dei canali corrente.<br />
Sono visualizzate delle informazioni sul programma corrente e quello successivo del canale selezionato.<br />
Nota: per passare dal programma corrente ad un altro canale, selezionare il canale e premere il tasto OK.<br />
12<br />
�<br />
.<br />
�<br />
�/ .
Menu<br />
Schema dei menu<br />
���� ����������<br />
� ������<br />
� � ���� �������<br />
� ����������<br />
� ��������������<br />
� ��������������<br />
� ������������<br />
������<br />
����� �� ������<br />
�������������� ��� ������<br />
� ���� �������<br />
����� ��� ���������<br />
����������<br />
���������� �� ������<br />
���������� �� ������<br />
���������� ����� � ������<br />
�������� �� ����<br />
�� �� ������<br />
��������������<br />
������<br />
�������<br />
��������� ��������<br />
������������<br />
�������������<br />
���� ���������<br />
������������<br />
�������<br />
������� ��� �������<br />
������� �� �������<br />
���� �����������<br />
����� �� ������<br />
����� � ������ ��<br />
����� � ������ ��<br />
� ���������<br />
��� �<br />
�������������� ��� ������<br />
���� ��� �����<br />
����� � ������ ��<br />
����� �� �������� �����<br />
��� �<br />
��������������<br />
������� �� ��������������<br />
����������� �����<br />
��������������<br />
����� �� ��������������<br />
��������� ����� ����� ��<br />
��������������<br />
������� �� �������<br />
����� ����������������<br />
����� �����������<br />
�����������<br />
�������� �� ������ ���<br />
�� ������� ������������<br />
���������������<br />
��� ���������� �� ���<br />
���� ������������<br />
������������ �����<br />
Per informazioni dettagliate sui canali, la guida elettronica dei programmi, i timer e alcuni parametri<br />
d'impostazione consultare le pagine che seguono<br />
13<br />
IT
Canali<br />
Lista dei canali<br />
������ ���� �������� ��������� � ����� �� ����� �� ������� �� ����� �������� �� ����� � ������ �� � �� ������<br />
liste di preferiti. Potrete vedere il contenuto della lista e modificare la lista che state visionando.<br />
Accesso alla lista dei canali<br />
1. Premere il tasto MENU.<br />
2. Utilizzando i tasti �<br />
e , selezionare 1 Canali e premere OK.<br />
3. Utilizzando i tasti �<br />
e , selezionare Lista di canali e premere OK.<br />
14<br />
�<br />
�<br />
Nota: Per accedere direttamente alla lista di canali, premere il tasto LIST del telecomando.<br />
Vedere il contenuto della lista<br />
Per vedere il contenuto di una lista, evidenziarla utilizzando i tasti �<br />
e<br />
�<br />
e premere il tasto OK.<br />
Per navigare nella lista di canali, usare i tasti �<br />
e ,<br />
Per passare al canale che desiderate guardare, evidenziate il canale utilizzando i tasti �<br />
e<br />
e premete il tasto OK. L’ultima lista che stavate usando sarà impostata come corrente.<br />
Per girare le pagine nella lista di canali, utilizzare i tasti � e �.<br />
Uscire dalla lista di canali<br />
Per uscire dal sottomenu della lista di canali, premere il tasto EXIT.<br />
Organizzazione dei canali<br />
L’organizzazione dei canali consente di creare delle liste di canali preferiti e di modificare le diverse<br />
liste: rinominare, riordinare o rimuovere una lista, aggiungere/rimuovere i canali, bloccare/sbloccare i<br />
canali ecc…<br />
Accedere all’organizzazione dei canali<br />
1. Premere il tasto MENU.<br />
2. Utilizzando i tasti �<br />
e , selezionare 1 Canali e premere OK.<br />
3. Utilizzando i tasti �<br />
e , selezionare organizzazione dei canali, inserire il pin e premere<br />
OK.<br />
�<br />
�<br />
Creare una nuova lista<br />
Per creare una nuova lista di preferiti, evidenziare Crea una lista utilizzando i tasti �<br />
e<br />
e premere OK.<br />
Tappa 1. Usare i tasti di direzione per modificare il nome della lista generica e premere OK per<br />
confermare.<br />
Tappa 2. ����������� �� ���� �� ����� ��� ���������� ������� ������ �� � ������<br />
Tappa 3. Selezionare la lista di canali esistente a partire dalla quale volete creare una nuova lista.<br />
Tappa 4. Rimuovere i canali da / aggiungere i canali alla nuova lista utilizzando il tasto OK sul canale<br />
selezionato.<br />
Premere BACK o EXIT per confermare la nuova lista.<br />
�<br />
�<br />
�
Modificare/cancellare una lista<br />
Per modificare o cancellare una lista, evidenziarla utilizzando i tasti �<br />
e<br />
Sullo schermo appare un nuovo menu con diverse opzioni.<br />
1. Per cambiare il nome della lista, selezionare la prima voce e premere OK.<br />
Utilizzare quindi i tasti di direzione per cambiare il nome predefinito.<br />
Premere il tasto BACK per salvare le nuove impostazioni.<br />
�<br />
e premere OK.<br />
2. Per modificare la lista, selezionare la seconda voce e premere OK.<br />
Utilizzare il tasto OK per aggiungere o rimuovere il canale selezionato dalla lista dei preferiti.<br />
Premere il tasto BACK per salvare le nuove impostazioni.<br />
3. Per bloccare/sbloccare i canali, selezionare la terza voce e premere OK.<br />
Utilizzare quindi il tasto OK per bloccare o sbloccare il canale selezionato dalla lista dei preferiti.<br />
Premere il tasto BACK per salvare le nuove impostazioni.<br />
�<br />
�<br />
4. Per riordinare la lista, selezionare la quarta voce e premere OK.<br />
Selezionare il canale che volete riordinare nella lista utilizzando i tasti<br />
Premere OK.<br />
e .<br />
Utilizzare i tasti e per spostare il canale nella posizione della lista che preferite.<br />
Premere OK per confermare la posizione. La lista viene modificata automaticamente.<br />
Premere il tasto BACK per salvare le nuove impostazioni.<br />
�<br />
5. Per cancellare la lista, selezionare l’ultima voce sulla lista e premere OK.<br />
Per confermare la rimozione dalla lista, evidenziare “Sì, conferma l'eliminazione” utilizzando il<br />
tasto �<br />
e premere OK due volte.<br />
Per cancellare la rimozione, premere OK.<br />
Premere il tasto BACK per salvare le nuove impostazioni.<br />
Uscire dal menu per l’organizzazione dei canali<br />
Per chiudere il menu organizzazione canali, premere il tasto EXIT.<br />
Aggiornamento lista dei canali<br />
������� �� ����� �������������� �� ������� ��� ����� � ������ ����� ����� �� ��������������� ����� ������<br />
���� ����������� � ������� ����������� ��������� � ���������� �� ������� ��� �������� ���������������<br />
la lista Tutti i canali.<br />
�<br />
15<br />
IT
Servizi disponibili<br />
Guida dei programmi<br />
�� ����� ����������� ��� ��������� ����� �������� �� ������ ����� ��������� ������� ��������� ���<br />
canale che state guardando nei prossimi 7 giorni. Inoltre, la EPG include uno strumento di ricerca:<br />
������ ����� ��� ����� ������ ���� �� �� �� ����� � ������ ������� �� ����� �� ��������<br />
Accedere alla lista di canali<br />
1. Premere il tasto MENU.<br />
2. Utilizzando i tasti �<br />
e , selezionare 2 I miei servizi e premere OK.<br />
3. Utilizzando i tasti �<br />
e , selezionare Guida dei programmi e premere OK.<br />
16<br />
�<br />
�<br />
Nota: Per un accesso rapido alla guida dei programmi premere il tasto GUIDE.<br />
Per usare la guida<br />
Per navigare fra gli orari e i giorni, usare i tasti �<br />
e .<br />
Per vedere la guida dei programmi di un altro canale, usare i tasti P+/-.<br />
Per passare ad un programma attualmente trasmesso su un altro canale, evidenziare il programma<br />
utilizzando i tasti di direzione, premere OK e selezionare Guarda questo programma.<br />
��� ��������� �� ����� ��� �� ��������� ��� ���� ��������� ��� ������ ����������� �� ���������<br />
utilizzando i tasti di direzione e premere OK. Potete anche scegliere di impostare un reminder<br />
������������� ��������� �� ���������� ��� ������ ����� � ������ � ���������� �� ���� �������� ��<br />
��������� ����������� ������� ����� ������ ���<br />
Per ottenere maggiori informazioni su un programma, evidenziarlo e premere il tasto / giallo.<br />
Per girare le pagine, utilizzare i tasti � e �.<br />
Per usare lo strumento di ricerca<br />
Premere il tasto GUIDE una volta mentre siete nel programma guida.<br />
Sullo schermo appare lo strumento di ricerca.<br />
Potete effettuare una ricerca nella guida dei programmi selezionando il nome di un programma, una<br />
data, un intervallo orario, un tema e/o un tipo di visione.<br />
Per selezionare i vostri criteri di ricerca, usare i tasti di direzione e premere OK per avviare la<br />
ricerca.<br />
Per uscire dalla guida<br />
Per chiudere la EPG, premere il tasto EXIT.<br />
�
Avvisi<br />
Nel menu avvisi, potete impostare un nuovo avvisi, selezionare un’opzione o visualizzare la lista dei<br />
avvisi impostati.<br />
È possibile impostare tre tipi di avvisi<br />
� Richiamo: il promemoria non è obbligatoriamente associato ad un programma. L’utente può<br />
�������� ��������� ��������� ��� �������� ��� ������� ��������� ������ ������ �� ���<br />
� Promemoria� �� �������� �������� �� ��������� �� ������� ��� ����� ������ � �� ��������<br />
standby.<br />
� Registratore: il avvisi del registratore consente di lanciare la registrazione di un video attraverso<br />
l’uscita scart.<br />
��� � ���������� � ��� ������� �� �� ������� ��� � ������ ������ ����� �� ������� �� ��������� �� ��������<br />
resta sullo schermo per un minuto. Terminato questo intervallo di tempo, l’apparecchio si sintonizzerà<br />
automaticamente sul servizio specificato.<br />
Importante: Non dimenticate di salvare il nuovo avvisi!<br />
Utilizzare i avvisi<br />
1. Premere il tasto MENU.<br />
2. Utilizzando i tasti �<br />
e , selezionare 3 Avvisi, inserire il pin e premere OK.<br />
�<br />
Sono disponibili le seguenti opzioni<br />
� opzione degli avvisi: per attivare/disattivare il avvisi e selezionare quanto tempo prima deve<br />
attivarsi il segnale d’allarme.<br />
� definizione degli avvisi: per creare un promemoria, un avviso o il lancio di una registrazione<br />
manualmente.<br />
� lista degli avvisi: per rivedere e cancellare i promemoria creati precedentemente.<br />
� lista dei conflitti tra gli avvisi: per sopprimere i avvisi “conflittuali” che si sovrappongono uno<br />
sull’altro.<br />
Uscire dal menu avvisi<br />
Per chiudere il menu avvisi, premere il tasto EXIT.<br />
17<br />
IT
Impostazioni (configurazione)<br />
Lingue<br />
La lingua dei menu, dell’audio e dei sottotitoli può essere scelta fra inglese, francese, tedesco e italiano<br />
��� ������ �� ������� ����������������<br />
Impostare la lingua<br />
1. Premere il tasto MENU.<br />
2. Utilizzando i tasti �<br />
e , selezionare 4 Configurazione, inserire il pin e premere OK.<br />
18<br />
�<br />
Modificare la lingua<br />
1. Utilizzando i tasti �<br />
e , selezionare la lingua dei menu, dell’audio o dei sottotitoli.<br />
2. Premere i tasti � e ��per confermare una lingua.<br />
�<br />
Uscire dal menu impostazioni lingua<br />
Per chiudere il menu impostazioni lingua, premere il tasto EXIT.<br />
Opzioni<br />
Con la schermata “opzioni” potrete impostare:<br />
� durata di visualizzazione del banner: da 3 a 10 secondi o sempre attivo<br />
� configurazione dei fusi orari<br />
� aspetto: blu, verde o rosso<br />
� volume*: volume comune o indipendente<br />
� configura la trasparenza dello schermo<br />
� Stand-by ecologico: attiva / disattiva<br />
� �� �� ������� �� ������ ������� �� ������� ��� �������� ����� � ������ ��� ������ �� � ����� ���� ������ ��������<br />
Se selezionate il volume indipendente, avrete la possibilità di impostare il livello del volume di ogni canale secondo le<br />
������ ����������� �� ������� ��� ���������� �������� ������ ���������� ��� ������ ������������<br />
Accedere al menu opzioni<br />
1. Premere il tasto MENU.<br />
2. Utilizzando i tasti �<br />
e , selezionare 4 Configurazione, e inserire il pin.<br />
3. Utilizzando i tasti �<br />
e , selezionare Opzioni e premere OK.<br />
�<br />
�<br />
Modificare un’opzione<br />
1. Utilizzando i tasti �<br />
e , selezionare la voce che volete modificare.<br />
2. Premere i tasti � e � per selezionare una voce.<br />
�<br />
Uscire dal menu opzioni<br />
Per chiudere il menu opzioni, premere il tasto EXIT.
Controllo parentale<br />
Il sottomenu <strong>Decoder</strong> consente di cambiare il codice PIN, bloccare/sbloccare il decoder e<br />
attivare/disattivare il controllo parentale impostando un limite d’età.<br />
Il controllo parentale è predefinito in fabbrica sul limite di 18 anni.<br />
Accedere al controllo parentale<br />
1. Premere il tasto MENU.<br />
2. Utilizzando i tasti �<br />
e , selezionare 4 Configurazione e premere OK.<br />
Un codice PIN protegge l’accesso. Inserire il PIN a quattro cifre.<br />
3. Utilizzando i tasti �<br />
e , selezionare Controllo genitori e premere OK.<br />
�<br />
�<br />
Cambiare il codice PIN<br />
��� �������� �� ������ ������������ ��� ������� ��� ���� ������ �������� ������� �������� �� ������<br />
���������������� ��������� ������ �� ������ ���������� �� �������� � 0000. Si raccomanda vivamente di<br />
cambiare questo numero.<br />
Importante: Tenete il vostro PIN segreto, ma non perdetelo!<br />
1. Selezionare Modifica il codice PIN e premere OK.<br />
2. Inserire il nuovo PIN usando i tasti numerici.<br />
3. Alla fine, confermare il nuovoPIN inserendolo nuovamente.<br />
����� ��� �������� �� �� ��� ���� ����� ����� ������ ������ ������ ���<br />
Blocco decoder<br />
1. Selezionare Blocco del decoder.<br />
2. Utilizzando i tasti � e �, bloccare/sbloccare i canali.<br />
Limite d’età<br />
1. Selezionare Limite di classificazione<br />
2. Utilizzando i tasti � e �, selezionare il limite di età in base al quale si preferisce limitare la<br />
visione del programma.<br />
Uscire dal menu controllo parentale<br />
Per chiudere il menu controllo parentale, premere il tasto EXIT.<br />
Connessione (collegamento)<br />
�� ���� ����������� �������� �������������� �� ��������� � ������� ��� ����� � ����� � �� �����������<br />
HD.<br />
Accedere al menu connessione<br />
1. Premere il tasto MENU.<br />
2. Utilizzando i tasti �<br />
e , selezionare 4 Configurazione e premere OK.<br />
3. Utilizzando i tasti �<br />
e , selezionare Collegamento e premere OK.<br />
�<br />
�<br />
19<br />
IT
Modificare le impostazioni di connessione<br />
Utilizzare i tasti di direzione per modificare le impostazioni di connessione. Qui sotto sono elencati<br />
i valori possibili per ciascuna voce.<br />
20<br />
������� ��� ���� ����<br />
������������� �������������� ��� ���� ��� � ����� ������ ���� � ����� �������<br />
��� ����� ������ ���� ���� ����� ���� ����� ���������<br />
�� �������� ������ CVBS + RGB* � ����� ����<br />
��� �������� ������ ����� ����<br />
Formato video: PAL, SECAM<br />
Formato audio: audio PCM, audio digitale<br />
Informazioni dispositivo HDMI**: connesso, non connesso<br />
YPrPb: Disattivato, attivato<br />
Risoluzione HD***: automatica, manuale<br />
�� �������� ��������� ���������� ����������<br />
Uscire dal menu connessione<br />
Per chiudere questo menu, premere il tasto EXIT.<br />
� ���� � ��� � �������������� ������������ ��� �� �������� ������� ���������� ��� �� �� ��� �������� �����<br />
** Questo parametro indica se viene utilizzato il connettore HDMI.<br />
��� �� ����� �� ���������� ��� ��� � ����������� ��� ��������� �������������� ��������� �� ��������� �� ���<br />
������� �� ������ ��������� �������������� ��������� ��� � ��������� ��� �� ��������� �� ��� ������� ���� ��<br />
��������� ��� ����� �������� ������������� ��������� � �����������<br />
Formato d'immagine<br />
Immagine originale nel formato 16/9<br />
��������������� ������������� ���� �� �� ���������� ����<br />
����������<br />
Pan & Scan
Immagine originale in formato 4/3<br />
��������������� �� ����������� ��� �� �� ���������� �����<br />
����������<br />
16/9 zoom<br />
��� ����� ��������� �� ��������� �������������<br />
���� ������<br />
immagine allungata<br />
21<br />
IT
Installazione<br />
Questo menu serve per inserire manualmente i parametri d’installazione o avviare una nuova ricerca di<br />
canali. Due tipi d’installazione sono disponibili:<br />
� ���������� �� ��������� ��� ������ ��������� ���������������� ������� OK per avviare<br />
la scansione.<br />
� ������������� �������� ������ ������������� �������� �� �������� ����������� �� ��������� � �� ����<br />
�� ������������ ������ ���� �������� ������ ���������� ���� ����� ������������ ��� ��������<br />
Accedere al menu installazione<br />
1. Premere il tasto MENU.<br />
2. Utilizzando i tasti �<br />
e , selezionare 4 Configurazione, inserire il pin e premere OK.<br />
3. Utilizzando i tasti �<br />
e , selezionare Installazione e premere OK.<br />
22<br />
�<br />
�<br />
Modificare un parametro<br />
1. Utilizzando i tasti �<br />
e , selezionare il parametro che volete modificare.<br />
2. Premere i tasti � e � per selezionare la vostra preferenza o usare i tasti numerici del telecomando<br />
per inserire il nuovo parametro.<br />
�<br />
Uscire dal menu installazione<br />
Per chiudere il menu installazione, premere il tasto EXIT.<br />
Accesso condizionato<br />
Il sottomenu accesso condizionato consente di ottenere informazioni sul vostro attuale abbonamento,<br />
sui gettoni disponibili e consente di cambiare il limite d’età.<br />
� Il menu Stato dell'abbonamento informa sulla durata dei diritti per ogni canale generale.<br />
� Il menu Stato dell'evento (1) ������ ����� � ��������� ���������� �������� ��� ����������<br />
� �����������<br />
� Il menu Stato dei gettoni (1) fornisce le informazioni sui gettoni di ogni conto disponibile, incluso<br />
le informazioni sugli addebiti e gli accrediti per ogni programma che richiede l’uso di gettoni<br />
per essere fruito.<br />
(1) Questa funzionalità è associata al servizio Pay Per View. È possibile che la PPV non sia disponibile sulla vostra rete.<br />
Cambiare il PIN della smart card<br />
Questo sottomenu consente di cambiare il codice PIN della smart card.<br />
Importante: Il codice CA PIN o codice smart card è diverso dal PIN del decoder. Il codice predefinito<br />
in fabbrica è 1234. Si raccomanda vivamente di cambiare questo numero.<br />
Cambiare il CA PIN<br />
1. Premere il tasto MENU.<br />
2. Utilizzando i tasti �<br />
e , selezionare 5 informazioni e premere OK.<br />
3. Utilizzando i tasti �<br />
e , selezionare Diritti di accesso e premere OK.<br />
4. Utilizzando i tasti �<br />
e , selezionare Modifica il codice PIN di accesso condizionale<br />
e premere OK.<br />
5. Inserire il vecchio codice PIN usando i tasti numerici.<br />
6. Inserire il nuovo codice PIN usando i tasti numerici.<br />
7. Alla fine, confermare il nuovo codice PIN inserendolo nuovamente.<br />
�<br />
�<br />
�<br />
Nota: Per cambiare il PIN del decoder, vedere pagina 19
Uscire dal menu CA PIN<br />
Per chiudere il menu CA PIN, premere il tasto EXIT.<br />
Limite d’età<br />
Questo sottomenu consente di verificare e cambiare l’attuale limite d'età. Si distinguono quattro<br />
categorie di limite d’età:<br />
� � ��� ������ ��������<br />
� �� ��� ����� ���������<br />
� � ��� �������� �� �� ����<br />
� � ��� ��������� �������<br />
� ������� �� ������ ����� ��� ������<br />
Impostare il Limite d’età<br />
1. Premere il tasto MENU.<br />
2. Utilizzando i tasti �<br />
e , selezionare 5 Informazioni e premere OK.<br />
3. Utilizzando i tasti �<br />
e , selezionare Diritti di accesso e premere OK.<br />
4. Utilizzando i tasti �<br />
e , selezionare Classificazione per intervallo di età e premere OK.<br />
Potrete vedere gli attuali limiti d’età applicati al vostro decoder.<br />
�<br />
�<br />
�<br />
Modificare il Limite d’età<br />
1. Selezionare Menu principale/5 Informazioni/Diritti di accesso/Classificazione<br />
per intervallo di età e premere OK.<br />
2. Utilizzando i tasti � e �, selezionare il limite d’età prescelto.<br />
3. Inserire il vostro CA PIN per confermare la nuova impostazione.<br />
Uscire dal menu Limite d’età<br />
Per chiudere il menu Limite d’età, premere il tasto EXIT.<br />
23<br />
IT
Caratteristiche principali<br />
8000 Series<br />
� ������� ��� ������� ����� � ����� �� ����������� ����� ������� �� ��� ������ �����������<br />
Collegamenti<br />
� ����������� �����<br />
� ������ ����� ��� �����<br />
� ������ ����� �������� ��������<br />
� � ����� ������ ����� �� ���������� � ����� ��� �������<br />
Software<br />
� ��������� ��������� ���<br />
� ���� � ������� ��������� � ����������� ��������� ��������� ������� � ��������� ��� �� ������ �������<br />
����� ��� �������<br />
� �������������� ������ ��� ��� � � ����� �� ����������<br />
� ����� ����������� ��� ��������� ��� ��� ����� � ��������� � � ��������� �� ��� ������<br />
� ������ ����������� �������� ��������� ��� ��������� �� ����� �� ������������<br />
� ����������� ���� ����������� ��������� � ��������� ���������<br />
� ��������� ����� ������ ��� � ������� �� ������ ��������� ��� ����� � ������������<br />
� ��������� ��������� ��� ��� ��� ��������<br />
� ����� ������������<br />
� �������� �� ������������� �� �����<br />
Accessori<br />
� ����������� ��� ��������<br />
� ���� ����������������<br />
� ���� �����<br />
� ������� �����<br />
Prodotto su licenza dei Dolby Laboratories.<br />
"Dolby" e il simbolo della doppia D sono marchi dei Dolby Laboratories.<br />
24<br />
Questo simbolo sta ad indicare che il vostro apparecchio elettronico non funzionante non deve essere<br />
gettato con i normali rifiuti casalinghi. L'Unione Europea ha implementato un sistema di raccolta e<br />
riciclaggio specifico sotto la responsabilità dei produttori degli apparecchi.<br />
Questo apparecchio è stato progettato e fabbricato con materiali e componenti di alta qualità che possono essere<br />
riciclati e riutilizzati. Gli apparecchi elettrici e elettronici possono contenere elementi che sono necessari per<br />
il funzionamento dell'articolo, ma che possono risultare pericolosi per la salute o per l'ambiente se non vengono<br />
manipolati o smaltiti in modo corretto. Di conseguenza, vi preghiamo di non gettare il vostro apparecchio non<br />
funzionante con i normali rifiuti di casa.<br />
Se siete i proprietari dell’apparecchio, dovete portarlo presso un punto di raccolta specializzato o darlo al venditore<br />
quando acquistate un apparecchio nuovo.<br />
� Se lo utilizzate in ambito professionale, siete pregati di seguire le istruzioni del fornitore.<br />
� Se avete avuto l'apparecchio in locazione o in prestito, siete pregati di contattare il vostro fornitore di servizi.<br />
Aiutateci a proteggere l'ambiente in cui viviamo!
Soluzione dei problemi<br />
� �������� �������� ������������ � �� ����� ��� ������ ������� ��� ��� ���� ������ ������� �� ��<br />
difetto. Se il vostro apparecchio si comporta in modo inaspettato mentre lo usate, provate a scollegarlo<br />
dalla corrente, attendere alcuni secondi e collegarlo di nuovo.<br />
Importante: Non cercare mai di aprire l'apparecchio da soli.<br />
Problema Possibile causa Soluzione suggerita<br />
Il STB (set-top box)<br />
non sembra funzionare,<br />
sul pannello frontale<br />
non ci sono spie accese.<br />
Il STB non sembra<br />
funzionare, e la spia di<br />
standby è rossa.<br />
Il STB non sembra<br />
funzionare, e la spia<br />
del pannello frontale<br />
è verde.<br />
Si notano delle<br />
interferenze sullo<br />
schermo<br />
Il telecomando non<br />
funziona.<br />
Avete dimenticato<br />
il vostro PIN.<br />
I menu e i banner<br />
sono in una lingua<br />
che non capite.<br />
Il STB non è collegato alla<br />
corrente<br />
Il STB è spento<br />
Il STB non è collegato<br />
correttamente agli altri<br />
apparecchi, oppure gli altri<br />
apparecchi non sono<br />
configurati correttamente.<br />
�� �� ��� � ��������� �����<br />
visione di canali digitali via<br />
cavo.<br />
�� �� ��� � ������������<br />
correttamente.<br />
Le batterie sono scariche o<br />
inserite in modo errato.<br />
Qualcosa si trova fra il<br />
telecomando e il vostro STB.<br />
Il telecomando universale non<br />
è settato correttamente.<br />
La lingua dei menu è stata<br />
cambiata con una lingua che<br />
non capite.<br />
��������� ��� �� ����� ��� �������� �������������<br />
nella presa della corrente e che l’apparecchio sia<br />
������� ��������� ��� �� �������� �������� ����<br />
������� ���������� ��� ������� ���� ������ �������<br />
Premere sul pannello frontale<br />
o sul telecomando.<br />
��������� ��� ����� � ������������ ����� �����<br />
���������� ������������� ������� ������ ���<br />
��������� ��� �� �� ��� ��������� ���� ��������<br />
e che sia accesa.<br />
�� �� ��� � ��������� ���� �� ������� �� �����<br />
����� ������� � ����������� �� ������ ��<br />
����������� ����� ������ ���<br />
��������� ��� �� �� ��� ������������ �������������<br />
��� �� ��� ������� ������ ��� ��� ��������<br />
������������� ���������� �� ������� ����� ����� ���<br />
��������� �� �������� � ����������� �� �����������<br />
Assicuratevi di aver puntato il telecomando<br />
direttamente sul STB e che non ci sia niente fra<br />
il telecomando e il STB. La spia del ricevitore ad<br />
infrarossi posta sul pannello anteriore del STB<br />
dovrebbe lampeggiare ogni volta che premete un<br />
comando. In caso contrario provare a cambiare<br />
���������� �� ����� ���<br />
Premere il tasto DECODER per comandare il<br />
decoder.<br />
Chiamare il vostro fornitore.<br />
Potete cambiare la lingua dei menu nel modo<br />
seguente:<br />
1. Premere MENU.<br />
2. Premere tre volte il tasto iniziando dalla<br />
prima voce.<br />
3. Premere OK e inserire il PIN.<br />
4. Premere OK.<br />
5. Premere i tasti � o � fino a quando potete<br />
vedere la vostra lingua preferita.<br />
6. Premere il tasto BACK o EXIT per salvare la<br />
nuova impostazione.<br />
Se questi suggerimenti non vi permettono di risolvere il problema o non portano risultati soddisfacenti,<br />
siete pregati di consultare il vostro fornitore.<br />
�<br />
25<br />
IT
Glossario<br />
DVI La <strong>Digital</strong> Video Interface ������������ ����� ��������� �������� ��� ����������� ��������<br />
ad alta velocità fra una fonte video e il televisore. L’audio è trasmesso separatamente.<br />
EPG L’Electronic Programme Guide ������ ����������� ��� ���������� �������� ������������<br />
��� ��������� �� �� ����� �� ������� � � ��������� ����� �������� �� ��������� � ���������<br />
�� ��� ������ �������� ���� � � ������ � ������� ��� �������� �� ����������� �� �������������<br />
di un programma selezionando un evento nella guida o di trovare facilmente i programmi<br />
����������� ����� � �� ������ ������� ��� ������� ��� � � ����������������� �������� ������<br />
HDMI L’High Definition Multimedia Interface ������������ ������������ �� ���� �����������<br />
è come un cavo scart ad alta definizione, una connessione digitale ad alta velocità per la<br />
trasmissione di dati video e audio. L’HDMI assicura la trasmissione del migliore segnale video<br />
����� ����� �������� ��� ���� ������� ����� ������� ����� ������ ������� ������ �� ����� ���<br />
i segnali video e audio multicanale sono trasmessi non compressi attraverso un unico cavo.<br />
HDCP L’High bandwidth <strong>Digital</strong> Content Protection ������ � �� ������� �� ���������� ���<br />
contenuti integrato negli schermi HD e nei decoder. Questo sistema permette di evitare la<br />
duplicazione e distribuzione non autorizzata di contenuti protetti da copyright.<br />
HD L’High Definition ����� ����������� �������� ����������� �� ������� ��������� ��� ���<br />
risoluzione verticale che va da 720p a 1080p.<br />
LCD I Liquid Crystal Displays �������� � ��������� �������� ���� �� ���� �� ���������� � �������<br />
piatto. Sono costituiti da due pannelli trasparenti con una soluzione di cristallo liquido<br />
intrappolata all’interno di celle contenute fra i due schermi. Con l’applicazione di un campo<br />
elettrico attraverso il liquido, i cristalli si allineano in modo tale che la luce non può passare<br />
attraverso. Ognuno dei cristalli agisce come un otturatore che permette oppure impedisce<br />
alla luce di passare attraverso. Il disegno formato dai cristalli trasparenti e scuri forma<br />
l’immagine.<br />
Pixel ����� � �� ����������� �� �������� �������� ��������� ��������������� � ����� ���� �� ���<br />
������� ����� �� ���� �� ����������� ������ ��� ����� �� ���� �� ������������ �������� � �� ���<br />
risoluzione.<br />
Plasma Lo schermo al Plasma è costituito da migliaia di minuscoli tubi riempiti di gas ionizzato in<br />
stato di plasma.<br />
SPDIF Il nome sta per Sony/Philips <strong>Digital</strong> Interface Format, dalle due società che hanno<br />
progettato per prime questo formato di interfaccia digitale.<br />
720p 720p sta ad indicare il numero di linee che compongono la risoluzione verticale dell’imma-<br />
���� ��� �� � ��� ��� ����������� �������� ���������� �������������<br />
1080i 1080i significa che la risoluzione verticale dell’immagine è costituita da 1080 linee. La i sta<br />
��� ����������� ��������� ���������� ���������������<br />
26
Programmazione del telecomando<br />
�� ������ ������� ��� � ������ �� �� ����������� ���������� ��� ��� ��������� �� ������� ���<br />
� �� ����������� ��� ����� �� ������� ��� ��� � ���������� ������� �������������� �����������<br />
�� ����������� � ������ ��� ��������� �� ������� ����<br />
Per comandare il televisore con il telecomando, seguite le tappe che seguono:<br />
Prima di iniziare<br />
1. Accendere il televisore.<br />
2. Guardare alla fine di questo manuale il codice corrispondente al fabbricante del vostro televisore.<br />
Importante: Se non trovate il fabbricante della vostra TV nella lista, optate direttamente per la<br />
programmazione ricerca automatica.<br />
Programmazione con inserimento diretto dei dati<br />
I fabbricanti di televisori possono avere diversi codici per la stessa marca. Se non sapete a quale corrisponde<br />
�� ������ ����������� �������� �� ��� ����� �������� �������� ����� � ������ �� ��� ����������� ��� � ������<br />
non trovate quello giusto.<br />
1. Premere il tasto TV e tenerlo premuto fino a quando non avete inserito il codice a 4 cifre.<br />
2. Premere ogni cifra una alla volta.<br />
� �� �� ����� � ��������� �� ��� ������ ������� ���������� �� ���������������<br />
� �� ��� ����� ��� � ��������� �� ��� ��������� � ������ �� ������ � �� �������������� ��� �����������<br />
diretto dei dati fallisce. Premere il tasto ��� ��������� �� �� � ���������� �� ������ � � ������<br />
Una volta inserito il codice corretto, il LED si accende.<br />
3. Rilasciare il tasto TV.<br />
Nota: Se non siete riusciti ad effettuare la programmazione con inserimento diretto dei dati, provate il secondo<br />
metodo: la ricerca automatica.<br />
Ricerca automatica<br />
�� ��� ������� �� ����������� ��� ������ ���������� ����� ����� ��� ������ ��� ����� �� ������ ����� �������<br />
automatica.<br />
1. Premere e tenere premuto il tasto TV del telecomando.<br />
2. Premere e tenere premuto il tasto fino a quando non si accende la spia verde, quindi rilasciare i<br />
����� �� � .<br />
3. Premere e rilasciare PLAY, poi aspettare 5 sec. Ripetere fino a quando il vostro apparecchio si spegne.<br />
4. Premere e rilasciare REW, poi aspettare 2 sec. Ripetere fino a quando il vostro apparecchio<br />
si accende di nuovo.*<br />
5. Per chiudere e salvare la nuova tabella, premere e tenere premuto STOP fino a quando la spia verde<br />
non si spegne.<br />
6. Per uscire senza salvare la ricerca del codice, premere EXIT. La spia verde si spegne.<br />
7. Se non viene trovata nessuna voce la ricerca del codice terminerà dopo cinque minuti e apparirà<br />
l'ultima tabella utilizzata. La spia verde si spegne.<br />
*Se il vostro televisore può passare da ON a OFF e viceversa con un unico tasto ON / STANDBY premere PLAY<br />
con il telecomando universale e quando il vostro apparecchio si spegne, premere REW fino a quando l’apparecchio<br />
si accende di nuovo. Se l’apparecchio non può passare da ON a OFF e viceversa con un solo tasto, premere PLAY.<br />
Quando il vostro apparecchio si spegne, accendere nuovamente l’apparecchio con il tasto sul pannello frontale del<br />
televisore, quindi premere REW sul telecomando universale fino a quando l’apparecchio si spegne di nuovo.<br />
27<br />
IT
Ripristino dei valori predefiniti in fabbrica<br />
Questa procedura ripristinerà i valori del telecomando predefiniti in fabbrica e cancellerà qualsiasi<br />
programmazione.<br />
28<br />
1. Premere e tenere premuto il tasto EXIT fino a quando non avete finito di inserire il codice.<br />
2. Inserire il codice a 3 cifre: 000<br />
� �� ��� ����� ��� � ��������� �� ��� ��������� � ����� � ��� �� �������<br />
Dopo aver premuto il terzo 0, il LED si accende di nuovo da 1 a 2 secondi.<br />
Il vostro telecomando è ripristinato ai valori predefiniti in fabbrica.
Funzioni di registrazione<br />
�� ������ ������� �������� �� ��� ���������� �� ��� ��������� ����� ��������� � ���������� ������� ���<br />
������� �� ����������������� �������� ��� ����� ���� ������ ��� ������ ����������� ������� ����������<br />
� ��������� �� ��� ����� ���� �� ��� �� �� �������� ������� ���� ���� ��� �� ����������������� ���<br />
separato.<br />
�� ������������� ������ ����� ������� ���� ���������� �� ��� ���������� ������������ �� ���������� �������� ��<br />
ricerca e la gestione delle vostre registrazioni.<br />
�� ��� �������� �� ������ �������� ����� ������� ����� ��� ������������ �������������� �� �� ������� �������<br />
�� �� ������� �������������� �� ��� �������������� ���������� �� �� ������� ����������� ���<br />
Con le funzioni di registrazione del vostro PVR, potete:<br />
� ���������� �� ��������� ������ �� �������� �� ����� �� ��������<br />
� ���������� �� ��������� ������ �������� �� ������ ���������� ��� ����� �����<br />
� �������� �� ��������� �� ��������� ������ ���� �������� ���� ����� ������� �� ������������� �� ��<br />
altro programma.<br />
Registrazione immediata<br />
Per registrare il programma in corso, premere una volta il tasto REC del telecomando. Nel menu che compare<br />
sullo schermo, confermare o modificare il tempo di registrazione indicato. Una spia rossa si accende<br />
sul pannello frontale del decoder per confermare l’inizio della registrazione. Per fermare la registrazione<br />
premere il tasto STOP.<br />
Registrazione differita (programmazione)<br />
��� ����������� ��� ������������� ������ ���������� �� ����� ����������� ��� ��������� ����� � �� ���� ��<br />
�������������� �Timer setting� �� �� ��������� �� ���������� ��� ����� ����� ����� ����<br />
Registrazione attraverso la guida dei programmi<br />
(EPG)<br />
1. Premere il tasto EPG.<br />
2. La guida dei programmi del canale selezionato appare sullo schermo.<br />
3. Selezionare il programma da registrare.<br />
4. Premere EPG per accedere alle opzioni.<br />
5. Seguire le indicazioni sullo schermo.<br />
Registrazione programmata<br />
������������ �� ���� � ��������� My Scheduler<br />
�/<br />
�����������������<br />
Selezionare le opzioni con i tasti .<br />
� Timer option �������� �� ��������������� �������� �� �������� �<br />
disattivare una programmazione e impostare un avviso prima dell’inizio<br />
di un programma.<br />
� Timer set ������������ ����� ��������������� �������� �� �������mare<br />
manualmente una registrazione e di impostare un avviso prima<br />
dell’inizio.<br />
� Timer list ������ �� ��������������� �������� �� ���������� �� �����<br />
delle vostre programmazioni e di cancellarle. Permette di disattivare un<br />
avviso.<br />
� Conflict timer list ��������� ����� ����� �� ��������������� ��������<br />
di cancellare una programmazione che si sovrappone ad un’altra.<br />
�<br />
program guide M T W T F S S<br />
301 ARTE TODAY<br />
13:00 NEWS<br />
15:00 SPORT<br />
main menu<br />
1 My Channels<br />
2 My Services<br />
3 My Recordings<br />
4 My Scheduler<br />
5 My Set up<br />
6 Information<br />
My Scheduler<br />
timer options<br />
timer set<br />
timer list<br />
conflict timer set<br />
29<br />
IT
Time shift (registrazione nella memoria tampone)<br />
La funzione Time Shift permette di mettere in pausa il programma che state guardando, per esempio,<br />
per rispondere ad una telefonata. In questo modo potete essere interrotti senza perdere niente del<br />
programma. Il vostro decoder dispone a questo scopo di una memoria tampone nella quale sono<br />
conservate 2 ore d’immagini dell’ultimo canale guardato.<br />
Per mettere in pausa il programma in corso, premere il tasto PAUSE del telecomando. Le immagini<br />
si bloccano. Per riprendere il programma dove l’avete lasciato, premere il tasto PLAY. Il programma<br />
�������� ���� ������� �������� �� �� �������� ���� ��������� ��������� ��� ������ �������� ���� ������mento<br />
del programma in corso.<br />
Conflitti di registrazione<br />
�� ������ ���� �� ������ ��� ��� ����� ���������� �������������� ���� ������ ��������� �� �������������<br />
perchè entra in conflitto con un’altra operazione in corso. In altri casi si può trattare di un’incoerenza<br />
fra due programmazioni. In caso di problema, uno schermo di avvertimento comparirà per proporvi<br />
una soluzione.<br />
�� ��� ����� ����� ������ �������� �� ������������� ������������� ��<br />
30<br />
� ��� ��������� �� ������������� ������ ��� ������������� � ��� �� ������ �� ������ ��� ��� ����������<br />
un solo programma alla volta.<br />
� �� �������������� �� ��� �������������� ���� �� ������� ��� ������� �������������� ���<br />
dovrebbe iniziare prima della fine della precedente.<br />
� ��������������� �� ���������� ��� �������� �� ������ ��� ����� ����� �� ������ ���� ������� ������lare<br />
dei titoli per liberare dello spazio.<br />
� �� ������������� ��� ��������� �������� ��� ������ ��� � �� ��������������� ������� �������
Biblioteca<br />
�� ������������� ������ ����� ������� ���� ���������� �� ��� ���������� ����������� ��� �� �������� ��<br />
���������� ��� �����������<br />
Accedere alla biblioteca dei titoli<br />
1. ������������ �� ���� ���������� �<br />
�/<br />
��������� PVR quindi Record Library.<br />
2. Selezionare i titoli con i tasti .<br />
My library 14/07/08 21:45<br />
80 % disk space available<br />
Title date duration<br />
Title 1 10/05/08 01 h 52 mn<br />
Title 2 12/05/08 02 h 05 mn<br />
Title 3 01/06/08 00 h 32 mn<br />
Title 4 03/06/08 01 h 47 mn<br />
Title 5 06/06/08 01 h 36 mn<br />
Title 6 07/06/08 00 h 13 mn<br />
Title 7 08/06/08 00 h 28 mn<br />
Title 8 14/06/08 01 h 15 mn<br />
Title 9 24/06/08 02 h 25 mn<br />
Title 10 10/07/08 00 h 05 mn<br />
Title 11 14/07/08 00 h 38 mn<br />
�<br />
���������<br />
1 Predefinito: nome del canale, data di registrazione, ora d’inizio,<br />
2 : Controllo parentale attivato (inserimento di un codice obbligatorio per la riproduzione del titolo),<br />
: Protezione contro la cancellazione incidentale attivata,<br />
Biblioteca, Comandi utilizzabili<br />
I tasti utilizzabili per la gestione dei titoli registrati sono i seguenti.<br />
Regolazione del volume sonoro<br />
Indietro<br />
� Ora e data.<br />
� Capacità restante sul disco duro.<br />
� Finestra di visualizzazione dei titoli / Pannello di con-<br />
������ �������������� ���� �� ������� � ����� ������� �<br />
partire da un’immagine, premere il tasto PLAY��<br />
� Lista dei titoli 1 ���������� ����� ���������� ������ ���� �<br />
ora, status 2 ��<br />
Interruzione dell’audio<br />
Chiudi<br />
Tasto di navigazione<br />
e di conferma<br />
Lettura, Avanti / indietro rapido / Stop,<br />
Arresto sull’immagine<br />
31<br />
IT
Personalizzazione dei titoli<br />
Quando una registrazione è terminata potete realizzare le seguenti operazioni:<br />
� ���������� �� ������ �� ��� �������������.<br />
� ���������� � ������� �� ��������������<br />
� ���������� ����� � �������<br />
� �������� �� ���� �� �� �������<br />
Proteggere un titolo<br />
Per proteggere una registrazione, selezionare Protect Record quindi confermare con OK<br />
Cancellare un titolo<br />
Per cancellare una registrazione, selezionare Delete Record quindi confermare con OK<br />
Cancellare tutti i titoli<br />
Per cancellare tutte le registrazioni, selezionare Delete all Records quindi confermare con OK<br />
Cambiare il nome di un titolo<br />
Per cambiare il titolo di una registrazione, selezionare Rename Record nel menu d’edizione e quindi<br />
confermare con OK. Utilizzare i tasti numerati del telecomando per comporre, lettera per lettera, il<br />
titolo di vostra scelta. Procedere come fareste con la tastiera del vostro telefono cellulare.<br />
32<br />
<strong>DCI82BBN</strong> / RST - EPHEME / AVRIL 2008
Introduction<br />
Copyrights<br />
© 2008 Thomson SA. All rights reserved. Republication or redistribution of Thomson content, including<br />
by framing or similar means, is prohibited without the prior written consent of Thomson SA. ‘THOMSON’<br />
and the Thomson logo are registered trademarks and trademarks of Thomson SA.<br />
Other trademarks and technology protection<br />
HDMI, the HDMI logo and High-Definition Multimedia Interface are trademarks or registered trademarks<br />
of HDMI Licensing LLC.<br />
This product incorporates copyright protection technology that is protected by U.S. patents and<br />
other intellectual property rights. Use of this copyright protection technology must be authorized by<br />
Macrovision, and is intended for home and other limited viewing uses only unless otherwise authorized<br />
by Macrovision. Reverse engineering or disassembly is prohibited.<br />
All other company or product names are either trademarks or registered trademarks of their respective<br />
owners.<br />
Disclaimer<br />
Thomson reserves the right to modify the specifications and pictures mentioned in this document at any<br />
time and without prior notice. Therefore the information in these instructions is not contractual.<br />
Content<br />
Introduction ............................................. 1<br />
Content .................................................... 1<br />
Safety recommendations ....................... 2<br />
About your HD <strong>Decoder</strong> ........................ 4<br />
What is HD ? ......................................................4<br />
How does the HD work ? ................................4<br />
What do you need to enjoy HD Services ? .4<br />
Connections ............................................ 5<br />
Package content ................................................5<br />
Front Panel Controls .........................................5<br />
Rear Panel Connections ...................................6<br />
Connections to your Television.......................6<br />
Other connections .............................................7<br />
Inserting the smartcard .....................................8<br />
Inserting batteries ..............................................8<br />
Remote Control .................................................9<br />
Quick Installation .................................. 10<br />
Everyday Use ......................................... 11<br />
Turning on/off ................................................... 11<br />
Changing Channels .......................................... 11<br />
Navigation Clues.............................................. 11<br />
Using the Menus .............................................. 11<br />
Using the Zapping/Info Banner ..................... 12<br />
Using the Mini-Guide ...................................... 12<br />
Menus ..................................................... 13<br />
Charts of the menu......................................... 13<br />
Channels ................................................ 14<br />
List of channels ................................................ 14<br />
Channel organizer ........................................... 14<br />
Channel list update ......................................... 15<br />
My Services ............................................ 16<br />
Programme guide ............................................ 16<br />
Timers .................................................... 17<br />
Setup ...................................................... 18<br />
Languages .......................................................... 18<br />
Options .............................................................. 18<br />
Parental Control .............................................. 19<br />
Connection ....................................................... 19<br />
Screen fit ........................................................... 20<br />
Installation ......................................................... 22<br />
Access rights .......................................... 22<br />
Change CA PIN ............................................... 22<br />
Maturity rating ................................................. 23<br />
Main Features ........................................ 24<br />
Trouble Shooting ................................... 25<br />
Glossary ................................................. 26<br />
Remote control programming ............ 27<br />
Before starting ................................................. 27<br />
Direct entry programming ............................ 27<br />
Automatic search ............................................ 27<br />
Reset to factory settings................................ 28<br />
Recording features ................................. 29<br />
Immediate recording ...................................... 29<br />
Offset recording ............................................. 29<br />
Time Shift ......................................................... 30<br />
Recording conflicts ........................................... 30<br />
Library .................................................... 31<br />
Accessing the titles library ............................ 31<br />
Library, available commands ......................... 31<br />
Customising titles .......................................... 32<br />
TV codes ...................................................I<br />
1<br />
EN
Safety recommendations<br />
Using equipment safely<br />
Your decoder has been manufactured to meet European safety standards, but care must be taken to<br />
ensure proper performance.<br />
It is important that you read this booklet completely, especially the safety instructions below. If you<br />
have any doubts about the installation, operation or safety of decoder, please contact your Customer<br />
Service.<br />
Avoiding the risk of electric shock<br />
� ���������� ��� ������� ���� ��� ����� ������ ������ ��� ������� ��� ������� �� ��� ����������<br />
it from) any other equipment. Avoid any contact with 230 Volt AC mains, which can be lethal or<br />
cause severe electric shock.<br />
� �� ��� ������ ��� ����� �� ��� �������� ������ ��� ������� ����� ������� ��� �������� �������<br />
for repair or service.<br />
� �� ��� ������ �������� ���� ��� ������� �� ��� ���� ������� ��� ����������<br />
� �� ��� ����� ��� ��������� ����������� ������ �� ��� ����� �� �� �������� �������� ���� ��������<br />
� �� ��� ��� �������� �� ��� ������� ����� ����� ����� �� ���� ���� �� ���� ������� ������� �� �������<br />
containers). Do not splash it with a liquid. If an object or liquid enters inside the decoder, unplug<br />
it immediately and contact the Customer Service.<br />
� �� ��� ����� ��� ������� �� ����������� ���� ���� �� ���� �������������� ������� �� ��������<br />
�� ������� �� �� ������� ����������� �� ���� ���� �� ������� ������� ��� � ������� ��������<br />
level of 75%.<br />
� �� ���� �� � ������������� �� �� ����������� ���� ��� ������ ��� ������� ���� ��� ����� ���<br />
the antenna from the TV set.<br />
� ����� ��� ����� ������ ���������� �� ���� ��� ��� ������ ��� ��� �������<br />
Connecting to the mains supply<br />
� ���� ������� �� �������� �� ������� �� ���� ��� �����<br />
� �� ��� ��� �� ��� ����� ����� ��� ����� ����� ��� ���� �� ����������� ������ ������� ��� ��������<br />
Service.<br />
Ensuring optimum performance<br />
� ����� � �� �� �� �� ������ ��� ������� �� ������ ������ ����������� �� ��� ��������<br />
� ������ ����� ���� ������� �������������<br />
� �� ����� ��� �������� ��� � ���� ����� ���� ����� ���� �� �������� ������� �� �������� ���������<br />
Clean the ventilation openings regularly.<br />
2<br />
10 cm<br />
10 cm<br />
10 cm<br />
7 cm
Environmental Information<br />
� ��� ��������� ��� ���� ��������� ���������� ����� ������� ��� ������������ �� ���<br />
dispose them out with other articles. Take care to dispose them at special collecting points.<br />
� �� ��� ��� ��� ����� ��� �������� ��� � ���� ������ ���������� ����������� ������ ������ �� ����<br />
to standby. This saves energy.<br />
Technical specifications<br />
Operating voltage 230 VAC / 50Hz<br />
Nominal Power consumption < 46W<br />
����� �� ����� ����������� �������� � ���<br />
����� �� ����� ����������� ��������� � ��<br />
������ �������� ������������ �����<br />
���������� �� � � � �� ������� ���� ��� � �� � ��� ��<br />
Operating temperature range 5 – 45°C<br />
Storage temperature range -25 – 70°C<br />
������ ������� ������� ���� � � ���<br />
Conditional access ISO7816 - CONAX<br />
Hard disk 160 Go<br />
Connections<br />
HDMI out HDMI connector type A<br />
RF in IEC60169-2 female<br />
RF out IEC60169-2 male<br />
TV Scart<br />
VCR Scart<br />
����� ��� �� ��� �� ��� ������ �������������<br />
���������� ����� ��� � ������� ��� ������ ��������� ���������<br />
Analogue components - YPrPb RCA female<br />
USB 2.0 – A-type<br />
Ethernet RJ45 – IEEE 802.3<br />
Meaning of symbols<br />
This symbol on your set guarantees that your product complies with European<br />
Directives 73/23/EEC, 89/336/EEC, 93/68/EEC on safety, electromagnetic compatibility<br />
and marking respectively.<br />
This symbol is intended to alert the user to the presence of un-insulated “dangerous<br />
voltage” within the product housing that may be of sufficient magnitude to constitute<br />
a risk of shock.<br />
This symbol is intended to alert the user to the presence of important operating and<br />
����������� ����������� ������������ ������������ ��� ��������<br />
3<br />
EN
About your HD <strong>Decoder</strong><br />
Thank you for choosing the new 8000 Series from Thomson, the very latest generation in cable HD<br />
������������������������ �� ��� ���� ��������� ���� �������� ��� ���� �� ��� ���� �� ���� �� ����� TV<br />
in premium quality!<br />
Equipped with the latest HD technology, your 8000 SERIES is ready for the latest standard and is also<br />
compatible with the traditional SD standard.<br />
What is HD?<br />
����� �������� ��������� ���� �� �������� �� ���������� ����� ��������� �� ��� ������ ����� �� ���<br />
������ ������ ���� ��� ��� �� ����� ���������� ����������� ��������� ���� ��� ��� �� ��� ����� �� ���������<br />
through each image scanning pass. This definition is sufficient for cathode-ray screens. Nevertheless with<br />
the commercialisation of large Plasma and LCD screens, the image quality is deteriorated. The search<br />
for enhancing this depiction quality lead to the birth of the HD format with an image definition of up to<br />
���� ������ ����� �� ���� ������ �������<br />
The difference between SD and HD images is obvious to the viewer. The High Definition delivers<br />
sharpness, details and visual comfort. For viewing documentaries, sports or movies, the HD becomes a<br />
��� ����������� ���������� �� ��� ���������� ���� ����� ��� ����� �� ������ ���<br />
How does the HD work?<br />
��� ����� ��������� �� �������� �� ����� ��������� ������ ��� ������ �� ������� ��� ������ �� ������� ���<br />
������������� ���� ��������� �� ����� �� ��� ����� ����� ������� ���� ������ ����������� ���� �����<br />
below). Thus, what was blurred and fuzzy with the SD appears to be automatically sharp and detailed<br />
with the HD.<br />
4<br />
TV<br />
Resolution<br />
(Nb Pixel x Nb lines)<br />
HD<br />
Compatibility<br />
Standard TV ������� No<br />
HD Ready ��������� Yes<br />
HD Ready ���������� Yes<br />
Full HD ���������� Yes<br />
What do you need to enjoy HD services?<br />
To enjoy programmes in High Definition quality, you need:<br />
� an HD TV<br />
� �� �� ������� ���<br />
� �� ���� ���� ���� ��������� �� ������� ��� ������� ��� ��� ��� ��<br />
� the relevant subscription.<br />
Ideally you will be using a TV labelled “HD Ready” or “Full HD”. Else check with your TV retailer if<br />
your TV set has HD features.<br />
Discover the technology of tomorrow with the new Thomson �� ������� ����<br />
If your TV has neither HDMI port nor DVI port, you can still enjoy all TV<br />
programmes in standard digital quality using the supplied Scart lead.
Connections<br />
Package content<br />
Scart lead<br />
Front panel controls<br />
Standby/<br />
Power<br />
Menu:<br />
opens/closes<br />
the menu<br />
���� ���� �� �� �<br />
�����<br />
����� ��� �����<br />
���� ���� �� �� �<br />
�<br />
OK:<br />
confirms a<br />
selection<br />
�<br />
���������������� ���<br />
User manual<br />
allows navigating left, up,<br />
down, right in the menus<br />
�������������������������������������������<br />
�������������������<br />
��������������������<br />
������������������������<br />
�����������<br />
Display panel: shows time,<br />
�� ������� ������ � ), or<br />
����� ������� ������ � --)<br />
�� ��������<br />
�������<br />
Amber Network LED on/off:<br />
network activity on/off<br />
Red DEL indicator light:<br />
confirms recording<br />
Remote control<br />
with Batteries<br />
Mains lead<br />
Smartcard slot<br />
�� ��������<br />
�������<br />
Red/Green Standby<br />
LED: standby/power<br />
5<br />
EN
Rear Panel Connections<br />
Connections to your television<br />
6<br />
RF Out:<br />
antenna output.<br />
ETH:<br />
ethernet data port.<br />
����� ������<br />
RF In:<br />
antenna input.<br />
USB:<br />
USB port.<br />
Reset:<br />
reset the modem.<br />
���<br />
�����<br />
HDMI:<br />
HDMI port.<br />
�������<br />
�����<br />
�<br />
�<br />
DIGITAL AUDIO outputs:<br />
������������������ ��������<br />
��<br />
��<br />
�<br />
����� ����������<br />
L / R outputs: left & right<br />
analog audio outputs.<br />
1. Your TV is “HD ready” or “Full HD”<br />
This connection ensures the best image quality. Both digital<br />
video and audio are broadcasted through the HDMI lead.<br />
Then all you need is an HDMI lead to connect the HDMI<br />
���� �� ���� ������� ��� ��� �� ���� ���<br />
2. Your TV has only one DVI-I port<br />
In this case, only video is broadcasted through the DVI<br />
port. Nevertheless you can still receive analog audio via the<br />
audio RCA.<br />
You will need:<br />
� � �������� ����� �� ������� ��� ���� ���� �� ����<br />
������� ��� ��� ��� ����� ���� �� ���� �� ����<br />
� � ����� ��� �� ������� ��� ���� ��� ����� ������ �����<br />
������� �� ���� ������� ��� ���� ��� ����� ������ ��<br />
your TV set.<br />
Some TV sets have a DVI interface which does not respect the HDCP protocol.<br />
These TV sets would not be able to display HD services.<br />
��<br />
���<br />
YPrPb: analogue<br />
video components.<br />
VCR/DVD Scart output.<br />
TV SCART<br />
output.<br />
�������������<br />
�������<br />
Mains input.
Other connections<br />
3. Your TV has neither HDMI port nor DVI port<br />
You will be able to watch HD programmes but not in HD<br />
quality.<br />
You can still enjoy all TV programmes in digital quality using<br />
the supplied Scart lead.<br />
� �<br />
�<br />
���������� ��� �� ���� ���� ��������� �� ���� ����� ����� �� ��� ��������� ������ �� �� �� ����<br />
������� ����<br />
��See page 6.<br />
��������� ��� ����� ���� �� ��� ����� ����� �� ���� ����������� ��� ���� �� �� ��� ������<br />
Plug the mains lead to the main only when all antenna connections are properly made.<br />
Connections to your VCR/DVD player<br />
Use a SCART lead to connect the VCR SCART output<br />
�� ���� ������� ��� �� ��� ������������� �� ���� ���<br />
or DVD player.<br />
�� ������� ���� ��� ��� ��� ������ �� ��� ������� ����<br />
��� � ����� ���� ���� ��������� �� ���� ��� ��� ������ ��<br />
the VCR.<br />
Via the Scart, the VCR will receive only analogical video and you would not be able to<br />
record in HD.<br />
7<br />
EN
Connections to your Hi-Fi systems<br />
Inserting the smartcard<br />
8<br />
���� ���� �� �� �<br />
�<br />
�� ��������<br />
�������<br />
Hold your smartcard with the golden chip down in front of the slot. Insert your smartcard into the slot<br />
as far as it will go without forcing it.<br />
Inserting batteries<br />
Figure 2: Inserting batteries *<br />
��� � ���� �� ������ ����� ����� ����� �� ������� ���<br />
L/R AUDIO ������� �� ���� ������� ��� �� ��� ���<br />
AUDIO inputs on your Hi-Fi unit. This will allow you to<br />
hear higher quality sound through your Hi-Fi.<br />
Note: Audio sockets are generally identified by colours. White for<br />
Left and Red for Right.<br />
Connections to your Audio Video Amplifier or Home-Cinema system<br />
�� ��� ���� ������ ����� ���� ���� ������� ���� ��� �<br />
������� ������� ������������ ����� ����� ���� �� �������<br />
the SPDIF ������ �� ���� ������� ��� �� ��� �������<br />
AUDIO input on your AV amplifier / Home-Cinema system.<br />
Note: In most cases the coaxial (also called electrical) and<br />
optical audio connections give similar results; the only difference<br />
lies in the type of cable being used. The coaxial cable is the<br />
cheaper of the two, but can suffer from external interference<br />
from the other household devices.<br />
� �� ��� ��� ��������� ����� �� ��������� �� ��� ��� ��� ����������<br />
Do not use rechargeable batteries.<br />
� �� ����� �� ����� ��� ���� �� ���������� ������� ��� ����������<br />
indicated inside the battery compartment. Replace only with the<br />
type of batteries specified above. Do not dispose of them in a<br />
fire or recharge them.<br />
� �� ��� ��� ��� ����� ��� ������ ������� ��� � ���� ������ �� �����<br />
remove the batteries.<br />
* Please respect the environment and prevailing regulations. Before you dispose of batteries or accumulators, ask your<br />
dealer whether they are subject to special recycling and if they will accept them for disposal.
Remote control<br />
Sets the remote<br />
in decoder mode<br />
Sets the remote in TV mode<br />
Increases/decreases<br />
the volume level<br />
Mutes the audio / restores<br />
the previous audio volume<br />
Steps back to previous screen<br />
or return to viewing mode<br />
Allows navigating<br />
up/down/left/right in the menus<br />
Selects functions<br />
displayed in the menu<br />
Launches Video on<br />
Demand service*<br />
������� ��� ��������� �����<br />
mode on TV<br />
Opens the Electronic<br />
Programme Guide<br />
Accesses to radio channels<br />
Advice: To modify the audio on a programme or on a<br />
�/<br />
channel, press the yellow / button. Check whether the<br />
symbol is displayed. If yes, select this item using the arrow buttons and select the preferred language using the<br />
�/� arrow buttons.<br />
�<br />
���� ���� ������� ���� �� ��������� ����� �� ���� ������� ����<br />
Toggles between power<br />
and stand-by mode<br />
Opens the menu<br />
�������� �� ������������� �������<br />
Accesses to channel lists<br />
Leaves all menus<br />
In menus, confirms a<br />
choice/selection.<br />
In the normal viewing mode,<br />
opens the TV banner<br />
Accesses to additional<br />
information on the selected<br />
programme<br />
To enters directly a number<br />
e.g a PIN number,<br />
a channel number<br />
�������� �� �������� �����������<br />
For PVR use only<br />
Accesses to interactive services**<br />
9<br />
EN
Quick installation<br />
For a quick installation, please follow the 4 steps below:<br />
� ����� ������� ���� ������� ��� �� ��������� �� ����� �� ���� ��<br />
� ����� ��� key on your remote to switch on your set.<br />
After a few seconds, a list of menu languages displays on screen.<br />
1. Language menu<br />
� ������ ���� ��������� �������� �������� ������� �������� �������� ����� ���<br />
press OK.<br />
A welcome message is displayed on screen.<br />
� ����� ��� OK button to switch to the time zone setting menu.<br />
10<br />
�<br />
�/ buttons and<br />
2. Time zone setting menu<br />
� ��� ��������� ���� ���� �������� ����� OK.<br />
� ����� ������ ���� ��������� ���� ���� ������� ����� ��� ����� ������� ��� ����� OK.<br />
For Switzerland please select Berlin, Bern, Rome.<br />
3. Eco-standby menu<br />
� �� ���� ������ �� ������� ����� ������ Yes and press OK.<br />
� ����� ������ No and press OK.<br />
The installation mode menu is displayed on screen.<br />
Note: Thomson contributes to global energy saving of consumer equipments by offering the<br />
Eco standby mode on its HD set-top boxes. This feature allows reducing the energy consumption of the set-top<br />
box to less than 3 Watts in standby mode. When this feature is activated, network data or software upgrade will<br />
not be available on the set-top box but recorder timers will remain active to allow launching recordings via the<br />
Scart output.<br />
4. Installation menu<br />
The TV and radio channel search starts automatically.<br />
� �� ����� � Network installation, press OK and enter<br />
�������� ��� ������������ �������������� ��������<br />
number, frequency, symbol rate, modulation). Press OK to<br />
validate the installation parameter.<br />
To find out which parameter you have to enter, please<br />
refer to information given by your network operator.<br />
� ����� ������ Automatic scan using the �/� arrow<br />
buttons and press OK.<br />
Please note that this parameter should only be used by<br />
����������� �����<br />
Advice: a progress bar keeps you up-to-date on how far the channel search is. The channel search<br />
can take several minutes.
5. Channel search<br />
� ���� ����� ��� ������� ���� �� ������� ��� ����� OK.<br />
��� ��� ��� �������� �� �� ������� ��������<br />
�� ����� ��� ����� ���� ��������������� �� ���� ������� ��� ��������� ��������� ����� ��� ����� ������<br />
������ ���� ��� ���� ������� �� Everyday use�<br />
Everyday use<br />
Turning on/off<br />
Press the key on your remote to switch on or off your set.<br />
Note: If you are not going to use the set for a long period of time you should unplug it to save energy.<br />
Changing channels<br />
Press the P+/- ��� �� ������ �� ��� ������������� ������� �� ����� ��� ������� ������ ����� ��� �����<br />
keys on your remote and press the OK button.<br />
Navigation clues<br />
Always read the help bar displayed at the bottom of your screen.<br />
� �� ��� ����� ���� ������ ��� ������� ����� ������������ �� ������������ �� ������� ���������������<br />
and on active remote control keys are given on screen.<br />
� �� ������� ��� ������� ������ ����� ��� LIST key.<br />
� �� ���� ��������� ������� ���� �� ���������� ����� ������� �� ��� ���������� ����� ��� /<br />
yellow key.<br />
� �� ������ ��� ���������� ��������� ������ ����� ��� GUIDE key.<br />
� �� ������ �� ��� ��������� ����� ��� VOD key.<br />
� �� ������ ������� ����� ��� �� ����� ����� ��� RADIO key.<br />
� �� ������ �� ��������� ����� ��� TXT key in TV mode.<br />
� �� ������� ���� �������� ���� ���� �������� ����������� ����� �� ���������� ��� ������� ������<br />
time-out), please follow MAIN MENU/4 Setup, enter your Pin code and select Connection<br />
��� ��� �� ���������� ��� ������������� ������ ������ ����� �� Option ��� ��� ������ �����<br />
out or user interface skin).<br />
�� ������� ���� ��� ������ �� ���������� ������������ ���� ���� ���� ������� ��� �� �����������<br />
through download “over the air”.<br />
Using the menus<br />
1. Press the MENU<br />
�/<br />
key on your remote to open the menu main page.<br />
2. Use the keys to navigate in a list and the �/� keys to set a selection.<br />
3. Press OK to open the sub-menu.<br />
4. Press the BACK button to come back to the previous screen or EXIT to return to the viewing<br />
mode.<br />
�<br />
11<br />
EN
Using the Zapping/Info Banner<br />
The zapping banner ����� ����� ����������� ����� ������� ��� ���� ��������������� ��� ������������<br />
number, channel name, programme title and elapsed time, start and end time of the programme etc.<br />
The information banner �������� �������� ����������� ���������� ��������� �������� ���������<br />
genres etc..) and a synopsis of the selected programme.<br />
To display the zapping banner:<br />
1. Press the / yellow key once.<br />
Advice: a basic zapping banner is automatically displayed when you tune to another channel. To change the display<br />
duration of the zapping banner goes in MAIN MENU/4.Setup/Options and select Banner time out.<br />
To display the information banner:<br />
2. Press the / yellow key again.<br />
Detailed information is given on the current programme.<br />
�� ������� ����������� �� ��� ���� ��������� �� ��� �������� �������� ����� ���<br />
To escape the zapping/information banner:<br />
3. Press the EXIT key once.<br />
Using the Mini-Guide<br />
Thanks to the Mini-Guide you can view what’s on other channels without zapping.<br />
To use the mini-guide:<br />
1. Press the / yellow key once.<br />
�/ Check that the highlight is set on Mini-Guide. Else, select it using the buttons.<br />
2. Press the �/� arrow keys for a virtual zapping in the current list of channels.<br />
����������� �� ����� �� ��� ������� ��� ���� ��������� �� ��� �������� ��������<br />
12<br />
�<br />
�<br />
arrow key.<br />
Advice: to switch to a current programme on another channel, select the channel and press the OK button.
Menus<br />
Charts of the menu<br />
���� ����<br />
� ��������<br />
� �� ��������<br />
� �� �������<br />
� �� ���������<br />
� �����<br />
� �����������<br />
��������<br />
���� �� ��������<br />
������� ���������<br />
�� ��������<br />
������� �����<br />
�� �������<br />
������� ������<br />
������ ������<br />
������ ��� �������<br />
������ ������<br />
�����<br />
���������<br />
�������<br />
�������� �������<br />
����������<br />
������������<br />
���� ���������<br />
�����������<br />
�������<br />
������ �������<br />
������ ������<br />
���� �����������<br />
���� �� ��������<br />
��� ��<br />
��� ��� ��<br />
��� �<br />
������� ���������<br />
������ � ��� ����<br />
��� �� ��������<br />
��� ����� ��������<br />
��� �<br />
�� ���������<br />
����� ������<br />
����� ���<br />
����� ����<br />
�������� ����� ����<br />
������ ������<br />
������������ ������<br />
����� ������<br />
�������<br />
������ �� ���<br />
�������� ������<br />
����� ����� ��<br />
For detailed information about channels, electronic programme guide, timers and some setup parameters<br />
consult the following pages.<br />
13<br />
EN
Channels<br />
List of channels<br />
This menu gives access to all lists of channels: the All TV list and your favourite lists. You can view list<br />
content and modify the currently viewed list.<br />
Access to the list of channels<br />
1. Press the MENU key.<br />
2. Using the �<br />
and keys, select 1 Channels and press OK.<br />
3. Using the �<br />
and keys, select list of channels then press OK.<br />
14<br />
�<br />
�<br />
Advice: For a direct access to the list of channels, press the LIST key on your remote.<br />
View list content<br />
To view the content of a list, highlight it using the �<br />
and<br />
�<br />
keys and press the OK key.<br />
To navigate through the channel list, use the �<br />
and keys.<br />
To switch to a channel you want to watch, highlight the channel using the �<br />
and<br />
the OK key. The list you were using at last will be set as current.<br />
To turn pages in the channel list, use the � and � keys.<br />
�<br />
Exit the list of channels<br />
�� ���� ��� �������� ���� �� ��������� ����� ��� EXIT key.<br />
Channel organizer<br />
�<br />
keys and press<br />
The channel organizer allows creating favourite lists and modifying the various lists: rename, reorder or<br />
������ � ����� ���������� ��������� ����������� �������� ����<br />
Access to the channel organizer<br />
1. Press the MENU key.<br />
2. Using the �<br />
and keys, select 1 Channels and press OK.<br />
3. Using the �<br />
and keys, select channel organizer, enter your pin and press OK.<br />
�<br />
�<br />
Create a new list<br />
To create a new favourite list, highlight Create a new list using the �<br />
and keys and press OK.<br />
Step 1. Use the arrow buttons to modify the generic list name and press OK to confirm.<br />
Step 2. Select the type of list you want to create: TV or radio channels.<br />
���� �� ������ ��� �������� ������� ���� ���� ����� ��� ���� �� ������ ��� ��� ����<br />
Step 4. Remove channels from / add channels to the new list using the OK button on the selected<br />
channel.<br />
Press BACK or EXIT to validate the new list.<br />
Modify/delete a list<br />
To modify or delete a list, highlight it using the �<br />
and<br />
different options displays on screen.<br />
�<br />
�<br />
keys and press OK. A menu with the<br />
1. To change the list name, select the first item and press OK. Then use the arrow buttons to<br />
change the preset name. Press the BACK key to save your settings.
2. To modify the list, select the second item and press OK. Then use the OK key to add or<br />
remove the selected channel from the favourite list. Press the BACK key to save your settings.<br />
3. To lock/unlock channels, select the third item and press OK. Then use the OK key the lock or<br />
unlock the selected channel from the favourite list. Press the BACK key to save your settings.<br />
4. To reorder the list, select the fourth item and press OK. Select the channel you want to reorder<br />
in the list using the �<br />
and keys. Then press OK.<br />
Use the �<br />
and keys to move the channel at your preferred position in the list.<br />
Press OK to confirm the position. The list has been modified automatically.<br />
Press the BACK key to save your settings.<br />
�<br />
�<br />
5. To delete the list, select the last item on the list and press OK. To confirm the list removal,<br />
highlight “Yes, confirm deletion” using the �<br />
key and press OK twice.<br />
To cancel the removal, press OK.<br />
Press the BACK key to save your settings.<br />
Exit the channel organizer<br />
�� ���� ��� ������� ���������� ����� ��� EXIT key.<br />
Channel list update<br />
������ ��� ���� ������������� ��� ������� ��� �������� ��� �������� �� ��� �������� �� ����� ��� ��������<br />
��� ���� ��������� �� ��� �������� ���������� �� �������� ��� ������� ��� ���� ������������� ������<br />
the All Channels list.<br />
15<br />
EN
My services<br />
Programme guide<br />
��� ���������� ��������� ����� ����� ������ ��� �� ���� ������ �� ��� ������� ��� ��� ���������<br />
watching up to 7 days in advance. Hence, the EPG integrates a searching tool: knowing what movies will<br />
�� �� �� ���� ������� �� ��� �������� �� � ������� �����<br />
Access to the list of channels<br />
1. Press the MENU key.<br />
2. Using the �<br />
and keys, select 2 My Services and press OK.<br />
3. Using the �<br />
and keys, select Program guide then press OK.<br />
16<br />
�<br />
�<br />
Advice: Press the GUIDE button for a short access to the programme guide.<br />
To use the guide<br />
To navigate through time slots and days, use the �<br />
and keys.<br />
To view the programme guide of another channel, use the P+/- keys.<br />
To switch to a current programme broadcasted on another channel, highlight the programme using<br />
the arrow keys, press OK and select View this program.<br />
To set a timer to a programme that will be broadcasted later on, highlight the programme using the<br />
arrow keys and press OK. You can then choose to set a reminder, set everyday reminder or add a<br />
���� �� ��� �������� ��������� ���� ���� ���� ���<br />
To get more information about a programme, highlight it and press the / yellow key.<br />
To turn pages, use the � and � keys.<br />
To use the searching tool<br />
Press the GUIDE once while you are in the programme guide.<br />
The searching tool menu displays.<br />
You can browse through the programme guide by selecting a programme name, a date, a time<br />
period, a theme or/and a viewing type.<br />
To select your search criteria, use the arrow buttons and press OK to start the search.<br />
To escape the guide<br />
�� ���� ��� ���� ����� ��� EXIT key.<br />
�
Timers<br />
In the timer menu, you can set a new timer, select an option or view the list of timer set.<br />
Three types of timers can be set<br />
� Reminder: the reminder is not focused on a programme. The user can input any message he/she<br />
needs to be reminded while watching TV.<br />
� Memo: ��� ���� ������ ������ �� ��� ��� ��� ��� �� ��� ��� ��� ��� �� �� ������� �����<br />
� <strong>Recorder</strong>: the recorder timer allows launching the video recording via the scart output.<br />
��� ��������� ��� ������ �� ��� ��� ��� ��� �� �� ����� �� ���� ���� ��� ����� �������� ��� �����mation<br />
question will keep staying on screen for 1 minute. After that time, it will zap automatically to<br />
the specified service.<br />
Important: Do not forget to save your new timer!<br />
Access to timers<br />
1. Press the MENU key.<br />
2. Using the �<br />
and keys, select 3 Timers, enter your pin and press OK.<br />
�<br />
Following options are available<br />
� ����� ������� To enable/disable timer and to select the alarm time before reminder occurs.<br />
� ����� ���� to create reminder, memo and recorder manually.<br />
� ����� ����� to review and delete reminders which were created before.<br />
� ������� ����� ����� to suppress the conflicting timers which overlap with each other.<br />
Exit the timer menu<br />
�� ���� ��� �������� �������� ���� ����� ��� EXIT key.<br />
17<br />
EN
Setup<br />
Languages<br />
��� ����� ����� ��� �������� ��������� ��� �� ��� �� �������� ������� ������ ��� ������� ��� ���<br />
������������� ����� �������<br />
Access to language settings<br />
1. Press the MENU key.<br />
2. Using the �<br />
and keys, select 4 Setup, enter your pin and press OK.<br />
18<br />
�<br />
Modify a language<br />
1. Using the �<br />
and keys, select the menu, audio or subtitle language.<br />
2. Press the � and � key to confirm a language.<br />
�<br />
Exit the language settings menu<br />
�� ���� ��� �������� �������� ���� ����� ��� EXIT key.<br />
Options<br />
The purpose of “options” screen is to set:<br />
� banner time out: 3 to 10 seconds or always displayed<br />
� time zone setting<br />
� skin: blue, green or red<br />
� volume*: common or independent volume<br />
� set on screen display transparency<br />
� eco standby mode: activate / deactivate<br />
� �� ��� ������ ������ ������� ��� ������� ��� ���� ������ ��� �� ��� ����� ������� ������� �� ��� ���� ������<br />
If you select independent volume, you will have the possibility to set the volume level of each channel according to<br />
���� ��������������� ������� ��� �������� ��� ���� ������ ������� ���� �� ��� �������� ��������<br />
Access to the option menu<br />
1. Press the MENU key.<br />
2. Using the �<br />
and keys, select 4 Setup and enter your pin.<br />
3. Using the �<br />
and keys, select Options and press OK.<br />
�<br />
�<br />
Modify an option<br />
1. Using the �<br />
and keys, select the item you want to modify.<br />
2. Press the � and � key to make your selection.<br />
�<br />
Exit the option menu<br />
�� ���� ��� �������� �������� ���� ����� ��� EXIT key.
Parental control<br />
The <strong>Decoder</strong> sub-menu allows changing the PIN code, lock/unlock the decoder<br />
and to activate/de-activate the parental control by setting a rating limit.<br />
By default the parental control is activated at the limit of 18 years old.<br />
Access to parental control<br />
1. Press the MENU key.<br />
2. Using the �<br />
and keys, select 4 Setup then press OK.<br />
A PIN code protects the access. Enter your 4-digit PIN code.<br />
3. Using the �<br />
and keys, select Parental control then press OK.<br />
�<br />
�<br />
Change decoder PIN code<br />
������� �������� �� ��� ������� ��� ����� ������� ����� ������� ��� ����� �� � �������� �������������<br />
������ ��������� ������� ������ ��� ���� �� 0000. It is highly recommended that you change this<br />
number.<br />
Important: Keep your PIN secret, but don’t lose it!<br />
1. Select Change PIN code and press OK.<br />
2. Enter the new PIN using the numerical buttons.<br />
3. Finally, confirm the new PIN by entering it again.<br />
Note: To change the CA PIN, see page 22.<br />
Lock decoder<br />
1. Select <strong>Decoder</strong> lock<br />
2. Using the � and � arrow buttons, lock/unlock channels.<br />
Rating limit<br />
1. Select rating limit<br />
2. Using the � and � arrow buttons, select the preferred age limit for programme viewing.<br />
Exit the parental control menu<br />
�� ���� ��� �������� ������� ���� ����� ��� EXIT key.<br />
Connection<br />
The connection menu allows mainly settings TV formats, audio and video formats and HD resolutions.<br />
Access to the connection menu<br />
1. Press the MENU key.<br />
2. Using the �<br />
and keys, select 4 Setup then press OK.<br />
3. Using the �<br />
and keys, select Connection then press OK.<br />
�<br />
�<br />
19<br />
EN
Modify the connection settings<br />
Use the arrow keys to modify the connection settings. Below are the possible values for each item.<br />
20<br />
TV format: 4/3, 16/9<br />
����� ����������� ��� ���� ��� � ����� ������ ���� ���� ������<br />
��� ����� ������ ���� ���� ����� ���� ����� ���������<br />
TV scart mode: CVBS + RGB* , CVBS, SVHS<br />
VCR Scart mode: CVBS, SVHS<br />
Video format: PAL, SECAM<br />
Audio format: audio PCM, digital audio<br />
HDMI device information**: connected, not connected<br />
YPrPb: disabled, enabled<br />
HD resolution***: automatic, manual<br />
�� ������� ��������� ���������� ����������<br />
Exit the connection menu<br />
�� ���� ���� ���� ����� ��� EXIT key.<br />
* CVBS + RGB is the recommended setting for the best quality picture on TV Scart input.<br />
** This parameter indicates if the HDMI connector is used.<br />
��� ����� � �� ����� ��� ��� �� ����������� ������ ��� �������� �������� �� ��� ������� �� �� �� ����� �������<br />
������ ��� ������� ��������� ��� �� ����������� �� ��� ������� �� � ���� �� ������ ������ ����� �� �� ��� ���<br />
�������� ��������� �� �����������<br />
Screen fit<br />
Original picture in 16/9 format<br />
Display of 16/9 picture on a 4/3 TV set :<br />
����������<br />
Pan & Scan
Original picture in 4/3 format<br />
Display of 4/3 picture on a 16/9 TV set :<br />
����������<br />
16/9 zoom<br />
���� ��� ������ �� ��� ������� ��� �����<br />
Stretched<br />
21<br />
EN
Installation<br />
This menu is intended to enter manually the installation parameters or start a new channel search.<br />
Two installation types are available:<br />
� scanning: the parameter can be set automatically. Press OK to start the scanning.<br />
� network installation: this installation allows you to enter manually the frequency or modulation type.<br />
���� ���� ������ ���� �� ���� �� ����������� ������<br />
Access to the installation menu<br />
1. Press the MENU key.<br />
2. Using the �<br />
and keys, select 4 Setup, enter your pin and press OK.<br />
3. Using the �<br />
and keys, select Installation then press OK.<br />
Access rights<br />
The access rights sub-menu allows getting information on your actual subscription, available tokens and<br />
changing the maturity rating.<br />
� The Subscription status menu informs on rights period on each general channel.<br />
� The Event status ��� menu lists all PPV purchased programmes.<br />
� The Tokens status ��� menu informs on tokens of each available purse, including their debit and<br />
credit information to each programme that need to use token to be consumed.<br />
��� ���� ������� �� ������ �� ��� ��� ���� �������� ���� ���� ��� ��� ��� �� ��������� �� ���� ��������<br />
Change CA PIN<br />
This sub-menu allows changing the smartcard PIN code.<br />
Important: The CA PIN code or smartcard code is different from the decoder PIN. The default number is<br />
1234. It is highly recommended that you change this number.<br />
Access to Change CA PIN<br />
1. Press the MENU key.<br />
2. Using the �<br />
and keys, select 5 Information then press OK.<br />
3. Using the �<br />
and keys, select Access rights then press OK.<br />
4. Using the �<br />
and keys, select Change CA PIN then press OK.<br />
5. Enter the old PIN using the numerical buttons.<br />
6. Enter the new PIN using the numerical buttons.<br />
7. Finally, confirm the new PIN by entering it again.<br />
Note: To Change the decoder PIN, see page19.<br />
22<br />
�<br />
�<br />
Modify a parameter<br />
1. Using the �<br />
and keys, select the parameter you want to modify.<br />
2. Press the � and � key to select your preference or use the numerical buttons on the remote<br />
control to enter the new parameter.<br />
�<br />
Exit the installation menu<br />
�� ���� ��� �������� �������� ���� ����� ��� EXIT key.<br />
�<br />
�<br />
�<br />
Exit the CA PIN menu<br />
�� ���� ��� �� ��� ���� ����� ��� EXIT key.
Maturity rating<br />
This sub-menu allows viewing and changing the current maturity rating. Four categories of maturity<br />
rating are defined:<br />
� G for general audience<br />
� PG for parental guidance<br />
� A for over 18<br />
� X for erotic<br />
G has the lowest maturity rating.<br />
Access to Maturity rating<br />
1. Press the MENU key.<br />
2. Using the �<br />
and keys, select 5 Information then press OK.<br />
3. Using the �<br />
and keys, select Access rights then press OK.<br />
4. Using the �<br />
and keys, select Maturity rating then press OK.<br />
You can view the current maturity rating applied to your decoder.<br />
�<br />
�<br />
�<br />
Modify the Maturity rating<br />
1. Select MAIN MENU/5 Information/Access rights/Maturity rating then press OK.<br />
2. Using the � and � key, select your preferred maturating rating.<br />
3. Enter your CA PIN to validate the new setting.<br />
Exit the maturity rating menu<br />
�� ���� ��� �������� ������ ���� ����� ��� EXIT key.<br />
23<br />
EN
Main features<br />
8000 Series<br />
� ������ ������� ���� �� ��� ���� �� ���� �� ����� �� �� �� ��������<br />
Connections<br />
� ���� ����������<br />
� ��� ����� ����� ��������<br />
� ���������� ������� ������� ����� �������<br />
� � ��������� ����� ���������� ��� ��� ����� �������<br />
Software<br />
� ��������� �� �����������<br />
� ������������ ���� �������� �� ������ ����� ��������� ������� ������� ��� �������� ������� ���<br />
������ �� ������ ������� ������<br />
� ������� ��������� ���� �� �� � ��������� ������<br />
� ���������� ��������� ����� ���� ��� � ���� ��� �������� ��� ������ ������<br />
� ����������� ������ ���������� �������� �� ��� ������� �����������<br />
� ��� ����������� �������� ���������� ��� ���� ���������<br />
� � ��������� ����� ��� � ��������� ��������� ��������� ����������<br />
� �������� ������� �� ������� ��� �����<br />
� ������ ����������<br />
� �������� ������� ���� ��� ����<br />
Accessories<br />
� ������ ������� ���� ����������<br />
� ����� �����<br />
� ����� ������<br />
� ���� �������<br />
Manufactured under license from Dolby Laboratories.<br />
"Dolby" and the double-D symbol are trademarks of Dolby Laboratories.<br />
24<br />
This symbol means that your inoperative electronic appliance must be collected separately and not<br />
mixed with the household waste. The European Union has implemented a specific collection and<br />
recycling system for which manufacturers’ are responsible.<br />
This appliance has been designed and manufactured with high quality materials and components that can be<br />
recycled and reused. Electrical and electronic appliances are liable to contain parts that are necessary in order for<br />
the system to work properly but which can become a health and environmental hazard if they are not handled<br />
or disposed of in the proper way. Consequently, please do not throw out your inoperative appliance with the<br />
household waste.<br />
If you are the owner of the appliance, you must deposit it at the appropriate local collection point or leave it with<br />
the vendor when buying a new appliance.<br />
� If you are a professional user, please follow your supplier’s instructions.<br />
� If the appliance is rented to you or left in your care, please contact your service provider.<br />
Help us protect the environment in which we live!
Trouble shooting<br />
��� ����� ������� �� ����� ������� �� ������ �� � ������ �� ���� ������� ���� �� ���� ���� ���� ����-<br />
����� ���������� ����� ��� ��� ����� ��� ������ ������ ��� ���� � ��� ������� ���� ���� �� �� ������<br />
Important: Never open your set yourself.<br />
Problem Possible cause Suggested solution<br />
Your set-top box<br />
doesn't seem to be<br />
working, and there<br />
are no lights on the<br />
front panel.<br />
Your set-top box<br />
doesn't seem to be<br />
working, and the<br />
front-panel standby<br />
light is red.<br />
Your set-top box<br />
doesn't seem to be<br />
working, and the<br />
front-panel display is<br />
green.<br />
You can see on-screen<br />
interference.<br />
Your remote control<br />
isn't working.<br />
You've forgotten<br />
your PIN.<br />
The menus and banners<br />
are in a language you<br />
don't understand.<br />
���� ������� ��� �� ���<br />
receiving power.<br />
���� ������� ��� ��<br />
switched off.<br />
���� ������� ��� �� ��� ���rectly<br />
connected to your<br />
other equipment, or your<br />
other equipment is not<br />
correctly set up.<br />
Your TV is not switched to<br />
show digital cable channels.<br />
Your TV is not<br />
correctly tuned.<br />
The batteries are flat or<br />
inserted the wrong way round.<br />
Something is between the<br />
remote control and your<br />
������� ����<br />
The universal remote control<br />
is not set in the correct mode.<br />
The menu language has been<br />
changed to a language you<br />
����� �����������<br />
Make sure that the mains plug is properly<br />
plugged in and that the mains supply is switched<br />
on. Check that the mains wall socket has power<br />
���� �������� �� � ������<br />
Press on the front panel or on your remote<br />
control.<br />
Check that all the connections are properly made<br />
���� ���� ���<br />
Check that your TV is plugged into the mains and<br />
that it is switched on.<br />
�� ���� ������� ��� �� ��������� �� ���� �� ��� �<br />
HDMI lead, try selecting the appropriate AV<br />
channel on your TV.<br />
Check that your TV is correctly tuned to your<br />
������� ��� ���� ���� ��� ��� ������� ������������<br />
refer to your TV user manual.<br />
Check the batteries and replace them if<br />
necessary.<br />
Make sure you point your remote control<br />
�������� �� ���� ������� ��� ��� ���� ������� ��<br />
������� �� ��� ���� ������� ������� �� �������<br />
����� �� ���� ������� ����� ����� ����� ������<br />
flash each time you press a remote control button.<br />
If not try selecting your TV “AV input”.<br />
Press the DECODER key to control the<br />
decoder.<br />
Call your service provider.<br />
You can change the menu language as follows:<br />
1. Press MENU.<br />
2. Press three time the arrow key starting<br />
from the top item.<br />
3. Press OK and enter your pin code.<br />
4. Press OK.<br />
5. Press the � or � arrow until you can see<br />
your preferred language.<br />
6. Press the BACK or EXIT button to save the<br />
new language.<br />
If this fails to solve the problem or the following measures do not bring satisfactory results, please<br />
consult your service provider.<br />
�<br />
25<br />
EN
Glossary<br />
DVI A <strong>Digital</strong> Video Interface provides high-bandwidth digital connection between a video<br />
source and a TV. Audio is carried separately.<br />
EPG An Electronic Programme Guide ����� ����������� �� ������� ��� ���� �� �����������<br />
��� ��� �� ���� �� ���� �� ���������� �� ��� ���� ���� ��� �� � ���� ��������� �� ���<br />
channel), to programme a record by selection an event from the guide or to search easily<br />
��� �� ����������� ��� ��� ������ �������� �� ������� ������� ����� ��� �� ������� �����<br />
�������� ������<br />
HDMI A High Definition Multimedia interface is like a high definition scart cable,<br />
a high-bandwidth digital connection for both video and audio. HDMI ensures the best video<br />
������ �� ���� ���� ��� ������ ��� ������� �� ��� ������� ����� ������� ����� �� ���� ���� ��<br />
sending uncompressed video and multi-channel audio to the TV through one single cable.<br />
HDCP High bandwidth <strong>Digital</strong> Content Protection ������ �� � ��������� ���������� ������<br />
that is incorporated into HD displays and receivers. It prevents unauthorised duplication and<br />
distribution of copyrighted content.<br />
HD HD ����� ���������� �������� � ������ ������� ������� ���� � �������� ���������� ������� ����<br />
720p to 1080p.<br />
LCD Liquid Crystal Displays are one form of fl at-panel TVs. They are made up of two<br />
transparent panels with a liquid crystal solution sandwiched between the two. Electric<br />
currents are passed through the liquid – this causes the crystals to line up so that light<br />
cannot pass through them. Each of the crystals acts as a shutter, either allowing light to pass<br />
through or blocking out the light. The pattern of transparent and dark crystals forms the<br />
image.<br />
Pixels ������ �� ��� ������������ ��� �������� ��������� ������ ��� ��� �������� ���� �� ���� �� � �����<br />
��������� ���� ������ ����� ��� �� �� ������ ��� ������� ��� �����������<br />
Plasma Plasma display is created by thousands of tiny tubes fi lled by ionized gas in a plasma state.<br />
SPDIF The name stands for Sony/Philips <strong>Digital</strong> Interface Format, the two companies being<br />
the primary designers of the S/PDIF format.<br />
720p 720p means the vertical resolution of the TV picture is 720 lines. P refers to Progressive<br />
scanning.<br />
1080i 1080i means the vertical resolution of the picture is 1080 lines. It refers to Interlaced<br />
scanning.<br />
26
Remote control programming<br />
���� ������� ��� �� ��������� ���� � ��������� ������ ������� ����� ��� ������� ���� ���� ������� ���<br />
and your TV set.<br />
�� ��� ��� ������� ��� �� ����� ����������� �� ��������� ��� ������ �� ����� �� ������� ��� �������<br />
������ ������� ���� �� ��� ���� ��� ��������� ������� ������ ��� ����� ��������� ������<br />
Before starting<br />
1. Turn your TV set on.<br />
2. ���� �� ��� ��� �� ���� ������ �� ��� ��� ����� ������� ������������� �� ���� �� �������������<br />
Important: If you can not find your TV manufacturer in the list, go directly to the automatic search<br />
programming.<br />
Direct entry programming<br />
TV manufacturers may have several codes for the same brand. If you do not know which one<br />
corresponds to your TV set, repeat the three following steps by trying all TV code of the manufacturer<br />
until you found the right one.<br />
1. Press the TV button and hold the button until you finish typing your 4 digit code.<br />
2. Press each number button one by one.<br />
� �� � ����� �� ������ ���� ��� ��� ������� ���� �������� ������������<br />
� �� � ����� �� �������� ��� ��� ������ � ������ ����� ��� ��� ������ ������ ����� ������������<br />
Press the button to turn on your TV set and reenter the 4 digit codes.<br />
After entering the correct code, the LED turns on.<br />
3. Release the TV button.<br />
Note: If you have not been successful in using the direct entry programming, try the second method: the<br />
automatic search.<br />
Automatic search<br />
If you can not find your TV manufacturer in the TV code, use the automatic search method.<br />
1. Press and hold the TV button on the universal remote.<br />
2. Press and hold the button until the green light turns on, then release the TV and buttons.<br />
3. Press and release PLAY, then wait 5 sec. Repeat until your device turns OFF.<br />
4. Press and release REW, then wait 2 sec. Repeat until your device turns back ON.*<br />
5. �� ���� ��� ���� ��� ��� ������ ����� ��� ���� STOP until the green light turns off.<br />
6. �� ���� ������� ������ ��� ���� ������� ����� EXIT. The green light will turn off.<br />
7. If there are no entries code search will timeout after five minutes and default to last used table.<br />
The green light will turn off.<br />
*If your TV set can toggle between ON and OFF mode with a ON / STANDBY key then press PLAY with<br />
the universal remote and when your device turns off, press REW until the device comes back on.<br />
If your product cannot toggle between ON and OFF mode with a single key, then press PLAY. When your device<br />
turns off, turn your device back on with the button on the front of the TV set, then press REW on the universal<br />
remote until the device comes back OFF.<br />
27<br />
EN
Reset to factory settings<br />
This procedure will set the remote back to the default settings and erase all programming.<br />
28<br />
1. Press and hold the EXIT button until you finish typing the digit code.<br />
2. Enter the 3 digit code: 000<br />
� �� � ����� �� �������� ��� ��� ���� ���� � ����� ��� ���� �� ����<br />
After pressing the third 0, the LED will come on for 1 to 2 seconds.<br />
Your remote is now back to factory settings.
Recording features<br />
���� ������� �������� � �������� ��� ��������� ����� �������������� �� � ������� �������� ���� ���� �<br />
���� ���� ����� ��������� ��� ��� �� �� ������ �� ���������� �� ��� ��� �� �������� ���� ����� ����<br />
like you do with a stand-alone DVD recorder.<br />
����� ���������� ����� ������ ������� ��� ��������� �� �� ���������� ����������� ������� ����� �� ������ ��<br />
find and manage your recordings.<br />
��� ��� ��� ��� ���� �������� �� ���� ��������� ���������� � ������ ������� ���� � ������ ���������� �<br />
recording, protecting a title or library from erasure, etc.).<br />
Your PVR's recording features let you<br />
� ������ � ��������� ����� �������� ������� ��������� �� �� �� ����������<br />
� ������ � ��������� ����� �������� � ����� �������� �� ��� ���� �����<br />
� ����� � ��������� �� � ����� ���� ���� �� �� ��������� �� ����� ��� ��������� ������� �����<br />
recording another programme.<br />
Immediate recording<br />
To record the programme being broadcast, press the REC button once on the remote control handset.<br />
When the menu comes up on the screen, confirm or modify the indicated time of recording. A red indicator<br />
light comes on on the front of your decoder to confirm recording has started. You can stop recording by<br />
pressing the STOP button.<br />
Offset recording (programming)<br />
�� �������� � ��������� ��� ����� ��� ��� ��� ��� ��� ���������� ���������� ����� ������ �� ��� ����� ���<br />
��� ��������� ��� ���� �� ��� ��� ������ ��� ��� ��� ��� ���������� ���� �Timer setting).<br />
Recording using the programmes guide (EPG)<br />
1. Press the EPG button to bring up the programmes guide for the<br />
selected channel.<br />
2. Select a programme for recording.<br />
3. Press EPG to bring up the options and follow the instructions on the<br />
screen.<br />
Scheduled recording<br />
Call up the menu and choose My Scheduler. Use the and keys to select an option.<br />
� Timer option lets you activate or deactivate a scheduled recording<br />
and set an alarm before the start of the programme.<br />
main menu<br />
1 My Channels<br />
� Timer set lets you manually set a programme time and create an<br />
2 My Services<br />
3 My Recordings<br />
alarm before the programme starts.<br />
4 My Scheduler<br />
5 My Set up<br />
� Timer list shows you a list of your scheduled recordings and lets<br />
6 Information<br />
you delete one or more of them. It also lets you remove alarms.<br />
� ������� ����� ���� allows you to delete any scheduled recordings<br />
that overlap each other.<br />
�<br />
�<br />
program guide M T W T F S S<br />
301 ARTE TODAY<br />
13:00 NEWS<br />
15:00 SPORT<br />
My Scheduler<br />
timer options<br />
timer set<br />
timer list<br />
conflict timer set<br />
29<br />
EN
Time shift (recording in a buffer memory)<br />
The Time Shift ������� ���� ��� ��� ��� ��������� ��� ��� �������� �� ����� ��� ������� �� ���<br />
���� �� ���� � ����� ���� ������� ������� ������ ��������� �� ��� ���� ��� ������������ �� ��������<br />
you can go back to the programme you were watching without having lost a single second of viewing<br />
time. Your decoder possesses a buffer memory for this purpose, capable of storing 2 hours of pictures<br />
and sound from the last channel watched.<br />
To put the current programme on hold, press the PAUSE button on the handset. The picture will<br />
freeze. To restart the programme where you left off, press the PLAY button. The programme will<br />
������� ������� ����� ��� ���� ���� ��� �������� ��� �������� ��� ����� ������� �� ����� ���� ����� �����<br />
broadcast in the current programme.<br />
��������� ��������<br />
In certain cases, your PVR will not be able to start recording immediately at the time you wish because<br />
doing so would conflict with another operation already in progress. In other instances, there could be<br />
inconsistency between two programmes. If such a problem arises you will receive a warning screen<br />
which will help you find a solution.<br />
Most often, these conflicts are caused by<br />
30<br />
� � ������� �� ������ ���� ��������� �� ������� �� ��������� ���� ��� ��� ������ �� ���� ���� ���<br />
programme at a time,<br />
� ����������� ����������� ��� ������� ���� � ������ ��������� ������ ������ ��� ���� ��� ��<br />
finished,<br />
� ��������� �� ��� ������ �� ������ �������� ������� ��� ���� ���� �� ����� ��� ���� ���� �� ������<br />
some titles to make room for new recordings,<br />
� ���� ��� ������ �������� �� ����� �������� ���� ���� � ��� ������� ��� �� �� ������
Library<br />
���������� ����� ������ ������� ��� ��������� �� �� ���������� ������� �� ���� �� ������ ��� ��� �� ���<br />
them.<br />
Accessing the titles library<br />
1. Bring up the main menu and choose PVR then Record Library.<br />
2. Select the title you want with the and keys.<br />
My library 14/07/08 21:45<br />
80 % disk space available<br />
Title date duration<br />
Title 1 10/05/08 01 h 52 mn<br />
Title 2 12/05/08 02 h 05 mn<br />
Title 3 01/06/08 00 h 32 mn<br />
Title 4 03/06/08 01 h 47 mn<br />
Title 5 06/06/08 01 h 36 mn<br />
Title 6 07/06/08 00 h 13 mn<br />
Title 7 08/06/08 00 h 28 mn<br />
Title 8 14/06/08 01 h 15 mn<br />
Title 9 24/06/08 02 h 25 mn<br />
Title 10 10/07/08 00 h 05 mn<br />
Title 11 14/07/08 00 h 38 mn<br />
���������<br />
�<br />
�<br />
1 By default: channel name, recording date, start time,<br />
2 : parental guidance activated (code required to play the title),<br />
: protection against accidental deletion activated,<br />
Library, available commands<br />
The buttons for making use of your recorded titles are described in detail below.<br />
Volume control<br />
Return<br />
� Time and date.<br />
� Spare hard disk capacity.<br />
� ����� ������� ������ � ����������� ������� ����� ����<br />
full-screen playback from a selected image, press the<br />
PLAY button).<br />
� List of titles 1 �������� �� ��� ������� ������ ����� �����<br />
status 2 ).<br />
Mute sound<br />
����<br />
Navigation<br />
and confirmation button<br />
Play, Forward / Rapid return / Stop,<br />
Freeze frame<br />
31<br />
EN
Customising titles<br />
When recording is finished the following operations are available to you:<br />
� ������� � ����� ������� ��������.<br />
� ������ �� ���� ��� ����������<br />
� ������ ��� �������<br />
� ������ � ������<br />
Protecting a title<br />
To protect a recording, select Protect Record then press OK to confirm.<br />
Deleting a title<br />
To delete a title, select Delete Record then press OK to confirm.<br />
Delete all titles<br />
To delete every title, select Delete all Records then press OK to confirm.<br />
Renaming a title<br />
To change the name of a recording, select Rename Record in the edition menu then press OK to<br />
confirm. Use the numeric keys on the handset to compose a title of your choice, as you would do on a<br />
mobile phone.<br />
32<br />
<strong>DCI82BBN</strong> / RST - EPHEME / AVRIL 2008
TV-Codes / Codes des téléviseurs / Codici TV / TV codes<br />
DIGITAL TV<br />
Sony 1420<br />
LCD Projection TV<br />
Sharp 1461<br />
Sony 1418<br />
Toshiba 1462<br />
LCD TV<br />
Bush 1456<br />
Goodmans 1451<br />
JVC 1457<br />
LG 1437,1438,1439,1452,1455<br />
Panasonic 1354,1440<br />
Philips 1450<br />
Samsung 1441,1442,1443,1458, 1459,<br />
1460<br />
Sharp 1444,1445,1446,1447,1448,<br />
1449<br />
Sony 1420<br />
Toshiba 1436<br />
Viewsonic 1453,1454<br />
LCD TV/Radio Tuner Combo<br />
Philips 1450<br />
PLASMA TV<br />
Panasonic 1354<br />
Philips 1370<br />
Samsung 1460<br />
Toshiba 1436<br />
PLASMA TV Monitor<br />
Daewoo 1317<br />
Hitachi 1463<br />
JVC 1465<br />
LG 1439,1464<br />
Philips 1370,1466<br />
Thomson 1467,1468<br />
Projection TV<br />
Hitachi 1469<br />
Panasonic 1355,1475<br />
Pioneer 1470,1471<br />
Sony 1420 TV<br />
A.R. Systems 1197,1240<br />
Acme 1003,1019<br />
Acura 1009,1062,1191<br />
ADA 1008<br />
ADC 1002,1004<br />
Admiral 1001,1002,1017,1018,1044,<br />
1093,1205,1247,1516,1583<br />
Adyson 1003,1183,1184,1218,1219<br />
Agashi 1183,1184,1505,1583<br />
Agazi 1002<br />
AGB 1106,1189<br />
Aiko 1003,1004,1009,1183,1184,<br />
1191,1195,1197,1203,1218,<br />
1219,1537<br />
Aim 1197<br />
Aiwa 1074,1162,1292,1293,1476<br />
Akai 1004,1006,1008,1009,1010,<br />
1042,1051,1057,1058,1059,<br />
1073,1116,1123,1142,1149,<br />
1183,1184,1189,1191,1195,<br />
1197,1203,1219,1220,1251,<br />
1257,1263,1512,1537,1558,<br />
1583<br />
Akiba 1010,1197,1220,1231,1248,<br />
1600<br />
Akito 1021<br />
Akura 1002,1010,1060,1191,1197,<br />
1220,1231<br />
Alaron 1183<br />
Alba 1003,1009,1010,1023,1024,<br />
1044,1052,1057,1070,1149,<br />
1183,1188,1191,1196,1197,<br />
1218,1220,1227,1242,1247,<br />
1266,1294,1295,1296,1297,<br />
1556<br />
Albiral 1032,1033,1548<br />
Alcyon 1204<br />
Alkos 1144<br />
Allorgan 1022,1137,1184,1219,1232<br />
Allstar 1042,1197<br />
Amplivision 1003,1184,1188,1219,1245<br />
Amstrad 1002,1009,1010,1012,1026,<br />
1057,1058,1060,1062,1093,<br />
1106,1189,1191,1197,1212,<br />
1220,1241,1509,1511,1583<br />
Anam 1009,1055,1094<br />
Anglo 1009,1191<br />
Anitech 1002,1009,1037,1094,1191,<br />
1197,1204,1583<br />
Ansonic 1009,1013,1187,1188,1191,<br />
1194,1197,1207,1227,1229,<br />
1246<br />
Antecno 1537<br />
Arc en Ciel 1038,1109,1121,1235,1528,<br />
1547,1573<br />
Arcam 1183,1184,1218,1219<br />
Arcam Delta 1003<br />
Aristona 1042,1149,1194,1197,1257<br />
Arthur Martin 138,1245<br />
ASA 1014,1015,1016,1018,1095,<br />
1202,1208,1238,1516,1560,<br />
1561,1563,1597,1601<br />
Asberg 1037,1042,1197,1204,1553<br />
Astra 1009,1583<br />
Asuka 1002,1003,1010,1183,1184,<br />
1218,1219,1220,1231,1537<br />
Aswo 1547<br />
Atlantic 1003,1042,1137,1149,1183,<br />
1197,1218,1229,1534,1565<br />
Atori 1009,1191<br />
Atoro 1583<br />
Auchan 1245<br />
Audiosonic 1003,1009,1010,1042,1121,<br />
1137,1149,1184,1188,1197,<br />
1219,1220,1237,1537,1583<br />
AudioTon 1003,1184,1188,1219,1583<br />
Ausind 1037,1204,1530,1551<br />
������� �������������������������<br />
1137,1184,1204,1219,1227,<br />
1520,1525,1530,1553,1563,<br />
1565<br />
Awa 1183,1184,1193,1512,1583<br />
Ayomi 1224<br />
Baird 1096,1121,1184,1203,1214,<br />
1215,1219,1494,1512<br />
Bang & Olufsen 1177<br />
Barco 1532,1548<br />
Basic Line 1009,1010,1042,1184,1191,<br />
1197,1220,1231,1537,1600<br />
Bastide 1003,1184,1219<br />
Bauer 1513,1527,1535,1558,1583<br />
Baur 1064,1102,1115,1123,1149,<br />
1192,1197,1216,1255<br />
Bazin 1184,1219,1493<br />
Beko 1007,1029,1070,1188,1197,<br />
1298,1299,1300,1301,1314,<br />
1592<br />
Beon 1042,1149,1197,1247<br />
Best 1098,1188,1237<br />
Bestar 1042,1100,1188,1197<br />
Bigston 1583<br />
Binatone 1003,1184,1219<br />
Black Star 1112,1227<br />
Blacktron 1231<br />
Blackway 1231<br />
Blaupunkt 1008,1097,1117,1179,1216,<br />
1505,1513,1539,1558,1562,<br />
1568,1585<br />
Blue Sky 1010,1197,1220,1231,1248,<br />
1266<br />
Blue Star 1103,1231<br />
Bondstec 1112,1227<br />
Boots 1003,1021,1184,1219<br />
BPL 1103,1197,1231<br />
Brandt 1031,1038,1039,1109,1110,<br />
1121,1235,1236,1302,1303,<br />
1304,1305,1422<br />
Brandt Electronique 1505,1518,1528,1547,<br />
1573<br />
Brinkmann 1197,1247<br />
Brionvega 1042,1149,1197,1505,1516,<br />
1525,1534<br />
Britannia 1003,1183,1184,1218,1219<br />
Bruns 1007,1516,1519,1577<br />
BSR 1022,1114,1232,1581<br />
BTC 1010,1220<br />
Bush 1009,1010,1017,1020,1021,<br />
1023,1024,1042,1052,1057,<br />
1100,1103,1114,1115,1121,<br />
1147,1149,1151,1184,1191,<br />
1196,1197,1219,1220,1231,<br />
1232,1242,1256,1266,1306,<br />
1307,1308,1309,1310,1311,<br />
1312,1313,1314,1333,1474,<br />
1476,1554<br />
Capsonic 1002<br />
Carena 1197,1248<br />
Carrefour 1023,1196,1202<br />
Cascade 1009,1191,1197<br />
Cathay 1042,1149,1197<br />
CBM 1553<br />
CCE 1184<br />
Centurion 1042,1149,1197<br />
Century 1227,1516<br />
CGE 1037,1044,1112,1114,1188,<br />
1204,1227,1247,1548,1553,<br />
1583,1592<br />
CGM 1537,1583<br />
CIE 1537<br />
Cimline 1009,1024,1191,1220<br />
City 1009,1191<br />
�������� �������������������������<br />
1575,1577<br />
Clatronic 1002,1003,1009,1010,1026,<br />
1037,1042,1070,1112,1184,<br />
1188,1191,1197,1204,1207,<br />
1219,1220,1227,1537<br />
CMS 1183<br />
CMS Hightec 1184<br />
Cofadel 1528<br />
Concorde 1009,1191<br />
Condor 1003,1042,1070,1176,1183,<br />
1188,1191,1197,1207,1218,<br />
1227,1231,1246,1553,1583<br />
Contec 1003,1009,1023,1025,1026,<br />
1183,1191,1193,1196,1210,<br />
1218,1581,1583<br />
Continental Edison 1031,1038,1039,1096,<br />
1109,1121,1233,1235,1518,<br />
1547,1573<br />
Cosmel 1009,1191,1237,1583<br />
Crosley 1037,1112,1114,1204,1227,<br />
1516,1553<br />
Crown 1009,1037,1042,1044,1070,<br />
1104,1149,1188,1191,1197,<br />
1204,1247,1258,1537,1553,<br />
1583<br />
CS Electronics 1003,1010,1112,1183,1218,<br />
1220,1227,1537<br />
CTC 1112,1227<br />
CTC Clatronic 1013,1537,1553,1583,1592<br />
Cybertron 1010,1220<br />
Daewoo 1003,1009,1042,1048,1081,<br />
1100,1169,1183,1184,1191,<br />
1197,1218,1219,1220,1254,<br />
1288,1315,1316,1317,1477,<br />
1537,1583,1591<br />
Dainichi 1010,1183,1218,1220<br />
Dansai 1002,1042,1149,1183,1184,<br />
1195,1197,1218<br />
������ �������������������������<br />
1151,1188<br />
Datsura 1104<br />
Dawa 1197<br />
Daytron 1009,1191<br />
33I<br />
EN
De Graaf 1006,1017,1028,1199,1223<br />
Decca 1003,1004,1021,1026,1042,<br />
1106,1149,1184,1189,1197,<br />
1203,1219,1512,1527,1594<br />
Dell 1487,1488,1489<br />
Denver 1583<br />
Desmet 1042,1149,1197<br />
Diamant 1197<br />
Diamond 1183,1583<br />
���� �������������������������<br />
1197<br />
DTS 1009,1191<br />
Dual 1003,1076,1108,1109,1114,<br />
1121,1140,1184,1197,1219,<br />
1229,1240,1256,1514,1583<br />
Dual Tec 1514,1534,1555,1583,1003,<br />
1009,1114,1219,1229<br />
Dumont 1003,1013,1015,1016,1184,<br />
1202,1207,1219,1516,1519,<br />
1553,1560,1561,1597,1601<br />
��� ����<br />
Dynatron 1042,1149,1197<br />
Edison Minerva 1233<br />
Elbe 1032,1033,1093,1137,1184,<br />
1187,1188,1189,1197,1220,<br />
1224,1229,1246,1262,1534,<br />
1552<br />
Elbe-Sharp 1189<br />
Elcit 1189,1207,1227<br />
Electa 1103<br />
Electro tech 1009,1583<br />
Electronic 1560,1561,1583<br />
Elektra 1231<br />
Elin 1003,1014,1016,1042,1149,<br />
1183,1191,1197,1208,1218,<br />
1519,1534,1561,1583,1601<br />
Elite 1010,1042,1197,1220<br />
Elman 1013,1114,1207,1511,<br />
1519<br />
Elta 1009,1183,1191,1583<br />
Emerson 1110,1123,1188,1197,1202,<br />
1212,1227,1516,1551,1553<br />
Emgel 1577<br />
Emperor 1231<br />
Erres 1042,1149,1194,1197<br />
ESC 1184<br />
Etron 1009<br />
Eurofeel 1184,1002<br />
Euroline 1075,1130,1149<br />
Euroman 1183,1184,1188,1231,1002,<br />
1003,1042,1197,1218,1219<br />
Europhon 1003,1013,1021,1042,1106,<br />
1114,1183,1184,1189,1197,<br />
1207,1219,1227,1519<br />
������ �������������������<br />
�������� ����<br />
Fenner 1009,1100,1191,1583<br />
Ferguson 1030,1031,1032,1033,1041,<br />
1043,1068,1096,1110,1143,<br />
1149,1214,1215,1224,1236,<br />
1304,1318,1426,1505,1598,<br />
1599<br />
Fidelis 1583<br />
Fidelity 1003,1017,1057,1062,1082,<br />
1183,1197,1218,1511,1548<br />
Filsai 1184<br />
Finlandia 1006,1017,1095,1111,1238,<br />
1601<br />
������ �������������������������<br />
1016,1037,1042,1051,1053,<br />
1095,1106,1114,1137,1147,<br />
1149,1184,1189,1197,1202,<br />
1203,1204,1207,1208,1213,<br />
1219,1238,1246,1519,1530,<br />
1551,1560,1561,1563,1564,<br />
1597,1601<br />
First Line 1003,1009,1022,1042,1052,<br />
1112,1583<br />
Firstline 1183,1184,1191,1197,1203,<br />
1207,1218,1219,1224,1227,<br />
1232,1234,1246,1266<br />
II<br />
34<br />
Fisher 1003,1006,1016,1023,1025,<br />
1034,1070,1114,1184,1188,<br />
1196,1200,1203,1210,1219,<br />
1516,1555,1561,1577<br />
Flint 1042,1129,1197,1203,1220,<br />
1248<br />
FNR 1207<br />
Formenti 1001,1003,1037,1108,1114,<br />
1116,1149,1183,1204,1218,<br />
1534,1551,1553,1560,1565<br />
���������������� 1551,1183<br />
Fortress 1001,1205<br />
Fraba 1188,1197<br />
France Concept 1600<br />
Friac 1188<br />
Frontech 1002,1009,1017,1018,1057,<br />
1102,1112,1184,1191,1227,<br />
1583<br />
Fujitsu 1004,1137,1184,1203,1207,<br />
1219,1537,1565<br />
Fujitsu General 1184<br />
Funai 1002,1022,1213,1232,1581,<br />
1583<br />
������ �������������������<br />
������� �������������������<br />
������ ���������<br />
Galeria 1583<br />
GBC 1009,1023,1114,1191,1220,<br />
1512,1537,1583<br />
Geant Casino 1245<br />
GEC 1003,1004,1018,1035,1042,<br />
1106,1115,1123,1149,1184,<br />
1189,1197,1198,1203,1219,<br />
1512,1522,1548,1584<br />
Geloso 1009,1017,1114,1191,1227,<br />
1537,1583<br />
General 1249<br />
General Technic 1009,1191,1583<br />
������� ������������������������<br />
Giant 1184<br />
GM 1583<br />
GMG 1583<br />
GoldHand 1183,1583<br />
Goldline 1197<br />
GoldStar 1003,1009,1011,1017,1042,<br />
1071,1080,1112,1114,1149,<br />
1151,1183,1184,1185,1188,<br />
1191,1197,1218,1219,1227,<br />
1244,1277,1491,1493,1514,<br />
1517,1524,1531,1538,1557,<br />
1583,1589<br />
Goodmans 1002,1004,1009,1023,1024,<br />
1042,1057,1080,1096,1100,<br />
1110,1133,1149,1184,1185,<br />
1189,1191,1195,1196,1197,<br />
1203,1213,1219,1251,1254,<br />
1257,1288,1481,1548,1583<br />
Gorenje 1070,1188,1499<br />
GPM 1010,1220,1537,1583<br />
Graetz 1018,1123,1124<br />
Granada 1003,1004,1006,1017,1023,<br />
1027,1034,1037,1042,1045,<br />
1054,1106,1110,1111,1116,<br />
1120,1149,1184,1189,1194,<br />
1196,1197,1200,1203,1204,<br />
1219,1222,1236,1245,1345,<br />
1530,1548,1549<br />
Grandin 1009,1010,1103,1149,1231,<br />
1500,1575,1591,1600<br />
Great Wall 1602<br />
Gronic 1184<br />
Grundig 1008,1015,1037,1078,1086,<br />
1099,1101,1117,1118,1188,<br />
1197,1202,1204,1216,1233,<br />
1257,1289,1319,1320,1321,<br />
1482,1500,1529,1530,1533,<br />
1535,1537,1539,1548,1549,<br />
1558,1581,1588<br />
������� �������������������������<br />
1219<br />
Hampton 1003,1183,1184,1218,1219<br />
Hanseatic 1003,1007,1009,1022,1023,<br />
1042,1061,1102,1114,1123,<br />
1149,1184,1187,1188,1191,<br />
1197,1219,1231,1232,1256,<br />
1535,1580<br />
�������� �������������������������<br />
1583<br />
Hantor 1197<br />
Harwood 1191,1197<br />
Hauppauge 1171<br />
HCM 1002,1003,1009,1062,1103,<br />
1184,1191,1197,1219,1220,<br />
1231,1247,1583<br />
Hema 1184,1191,1219<br />
������ ����<br />
Higashi 1183<br />
HiLine 1197<br />
Hinari 1006,1009,1010,1023,1037,<br />
1042,1119,1149,1191,1196,<br />
1197,1213,1220,1242,1527,<br />
1548,1583,1584,1586,1594<br />
Hisawa 1010,1103,1129,1220,1231,<br />
1245,1248<br />
������� ����<br />
Hitachi 1003,1004,1014,1017,1018,<br />
1019,1023,1028,1035,1038,<br />
1039,1040,1072,1102,1106,<br />
1114,1116,1120,1121,1122,<br />
1123,1124,1126,1184,1189,<br />
1196,1197,1198,1199,1203,<br />
1208,1209,1219,1221,1223,<br />
1252,1254,1276,1277,1317,<br />
1322,1323,1324,1325,1326,<br />
1327,1328,1493,1495,1517,<br />
1518,1548,1570,1584,1586,<br />
1590<br />
Hornyphon 1197,1042<br />
Hoshai 1010,1220,1248,1537<br />
Huanyu 1003,1100,1183,1218<br />
Hygashi 1003,1183,1184,1218,1219<br />
Hyper 1003,1009,1112,1114,1183,<br />
1184,1191,1218,1219,1227,<br />
1537,1583<br />
Hypson 1002,1003,1042,1103,1149,<br />
1184,1197,1219,1231,1245,<br />
1248<br />
Iberia 1197<br />
ICE 1002,1003,1009,1010,1042,<br />
1057,1183,1184,1191,1197,<br />
1218,1219,1220,1537<br />
ICE/ITS 1537<br />
ICeS 1183,1218,1220<br />
Imperial 1018,1037,1042,1044,1070,<br />
1112,1114,1188,1197,1204,<br />
1227,1247,1548,1553,1580,<br />
1592<br />
Indesit 1020,1086,1566<br />
Indiana 1042,1149,1197<br />
Ingelen 1018<br />
Ingersol 1009,1191<br />
Inno Hit 1003,1004,1009,1010,1042,<br />
1080,1106,1149,1184,1185,<br />
1189,1191,1197,1203,1204,<br />
1219,1220,1227,1512,1531,<br />
1537,1552,1557,1583<br />
Innovation 1002,1009,1051,1056,1057,<br />
1074,1088,1092,1096,1100,<br />
1134,1136,1148,1151,1155,<br />
1156,1157<br />
Interactive 1188<br />
Interbuy 1009,1094,1112,1191,1227,<br />
1504<br />
Interfunk 1018,1042,1112,1121,1123,<br />
1149,1188,1194,1197,1230,<br />
1255,1516,1528,1547,1549,<br />
1578<br />
International 1183<br />
Intervision 1002,1003,1013,1094,1184,<br />
1188,1197,1207,1219,1220,<br />
1227,1231,1244,1248,1256,<br />
1519
Irradio 1009,1010,1042,1057,1149,<br />
1185,1191,1197,1204,1220,<br />
1227,1530,1531,1537,1557,<br />
1564,1583<br />
Isukai 1010,1197,1220,1231<br />
ITC 1003,1114,1184,1219<br />
ITS 1010,1042,1057,1103,1183,<br />
1197,1218,1220,1231<br />
ITT 1009,1018,1027,1051,1115,<br />
1116,1123,1124,1125,1213,<br />
1238,1251<br />
ITT Nokia 1142,1494,1534,1561,1565,<br />
1578,1596,1009,1075,1149,<br />
1151,1197,1227<br />
JEC 1144,1195<br />
JVC 1023,1042,1057,1068,1196,<br />
1201,1206,1214,1215,1220,<br />
1239,1260,1265,1329,1330,<br />
1331,1332,1333,1334,1335,<br />
1492,1548,1593,1595<br />
Kanig 1511,1594,1597<br />
Karting 1503,1516,1522<br />
Kaisui 1003,1009,1010,1103,1183,<br />
1184,1191,1197,1218,1219,<br />
1220,1231,1248,1537,1583,<br />
1600<br />
Kamosonic 1003<br />
Kamp 1003,1183,1218<br />
Kapsch 1018,1137,1229,1534,1561,<br />
1565<br />
Karcher 1003,1009,1014,1032,1033,<br />
1149,1188,1197,1207,1231,<br />
1262,1583<br />
Kawasho 1183<br />
Kendo 1013,1017,1024,1093,1188,<br />
1197,1207,1227,1246,1262,<br />
1580,1583<br />
Kennedy 1114,1137,1520,1534,1565<br />
KIC 1184<br />
Kingsley 1003,1137,1183,1218<br />
������� ����<br />
Kneissel 1154,1187,1188,1197,1224,<br />
1229,1246<br />
Kolster 1042,1197<br />
Konka 1010,1182,1220<br />
Korpel 1042,1149,1197<br />
Korting 1188<br />
Kosmos 1197<br />
Koyoda 1009<br />
K 1003,1184<br />
Kuro 1104<br />
Kyoto 1032,1033,1183,1184<br />
Lasat 1188<br />
Legend 1602<br />
Lenco 1009,1191<br />
Lenoir 1003,1009,1191,1583<br />
Lerico 1519<br />
Lesa 1112,1227<br />
Leyco 1002,1004,1022,1042,1149,<br />
1197,1203,1232,1258,1512,<br />
1581<br />
LG 1003,1009,1011,1017,1042,<br />
1071,1075,1080,1112,1114,<br />
1130,1149,1151,1183,1184,<br />
1185,1188,1191,1197,1218,<br />
1219,1227,1244,1314,1336,<br />
1337,1338,1339,1340<br />
LG/GoldStar 1341<br />
Liesenk 1149<br />
Liesenkotter 1197<br />
Life 1002,1009,1051,1056,1057,<br />
1074,1088,1092,1096,1100,<br />
1134,1136,1148,1151,1155,<br />
1156,1157<br />
Lifetec 1002,1009,1051,1056,1057,<br />
1074,1088,1092,1096,1100,<br />
1134,1136,1148,1151,1155,<br />
1156,1157,1191,1197,1220,<br />
1256,1266<br />
Lloyds 1191<br />
Locik 1527<br />
Loewe 1083,1084,1187,1188,1189,<br />
1197,1255,1342,1343,1344<br />
Loewe Opta 1042,1149,1516,1518,1543,<br />
1561<br />
Logik 1026,1193,1594<br />
Luma 1017,1123,1137,1149,1191,<br />
1197,1229,1246,1534,1565<br />
Lumatron 1017,1042,1062,1123,1137,<br />
1149,1184,1197,1219,1229<br />
��� ��� ����<br />
����� �������������������������<br />
1086,1115,1120,1123,1174,<br />
1184,1185,1251,1253,1494,<br />
1516,1517,1531,1548,1549,<br />
1557,1578,1580,1601<br />
Maaz 1548<br />
Magnadyne 1013,1106,1112,1114,1149,<br />
1189,1207,1227,1516,1519,<br />
1583<br />
Magnafon 1003,1013,1037,1106,1183,<br />
1189,1204,1207,1218,1519,<br />
1530,1551,1560<br />
Magnum 1002,1009,1051,1056,1057,<br />
1074,1088,1092,1096,1100,<br />
1134,1136,1148,1151,1155,<br />
1156,1157<br />
Mandor 1002<br />
Manesth 1002,1003,1024,1042,1149,<br />
1184,1195,1197,1219,1232,<br />
1580<br />
Marantz 1042,1149,1197<br />
Mark 1042,1149,1183,1184,1191,<br />
1197,1218,1219<br />
Masuda 1184<br />
Matsui 1003,1004,1009,1012,1017,<br />
1021,1022,1023,1024,1026,<br />
1042,1052,1057,1078,1106,<br />
1128,1129,1144,1149,1153,<br />
1158,1184,1189,1191,1193,<br />
1195,1196,1197,1200,1203,<br />
1212,1216,1219,1232,1236,<br />
1239,1241,1242,1243,1248,<br />
1250,1257,1258,1511,1527,<br />
1548,1579,1580,1583,1594<br />
Matsushita 1055<br />
������ ����<br />
������� ����<br />
McMichael 1035,1198<br />
Mediator 1042,1149,1194,1197,1257<br />
Medion 1002,1009,1051,1056,1057,<br />
1074,1088,1092,1100,1134,<br />
1136,1148,1151,1155,1156,<br />
1157,1159,1197,1266<br />
Melectronic 1183,1184,1030,1003,1009,<br />
1014,1016,1018,1031,1042,<br />
1057,1094,1095,1100,1121,<br />
1149,1191,1197,1208,1218,<br />
1219,1227,1238,1246,1251,<br />
1253,1255,1491,1516,1555,<br />
1560,1597,1601<br />
������ ����<br />
������� ���������<br />
Memphis 1004,1009,1098,1191,1203,<br />
1237,1602<br />
Mercury 1191,1197<br />
Metz 1063,1117,1131,1132,1216,<br />
1225,1230,1506,1516,1526,<br />
1533,1535,1539,1558,1576<br />
MGA 1537<br />
��������� �������������������������<br />
1074,1088,1092,1096,1100,<br />
1134,1136,1148,1151,1155,<br />
1156,1157<br />
Microstar 1002,1009,1051,1056,1057,<br />
1074,1088,1092,1096,1100,<br />
1134,1136,1148,1151,1155,<br />
1156,1157<br />
Minerva 1015,1086,1117,1189,1202,<br />
1204,1216,1530,1533,1539,<br />
1558<br />
Minoka 1042,1197<br />
Mission 1492<br />
Mitsubishi 1023,1026,1042,1045,1046,<br />
1050,1084,1086,1117,1150,<br />
1196,1197,1241,1255,1345,<br />
1346,1347,1501,1507,1516,<br />
1527,1548,1558,1583,1587<br />
Mivar 1003,1037,1061,1080,1106,<br />
1183,1184,1185,1186,1187,<br />
1188,1189,1190,1204,1218,<br />
1261,1531,1552,1556,1559<br />
Motion 1037,1204<br />
MTC 1115,1183,1188<br />
Multi System 1149<br />
Multistandard 1207<br />
Multitech 1003,1009,1013,1017,1023,<br />
1037,1038,1112,1114,1149,<br />
1183,1184,1188,1191,1197,<br />
1207,1218,1219,1227,1537,<br />
1553,1583<br />
Murphy 1003,1016,1116,1183,1203,<br />
1218<br />
NAD 1123<br />
Naiko 1085<br />
Naonis 1017,1093<br />
National 1054,1086,1217<br />
NEC 1023,1047,1163,1184,1196,<br />
1211,1496,1527,1583<br />
Neckermann 1003,1008,1017,1042,1070,<br />
1102,1115,1149,1184,1188,<br />
1192,1197,1219,1227,1246,<br />
1247,1257,1513,1516,1535,<br />
1592<br />
NEI 1042,1057,1098,1149,1197,<br />
1237,1602<br />
Nesco 1112,1213,1227<br />
Network 1237<br />
Neufunk 1191,1197,1257<br />
New Tech 1009,1042,1191,1197,1219,<br />
1257,1184<br />
New World 1010,1220<br />
Nicamagic 1003,1183,1218<br />
Nikkai 1002,1003,1004,1010,1042,<br />
1098,1144,1149,1183,1184,<br />
1191,1195,1196,1197,1203,<br />
1218,1219,1220,1237,1517<br />
������ ����<br />
Nobliko 1003,1013,1015,1037,1183,<br />
1202,1204,1207,1218,1516,<br />
1519,1530,1551,1553,1560,<br />
1564<br />
Nogamatic 1121<br />
Nokia 1018,1027,1051,1053,1065,<br />
1115,1116,1123,1124,1125,<br />
1142,1238,1251,1253,1263,<br />
1490,1491,1601<br />
Nordic 1184<br />
Nordmende 1018,1020,1031,1038,1039,<br />
1042,1096,1109,1110,1121,<br />
1216,1505,1518,1523,1528,<br />
1532,1547,1573,1598<br />
Nordvision 1149<br />
Novatronic 1197,1208<br />
Oceanic 1018,1123,1124,1232,1245,<br />
1494,1530,1574,1575<br />
Okano 1070,1188,1197,1203,1592<br />
ONCEAS 1003,1583<br />
Onwa 1058,1220,1503<br />
Opera 1197<br />
Orava/OTF 1583<br />
Orbit 1042,1197<br />
Orion 1009,1012,1022,1024,1026,<br />
1042,1052,1063,1085,1106,<br />
1124,1128,1139,1149,1151,<br />
1189,1191,1193,1197,1207,<br />
1212,1232,1234,1242,1285,<br />
1348,1349,1350,1351,1478,<br />
1483,1496,1497,1498,1511,<br />
1527,1535,1542,1548,1567,<br />
1580,1581,1594<br />
Orline 1197,1220<br />
Ormond 1151<br />
III<br />
35<br />
EN
Orsowe 1189<br />
Osaki 1002,1003,1004,1010,1062,<br />
1145,1184,1197,1203,1219,<br />
1220,1581<br />
Osio 1185<br />
Oso 1010,1220<br />
Osume 1004,1025,1196,1203,1210,<br />
1220<br />
Otto Versand 1001,1003,1008,1023,1042,<br />
1064,1096,1102,1103,1104,<br />
1114,1115,1121,1123,1149,<br />
1184,1189,1192,1196,1197,<br />
1205,1216,1219,1222,1227,<br />
1232,1255,1257,1502,1505,<br />
1513,1535,1558,1580,1581,<br />
1583<br />
Pael 1003,1183,1218,1530,1564<br />
Palladium 1003,1011,1070,1184,1188,<br />
1192,1197,1219,1227,1246,<br />
1247,1257,<br />
1592<br />
Palsonic 1184<br />
Panama 1002,1003,1009,1145,1183,<br />
1184,1191,1197,1218,1219,<br />
1227<br />
Panasonic 1018,1054,1055,1056,1086,<br />
1107,1123,1124,1131,1132,<br />
1164,1175,1189,1197,1217,<br />
1222,1228,1264,1283,1352,<br />
1353,1354,1355,1356,1357,<br />
1358,1359,1360,1475,1535,<br />
1540,1548,1549,1582<br />
Panavision 1197,1246<br />
Pathe Cinema 1003,1032,1033,1061,1114,<br />
1183,1187,1188,1218,1224,<br />
1245,1575,1592<br />
Pathe Marconi 1032,1033,1038,1039,1109,<br />
1121,1235,1547,1573<br />
Pausa 1009,1191,1583<br />
Perdio 1004,1183,1197,1203<br />
Perfekt 1197<br />
PERSHIN 1530,1575<br />
Philco 1037,1044,1112,1114,1188,<br />
1197,1204,1227,1247,1516,<br />
1548,1553,1592<br />
Philharmonic 1003,1145,1184,1219<br />
Philips 1003,1035,1037,1042,1075,<br />
1076,1096,1100,1114,1123,<br />
1135,1149,1178,1180,1194,<br />
1197,1198,1257,1311,1361,<br />
1362,1363,1364,1365,1366,<br />
1367,1368,1369,1370,1371,<br />
1372,1373,1374,1375,1376,<br />
1377,1378,1379,1380,1381,<br />
1382,1484,1485,1498,1500,<br />
1515,1516,1518,1534,1544,<br />
1548,1549<br />
������� �������������������������<br />
1203,1218<br />
Phonola 1042,1149,1183,1194,1197,<br />
1218,1257,1515,1516,1544,<br />
1548,1549<br />
Pioneer 1018,1031,1042,1121,1127,<br />
1149,1188,1197,1277,1278,<br />
1473,1518<br />
Pionier 1188<br />
Plantron 1002,1042,1191,1197,<br />
1583<br />
Playsonic 1184,1219<br />
Poppy 1009,1191<br />
Prandoni 1519,1564<br />
Prandoni-Prince 1017,1106,1123,1189,1204,<br />
1227,1564<br />
Precision 1003,1145,1184,1219<br />
Prima 1009,1018,1191,1583<br />
Prinz 1040,1203<br />
������ �������������������������<br />
1583<br />
Profilo 1151<br />
Profi-Tronic 1042,1197,1207<br />
Proline 1004,1042,1052,1194,1197,<br />
1203,1234,1426<br />
IV<br />
36<br />
Prosonic 1003,1036,1092,1141,1149,<br />
1151,1183,1184,1188,1197,<br />
1217,1218,1258<br />
Protech 1002,1003,1009,1013,1042,<br />
1098,1112,1114,1115,1145,<br />
1149,1184<br />
Provision 1149,1151,1197,1254<br />
Pye 1042,1057,1149,1194,1197,<br />
1257,1383,1384<br />
Pymi 1009,1191<br />
Quandra Vision 1245<br />
Quasar 1112,1530<br />
Quelle 1002,1003,1014,1015,1016,<br />
1022,1026,1042,1064,1112,<br />
1114,1117,1123,1149,1151,<br />
1184,1185,1192,1193,1196,<br />
1197,1202,1208,1210,1216,<br />
1219,1227,1255,1513,1516,<br />
1527,1529,1530,1552,1558,<br />
1560,1561,1563,1564,1581,<br />
1583,1601<br />
Questa 1023,1196<br />
Radialva 1197,1220<br />
Radiola 1042,1149,1184,1194,1197,<br />
1257,1515,1549<br />
Radiomarelli 1106,1112,1189,1197,1227<br />
Radionette 1014,1016,1561,1597,1601<br />
RadioShack 1197<br />
Radiotone 1007,1042,1188,1191,1197,<br />
1247,1258<br />
Rank 1015,1023,1202<br />
RBM 1015<br />
RBM Rank 1554<br />
RCA 1027<br />
Recor 1197<br />
Rediffusion 1123,1508,1548<br />
Redstar 1197<br />
����� ����<br />
����� �������������������<br />
��� �������������������������<br />
1227,1229,1246,1514,1520,<br />
1534,1565<br />
RFT 1007,1187,1188,1203<br />
Rhapsody 1183<br />
R-Line 1042,1149,1197<br />
Roadstar 1002,1009,1010,1191,1220,<br />
1247,1476,1537,1583<br />
Rob. Electr. 1577<br />
Robotron 1516<br />
Rowa 1183,1184<br />
Royal 1583<br />
����� ��� ����<br />
RTF 1516<br />
Saba 1018,1031,1038,1039,1048,<br />
1096,1106,1109,1110,1121,<br />
1123,1124,1189,1236,1304,<br />
1385,1422,1426,1505,1516,<br />
1518,1521,1528,1532,1546,<br />
1547<br />
Saccs 1032,1033<br />
Sagem 1248,1262<br />
Saisho 1002,1003,1009,1012,1024,<br />
1026,1106,1184,1189,1191,<br />
1193,1212,1219,1241,1511,<br />
1518,1527,1537,1548,1580,<br />
1594<br />
Salora 1017,1018,1027,1040,1080,<br />
1092,1093,1102,1104,1111,<br />
1114,1115,1120,1123,1185,<br />
1189,1494,1516,1517,1548,<br />
1601<br />
Sambers 1013,1037,1106,1189,1204,<br />
1207,1511,1519,1530,1531,<br />
1551,1552,1553,1560,1564<br />
Samsung 1002,1003,1004,1009,1026,<br />
1042,1070,1077,1080,1089,<br />
1090,1140,1145,1149,1152,<br />
1170,1183,1184,1185,1188,<br />
1191,1197,1203,1218,1219,<br />
1257,1259,1290,1386,1387,<br />
1388,1389,1390,1391,1392,<br />
1393,1394,1395,1486,1498,<br />
1512,1531,1552,1557,1583,<br />
1592<br />
Sandra 1003,1183,1184,1218,1219<br />
Sansui 1042,1197<br />
Sanyo 1003,1004,1006,1014,1016,<br />
1023,1025,1026,1027,1034,<br />
1037,1061,1110,1114,1140,<br />
1183,1184,1187,1188,1191,<br />
1193,1196,1200,1203,1210,<br />
1218,1219,1396,1397,1398,<br />
1399,1494,1512,1516,1518,<br />
1527,1561,1577,1583<br />
SBR 1035,1149,1194,1197,1257<br />
Schaub Lorentz 1018,1123,1124,1537,<br />
1583<br />
Schneider 1003,1010,1042,1057,1060,<br />
1108,1114,1121,1140,1149,<br />
1157,1184,1194,1197,1219,<br />
1220,1227,1229,1240,1256,<br />
1257,1266,1328,1400,1401,<br />
1402,1403,1404,1405,1511,<br />
1514,1515,1530,1537,1544,<br />
1548,1555,1583<br />
SEG 1002,1003,1013,1023,1037,<br />
1075,1112,1114,1149,1183,<br />
1184,1191,1196,1197,1218,<br />
1219,1227,1266,1345,1406,<br />
1498,1553,1577<br />
SEI 1189,1192,1197,1207,1232<br />
SEI-Sinudyne 1012,1013,1018,1022,1063,<br />
1106,1189,1511,1516,1519,<br />
1581<br />
Seleco 1017,1018,1023,1093,1114,<br />
1137,1229,1246,1505,1514,<br />
1518,1520,1530,1534,1547,<br />
1565<br />
Sencora 1009,1191<br />
Sentra 1144,1191,1195,1220<br />
Serino 1183,1248,1262<br />
Sharp 1001,1005,1023,1025,1049,<br />
1165,1166,1189,1196,1201,<br />
1205,1210,1232,1291,1407,<br />
1408,1409,1410,1411,1412,<br />
1413,1414,1502,1548,1550,<br />
1571<br />
Shiwan 1537<br />
Shorai 1022,1213,1232,1581<br />
Siarem 1013,1106,1114,1189,1197,<br />
1207,1210,1216,1516,1519<br />
Sicatel 1032,1033<br />
Siemens 1008,1025,1117,1518,1530,<br />
1533,1535,1539,1558<br />
Sierra 1042,1194,1197,1257<br />
Siesta 1140,1188<br />
Silva 1183,1218,1583<br />
Silver 1023,1196,1213,1537<br />
Singer 1013,1112,1114,1207,1227,<br />
1245,1516,1519,1575,1583<br />
Sinudyne 1012,1013,1022,1024,1063,<br />
1114,1149,1189,1192,1197,<br />
1207,1212,1232,1511,1516,<br />
1519,1520,1537,1548,1580,<br />
1581<br />
Skantic 1018,1120,1174<br />
Skyworth 1181<br />
������� ������������������������<br />
Sonitron 1006,1027,1184,1188,1219<br />
Sonoko 1002,1003,1009,1042,1149,<br />
1184,1191,1197,1219,1231,<br />
1537,1583<br />
Sonolor 1006,1018,1192,1245<br />
Sontec 1042,1140,1149,1188,1197,<br />
1232,1592<br />
Sony 1004,1009,1023,1025,1026,<br />
1064,1091,1110,1113,1145,<br />
1160,1161,1192,1193,1196,<br />
1207,1415,1416,1417,1418,<br />
1419,1420,1421,1479,1492,<br />
1513,1527,1541,1548,1569,<br />
1594,1603
Sound & Vision 1010,1013,1207,1220<br />
Soundmaster 1537,1583<br />
Soundwave 1042,1149,1197,1247<br />
Stag 1537<br />
Standard 1003,1009,1010,1042,1145,<br />
1184,1191,1197,1219,1220,<br />
1537,1583<br />
Star Lite 1191,1197<br />
Starlight 1149<br />
Starlite 1583<br />
������� ����<br />
Stenway 1103,1220,1231<br />
Stern 1017,1018,1137,1229,1534,<br />
1565<br />
Strato 1191,1197<br />
Stylandia 1184<br />
Sunkai 1009,1022,1052,1220,1232,<br />
1234,1242,1248,1580,1581<br />
Sunstar 1191,1197<br />
Sunwood 1009,1042,1191,1197<br />
Superla 1003,1183,1184,1189,1218<br />
SuperTech 1102,1183,1191,1197,1218,<br />
1257,1583<br />
Supra 1009,1191,1583<br />
Susumu 1010,1236<br />
Sutron 1009,1191<br />
SYC Line 1583<br />
Sydney 1003,1145,1183,1184,1218,<br />
1219<br />
Sysline 1149<br />
Sytong 1183,1218<br />
Talent 1558<br />
Tandberg 1022,1137,1237,1246,1543,<br />
1581<br />
Tandy 1001,1003,1004,1010,1018,<br />
1116,1145,1184,1203,1205,<br />
1219,1220,1227,1575<br />
Tashiko 1003,1017,1023,1035,1047,<br />
1111,1145,1183,1184,1196,<br />
1198,1211,1218,1219,1584<br />
Tatung 1003,1004,1021,1042,1106,<br />
1145,1149,1184,1189,1193,<br />
1197,1203,1219,1476,1480,<br />
1512,1527,1594<br />
TCM 1002,1009,1051,1056,1057,<br />
1074,1088,1092,1096,1100,<br />
1134,1136,1148,1151,1155,<br />
1156,1157<br />
Teac 1184,1197,1248,1255<br />
Tec 1003,1009,1112,1114,1116,<br />
1145,1184,1191,1219,1227,<br />
1236,1237,1249,1514,1583<br />
Technica 1537<br />
Technics 1055<br />
������� ���������<br />
Teknant 1583<br />
Tele + 1548<br />
Teleavia 1031,1038,1096,1109,1121,<br />
1235,1518,1528,1547,1573<br />
Telecor 1184,1197,1219,1220,1229<br />
Telefunken 1030,1031,1041,1042,1043,<br />
1066,1067,1086,1093,1096,<br />
1109,1110,1121,1143,1146,<br />
1168,1197,1236,1249,1277,<br />
1279,1422,1423,1426,1505,<br />
1518,1528,1547,1548,1566,<br />
1572,1599,1604,1605<br />
Telegazi 1197,1220,1229<br />
Telemeister 1197<br />
Teleopta 1583<br />
Teleservice 1518<br />
Telesonic 1197<br />
Telestar 1197<br />
Teletech 1009,1075,1098,1112,1149,<br />
1191,1197,1227,1237<br />
Teleton 1003,1102,1115,1137,1145,<br />
1184,1196,1219,1229,1230<br />
Televideon 1183,1218,1530,1551<br />
Televiso 1245<br />
Temco 1232<br />
Tensai 1009,1010,1016,1022,1042,<br />
1184,1191,1197,1208,1219,<br />
1220,1227,1232,1244,1519,<br />
1537,1561,1583,1597<br />
Tesmet 1042<br />
Tevion 1002,1009,1051,1056,1057,<br />
1074,1088,1092,1096,1100,<br />
1134,1136,1148,1151,1155,<br />
1156,1157<br />
����� �������������������������<br />
1219<br />
Thomson 1000,1003,1031,1038,1039,<br />
1041,1042,1043,1048,1086,<br />
1087,1096,1109,1110,1121,<br />
1143,1146,1163,1197,1235,<br />
1236,1249,1267,1268,1269,<br />
1270,1271,1272,1273,1274,<br />
1275,1277,1280,1281,1284,<br />
1287,1303,1304,1422,1424,<br />
1425,1426,1505,1518,1528,<br />
1530,1532,1546,1547,1573,<br />
1598,1599<br />
Thorn 1004,1016,1030,1032,1033,<br />
1045,1068,1096,1110,1123,<br />
1144,1149,1197,1214,1215,<br />
1224,1236,1254,1255,1282,<br />
1288,1494,1505,1512,1513,<br />
1518,1530,1535,1548,1558,<br />
1561,1597,1601<br />
Tobo 1583<br />
Tokai 1004,1042,1184,1197,1203,<br />
1219,1237,1583<br />
Tokyo 1003,1183,1195,1218<br />
Tomashi 1103,1231<br />
Toshiba 1015,1023,1069,1099,1144,<br />
1167,1184,1195,1196,1202,<br />
1207,1226,1286,1314,1392,<br />
1427,1428,1429,1430,1431,<br />
1432,1433,1434,1435,1436,<br />
1476,1483,1536,1545,1554,<br />
1579<br />
Towada 1018,1114,1184,1207<br />
Trakton 1184<br />
Trans Continens 1197,1219,1184<br />
Transtec 1183<br />
Trevi 1537,1583<br />
Trident 1145,1184,1189,1219<br />
Tristar 1220<br />
Triumph 1012,1069,1106,1189,1197,<br />
1212,1226,1238,1257,1510,<br />
1511,1560<br />
Uher 1018,1037,1042,1137,1188,<br />
1197,1204,1229,1247,1516,<br />
1530,1534,1555,1565<br />
�������� �������������������������<br />
1183,1197,1207,1218,1227,<br />
1516<br />
Unic Line 1197<br />
United 1075,1149<br />
Universum 1002,1014,1016,1042,1070,<br />
1087,1095,1105,1112,1114,<br />
1142,1149,1184,1185,1188,<br />
1192,1193,1196,1197,1202,<br />
1204,1208,1210,1212,1216,<br />
1219,1227,1232,1237,1238,<br />
1246,1247,1251,1253,1255,<br />
1263,1513,1527,1530,1531,<br />
1535,1558,1560,1561,1563,<br />
1581,1583,1597,1601<br />
������ ������������������������<br />
Urania 1530,1583<br />
Vanguard 1583<br />
Vestel 1017,1018,1042,1070,1079,<br />
1088,1112,1114,1120,1149,<br />
1151,1172,1173,1174,1184,<br />
1197,1219<br />
���� �������������������������<br />
1583<br />
Victor 1023,1042,1055<br />
Videologic 1183,1537<br />
Videologique 1003,1010,1183,1184,1218,<br />
1219,1220<br />
Videosat 1112<br />
VideoSystem 1042,1197<br />
Videotechnic 1183,1184,1218,1219<br />
Vidion 1583<br />
VISA 1514,1532<br />
Visiola 1003,1183,1218<br />
Vision 1042,1184,1197<br />
������� ����<br />
Vistar 1116<br />
Vortec 1042,1149,1197<br />
������ �������������������������<br />
1197,1204,1247,1516,1530,<br />
1564<br />
Walkie 1514<br />
Wallis 1560<br />
Waltham 1003,1032,1033,1116,1120,<br />
1145,1184,1197,1219,1247<br />
Watson 1042,1149,1197,1220,1256,<br />
1258,1511<br />
Watt Radio 1003,1013,1032,1033,1114,<br />
1183,1207,1218,1519<br />
Wega 1023,1196,1197<br />
������� ���������<br />
Weltblick 1042,1149,1184,1197<br />
Weston 1114<br />
Wharfedale 1085<br />
White Westinghous 1003,1013,1037,1149,<br />
1183,1197,1218,1237<br />
Windstar 1231<br />
Winston 1537,1583<br />
Winternitz 1583<br />
Xrypton 1197<br />
Yamishi 1184,1197,1219,1220,1231,<br />
1248<br />
Yokan 1197<br />
Yoko 1002,1003,1009,1010,1042,<br />
1145,1149,1183,1184,1188,<br />
1191,1197,1219,1220,1583<br />
���� �������������������<br />
Zanussi 1017,1093,1137,1184,1219,<br />
1520,1565<br />
TV Tuner<br />
Hauppauge 1472<br />
TV/DVD Combo<br />
Bush 1313,1474<br />
Panasonic 1475<br />
Pioneer 1473<br />
Thomson 1304<br />
Toshiba 1473<br />
TV/DVD/VCR Combo<br />
Samsung 1486<br />
Toshiba 1486<br />
TV/VCR Combo<br />
Aiwa 1476<br />
Bush 1476<br />
Daewoo 1477<br />
Goodmans 1481<br />
Grundig 1482<br />
Orion 1478,1483<br />
Philips 1484,1485<br />
Roadstar 1476<br />
Samsung 1392<br />
Sony 1479<br />
Tatung 1476,1480<br />
Toshiba 1392,1476,1483<br />
37 V<br />
EN
Fore more information<br />
Thomson | 46, quai Alphonse Le Gallo | 92100 Boulogne-Billancourt | France<br />
www.thomson-broadband.com<br />
© 2008 Thomson Inc.- Trademark(s) ® Registered\ -Marca(s) Registada(s)\<br />
Photos and features subject to change without notice.<br />
Illustration of product finish may vary from actual color.<br />
TOCOM 36576960