• Reach into pump suction opening and rotate impeller slightlyuntil the shaft will engage the coupling. Verify that there isno gap between bracket and flywheel housing faces. Rotatepump as necessary to align bracket holes with engine. Installcapscrews and bolt pump end securely to engine.NOTE: If any interference, or incompatibility of parts isdetected during installation, DO NOT proceed withassembly. Direct the problem to your nearest GouldsPumps distributor.• Mount the pump to the engine using the bolts and lockwashersprovided, torqued as follows in a crossing sequence:SAE #2, #3, #4, #5 – 20 lbs.-ft. (27 N . m)SAE #1 – 50 lbs.-ft. (68 N . m)• Install coupling guards (501N).• Bolt motor adapter (3) to the rigid support described above.Coupling AlignmentWARNINGHazardous machinerycan cause personalinjury or death.FRAME-MOUNTED UNITS ONLYFAILURE TO DISCONNECT ANDLOCKOUT ELECTRICAL POWERBEFORE ATTEMPTING ANYMAINTENANCE CAN CAUSESEVERE PERSONAL INJURY.• Alignment MUST be checked prior to running. See Figure 7.Parallel• All piping MUST be independently supported and MUSTNOT place any piping loads on the pumpNOTICE: DO NOT FORCE PIPING INTO PLACEAT PUMP SUCTION AND DISCHARGECONNECTIONS.• All pipe joints MUST be airtight.piping – suction• For suction lifts over 10 ft. (3 m) and liquid temperaturesover 120° F (49° C), consult pump performance curve fornet positive suction head required (NPSH R ).• If a pipe size larger than pump suction is required, an eccentricpipe reducer, with the straight side up, MUST beinstalled at the pump suction.• If pump is installed below the liquid source, install a gatevalve in the suction for pump inspection and maintenance.NOTICE: DO NOT USE THE GATE VALVE TOTHROTTLE PUMP. THIS MAY CAUSE LOSSOF PRIME, EXCESSIVE TEMPERATURESAND DAMAGE TO PUMP, VOIDINGWARRANTY.• If the pump is installed above the liquid source, the followingMUST be provided:• To avoid air pockets, no part of the piping should be abovethe pump suction connection.• Slope the piping upward from liquid source.• Use a foot valve or check valve ONLY if necessary forpriming or to hold prime during intermittent duty.• The suction strainer or suction bell MUST be at least3 times the suction pipe diameter area.• Insure that the size and minimum submergence over suctioninlet is sufficient to prevent air from entering pumpthrough a suction vortex. See Figures 8 through 11.Figure 7• Tighten all hold-down bolts before checking alignment.• If realignment is necessary, always move the motor. Shimas required.• Parallel misalignment, shafts with axis parallel but notconcentric. Place dial indicator on one hub and rotate thishub 360° while taking readings on the outside diameter ofthe other hub. Parallel alignment is achieved when reading is0.010" (0.254 mm) TIR, or less.• Angular misalignment, shaft with axis concentric but not parallel.Place dial indicator on one hub and rotate this hub 360°while taking readings on the face of the other hub. Angularalignment is achieved when reading is 0.020" (0.508mm) TIR, or less.• Final alignment is achieved when parallel and angular requirementsare satisfied with motor hold-down bolts tight.NOTICE: ALWAYS RECHECK BOTH ALIGNMENTSAFTER MAKING ANY MECHANICALADJUSTMENTS.PipingAngular• Piping should be no smaller than pump’s discharge andsuction connections and kept as short as possible, avoidingunnecessary fittings to minimize friction losses. See Table 1.1.5Dmin.D3.0Dmin.H min.D min.2Figure 10 Figure 11piping – dischargeH min.DDH16151413121110987654321H min.Figure 8 Figure 9• Install a check valve suitable to handle the flow, liquids andto prevent backflow. After the check valve, install an appropriatelysized gate valve to be used to regulate the pumpcapacity, pump inspection and for maintenance.• When required, pipe increaser should be installed betweenthe check valve and the pump discharge.H = Min. Submergence in feet1 2 3 4 5 6 7 8 9 10111213141516 VV = Velocity in feet per second= GPM x 0.321 GPM x 0.4085AreaD 2D
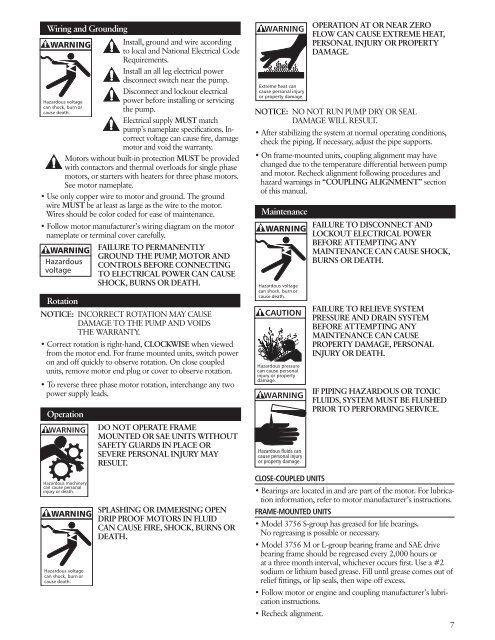
Wiring and GroundingInstall, ground and wire accordingto local and National Electrical CodeRequirements.Install an all leg electrical powerdisconnect switch near the pump.Disconnect and lockout electricalpower before installing or servicingthe pump.Electrical supply MUST matchpump’s nameplate specifications. Incorrectvoltage can cause fire, damagemotor and void the warranty.Motors without built-in protection MUST be providedwith contactors and thermal overloads for single phasemotors, or starters with heaters for three phase motors.See motor nameplate.WARNINGHazardous voltagecan shock, burn orcause death.• Use only copper wire to motor and ground. The groundwire MUST be at least as large as the wire to the motor.Wires should be color coded for ease of maintenance.• Follow motor manufacturer’s wiring diagram on the motornameplate or terminal cover carefully.WARNINGHazardousvoltageRotationFAILURE TO PERMANENTLYGROUND THE PUMP, MOTOR ANDCONTROLS BEFORE CONNECTINGTO ELECTRICAL POWER CAN CAUSESHOCK, BURNS OR DEATH.NOTICE: INCORRECT ROTATION MAY CAUSEDAMAGE TO THE PUMP AND VOIDSTHE WARRANTY.• Correct rotation is right-hand, CLOCKWISE when viewedfrom the motor end. For frame mounted units, switch poweron and off quickly to observe rotation. On close coupledunits, remove motor end plug or cover to observe rotation.• To reverse three phase motor rotation, interchange any twopower supply leads.OperationWARNINGHazardous machinerycan cause personalinjury or death.WARNINGHazardous voltagecan shock, burn orcause death.DO NOT OPERATE FRAMEMOUNTED OR SAE UNITS WITHOUTSAFETY GUARDS IN PLACE ORSEVERE PERSONAL INJURY MAYRESULT.SPLASHING OR IMMERSING OPENDRIP PROOF MOTORS IN FLUIDCAN CAUSE FIRE, SHOCK, BURNS ORDEATH.WARNINGExtreme heat cancause personal injuryor property damage.OPERATION AT OR NEAR ZEROFLOW CAN CAUSE EXTREME HEAT,PERSONAL INJURY OR PROPERTYDAMAGE.NOTICE: NO NOT RUN PUMP DRY OR SEALDAMAGE WILL RESULT.• After stabilizing the system at normal operating conditions,check the piping. If necessary, adjust the pipe supports.• On frame-mounted units, coupling alignment may havechanged due to the temperature differential between pumpand motor. Recheck alignment following procedures andhazard warnings in “COUPLING ALIGNMENT” sectionof this manual.MaintenanceWARNINGHazardous voltagecan shock, burn orcause death.CAUTIONHazardous pressurecan cause personalinjury or propertydamage.WARNINGHazardous fluids cancause personal injuryor property damage.CLOSE-COUPLED UNITSFAILURE TO DISCONNECT ANDLOCKOUT ELECTRICAL POWERBEFORE ATTEMPTING ANYMAINTENANCE CAN CAUSE SHOCK,BURNS OR DEATH.FAILURE TO RELIEVE SYSTEMPRESSURE AND DRAIN SYSTEMBEFORE ATTEMPTING ANYMAINTENANCE CAN CAUSEPROPERTY DAMAGE, PERSONALINJURY OR DEATH.IF PIPING HAZARDOUS OR TOXICFLUIDS, SYSTEM MUST BE FLUSHEDPRIOR TO PERFORMING SERVICE.• Bearings are located in and are part of the motor. For lubricationinformation, refer to motor manufacturer’s instructions.FRAME-MOUNTED UNITS• <strong>Model</strong> <strong>3756</strong> S-group has greased for life bearings.No regreasing is possible or necessary.• <strong>Model</strong> <strong>3756</strong> M or L-group bearing frame and SAE drivebearing frame should be regreased every 2,000 hours orat a three month interval, whichever occurs first. Use a #2sodium or lithium based grease. Fill until grease comes out ofrelief fittings, or lip seals, then wipe off excess.• Follow motor or engine and coupling manufacturer’s lubricationinstructions.• Recheck alignment.