MAX! Cube - REV-Ritter GmbH
MAX! Cube - REV-Ritter GmbH
MAX! Cube - REV-Ritter GmbH

You also want an ePaper? Increase the reach of your titles
YUMPU automatically turns print PDFs into web optimized ePapers that Google loves.
DE Bedienungsanleitung<br />
GB Operating Manual<br />
FR Mode d’emploi<br />
NL Handleiding<br />
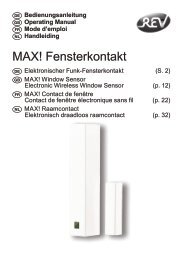
<strong>MAX</strong>! <strong>Cube</strong><br />
DE LAN Gateway (S. 2)<br />
GB <strong>MAX</strong>! <strong>Cube</strong><br />
LAN Gateway (p. 13)<br />
FR <strong>MAX</strong>! <strong>Cube</strong><br />
Passerelle LAN (p. 23)<br />
NL <strong>MAX</strong>! <strong>Cube</strong><br />
LAN Gateway (p. 33)<br />
1
2<br />
Inhaltsverzeichnis<br />
1. Bestimmungsgemäßer Einsatz ...................................3<br />
2. Übersicht .....................................................................4<br />
3. Sicherheitshinweise ....................................................5<br />
4. Entsorgungshinweise ..................................................5<br />
5. Montage ......................................................................5<br />
6. Anlernen von <strong>MAX</strong>! Komponenten .............................6<br />
7. Stromversorgung.........................................................6<br />
8. Installation der Gerätesoftware &<br />
Systemvoraussetzungen ............................................7<br />
9. Internetverbindung ......................................................8<br />
10. Werkseinstellungen wieder herstellen ........................9<br />
11. LED-Blinkfolgen und Sendeverhalten ......................10<br />
12. Hinweise zum Funkbetrieb ........................................ 11<br />
13. Wartung und Reinigung ............................................ 11<br />
14. Technische Eigenschaften ........................................12<br />
15. Garantie .....................................................................12<br />
Lesen Sie diese Anleitung sorgfältig, bevor Sie das Gerät in<br />
Betrieb nehmen. Bewahren Sie die Anleitung zum späteren<br />
Nachschlagen auf.<br />
<strong>REV</strong> <strong>Ritter</strong> <strong>GmbH</strong><br />
Frankenstr. 1-4<br />
D-63776 Mömbris<br />
www.rev.biz
1. Bestimmungsgemäßer Einsatz<br />
Der <strong>MAX</strong>! <strong>Cube</strong> ermöglicht die komfortable Konfiguration<br />
der <strong>MAX</strong>! Komponenten mit der <strong>MAX</strong>! Software und dem<br />
<strong>MAX</strong>! Portal. Des Weiteren lässt sich der Status der<br />
einzelnen Komponenten über den <strong>Cube</strong> abrufen. Das<br />
Gerät ist somit als LAN Gateway die Datenschnittstelle<br />
des Systems und fungiert zudem als Speicher aller<br />
Konfigurationsdaten. Die Funkkommunikation der <strong>MAX</strong>!<br />
Komponenten untereinander erfolgt bidirektional. Somit<br />
ist dafür gesorgt, dass gesendete Informationen den<br />
Empfänger erreichen. Das System lässt sich bei einer<br />
bestehenden Internetverbindung auf verschiedene Weisen<br />
steuern. Auf den <strong>MAX</strong>! <strong>Cube</strong> kann durch einen Browser<br />
über das Internetportal, über Smartphone-Applikationen<br />
sowie über die lokale Software zugegriffen werden.<br />
Bitte beachten Sie, dass der Zugriff auf den <strong>MAX</strong>!<br />
<strong>Cube</strong> über das Internetportal nur möglich ist, wenn<br />
die lokale Software inaktiv ist.<br />
Konfigurationen für alle Endgeräte werden bequem in<br />
der <strong>MAX</strong>! Software vorgenommen und lassen sich für<br />
einzelne Räume individuell gestalten. Einstellungen (z.B.<br />
Wochenprofile) werden an die <strong>MAX</strong>! Heizkörperthermostate<br />
im System übertragen, damit diese auch autark ohne den<br />
<strong>MAX</strong>! <strong>Cube</strong> funktionieren.<br />
Betreiben Sie das Gerät nur in Innenräumen und<br />
vermeiden Sie den Einfluss von Feuchtigkeit, Staub<br />
sowie Sonnen- oder Wärmebestrahlung. Jeder andere<br />
Einsatz als in dieser Bedienungsanleitung beschriebene<br />
ist nicht bestimmungsgemäß und führt zu Garantie- und<br />
Haftungsausschluss. Dies gilt auch für Umbauten und<br />
3
Veränderungen. Die Geräte sind ausschließlich für den<br />
privaten Gebrauch gedacht.<br />
Weitere Informationen zum <strong>MAX</strong>! System und den<br />
verfügbaren Komponenten erhalten Sie auf der Webseite<br />
Ihres Vertragspartners.<br />
4<br />
2. Übersicht<br />
Oberseite:<br />
Power: Die LED zeigt an, ob eine Stromversorgung<br />
besteht und das Gerät betriebsbereit<br />
ist.<br />
Internet: Die LED signalisiert, ob eine Verbindung<br />
zum LAN/Internet besteht.<br />
Battery: Die LED zeigt an, ob bei einer<br />
<strong>MAX</strong>! Komponente die Batterie auszutauschen<br />
ist.<br />
Unterseite:<br />
Reset-Taste: Zum Wiederherstellen der<br />
Werkseinstellung.<br />
Seite:<br />
1: Netzwerkanschluss zur Verbindung<br />
mit einem Router.<br />
2: Anschluss für USB Versorgungsspan-<br />
nung (siehe Kapitel 7).
3. Sicherheitshinweise<br />
Die Geräte sind keine Spielzeuge, erlauben Sie Kindern<br />
nicht damit zu spielen. Lassen Sie das Verpackungsmaterial<br />
nicht achtlos liegen, dies kann für Kinder zu einem<br />
gefährlichen Spielzeug werden. Öffnen Sie das Gerät<br />
nicht, es enthält keine durch den Anwender zu wartenden<br />
Teile. Im Fehlerfall schicken Sie das Gerät an den Service.<br />
4. Entsorgungshinweise<br />
WEEE-Entsorgungshinweis<br />
Gebrauchte Elektro- und Elektronikgeräte dürfen<br />
gemäß europäischer Vorgaben nicht mehr<br />
zum unsortierten Abfall gegeben werden. Das<br />
Symbol der Abfalltonne auf Rädern weist auf die<br />
Notwendigkeit der getrennten Sammlung hin.<br />
Helfen auch Sie mit beim Umweltschutz und sorgen<br />
dafür, dieses Gerät, wenn Sie es nicht mehr nutzen, in die<br />
hierfür vorgesehenen Systeme der Getrenntsammlung zu<br />
geben. RICHTLINIE 2002/96/EG DES EUROPÄISCHEN<br />
PARLAMENTS UND DES RATES vom 27. Januar 2003<br />
über Elektro- und Elektronik-Altgeräte.<br />
Das CE-Zeichen ist ein Freiverkehrszeichen, das<br />
sich ausschließlich an die Behörden wendet und<br />
keine Zusicherung von Eigenschaften beinhaltet.<br />
5. Montage<br />
Der <strong>MAX</strong>! <strong>Cube</strong> kann an der Wand befestigt oder, auf<br />
seinen Füßen stehend, aufgestellt werden.<br />
Zur Wandmontage des <strong>MAX</strong>! <strong>Cube</strong>s verwenden Sie die<br />
Wandhalterung:<br />
5
6<br />
• Markieren Sie die Bohrlöcher (a)<br />
mit einem Stift an der Wand.<br />
• Bohren Sie die angezeichneten<br />
Löcher (a) mit einem Bohrer.<br />
• Verwenden Sie zur Befestigung<br />
der Wandhalterung die mitgelie-<br />
ferten Schrauben und Dübel.<br />
• Nach Befestigung der<br />
Wandhalterung kann der <strong>MAX</strong>!<br />
<strong>Cube</strong> von oben mit der Öffnung<br />
nach unten auf die Wandhalterung<br />
aufgesetzt werden.<br />
6. Anlernen von <strong>MAX</strong>! Komponenten<br />
Damit <strong>MAX</strong>! Komponenten miteinander kommunizieren<br />
können, müssen sie aneinander angelernt sein.<br />
Das Anlernen am <strong>MAX</strong>! <strong>Cube</strong> erfolgt komfortabel über die<br />
<strong>MAX</strong>! PC Software.<br />
Ordnen Sie den angelernten <strong>MAX</strong>! Komponenten<br />
bereits zwischenzeitlich Räume zu, um mögliche<br />
Verwechslungen beim Anlernen zu vermeiden.<br />
7. Stromversorgung<br />
Die Stromversorgung des <strong>MAX</strong>! <strong>Cube</strong> erfolgt mit dem<br />
mitgelieferten Steckernetzteil.<br />
• Stecken Sie das mitgelieferte USB-Netzteil in<br />
eine Steckdose.<br />
• Verbinden Sie den <strong>MAX</strong>! <strong>Cube</strong> und das Netzteil<br />
mit dem USB-Kabel. Verwenden Sie hierzu die<br />
seitlich angebrachte USB-Anschlussbuchse (2).
Die Stromversorgung des <strong>MAX</strong>! <strong>Cube</strong> ist alternativ<br />
auch über den USB Anschluss eines Computers<br />
oder eines Routers möglich. Beachten Sie dabei,<br />
dass bei einigen Modellen die USB Spannung nach<br />
Ausschalten des Gerätes nicht mehr zur<br />
Verfügung steht.<br />
Sollte die Stromversorgung zum <strong>MAX</strong>! <strong>Cube</strong><br />
unterbrochen sein, regeln die Thermostate die<br />
Temperatur in den Räumen autark weiter. Der <strong>MAX</strong>!<br />
<strong>Cube</strong> dient nur als Schnittstelle zur <strong>MAX</strong>! Software,<br />
zu einem <strong>MAX</strong>! Eco Taster und als zentraler<br />
Datenspeicher.<br />
Achtung: Um Schäden am Gerät zu vermeiden,<br />
benutzen Sie bitte ausschließlich das mitgelieferte<br />
Originalnetzteil für die Stromversorgung.<br />
8. Installation der PC Software &<br />
Systemvoraussetzungen<br />
Der <strong>MAX</strong>! <strong>Cube</strong> muss für die Installation der <strong>MAX</strong>!<br />
Software mit Strom versorgt und mit einem Router<br />
verbunden sein.<br />
Bei der Inbetriebnahme des <strong>MAX</strong>! <strong>Cube</strong>s muss<br />
DHCP beim Router aktiviert sein. Alternativ kann<br />
dem <strong>MAX</strong>! <strong>Cube</strong> manuell über die <strong>MAX</strong>! Software<br />
folgende IP-Adresse zugewiesen werden:<br />
192.168.0.222.<br />
Das <strong>MAX</strong>! PC Programm benötigen Sie, um über den <strong>MAX</strong>!<br />
<strong>Cube</strong> <strong>MAX</strong>! Komponenten anzulernen, zu konfigurieren und<br />
um Statusmeldungen der Geräte abzurufen.<br />
7
• Verbinden Sie den <strong>Cube</strong> mit einem Router. Stecken Sie<br />
dazu das mitgelieferte Netzwerkkabel in die dafür vor-<br />
gesehene Buchse seitlich am <strong>MAX</strong>! <strong>Cube</strong>. Das andere<br />
Ende stecken Sie in einen freien Steckplatz Ihres<br />
Routers.<br />
• Öffnen Sie den Internet-Browser Ihres PCs, auf dem<br />
das <strong>MAX</strong>! PC Programm installiert werden soll.<br />
• Zum Download Ihres <strong>MAX</strong>! PC Programms gehen Sie<br />
auf die Website Ihres Vertragspartners und folgen Sie<br />
den Hinweisen.<br />
• Starten Sie das heruntergeladene Programm und<br />
folgen Sie den Installationshinweisen.<br />
Systemvoraussetzungen:<br />
• Betriebssystem: Windows XP ® , Windows Vista ,<br />
Windows 7,<br />
Mac OS X 10.5 oder höher<br />
• Browser: Internet Explorer ® ab Version 7.0,<br />
Mozilla Firefox ® ab Version 3.6.16,<br />
Safari ab Version 5, Google Chrome<br />
ab Version 8<br />
9. Internetverbindung<br />
Die Konfiguration des <strong>MAX</strong>! Systems erfordert eine<br />
lokale Verbindung zum Heimnetzwerk (LAN) und eine<br />
bestehende Spannungsversorgung des <strong>MAX</strong>! <strong>Cube</strong>. Um<br />
mit Ihrem Smartphone oder Notebook über das <strong>MAX</strong>!<br />
Portal aus eine Verbindung herzustellen, muss zusätzlich<br />
der Internetzugriff freigeschaltet sein.<br />
8<br />
Zur dauerhaften Stromversorgung des <strong>MAX</strong>! <strong>Cube</strong>s<br />
sollten Sie das mitgelieferte USB-Netzteil verwenden.
10. Werkseinstellungen wieder herstellen<br />
Der Auslieferungszustand des<br />
<strong>MAX</strong>! <strong>Cube</strong> kann manuell wieder<br />
hergestellt werden. Dabei gehen alle<br />
vorgenommenen Einstellungen und<br />
Informationen über angelernte Geräte<br />
unwiderruflich verloren.<br />
• Trennen Sie den <strong>MAX</strong>! <strong>Cube</strong> von der Stromversorgung<br />
und warten Sie 1 Minute.<br />
• Halten Sie nun die Reset-Taste (b) gedrückt.<br />
• Stellen Sie gleichzeitig die Stromversorgung wieder<br />
her.<br />
• Halten Sie die Reset-Taste weiterhin gedrückt.<br />
• Die LED leuchtet und beginnt anschließend zu blinken.<br />
Die LED leuchtet wieder permanent.<br />
• Die Werkseinstellungen sind nun wieder hergestellt.<br />
9
10<br />
11. LED-Blinkfolgen und Sendeverhalten<br />
LED Zustand Bedeutung<br />
Power-LED LED aus Stromversorgung<br />
unterbrochen<br />
LED blinkt <strong>MAX</strong>! <strong>Cube</strong> startet und führt<br />
Selbsttest durch<br />
LED leuchtet Selbsttest erfolgreich<br />
dauerhaft abgeschlossen und die<br />
Stromversorgung besteht<br />
Internet-LED LED aus Keine Verbindung aktiv<br />
LED blinkt LAN Verbindung zum Router<br />
besteht, keine Verbindung<br />
zum Internet<br />
LED leuchtet Verbindung zum Router und<br />
dauerhaft zum Internet aktiv<br />
Battery-LED LED aus Alle <strong>MAX</strong>! Komponenten<br />
haben ausreichend<br />
Batteriespannung<br />
LED blinkt Batterien einer <strong>MAX</strong>!<br />
Komponente müssen<br />
ausgetauscht werden
12. Hinweise zum Funkbetrieb<br />
Die Funkübertragung wird auf einem nicht exklusiven<br />
Übertragungsweg realisiert, weshalb Störungen nicht<br />
ausgeschlossen werden können. Störeinflüsse können<br />
u. a. durch Schaltvorgänge, Elektromotoren oder auch<br />
defekte Elektrogeräte hervorgerufen werden.<br />
Die Reichweite in Gebäuden kann stark von der im Freifeld<br />
abweichen. Außer der Sendeleistung und den Empfangseigenschaften<br />
der Empfänger spielen Umwelteinflüsse<br />
wie Luftfeuchtigkeit neben baulichen Gegebenheiten eine<br />
wichtige Rolle.<br />
Hiermit erklärt <strong>REV</strong> <strong>Ritter</strong>, dass sich das Model in<br />
Übereinstimmung mit den grundlegenden Anforderungen<br />
und den anderen relevanten Vorschriften der Richtlinie<br />
1999/5/EG befindet. Vollständige CE-Konformitätserklärung<br />
siehe: www.rev.biz unter dem jeweiligen Artikel.<br />
13. Wartung und Reinigung<br />
Das Produkt ist wartungsfrei. Überlassen Sie eine<br />
Reparatur einer Fachkraft. Reinigen Sie das Produkt mit<br />
einem weichen, sauberen, trockenen und fusselfreien<br />
Tuch. Für die Entfernung von stärkeren Verschmutzungen<br />
kann das Tuch leicht mit lauwarmem Wasser angefeuchtet<br />
werden. Verwenden Sie keine lösungsmittelhaltigen<br />
Reinigungsmittel, das Kunststoffgehäuse und die<br />
Beschriftung können dadurch angegriffen werden.<br />
Trennen Sie das Gerät vor der Reinigung vom<br />
Stromnetz.<br />
11
12<br />
14. Technische Eigenschaften<br />
Spannungsversorgung: Input: 100V - 240V~ / 350mA<br />
Output: 5V= / 550mA<br />
Gehäusemaße (BxHxT): 80 x 80 x 80mm<br />
Funkfrequenz: 868,3MHz<br />
Empfängerklasse: SRD Class 2<br />
Schutzart: IP20<br />
Typische Freifeldreichweite: 100m<br />
Schnittstelle: RJ-45 (Ethernet)<br />
Farbe: weiß<br />
15. Garantie<br />
<strong>REV</strong> Produkte durchlaufen während der Fertigung mehrere, nach<br />
neuestem Stand der Technik aufgebaute Prüfstationen. Sollte<br />
dennoch ein Mangel am Gerät auftreten, leistet <strong>REV</strong> im<br />
nachfolgenden Umfang Gewähr:<br />
1. Die Dauer der Garantie beträgt 24 Monate ab dem Kaufdatum.<br />
Sie endet spätestens 30 Monate nach der Fertigung des Gerätes.<br />
2. Das Gerät wird von <strong>REV</strong> entweder unentgeltlich nachge-<br />
bessert oder ausgetauscht, wenn es innerhalb der Garantiezeit<br />
nachweisbar wegen eines Fertigungs- oder Materialfehlers<br />
unbrauchbar wird.<br />
3. Die Haftung erstreckt sich nicht auf Transportschäden sowie<br />
auf Schäden, die durch fehlerhafte Installation entstehen.<br />
4. Wird innerhalb von 6 Monaten nach Nichtanerkennung des<br />
Haftungsfalles durch <strong>REV</strong>, kein Widerspruch vom Käufer<br />
eingelegt, verjährt das Recht auf Nachbesserung.<br />
5. Im Fehlerfall ist das Gerät zusammen mit dem Kaufbeleg und<br />
einer kurzen Mängelbeschreibung an den Händler oder <strong>REV</strong> zu<br />
senden.<br />
6. Ohne Garantienachweis erfolgt Nachbesserung ausschließlich<br />
gegen Berechnung.<br />
Technische Änderungen vorbehalten.<br />
<strong>REV</strong> 0084010112/0084020112 03.12
Table of contents<br />
1. Intended use ..............................................................13<br />
2. Overview ...................................................................14<br />
3. Safety instructions ....................................................15<br />
4. Instructions for disposal ............................................15<br />
5. Mounting ....................................................................15<br />
6. Teaching-in <strong>MAX</strong>! Components ................................16<br />
7. Power supply .............................................................16<br />
8. Installation of device software &<br />
system requirements .................................................17<br />
9. Internet connection ...................................................18<br />
10. Restoring the factory settings ...................................18<br />
11. LED flashing sequences and transmission behaviour .19<br />
12. Information about radio operation ............................20<br />
13. Maintenance and cleaning ........................................20<br />
14. Technical characteristics ..........................................21<br />
Read this manual carefully before starting to use the device. Keep<br />
the manual so you can refer to it at a later date should you need to.<br />
<strong>REV</strong> <strong>Ritter</strong> <strong>GmbH</strong><br />
Frankenstr. 1-4<br />
D-63776 Mömbris<br />
www.rev.biz<br />
13
14<br />
1. Intended use<br />
The <strong>MAX</strong>! <strong>Cube</strong> provides a user-friendly means of<br />
configuring <strong>MAX</strong>! Components with the <strong>MAX</strong>! Software and<br />
the <strong>MAX</strong>! Portal. It can also be used to query the status of<br />
the individual components.<br />
As a LAN gateway, the device is thus the data interface<br />
of the system. Furthermore, it provides a storage location<br />
for all configuration data. Radio communication between<br />
<strong>MAX</strong>! Components is bi-directional. This ensures that the<br />
information sent reaches the recipient.<br />
With an existing Internet connection, there are various ways<br />
of controlling the system. The <strong>MAX</strong>! <strong>Cube</strong> can be accessed<br />
using a browser via the Internet portal, using a smartphone<br />
application and with the local software.<br />
Please note that you can only access the <strong>MAX</strong>! <strong>Cube</strong><br />
via the Internet portal if the local software is inactive.<br />
Configuration settings for all terminals are made via the<br />
user-friendly <strong>MAX</strong>! Software. Different settings can be<br />
made for individual rooms. Settings (e.g. weekly profiles)<br />
are transmitted to the <strong>MAX</strong>! Radiator Thermostats in the<br />
system (so these also function independently without the<br />
<strong>MAX</strong>! <strong>Cube</strong>).<br />
The device may only be operated indoors and must be<br />
protected from the effects of damp and dust, as well<br />
as solar or heat radiation. Using this device for any<br />
purpose other than that described in this operating manual<br />
does not fall within the scope of intended use and shall<br />
invalidate any warranty or liability. This also applies to any<br />
conversion or modification work. This device is intended<br />
for private use only.
For more information about the <strong>MAX</strong>! System and the available<br />
components, please go to the website of your contracting<br />
partner.<br />
2. Overview<br />
Top:<br />
Power: The LED indicates whether a power<br />
supply is present and if the device is<br />
ready for operation.<br />
Internet: The LED indicates whether a<br />
connection to the LAN/Internet exists.<br />
Battery: The LED indicates whether the<br />
battery needs to be replaced on a <strong>MAX</strong>!<br />
Component.<br />
Underside:<br />
Reset button: Restores the factor y<br />
setting.<br />
Side:<br />
(1) Network port to connect to a router<br />
(2) Port for for USB power supply (see<br />
Section 6)<br />
15
16<br />
3. Safety instructions<br />
This device is not a toy; do not allow children to play with<br />
it. Do not leave packaging material lying around, as it can<br />
be dangerous in the hands of a child. Do not open the<br />
device: it does not contain any components that need to be<br />
serviced by the user. In the event of an error, please return<br />
the device to our service department.<br />
4. Instructions for disposal<br />
WEEE-reference of disposal<br />
In accordance with European defaults used electrical<br />
and electronics devices may no more be given<br />
to the unsorted waste. The symbol of the waste bin<br />
on wheels refers to the necessity of separate collection.<br />
Please help with environmental protection and see<br />
to it that this device is given to the for this purpose designated<br />
systems of waste sorting if you do not use it any longer.<br />
GUIDELINE 2002/96/EG of the EUROPEAN PARLIAMENT<br />
AND the COUNCIL of January 27th 2003 about electrical<br />
and electronics old devices.<br />
The CE Marking is simply an official symbol<br />
relating to the free movement of a product; it does<br />
not warrant a product’s characteristics.<br />
5. Mounting<br />
The <strong>MAX</strong>! <strong>Cube</strong> can be installed<br />
fastened to the wall or stood up on<br />
its feet.<br />
Use the wall bracket if you wish to<br />
mount the <strong>MAX</strong>! <strong>Cube</strong> on a wall:
• Use a pen to mark the bore hole positions<br />
(a) of the wall mount on the<br />
wall.<br />
• Use a drill to make the holes as<br />
illustrated (a).<br />
• Use the screws and plugs supplied<br />
to fasten the bracket to the wall.<br />
• Once the wall bracket is in place,<br />
the <strong>MAX</strong>! <strong>Cube</strong> can be attached to<br />
the wall bracket from above, with<br />
the opening pointing down.<br />
6. Teaching-in <strong>MAX</strong>! Components<br />
In order to enable communication between <strong>MAX</strong>! Components,<br />
the devices have to be taught-in to one another.<br />
Devices are taught-in on the <strong>MAX</strong>! <strong>Cube</strong> with the userfriendly<br />
<strong>MAX</strong>! PC software.<br />
In the meantime, please allocate rooms to the taughtin<br />
<strong>MAX</strong>! Components to avoid possible confusion.<br />
7. Power supply<br />
The <strong>MAX</strong>! <strong>Cube</strong> draws its power supply from the plug-in<br />
main adapter included in the scope of supply.<br />
• Plug the USB main adapter supplied into a socket<br />
outlet.<br />
• Connect the <strong>MAX</strong>! <strong>Cube</strong> and the main adapter with the<br />
USB cable. Use the USB port on the side of the device<br />
(2) for this purpose.<br />
Alternatively, power can be supplied to the <strong>MAX</strong>!<br />
<strong>Cube</strong> via the USB port on a computer or a router.<br />
17
Please note that in the case of some models, the USB voltage<br />
is no longer available once the device has been<br />
switched off.<br />
18<br />
If the power supply to the <strong>MAX</strong>! <strong>Cube</strong> is interrupted,<br />
the thermostats in the rooms continue to regulate<br />
the temperature independently. The <strong>MAX</strong>! <strong>Cube</strong><br />
serves solely as the interface to the <strong>MAX</strong>! Software,<br />
to a <strong>MAX</strong>! Eco Switch and as a central data store.<br />
Attention: To avoid damaging the device, please only<br />
use the original main adapter supplied with the<br />
device for the power supply.<br />
8. Installation of PC software &<br />
system requirements<br />
The <strong>MAX</strong>! <strong>Cube</strong> must be supplied with power and<br />
connected to router for the installation of the <strong>MAX</strong>!<br />
Software.<br />
For the installation of your <strong>MAX</strong>! <strong>Cube</strong>, the DHCP<br />
of your router has to be activated. Alternatively, the<br />
following IP address can be manually allocated to<br />
t h e M A X ! <strong>Cube</strong> v i a t h e M A X ! S of t ware:<br />
192.168.0.222.<br />
You need the <strong>MAX</strong>! PC program to teach-in <strong>MAX</strong>!<br />
Components via the <strong>MAX</strong>! <strong>Cube</strong>, for configuration purposes<br />
and to call up device status messages.<br />
• Connect the cube to a router by plugging the network<br />
cable supplied with the device into the designated port<br />
on the side of the <strong>MAX</strong>! <strong>Cube</strong>. Connect the other end of<br />
the cable to a free slot on your router.<br />
• Open the Internet browser on your PC (the one on<br />
which the <strong>MAX</strong>! Software is to be installed).
• To download the <strong>MAX</strong>! PC Program, please go to<br />
the website of your contracting partner and follow the<br />
corresponding instructions.<br />
• Start the program you have downloaded and follow the<br />
installation instructions.<br />
System requirements:<br />
• Operating system: Windows XP ® , Windows Vista ,<br />
Windows 7, Mac OS X 10.5 or<br />
higher<br />
• Browser: Internet Explorer® Version 7.0 or<br />
higher, Mozilla Firefox® Version<br />
3.6.16 or higher, Safari Version 5<br />
or higher, Google Chrome Version<br />
8 or higher<br />
9. Internet connection<br />
The configuration of the <strong>MAX</strong>! System requires a local<br />
connection to the home network (LAN) and an existing<br />
power supply to the <strong>MAX</strong>! <strong>Cube</strong>. To use your smartphone<br />
or notebook to establish a connection via the <strong>MAX</strong>! Portal,<br />
Internet access must also be enabled.<br />
You should use the USB main adapter supplied with<br />
the device for a permanent power supply to the<br />
<strong>MAX</strong>! <strong>Cube</strong>.<br />
10. Restoring the factory settings<br />
The MA X! <strong>Cube</strong> can be reset to the<br />
initial state manually. When the initial state<br />
is restored, all information about taught-in<br />
devices and all settings made are lost and<br />
cannot be retrieved.<br />
19
• Start by disconnecting the <strong>MAX</strong>! <strong>Cube</strong> from the power<br />
supply.<br />
• Wait 1 minute.<br />
• Then press and hold down the Reset button (b).<br />
• At the same time, reconnect the <strong>MAX</strong>! <strong>Cube</strong> to the<br />
power supply.<br />
• Still hold down the Reset button. The Power LED lights<br />
up and begins to flash.<br />
• The Power LED stays lit now.<br />
• The factory settings are restored.<br />
20<br />
11. LED flashing sequences<br />
and transmission behaviour<br />
LED State Meaning<br />
Power LED LED off Power supply interrupted<br />
LED flashing <strong>MAX</strong>! <strong>Cube</strong> starting up and<br />
performing self-test<br />
LED permanently Self-test completed<br />
lit<br />
successfully and power<br />
supply present<br />
Internet LED LED off No connection active<br />
LED flashing LAN connection to router<br />
established, no connection<br />
to Internet<br />
LED permanently Connection to router and to<br />
lit<br />
Internet active<br />
Battery LED LED off All <strong>MAX</strong>! Components have<br />
sufficient battery voltage<br />
LED flashing Batteries of a <strong>MAX</strong>!<br />
Component need to be<br />
replaced
12. Information about radio operation<br />
Radio transmission is performed on a non-exclusive<br />
transmission path, which means that there is a possibility<br />
of interference occurring. Interference can also be caused<br />
by switching operations, electrical motors or defective<br />
electrical devices.<br />
The range of transmission within buildings can differ<br />
greatly from that available in the open air. Besides the<br />
transmitting power and the reception characteristics of the<br />
receiver, environmental factors such as humidity in the vicinity<br />
have an important role to play, as do on-site structural/screening<br />
conditions.<br />
<strong>REV</strong> <strong>Ritter</strong> hereby declares that the . model is in<br />
accordance with the underlying requirements and other<br />
relevant provisions of Directive 1999/EC. For the complete<br />
CE Declaration of Conformity please refer to www.rev.biz<br />
under the article in question.<br />
13. Maintenance and cleaning<br />
The product does not require any maintenance. Enlist<br />
the help of an expert to carry out any repairs. Clean the<br />
product using a soft, lint-free cloth that is clean and dry.<br />
You may dampen the cloth a little with lukewarm water in<br />
order to remove more stubborn marks. Do not use any detergents<br />
containing solvents, as they could corrode the<br />
plastic housing and label.<br />
Disconnect the device from the power supply system<br />
before commencing cleaning.<br />
21
22<br />
14. Technical characteristics<br />
Power supply: Input: 100V - 240V~ / 350mA<br />
Output: 5V= / 550mA<br />
Housing dimensions<br />
(W x H x D): 80 x 80 x 80mm<br />
Radio frequency: 868.3MHz<br />
Receiver class: SRD Class 2<br />
Degree of protection: IP20<br />
Typical open air range: 100m<br />
Interface: RJ-45 (Ethernet)<br />
Colour: White<br />
During manufacturing this <strong>REV</strong> product is passed through<br />
several quality testing stations which are set up with newest<br />
technology. Should nevertheless a defect arise, <strong>REV</strong> offers a<br />
warranty to the following extent:<br />
1. The duration of the warranty is 24 months after the date of<br />
purchase.<br />
2. The unit is either repaired or replaced by <strong>REV</strong> free of<br />
charge or if it can be shown that it has become unusable<br />
during the warranty period due to a manufacturing or<br />
material defect.<br />
3. The liability does not cover transport damages or<br />
damaged incurred through defective installation.<br />
4. If <strong>REV</strong> repudiates the warranty claim and no objection<br />
is made within 6 months, the right to repair becomes time-<br />
barred.<br />
5. In a warranty case the unit must be sent to the dealer or<br />
<strong>REV</strong> together with the sales slip and a short description of<br />
the defect.<br />
6. If there is no proof for a warranty liability being in place,<br />
any repair carried out will be invoiced.
Sommaire<br />
1. Utilisation conforme ..................................................23<br />
2. Vue d’ensemble .........................................................24<br />
3. Consignes de sécurité ..............................................25<br />
4. Consignes pour l’élimination .....................................25<br />
5. Montage ....................................................................25<br />
6. Apprentissage des éléments <strong>MAX</strong>! ..........................26<br />
7. Alimentation électrique .............................................26<br />
8. Installation du logiciel d’appareils<br />
et configurations minimales des systèmes ...............27<br />
9. Connexion Internet ....................................................28<br />
10. Rétablir les réglages par défaut ................................28<br />
11. Séquences de clignotements<br />
et comportements d’émission ...................................29<br />
12. Remarques au sujet du fonctionnement radio .........30<br />
13. Entretien et nettoyage ...............................................30<br />
14. Caractéristiques techniques .....................................31<br />
Lisez soigneusement la présente notice avant la mise en service<br />
de l’appareil. Conservez la notice pour pouvoir vous y référer ultérieurement.<br />
<strong>REV</strong> <strong>Ritter</strong> <strong>GmbH</strong><br />
Frankenstr. 1-4<br />
D-63776 Mömbris<br />
www.rev.biz<br />
23
24<br />
1. Utilisation conforme<br />
Le <strong>MAX</strong>! <strong>Cube</strong> permet la configuration confortable des<br />
éléments <strong>MAX</strong>! au moyen du logiciel <strong>MAX</strong>! et du portail<br />
<strong>MAX</strong>!. De plus, le <strong>Cube</strong> permet de visualiser l’état des différents<br />
éléments. En tant que passerelle LAN, l’appareil<br />
constitue ainsi l’interface de données du système et sert<br />
également de mémoire pour toutes les données de configuration.<br />
La communication radio entre les éléments <strong>MAX</strong>!<br />
est bidirectionnelle. Ceci permet d’assurer que les informations<br />
transmises sont bien réceptionnées par le récepteur.<br />
Une connexion Internet existante permet de commander<br />
le système de différentes manières. L’accès au <strong>MAX</strong>!<br />
<strong>Cube</strong> est possible au moyen d’un navigateur via le portail<br />
Internet, par des applications de Smartphones ainsi qu’au<br />
moyen du logiciel local.<br />
Veuillez bien noter qu’on ne peut qu’accéder au <strong>MAX</strong>!<br />
<strong>Cube</strong> via le portail Internet, quand le logiciel local<br />
est inactif.<br />
Les configurations pour tous les périphériques sont effectuées<br />
confortablement à partir du logiciel <strong>MAX</strong>! et peuvent<br />
être paramétrées individuellement pour les différentes<br />
pièces. Les réglages (par ex. les profils de semaines) sont<br />
transmis aux thermostats des radiateurs du système, leur<br />
permettant ainsi de fonctionner aussi sans le <strong>MAX</strong>! <strong>Cube</strong>.<br />
Utilisez l’appareil uniquement à l’intérieur et évitez l’exposition<br />
à l’humidité, à la poussière ainsi qu’au soleil et aux<br />
rayonnements thermiques. Toute utilisation autre que celle<br />
décrite dans le présent manuel est considérée comme non<br />
conforme et entraîne une annulation de la garantie et de la<br />
responsabilité du fabricant. Ceci s’applique également aux<br />
modifications et transformations. Les appareils sont desti-
nés exclusivement à une utilisation privée.<br />
Pour plus d’informations concernant le système <strong>MAX</strong>! et<br />
les éléments correspondants, visitez le site Web de votre<br />
partenaire de contrat.<br />
2. Vue d’ensemble<br />
Dessus de l’appareil :<br />
Power : la DEL indique la présence ou non<br />
d’une alimentation électrique et l’opérationnalité<br />
de l’appareil.<br />
Internet : la DEL indique si la connexion<br />
avec LAN/Internet est établie ou non.<br />
Battery : la DEL indique lorsque la pile<br />
d’un élément <strong>MAX</strong>! doit être remplacée.<br />
Dessous de l’appareil :<br />
Touche « Reset » : pour restituer la configuration d’usine.<br />
Côté :<br />
(1) Connecteur réseau pour la connexion<br />
avec un routeur.<br />
(2) Connecteur pour l’alimentation<br />
électrique par USB (voir chapitre 6).<br />
3. Consignes de sécurité<br />
25
Les appareils ne sont pas des jouets, ne permettez pas à des<br />
enfants de jouer avec eux. Ne laissez pas traîner les matériels<br />
d’emballage, ils peuvent constituer des jouets dangereux<br />
pour les enfants. N’ouvrez pas l’appareil, il ne contient aucune<br />
pièce réparable par l’utilisateur. En cas de dysfonctionnement,<br />
renvoyez l’appareil au service après-vente.<br />
26<br />
4. Consignes pour l’élimination<br />
WEEE - Indication des traitements des déchets<br />
Suite aux indications européennes, les déchets<br />
électriques et électroniques ne doivent plus être<br />
jeter avec les déchets non tirés. Le symbole de<br />
la poubelle avec les roues indique l’importance<br />
du tri sélectif.Participez vous aussi au respect de<br />
l’environnement et faites en sorte que, lorsque vous n’utiliserez<br />
plus votre appareil, vous suiviez les indications du<br />
traitement des déchets.Directive : 2002/96/EG DU PAR-<br />
LEMENT ET CONSEIL EUROPÉENS DU 27 janvier 2003<br />
au sujet d’anciens appareils électroniques et électriques.<br />
Le sigle CE est un sigle de libre circulation destiné<br />
uniquement aux administrations ; il ne constitue<br />
pas une garantie de caractéristiques.<br />
5. Montage<br />
Le <strong>MAX</strong>! <strong>Cube</strong> peut être fixé au mur ou posé sur son pied.<br />
Pour le montage mural du <strong>MAX</strong>! <strong>Cube</strong>, utilisez le support<br />
mural :<br />
• Marquez les trous de perçage (a)<br />
sur le mur à l’aide d’un stylo.<br />
• Percez les trous marqués (a) au moyen
d’une perceuse.<br />
•Utilisez les vis et chevilles fournies<br />
pour fixer le support mural.<br />
• Après la fixation du support mural,<br />
le <strong>MAX</strong>! <strong>Cube</strong> peut y être inséré par<br />
le haut et avec l’ouverture orientée<br />
vers le bas.<br />
6. Apprentissage des éléments <strong>MAX</strong>!<br />
Afin que les éléments <strong>MAX</strong>! puissent communiquer entre<br />
eux, ils doivent faire l’objet d’un apprentissage mutuel.<br />
L’apprentissage dans le <strong>MAX</strong>! <strong>Cube</strong> est réalisé confortablement<br />
au moyen du logiciel <strong>MAX</strong>! pour PC.<br />
Entre-temps, classez les éléments <strong>MAX</strong>! dans les<br />
differentes chambres pourqu’on puisse évider des<br />
échanges involontaires en les faisant l’objet d’un<br />
apprentissage.<br />
7. Alimentation électrique<br />
L’alimentation électrique du <strong>MAX</strong>! <strong>Cube</strong> est réalisée au<br />
moyen du bloc d’alimentation fourni.<br />
• Branchez le bloc d’alimentation USB à une prise<br />
électrique.<br />
• Connectez le <strong>MAX</strong>! <strong>Cube</strong> et le bloc d’alimentation au<br />
câble USB. Utilisez à cet effet le connecteur USB dis<br />
posé sur le côté (2).<br />
L’alimentation électrique du <strong>MAX</strong>! <strong>Cube</strong> est<br />
alternativement aussi possible via le connecteur<br />
USB d’un PC ou d’un routeur. Notez cependant<br />
que sur certains modèles, la tension USB n’est<br />
plus disponible après avoir éteint l’appareil.<br />
Si l’alimentation électrique du <strong>MAX</strong>! <strong>Cube</strong> est inter-<br />
27
ompue, les thermostats dans les différentes pièces<br />
effectueront le réglage de manière autonome. Le<br />
<strong>MAX</strong>! <strong>Cube</strong> sert uniquement d’interface avec le logiciel<br />
<strong>MAX</strong>!, avec un bouton mural <strong>MAX</strong>! ou la mémoire<br />
de données centrale.<br />
Attention: afin d’éviter d’endommager l’appareil,<br />
veuillez utiliser exclusivement le bloc d’alimentation<br />
d’origine pour assurer l’alimentation électrique.<br />
8. Installation du logiciel PC<br />
et configurations minimales des systèmes<br />
Le <strong>MAX</strong>! <strong>Cube</strong> doit être alimenté électriquement et<br />
relié à un routeur pour l’installation du logiciel <strong>MAX</strong>!<br />
A la mise en service du <strong>MAX</strong>! <strong>Cube</strong>, DHCP doit être<br />
activé sur le routeur. En alternative, on peut manuellement<br />
affecter le <strong>MAX</strong>! <strong>Cube</strong> via le logiciel à<br />
l’adrèsse IP suivante: 192.168.0.222.<br />
Vous avez besoin du logiciel <strong>MAX</strong>! PC afin d’enregistrer les<br />
éléments <strong>MAX</strong>! pour le <strong>MAX</strong>! <strong>Cube</strong>, pour les configurer et<br />
visualiser les messages d’état des appareils.<br />
• Connectez le <strong>Cube</strong> à un routeur. Raccordez à cet effet<br />
le câble réseau fourni au connecteur prévu à cet effet<br />
sur le côté du <strong>MAX</strong>! <strong>Cube</strong>. Raccordez l’autre extrémité<br />
à un connecteur libre de votre routeur.<br />
• Ouvrez le navigateur Internet de votre PC sur lequel le<br />
logiciel <strong>MAX</strong>! PC doit être installé.<br />
• Pour le téléchargement du logiciel <strong>MAX</strong>! PC visitez le<br />
site Web de votre partenaire de contract et suivez les<br />
instructions.<br />
• Démarrez le programme téléchargé et suivez les ins<br />
tructions d’installation.<br />
28
Configuration minimale:<br />
• Système d’exploitation : Windows XP ® , Windows Vista ,<br />
Windows 7, Mac OS X 10.5 où plus<br />
• Navigateur: Internet Explorer® à partir de la version<br />
7.0, Mozilla Firefox® à partir de<br />
la version 3.6.16, Safari à partir de<br />
la version 5, Google Chrome à partir<br />
de la version 8<br />
9. Connexion Internet<br />
La configuration du système <strong>MAX</strong>! requiert une connexion<br />
locale avec le réseau domestique (LAN) et une alimentation<br />
électrique existante pour le <strong>MAX</strong>! <strong>Cube</strong>. Afin de pouvoir<br />
établir une connexion avec votre Smartphone ou votre ordinateur<br />
portable via le Portail <strong>MAX</strong>!, l’accès Internet doit<br />
également être activé.<br />
Pour l’alimentation continue du <strong>MAX</strong>! <strong>Cube</strong>, nous<br />
recommandons d’utiliser le bloc d’alimentation USB<br />
fourni.<br />
10. Rétablir les réglages par défaut.<br />
L’état de livraison du <strong>MAX</strong>! <strong>Cube</strong> peut être rétabli manuellement.<br />
Les réglages effectués et les informations<br />
concernant les appareils enregistrés sont alors perdus<br />
irrévocablement.<br />
• Débranchez d’abord le <strong>MAX</strong>! <strong>Cube</strong> de son alimentation<br />
électrique.<br />
• Patientez 1 minute.<br />
• Maintenez ensuite la touche<br />
29
Reset (b) appuyée.<br />
• Rétablissez simultanément l’alimentation<br />
électrique.<br />
• Maintenez la touche Reset ap<br />
puyée jusqu’à ce que la DEL<br />
d’ali mentation (Power) soit allu<br />
mée en continu.<br />
• La configuration d’usine est alors<br />
rétablie.<br />
30<br />
11. Séquences de clignotements<br />
et comportements d’émission<br />
DEL Etat Signification<br />
DEL Power DEL éteinte Alimentation électrique<br />
interrompue<br />
DEL clignote <strong>MAX</strong>! <strong>Cube</strong> démarre et effectue<br />
un autotest<br />
DEL allumée en<br />
continu<br />
Autotest terminé avec succès et<br />
alimentation électrique établie<br />
DEL Internet DEL éteinte Aucune connexion n’est active<br />
DEL clignote Connexion LAN établie avec le<br />
routeur, mais pas avec Internet<br />
DEL allumée en Connexion établie avec le routeur<br />
continu et Internet<br />
DEL Battery DEL éteinte Tous les éléments <strong>MAX</strong>!<br />
présentent une tension de pile<br />
suffisante<br />
DEL clignote Les piles d’un élément <strong>MAX</strong>!<br />
doivent être remplacées
12. Remarques au sujet du fonctionnement radio<br />
La transmission radio est réalisée par une voie non exclusive,<br />
ce qui peut provoquer des interférences. Les perturbations<br />
peuvent être induites entre autres par des processus<br />
de commutation, des moteurs électriques ou également par<br />
des appareils électriques défectueux.<br />
La portée à l’intérieur des bâtiments peut être très différente<br />
de celle en champ libre. En-dehors des performances<br />
d’émission et des propriétés de réception des récepteurs,<br />
les influences environnementales comme l’hygrométrie et<br />
les données structurelles jouent un rôle important.<br />
<strong>REV</strong> <strong>Ritter</strong> déclare par la présente que le modèle est<br />
conforme aux exigences essentielles et aux autres<br />
prescriptions de la directive 1999/EG. Consulter la déclaration<br />
CE de conformité complète: http://www.rev.biz à<br />
l‘article correspondant.<br />
13. Entretien et nettoyage<br />
Le produit ne requiert aucun entretien. Les réparations doivent<br />
être effectuées par un spécialiste. Nettoyez le produit<br />
avec un chiffon doux, propre, sec et non pelucheux. Pour<br />
enlever des salissures plus conséquentes, le chiffon peut<br />
être légèrement humidifié avec de l’eau tiède. N’utilisez pas<br />
de détergents solvantés susceptibles d’attaquer le boîtier<br />
et les inscriptions.<br />
Débranchez l’appareil du secteur avant de le nettoyer.<br />
31
32<br />
14. Caractéristiques techniques<br />
Alimentation électrique : Entrée: 100V - 240V~ / 350mA<br />
Sortie : 5V= / 550mA<br />
Dimensions du boîtier (lxhxp) : 80 x 80 x 80mm<br />
Fréquence radio : 868,3MHz<br />
Classe de récepteur : SRD Classe 2<br />
Type de protection : IP20<br />
Portée typique en champ libre : 100m<br />
Interface : RJ-45 (Ethernet)<br />
Coloris : blanc<br />
Sous réserve de modifications techniques.
Inhoudsopgave<br />
1. Beoogd gebruik .........................................................33<br />
2. Overzicht ...................................................................34<br />
3. Veiligheidsinstructies ................................................35<br />
4. Verwijdering ..............................................................35<br />
5. Montage ....................................................................35<br />
6. Aanleren van <strong>MAX</strong>! Componenten ...........................36<br />
7. Voeding .....................................................................36<br />
8. I nstallatie van de apparaatsoftware &<br />
systeemvereisten ......................................................37<br />
9. Internetverbinding .....................................................38<br />
10. Fabrieksinstellingen opnieuw instellen .....................38<br />
11. Led-knipperreeksen en zendgedrag ........................39<br />
12. Instructies voor het draadloze bedrijf .......................40<br />
13. Onderhoud en reiniging ............................................40<br />
14. Technische eigenschappen ......................................41<br />
Lees deze handleiding zorgvuldig door, vóór u het apparaat in gebruik<br />
neemt. Bewaar de handleiding, om ze ook later nog te kunnen<br />
raadplegen.<br />
<strong>REV</strong> <strong>Ritter</strong> <strong>GmbH</strong><br />
Frankenstr. 1-4<br />
D-63776 Mömbris<br />
www.rev.biz<br />
33
34<br />
1. Beoogd gebruik<br />
De <strong>MAX</strong>! <strong>Cube</strong> maakt een comfortabele configuratie van<br />
de <strong>MAX</strong>! Componenten met de <strong>MAX</strong>! Software en <strong>MAX</strong>!<br />
Portal mogelijk. Bovendien kan via de <strong>Cube</strong> de status van<br />
de afzonderlijke componenten worden opgevraagd.<br />
Het apparaat is dus als LAN-gateway de data-interface<br />
van het systeem en fungeert tegelijkertijd als geheugen<br />
voor alle configuratiegegevens. De draadloze communicatie<br />
tussen de <strong>MAX</strong>! Componenten gebeurt bidirectioneel.<br />
Zo is gegarandeerd dat de verzonden informatie de<br />
ontvangers ook bereikt.<br />
Bij een bestaande internetverbinding kan het systeem op<br />
verschillende manieren worden bestuurd. Met een browser<br />
is via het internetportaal, via smartphone-applicaties en<br />
via de lokale sofware toegang tot de <strong>MAX</strong>! <strong>Cube</strong> mogelijk.<br />
Let op: Toegang tot de <strong>MAX</strong>! <strong>Cube</strong> via het internetportaal<br />
is alleen mogelijk als de lokale software is<br />
niet actief.<br />
De configuraties voor alle eindapparaten worden comfortabel<br />
via de <strong>MAX</strong>! Software uitgevoerd en kunnen voor<br />
de afzonderlijke ruimten individueel worden ingesteld.<br />
Instellingen (bijv. weekprofielen) worden aan de <strong>MAX</strong>!<br />
Radiatorthermostaten in het systeem doorgegeven, zodat<br />
deze ook autonoom, zonder de <strong>MAX</strong>! <strong>Cube</strong>, kunnen<br />
functioneren.<br />
Gebruik het apparaat uitsluitend binnen en vermijd blootstelling<br />
aan vocht, stof, zonlicht en warmtestraling. Elk ander<br />
gebruik dan in deze handleiding beschreven is, geldt<br />
als oneigenlijk en leidt tot de uitsluiting van garantie en<br />
aansprakelijkheid. Dit geldt ook voor verbouwingen en veranderingen.<br />
De apparaten zijn uitsluitend voor particulier
gebruik bedoeld. Meer informatie over het <strong>MAX</strong>!-systeem<br />
en de verkrijgbare componenten vindt u onder de website<br />
van uw contractante.<br />
Bovenzijd<br />
2. Overzicht<br />
Power: De led geeft aan of het apparaat<br />
onder spanning staat en bedrijfsklaar is.<br />
Internet: De led geeft aan of een verbinding<br />
met het LAN/internet bestaat.<br />
Battery: De led geeft aan of bij een <strong>MAX</strong>!<br />
Component de batterij moet worden vervangen.<br />
Onderzijde<br />
Resettoets: Om de fabrieksinstellingen opnieuw in te<br />
stellen.<br />
Zijkant<br />
(1) Netwerkaansluiting voor verbinding met een router.<br />
(2) Aansluiting voor USB-voeding (zie hoofdstuk 6).<br />
3. Veiligheidsinstructies<br />
De apparaten zijn geen speelgoed! Laat kinderen er niet mee<br />
35
spelen. Laat verpakkingsmateriaal niet rondslingeren. Het kan<br />
door kinderen als gevaarlijk speelgoed worden gebruikt. Open<br />
het apparaat niet. Het bevat geen onderdelen die door de gebruiker<br />
moeten worden onderhouden. In het geval van een<br />
defect dient u het apparaat naar de klantenservice te sturen.<br />
36<br />
4. Verwijdering<br />
WEEE-afvalrichtlijn<br />
In overeenstemming met de Europese aanwijzingen mag<br />
afgedankte elektrische en elektronische apparatuur niet<br />
langer bij het ongesorteerde afval worden gedeponeerd.<br />
Het symbool van de verrijdbare afvalbak wijst op de<br />
noodzaak van een gescheiden afvalinzameling. Help ook mee<br />
ons milieu te beschermen en zorg ervoor dat deze apparaten, als<br />
u ze niet meer gebruikt, in de correcte systemen van de gescheiden<br />
afvalinzameling terechtkomen. RICHTLIJN 2002/96/EG VAN<br />
HET EUROPEES PARLEMENT EN DE RAAD van 27 januari 2003<br />
betreffende afgedankte elektrische en elektronische apparatuur.<br />
De CE-markering is een label voor het vrij verkeer van<br />
goederen binnen de Europese Unie en is uitsluitend bedoeld<br />
voor de betreffende autoriteiten. Het is geen garantie<br />
voor bepaalde eigenschappen.<br />
5. Montage<br />
De <strong>MAX</strong>! <strong>Cube</strong> kan aan de wand worden bevestigd of<br />
staand op zijn poten worden opgesteld.<br />
Voor de wandmontage van de <strong>MAX</strong>! <strong>Cube</strong> gebruikt u de<br />
wandhouder:<br />
• Markeer de boorgaten (a) met een<br />
potlood op de<br />
muur.
• Boor de gemarkeerde gaten (a) met<br />
een boor.<br />
• Gebruik voor het bevestigen<br />
van de wandhouder de bijgeleverd<br />
schroeven en pluggen.<br />
• Na het bevestigen van de wandhouder<br />
kan de <strong>MAX</strong>! <strong>Cube</strong> via de<br />
bovenzijde met de opening naar beneden<br />
op de wandhouder worden<br />
geplaatst.<br />
6. Aanleren van <strong>MAX</strong>!-componenten<br />
Opdat <strong>MAX</strong>!-componenten met elkaar zouden kunnen<br />
communiceren, moeten ze aan elkaar worden aangeleerd.<br />
Het aanleren aan de <strong>MAX</strong>! <strong>Cube</strong> gebeurt comfortabel via<br />
de <strong>MAX</strong>!-computersoftware.<br />
Wijs de aangeleerd <strong>MAX</strong>!-componenten in de tussentijd<br />
ruimtes toe om mogelijke verwarringen te<br />
vermijden.<br />
7. Voeding<br />
De elektrische voeding van de <strong>MAX</strong>! <strong>Cube</strong> gebeurt met de<br />
bijgeleverde adapter.<br />
• Steek de bijgeleverde USB-adapter in een stopcontact.<br />
• Verbind de <strong>MAX</strong>! <strong>Cube</strong> en de adapter met de<br />
USB-kabel. Gebruik hiervoor de USB-poort (2) aan de<br />
zijkant van het apparaat (2).<br />
De elektrische voeding van de <strong>MAX</strong>! <strong>Cube</strong> is ook<br />
via de USB-aansluiting van een computer of router<br />
37
mogelijk. Houd er hierbij wel rekening mee dat bij sommige<br />
modellen de USB-spanning na het uitschakelen van het<br />
apparaat niet meer beschikbaar is.<br />
Als de elektrische voeding van de <strong>MAX</strong>! <strong>Cube</strong> onderbroken<br />
is, regelen de thermostaten in de ruimten<br />
autonoom verder. De <strong>MAX</strong>! <strong>Cube</strong> dient slechts als<br />
interface voor de <strong>MAX</strong>! Software, voor een <strong>MAX</strong>!<br />
Wandschakelaar en als centraal datageheugen.<br />
Let op! Om schade aan het apparaat te voorkomen,<br />
mag u uitsluitend de bijgeleverde originele adapter<br />
gebruiken voor de elektrische voeding.<br />
8. Installatie van de computersoftware &<br />
systeemvereisten<br />
De <strong>MAX</strong>! <strong>Cube</strong> moet voor de installatie van de <strong>MAX</strong>!<br />
Software van stroom voorzien worden en met een<br />
router verbonden zijn.<br />
Voor de installatie van de <strong>MAX</strong>! <strong>Cube</strong> activeer de<br />
DHCP van de router. Alternatief kan over de <strong>MAX</strong>!<br />
Software het volgende IP-adres naar de <strong>MAX</strong>! <strong>Cube</strong><br />
worden toegewezen: 192.168.0.222.<br />
Het <strong>MAX</strong>! Computerprogramma hebt u nodig om via de<br />
<strong>MAX</strong>! <strong>Cube</strong> <strong>MAX</strong>! Componenten aan te leren of te configureren<br />
en om statusmeldingen van de apparaten op te vragen.<br />
• Verbind de <strong>Cube</strong> met een router. Steek hiervoor de<br />
bij geleverde netwerkkabel in de daarvoor bedoelde<br />
aans lui ting aan de zijkant van de <strong>MAX</strong>! <strong>Cube</strong>. Het<br />
andere uit einde steekt u in een vrije poort van uw router.<br />
• Open de internetbrowser van uw computer waarop het<br />
<strong>MAX</strong>! Computerprogramma moet worden geïnstalleerd.<br />
• Voor het download van het <strong>MAX</strong>! Programma sla op the<br />
38
website van uw contactante an volg de instructies.<br />
• Start het gedownloade programma en volg de installatie-<br />
instructies.<br />
Systeemvereisten:<br />
• Besturingssysteem: Windows XP ® , Windows Vista ,<br />
Windows 7, Mac OS X 10.5 of<br />
hoger<br />
• Browser: Internet Explorer® vanaf versie<br />
7.0, Mozilla Firefox® vanaf versie<br />
3.6.16, Safari vanaf versie 5,<br />
Google Chrome vanaf versie 8<br />
9. Internetverbinding<br />
De configuratie van het <strong>MAX</strong>! Systeem vereist een lokale<br />
verbinding met het thuisnetwerk (LAN) en de elektrische<br />
voeding van de <strong>MAX</strong>! <strong>Cube</strong>. Om met uw smartphone of<br />
notebook via de <strong>MAX</strong>! Portal een verbinding tot stand te<br />
brengen, moet ook de internettoegang geactiveerd zijn.<br />
Voor de continue voeding van de <strong>MAX</strong>! <strong>Cube</strong> dient<br />
u de bijgeleverde USB-adapter te gebruiken.<br />
10. Fabrieksinstellingen opnieuw instellen<br />
De oorspronkelijke toestand van de <strong>MAX</strong>! <strong>Cube</strong> kan handmatig<br />
worden hersteld. Hierbij gaan alle instellingen en informatie<br />
over aangeleerde apparaten<br />
onherroepelijk verloren.<br />
• Koppel eerst de <strong>MAX</strong>! <strong>Cube</strong> van<br />
de elektrische voeding los.<br />
• Wacht 1 minuut.<br />
39
• Houd nu de resettoets (b)<br />
ingedrukt.<br />
• •Schakel tegelijkertijd de<br />
elektrische voeding weer in.<br />
• Houd de resettoets ingedrukt, totde powerled brandt.<br />
De powerledbegint te blinken.<br />
• De powerled brand weer permanent<br />
• De fabrieksinstellingen zijn nu weer ingesteld.<br />
40<br />
11. Led-knipperreeksen en zendgedrag<br />
Led Toestand Betekenis<br />
Power-led led uit elektrische voeding<br />
onderbroken<br />
led knippert <strong>MAX</strong>! <strong>Cube</strong> start en voert<br />
zelftest uit<br />
led brandt zelftest succesvol voltooid<br />
continu en het apparaat staat onder<br />
stroom<br />
Internet-led led uit geen actieve verbinding<br />
led knippert LAN-verbinding met router<br />
bestaat, geen verbinding met<br />
internet<br />
led brandt verbinding met router en<br />
continu internet actief<br />
Battery-led led uit alle <strong>MAX</strong>! Componenten<br />
hebben voldoende<br />
batterijspanning<br />
led knippert de batterijen van een <strong>MAX</strong>!<br />
Component moeten worden<br />
vervangen
12. Instructies voor het draadloze bedrijf<br />
De draadloze communicatie wordt via een niet-exclusief<br />
communicatiekanaal gerealiseerd, zodat storingen niet<br />
kunnen worden uitgesloten. Storende invloeden kunnen<br />
o.a. afkomstig zijn van schakelprocessen, elektromotoren<br />
of defecte elektrische apparaten.<br />
Het bereik in gebouwen kan sterk afwijken van het bereik<br />
in openlucht. Behalve het zendvermogen en de ontvangst-eigenschappen<br />
van de ontvanger spelen ook milieu-in-vloe-den<br />
zoals luchtvochtigheid, en de bouwkundige<br />
situatie een belangrijke rol.<br />
Hiermee verklaart <strong>REV</strong> <strong>Ritter</strong>, dat het model zich in<br />
overeenstemming bevindt met de principiële vereisten en<br />
andere relevante voorschriften van de richtlijn 1999/EEG.<br />
Volledige CE-conformiteitsverklaring zie: www.rev.biz<br />
onder het betreffende artikel.<br />
13. Onderhoud en reiniging<br />
Het product is onderhoudsvrij. Laat reparaties aan een<br />
vakman over. Reinig het product met een zachte, schone,<br />
droge en pluisvrije doek. Voor het verwijderen van sterke<br />
verontreinigingen kan de doek licht met lauw water worden<br />
bevochtigd. Gebruik geen oplosmiddelhoudende reinigingsmiddelen.<br />
Deze kunnen de kunststof kast en opschriften<br />
aantasten.<br />
Koppel het apparaat vóór de reiniging van het stroomnet<br />
los.<br />
41
42<br />
14. Technische eigenschappen<br />
Voeding: Input: 100V - 240V~ / 350mA<br />
Output: 5 V= / 550mA<br />
Afmetingen kast (b x h x d): 80 x 80 x 80mm<br />
Zendfrequentie: 868,3MHz<br />
Klasse ontvanger: SRD Class 2<br />
Beschermingsgraad: IP20<br />
Typisch bereik in het vrije veld: 100m<br />
Interface: RJ-45 (ethernet)<br />
Kleur: wit<br />
Technische wijzigingen zijn voorbehouden.
44<br />
<strong>REV</strong> <strong>Ritter</strong> GmH<br />
Frankenstr. 1-4<br />
D-63776 Mömbris<br />
www.rev.biz