LED Aussenleuchte IMAGO 9026C1-28L4, 9026C2-28L4 ... - Tulux AG
LED Aussenleuchte IMAGO 9026C1-28L4, 9026C2-28L4 ... - Tulux AG
LED Aussenleuchte IMAGO 9026C1-28L4, 9026C2-28L4 ... - Tulux AG

Create successful ePaper yourself
Turn your PDF publications into a flip-book with our unique Google optimized e-Paper software.
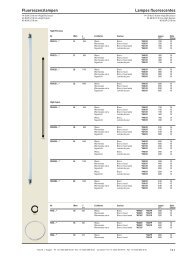
Nummer - Numéro - Number<br />
Datum - Date<br />
Änderungen - Modifications<br />
Seite - Page<br />
M0113dfe<br />
05.09.2012<br />
2/2<br />
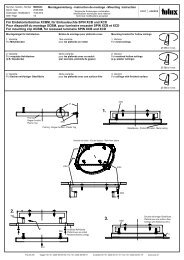
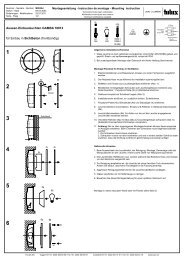
Montageanleitung - Instruction de montage - Mounting instruction<br />
Technische Änderungen vorbehalten<br />
Modifications techniques sous réserve<br />
Technical modifications excepted<br />
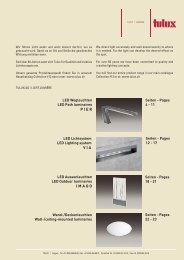
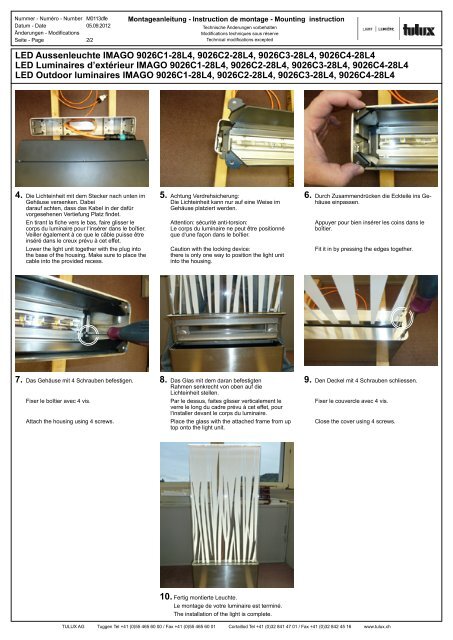
<strong>LED</strong> <strong>Aussenleuchte</strong> <strong>IM<strong>AG</strong>O</strong> <strong>9026C1</strong>-<strong>28L4</strong>, <strong>9026C2</strong>-<strong>28L4</strong>, 9026C3-<strong>28L4</strong>, 9026C4-<strong>28L4</strong><br />
<strong>LED</strong> Luminaires d’extérieur <strong>IM<strong>AG</strong>O</strong> <strong>9026C1</strong>-<strong>28L4</strong>, <strong>9026C2</strong>-<strong>28L4</strong>, 9026C3-<strong>28L4</strong>, 9026C4-<strong>28L4</strong><br />
<strong>LED</strong> Outdoor luminaires <strong>IM<strong>AG</strong>O</strong> <strong>9026C1</strong>-<strong>28L4</strong>, <strong>9026C2</strong>-<strong>28L4</strong>, 9026C3-<strong>28L4</strong>, 9026C4-<strong>28L4</strong><br />
4. Die Lichteinheit mit dem Stecker nach unten im<br />
Gehäuse versenken. Dabei<br />
darauf achten, dass das Kabel in der dafür<br />
vorgesehenen Vertiefung Platz findet.<br />
En tirant la fiche vers le bas, faire glisser le<br />
corps du luminaire pour l‘insérer dans le boîtier.<br />
Veiller également à ce que le câble puisse être<br />
inséré dans le creux prévu à cet effet.<br />
Lower the light unit together with the plug into<br />
the base of the housing. Make sure to place the<br />
cable into the provided recess.<br />
7. Das Gehäuse mit 4 Schrauben befestigen.<br />
Fixer le boîtier avec 4 vis.<br />
Attach the housing using 4 screws.<br />
5. Achtung Verdrehsicherung:<br />
Die Lichteinheit kann nur auf eine Weise im<br />
Gehäuse platziert werden.<br />
Attention: sécurité anti-torsion:<br />
Le corps du luminaire ne peut être positionné<br />
que d‘une façon dans le boîtier.<br />
Caution with the locking device:<br />
there is only one way to position the light unit<br />
into the housing.<br />
8. Das Glas mit dem daran befestigten<br />
Rahmen senkrecht von oben auf die<br />
Lichteinheit stellen.<br />
Par le dessus, faites glisser verticalement le<br />
verre le long du cadre prévu à cet effet, pour<br />
l‘installer devant le corps du luminaire.<br />
Place the glass with the attached frame from up<br />
top onto the light unit.<br />
10. Fertig montierte Leuchte.<br />
Le montage de votre luminaire est terminé.<br />
The installation of the light is complete.<br />
6. Durch Zusammendrücken die Eckteile ins Gehäuse<br />
einpassen.<br />
Appuyer pour bien insérer les coins dans le<br />
boîtier.<br />
Fit it in by pressing the edges together.<br />
9. Den Deckel mit 4 Schrauben schliessen.<br />
Fixer le couvercle avec 4 vis.<br />
Close the cover using 4 screws.<br />
TULUX <strong>AG</strong> Tuggen Tel +41 (0)55 465 60 00 / Fax +41 (0)55 465 60 01 Cortaillod Tel +41 (0)32 841 47 01 / Fax +41 (0)32 842 45 16 www.tulux.ch