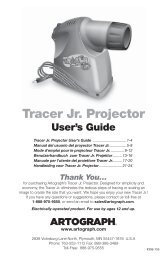
Prism Projector User's Guide - Artograph
Prism Projector User's Guide - Artograph
Prism Projector User's Guide - Artograph

Create successful ePaper yourself
Turn your PDF publications into a flip-book with our unique Google optimized e-Paper software.
2<br />
Important Safeguards<br />
PLEASE SAVE THESE INSTRUCTIONS<br />
When using this projector, always follow basic<br />
safety precautions, including the following:<br />
1. Read and understand all instructions<br />
before operating.<br />
2. Close supervision is necessary when used<br />
by or near children. Do not leave unattended<br />
while in use.<br />
3. Do not operate this equipment with a damaged<br />
cord, or if it has been dropped or otherwise<br />
damaged, until it has been examined by a<br />
qualifi ed electrician.<br />
4. If an extension cord is necessary, be sure it<br />
has a suitable current rating. Cords rated for<br />
less amperage than this equipment may<br />
overheat. Be careful to arrange the cord so that<br />
it will not be tripped over or pulled.<br />
5. Always unplug from the electrical outlet when<br />
not in use. Disconnect by grasping and pulling<br />
the plug from the outlet; never yank the cord to<br />
disconnect the plug.<br />
6. Allow the projector to cool completely before<br />
moving. Loop the cord loosely when storing.<br />
7. If the projector receives water damage, do not<br />
use until inspected by a qualifi ed electrician.<br />
8. To avoid electrical shock hazard, do not<br />
disassemble. Take the projector to a qualifi ed<br />
electrician. Incorrect reassembly can cause an<br />
electrical shock hazard.<br />
9. Care must be taken as burns can occur from<br />
touching hot parts.<br />
10. The projector switch is provided with the<br />
symbols 0, indicating off, and I, indicating on.<br />
11. Position the cord so that it will not be<br />
tripped over, pulled or come in contact<br />
with hot surfaces.<br />
12. Always unplug the projector from electrical outlet<br />
before cleaning, servicing and when not in use.<br />
13. To reduce risk of electrical shock, do not<br />
immerse this projector in water or other liquids.<br />
14. The use of accessory attachment not<br />
recommended by the manufacturer may<br />
cause the risk of fi re, electric shock or<br />
injury to persons.<br />
15. Connect this projector to a grounded outlet.<br />
16. Disconnect the projector from power supply<br />
before replacing lamps.<br />
Set up & Operation<br />
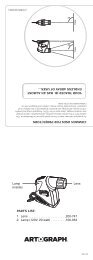
Contents: <strong>Projector</strong> + <strong>Prism</strong> Accessory Lens<br />
The <strong>Prism</strong> both enlarges and reduces with one<br />
reversible lens (See General Focusing & Enlarging<br />
section for reduction and enlargement positions.)<br />
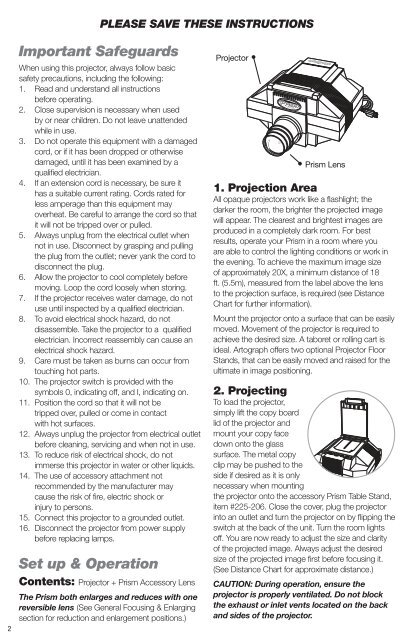
<strong>Projector</strong><br />
<strong>Prism</strong> Lens<br />
1. Projection Area<br />
All opaque projectors work like a fl ashlight; the<br />
darker the room, the brighter the projected image<br />
will appear. The clearest and brightest images are<br />
produced in a completely dark room. For best<br />
results, operate your <strong>Prism</strong> in a room where you<br />
are able to control the lighting conditions or work in<br />
the evening. To achieve the maximum image size<br />
of approximately 20X, a minimum distance of 18<br />
ft. (5.5m), measured from the label above the lens<br />
to the projection surface, is required (see Distance<br />
Chart for further information).<br />
Mount the projector onto a surface that can be easily<br />
moved. Movement of the projector is required to<br />
achieve the desired size. A taboret or rolling cart is<br />
ideal. <strong>Artograph</strong> offers two optional <strong>Projector</strong> Floor<br />
Stands, that can be easily moved and raised for the<br />
ultimate in image positioning.<br />
2. Projecting<br />
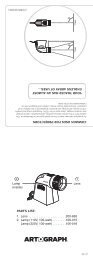
To load the projector,<br />
simply lift the copy board<br />
lid of the projector and<br />
mount your copy face<br />
down onto the glass<br />
surface. The metal copy<br />
clip may be pushed to the<br />
side if desired as it is only<br />
necessary when mounting<br />
the projector onto the accessory <strong>Prism</strong> Table Stand,<br />
item #225-206. Close the cover, plug the projector<br />
into an outlet and turn the projector on by fl ipping the<br />
switch at the back of the unit. Turn the room lights<br />
off. You are now ready to adjust the size and clarity<br />
of the projected image. Always adjust the desired<br />
size of the projected image fi rst before focusing it.<br />
(See Distance Chart for approximate distance.)<br />
CAUTION: During operation, ensure the<br />
projector is properly ventilated. Do not block<br />
the exhaust or inlet vents located on the back<br />
and sides of the projector.