Offbeat Bikes Issue 19 Yumpu
- No tags were found...

You also want an ePaper? Increase the reach of your titles
YUMPU automatically turns print PDFs into web optimized ePapers that Google loves.
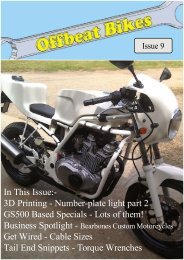
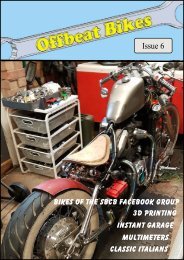
Issue 19
C200
CB750
VT125
GS500
Shop Now
Contact:- offbeatbikesmagazine@gmail.com
Website:- offbeatbikesmagazine.co.uk
Facebook:- Offbeat Bikes Magazine
Instagram:- jr.offbeatbikes
Welcome to the 19 th issue of the magazine. Coronavirus is
still with us, but by the time you read this, Boris will have
(hopefully) given us a bit more freedom to get out and about.
It must be the longest time I’ve ever gone without riding a
motorcycle, but that’s mostly because the winter bike has
spent most of that time in pieces across the workbench. I’m
also hoping that by the time you read this that that particular
bike is back on the road and I can return to the dirt bike
project.
I hope that you are all well, looking forward to some warmer
weather and to the ability to get out on your bike and meeting
up with friends again.
Once again, I have to thank those people who have answered
my pleas for details and pictures about their bike builds. I
really appreciate them taking the time to send me stuff.
Elsewhere in the magazine (and on the website) you’ll see
product / tool reviews. The associated links show you the
actual product I purchased and its supplier. Some of these
links will generate a small income (should you decide to
purchase said item) which will be used to offset the cost of
website hosting etc. There will, as is the nature of these links,
be cookies involved. Rest assured I have purchased these
products with my own cash, there are no freebies here, so
what I’ve written is my honest opinion.
If you’re reading this on YUMPU, the links in the pictures /
text won’t work. Try viewing on the website:
https://www.offbeatbikesmagazine.co.uk
Gorrilla
Projects
Gorrilla projects is the baby of Andy Gorrie. In his
spare time he likes to repair, repurpose and upcycle
items of furniture, electrical equipment, old tools
etc. He’s also done a few bikes and as this is a bike magazine,
it’s those that we’ll be looking at here.
First off is this little Honda VT125 which was been converted
into a sweet little bobber. Andy didn’t get to ride this one much
as it was soon snapped up by a new owner. I’m not surprised.
Andy’s conversion, although as he readily admits, is mainly
cosmetic, but it gives the little VT a much more purposeful and
aggressive look, and the chosen colour scheme sets it off nicely.
It also helps that the V twin motor gives the illusion that the
bike is much bigger than its 125ccs.
The bike had languished in a shed for four years and corrosion
was starting to take hold. It also didn’t want to run properly. A
little bit of detective work soon found the culprit in a snagged
choke cable. With that sorted, the bike ran a treat, and so, on
with the makeover.
VT125 bobber
TOP: The bike (as
purchased) looks OK
from a distance, but as
the remaining photos
show, corrosion was
starting to effect all of
the chrome work, with
forks and wheels
particularly badly
affected
Mock-up time,
with what
looks
suspiciously
like a broom
handle
performing
handlebar
duties.
TOP: Electrical tape
marks the cut line. Andy
elected to keep the rear
suspension - hard tails
and pre-existing back
problems don’t mix.
Petrol tank required some filling
and sanding before the colour
coat could be applied. It also
acquired black and gold stripes.
Mudguards (front and rear) are
cut down originals. The front
one is undergoing surgery
below.
Finishing touches included
picking out tyre branding in
white.
The finished bike out in the sunshine.
It’s looks belie its small engine
Standard exhaust has been
shortened. It improves
aesthetics and also gives a bit
more bark.
Bar end
mirrors and
chrome
bullet
indicators
clean up the
front of the
bike.
CB750 Cafe
Racer
Andy’s next project
was a Cafe Racer and
the donor bike of
choice was another
Honda, but this time
the bigger engined
CB750. The bike was
in good running
order, so once again
it was a largely
cosmetic make over.
Unlike most cafe
racer conversions, Andy chose to not go down the pod filter route
and instead kept the standard airbox. Personally, I’m with Andy
on this one. Most bikes with standard engines work better with
the manufacturer’s setup, so if you can hide it, keep it.
Frame ‘hoop’ was made by
carefully cutting up the
original handlebars into
sections, and then welding
them back together to form
the hoop.
Additional brackets were
added for tail light, seat unit
support and number plate.
Side panels get some added detail.
Wheels have their own finishing
touches added
Final mock-up before tank
came off to be painted to
match the rest of the
bodywork
Andy has a good eye for
colour schemes, both his
bikes look gorgeous.
Nice curves!
Find out
1 inch shorter rear shocks and a
corresponding lowering of the front
suspension gives the bike a low and lean
look.
more about Gorilla Projects on FACEBOOK and YOUTUBE
Shop Now
Shop
Now
HONDA C200
There are many reasons why
people undertake motorcycle
projects, but often it’s to satisfy
our need to have built
something that is uniquely ours
and that reflects our
personality. For Roy
Bermingham it was also to act
as a moving billboard to
highlight a disease whose
effects on its suffers can be
completely debilitating, but
often dismissed or
misdiagnosed by the medical
profession. It’s a subject
close to his heart after having
witnessed the struggle of
family members, both to
cope with the disease and to
access suitable treatment.
The bike of choice was a
1964 Honda C200 and it
arrived in a mostly complete
state, but hadn’t run in 35
years.
After a bit of ebay searching,
replacement points, stator, rotor
etc. were purchased and fitted
and after a little more tlc, the
tiny beastie fired back to life.
With the engine now deemed a
runner, it was time for the
makeover proper to begin.
TOP: Bike was mostly complete,
and by torchlight didn’t look too
bad.
But daylight highlighted a few
issues. Points (right) needed
replacement as did many of the
other electrical components
(below right).
Silencer (below) had also
suffered badly
Fresh fuel
and a little
fettling
sparked the
engine back
to life - after
35 years of
slumber.
The makeover begins in earnest.
Frame is blasted, primed and
painted.
Initial tank painting had issues,
requiring it to be stripped for a
second attempt…
…but it was well worth the effort.
New seat grafted
to old seat base
New spokes
and good
secondhand
rims replaced
rusty
originals.
Replacement low level exhaust
interfered with brake lever and so was
replaced with…
…a high level version. Eagle eyed readers will also notice an
engine change. The original Honda engine was a little smokey, the
clutch was slipping and the electrics still not completely reliable.
To get the bike on the road in a timely manner, this Stomp unit
was substituted.
What is Lyme Disease?
Lyme disease is a bacterial infection that is spread to
humans by infected ticks.
What’s a tick?
Ticks are tiny spider-like creatures that live in woods
and areas with long grass. They're found all over the
UK, but only a small number of ticks are infected
with the bacteria
How do I avoid tick bites?
If you’re walking, working or playing in tick friendly
countryside consider using insect repellent, minimise
exposed skin and check none of the little blighters
are hitching a ride. Also check your pets.
Read NHS advice about Lyme Disease HERE
Either Roy is a
giant, or the bike is
very tiny. Perhaps
a little of both.
For more on this bike, see the YOUTUBE video.
For more on living with Lyme Disease click HERE
under Pressure!
If you’re not used to working
on your own bikes, performing
a compression test sounds very
technical, but it’s not. If you
can change a sparkplug, you
can do a compression check.
And, you can get a cheap
compression tester for around
a tenner. But why should you
want to?
A compression test gives a
simple visual indication of
how healthy the top end of
your engine is, without having
to take anything apart! Most
manufacturers will give
pressure figures for a healthy
engine and also specify a
lower limit, below which, it
may well be time for some
remedial work.
On the next page is the
official Suzuki compression
test procedure for a GS500. It
gives a figure for a healthy,
standard cylinder 142 - 199
psi and a lower limit of 114
psi. There are a few other
conditions that Suzuki state -
The GS500 is a twin, so a
compression test is done for
each cylinder. If they’re both
above 142 psi, then
everything’s rosy. One
cylinder can be below 142 psi,
right down to that 114 psi
lower limit, provided the other
cylinder reads at least 142 psi,
but (there’s always a but!)
there should only be a 28 psi
difference between the two. If
neither cylinder reaches the
magic 142 psi, Mr Suzuki says
you need to overhaul it (even
if they’re both above 114 psi).
It’s important to check what
the manufacturer specifies for
you own machine. If you’ve
got something really odd that
you can’t find any
specification for, as a (very)
general rule of thumb, you
need at least 100 psi for an
engine to start and run
reasonably well. Whisper it,
but my own GS500 has quite
happily run for sometime with
compression figures well into
Mr Suzuki’s ‘you need to fix
it’ range, as you will shortly
see.
Before testing Suzuki asks you to check that head bolts etc. are
tight and the valves correctly adjusted. That’s a sensible
precaution because if these are incorrect, you will get low
readings. But, given that these would be the first things to
check, should you get a low reading, it’s up to you if you do
them first. To be honest, I didn’t as the bike has done few miles
since the valve clearances were last checked and I was
expecting low readings anyway because I know the bike is a
little ‘tired’.
Warm up the engine, whip out the spark plugs and screw in the
compression gauge. There are a few more precautions, though,
which you might need to check in the manual. For the old
Suzuki, the spark plugs need to be grounded, so put them back
into the plug caps and rest the threaded part on the cylinder
head. Ideally away from any open plug holes so that they don’t
accidentally ignite any fuel vapour that may emerge when the
engine is cranked over.
Compression gauge in place.
Sparkplug grounded. We’re
ready to test…
With the compression gauge fitted, crank the engine over with
the throttle held wide open until you get a stable reading.
Repeat for however many cylinders you have, and then
compare with the manufacturers figures. What you have to do
next depends on how the numbers stack up!
Here are the Suzuki’s vital statistics:-
Results for left and
right cylinders are
consistent, but low at
110 psi. It’s not a
surprise, I’ve tested
the bike periodically
over the last 5 years
and the pressure’s
gradually been
dropping from 130 /
140 psi to 110 / 130
psi and now we’re
down to 110 / 110 psi.
Perhaps it’s time for
some investigation.
Out of interest, I also tried the test
with a cold engine, and got very
similar results.
In the last issue we saw how
Mark and Cheyenne had
started to progress their GS500
build from rendered image to
reality.
A large part of the fabrication
work had been done, with neat
solutions to locate the battery,
electrics and rear indicators,
and a very tidy integrated rear
Frame’s back from powder
coating. Cheyenne gets the
job of wrestling the parcel
tape off and getting it safely
unwrapped.
The new, yellow tank
sparked second thoughts
about the paint scheme…
Part 2
light / number plate / seat
release unit.
They also became quite
skilled at forming ABS sheet
with a heat gun to produce
infill panels.
Now, with a lot of the pieces
back from the powder coaters /
painters, it’s time to start
assembly…
…and so the original black and white scheme
made way for a black and yellow theme.
The rendered
drawing’s paint
scheme was then
brought to life using
the skills of painter
WOBBZ.
New discs, tyres, sprockets and self
assembled brake lines are added to the
build.
Front caliper is actually SV650, a direct
replacement for the tired original.
A gear indicator system has
been fitted, the display of
which has been neatly
incorporated on top of the
dials. Housing is a much
modified electronics projects
box.
Fork brace was an Ebay
purchase
Headlight rim
needed an
extension so that
the chosen
Harley style
cowl could sit at
the correct angle.
Extension was
hand formed
around the body
of a garden
sprayer!
Once painted, it
all blends in
nicely, and as
they saying goes,
if it looks right,
it is right.
Rear suspension
is R6 shock,
with GSF650
linkage.
Adjustable
dogbones have
now been
replaced with
fixed 173mm
items.
A Firefox hugger
has been fitted
to protect both
the shock and
underside of the
bike from the
worst of the
British weather.
The rolling chassis awaiting the addition of the engine. The task
of reinstalling an engine is even more fraught when there’s fresh
paint and powder coat involved!
Mark and Cheyenne came up with a plan that involved paddock
stands, scissor lifts and dollies, and with a twist here and a tweak
there, the engine was teased into place without damage.
Mark wrote a detailed how-to on this and posted it on the GS500
Facebook group, it’s worth a look if you’re faced with a similar
task.
The bike now sports a 350mm Delkevic exhaust system and that
rather eye catching clear clutch cover - another Ebay find.
If your wiring / electrics look as neat as Mark and Cheyenne’s, then
you’ve done a good job.
Mark and
Cheyenne have a
few little jobs to
finish before it’s
start-up time and
then, all being
well, a season of
bike shows
beckons.
Good luck with
your bike test,
Cheyenne
I know it’s not a motorcycle, or even a road registered vehicle, but it
does only have 3 wheels, so I think it’s allowable in a bike magazine.
What this vehicle is, is a CycleKart. Originating in America, the
CycleKart scene is all about having a bit of fun in your garage, making
stuff to hoon around on. Now that is something that most readers of
this magazine are interested in. I’ve also just found out that it’s also
quite popular in the UK.
This CycleKart belongs to Derek, who was featured in the last issue
with some of his bikes, and his replica badge business. I’ll let him take
up the story…
The Morgan CycleKart
Words and pictures Derek Evans
Cyclekarts are a tribute to the builders of the early cars in the
1920s. The concept was born in the USA a few years ago where
there are groups who build these karts and “ race” them,
although the race as such isn't so important, its more about the
build.
The idea was to build a cyclekart in the spirit of engineers who
built and modified their cars with anything they had to hand,
mostly using motorcycle components and working out of sheds.
The karts are loosely based on cars of the 20s and 30s, they are
not meant to be replicas, but representations.
To keep the costs down a basic formula was drawn up and is
known as the Stephenson formula after the first person to make
one in the USA.
The basic formula is:
Engine max 200cc. Usually Honda gx160 or gx200. These are
commonly used in go karts and stationary equipment such as
Chassis starts to take shape. Main
backbone is scaffold pole.
compressors, generators and mowers.
Transmission normally variable speed belt torque converter or
centrifugal clutch single speed, driving one wheel only.
Chassis simple ladder frame
Suspension leaf springs
Wheels typically Honda cub moped wheels
Brakes on rear wheels only
Max wheel base 66 inches and width 36 inches.
Total weight under 300lbs
The body can be made from plywood, sheet metal, aluminium
or fibreglass.
The overall objective is to build a kart as a fun project but at
low cost.
GX160 engine is
installed along
with the chosen
transmission
system.
Rear engine cowl
was made using
chicken wire (wire
netting), tin foil and
fibreglass.
This cycle trike build was started in July 2018.
It was built without any plans and evolved as it went along,
using whatever I had left over from previous projects.
I had a basic target of a build time of 6 months and a budget of
£500.
I decided to build a three wheeler loosely based on a Morgan
because I had never seen a cyclekart in three wheel form, they
were all four wheelers. It was deemed to be too difficult to
build a three wheeler because the rear wheel needs to be where
the engine would usually be in a four wheeler. Anyway I went
ahead.
I had been doing some work as a volunteer maintaining three
go karts for disadvantaged young people to drive at a local go
kart track. In the course of this, I had bought a job lot of Honda
GX160 engine parts as a spare parts stock for the three go karts.
From these left over parts I assembled a complete GX160
engine. I removed the governor and oil level switch, fitted a
slide carburettor, de baffled the silencer, fitted a Kawasaki
starter motor and modified the crank to accept a very small
drive sprocket. This was linked up to a Villiers 4 speed clutch
gearbox that had been under the bench for a few years. The rear
wheel was left over from a 1965 Honda 305 Dream project, but
the rear drive sprocket had to be changed to match the drive
sprocket of the Villiers gearbox and to lower the gear ratios.
The chassis single main spine is made from a scaffolding tube
with a fork made from box section holding the rear wheel in
place. The rest of the chassis sub frame is taken from a scrap
mobility scooter.
The front axle originally articulated from the centre of the
chassis and was again made from scaffold tube. The springs are
from a motorcycle attached to home made sliders, there is no
Forming sheet
steel bonnet.
damping. The articulating axle was later modified to prevent it
articulating as it was found to be much more stable. The
kingpins were taken from the mobility scooter and welded to
the front axle. Home made stub axles were made and welded to
the kingpins to accept the front hubs.
The front hubs are from a James motorcycle but re-spoked
with new narrower rims and tyres.
The steering is home made with a steering wheel from a Massey
Ferguson tractor.
The rear engine cover is home made from fibreglass. The basic
shape was mocked up using chicken wire and covered in foil
and then fibre glassed. The rest of the body is mostly plywood.
The bonnet is made from sheet metal. It was brushed painted
using industrial plant quality paint and we made some NO
LIMIT decals
The build took just 6 months with around 300 hours work.
The build cost came in at around £600 but this did not take into
Steering wheel previously used
to grace a Massey Ferguson
tractor.
account the cost of the parts I had lying around. If these had to
be bought new the cost would be between £2500 to £3000, not
including time.
Its a bit of a hairy, scary drive with those narrow front wheels.
It’s got a similar power to a 100cc motorbike, but the brake and
gear change is excellent.
I have never tried the top speed because there is nowhere I can
try it, but it is geared for around 40 mph. I wouldn’t go
anywhere near that speed in it, though!
I did try to make an electric reversing set up, but eventually
abandoned it because the electric motor I had didn’t have
enough power.
These projects are never really finished. There is always
something to improve, but it is what it is, a bit of fun.
Plywood
bodywork built up
around the engine
and ladder frame
chassis.
Finished cockpit
looks quite comfy.
Finished cycle
trike looks like it
might be fun to
drive!
If Derek’s cyclekart has
piqued your interest, there
is an active UK community,
including some very busy
forums and several
companies who can supply
you with those parts that
you don’t want to fabricate
yourself. A quick Google
will show you what’s
available.
Me? I’m just popping out
to the garage. I may be
some time…
Shop Now
GS500 REFRESH
This is the offending bike from
the compression test article. She
looks quite good in the photos
and so obviously proves that ‘the
camera never lies’ statement is a
complete fallacy, as in reality
she’s a scabby old girl.
She hadn’t had an easy life
before she arrived in my garage,
suffering from routine
maintenance neglect and the after
effects of being side swiped on a
roundabout. Her looks didn’t
matter to me, I only wanted the
engine and running gear for
another project - except, after I’d
ridden her around for a bit we
started to bond and she became
the winter hack.
After 6 years of winter weather,
her looks haven’t improved, but
that doesn’t matter, what did
matter was (as the compression
test confirmed) mechanically she
was also getting a little tired. So,
this year, with lockdown
restricting riding activity to the
journey too and from work, she
got to spend the best part of 3
months sitting on the workbench
and I got a lot fitter by cycling to
work.
The original intention was just to
remove head and cylinder, fit new
rings, make sure the valves were
seating, fit new valve stem seals /
gaskets etc. as required, and then
bolt it all back together.
Unfortunately, the project got
bigger and was eventually
christened ‘Project Snowball’ as
in addition to the engine work, I
also decided to try life naked, so
the fairing has gone and has been
replaced with a round headlight
and small front cowl. At the back,
the standard shock made way for
a Yamaha R6 item and also
gained a modified Suziki Bandit
400 hugger. The rear also got a
new undertray.
The refurb has been covered in
the Monday Articles on the
website, so this is a brief overview
of the work, with a link to the
relevant pages on the website if
anyone wants further info.
She’s still not pretty. The
copious rust on the frame has just
been treated to a slap of black
direct to rusty metal paint
(Smoothrite or similar). To look
her best, she really needs you to
be socially distanced from her!
First job (and one of the reasons why I had put this off for so long)
was to remove the exhaust bolts. They didn’t want to leave.
In the end I ground the heads off using a carbide burr, so that the
exhaust could be removed and decided to deal with the remainder of
the bolt once the head was off.
A stud extractor gripped the remains of the bolt well but
unfortunately they just snapped off close to the head.
I ended up having to drill them out and fit inserts.
The engine work was also a good excuse to buy
some new tools.
Honing the bore was a bit of a c*ck-up. Luckily for
me, I had a good spare cylinder.
The spares stash. Gathered over many
years, they’ll all come in handy
eventually.
Also tried some DIY valve seat
refacing, which actually seemed to
work OK.
Fitting shiny R6 shock meant
that a hugger was also a
desirable addition. It woud help
to keep that shock looking shiny
for longer.
But fitting the hugger meant that the
undertray needed modifying to
provide adequate clearance when the
suspension was fully compressed. In
the end a fibreglass undertray was
made and fitted.
Removing the fairing meant that
new headlight, indicators and
mirrors were required. I went a bit
further and added a small front
cowl too.
The cowl was 3D printed and then
covered with surface tissue and
resin for more robustness.
Mount for new cowl and indicators is
another 3D print, this time with sheet
steel reinforcement added.
The bike’s now all back together again,
but now I have to sort out why it’s
decided to only run on one cylinder!
More details on the
GS’s makeover can be
found on the
WEBSITE
There she is already for another
few years of service (hopefully).
What the picture doesn’t show is
that having finally finished the
refurb, I dropped it when I
attempted to remove it from the
workbench. Thankfully, damage
to the bike was minor (some more
black paint sorted that) but the
shelf unit that broke its fall
needed repairing.
Having sorted that, I started the
bike up only to find that it was
running on one cylinder. This was
quickly traced to the absence of a
spark and so seat and tank had to
come off again to expose the
relevant electrics.
The loom on this bike isn’t
pretty. At some point in its life it
had an alarm system fitted. That’s
since been removed, but the loom
still bears its scars. I was worried
that I was going to have to spend
ages tracing and replacing wires,
but a quick substitution test
highlighted the issue as being with
the ignition coil / plug cap
assembly. So some replacements
are on their way. Hopefully, once
they’re fitted, I can actually get to
ride it again.
The work on the Suzuki
required the purchase numerous
bits and pieces. Here’s a review
of some of the items I’ve
invested my cash in over the last
few months.
HENDLER GS500 GASKET SET
Not a brand I’d heard of before, but I Googled them and
they’ve been a UK wholesaler of motorcycle products since
2017. They were also the cheapest for a full GS500 gasket kit,
so I gave them a go.
Generally, the gaskets looked OK and those that I needed for
the top end fitted without issue. I wasn’t quite so convinced
with the valve stem seals, they looked more plasticy than the
ones I’d taken out, but I used them anyway. Time will tell, I’ll
report back if I experience any issues with those.
Other things to note - the kit includes aluminium washers for
the head bolts rather than OE copper and it doesn’t include the
4 little seals that go between cylinder and cylinder head (Part
No.11143-06B00). These are expensive to purchase separately.
If I were buying another set I’d do a bit more research and see if
any of the alternative kits included these.
I purchased my set from Ebay HERE. I paid £47 for mine, but
the price now seems to have gone up a tenner.
One thing to note,
the connectors on
the OE coil are
slightly different
sizes (so you can’t
connect it
wrongly). You may
need to file a little
off the Hendler
one as appropriate.
HENDLER GS500
Ignition Coil
Another Hendler
branded product.
Looks well made,
virtually identical in
size and shape to
OE. It comes with
the lead attached
(and like the
original Suzuki item,
it’s quite short, long
enough to do the
job but no spare)
but no a plug cap.
You need to buy
that separately if
required. I plumped
for an NGK
LB05F.
Coil £14.95
from Ebay
HERE
Plug cap
£2.20 from
Amazon
HERE
SILVERLINE Piston
Ring Pliers - cheap and
cheerful, but I think these
are better suited to thicker
piston rings than the ones
on the GS. The Vs on the
end are quite large. Better
at taking them off than
putting them on. Didn’t
really like them.
Pliers £4.24
from Amazon
HERE
RYDE UNIVERSAL ANGLED MOTORCYCLE
MIRRORS
£12.99 From Ebay HERE
I really like look of these
mirrors. Their angular shape
goes well with the spiky
shape of my new front cowl.
These have a 10mm standard
thread on both mirror stalks,
so check that they are
suitable for your bike.
Yet to be tried on the road,
so I don’t know how well
they actually work.
7 Inch Round Halogen
60/55W Headlight
Nicely made Yamaha
RD type headlight.
Chrome rim, black
plastic shell, complete
with H4 bulb.
Plenty of space for
hiding wiring. Comes
with rubber side
mountings which I
swapped out for some
3D printed versions for
my application
As supplied, when fitted
to the bike, the lens
looked like it needed
rotating just a bit. Like
most headlights, it’s
held in the rim using
spring clips. Unlike
most other headlights
I’ve encountered, the
spring locations in the
rim had been peened
over. It made removing
and replacing the clips
more awkward, but it
was doable.
Sidelight bulbs often
seem to be supplied in a
yellow/orange colour.
Very fine abrasive paper
will remove this if you’d
prefer a standard clear
bulb.
Headlight £27.99 from
Busters Accessories via
Ebay HERE.
LASER 6519 Valve Shim Tool
A helpful little chap to ease valve shim removal
from GS500s and other similar Suzuki models. I
find a tiny flat blade screwdriver and a magnetic
pickup tool also come in handy for this job.
Valve tool
£11.95 from Ebay
HERE
POLAR Metal Paint
Direct to rust paint
(similar to Smoothrite).
Sprayed OK but rust was
already starting to show
through again after a
week - and the bike
hadn’t even left the
workbench - so can’t
recommend it.
£14.99 for two cans from
Amazon HERE
COMPRESSION TESTER - Unbranded
After writing the article on compression testing I decided that I
ought to purchase one of the cheap offerings available from
Ebay / Amazon just to see what they were like.
This kit cost me under £6 from Amazon, however the price has
now gone up, but similar sets are available for around £12.
As you can see, it comes with a range of adapters, so you
should be covered on that score. It evens comes with
instructions, but they are written in Chinglish.
I like this set, it’s easier to screw into the Suzuki’s plug holes
than my old Draper version, but that all really depends on
individual bikes and their plug locations.
It did have one major issue, though…
As supplied, the flexible hose wouldn’t attach to
the gauge. If you look at the picture above, you
can see the difference in size between the
flexible hose (left) and one of the other fittings
(right) which did fit OK.
I should have sent it back, but decided instead to
fix it, and after a little fettling all is good.
Many versions of this
and similar sets are
available on Ebay
and Amazon
I thought the adapters were
good, having a nice
chamfer to seat the O ring
on (left) rather than the
thin lip of my Draper one
(on the right).
Shop Now
CLARKE PARTS WASHER
Make cleaning things fun again!
The job I most hate when it
comes to working on bikes is
cleaning all the sh*t off
everything first. Usually it
involved traipsing into the
house to fill up a bucket and
then standing outside in the
cold with brushes and
degreaser. But no more, after
looking longingly at these for
many years, I finally parted
with the cash and bought one
and I love it!
This is the smallest Clarke
washer, if I’d had both cash
and space, I’d have bought the
big one, but this is just big
enough.
Internal dimensions are
395x295x85mm with the
shelf in place. It is
removable giving a total
depth of 200mm
I also bought these
GUNSON Engine
Cleaning Brushes (£5.99
from Ebay HERE). Very
useful for cleaning out tiny
oilways etc.
I found the bare steel drainage
shelf quite slippery, especially
when trying to manoeuvre the
GS cylinder head with one
hand and work the brush with
the other. So I bought a roll of
ROLSON GRIP MAT
(£5.22 from Amazon HERE)
which helped solve that
problem and has also stood up
to whatever chemicals are in
the degreaser I’m using.
I bought this one from clarketooling.co.uk HERE, but they
are currently out of stock. Clarke products are available
from many outlets and there are also some unbranded
versions on Ebay which look very similar.
Working on the GS has meant
that the dirt bike project has
temporarily been on hold, but
before work stopped I had
actually managed to make all
of the pieces for the petrol
tank.
Once I’ve cleared the decks
of Suzuki parts, the next item
on the agenda will be welding
it all together. Can’t say that
I’m really looking forward to
this. I’m not the world’s most
skilled welder, so there’s
plenty of scope for error -
anywhere on the scale
between minor setback and
major disaster!
What is certain is that I will
be learning as I go…
Shop Now
A big thank you to everyone who has taken the
time to provide content. It is (as always) very
much appreciated.
Well, that’s it. The end of the nineteenth issue.
If you’d like your business (motorcycle related) to be
featured in the magazine, get in touch - there’s no charge!
Email: offbeatbikesmagazine@gmail.com