You also want an ePaper? Increase the reach of your titles
YUMPU automatically turns print PDFs into web optimized ePapers that Google loves.
CYBEX GmbH<br />
Riedinger Str. 18 | 95448 Bayreuth |Deutschland<br />
info@cybex-online.com<br />
www.cybex-online.com – [watch instructional video here]<br />
www.facebook.com/cybex.online<br />
CY_170_0393_A0513
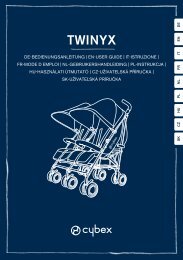
CYBEX CALLISTO<br />
USER GUIDE<br />
EN / MY
5.<br />
4.<br />
3. 9.<br />
6.<br />
7.<br />
8.
Dear customer<br />
ThAnk YOu vErY muCh fOr PurChASIng ThE CYBEX CALLISTO. ThIS PrOduCT IS A STrOLLEr fOr ChILdrEn SuITABLE frOm BIrTh And uP<br />
TO 15 kg. IT IS SuITABLE fOr OnE ChILd OnLY. ThE STrOLLEr IS EquIPPEd wITh A hOOd – ALL fEATurES ArE EXPLAInEd In ThE InSTruCTIOnS.<br />
In dEvELOPIng ThE CYBEX CALLISTO wE CAn ASSurE YOu ThAT Our mAIn fOCuS wAS BOTh SAfETY, COmfOrT And EASY OPErATIOn. ThE<br />
PrOduCT hAS BEEn dEvELOPEd undEr STrICT quALITY COnTrOL And mEETS ALL rELEvAnT SAfETY STAndArdS. ShOuLd YOu hAvE AnY<br />
quESTIOnS, PLEASE fEEL frEE TO COnTACT uS AT AnY TImE.<br />
IMPORTaNT: REaD ThESE INSTRUcTIONS caREFUllY bEFORE USE aND kEEP ThEM FOR FUTURE REFERENcE. YOUR chIlD’S SaFETY MaY bE aFFEcTED IF YOU DO NOT<br />
FOllOW ThESE INSTRUcTIONS.<br />
Pelanggan yang dihormati<br />
TErImA kASIh kErAnA mEmBELI CYBEX CALLISTO. PrOduk InI IALAh kErETA SOrOng unTuk kAnAk-kAnAk dArIPAdA BAru LAhIr dAn<br />
SEhInggA 15 kg. IA SESuAI unTuk SEOrAng kAnAk-kAnAk SAhAjA. kErETA SOrOng InI dILEngkAPI dEngAn hud - SEmuA CIrInYA AdA<br />
dITErAngkAn dI dALAm ArAhAn. dALAm mEmBAngunkAn CYBEX CALLISTO kAmI mAhu mEmASTIkAn AndA BAhAwA TumPuAn uTAmA<br />
kAmI AdALAh kESELAmATAn, kESELESAAn dAn PEngEndALIAn YAng mudAh. PrOduk InI TELAh dIBAngunkAn dI BAwAh kAwALAn<br />
muTu YAng kETAT dAn mEmEnuhI SEmuA STAndArd kESELAmATAn YAng BErkAITAn. SEkIrAnYA AndA AdA SEBArAng SOALAn, SILA<br />
huBungI kAmI PAdA BILA-BILA mASA.<br />
PENTING: SIla baca aRahaN INI DENGaN TElITI SEbElUM GUNa DaN SIMPaN UNTUk RUjUkaN DI MaSa akaN DaTaNG. kESElaMaTaN aNak aNDa<br />
MUNGkIN MENERIMa kESaN jIka aNDa TIDak MENGIkUTI aRahaN INI.<br />
1
2<br />
EN cONTENT<br />
General Information & Safety ............................................................................. 2<br />
Instructions for maintenance .............................................................................. 3<br />
cleaning ............................................................................................................... 3<br />
Instructions for use ............................................................................................... 3<br />
1. Opening the stroller ....................................................................................... 3<br />
2. Assembing the wheels .................................................................................. 3<br />
3. Automatic front wheel swivel locks ............................................................. 3<br />
4. using the brakes ............................................................................................ 3<br />
5. using the harness system .............................................................................. 3<br />
6. Adjusting the harness system for newborns ................................................ 4<br />
7. removing the headhugger and shoulder pads ........................................ 4<br />
8. Attaching the bumper bar ........................................................................... 4<br />
9. reclining the leg rest ..................................................................................... 4<br />
10. reclining the backrest .................................................................................. 4<br />
11. Adjusting height of the handle .................................................................... 4<br />
12. folding the stroller ......................................................................................... 4<br />
13. Carrying the stroller ....................................................................................... 4<br />
14. removing the seat cover ............................................................................. 4<br />
15. Attaching the canopy .................................................................................. 4<br />
16. To remove the complete sub seat ............................................................... 5<br />
17. Attaching the rain cover (optional) ............................................................ 5<br />
disposal ................................................................................................................. 5<br />
warranty ................................................................................................................ 5<br />
wArnIng! EnSurE YOur ChILd IS CLEAr Of mOvIng PArTS<br />
whILE mAkIng AdjuSTmEnTS Or OPEnIng Or fOLdIng ThE<br />
STrOLLEr.<br />
GENERal INFORMaTION & SaFETY<br />
wArnIng: IT mAY BE dAngErOuS TO LEAvE YOur ChILd<br />
unATTEndEd.<br />
wArnIng: dO nOT LET YOur ChILd PLAY wITh ThIS PrOduCT.<br />
for new born babies we recomend to adjust the backreest into the lowest (flattest<br />
recline position.<br />
wArnIng: EnSurE ThAT ALL ThE LOCkIng dEvICES ArE<br />
EngAgEd BEfOrE uSE.<br />
Your child’s safety is your responsibility. Always use the harness system to prevent your<br />
child from falling or sliding out of the seat. This vehicle is suitable for one child only.<br />
follow all instructions carefully to avoid incorrect handling as this can impair the<br />
stroller’s correct function.<br />
wArnIng: ThIS vEhICLE IS InTEndEd fOr ChILdrEn frOm<br />
BIrTh uP TO 15 kg (uP TO 17,5 kg LOAd CAPACITIY).<br />
use of this stroller with a child weighing more than 15 kg will cause excessive wear and<br />
tear on the stroller.<br />
wArnIng: ALwAYS uSE ThE CrOTCh STrAP In COmBInATIOn<br />
wITh ThE wAIST BELT.<br />
The harness always needs to be attached and adjusted correctly. If not adjusted<br />
correctly according to the instructions, the stability of the stroller will be affected.<br />
wArnIng: uSE A hArnESS SYSTEm AS SOOn AS ThE ChILd<br />
CAn SIT unAIdEd.<br />
The harness and seat belt do not replace the permanent supervision by an adult.<br />
wArnIng: ThIS PrOduCT IS nOT SuITABLE fOr runnIng Or<br />
SkATIng.<br />
To attach an additional full harness system for safety reasons ‘d’ rings (according to<br />
En13210 or BS6684) are provided.<br />
The child should be clear of any moving parts while making adjustments. To avoid<br />
injuries prevent children from grabbing the stroller while folding and unfolding.<br />
wArnIng: AnY LOAd ATTAChEd TO ThE hAndLES AffECTS<br />
ThE STABILITY Of ThE STrOLLEr.<br />
do not carry additional children, do not hang shopping bags from the handle bars or<br />
carry shopping bags on the stroller except in the stroller’s basket.<br />
maximum load 2 kg, maximum load for the canopy pocket 0,5 kg. Otherwise the<br />
stroller is likely to become unstable. Overloading can also damage the vehicle.
damages caused by the use of accessories not approved by CYBEX, such as rain<br />
covers, buggy boards, bag hooks, etc. will not be covered by the terms of our warranty.<br />
It may be unsafe to use replacement parts other than those approved by CYBEX.<br />
Before using the stroller, always check whether the accessories are well secured.<br />
Please make sure that the brake is locked while placing and removing the children.<br />
never lift the stroller with the child inside; never ascend or descend stairs or escalators<br />
with the child inside or when using other means of transportation.<br />
when opening and closing the stroller, do not use force, as incorrect folding can<br />
damage or break the stroller. Check the instruction manual if necessary.<br />
drive carefully over curbs and gravel roads. The vehicle will be damaged by repeated<br />
impact.<br />
make sure your child does not use the footrest to stand on.<br />
do not expose the stroller to any artificial heat or direct sunlight.<br />
INSTRUcTIONS FOR MaINTENaNcE<br />
The <strong>user</strong> is responsible for the regular maintenance of the stroller. All connecting parts<br />
and rivets have to be tightened and secured properly. It is particularly important to<br />
ensure that the locking and swiveling mechanism are treated regularly with Teflon spray<br />
(dry lubricant). It is important that brakes, wheels and tyres are not impaired during use.<br />
Inspect them regularly and repair or replace if necessary. STOP using any product that<br />
does not appear structurally sound.<br />
do not make any modifications to the product. If you have any complaints or<br />
problems, please contact your supplier or importer.<br />
A service should be scheduled every 12 months.<br />
You can also treat the other moving parts with Teflon spray (dry lubricant). After<br />
spraying on the Teflon, wipe the product with a soft cloth.<br />
use only original CYBEX replacement parts. It may be unsafe to use substitutes.<br />
The frame tubes covered by the locking mechanism and turning mechanism should<br />
also be regularly cleaned and sprayed. This will ensure that you enjoy your stroller<br />
without any problems.<br />
clEaNING<br />
do not use abrasives to clean the frame! use a damp cloth and a mild detergent and<br />
dry thoroughly.<br />
Should the stroller be exposed to salt water, please rinse it down with fresh (tap) water<br />
as soon as possible afterwards.<br />
Seat covers are machine washable at max. 30° C on delicate cycle. The canopy can<br />
be hand washed with mild detergent at max. 30° C.<br />
Please make note of the care label. do not tumble dry. Let covers dry completely<br />
before reuse.<br />
All CYBEX fabrics have been tested, but when the stroller is very wet, the water may<br />
permeate the lining through the bottom edges and seams and leave water stains<br />
on the upholstery. we advise you to use a rain cover to avoid this. Also please do not<br />
fold or store the product while wet. If the stroller is wet, allow to dry with the canopy<br />
extended. never store in a damp environment as this can cause mildew to form.<br />
Note! Please wash the cover separately before you use it the first time. do not tumble<br />
dry and do not expose to direct sunlight! do not iron!<br />
ThIS PrOduCT wAS APPrOvEd ACCOrdIng TO ThE<br />
En1888:2012 STAndArd.<br />
INSTRUcTIONS FOR USE<br />
ImPOrTAnT: rEAd ThESE InSTruCTIOnS CArEfuLLY BEfOrE<br />
uSE And kEEP ThEm fOr fuTurE rEfErEnCE. YOur ChILd’S<br />
SAfETY mAY BE AffECTEd If YOu dO nOT fOLLOw ThESE<br />
InSTruCTIOnS.<br />
1. OPENING ThE STROllER<br />
a) Before opening the pushchair the safety lock needs to be released.<br />
b) After releasing the safety clip you can unfold the pushchair.<br />
c) Step on the footboard until it locks in place with an audible click.<br />
d) Please make sure that the handle bar is safely locked as well.<br />
wArnIng: ChECk ThAT ThE SEAT unIT ATTAChmEnT dEvICES<br />
And CArrYCOT/CAr SEAT AdAPTErS ArE COrrECTLY<br />
EngAgEd.<br />
2. aSSEMbING ThE WhEElS<br />
a), b) front wheel assembly.<br />
c), d) e) rear wheel assembly. make sure that both mudguards point outwards.<br />
f) After assembling the wheels the bowden brake cable can easily be lodged into<br />
the designated slots.<br />
3. aUTOMaTIc FRONT WhEEl SWIVEl lOckS<br />
regardless of their position, the front wheels can be automatically locked into place by<br />
stepping on the lock button (wait for an audible CLICk). To release the lock press again<br />
until you hear a CLICk.<br />
4. USING ThE bRakES<br />
Tilt the lever located at the right wheel to secure the brake. To release the brake tilt the<br />
lever again.<br />
5. USING ThE haRNESS SYSTEM<br />
a) To fasten the harness system insert left and right side fasteners into the central<br />
harness buckle.<br />
b) To tighten the belts pull the strap on the front of the central harness buckle.<br />
c) To release the belt system press the release button located on the seat in front of<br />
the belt lock while pulling at the shoulder belts.<br />
d) To release the fasteners squeeze the grooves on left and right side of the central<br />
harness buckle.<br />
e) Adjust the length of the crotch strap with the corresponding slider under the seat<br />
cover.<br />
3
4<br />
6. aDjUSTING ThE haRNESS SYSTEM FOR NEWbORNS<br />
– release the loops at the end of the shoulder straps from the triangle in the belt<br />
system, situated at the bottom of the backrest under the seat cover.<br />
– Completely pull the shoulder straps out of the holes in the backrest.<br />
– feed the shoulder straps through the two bottom holes. make sure to feed the<br />
straps back through the holes in the backrest mechanism and re-attach them to<br />
the triangle.<br />
– To adjust the length of the shoulder straps to newborns please attach the inner loop<br />
of the shoulder strap ends to the triangular ring.<br />
Switch back to the upper holes as soon as the shoulder straps do no longer fit over the<br />
child´s shoulders.<br />
7. REMOVING ThE hEaDhUGGER aND ShOUlDER PaDS<br />
a) remove the headhugger as soon as the headhugger does no longer fit over the<br />
child´s shoulders.<br />
b) remove the velcros of the headhugger on the top left and right side on the back of<br />
the seat cover. release the loops at the end of the shoulder straps from the triangle<br />
in the belt system, situated at the bottom of the backrest under the seat cover.<br />
– Completely pull the shoulder straps out of the holes in the backrest.<br />
c) Pull the shoulder straps through the shoulder pads and the headhugger. make sure<br />
to feed the straps back through the holes in the backrest mechanism and attach<br />
them to the triangle.<br />
You can use the haedhugger and the shoulder pads separately.<br />
8. aTTachING ThE bUMPER baR<br />
a) Slide in latches on left and right side into gadgets sewn into the seat fabric.<br />
b) Press buttons on left and right end of the bumper bar to take it off.<br />
9. REclINING ThE lEG REST<br />
a) Press the leg rest on both front edges and push down.<br />
b) Simply lift the leg rest to put it back to the starting position.<br />
10. REclINING ThE backREST<br />
a) Pull the recline lever on the back of the seat to recline the backrest.<br />
b) To raise it again just lift the backrest of the seat. The backrest can be engaged in 5<br />
different positions.<br />
11. aDjUSTING hEIGhT OF ThE haNDlE<br />
a) b) Push button underneath the handle bar and slide up upper part of handle bar to<br />
extend it until it clicks in place. Shorten the handle bar by pushing the button again.<br />
12. FOlDING ThE STROllER<br />
remove all contents from the basket. If attached, ensure the canopy is folded back.<br />
a) Push the primary lock lever underneath the pedal button.<br />
Lift the pushed primary lock lever to release the stretching system.<br />
b) Push down the secondary lock lever (extended bar on right side of the locking<br />
system).<br />
c), d) Press the button at the handle bar and fold the buggy by pushing it slightly<br />
forward. PlEaSE NOTE: keep the button pushed the whole time. To make folding<br />
easier lift the locking lever with your foot. fold the buggy together carefully until the<br />
safety clip is securely locked.<br />
e) The brake can be used even with a folded buggy. with a locked brake the folded<br />
buggy can rest against a wall to prevent inadvertent rolling.<br />
13. caRRYING ThE STROllER<br />
Pull the flexible carring handle on right rear tube and lift the stroller.<br />
14. REMOVING ThE SEaT cOVER<br />
– Slightly fold the stroller to reduce tension.<br />
– remove the canopy from the stroller, if attached.<br />
a) Take the seat cover’s hooks (3) off the frame on left and right side<br />
– Open the press buttons (4) of the straps connected to the seat side panels and the<br />
basket rear tube.<br />
– Open the flaps (5) which are fixed with velcro over the tubes, one on each side.<br />
– feed the strap with the slider (6) of the central harness buckle through the hole in<br />
the seat fabric.<br />
b) feed the loops on the end of the shoulder straps through the triangle in the backrest<br />
(7).<br />
c) feed the shoulder straps through the holes in the seat fabric (8).<br />
– Open the press buttons which are on the left and the right side from the seat on the<br />
bottom from the fabric.<br />
– Pull the seat cover over the belt shifting button on the seat.<br />
– Slide the fabrics from the seat base tubes.<br />
– reverse this procedure to refit the seat cover and the harness. make sure that the<br />
seat tubes slide back into the pockets inside the seat cover.<br />
15. aTTachING ThE caNOPY<br />
a) Attach the canopy adaptor on to the inside of the frame tubes of the buggy.<br />
b) To remove the canopy reverse procedure.<br />
c), d), e) Extend the canopy and place canopy rear flap behind the seat.<br />
f) Lie-flat position: Put the rear flap over the seat’s back rest and fixate it with the two<br />
velcros underneath.<br />
g), h), i), The canopy is adjustable to various positions. The Canopy has a height<br />
adjustment and a forward rotation function. To rotate open the zip located at the<br />
top of the canopy.<br />
The canopy has a fully ratcheting function to create complete coverage. Simply pull<br />
on the front of the canopy to the desired position. The height can be easily adjusted by<br />
simply sliding the canopy up or down the frame. The entire canopy can also be tilted<br />
forward. for maximum coverage, unzip the extra panel on top of canopy and pull<br />
forward.<br />
j) The canopy flap at the rear of the stroller can be rolled up and fixed with a velcro<br />
fastener, if required.
16. TO REMOVE ThE cOMPlETE SUb SEaT<br />
remove the canopy<br />
a) undo the press buttons that attach the seatcover with the rear frame.<br />
b) unhook the side panels at the left and right upper end out of the adaptor.<br />
c) Open the adaptor on the left and the right side under the seat unit.<br />
d) Pull out the complete sub seat towards the front of the buggy.<br />
e) To attach the subseat reverse this procedure. Ensure that the buggy is not<br />
completely unfolded.<br />
17. aTTachING ThE RaIN cOVER (OPTIONal)<br />
Extend the rain cover over the stroller like shown in the image.<br />
To fit the rain cover fasten the velcro strips around the frame at the top and bottom on<br />
both sides of the buggy.<br />
DISPOSal<br />
when you are done using your CYBEX CALLISTO, a proper disposal is important.<br />
garbage disposal may vary in every country. Please contact your local waste<br />
management company to make sure you are taking the right steps to dispose of the<br />
CYBEX CALLISTO. Always follow the disposal regulations of your country.<br />
WaRRaNTY<br />
The following warranty applies solely in the country where this product was initially<br />
sold by a retailer to a customer. The warranty covers all manufacturing and material<br />
defects, existing and appearing, at the date of purchase or appearing within a<br />
term of two (2) years from the date of purchase from the retailer who initially sold the<br />
product to a consumer (manufacturer’s warranty). In the event that a manufacturing<br />
or material defect should appear, we will – at our own discretion – either repair the<br />
product free of charge or replace it with a new product. To obtain such warranty it is<br />
required to take or ship the product to the retailer, who initially sold this product to a<br />
customer and to submit an original proof of purchase (sales receipt or invoice) that<br />
contains the date of purchase, the name of the retailer and the type designation of this<br />
product. This warranty shall not apply in the event that this product is taken or shipped<br />
to the manufacturer or any other person other than the retailer who initially sold this<br />
product to a consumer. Please check the product with respect to completeness and<br />
manufacturing or material defects immediately at the date of purchase or, in the<br />
event that the product was purchased in distance selling, immediately after receipt. In<br />
case of a defect stop using the product and take or ship it immediately to the retailer<br />
who initially sold it. In a warranty case the product has to be returned in a clean and<br />
complete condition. Prior to contacting the retailer, please read this instruction manual<br />
carefully. This warranty does not cover any damages caused by misuse, environmental<br />
influence (water, fire, road accidents etc.) or normal wear and tear. It does solely apply<br />
in the event that the use of the product was always in compliance with the operating<br />
instructions, if any and all modifications and services were performed by authorized<br />
persons and if original components and accessories were used. This warranty does not<br />
exclude, limit or otherwise affect any statutory consumer rights, including claims in tort<br />
and claims with respect to a breach of contract, which the buyer may have against<br />
the seller or the manufacturer of the product.<br />
5
6<br />
MY kaNDUNGaN<br />
I. Maklumat am & keselamatan......................................................................... 6<br />
aRahaN PENYElENGGaRaaN ........................................................................... 7<br />
Membersihkan ..................................................................................................... 7<br />
arahan penggunaan .......................................................................................... 7<br />
1. membuka kereta sorong .............................................................................. 7<br />
2. memasang roda .......................................................................................... 7<br />
3. mengunci pusingan roda depan secara automatik ................................ 7<br />
4. menggunakan brek ...................................................................................... 7<br />
5. menggunakan Sistem Abah-abah ............................................................. 7<br />
6. melaraskan Sistem Abah-abah untuk Bayi Baru Lahir ............................... 8<br />
7. membuka Pemegang kepala dan Pad Bahu .......................................... 8<br />
8. memasang bampar bar .............................................................................. 8<br />
9. menyandarkan alas kaki .............................................................................. 8<br />
10. menyandarkan penyandar tempat duduk ............................................... 8<br />
11. melaraskan ketinggian pemegang ............................................................ 8<br />
12. melipat kereta sorong ................................................................................... 8<br />
13. membawa kereta sorong............................................................................. 8<br />
14. membuka alas tempat duduk ..................................................................... 8<br />
15. memasang kanopi ........................................................................................ 8<br />
16. untuk membuka sub tempat duduk lengkap ............................................ 9<br />
17. memasang penutup hujan (opsyenal ........................................................ 9<br />
Pelupusan ............................................................................................................. 9<br />
jaminan ................................................................................................................ 9<br />
AmArAn! PASTIkAn AnAk AndA jAuh dArIPAdA<br />
BAhAgIAn YAng BErgErAk SEmASA mEmBuAT<br />
PEnYELArASAn ATAu mEmBukA ATAu mELIPAT kErETA<br />
SOrOng.<br />
MaklUMaT aM & kESElaMaTaN<br />
AmArAn: BAhAYA jIkA mEnInggALkAn AnAk AndA TAnPA<br />
dIjAgA. AmArAn: jAngAn BIAr AnAk AndA BErmAIn<br />
dEngAn PrOduk InI.<br />
Bagi bayi baru lahir kami mengesyorkan melaraskan penyandar belakang kepada<br />
kedudukan menyandar paling rendah (paling rata).<br />
AmArAn: PASTIkAn SEmuA PErAnTI PEngunCI dIPASAng<br />
SEBELum PEnggunAAn.<br />
keselamatan anak anda adalah tanggungjawab anda. Sentiasa gunakan sistem<br />
abah-abah untuk mencegah anak anda daripada terjatuh atau menggelongsor dari<br />
tempat duduk. kereta sorong ini sesuai untuk seorang kanak-kanak sahaja.<br />
Ikuti semua arahan betul-betul untuk mengelakkan pengendalian yang salah kerana<br />
ini boleh mendatangkan kesan kepada fungsi kereta sorong yang betul.<br />
dArIPAdA BAru LAhIr hInggA mAkS. 15 kg (dIujI En1888) –<br />
2.5 kg BEBAn TAmBAhAn (dIujI OLEh InTErTEk)<br />
Penggunaan kereta sorong ini untuk kanak-kanak yang beratnya melebihi 15 kg akan<br />
menyebabkan haus dan lusuh yang berlebihan kepada kereta sorong.<br />
AmArAn: SEnTIASA gunAkAn TALI PEngIkAT kELAngkAng<br />
BErSAmA dEngAn TALI PInggAng.<br />
Abah-abah perlu disambungkan dan dilaraskan dengan betul. jika tidak dilaraskan<br />
dengan betul menurut arahan, kestabilan kereta sorong akan terganggu.<br />
AmArAn: gunAkAn SISTEm ABAh-ABAh SEBAIk SAhAjA<br />
kAnAk-kAnAk BOLEh duduk TAnPA dIBAnTu.<br />
Abah-abah dan tali pinggang keselamatan tidak boleh menggantikan pengawasan<br />
sepanjang masa oleh orang dewasa.<br />
AmArAn: PrOduk InI TIdAk SESuAI unTuk BErLArI ATAu<br />
mELunCur<br />
untuk menyambungkan sistem abah-abah penuh tambahan untuk keselamatan<br />
cincin 'd' (menurut En13210 atau BS6684) disediakan.<br />
kanak-kanak perlu jauh daripada sebarang bahagian yang bergerak semasa<br />
membuat pelarasan. untuk mengelak kecederaan cegah kanak-kanak daripada<br />
memegang kereta sorong semasa dilipat dan dibuka.<br />
AmArAn: SEBArAng BEBAn YAng dISAngkuT kEPAdA<br />
PEmEgAng AkAn mEmBErI kESAn kEPAdA kESTABILAn<br />
kErETA SOrOng.<br />
jangan bawa kanak-kanak tambahan, jangan sangkut beg beli-belah pada bar<br />
pemegang atau membawa beg beli-belah di atas kereta sorong kecuali di dalam<br />
bakul kereta sorong.
Beban maksimum 2 kg, beban maksimum untuk poket kanopi 0,5 kg. jika tidak kereta<br />
sorong mungkin menjadi tidak stabil. Beban berlebihan juga boleh merosakkan kereta<br />
sorong.<br />
kerosakan disebabkan oleh penggunaan aksesori yang tidak diluluskan oleh CYBEX,<br />
seperti penutup hujan, papan buggy, penyangkut beg dan sebagainya tidak akan<br />
dilindungi oleh terma jaminan kami. Penggunaan alat ganti selain daripada yang<br />
diluluskan oleh CYBEX mungkin tidak selamat. Sebelum menggunakan kereta sorong,<br />
sentiasa periksa sama ada aksesori sudah dipasang dengan selamat.<br />
Sila pastikan brek dikunci semasa meletakkan dan mengangkat kanak-kanak. jangan<br />
angkat kereta sorong dengan kanak-kanak berada di dalam: jangan naik atau<br />
turun tangga atau tangga bergerak dengan kanak-kanak di dalam atau semasa<br />
menggunakan pengangkutan yang lain.<br />
Semasa membuka dan menutup kereta sorong, jangan gunakan kekuatan, kerana<br />
melipat dengan cara yang salah boleh merosakkan atau mematahkan kereta sorong.<br />
Baca manual arahan jika perlu.<br />
Sorong dengan berhati-hati apabila melalui susur jalan dan jalan kerikil. kereta sorong<br />
akan rosak akibat impak yang berulang.<br />
Pastikan anak anda tidak berdiri di atas alas kaki.<br />
jangan dedahkan kereta sorong kepada sebarang haba buatan atau cahaya<br />
matahari secara terus.<br />
aRahaN PENYElENGGaRaaN<br />
Pengguna bertanggungjawab untuk kerap menyelenggarakan kereta sorong. Semua<br />
bahagian yang bersambung serta rivet perlu diketatkan dan dipasang dengan<br />
betul. Adalah penting untuk memastikan bahawa mekanisme kunci dan mekanisme<br />
berpusing disemburkan dengan semburan Teflon (pelincir kering) secara kerap.<br />
Adalah penting untuk brek, roda dan tayar tidak rosak semasa penggunaan. Periksa<br />
bahagian ini dengan kerap dan baiki atau gantikan jika perlu. BErhEnTI daripada<br />
menggunakan produk yang kelihatan tidak kukuh.<br />
jangan buat sebarang pengubahsuaian kepada produk. jika anda mempunyai<br />
sebarang aduan atau masalah, sila hubungi pembekal atau pengimport anda.<br />
Servis perlu dijadualkan setiap 12 bulan.<br />
Anda juga boleh menggunakan semburan Teflon (pelincir kering) untuk bahagian<br />
bergerak yang lain. Selepas semburan Teflon, lap produk dengan kain lembut.<br />
gunakan hanya alat ganti CYBEX yang asli. Penggunaan alat ganti yang lain mungkin<br />
tidak selamat.<br />
Tiub rangka yang dilekapkan dengan mekanisme kunci dan mekanisme berpusing<br />
perlu dibersihkan dan disemburkan dengan kerap. Ini akan memastikan anda boleh<br />
menikmati penggunaan kereta sorong tanpa sebarang masalah.<br />
MEMbERSIhkaN<br />
jangan gunakan penyental untuk membersihkan rangka! gunakan kain lembap dan<br />
bahan pencuci lembut dan keringkan betul-betul.<br />
Sekiranya kereta sorong terdedah kepada air masin, sila bilas dengan air tawar (air<br />
paip) dengan segera selepas itu.<br />
Alas tempat duduk boleh dibasuh mesin pada suhu maks. 30° C pada kitaran lembut.<br />
kanopi boleh dicuci tangan menggunakan bahan pencuci lembut pada kepanasan<br />
maks. 30°C.<br />
Sila ambil perhatian tentang label penjagaan. jangan guna mesin pengering. Biarkan<br />
alas kering betul-betul sebelum digunakan semula.<br />
Semua fabrik CYBEX telah diuji, tetapi apabila kereta sorong terlalu basah, air mungkin<br />
meresap ke lapisan melalui bahagian bawah dan kelim dan meninggalkan kesan air<br />
pada upholsteri. kami menasihatkan anda untuk menggunakan penutup hujan untuk<br />
mengelakkan perkara ini. dan juga jangan lipat atau simpan kereta sorong semasa<br />
basah. jika kereta sorong basah, biarkannya kering dengan kanopi dipanjangkan<br />
keluar. jangan simpan di persekitaran yang lembap kerana ini boleh menyebabkan<br />
kulat terbentuk.<br />
Perhatian! Sila basuh pelapik secara berasingan sebelum anda menggunakan buat<br />
kali pertama. jangan gunakan mesin pengering dan jangan dedahkan kepada<br />
cahaya matahari secara terus! jangan seterika!<br />
PrOduk InI dILuLuSkAn mEnuruT STAndArd En1888:2012<br />
aRahaN PENGGUNaaN<br />
PEnTIng: SILA BACA ArAhAn InI dEngAn TELITI SEBELum<br />
gunA dAn SImPAn unTuk rujukAn dI mASA AkAn<br />
dATAng. kESELAmATAn AnAk AndA mungkIn TErjEjAS<br />
jIkA AndA TIdAk mEngIkuTI ArAhAn InI.<br />
1. MEMbUka kERETa SORONG<br />
a) Sebelum membuka kereta sorong, lepaskan tuil pengunci lipatan.<br />
b) Setelah melepaskan tuil pengunci lipatan, kereta sorong boleh dibuka.<br />
c) Langkah pada kaki katil sehingga terpasang dengan bunyi "klik".<br />
d) Sila pastikan bahawa bar pemegang dikunci dengan selamat.<br />
AmArAn: PASTIkAn PErAnTI TAmBAhAn kEruSI dAn<br />
AdAPTEr CArrYCOT / kEruSI kErETA dILETAkkAn dEngAn<br />
BETuL.<br />
2. MEMaSaNG RODa<br />
a) b) memasang roda depan<br />
c), d) e) memasang roda belakang. Pastikan bahawa kedua-dua slebor menunjukkan<br />
ke arah luar.<br />
f) Selepas memasang brek, kabel bowden boleh dipasang ke dalam bahagian yang<br />
ditetapkan.<br />
3. MENGUNcI PUSINGaN RODa DEPaN SEcaRa aUTOMaTIk<br />
Tekan Tuil kunci Pusingan depan dalam mana-mana kedudukan roda untuk mengunci<br />
roda depan (sehingga "klik”). Angkat Tuil kunci Pusingan depan ke atas sekali lagi<br />
sehingga “klik” untuk melepaskan kunci Pusingan<br />
7
8<br />
4. MENGGUNakaN bREak<br />
dongakkan tuil yang terletak di roda depan untuk menahan brek. untuk melepaskan<br />
brek, dongakkan tuil sekali lagi.<br />
5. MENGGUNakaN SISTEM abah-abah<br />
a) untuk menutup hanya selitkan lidah pengancing di kiri dan kanan ke dalam<br />
pengancing abah-abah.<br />
b) untuk menutup hanya selitkan lidah pengancing di kiri dan kanan ke dalam<br />
pengancing abah-abah.<br />
c) untuk melepaskan sistem tali pinggang telan butang pelepas yang terletak di atas<br />
tempat duduk di depan pengunci tali pinggang dan tarik tali pinggang bahu.<br />
d) untuk melepaskan pengancing abah-abah, cuma tekan kedua-dua bahagian<br />
pengancing abah-abah bersama-sama.<br />
e) Panjang tali pengikat kelangkang dilaraskan dengan menggerakkan<br />
penggelongsor di bawah kerusi.<br />
6. MElaRaSkaN SISTEM abah-abah UNTUk baYI baRU lahIR<br />
– Lepaskan gelung di bahagian hujung pengikat bahu daripada segi tiga dalam<br />
sistem tali pinggang, terletak di bawah penyandar belakang di bawah alas<br />
tempat duduk.<br />
– Tarik pengikat bahu keluar sampai habis daripada lubang pada penyandar<br />
belakang.<br />
– masukkan pengikat bahu melalui dua lubang bawah. Pastikan untuk memasukkan<br />
pengikat semula melalui lubang pada mekanisme penyandar belakang dan<br />
sambungkan semula pada segi tiga.<br />
– untuk melaraskan panjang pengikat bahu bagi bayi baru lahir sila pasangkan<br />
bahagian dalam gelung pada hujung pengikat bahu kepada cincin segi tiga.<br />
ubah semula kepada lubang atas sebaik sahaja pengikat bahu tidak lagi muat pada<br />
bahu bayi.<br />
7. MEMbUka PEMEGaNG kEPala DaN PaD bahU<br />
a) Buka pemegang kepala sebaik sahaja ia tidak muat pada bahagian bahu bayi.<br />
b) Buka velkro pemegang kepala di bahagian atas sebelah kiri dan kanan pada<br />
bahagian belakang alas tempat duduk. Lepaskan gelung di bahagian hujung<br />
pengikat bahu daripada segi tiga dalam sistem tali pinggang, terletak di bawah<br />
penyandar belakang di bawah alas tempat duduk<br />
– Tarik pengikat bahu keluar sampai habis daripada lubang pada penyandar<br />
belakang.<br />
c) Tarik pengikat bahu melalui pad bahu dan pemegang kepala. Pastikan untuk<br />
memasukkan pengikat semula melalui lubang pada mekanisme penyandar<br />
belakang dan sambungkan pada segi tiga.<br />
Anda boleh gunakan pemegang kepala dan pad bahu secara berasingan.<br />
8. MEMaSaNG baMPaR baR<br />
a) Selitkan selak di sebelah kiri dan kanan pada gajet yang dijahit pada fabrik tempat<br />
duduk.<br />
b) Tekan butang di sebelah kiri dan kanan bampar bar untuk mengeluarkannya<br />
9. MENYaNDaRkaN alaS kakI<br />
a) Tekan alas kaki di kedua-dua hujung depan dan tekan ke bawah.<br />
b) Cuma angkat alas kaki untuk mengembalikannya kepada kedudukan asal.<br />
10. MENYaNDaRkaN PENYaNDaR TEMPaT DUDUk<br />
a) Tarik tuil sandar di bahagian belakang tempat duduk bagi menyandarkan<br />
penyandar belakang.<br />
b) untuk menaikkannya semula cuma angkat penyandar belakang tempat duduk.<br />
Penyandar belakang boleh diletakkan dalam 5 kedudukan berbeza.<br />
11. MElaRaSkaN kETINGGIaN PEMEGaNG<br />
a) b) Tekan butang di bawah bar pemegang dan tolah bahagian atas bar<br />
pemegang untuk memanjangkannya sehingga klik masuk. Pendekkan bar<br />
pemegang dengan menekan semula butang.<br />
12. MElIPaT kERETa SORONG<br />
keluarkan semua kandungan daripada bakul. jika dipasang, pastikan kanopi dilipat<br />
semula.<br />
a) Tekan tuil pengunci utama di bawah butang pedal.<br />
Angkat tuil pengunci utama untuk melepaskan sistem regangan.<br />
b) Tekan tuil pengunci kedua (bar yang terjulur di sebelah kanan sistem pengunci).<br />
c), d) Tekan butang pada bar pemegang dan lipat kereta sorong dengan<br />
menolaknya sedikit ke hadapan. SILA AmBIL PErhATIAn: Butang perlu ditekan<br />
sepanjang masa. untuk memudahkan kerja melipat, angkat tuil pengunci<br />
menggunakan kaki anda. Lipat kereta sorong dengan berhati-hati sehingga klip<br />
keselamatan telah terkunci.<br />
e) Brek boleh digunakan walaupun kereta sorong telah dilipat. dengan brek yang<br />
terkunci, kereta sorong yang berlipat boleh disandarkan pada dinding dan tidak<br />
akan menggelongsor secara tidak sengaja.<br />
13. MEMbaWa kERETa SORONG<br />
Tarik pemegang pembawa fleksibel pada tiub kanan belakang dan angkat kereta<br />
sorong.<br />
14. MEMbUka alaS TEMPaT DUDUk<br />
– Lipat sedikit kereta sorong untuk mengurangkan tegangan.<br />
– Alihkan kanopi daripada kereta sorong, jika terpasang.<br />
a) Buka penyangkut alas tempat duduk (3) daripada rangka di sebelah kiri dan<br />
kanan.<br />
– Buka butang tekan (4) bagi pengikat yang disambungkan ke panel sebelah<br />
tempat duduk dan tiub belakang bakul.<br />
– Buka penutup (5) yang dipasang dengan velkro pada tiub, satu bagi setiap sisi.<br />
– masukkan pengikat dengan gelongsor (6) pengancing abah-abah tengah melalui<br />
lubang pada fabrik tempat duduk.<br />
b) masukkan gelung pada bahagian hujung pengikat bahu melalui segi tiga pada<br />
penyandar belakang (7).<br />
c) masukkan pengikat bahu melalui lubang pada fabrik tempat duduk (8).<br />
– Buka butang tekan di sebelah kiri dan kanan tempat duduk di bahagian bawah<br />
fabrik.
– Tarik alas tempat duduk melepasi butang pengalih tali pinggang pada tempat<br />
duduk.<br />
– Tarik fabrik daripada tiub dasar tempat duduk.<br />
– Terbalikkan prosedur ini untuk memasang semula alas tempat duduk dan abahabah.<br />
Pastikan tiub tempat duduk masuk semula ke dalam poket sebelah dalam<br />
alas tempat duduk.<br />
15. MEMaSaNG kaNOPI<br />
a) Pasangkan adaptor kanopi kepada bahagian dalam tiub rangka kereta sorong.<br />
b) untuk membuka kanopi terbalikkan prosedur ini.<br />
c), d), e) Panjangkan kanopi dan letakkan penutup belakang kanopi ke belakang<br />
tempat duduk.<br />
f) kedudukan mendatar: Letakkan penutup belakang di atas penyandar belakang<br />
tempat duduk dan lekatkan menggunakan dua velkro di bawah.<br />
g), h), i), kanopi boleh dilaraskan kepada pelbagai kedudukan. kanopi ada<br />
pelarasan ketinggian dan fungsi pusingan ke depan. untuk memusingkan buka zip<br />
yang terletak di bahagian atas kanopi.<br />
kanopi mempunyai fungsi gear sehala untuk menghasilkan liputan penuh. hanya<br />
tarik bahagian depan kanopi kepada kedudukan yang diingini. ketinggian boleh<br />
dilaraskan dengan mudah dengan hanya menggelongsor kanopi ke atas atau ke<br />
bawah rangka. keseluruhan kanopi juga boleh dicondongkan ke depan. untuk<br />
liputan maksimum, buka zip panel tambahan pada bahagian atas kanopi dan tarik<br />
ke depan.<br />
j) Penutup kanopi pada bahagian belakang kereta sorong boleh digulung dan<br />
diikat menggunakan kancing velkro, jika perlu.<br />
16. UNTUk MEMbUka SUb TEMPaT DUDUk lENGkaP<br />
Buka kanopi<br />
a) Buka butang tekan yang menyambungkan alas tempat duduk dengan rangka<br />
belakang.<br />
b) Buka penyangkut panel susu di kiri dan kanan sebelas atas daripada adaptor.<br />
c) Buka adaptor di sebelah kiri dan kanan di bawah tempat duduk.<br />
d) Tarik seluruh tempat duduk kecil ke arah depan kereta sorong.<br />
e) untuk memasang tempat duduk kecil terbalikkan prosedur ini. Pastikan kereta<br />
sorong tidak dibuka sepenuhnya.<br />
17. MEMaSaNG PENUTUP hUjaN (OPSYENal)<br />
Panjangkan penutup hujan di atas kereta sorong seperti dalam gambar.<br />
untuk memasang penutup hujan ketatkan kepingan velkro din sekeliling rangka di<br />
bahagian atas dan bawah kedua-dua sisi kereta sorong.<br />
PElUPUSaN<br />
Apabila anda selesai menggunakan CYBEX CALLISTO, pelupusan yang sewajarnya<br />
perlu dilakukan. Pelupusan sisa mungkin berbeza di setiap negara. Sila hubungi<br />
syarikat pengurusan sisa tempatan anda untuk memastikan anda mengambil langkah<br />
yang wajar dalam melupuskan CYBEX CALLISTO. Sentiasa ikut peraturan pelupusan<br />
negara anda.<br />
jaMINaN<br />
jaminan berikut terpakai hanya di negara di mana produk ini mula-mula dijual oleh<br />
peruncit kepada pelanggan. jaminan meliputi semua kerosakan pembuatan dan<br />
bahan, yang sedia ada dan muncul, pada tarikh pembelian atau muncul dalam<br />
tempoh dua (2) tahun selepas tarikh pembelian daripada peruncit yang mulamula<br />
menjual produk kepada pengguna (jaminan pembuat). Sekiranya kerosakan<br />
pembuatan atau bahan muncul, kami akan - mengikut budi bicara kami - sama<br />
ada membaiki produk secara percuma atau menggantikannya dengan produk<br />
yang baharu. untuk mendapatkan jaminan ini, adalah perlu untuk mengambil atau<br />
menghantar produk kepada peruncit, yang mula-mula menjual produk ini kepada<br />
pelanggan dan menyerahkan bukti pembelian asal (resit jualan atau invois) yang<br />
mengandungi tarikh pembelian, nama peruncit dan jenis gelaran produk ini. jaminan<br />
ini tidak terpakai sekiranya produk ini diambil atau dihantar kepada pembuat atau<br />
mana-mana orang lain selain daripada peruncit yang mula-mula menjual produk<br />
ini kepada pengguna. Sila periksa produk berkaitan kesempurnaan dan kerosakan<br />
pembuatan atau bahan dengan segera pada tarikh pembelian, atau sekiranya<br />
produk dibeli dengan jualan jarak jauh, sebaik sahaja selepas penerimaan. Sekiranya<br />
rosak, berhenti menggunakan produk dan hantar atau kirimkan segera kepada<br />
peruncit yang mula-mula menjualnya. dalam kes jaminan, produk perlu dipulangkan<br />
dalam keadaan bersih dan lengkap. Sebelum menghubungi peruncit, sila baca<br />
manual arahan ini dengan teliti. jaminan ini tidak melindungi sebarang kerosakan<br />
akibat salah guna, pengaruh persekitaran (air, api, kemalangan jalan raya dan<br />
sebagainya) atau haus an lusuh yang biasa. Ia hanya terpakai dalam keadaan<br />
penggunaan produk ini hanya mematuhi arahan pengendalian., jika ada dan<br />
semua pengubahsuaian dan servis dilakukan oleh mereka yang layak dan hanya<br />
komponen dan aksesori asli sahaja yang digunakan. jaminan ini tidak mengecualikan,<br />
mengehadkan atau memberi kesan kepada mana-mana hak berkanun pelanggan,<br />
termasuk tuntutan tort dan tuntutan berkaitan pelanggaran kontrak, yang mana<br />
pembeli mungkin ada terhadap penjual atau pembuat produk.<br />
9