LIBRETTO ISTRUZIONI - Nuova Simonelli
LIBRETTO ISTRUZIONI - Nuova Simonelli
LIBRETTO ISTRUZIONI - Nuova Simonelli

Create successful ePaper yourself
Turn your PDF publications into a flip-book with our unique Google optimized e-Paper software.
<strong>LIBRETTO</strong> <strong>ISTRUZIONI</strong><br />
USER HANDBOOK<br />
COMPACT
I<br />
Complimenti,<br />
con l’acquisto del modello Lei ha fatto un’ottima scelta.<br />
COMPACT<br />
L’acquisto di una macchina per caffè espresso professionale coinvolge diversi fattori di selezione: il nome<br />
dell’azienda produttrice, le specifiche funzioni della macchina, l’affidabilità tecnica, la possibilità di una<br />
pronta e adeguata assistenza, il costo. Lei certamente ha valutato tutto questo e poi ha deciso: scelgo il<br />
modello .<br />
COMPACT<br />
Per noi, ha scelto il meglio e potrà verificarlo, caffè dopo caffè, cappuccino dopo cappuccino.<br />
Vedrà quanto sarà comodo, pratico ed efficiente lavorare con .<br />
COMPACT<br />
Se è la prima volta che acquista una macchina <strong>Nuova</strong> <strong>Simonelli</strong>, benvenuto nell’alta caffetteria; se è già nostro<br />
Cliente, siamo molto lusingati della Sua fedeltà.<br />
Grazie della preferenza.<br />
Cordialmente,<br />
<strong>Nuova</strong> <strong>Simonelli</strong> S.p.a.<br />
COMPACT<br />
COMPACT
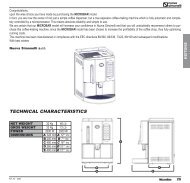
CARATTERISTICHE TECNICHE<br />
B<br />
A<br />
0 V 0 V<br />
PESO NETTO 60 kg 133 lb 60 kg 133 lb<br />
PESO LORDO 65 kg 143 lb 65 kg 143 lb<br />
POT. TERMICA 3000 W 3000 W 1500/2200 W 1500/2200 W<br />
DIMENSIONI A 550 mm A 21.6 A 550 mm A 21.6<br />
E<br />
B 460 mm B 18 B 460 mm B 18<br />
C 545 mm C 21.4 C 545 mm C 21.4<br />
D 370 mm D 14.5 D 370 mm D 14.5<br />
E 530 mm E 20.8 E 530 mm E 20.8<br />
D<br />
C<br />
COMPACT<br />
COMPACT<br />
I
I<br />
INDICE<br />
CARATTERISTICHE TECNICHE ....<br />
. DESCRIZIONE ............................... 4<br />
. DESCRIZIONE TASTIERE .................................. 5<br />
. LISTA ACCESSORI ............................................ 6<br />
. PRESCRIZIONI DI SICUREZZA..... 7<br />
. TRASPORTO E<br />
MOVIMENTAZIONE ..................... 0<br />
. IDENTIFICAZIONE MACCHINA ..................... 0<br />
. TRASPORTO .................................................. 0<br />
. MOVIMENTAZIONE........................................ 0<br />
4. INSTALLAZIONE E OPERAZIONI<br />
PRELIMINARI ..............................<br />
5. REGOLAZIONI DEL<br />
TECNICO QUALIFICATO .............<br />
5. RIEMPIMENTO MANUALE CALDAIA ............<br />
5. REGOLAZIONE PRESSIONE CALDAIA .........<br />
5. REGOLAZIONE PRESSIONE POMPA ............. 4<br />
5.4 REGOLAZIONE ECONOMIZZATORE<br />
ACQUA CALDA ............................................. 5<br />
6. UTILIZZO ................................... 6<br />
6. ACCENSIONE ................................................ 6<br />
6. SPEGNIMENTO .............................................. 6<br />
6. PREPARAZIONE CAFFE’ ................................ 6<br />
6.4 UTILIZZO DEL VAPORE ............................... 7<br />
6.5 PREPARAZIONE DEL CAPPUCCINO ............. 7<br />
6.6 SELEZIONE ACQUA CALDA .......................... 7<br />
6.7 SELEZIONE VAPORE TEMPORIZZATO ......... 7<br />
6.8 SELEZIONE VAPORE AUTOSTEAM ............... 7<br />
7. PROGRAMMAZIONE .................... 9<br />
7. PROGRAMMAZIONE DOSI ............................. 9<br />
7. PROGRAMMAZIONE DOSI CAFFè ................. 9<br />
7. PROGRAMMAZIONE<br />
VAPORE TEMPORIZZATO ............................. 9<br />
7.4 PROGRAMMAZIONE AUTOSTEAM ................ 9<br />
7.5 PROGRAMMAZIONE ACQUA CALDA ............. 9<br />
7.6 PROGRAMMAZIONE DOSI STANDARD ......... 0<br />
7.7 COPIATURA DOSI .......................................... 0<br />
7.8 PROGRAMMAZIONE<br />
PARAMETRI DI FUNZIONAMENTO................ 0<br />
7.9 CICLO AUTOMATICO DI PULIZIA GRUPPI ....<br />
COMPACT<br />
8. PULIZIA E MANUTENZIONE ......<br />
8. PULIZIA DELLA CARROZZERIA ....................<br />
8. PULIZIA DELLE DOCCETTE INOX.................<br />
8. PULIZIA DEL GRUPPO CON<br />
L'AUSILIO DEL FILTRO CECO ......................<br />
8.4 PULIZIA DEI FILTRI E PORTAFILTRI ...........<br />
8.5 RIGENERAZIONE RESINE ADDOLCITORE ....<br />
. MESSAGGI ERRORI<br />
MACCHINA.................................. 4
4<br />
. DESCRIZIONE<br />
4<br />
4<br />
LEGENDA<br />
1 Pulsanti selezione<br />
2 Pulsanti erogazione<br />
3 Manopola vapore<br />
4 Lancia vapore<br />
5 Portafiltro<br />
6 Becco 1 caffè<br />
7 Becco 2 caffè<br />
8 Livello ottico<br />
9 Manometro<br />
10 Piede regolabile<br />
7 6<br />
11 Lancia Acqua calda<br />
12 Targhetta dati<br />
13 Interruttore generale<br />
14 Scaldatazze (optional)<br />
5<br />
8<br />
9<br />
0<br />
Fig. 1<br />
COMPACT<br />
I
I<br />
. DESCRIZIONE TASTIERE<br />
APPIA COMPACT VOLUMETRICA<br />
LEGENDA<br />
1 Tasto 1 Espresso<br />
2 Tasto 2 Espressi<br />
3 Tasto 1 Caffè<br />
4 Tasto 2 Caffè<br />
5 Tasto caffè continuo<br />
6 Tasto Acqua Calda<br />
7 Tasto Vapore<br />
8 Tasto autosteam / vapore temporizzato<br />
9 Tasto Caffè<br />
COMPACT<br />
7 4 5 6<br />
4 5 7<br />
APPIA COMPACT VOLUMETRICA AUTOSTEAM<br />
8 4 5 6 4 5 7<br />
APPIA COMPACT SEMIAUTOMATICA<br />
7 9<br />
6 9 7<br />
5
6<br />
. LISTA ACCESSORI<br />
A<br />
A05<br />
A06<br />
A04<br />
A07<br />
A0<br />
A08<br />
A 0<br />
CODICE DESCRIZIONE QUANTITà<br />
A01 Tubo carico C\,” 1<br />
A02 Tubo scarico Ø 25 mm - L. 150 cm 1<br />
A03 Portafiltro 3<br />
A04 Filtro doppio 2<br />
A05 Filtro singolo 1<br />
A06 Filtro cieco 1<br />
A07 Molla 3<br />
A08 Becco erogazione doppio 2<br />
A09 Becco erogazione singolo 1<br />
A10 Pressa caffè 1<br />
A0<br />
A0<br />
I<br />
Fig. 2<br />
COMPACT
. PRESCRIZIONI DI SICUREZZA<br />
<br />
<br />
<br />
Il presente libretto costituisce parte integrante<br />
ed essenziale del prodotto e dovrà<br />
essere consegnato all’utilizzatore. Leggere<br />
attentamente le avvertenze contenute nel<br />
presente libretto in quanto forniscono<br />
importanti indicazioni riguardanti la sicurezza<br />
di installazione, d’uso e manutenzione.<br />
Conservare con cura questo libretto<br />
per ogni ulteriore consultazione.<br />
Dopo aver tolto l’imballaggio assicurarsi<br />
dell’integrità dell’apparecchio. In caso<br />
di dubbio non utilizzare l’apparecchio e<br />
rivolgersi a personale professionalmente<br />
qualificato. Gli elementi dell’imballaggio<br />
(sacchetti in plastica, polistirolo espanso,<br />
chiodi, ecc.) non devono essere lasciati<br />
alla portata dei bambini in quanto potenziali<br />
fonti di pericolo, né essere dispersi<br />
nell’ambiente.<br />
COMPACT<br />
PERICOLO DI INQUINAMENTO<br />
Fig. 3<br />
Prima di collegare l’apparecchio accertarsi<br />
che i dati di targa siano rispondenti a quelli<br />
della rete di distribuzione elettrica. La targa<br />
è situata sul frontale della macchina in alto<br />
a destra. L’installazione deve essere effettuata<br />
in ottemperanza alle norme vigenti,<br />
secondo le istruzioni del costruttore e da<br />
personale qualificato.<br />
Il costruttore non può essere considerato<br />
responsabile per eventuali danni causati<br />
dalla mancanza di messa a terra dell’impianto.<br />
Per la sicurezza elettrica di questo<br />
apparecchio è obbligatorio predisporre l’impianto<br />
di messa a terra, rivolgendosi ad un<br />
elettricista munito di patentino, che dovrà<br />
verificare che la portata elettrica dell’impianto<br />
sia adeguata alla potenza massima<br />
dell’apparecchio indicata in targa.<br />
<br />
<br />
<br />
<br />
Fig. 4<br />
In particolare dovrà anche accertare che la<br />
sezione dei cavi dell’impianto sia idonea<br />
alla potenza assorbita dall’apparecchio.<br />
È vietato l’uso di adattatori, prese multiple<br />
e prolunghe. Qualora il loro uso si rendesse<br />
indispensabile è necessario chiamare<br />
un elettricista munito di patentino.<br />
La macchina deve essere installata in<br />
accordo alle normative sanitarie locali<br />
vigenti per gli impianti idraulici. Quindi<br />
per l’impianto idraulico rivolgersi ad un<br />
tecnico autorizzato.<br />
Questo apparecchio dovrà essere destinato<br />
solo all’uso descritto in questo<br />
manuale. Il costruttore non può essere<br />
considerato responsabile per eventuali<br />
danni causati da usi impropri, erronei ed<br />
irragionevoli.<br />
ATTENZIONE<br />
Il cavo di alimentazione deve essere sostituito<br />
da un Tecnico Specializzato con un Ricambio<br />
Originale, disponibile presso i Centri di Assistenza<br />
Autorizzati, provvisto di un conduttore di terra<br />
speciale<br />
L’uso di un qualsiasi apparecchio elettrico<br />
comporta l’osservanza di alcune<br />
regole fondamentali.<br />
In particolare:<br />
• non toccare l’apparecchio con mani o<br />
piedi bagnati;<br />
ATTENZIONE<br />
PERICOLO DI SCOSSA ELETTRICA<br />
• non usare l’apparecchio a piedi nudi;<br />
• non usare, prolunghe in locali adibiti a<br />
bagno o doccia;
8<br />
• non tirare il cavo di alimentazione, per<br />
scollegare l’apparecchio dalla rete di<br />
alimentazione;<br />
Fig. 5<br />
• non lasciare esposto l’apparecchio<br />
ad agenti atmosferici (pioggia, sole,<br />
ecc.);<br />
• non permettere che l’apparecchio sia<br />
usato da bambini, o da personale non<br />
autorizzato e che non abbia letto e ben<br />
compreso questo manuale.<br />
Il tecnico autorizzato deve, prima di effettuare<br />
qualsiasi operazione di manutenzione,<br />
staccare la spina e spegnere l’interruttore<br />
della macchina.<br />
Fig. 6<br />
Per le operazioni di pulizia portare la<br />
macchina a stato energetico “O”, cioè<br />
“INTERRUTTORE MACCHINA SPENTO E<br />
SPINA STACCATA” ed attenersi esclusivamente<br />
a quanto previsto nel presente<br />
libretto.<br />
In caso di guasto o di cattivo funzionamento<br />
dell’apparecchio, spegnerlo. È severamente<br />
vietato intervenire. Rivolgersi esclusivamente<br />
a personale professionalmente qualificato.<br />
L’eventuale riparazione dei prodotti dovrà<br />
<br />
<br />
<br />
<br />
<br />
<br />
essere effettuata solamente dalla casa<br />
costruttrice o da centro di assistenza autorizzato<br />
utilizzando esclusivamente ricambi<br />
originali.<br />
Il mancato rispetto di quanto sopra può compromettere<br />
la sicurezza dell’apparecchio.<br />
All’installazione, l’elettricista munito di<br />
patentino dovrà prevedere un interruttore<br />
onnipolare come previsto dalle normative<br />
di sicurezza vigenti con distanza di apertura<br />
dei contratti uguale o superiore a 3 mm.<br />
Per evitare surriscaldamenti pericolosi si<br />
raccomanda di svolgere per tutta la sua<br />
lunghezza il cavo di alimentazione.<br />
Non ostruire le griglie di aspirazione e/o di<br />
dissipazione in particolare dello scaldatazze.<br />
Il cavo di alimentazione di questo apparecchio<br />
non deve essere sostituito<br />
dall’utente. In caso di danneggiamento,<br />
spegnere l’apparecchio e per la sua<br />
sostituzione rivolgersi esclusivamente a<br />
personale professionalmente qualificato.<br />
Allorché si decida di non utilizzare più<br />
un apparecchio di questo tipo si raccomanda<br />
di renderlo inoperante dopo<br />
aver staccato la spina, tagliare il cavo di<br />
alimentazione.<br />
ATTENZIONE<br />
PERICOLO DI INQUINAMENTO<br />
Non disperdere la macchina nell’ambiente:<br />
per lo smaltimento rivolgersi ad un<br />
centro autorizzato o contattare il costruttore<br />
che darà indicazioni in merito.<br />
Fig. 7<br />
COMPACT<br />
I
I<br />
<br />
<br />
Durante l’uso della lancia del vapore, prestare<br />
molta attenzione e non mettere le<br />
mani sotto di esso e non toccarla subito<br />
dopo l’uso.<br />
COMPACT<br />
ATTENZIONE<br />
PERICOLO DI USTIONE<br />
ATTENZIONE<br />
PERICOLO DI USTIONE<br />
Fig. 8<br />
Ricordare che prima di effettuare qualsiasi<br />
operazione di installazione, manutenzione,<br />
scarico, regolazione, l’operatore<br />
qualificato deve indossare i guanti da<br />
lavoro e le scarpe antinfortunistiche.<br />
ATTENZIONE<br />
INFORMAZIONE AGLI UTENTI<br />
Ai sensi dell’ art. 13 del Decreto<br />
Legislativo 25 luglio 2005, n.<br />
151 “Attuazione delle Direttive<br />
2002/95/CE, 2002/96/CE e<br />
2003/108/CE, relative alla riduzio-<br />
ne dell’ uso di sostanze pericolo-<br />
se nelle apparecchiature elettriche ed elettroniche,<br />
nonché allo smaltimento dei rifiuti”.<br />
Il simbolo del cassonetto barrato riportato sull’apparecchiatura<br />
indica che il prodotto alla fine della<br />
propria vita utile deve essere raccolto separatamente<br />
dagli altri rifiuti. L’ utente dovrà, pertanto, conferire<br />
l’ apparecchiatura giunta a fine vita agli idonei centri<br />
di raccolta differenziata dei rifiuti elettronici ed<br />
elettrotecnici, oppure riconsegnarla al rivenditore al<br />
momento dell’acquisto di una nuova apparecchiatura<br />
di tipo equivalente, in ragione di uno a uno. L’ adeguata<br />
raccolta differenziata per l’ avvio successivo<br />
dell’ apparecchiatura dimessa al riciclaggio,al trattamento<br />
e allo smaltimento ambientalmente compatibile<br />
contribuisce ad evitare possibili effetti negativi<br />
sull’ ambiente e sulla salute e favorisce il riciclo dei<br />
materiali di cui è composta l’ apparecchiatura. Lo<br />
smaltimento abusivo del prodotto da parte dell’ utente<br />
comporta l’ applicazione delle sanzioni amministrative<br />
di cui al D.Lgs.n.22/1997” (articolo 50 e seguenti<br />
del D.Lgs.n.22/1997).<br />
9
. TRASPORTO E<br />
MOVIMENTAZIONE<br />
. IDENTIFICAZIONE<br />
MACCHINA<br />
Per qualsiasi comunicazione con il costruttore <strong>Nuova</strong><br />
<strong>Simonelli</strong>, citare sempre il numero di matricola della<br />
macchina.<br />
0<br />
Fig. 9<br />
La macchina viene trasportata in pallett con più<br />
macchine dentro scatoloni assicurati al pallett con<br />
delle centine.<br />
Prima di procedere a qualsiasi operazione di trasporto<br />
o movimentazione, l’operatore deve:<br />
• indossare guanti e scarpe antinfortunistici ed una<br />
tuta con elastici alle estremità.<br />
Il trasporto del pallett deve essere effettuato con un<br />
mezzo di sollevamento adeguato (tipo muletto).<br />
. MOVIMENTAZIONE<br />
ATTENZIONE<br />
PERICOLO DI URTO<br />
O SCHIACCIAMENTO<br />
L’operatore durante tutta la movimentazione,<br />
deve avere l’attenzione che non ci siano persone,<br />
cose od oggetti nell’area di operazione.<br />
Sollevare lentamente il pallett a circa 30 cm (11,8<br />
in) da terra e raggiungere la zona di carico. Dopo<br />
aver verificato che non ci siano ostacoli, cose o<br />
persone, procedere al carico.<br />
Una volta arrivati a destinazione, sempre con un<br />
mezzo di sollevamento adeguato (es. muletto),<br />
dopo essersi assicurati che non ci siano cose<br />
o persone nell’area di scarico, portare il pallett<br />
a terra e movimentarlo a circa 30 cm (11,8 in) da<br />
terra, fino all’area di immagazzinamento.<br />
. TRASPORTO ATTENZIONE<br />
PERICOLO DI URTO<br />
O SCHIACCIAMENTO<br />
Prima della seguente operazione verificare che il<br />
carico sia a posto e che con il taglio delle centine<br />
non cada.<br />
L’operatore con guanti e scarpe antinfortunistiche,<br />
deve procedere al taglio delle centine e allo<br />
stoccaggio del prodotto, in questa operazione<br />
consultare le caratteristiche tecniche del prodotto<br />
per vedere il peso della macchina da immagazzinare<br />
e potersi regolare di conseguenza.<br />
ATTENZIONE<br />
PERICOLO DI INQUINAMENTO<br />
I<br />
Fig. 10<br />
COMPACT
I<br />
4. INSTALLAZIONE<br />
E OPERAZIONI<br />
PRELIMINARI<br />
Prima di procedere a qualsiasi operazione di<br />
installazione e regolazione, devono essere lette e<br />
ben comprese le PRESCRIZIONI DI SICUREZZA di<br />
questo manuale. L'azienda non risponde di alcun<br />
danno a cose o a persone derivante da una mancata<br />
osservanza delle prescrizioni di sicurezza,<br />
installazione e manutenzione, di questo manuale.<br />
COMPACT<br />
ATTENZIONE<br />
PERICOLO DI INQUINAMENTO<br />
Non disperdere l’imballo nell’ambiente.<br />
Fig. 11<br />
Una volta rimosso l’imballo e aver verificato l’integrità<br />
della macchina e degli accessori, procedere come<br />
descritto di seguito:<br />
• posizionare la macchina su un piano orizzontale;<br />
• assemblare i piedini di sostegno della macchina<br />
inserendo l’inserto all’interno del guscio cilindrico;<br />
• avvitare il piedino in gomma nella filettatura dell’inserto<br />
contenuto nel guscio;<br />
• avvitare tutto il gruppo assemblato nelle apposite<br />
sedi di alloggiamento dei piedini della macchina;<br />
• mettere in piano la macchina agendo sui piedini di<br />
regolazione;<br />
NOTA: la scanalatura del guscio deve essere<br />
rivolta verso l’alto, come indicato nella<br />
figura successiva.<br />
Fig. 12<br />
In fase preliminare, dopo la messa in piano della<br />
macchina, si consiglia di installare un addolcitore<br />
(1), all’uscita della rete idrica, e di seguito un filtro a<br />
maglia (2). Questo non permette alle impurità, come<br />
sabbia, particelle di calcare in sospensione, ruggine<br />
ecc., di danneggiare le delicate superfici in grafite,<br />
garantendo una buona durata della macchina.<br />
Dopo queste operazioni, provvedere ai collegamenti<br />
idraulici come illustrato nella seguente figura.<br />
ATTENZIONE<br />
Evitare strozzature nei tubi di collegamento.<br />
Verificare inoltre che lo scarico (3) sia in grado di<br />
eliminare gli scarti.<br />
LEGENDA<br />
1 Addolcitore<br />
2 Filtro a maglia<br />
3 Scarico Ø 50 mm<br />
Fig. 13<br />
NOTA: Per un buon funzionamento della macchina<br />
occorre che la pressione di rete non<br />
superi i 4 bar.<br />
In caso contrario, installare un riduttore di<br />
pressione a monte dell’addolcitore; il tubo<br />
in entrata dell’acqua deve avere un diametro<br />
interno non inferiore ai 6 mm.
ATTENZIONE<br />
PERICOLO DI SCOSSA ELETTRICA<br />
La macchina deve essere sempre protetta con un<br />
interruttore automatico onnipolare di adeguata<br />
potenza con distanza di apertura dei contatti<br />
uguale o superiore a 3 mm.<br />
La <strong>Nuova</strong> <strong>Simonelli</strong> non risponde di alcun danno<br />
a cose o persone derivante dalla mancata osservanza<br />
delle vigenti norme di sicurezza.<br />
Prima di allacciare la macchina a una rete elettrica<br />
verificare che il voltaggio indicato sulla targhetta dati<br />
della macchina corrisponda a quello della rete.<br />
COMPACT<br />
I
I<br />
5. REGOLAZIONI<br />
DEL TECNICO<br />
QUALIFICATO<br />
COMPACT<br />
ATTENZIONE<br />
Le regolazioni di seguito elencate devono essere<br />
eseguite SOLO dal Tecnico Specializzato.<br />
La <strong>Nuova</strong> <strong>Simonelli</strong> non risponde di alcun danno<br />
a cose o persone, derivanti da una mancata<br />
osservanza delle prescrizioni di sicurezza,<br />
descritte in questo manuale.<br />
ATTENZIONE<br />
PERICOLO DI SCOSSA ELETTRICA<br />
Il tecnico specializzato deve, prima di effetture<br />
qualsiasi operazione di regolazione, spegnere<br />
l'interruttore della macchina e staccare la spina.<br />
5. RIEMPIMENTO<br />
MANUALE CALDAIA<br />
Tutti i modelli sono muniti di sonda di<br />
livello, per mantenere costante il livello di acqua<br />
all’interno della caldaia.<br />
E’ buona norma, al primo avviamento della macchina,<br />
riempire manualmente la caldaia per evitare che<br />
la resistenza elettrica si danneggi e che inserisca la<br />
protezione elettronica.<br />
Se questo dovesse accadere, è sufficiente spegnere<br />
la macchina e riaccenderla, per completarne il<br />
caricamento (vedi capitolo “MESSAGGI FUNZIONE<br />
MACCHINA - ERRORE LIVELLO”).<br />
Per effettuare il primo riempimento manuale, agire<br />
come descritto di seguito:<br />
• rimuovere la griglia del piano di lavoro;<br />
• togliere la protezione in lamiera svitando le quattro<br />
viti laterali (A) come illustrato nella seguente<br />
figura.<br />
A<br />
Fig. 14<br />
• agire sul rubinetto livello manuale, per permettere<br />
l’ingrasso dell’acqua nella caldaia, per circa<br />
20/30 sec.;<br />
Fig. 15<br />
Fig. 16<br />
: Posizione di lavoro<br />
: Posizione di carico manuale<br />
Al termine delle regolazioni, riposizionare la protezione<br />
in lamiera nell’apposito alloggiamento e<br />
fissarla con le quattro viti laterali; riposizionare la<br />
griglia del piano di lavoro.<br />
5. REGOLAZIONE PRESSIO-<br />
NE CALDAIA (Regolazione<br />
pressostato)<br />
Per modificare la pressione di esercizio della caldaia,<br />
quindi la temperatura dell’acqua, in funzione delle varie<br />
esigenze o delle caratteristiche del caffè utilizzato,<br />
agire come descritto di seguito:<br />
• svitare le 4 viti del pannello superiore (Fig. 17);<br />
Fig. 17
• agire sulla vite di regolazione del pressostato per<br />
AUMENTARE (senso orario) oppure DIMINUIRE<br />
(senso antiorario) la pressione;<br />
Fig. 18<br />
Valore consigliato: 1 - 1,4 bar<br />
(secondo il tipo di caffè).<br />
5. REGOLAZIONE<br />
PRESSIONE POMPA<br />
Per regolare la pressione della pompa, agire come<br />
descritto di seguito:<br />
• rimuovere la griglia del piano di lavoro;<br />
• togliere la protezione in lamiera svitando le quattro<br />
viti laterali (A) come illustrato nella seguente<br />
figura;<br />
4<br />
A<br />
Fig. 19<br />
• Agire sulla vite di regolazione della pompaper<br />
AUMENTARE (senso orario) oppure DIMINUIRE<br />
(senso antiorario) la pressione;<br />
Valore consigliato: 9 bar<br />
Fig. 20<br />
• La pressione impostata della pompa viene visualizzata<br />
nel settore inferiore del manometro nel<br />
momento dell'erogazione del caffè<br />
Fig. 21<br />
Al termine delle regolazioni, riposizionare la protezione<br />
in lamiera nell’apposito alloggiamento e fissarla<br />
con le quattro viti laterali; riposizionare la griglia del<br />
piano di lavoro.<br />
COMPACT<br />
I
I<br />
5.4 REGOLAZIONE<br />
ECONOMIZZATORE<br />
ACQUA CALDA<br />
Tutti i modelli sono equipaggiati di<br />
un miscelatore di acqua calda, il quale permette<br />
di regolare la temperatura di uscita dell’acqua e di<br />
ottimizzare il rendimento del sistema.<br />
Per regolare l’economizzatore acqua calda, occorre<br />
rimuovere il pannello superiore della macchina,<br />
operando come descritto di seguito:<br />
• svitare le 4 viti del pannello superiore (Fig. 22);<br />
COMPACT<br />
Fig. 22<br />
• per regolare la temperatura dell'acqua calda in<br />
uscita dalla lancia, ruotare il pomello di registro in<br />
senso ORARIO / ANTIORARIO per AUMENTARE<br />
/ DIMINUIRE la temperatura;<br />
Fig. 23<br />
• al termine dell'operazione rimontare il pannello<br />
superiore della macchina.<br />
5
6. UTILIZZO<br />
L’operatore deve prima di iniziare la lavorazione,<br />
accertarsi di aver letto e ben compreso le prescrizioni<br />
di sicurezza di questo manuale.<br />
6. ACCENSIONE<br />
• Collegare la macchina alla presa elettrica.<br />
• Posizionare l'interruttore generale (n.13, Fig 1) in<br />
posizione “I”.<br />
6. SPEGNIMENTO<br />
6<br />
Fig. 24<br />
• Posizionare l'interruttore generale (n. 13, Fig 1) in<br />
posizione “O”.<br />
• Scollegare la macchina alla presa elettrica.<br />
6. PREPARAZIONE DEL<br />
CAFFE<br />
Sganciare il portafiltro e riempire di una o due dosi di<br />
caffè macinato a seconda del filtro utilizzato.<br />
1 Caffè corto 2 Caffè corto<br />
1 Caffè lungo 2 Caffè lungo<br />
Fig. 25<br />
Pressare il caffè con l’apposito pressino in dotazione,<br />
pulire dai residui di polvere di caffè il bordo<br />
anulare del filtro (per garantire una migliore tenuta e<br />
un’inferiore usura della guarnizione).<br />
Innestare quindi il portafiltro nel gruppo.<br />
Premere il pulsante caffè desiderato:<br />
Si attiva la pompa e si apre l’elettrovalvola del gruppo<br />
dando avvio all’infusione del caffè.<br />
L’ operazione è evidenziata dall’accensione del tasto<br />
premuto.<br />
NOTA: nelle fasi di pausa, lasciare il portafiltro<br />
innestato al gruppo affinchè rimanga sempre<br />
caldo.<br />
I gruppi di erogazione sono termocompensati<br />
a circolazione totale di acqua calda,<br />
per garantire la massima stabilità termica<br />
durante l’esercizio.<br />
COMPACT<br />
I
I<br />
6.4 UTILIZZO DEL VAPORE<br />
COMPACT<br />
ATTENZIONE<br />
PERICOLO DI USTIONE<br />
Durante l’uso della lancia del vapore, prestare<br />
molta attenzione a non mettere le mani sotto di<br />
essa e non toccarla subito dopo.<br />
Per utilizzare il vapore è sufficiente tirare o spingere<br />
l’apposita leva (Fig. 26).<br />
Tirando completamente, la leva rimane bloccata<br />
nella posizione di massima erogazione, spingendo,<br />
il ritorno della leva è automatico.<br />
Le due lance vapore sono snodate, consentendo un<br />
più agevole utilizzo delle stesse.<br />
6.5 PREPARAZIONE DEL<br />
CAPPUCCINO<br />
Fig. 26<br />
Per ottenere la tipica schiuma immergere il beccuccio<br />
del vapore in fondo al recipiente pieno per<br />
1/3 (preferibilmente a forma tronco-conica). Aprire<br />
il vapore. Prima che il latte abbia raggiunto lo stato<br />
di ebollizione, spostare il beccuccio del vapore<br />
in superficie facendo sfiorare il latte con piccoli<br />
spostamenti in senso verticale. Alla fine dell’operazione<br />
pulire accuratamente la lancia con un panno<br />
morbido.<br />
Fig. 27<br />
6.6 SELEZIONE ACQUA<br />
CALDA<br />
ATTENZIONE<br />
PERICOLO DI USTIONE<br />
Durante l’uso della lancia dell’acqua calda, prestare<br />
molta attenzione a non mettere le mani<br />
sotto di essa e non toccarla subito dopo.<br />
Consente l'erogazione di acqua calda per preparare<br />
thè, camomilla e tisane.<br />
Posizionare sotto la lancia acqua calda un contenitore<br />
e azionare interruttore (versione ESSE) o premere<br />
il pulsante selezione acqua calda<br />
Assicurarsi che il pulsante stesso si illumini. Dalla<br />
lancia acqua calda verrà erogata acqua per un<br />
tempo equivalente al valore programmato.<br />
NOTA: L’erogazione dell’acqua calda può avvenire<br />
contemporaneamente a quella del caffè<br />
.<br />
6.7 SELEZIONE VAPORE<br />
TEMPORIZZATO<br />
(Versione con lancia vapore<br />
temporizzata senza sonda<br />
di temperatura)<br />
ATTENZIONE<br />
PERICOLO DI USTIONE<br />
Durante l’uso della lancia del vapore prestare<br />
molta attenzione a non mettere le mani sotto di<br />
essa e non toccarla subito dopo.<br />
Consente l’erogazione di vapore per la preparazione<br />
di bevande a base latte (es. cappuccino, caffelatte).<br />
Posizionare sotto la lancia del vapore un contenitore<br />
con il liquido da riscaldare e premere il pulsante<br />
vapore .<br />
Assicurarsi che il pulsante stesso si illumini.<br />
Dalla lancia verrà erogato vapore per un tempo<br />
equivalente al valore programmato.<br />
NOTA: L’erogazione del vapore può avvenire contemporaneamente<br />
a quella del caffè .<br />
7
6.8 SELEZIONE VAPORE<br />
AUTOSTEAM (Versione<br />
con Autosteam)<br />
8<br />
ATTENZIONE<br />
PERICOLO DI USTIONE<br />
Durante l’uso della lancia del vapore prestare<br />
molta attenzione a non mettere le mani sotto di<br />
essa e non toccarla subito dopo.<br />
Consente l’erogazione di vapore per la preparazione<br />
di bevande a base latte (es. cappuccino, caffelatte).<br />
Posizionare sotto la lancia del vapore un contenitore<br />
con il liquido da riscaldare e premere il pulsante<br />
vapore .<br />
Assicurarsi che il pulsante stesso si illumini.<br />
Dalla lancia verrà erogato vapore fino a che il<br />
liquido riscaldato non raggiungerà la temperatura<br />
programmata.<br />
NOTA: L’erogazione del vapore può avvenire contemporaneamente<br />
a quella del caffè .<br />
COMPACT<br />
I
I<br />
7. PROGRAMMAZIONE<br />
7. PROGRAMMAZIONE<br />
DOSI<br />
Per entrare negli ambienti di programmazione, operare<br />
come descritto:<br />
NOTA: Operazione eseguibile a macchina accesa.<br />
• Per entrare nello stato di programmazione dosi<br />
di ogni gruppo è necessario premere per 5 sec. il<br />
tasto erogazione continua .<br />
• I tasti erogazione cominceranno a lampeggiare.<br />
• L'accesso alla programmazione del primo gruppo<br />
abilita anche l'impostazione dei parametri di<br />
funzionamento della macchina.<br />
7. PROGRAMMAZIONE<br />
DOSI CAFFè<br />
Per programmare la dose di acqua relativa a uno dei<br />
tasti erogazione, procedere come segue:<br />
• riempire con la giusta dose di caffè il portafiltro (il<br />
portafiltro può essere singolo o doppio, a seconda<br />
del tasto che si desidera programmare).<br />
• Immettere il portafiltro nel gruppo.<br />
• Premere uno dei pulsanti erogatori:<br />
• L'erogazione ha inizio; una volta raggiunta la<br />
quantità desiderata premere il tasto continuo<br />
.<br />
• L'erogazione si arresta e il tasto dose scelto si<br />
spegne (gli altri tasti continuano a lampeggiare).<br />
• Premere il tasto continuo per uscire dalla<br />
programmazione o continuare la programmazione<br />
di altri tasti dose.<br />
NOTA: Questa procedura è utilizzabile per tutti i<br />
gruppi della macchina ad eccezione che<br />
venga effettuata un gruppo alla volta, gli<br />
altri gruppi possono continuare a operare<br />
normalmente.<br />
COMPACT<br />
7. PROGRAMMAZIONE<br />
VAPORE<br />
TEMPORIZZATO<br />
(Versione con lancia vapore<br />
temporizzata senza<br />
sonda di temperatura)<br />
• Entrare in programmazione secondo la relativa<br />
procedura;<br />
• Posizionare la lancia vapore all’interno del liquido<br />
che intende riscaldare;<br />
• Premere il tasto selezione vapore ,<br />
• L’erogazione del vapore avrà inizio;<br />
• Premere nuovamente il tasto vapore quando<br />
la quantità di vapore fuoriuscito è ritenuta<br />
sufficiente. La macchina memorizzerà il tempo di<br />
erogazione.<br />
• Premere il tasto continuo per uscire dalla<br />
programmazione o continuare la programmazione<br />
degli altri tasti selezione.<br />
7.4 PROGRAMMAZIONE<br />
AUTOSTEAM (Versione<br />
con Autosteam )<br />
• Entrare in programmazione secondo la relativa<br />
procedura;<br />
• Posizionare la lancia vapore dotata di sonda di<br />
temperatura all’interno del liquido che intende<br />
riscaldare;<br />
• Premere il tasto selezione vapore ;<br />
• L’erogazione del vapore avrà inizio<br />
• Premere nuovamente il tasto vapore una<br />
volta che il liquido avrà raggiunto la temperatura<br />
desiderata. La macchina memorizzerà la temperatura<br />
raggiunta;<br />
• Premere il tasto continuo per uscire dalla<br />
programmazione o continuare la programmazione<br />
degli altri tasti selezione.<br />
7.5 ROGRAMMAZIONE<br />
ACQUA CALDA<br />
• Entrare in programmazione secondo la relativa<br />
procedura.<br />
• Premere il tasto selezione acqua calda .<br />
• L'erogazione dell'acqua calda ha inizio.<br />
• Stabilire la dose di acqua calda desiderata e<br />
premere nuovamente il tasto .<br />
• Premere il tasto continuo per uscire dalla<br />
programmazione o continuare la programmazione<br />
di altri tasti selezione.<br />
9
7.6 PROGRAMMAZIONE<br />
DOSI STANDARD<br />
• E' possibile impostare dei valori predeterminati<br />
per le 4 dosi del gruppo, per l'acqua (vapore).<br />
Per fare ciò occorre premere il tasto .<br />
e mantenerlo premuto per almeno 10 secondi<br />
fino a quando i tasti lampeggianti si spengono.<br />
Le dosi sono:<br />
0<br />
1CN 2CN 1CL 2CL<br />
40 cc 60 cc 50 cc 85 cc<br />
ACQUA VAPORE TEMP. VAPORE<br />
9 sec. 0 sec. 50°C<br />
NOTA: Un tempo di 0 secondi per l'acqua e per il<br />
vapore ne determina il funzionamento in<br />
continuo.<br />
7.7 COPIATURA DOSI<br />
E' possibile copiare le dosi memorizzate per il gruppo<br />
1 nelle dosi del gruppo 2.<br />
Questa operazione, avviene premendo il tasto continuo<br />
del gruppo 2 almeno per 10 secondi fino a<br />
quando i tasti lampeggianti si spengono.<br />
7.8 PROGRAMMAZIONE<br />
PARAMETRI DI<br />
FUNZIONAMENTO<br />
ATTENZIONE<br />
Le regolazioni di seguito elencate devono essere<br />
eseguite SOLO dal Tecnico Specializzato.<br />
Premendo il tasto del secondo gruppo, dopo<br />
essere entrati in programmazione del primo gruppo,<br />
si accede all'impostazione dei parametri di funzionamento<br />
macchina; situazione segnalata dall'accensione<br />
del tasto continuo del secondo gruppo .<br />
1. Attivazione pompa se attivato livello.<br />
2. Attivazione blocco software per ingresso in<br />
programmazione dosi.<br />
3. Regolazione luminosità tastiera.<br />
4. Attivazione pompa con acqua calda (nelle<br />
macchine con economizzatore).<br />
5. Disabilitazione scaldatazze.<br />
6. Ripristino parametri di default.<br />
1. Attivazione pompa durante livello.<br />
Tramite il tasto caffè corto del secondo gruppo<br />
si imposta l'attivazione della pompa durante il livello:<br />
se il tasto è acceso la pompa si attiva assieme<br />
al livello, se è spento la pompa non si attiva con il<br />
livello.<br />
2. Attivazione blocco software per l'ingresso in<br />
programmazione dosi.<br />
Tramite il tasto caffè lungo si attiva il blocco<br />
software per la programmazione delle dosi (tasto<br />
acceso) o si disattiva il blocco (tasto spento).<br />
3. Regolazione luminosità tastiera.<br />
Il tasto 2 caffè lunghi del secondo gruppo viene<br />
utilizzato per scegliere la luminosità dei tasti tra 5<br />
livelli preimpostati.<br />
Premendo il tasto , che lampeggia, si cambia il<br />
livello, abbassando il valore fino al minimo per poi<br />
ritornare al valore massimo.<br />
4. Attivazione pompa con acqua calda (solo per<br />
macchine con economizzatore).<br />
Tramite il tasto acqua calda si impostata l'attivazione<br />
della pompa durante l'erogazione di acqua.<br />
Se il tasto è acceso la pompa si attiva durante<br />
l'erogazione di acqua calda, se è spento la pompa<br />
non si attiva.<br />
5. Attivazione pompa con vapore (solo per macchine<br />
fornite di vapore temporizzato o autosteam).<br />
Tramite il tasto vapore si impostata l'attivazione<br />
della pompa durante l'erogazione di vapore.<br />
Se il tasto è acceso la pompa si attiva durante<br />
l'erogazione di vapore, se è spento la pompa non<br />
si attiva.<br />
COMPACT<br />
I
I<br />
7.9 CICLO AUTOMATICO DI<br />
PULIZIA GRUPPI<br />
Per entrare nello stato di pulizia automatica si deve<br />
spegnere la macchina e riaccenderla mantenendo<br />
premuti i tasti acqua calda e un caffè corto 2°<br />
gruppo durante il Lamp-test iniziale.<br />
Al termine del Lamp-test iniziano a lampeggiare i<br />
tasti e ed i tasti un caffè lungo di tutti<br />
i gruppi.<br />
Premendo il tasto inizia il ciclo di lavaggio del<br />
relativo gruppo.<br />
Terminato il ciclo di lavaggio si può effettuare il ciclo<br />
di risciacquo sullo stesso gruppo, premendo nuovamente<br />
il tasto .<br />
Se si vuole eseguire il ciclo di risciacquo in un secondo<br />
momento è sufficiente spegnere la macchina: la<br />
scheda mantiene memorizzati i cicli di pulizia da<br />
terminare. Alla successiva accensione, infatti, la<br />
scheda entrerà automaticamente nello stato di pulizia<br />
gruppi, senza premere i tasti e .<br />
Premendo i tasti e per 2 secondi si esce<br />
dallo stato di pulizia nel caso in cui non ci siano cicli<br />
da terminare, altrimenti rimarranno lampeggianti i<br />
tasti dei gruppi in cui si deve ancora eseguire il<br />
ciclo di risciacquo.<br />
Mantenendo i tasti e per altri 2 secondi, si<br />
forza l'uscita dallo stato di pulizia azzerando l'informazione<br />
sui risciacqui da terminare.<br />
Se il ciclo di pulizia viene completato, il tasto del<br />
gruppo si spegne.<br />
Se non ci sono altri risciacqui da seguire la scheda<br />
esce dallo stato di pulizia.<br />
COMPACT
8. PULIZIA E<br />
MANUTENZIONE<br />
8. PULIZIA DELLA<br />
CARROZZERIA<br />
Prima di effettuare qualsiasi operazione di pulizia,<br />
bisogna portare la macchina a stato energetico<br />
“O” (cioè interruttore macchina spento e spina<br />
staccata).<br />
ATTENZIONE<br />
Fig. 28<br />
Non utilizzare solventi, prodotti a base di cloro,<br />
abrasivi.<br />
Pulizia zona lavoro: togliere la griglia del piano<br />
lavoro sollevandolo anteriormente verso l’alto e<br />
sfilarlo, togliere il sottostante piatto raccogli acqua e<br />
pulire il tutto con acqua calda e detersivo.<br />
Pulizia carena: per pulire tutte le parti cromate<br />
utilizzare un panno morbido inumidito.<br />
8. PULIZIA DELLE<br />
DOCCETTE INOX<br />
Le doccette inox sono situate sotto i gruppi erogazione,<br />
come si vede in figura.<br />
Fig. 29<br />
NOTA: Per la pulizia operare come descritto:<br />
• Svitare la vite posta al centro della doccetta.<br />
• Sfilare la doccetta e verificare che i fori non<br />
siano ostruiti.<br />
• In caso di ostruzioni pulire secondo descrizione<br />
(Paragrafo “PULIZIA DEI FILTRI E<br />
PORTAFILTRI).<br />
Si raccomanda di effettuare la pulizia delle<br />
doccette settimanalmente.<br />
8. PULIZIA DEL GRUPPO<br />
CON L’AUSILIO DEL<br />
FILTRO CIECO<br />
La macchina è predisposta per il lavaggio del gruppo<br />
erogazione tramite detergente specifico in polvere.<br />
E’ consigliabile effettuare il lavaggio almeno una<br />
volta al giorno con gli appositi detergenti.<br />
ATTENZIONE<br />
PERICOLO DI INTOSSICAZIONE<br />
Una volta tolto il portafiltro effettuare alcune erogazioni<br />
per eliminare eventuali residui di detergente.<br />
Per eseguire la procedura di lavaggio procedere<br />
come segue:<br />
1) Sostituire il filtro con quello cieco del gruppo<br />
erogatore.<br />
2) Mettervi all’interno due cucchiai di detergente specifico<br />
in polvere e immettere il portafiltro al gruppo.<br />
3) Premere uno dei tasti caffè e arrestare dopo 10 sec. .<br />
4) Ripetere l’operazione più volte.<br />
5) Togliere i portafiltro ed effettuare alcune erogazioni.<br />
COMPACT<br />
I
I<br />
8.4 PULIZIA DEI FILTRI E<br />
PORTAFILTRI<br />
Mettere due cucchiaini di detergente specifico in<br />
mezzo litro d’acqua calda e immetervi filtro e portafiltro<br />
(escluso il manico) per almeno mezz’ora.<br />
Dopodichè risciacquare in abbondante acqua corrente.<br />
8.5 RIGENERAZIONE<br />
DELLE RESINE<br />
DELL’ADDOLCITORE<br />
Al fine di evitare la formazione di depositi calcare<br />
all’interno della caldaia e degli scambiatori di calore<br />
è necessario che l’addolcitore sia sempre in perfetta<br />
efficienza. Occorre perciò effettuare regolarmente la<br />
rigenerazione delle resine ioniche.<br />
I tempi di rigenerazione vanno stabiliti in funzione<br />
della quantità di caffè erogati giornalmente e della<br />
durezza dell’acqua utilizzata.<br />
Indicativamente si possono rilevare dal diagramma<br />
riportato in Fig. 30.<br />
COMPACT<br />
Fig. 30<br />
Le procedure di rigenerazione sono le seguenti:<br />
1) Spegnere la macchina e mettere un recipiente<br />
della capacità di almeno 5 litri sotto il tubo E (Fig. 31).<br />
Ruotare le leve C e D da sinistra verso destra; togliere<br />
il tappo svitando la manopola G e introdurre 1 Kg<br />
di sale grosso da cucina (Fig. 32).<br />
ENTRATA<br />
USCITA<br />
C<br />
E<br />
D<br />
Fig. 31<br />
C<br />
D<br />
Fig. 32<br />
2) Rimettere il tappo e riposizionare la leva C verso<br />
sinistra (Fig. 33), lasciando scaricare l’acqua salata<br />
dal tubo F finchè non ritorni dolce (circa 1/2 ora).<br />
C<br />
Fig. 33<br />
3) Riportare quindi la leva D verso sinistra (Fig. 34).<br />
G<br />
F<br />
D<br />
Fig. 34
9. MESSAGGI ERRORI MACCHINA<br />
4<br />
INDICAZIONI<br />
TASTI CAUSA EFFETTO<br />
ERRORE DOSATURA<br />
Tasto continuo lampeggiante<br />
e tasto erogazione<br />
fisso.<br />
ERRORE LIVELLO<br />
Tasto continuo lampeggiante<br />
in entrambi i gruppi.<br />
Se entro i primi<br />
tre sec. dall'inizio<br />
dell'erogazione il<br />
dosatore non invia<br />
impulsi.<br />
Se dopo 90 sec.<br />
dall'inizio, con<br />
pompa inserita<br />
durante alto livello,<br />
a 180 sec. se è<br />
disabilitata, il livello<br />
non è stata ripristinato.<br />
Se l’erogazione non<br />
è interrotta manualmente<br />
si arriva al<br />
blocco di tempo<br />
limite (120 sec.).<br />
Viene disattivata la<br />
pompa, la resistenza<br />
e tutte le funzioni<br />
sono inibite.<br />
SOLUZIONE NOTA<br />
I n t e r r o m p e r e<br />
l'erogazione.<br />
Spegnere la macchina<br />
per almeno<br />
5 sec. e riaccenderla.<br />
COMPACT<br />
I
UK I<br />
Congratulations,<br />
By purchasing the you have made an excellent choice.<br />
COMPACT<br />
The purchase of a professional espresso coffee-maker involves various elements of selection: the name of the<br />
manufacturing firm, the machine’s specific functions, its technical reliability, the option of immediate and suitable<br />
servicing, its price. You certainly evaluated all these factors and then made your choice: the model.<br />
COMPACT<br />
We think you have made the best choice and after every coffee and cappuccino you will be able to assess<br />
this.<br />
You will see how practical, convenient and efficient working with is.<br />
COMPACT<br />
If this is the first time you have bought a <strong>Nuova</strong> <strong>Simonelli</strong> coffee machine, welcome to high quality coffee-making;<br />
if you are already a customer of ours, we feel flattered by the trust you have shown us.<br />
Thanks of the preference.<br />
With best wishes,<br />
<strong>Nuova</strong> <strong>Simonelli</strong> S.p.a.<br />
COMPACT<br />
COMPACT<br />
25
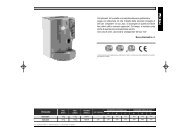
TECHNICAL CHARACTERISTICS<br />
26<br />
B<br />
A<br />
220 V 110 V<br />
NET WEIGHT 60 kg 133 lb 60 kg 133 lb<br />
GROS WEIGHT 65 kg 143 lb 65 kg 143 lb<br />
POWER 3000 W 3000 W 1500/2200 W 1500/2200 W<br />
DIMENSIONS A 550 mm A 21.6 A 550 mm A 21.6<br />
E<br />
B 460 mm B 18 B 460 mm B 18<br />
C 545 mm C 21.4 C 545 mm C 21.4<br />
D 370 mm D 14.5 D 370 mm D 14.5<br />
E 530 mm E 20.8 E 530 mm E 20.8<br />
D<br />
C<br />
COMPACT<br />
UK<br />
COMPACT
UK<br />
INDEX<br />
TECHNICAL CHARACTERISTICS 26<br />
1. DESCRIPTION ............................. 28<br />
1.1 KEYPAD DESCRIPTION ................................... 29<br />
1.2 ACCESSORIES LIST ........................................ 30<br />
2. SAFETY PRESCRIPTION ............ 31<br />
3. TRANSPORT AND HANDLING .... 34<br />
3.1 MACHINE IDENTIFICATION .......................... 34<br />
3.2 TRANSPORT .................................................. 34<br />
3.3 HANDLING ..................................................... 34<br />
4. INSTALLATION AND<br />
PRELIMINARY OPERATIONS ...... 35<br />
5. ADJUSTMENTS TO BE<br />
MADE BY A QUALIFIED<br />
TECHNICIAN ONLY .................... 37<br />
5.1 PRESSURE SWITCH ADJUSTMENT ............. 37<br />
5.2 SETTING THE BOILER TANK PRESSURE .. 37<br />
5.3 SETTING THE PUMP PRESSURE .................. 38<br />
5.4 SETTING THE HOT WATER ECONOMISER . 39<br />
6. USE ........................................... 40<br />
6.1 SWITCHING THE MACHINE ON .................... 40<br />
6.2 SWITCHING THE MACHINE OFF ................... 40<br />
6.3 COFFEE PREPARATION................................. 40<br />
6.4 USING STEAM .............................................. 41<br />
6.5 MAKING CAPPUCCINO ................................. 41<br />
6.6 HOT WATER SELECTION .............................. 41<br />
6.7 TIMED STEAM SELECTION ........................... 41<br />
6.8 AUTOSTEAM SELECTION ............................. 42<br />
7. PROGRAMMING .......................... 43<br />
7.1 PROGRAMMING DOSES ................................ 43<br />
7.2 PROGRAMMING COFFEE DOSES .................. 43<br />
7.3 SETTING THE TIMED STEAM FUNCTION .... 43<br />
7.4 SETTING THE AUTOSTEAM FUNCTION ....... 43<br />
7.5 PROGRAMMING HOT WATER ....................... 43<br />
7.6 PROGRAMMING STANDARD DOSES ............. 44<br />
7.7 COPYING DOSE SETTINGS ........................... 44<br />
7.8 PROGRAMMING OPERATING PARAMETERS 44<br />
7.9 AUTOMATIC GROUP CLEANING CYCLE ....... 45<br />
COMPACT<br />
8. CLEANING AND MAINTENANCE 46<br />
8.1 CLEANING THE OUTSIDE OF THE MACHINE 46<br />
8.2 CLEANING THE STAINLESS<br />
COFFEE-HOLDERS ........................................ 46<br />
8.3 CLEANING THE UNIT WITH<br />
THE AID OF THE BLIND FILTER ................... 46<br />
8.4 CLEANING FILTERS AND FILTER-HOLDERS 47<br />
8.5 REGENERATING THE WATER<br />
SOFTENER RESINS ....................................... 47<br />
11. MACHINE ERROR MESSAGES .... 48<br />
27
1. DESCRIPTION<br />
KEY<br />
28<br />
14<br />
2<br />
12<br />
4<br />
1 Select buttons<br />
2 Delivery buttons<br />
3 Steam knob<br />
4 Steam nozzle<br />
5 Filter holder<br />
6 Single delivery spout<br />
7 Double delivery spout<br />
8 Optical level<br />
9 Pressure gauge<br />
10 Adjustable foot<br />
7 11<br />
6<br />
11 Hot water nozzle<br />
12 Rating plate<br />
13 Main switch<br />
14 Cup warmer (optional)<br />
1<br />
3<br />
5<br />
8<br />
9<br />
13<br />
10<br />
Fig. 1<br />
COMPACT<br />
UK
UK<br />
1.1 KEYPAD DESCRIPTION<br />
VOLUMETRIC APPIA COMPACT<br />
VOLUMETRIC APPIA COMPACT AUTOSTEAM<br />
SEMIAUTOMATIC APPIA COMPACT<br />
KEY<br />
1 1 Espresso key<br />
2 2 Espressos key<br />
3 1 Coffee key<br />
4 2 Coffees key<br />
5 Continuous coffee key<br />
6 Hot water key<br />
7 Steam key<br />
8 Autosteam / timed steam key<br />
9 Coffee key<br />
COMPACT<br />
7 1 2 3 4 5 6<br />
1 2 3 4 5 7<br />
8 1 2 3 4 5 6 1 2 3 4 5 7<br />
7 9<br />
6 9 7<br />
29
1.2 ACCESSORIES LIST<br />
A11<br />
A05<br />
A06<br />
A04<br />
A07<br />
A03<br />
A08<br />
A10<br />
CODE DESCRIPTION QUANTITY<br />
A01 Filling tube C 3\8, 1<br />
A02 Waste pipe Ø 25 mm - L. 150 cm 1<br />
A03 Filter-holder 3<br />
A04 Double filter 2<br />
A05 Single filter 1<br />
A06 Blind filter 1<br />
A07 Spring 3<br />
A08 Double delivery spout 2<br />
A09 Single delivery spout 1<br />
A10 Coffee presser 1<br />
30<br />
COMPACT<br />
A02<br />
A01<br />
UK<br />
Fig. 2
UK<br />
2. SAFETY PRESCRIPTION<br />
<br />
<br />
<br />
This book is an integral and essential part<br />
of the product and must be given to the<br />
user. Read this book carefully. It provides<br />
important information concerning safety<br />
of installation, use and maintenance. Save<br />
it carefully for future reference.<br />
After unpacking, make sure the appliance<br />
is complete. In case of doubts, do not<br />
use the appliance, but consult a qualified<br />
technician. Packaging items which<br />
are potentially dangerous (plastic bags,<br />
polystyrene foam, nails, etc.) must be<br />
kept out of children’s reach and must not<br />
be disposed of in the environment.<br />
COMPACT<br />
RISK OF POLLUTION<br />
Fig. 3<br />
Before connecting the appliance make sure<br />
the rating plate data correspond with the<br />
mains. This plate is on the front panel at<br />
the top right hand side of the appliance.<br />
The appliance must be installed by qualified<br />
technicians in accordance with current<br />
standards and manufacturer’s instructions.<br />
The manufacturer is not liable for any damage<br />
caused due to failure to ground the<br />
system. For the electrical safety of the appliance,<br />
it is necessary to equip the system<br />
with the proper grounding. This must be<br />
carried out by a qualified electrician who<br />
must ensure that the electric power of the<br />
system is sufficient to absorb the maximum<br />
power input stated on the plate.<br />
<br />
<br />
<br />
<br />
Fig. 4<br />
In particular you must ensure that the size<br />
of the wiring cables is sufficient to absorb<br />
power input.<br />
The use of adapters, multiple sockets or<br />
extensions is strictly forbidden. If they<br />
prove necessary, call a fully qualified electrician.<br />
The machine must be installed according<br />
to the local standards in force with regard<br />
to plumbing systems. For this reason, the<br />
plumbing connections must be carried<br />
out by a qualified technician.<br />
This appliance must only be used as<br />
described in this handbook. The manufacturer<br />
shall not be liable for any damage<br />
caused due to improper, incorrect and<br />
unreasonable use.<br />
WARNING<br />
The power cord may only be replaced by a Qualified<br />
Electrician, using an Original Replacement fitted<br />
with special earth wire, which is available from<br />
Authorised Assistance Centres.<br />
Basic rules must be observed when using<br />
any electric appliance.<br />
In particular:<br />
• do not touch the appliance when<br />
hands or feet are wet;<br />
CAUTION<br />
RISK OF ELECTRIC SHOCK<br />
• do not use the appliance when barefoot;<br />
• do not use extensions in bath or shower<br />
rooms;<br />
31
32<br />
• do not pull the supply cord out of<br />
the socket to disconnect it from the<br />
mains;<br />
Fig. 5<br />
• do not leave the appliance exposed to<br />
atmospheric agents (rain, sun, etc.);<br />
• do not let the appliance be used by<br />
children, unauthorised staff or staff<br />
who have not read and fully understood<br />
the contents of this handbook.<br />
Before servicing the appliance, the<br />
authorised technician must first switch<br />
off the appliance and remove the plug.<br />
Fig. 6<br />
To clean the appliance, set the machine to<br />
the “0” energy level, that is, “WITH THE<br />
MACHINE SWITCHED OFF AND THE PLUG<br />
REMOVED FROM THE MAINS” and follow<br />
the instructions in this handbook.<br />
If the appliance breaks down or fails to work<br />
properly, switch it off. Any intervention is<br />
strictly forbidden. Contact qualified experts<br />
only.<br />
Repairs should only be made by the manu-<br />
<br />
<br />
<br />
<br />
<br />
<br />
Fig. 7<br />
COMPACT<br />
UK<br />
facturer or authorized service centres. Only<br />
original spare parts must be used. Failure to<br />
observe the above, could make the appliance<br />
unsafe.<br />
For installation, the qualified electrician<br />
must fit an omnipolar switch in accordance<br />
with the safety regulations in force<br />
and with 3 (0,12) or more mm (in) between<br />
contacts.<br />
To avoid dangerous overheating, make<br />
sure the supply cord is fully uncoiled.<br />
Do not obstruct the extraction and/or dissipator<br />
grids, especially of the cup warmer.<br />
The user must not replace the appliance<br />
supply cord. If the cord is damaged,<br />
switch off the appliance and have a qualified<br />
technician change the cord.<br />
If no longer using the appliance, we<br />
recommend making it inoperative; after<br />
removing the plug from the mains electricity,<br />
cut the power supply cable.<br />
CAUTION<br />
RISK OF POLLUTION<br />
Do not dispose of the machine in the<br />
environment: to dispose of the machine,<br />
use an authorised centre, or contact the<br />
manufacturer for relative information.
UK<br />
<br />
<br />
Do not dispose of the machine in the<br />
environment: to dispose of the machine,<br />
use an authorised centre, or contact the<br />
manufacturer for relative information.<br />
COMPACT<br />
CAUTION<br />
RISK OF BURNS OR SCALDING<br />
Fig. 8<br />
CAUTION<br />
RISK OF BURNS OR SCALDING<br />
We remind you that before carrying out<br />
any installation, maintenance, unloading<br />
or adjustment operations, the qualified<br />
operator must put on work gloves and<br />
protective footwear.<br />
CAUTION<br />
INFORMATION TO THE USERS<br />
Under the senses of art. 13 of<br />
Law Decree 25th July 2005, n. 151<br />
“Implementation of the Directives/<br />
Guidelines 2002/95/CE, 2002/96/CE<br />
and 2003/108/CE, concerning the<br />
reduction of the use of dangerous<br />
substances in electric and electronic equipment, as<br />
well as the disposal of wastes“.<br />
The symbol of the crossed large rubbish container<br />
that is present on the machine points out that the<br />
product at the end of its life cycle must<br />
be collected separately from the other wastes. The<br />
user for this reason will have to give the equipment<br />
that got to its life cycle to the suitable separate waste<br />
collection centres of electronic and electrotechnical<br />
wastes, or to give it back to the seller or dealer<br />
when buying a new equipment of equivalent type,<br />
in terms of one to one. The suitable separate waste<br />
collection for the following sending of the disused<br />
equipment to recycling, the dealing or handling and<br />
compatible environment disposal contributes to avoid<br />
possible negative effects on the environment and on<br />
the people's health and helps the recycling of the<br />
materials the machine is composed of. The user's<br />
illegal disposal of the product implies the application<br />
of administrative fines as stated in Law Decree<br />
n.22/1997” (article 50 and followings of the Law<br />
Decree n.22/1997).<br />
33
3. TRANSPORT AND<br />
HANDLING<br />
3.1 MACHINE<br />
IDENTIFICATION<br />
Always quote the machine serial number in all communications<br />
to the manufacturer, <strong>Nuova</strong> <strong>Simonelli</strong>.<br />
34<br />
Fig. 9<br />
The machine is transported on pallets which also<br />
contain other machines - all boxed and secured to<br />
the pallet with supports.<br />
Prior to carrying out any transport or handling operation,<br />
the operator must:<br />
• put on work gloves and protective footwear, as well<br />
as a set of overalls which must be elasticated at the<br />
wrists and ankles.<br />
The pallet must be transported using a suitable<br />
means for lifting (e.g., forklift).<br />
3.3 HANDLING<br />
CAUTION<br />
RISK OF IMPACT<br />
OR CRASHING<br />
3.2 TRANSPORT CAUTION<br />
RISK OF IMPACT<br />
OR CRASHING<br />
UK<br />
During all handling operations, the operator<br />
must ensure that there are no persons, objects<br />
or property in the handling area.<br />
The pallet must be slowly raised to a height of<br />
30 cm (11,8 in) and moved to the loading area.<br />
After first ensuring that there are no persons,<br />
objects or property, loading operations can be<br />
carried out.<br />
Upon arrival at the destination and after ensuring<br />
that there are no persons, objects or property in<br />
the unloading area, the proper lifting equipment<br />
(e.g. forklift) should be used to lower the pallet to<br />
the ground and then to move it (at approx. 30 cm<br />
(11,8 in) from ground level), to the storage area.<br />
Before carrying out the following operation, the<br />
load must be checked to ensure that it is in the<br />
correct position and that, when the supports are<br />
cut, it will not fall.<br />
The operator, who must first put on work gloves<br />
and protective footwear, will proceed to cut the<br />
supports and to storing the product. To carry<br />
out this operation, the technical characteristics<br />
of the product must be consulted in order to<br />
know the weight of the machine and to store it<br />
accordingly.<br />
CAUTION<br />
RISK OF POLLUTION<br />
Fig. 10<br />
COMPACT
UK<br />
4. INSTALLATION<br />
AND PRELIMINARY<br />
OPERATIONS<br />
Before carrying out any installation and adjustment<br />
operations you must read and fully understand<br />
the SAFETY INSTRUCTIONS of this handbook.<br />
The company cannot be held responsible<br />
for damage to things or injury to persons caused<br />
by failure to comply with the safety instructions<br />
and installation and maintenance instructions<br />
contained in this handbook.<br />
COMPACT<br />
CAUTION<br />
RISK OF POLLUTION<br />
Do not dispose of packaging in the environment<br />
Fig. 11<br />
After unpacking, assess that the machine and its<br />
accessories unit are complete, then proceed as<br />
follows:<br />
• place the machine so that it is level on a flat surface;<br />
• assemble its supporting feet by inserting the insert<br />
into the cylindrical unit;<br />
• twist the rubber foot into the screw thread inside<br />
the unit;<br />
• screw the whole assembled unit into the allotted<br />
setting for the machine’s adjustable feet;<br />
• level the machine by regulating the adjustable<br />
feet;<br />
NOTE: the unit grooves have to face upwards, as<br />
shown in the following illustration.<br />
Fig. 12<br />
It is advisable to install a softener (1) and then a<br />
mesh filter (2) on the external part of the plumbing<br />
system, during preliminaries and after levelling the<br />
machine.<br />
In this way impurities like sand, particles of calcium,<br />
rust etc will not damage the delicate graphite surfaces<br />
and durability will be guaranteed.<br />
Following these operations, connect the plumbing<br />
systems as illustrated in the following figure.<br />
WARNING<br />
Avoid throttling in the connecting tubes.<br />
Assess that the drain pipe (3) is able to eliminate<br />
waste.<br />
1<br />
KEY<br />
1 Softener<br />
2 Mesh filter<br />
3 Drain Ø 50 mm<br />
Fig. 13<br />
NOTE: For a correct functioning of the machine<br />
the water works pressure must not exceed<br />
4 bars.<br />
Otherwise install a pressure reducer<br />
upstream of the softener; the internal diameter<br />
of water entrance tube must not be<br />
less than 6mm (3\8").<br />
2<br />
3<br />
35
36<br />
CAUTION<br />
RISK OF SHORT CIRCUITS<br />
The machine must always be protected by an<br />
automatic omnipolar switch of suitable power<br />
with contact openings of equal distance or more<br />
than 3mm.<br />
<strong>Nuova</strong> <strong>Simonelli</strong> is not liable for any damage to<br />
people or objects due to not observing current<br />
security measures.<br />
Prior to connecting the machine to the electrical mains,<br />
assess that the voltage shown on the machine’s data<br />
plate corresponds with that of the mains.<br />
COMPACT<br />
UK
UK<br />
5. ADJUSTMENTS<br />
TO BE MADE BY<br />
A QUALIFIED<br />
TECHNICIAN ONLY<br />
COMPACT<br />
CAUTION<br />
The adjustments listed here below must ONLY be<br />
performed by a Specialist Technical Engineer.<br />
<strong>Nuova</strong> <strong>Simonelli</strong> cannot be held liable for any<br />
damage to persons or property arising from failure<br />
to observe the safety instructions supplied in<br />
this manual.<br />
CAUTION<br />
ELECTRIC SHOCK HAZARD<br />
Before performing any operation, the specialist<br />
technical engineer must first switch off the main<br />
switch off and unplug the machine.<br />
5.1 FILLING BOILER<br />
MANUALLY<br />
All models COMPACT are equipped with a level<br />
gauge to keep the water level inside the boiler constant.<br />
When using the machine for the first time, it is advisable<br />
to fill the boiler by hand to avoid damaging<br />
the electrical resistor and turning on the electronic<br />
protection.<br />
If this should happen, just turn the machine off<br />
and then start it up again to complete its loading<br />
procedure (see chapter “MACHINE FUNCTIONS<br />
MESSAGE – LEVEL ERROR”).<br />
To fill the boiler manually for the first time, proceed<br />
as follows:<br />
• remove the worktop grid;<br />
• remove the sheet metal guard by unscrewing the<br />
four screws at the sides (A), as illustrated in the<br />
following figure;<br />
A<br />
Fig. 14<br />
• use the manual level valve to allow water to enter<br />
the boiler tank for about 20-30 secs.;<br />
1<br />
2<br />
Fig. 15<br />
Fig. 16<br />
1: Operating position<br />
2: Manual filling position<br />
When the adjustments have been made, refit the<br />
sheet metal guard into its housing and fix it into<br />
place with the four side screws; refit the grid into the<br />
work surface.<br />
5.2 SETTING THE BOILER<br />
TANK PRESSURE (Pressure<br />
switch adjustment)<br />
To adjust the service pressure of the boiler, thus regulating<br />
the water temperature, according to the various<br />
functions and needs of the coffee desired, proceed<br />
as follows:<br />
• unscrew the 4 screws on the top panel (Fig. 17);<br />
Fig. 17<br />
37
• turn the pump registration screw, turning it clockwise<br />
to INCREASE and counter clock wise to<br />
DECREASE the pressure.<br />
Fig. 18<br />
Advisable pressure: 1 - 1,4 bar<br />
(according to the kind of coffee).<br />
5.3 SETTING THE PUMP<br />
PRESSURE<br />
To set the pressure of the pump, proceed as follows:<br />
• remove the grid from the work surface;<br />
• remove the sheet metal guard by unscrewing the<br />
four screws at the sides (A), as illustrated in the<br />
following figure;<br />
38<br />
A<br />
Fig. 19<br />
• turn the pump registration screw, turning it clockwise<br />
to INCREASE and counter clock wise to<br />
DECREASE the pressure.<br />
Advisable pressure: 9 bar.<br />
Fig. 20<br />
Fig. 21<br />
COMPACT<br />
UK<br />
• The pressure set for the pump will be shown in<br />
the bottom section of the pressure gauge when<br />
coffee is being dispensed.<br />
Once the adjustment operation has been completed,<br />
screw the protective metal sheet back into its setting<br />
and replace the worktop grid cover.
UK<br />
5.4 HOT WATER<br />
ECONOMISER<br />
ADJUSTMENT<br />
All COMPACT models are fitted with a hot water<br />
mixer that can be used to adjust the delivery temperature<br />
of the water and therefore, to optimise<br />
system performance.<br />
To adjust the hot water economiser, it is necessary<br />
to remove the top panel of the machine, proceeding<br />
as follows:<br />
• unscrew the 4 screws on the top panel (Fig. 22);<br />
COMPACT<br />
Fig. 22<br />
• to adjust the temperature of the hot water delivered<br />
from the nozzle, turn the register knob<br />
CLOCKWISE / ANTICLOCKWISE to INCREASE<br />
/ REDUCE the temperature;<br />
Fig. 23<br />
• at the end of this operation, refit the top panel on<br />
the machine.<br />
39
6. USE<br />
Before starting to use the appliance, the operator<br />
must be sure to have read and understood the safety<br />
prescriptions contained in this booklet.<br />
6.1 SWITCHING THE<br />
MACHINE ON<br />
• Plug the machine into the mains power socket.<br />
• Set the main switch (n.xx, Fig 1) to “I”.<br />
6.2 SWITCHING THE<br />
MACHINE OFF<br />
40<br />
Fig. 24<br />
• Set the main switch (n. 13, Fig 1) to “O”.<br />
• Unplug the machine into the mains power socket.<br />
6.3 MAKING COFFEE<br />
Fig. 25<br />
1 small coffee 2 small coffees<br />
1 long coffee 2 long coffees<br />
COMPACT<br />
UK<br />
Unhitch the filter-holder and fill it with one or two<br />
doses of ground coffee depending on the filter<br />
used.<br />
Press the coffee with the provided coffee presser,<br />
dust off any coffee residue from the rim of the filter<br />
(this way the rubber gasket will last longer).<br />
Insert the filter in its unit.<br />
Press the desired coffee button:<br />
By starting up the coffee brewing procedure the<br />
unit’s pump is activated and the unit’s solenoid valve<br />
is opened.<br />
By pressing it, the button will turn on and signal the<br />
operation<br />
NOTE: when in pause, leave the filter-holder<br />
inserted in the unit so that it will keep<br />
warm. To guarantee the utmost thermic<br />
stability during use, the delivery units are<br />
thermo-compensated with complete hot<br />
water circulation.
UK<br />
6.4 USING STEAM<br />
COMPACT<br />
CAUTION<br />
RISK OF BURNS OR SCALDING<br />
While using the steam nozzle, you must pay<br />
attention to not place your hands beneath it or<br />
touch just after it has been used.<br />
To use steam just pull or push the provided lever<br />
(Fig. 26).<br />
By pulling it completely the lever will hold a position<br />
of maximum delivery; by pushing it, the lever will<br />
automatically give way.<br />
The two steam nozzles are articulated to guarantee<br />
their easy use.<br />
Fig. 26<br />
6.5 MAKING CAPPUCCINO<br />
To obtain the typical cappuccino foam, immerse<br />
the nozzle all the way into a container 1/3 full of<br />
milk (preferably cone-shaped). Turn on the steam.<br />
Before the milk starts to boil, pull the nozzle slightly<br />
up and lightly move it vertically across the surface of<br />
the milk. When you have completed the procedure,<br />
clean the nozzle carefully with a soft cloth.<br />
Fig. 27<br />
6.6 HOT WATER<br />
SELECTION<br />
CAUTION<br />
RISK OF BURNS OR SCALDING<br />
While using the hot water nozzle, pay careful<br />
attention not to place your hands beneath it or<br />
touch it just after it has been used.<br />
This nozzle delivers hot water to make tea or herb<br />
teas.<br />
Place a container underneath the hot water nozzle<br />
and press the hot water select button .<br />
Make sure the button lights up.<br />
Water will be delivered from the hot water nozzle for<br />
as long as the set time indicates.<br />
NOTE: Hot water can be delivered at the same<br />
time as coffee.<br />
6.7 TIMED STEAM<br />
SELECTION<br />
(Version with timed<br />
steam nozzle without<br />
temperature probe)<br />
WARNING<br />
DANGER OF BURNS OR SCALDS<br />
When using the steam nozzle always take great<br />
care never to place your hands underneath it or<br />
to touch it immediately after use.<br />
This is used to dispense steam for milk-based beverages<br />
(e.g. cappuccino or latte).<br />
Place a container with the liquid to be heated<br />
beneath the steam nozzle and press the steam<br />
button .<br />
Make sure that the button itself lights up.<br />
The nozzle will dispense steam for the amount of<br />
time set in the programming function.<br />
NOTE: Steam can be dispensed at the same time<br />
as coffee.<br />
41
6.8 AUTOSTEAM<br />
SELECTION (Version<br />
with Autosteam)<br />
42<br />
WARNING<br />
DANGER OF BURNS OR SCALDS<br />
When using the steam nozzle always take great<br />
care never to place your hands underneath it or<br />
to touch it immediately after use.<br />
This is used to dispense steam for milk-based beverages<br />
(e.g. cappuccino or latte).<br />
Place a container with the liquid to be heated<br />
beneath the steam nozzle and press the steam<br />
button .<br />
Make sure that the button itself lights up.<br />
The nozzle will continue to dispense steam until the<br />
heated liquid reaches the set temperature.<br />
NOTE: Steam can be dispensed at the same time<br />
as coffee.<br />
COMPACT<br />
UK
UK<br />
7. PROGRAMMING<br />
7.1 PROGRAMMING DOSES<br />
To access the programming units, proceed as follows:<br />
NOTE: the procedure can be carried out with the<br />
machine on.<br />
• To enter the programming function for each<br />
group, it is necessary to hold down the continued<br />
delivery key for 5 seconds.<br />
• The delivery keys will begin to flash.<br />
• Accessing the programming mode for the first<br />
group also enables the setting mode for the<br />
machine's operating parameters.<br />
7.2 PROGRAMMING<br />
COFFEE DOSES<br />
To programme the amount of water for each of the<br />
delivery keys, proceed as follows:<br />
• fill the filter holder with the right amount of coffee<br />
(the double or single filter holder can be used,<br />
according to the key to be programmed).<br />
• Place the filter holder in the group.<br />
• Press one of the delivery keys:<br />
• The machine will begin to dispense and once the<br />
required quantity has been delivered, press the<br />
continued key .<br />
• Delivery will cease and the selected dose key will<br />
switch off (the other keys will continue to flash).<br />
• Press the continued key to exit the programming<br />
function or to continue programming other<br />
dose keys<br />
NOTE: This procedure can be used for all groups<br />
on the machine, although it must be performed<br />
on one group at a time; the other<br />
groups will continue to operate as normal.<br />
COMPACT<br />
7.3 SETTING THE TIMED<br />
STEAM FUNCTION<br />
(Version with timed<br />
steam nozzle without<br />
temperature probe)<br />
• Follow the standard procedure to enter the programming<br />
function;<br />
• Place the steam nozzle inside the liquid to be<br />
heated;<br />
• Press the steam select key ,<br />
• The nozzle will begin to dispense steam;<br />
• Press the steam key again when a sufficient<br />
amount of steam has been dispensed.<br />
The machine will store this dispensing time to<br />
memory.<br />
• Press the continuous key to quit the programming<br />
function or to go on to program other<br />
selection keys.<br />
7.4 SETTING THE<br />
AUTOSTEAM FUNCTION<br />
(Version with<br />
Autosteam)<br />
• Follow the standard procedure to enter the programming<br />
function;<br />
• Place the steam nozzle complete with temperature<br />
probe inside the liquid to be heated;<br />
• Press the steam select key ;<br />
• The nozzle will begin to dispense steam;<br />
• Press the steam key again when the liquid<br />
has reached the required temperature. The<br />
machine will store this temperature setting to<br />
memory;<br />
• Press the continuous key to quit the programming<br />
function or to go on to program other<br />
selection keys.<br />
7.5 PROGRAMMING HOT<br />
WATER<br />
• Use the relevant procedure to enter the programming<br />
function.<br />
• Press the hot water selection key .<br />
• Hot water delivery will begin.<br />
• Decide the required amount of hot water and<br />
then press the key again.<br />
• Press the continued key to exit the programming<br />
function or to continue programming<br />
other selection keys.<br />
43
7.6 PROGRAMMING<br />
STANDARD DOSES<br />
• It is possible to enter pre-set values for the 4<br />
group doses and water (steam).<br />
44<br />
PTo do this, it is necessary to press the key<br />
and hold it down for at least 10 seconds<br />
until the flashing keys switch off.<br />
The doses are:<br />
1CN 2CN 1CL 2CL<br />
40 cc 60 cc 50 cc 85 cc<br />
WATER STEAM STEAM TEMP.<br />
9 sec. 0 sec. 50°C<br />
NOTE: A time setting of 0 seconds for steam and<br />
water means this function will work continually.<br />
7.7 COPIATURA DOSI<br />
It is possible to copy the doses stored to memory for<br />
group 1 to the doses for group 2.<br />
This operation is performed by pressing the continuous<br />
key for group 2 and holding it down for at<br />
least 10 seconds until the flashing keys switch off.<br />
7.8 PROGRAMMING<br />
OPERATING<br />
PARAMETERS<br />
CAUTION<br />
The adjustments listed here below must ONLY be<br />
performed by a Specialist Technical Engineer.<br />
If you hold down the key of the second group,<br />
after first entering the programming mode for the<br />
first group, this will access the machine parameters<br />
setting mode; this is signalled by the continuous key<br />
or the second group, which will switch on<br />
1. Enabling the pump if the level is enabled.<br />
2. Enabling the software block to enter the dose<br />
programming function.<br />
3. Adjusting keypad brightness.<br />
4. Enabling the hot water pump (on machines<br />
fitted with economiser).<br />
5. Disenabling the cup warmer<br />
6. Restoring default settings.<br />
1. Enabling the pump during levelling.<br />
COMPACT<br />
UK<br />
Use the espresso key to set pump enabling<br />
during levelling:<br />
if the key is lit, the pump is enabled together with<br />
the level; if it is switched off, the pump is not enabled<br />
with the level function.<br />
2. Enabling the software block to enter the dose<br />
programming function.<br />
Use the long coffee key to enable a software<br />
block to programme doses (key lit) or to de-activate<br />
the block (key off).<br />
3. Adjusting keypad brightness.<br />
The 2 long coffees key of the second group is<br />
used to choose the key brightness setting from 5<br />
pre-set levels.<br />
Use the , key, which will flash, to change the<br />
level, lowering it to minimum or returning it to maximum.<br />
4. Enabling the hot water pump (machines fitted<br />
with economiser only).<br />
Use the hot water key to set the pump to switch<br />
on while hot water is being delivered.<br />
If the key is lit, the pump will switch on while hot<br />
water is being delivered; if it is switched off, the pump<br />
will not switch on.<br />
5. Starting the pump with steam (only for machine<br />
models with timed steam or autosteam functions).<br />
The steam key is used to set the pump to start<br />
while steam is being dispensed.<br />
If the key is lit, the pump will start while steam is<br />
being dispensed; if the key is not switched on, then<br />
the pump will not start.
UK<br />
7.9 AUTOMATIC GROUP<br />
CLEANING CYCLE<br />
To start the automatic cleaning mode, the machine<br />
must first be switched off and then back on again<br />
while holding down the hot water and one low<br />
coffee from group 2 during the initial Lamp-test.<br />
At the end of the Flash-test, the and keys<br />
and the single long coffee key of all groups will<br />
begin to flash.<br />
Press the key to start the washing cycle for the<br />
relevant group.<br />
Once the washing cycle has been completed, it is<br />
possible to perform a rinse cycle for the same group<br />
by pressing the key again.<br />
To perform the rinse cycle at a later time, switch off<br />
the machine and the card will store any cleaning<br />
cycles that need to be completed in its memory. In<br />
fact, the next time that the machine is switched on,<br />
the machine card will automatically open the group<br />
cleaning status without it being necessary to press<br />
the and keys.<br />
Hold down the and keys for 2 seconds to<br />
exit the cleaning mode in the event that there are<br />
no cycles to be completed. For incomplete cycles,<br />
the keys of the groups that require rinsing will<br />
continue to flash.<br />
Hold down the and keys for 2 seconds more<br />
to force exit from the cleaning mode, resetting all<br />
information about rinse cycles still to be completed.<br />
When a cleaning cycle is complete, the key for<br />
the group will switch off.<br />
If there are no more rinse cycles to be performed, the<br />
card will exit the cleaning mode.<br />
COMPACT<br />
45
8. CLEANING AND<br />
MAINTENANCE<br />
8.1 CLEANING THE<br />
OUTSIDE OF THE<br />
MACHINE<br />
Before performing any cleaning operation, the<br />
machine must be cut off from the power supply<br />
(machine switched off and unplugged).<br />
46<br />
WARNING<br />
Fig. 28<br />
Do not use solvents, chlorine-based products or<br />
abrasives.<br />
Cleaning the work area: remove the worktop, lifting<br />
it up from the front and sliding it out. Remove the<br />
water collection dish underneath and clean everything<br />
with hot water and cleansers.<br />
Cleaning the bottom: To clean all the chromiumplated<br />
areas, use a soft, damp cloth.<br />
8.2 CLEANING THE<br />
STAINLESS COFFEE-<br />
HOLDERS<br />
Fig. 29<br />
COMPACT<br />
UK<br />
The stainless coffee-holders are situated under the<br />
delivery units, as shown in figure.<br />
NOTE: To clean proceed as follows:<br />
• Turn the screw placed in the centre of the<br />
coffee-holder.<br />
• Slide the coffee-holder out and check that<br />
its holes are not obstructed but clean.<br />
• If obstructed, clean as described (Paragraph<br />
“CLEANING FILTERS AND FILTER-<br />
HOLDERS”)<br />
We recommend cleaning the coffee-holder<br />
once a week.<br />
8.3 CLEANING THE UNIT<br />
WITH THE AID OF THE<br />
BLIND FILTER<br />
The machine is pre-set for cleaning the delivery unit<br />
with a specific washing powder.<br />
We recommend carrying out a washing cycle at least<br />
once a day with special cleansers.<br />
CAUTION<br />
RISK OF INTOXICATION<br />
Once the filter-holder has been removed, repeat<br />
delivery operations a few times to eliminate any<br />
cleanser residues.<br />
To carry out the washing procedure, proceed as follows:<br />
1) Substitute the filter with the delivery unit blind filter.<br />
2) Fill it with two spoonfuls of special cleanser powder<br />
and insert it into the unit filter-holder.<br />
3) Press one of the coffee keys and halt it after 10<br />
seconds.<br />
4) Repeat the procedure several times.<br />
5) Remove the filter-holder and carry our a few<br />
deliveries.
UK<br />
8.4 CLEANING FILTERS<br />
AND FILTER-HOLDERS<br />
Place two spoonfuls of special cleanser in half a<br />
litre of hot water and immerse filter and filter-holder<br />
(without its handle) in it leaving them to soak for at<br />
least half an hour. Then rinse abundantly with running<br />
water.<br />
8.5 RESIN AND SOFTENER<br />
REGENERATION<br />
To avoid scaling deposits in the boiler and in the<br />
heating exchangers, the softener must always be<br />
kept efficient. Therefore, the ionic resins must be<br />
regularly regenerated.<br />
Regeneration times are established according to the<br />
quantity of coffee delivered daily and the hardness<br />
of the water utilised.<br />
As an indication, regeneration times can be calculated<br />
on the basis diagram illustrated in Fig. 30.<br />
Fig. 30<br />
Regeneration procedures are as follows:<br />
1) 1) Turn the machine off and place a container<br />
large enough to contain at least 5 litres under tube E<br />
(Fig. 31).<br />
Turn levers C and D from left to right; take the cap off<br />
by unscrewing knob and fill with 1 Kg normal kitchen<br />
salt (Fig. 32).<br />
COMPACT<br />
OUT<br />
IN<br />
C<br />
E<br />
D<br />
Fig. 31<br />
C<br />
D<br />
Fig. 32<br />
2) Put the cap back on and reposition lever C moving<br />
it towards the left (Fig. 33), and allowing tube F to<br />
discharge the salty water until it has been eliminated<br />
and the water becomes fresh again (about half and<br />
hour).<br />
C<br />
Fig. 33<br />
3) Reposition lever D towards the left (Fig. 34).<br />
G<br />
F<br />
D<br />
Fig. 34<br />
47
9. MACHINE ERROR MESSAGES<br />
DISPLAY AND KEY<br />
INDICATIONS CAUSE EFFECT<br />
DOSAGE ERROR<br />
Continuous key flashing<br />
and dispensing key<br />
lit without flashing.<br />
LEVEL ERROR<br />
Continuous key flashing<br />
on both groups.<br />
If the doser doesn’t<br />
send out its set<br />
commands within<br />
the first three seconds<br />
from delivery<br />
onset.<br />
If within 90 sec.<br />
from onset, with<br />
pump inserted during<br />
the levelling,<br />
at 180 sec., if the<br />
level has not been<br />
re-established.<br />
If the delivery isn’t<br />
manually halted,<br />
the maximum time<br />
limit (120 sec) will<br />
be blocked.<br />
The pump, the<br />
resistor and all the<br />
functions will be<br />
halted.<br />
SOLUTION NOTES<br />
Interrupt delivery.<br />
Turn the machine<br />
off for at least 5<br />
sec. and then<br />
switch it on<br />
again.<br />
48 COMPACT<br />
UK
COMPACT<br />
49
IMPIANTO ELETTRICO / ELECTRICAL SYSTEM<br />
50 COMPACT
IMPIANTO ELETTRICO / ELECTRIC SYSTEM<br />
COMPACT<br />
KEY<br />
LEGENDA<br />
MS Switch<br />
R Relay.<br />
P Pressostat<br />
PM Pump motor<br />
HE Boiler heating elem.<br />
LP Level probe<br />
EV1 Electrovalve group 1<br />
EV2 Electrovalve group 2<br />
TP Temperature probe<br />
TE Thermostat<br />
EV3 Electrovalve group 3<br />
EV4 Electrovalve group 4<br />
EVHW Mixer electrovalve<br />
EVC Cupwarmwr elecrtrovalve<br />
EVL Water level elec.<br />
MS Interruttore<br />
R Relè.<br />
P Pressostato<br />
PM Motore pompa<br />
HE Resistenza boiler<br />
LP Sonda livello<br />
EV1 Elettrovalvola gruppo<br />
EV2 Elettrovalvola gruppo 2<br />
TP Sonda temperatura<br />
TE Termostato<br />
EV3 Elettrovalvola gruppo 3<br />
EV4 Elettrovalvola gruppo 4<br />
EVHW Elettrovalvola miscelatore<br />
EVC Elettrovalvola scaldatazze<br />
EVL Elettrovalvola livello<br />
51
IMPIANTO IDRAULICO / PLUMBING SYSTEM<br />
52 COMPACT
IMPIANTO IDRAULICO / PLUMBING SYSTEM<br />
COMPACT<br />
KEY<br />
LEGENDA<br />
1 General tap<br />
2 Pump<br />
3 Retaining valve<br />
4 Expansion valve<br />
5 Refill electrovalve<br />
6 Flowmeter<br />
7 Heater exchange<br />
8 Delivery electrovalve<br />
9 Safety valve<br />
10 Hot water electrovalve<br />
11 Steam tap<br />
12 Pressostat<br />
13 Boiler<br />
14 Heating element<br />
1 Rubinetto generale<br />
2 Pompa.<br />
3 Valvola di ritegno<br />
4 Valvola di espansione<br />
5 Elettrovalvola di livello<br />
6 Dosatore volumetrico<br />
7 Scambiatore di calore<br />
8 Elettroval. erogazione<br />
9 Valvola di sicurezza<br />
10 Elettroval. acqua calda<br />
11 Rubinetto vapore<br />
12 Pressostato<br />
13 Caldaia<br />
14 Resistenza<br />
53
54 COMPACT
<strong>Nuova</strong> Distribution Centre<br />
LLC 6940Salashan PKWY BLDG A 98248 Ferdale, WA<br />
Tel. +1.360.3662226<br />
Fax +1.3603664015<br />
videoconf.+1.360.3188595<br />
www.nuovasimonelli.it<br />
info@nuovasimonelli.com<br />
Graphics and printing by: X TYPE ENGINEERING S.r.l<br />
Via M. d’Antegiano, 6<br />
62020 Belforte del Chienti<br />
Macerata Italy<br />
Tel. +39.0733.9501<br />
Fax +39.0733-950242<br />
www.nuovasimonelli.it<br />
E-mail: n.simonelli@nuovasimonelli.it<br />
La <strong>Nuova</strong> <strong>Simonelli</strong> si riserva di apportare tutte le modifiche ritenute necessarie.