
You also want an ePaper? Increase the reach of your titles
YUMPU automatically turns print PDFs into web optimized ePapers that Google loves.
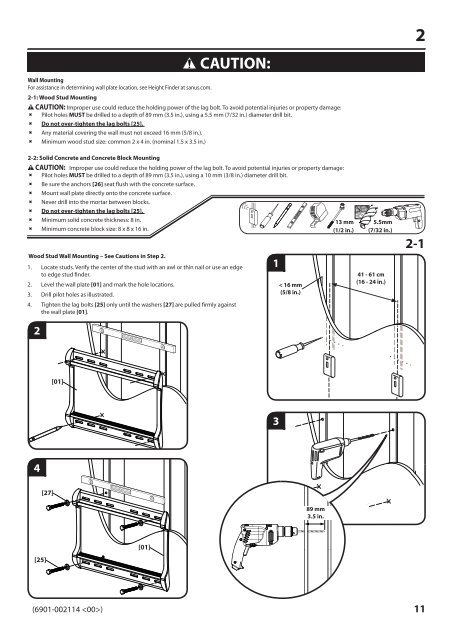
Wood Stud Wall Mounting – See Cautions in Step 2.<br />
1. Locate studs. Verify the center of the stud with an awl or thin nail or use an edge<br />
to edge stud fi nder.<br />
2. Level the wall plate [01] and mark the hole locations.<br />
3. Drill pilot holes as illustrated.<br />
4. Tighten the lag bolts [25] only until the washers [27] are pulled fi rmly against<br />
the wall plate [01].<br />
2<br />
4<br />
[25]<br />
[27]<br />
[01]<br />
[01]<br />
CAUTION:<br />
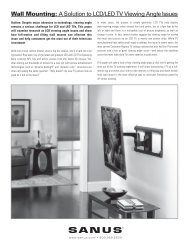
Wall Mounting<br />
For assistance in determining wall plate location, see Height Finder at sanus.com.<br />
2-1: Wood Stud Mounting<br />
CAUTION: Improper use could reduce the holding power of the lag bolt. To avoid potential injuries or property damage:<br />
Pilot holes MUST be drilled to a depth of 89 mm (3.5 in.), using a 5.5 mm (7/32 in.) diameter drill bit.<br />
Do not over-tighten the lag bolts [25].<br />
Any material covering the wall must not exceed 16 mm (5/8 in.).<br />
Minimum wood stud size: common 2 x 4 in. (nominal 1.5 x 3.5 in.)<br />
2-2: Solid Concrete and Concrete Block Mounting<br />
CAUTION: Improper use could reduce the holding power of the lag bolt. To avoid potential injuries or property damage:<br />
Pilot holes MUST be drilled to a depth of 89 mm (3.5 in.), using a 10 mm (3/8 in.) diameter drill bit.<br />
Be sure the anchors [26] seat fl ush with the concrete surface.<br />
Mount wall plate directly onto the concrete surface.<br />
Never drill into the mortar between blocks.<br />
Do not over-tighten the lag bolts [25].<br />
Minimum solid concrete thickness: 8 in.<br />
Minimum concrete block size: 8 x 8 x 16 in.<br />
(6901-002114 ) 11<br />
1<br />
3<br />
< 16 mm<br />
(5/8 in.)<br />
89 mm<br />
3.5 in.<br />
13 mm<br />
(1/2 in.)<br />
5.5mm<br />
(7/32 in.)<br />
41 - 61 cm<br />
(16 - 24 in.)<br />
2<br />
2-1