STEFANY Forno / SVEZIA New / NORVEGIA New
STEFANY Forno / SVEZIA New / NORVEGIA New
STEFANY Forno / SVEZIA New / NORVEGIA New

Create successful ePaper yourself
Turn your PDF publications into a flip-book with our unique Google optimized e-Paper software.
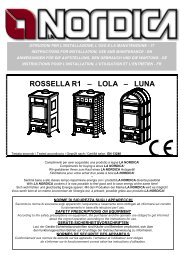
Stufa camino / Chimney stove / Kaminofen <strong>STEFANY</strong> <strong>Forno</strong> / <strong>SVEZIA</strong> <strong>New</strong> / <strong>NORVEGIA</strong> <strong>New</strong><br />
ISTRUZIONI PER IL MONTAGGIO DELLE PIASTRELLE MODELLO <strong>STEFANY</strong> FORNO Maiolica<br />
Le piastrelle della stufa <strong>STEFANY</strong> FORNO vanno posizionate come da Figura 1: si posiziona per prima<br />
una delle piastrelle piane (A) sui due sostegni più in basso Figura 2 e Figura 3) assicurandosi che gli<br />
appoggi della piastrella siano ben agganciati ai sostegni. Si procede allo stesso modo con la seconda<br />
piastrella piana (A), che va agganciata al terzo e al quarto sostegno a partire dal basso (Figura 3). Si<br />
procede, quindi, con la terza piastrella piana e successivamente una delle due piastrelle curve senza foro<br />
(B). Per bloccare quest’ultima, e necessario montare l’apposita squadretta, che va fissata all’interno della<br />
schiena della stufa (Figura 4). Si ripetono le stesse operazioni per montare le piastrelle (A-B) sull’altro lato<br />
della stufa. Infine, si posiziona la piastrella curva con il foro (C).<br />
INSTRUCTIONS FOR ASSEMBLY OF TILES <strong>STEFANY</strong> FORNO MODEL <strong>STEFANY</strong> FORNO Majolika<br />
The tiles of <strong>STEFANY</strong> FORNO stove must be positioned as in Picture 1: first position one of the flat tiles<br />
(A) on the two lowest supports (Picture 2 and Picture 3); make sure the supports of the tile are well hooked<br />
to the holders.<br />
Proceed in the same way with the second flat tile (A) which must be hooked to the third and fourth holder,<br />
starting from the bottom (Picture 3). Position then the third flat tile and then one of the two curved tiles<br />
without a hole (B). To block this last tile it is necessary to mount the suitable bracket, which must be fixed<br />
inside the back of the stove (Picture 4).Repeat the same operations to mount the tiles (A-B) on the other<br />
side of the stove. Finally, position the curved tile with the hole (C).<br />
MONTAGEANLEITUNG DER KERAMIK IM MODELL <strong>STEFANY</strong> FORNO Majolika<br />
Die Keramik für das Modell <strong>STEFANY</strong> <strong>Forno</strong> sind nach ABB. 1 der numerierten Reihenfolge (nach<br />
Nummern auf der Rückseite der Kachel) zu sortieren.<br />
Es ist darauf zu achten immer mit einer flachen Keramik (A) anzufangen und diese fest mit der Auflage in<br />
der Unterstützung anzubringen. Siehe ABB. 2 und ABB. 3.<br />
Die halbrunde Keramik (B) muß an der Ofenrückseite mittels der mitgelieferten Schraube und Blechmutter<br />
gegen herabfallen gesichert werden. Siehe ABB. 4.<br />
Zum Schluß wird Keramik (C) auf die Ofenoberseite aufgelegt.<br />
6 Istruzioni uso e manutenzione / Instructions for installation / Aufstell- und Bedienungsanleitung – IT– EN – DE – Rev.02