PIANO CALDO ITA-ENG
PIANO CALDO ITA-ENG
PIANO CALDO ITA-ENG

Create successful ePaper yourself
Turn your PDF publications into a flip-book with our unique Google optimized e-Paper software.
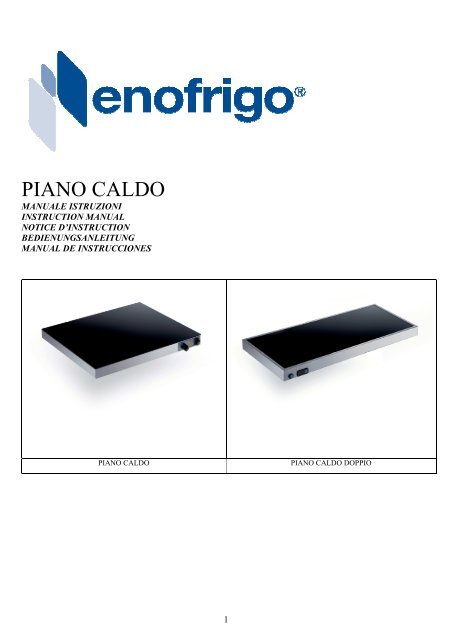
<strong>PIANO</strong> <strong>CALDO</strong><br />
MANUALE ISTRUZIONI<br />
INSTRUCTION MANUAL<br />
NOTICE D’INSTRUCTION<br />
BEDIENUNGSANLEITUNG<br />
MANUAL DE INSTRUCCIONES<br />
<strong>PIANO</strong> <strong>CALDO</strong> <strong>PIANO</strong> <strong>CALDO</strong> DOPPIO<br />
1
INDICE PER ARGOMENTI<br />
Capitolo Pagina<br />
1. Introduzione 4<br />
2. Avvertenze 4<br />
3. Precauzioni generali 5<br />
4. Norme di garanzie 5<br />
5. Targhetta di identificazione 5<br />
6. Caratteristiche tecniche 6<br />
7. Destinazione d’uso 6<br />
8. Descrizione della macchina 6<br />
9. Misure di prevenzione contro i rischi per la salute e la sicurezza 7<br />
10. Segnaletica e simbologia 8<br />
11. Trasporto, movimentazione e immagazzinamento 8<br />
12. Predisposizione locali e installazione della macchina 9<br />
13. Messa in funzione 9<br />
14. Igiene alimentare e pulizia 10<br />
15. Manutenzione e controlli 11<br />
16. Anomalie e possibili rimedi 11<br />
17. Situazioni di emergenza 12<br />
18. Smantellamento della macchina 12<br />
19. Ordinazione ricambi 12<br />
Allegati<br />
Schemi elettrici A<br />
Dichiarazione di conformità CE B<br />
3
1. INTRODUZIONE<br />
Si raccomanda la lettura di questo manuale istruzioni prima di effettuare qualsiasi operazione sulla macchina.<br />
Questo manuale istruzioni è stato concepito e strutturato in modo da consentirne la rapida e agevole<br />
consultazione. Per ogni argomento trattato, vi sono delle illustrazioni o delle tabelle che ne facilitano la<br />
comprensione.<br />
Il manuale istruzioni è suddiviso in vari capitoli. Ogni capitolo contiene uno degli argomenti indicati<br />
nell’indice.<br />
All’interno del manuale troverete delle segnalazioni che sintetizzano il seguente significato:<br />
ATTENZIONE!<br />
norme antinfortunistiche per l’operatore<br />
AVVERTENZA:<br />
si può creare un danno alla macchina e/o ai suoi componenti<br />
PRECAUZIONE:<br />
notizie aggiuntive riguardanti l’operazione in corso<br />
NOTA:<br />
indicazioni generali<br />
2. AVVERTENZE<br />
Questo manuale istruzioni è rivolto al proprietario e/o utilizzatore della macchina e al personale dipendente<br />
addetto alla movimentazione, all’installazione, all’uso, alla manutenzione e allo smantellamento della<br />
medesima.<br />
Questo manuale fornisce dettagliate informazioni e istruzioni circa:<br />
• le caratteristiche tecniche della macchina<br />
• l’uso previsto della macchina<br />
• la movimentazione e l’installazione della macchina<br />
• la manutenzione e lo smantellamento della macchina<br />
Questo manuale è da considerarsi parte integrante di una macchina destinata ad uso professionale e, come tale,<br />
non potrà mai sostituire una adeguata preparazione ed esperienza dell’utilizzatore.<br />
La casa costruttrice ricorda al Cliente, utilizzatore della macchina, l’obbligo di osservare la legislazione vigente<br />
riguardante i luoghi di lavoro e l’igiene.<br />
Questo manuale è da considerare parte della macchina e deve essere conservato per future consultazioni fino<br />
allo smantellamento della medesima.<br />
Questo manuale rispecchia lo stato della tecnica (o lo stato dell’arte) esistente al momento della<br />
commercializzazione della macchina e non può essere considerato inadeguato solo perché successivamente<br />
aggiornato sulla base di nuove esperienze.<br />
La casa costruttrice si riserva il diritto di apportare alla macchina e al manuale istruzioni eventuali<br />
aggiornamenti, senza che ciò costituisca obbligo di aggiornare macchine e/o manuali di precedente produzione.<br />
Tuttavia, la casa costruttrice si rende disponibile a fornire al Cliente le eventuali ulteriori informazioni richieste,<br />
così come terrà nella massima considerazione eventuali proposte di miglioramento del presente manuale.<br />
In caso di cessione della macchina, il Cliente è pregato di segnalare alla casa costruttrice l’indirizzo del nuovo<br />
proprietario.<br />
La casa costruttrice declina ogni responsabilità per eventuali danni subiti da persone, animali o cose derivanti<br />
da:<br />
a. uso improprio della macchina o suo uso da parte di personale non addestrato per le macchine riservate ad<br />
uso professionale<br />
b. uso contrario alla normativa nazionale specifica<br />
c. installazione non corretta<br />
d. difetti di alimentazione elettrica<br />
4
e. carenza nella pulizia e manutenzione prevista<br />
f. modifiche o interventi non autorizzati<br />
g. utilizzo di ricambi non originali o non specifici per il modello<br />
h. mancata osservanza totale o parziale delle istruzioni di questo manuale<br />
i. eventi eccezionali<br />
3. PRECAUZIONI GENERALI<br />
• Non lasciare la macchina incustodita, soprattutto in presenza di bambini.<br />
• Appoggiare sul piano caldo alimenti esclusivamente caldi, non refrigerati.<br />
• Prima di eseguire qualsiasi operazione di installazione, pulizia, manutenzione e riparazione, disinserire<br />
l’interruttore generale e staccare la spina della presa di alimentazione elettrica interbloccata con<br />
interruttore.<br />
4. NORME DI GARANZIA<br />
I criteri per definire la garanzia della macchina sono di seguito riportati:<br />
• la durata della garanzia è di un anno (per 1 anno si intendono 12 mesi consecutivi dalla data di acquisto);<br />
• restano esclusi dalla garanzia le parti elettriche ed elettroniche e quei componenti della macchina che per<br />
natura o destinazione sono soggetti a deterioramento o logorio;<br />
• la garanzia decade qualora la macchina sia stata impiegata senza rispettare le prescrizioni contenute nel<br />
presente manuale;<br />
• la garanzia decade qualora il Cliente provveda autonomamente o per mezzo di terzi non autorizzati dalla casa<br />
costruttrice o dal rivenditore autorizzato a smontare, modificare o tentare di riparare la macchina;<br />
• per qualsiasi controversia, il giudizio è esclusività del Tribunale di Padova.<br />
5. TARGHETTA DI IDENTIFICAZIONE<br />
La targhetta di identificazione, contenente tutti i dati necessari all’identificazione della macchina, è applicata<br />
sul basamento.<br />
I dati riportati sono i seguenti:<br />
• dati identificativi del costruttore;<br />
• modello della macchina;<br />
• numero di matricola;<br />
• anno di costruzione;<br />
• marchio CE di conformità;<br />
• classe climatica della macchina;<br />
• dati tecnici.<br />
I dati contenuti nella targhetta di identificazione dovranno essere comunicati per qualsiasi richiesta di<br />
intervento. La targhetta riportata in figura è da intendersi a puro titolo esemplificativo.<br />
5
Legenda<br />
1 – Nome della casa costruttrice<br />
2 – indirizzo della casa costruttrice<br />
3 – tipo di macchina<br />
4 – numero di matricola della macchina<br />
5 – modello della macchina<br />
6. CARATTERISTICHE TECNICHE<br />
Le principali caratteristiche tecniche dei vari modelli sono le seguenti:<br />
Temperature °C Dimensioni (LxPxH)<br />
cm<br />
Peso kg Potenza assorbita<br />
W<br />
6<br />
Alimentazione elettrica<br />
V/Ph/Hz<br />
A1<strong>PIANO</strong>HOTSB +20/+100 64.2x54.2x8 20 700 230/1/50<br />
A1<strong>PIANO</strong>HOTKSB +20/+100 64.2x54.2x8 20 700 230/1/50<br />
A1<strong>PIANO</strong>2HOTSB +20/+100 108x64.2x8 40 1400 230/1/50<br />
A1<strong>PIANO</strong>2HOTKSB +20/+100 108x64.2x8 40 1400 230/1/50<br />
7. DESTINAZIONE D’USO<br />
I piani caldi per la ristorazione sono destinati all’esposizione e alla conservazione giornaliera di alimenti<br />
destinati all’immediato consumo nei pubblici esercizi quali alberghi, ristoranti, trattorie, pizzerie, gastronomie,<br />
supermercati.<br />
Eventuali usi per scopi diversi non sono consentiti in quanto da ritenersi pericolosi per l’utilizzatore<br />
della macchina e per la buona tenuta della medesima.<br />
8. DESCRIZIONE DELLA MACCHINA<br />
I piani caldi per la ristorazione sono essenzialmente così strutturati:<br />
• Piastra superiore in vetroceramica;<br />
• Resistenza elettrica sulla parte inferiore della piastra;<br />
• Base supporto piastra in acciaio inox;<br />
• Termostato per il controllo automatico della temperatura;<br />
• Pulsante per l’alimentazione generale.<br />
1<br />
2<br />
3<br />
5<br />
4
9. MISURE DI PREVENZIONE CONTRO I RISCHI PER LA SICUREZZA E LA<br />
SALUTE<br />
La casa costruttrice ha progettato e costruito la macchina tenendo nel massimo conto i risultati di una<br />
preventiva e accurata analisi dei rischi per la SICUREZZA e la SALUTE connessi con l’impiego della stessa.<br />
Le protezioni e i dispositivi installati sulla macchina rappresentano quindi i risultati ottenuti nel conseguire le<br />
finalità di sicurezza sancite nelle specifiche direttive CEE.<br />
Di tali protezioni e dispositivi vengono di seguito fornite informazioni ed illustrazioni allo scopo di consentire<br />
all’utilizzatore della macchina di operare in condizioni di massima sicurezza possibile.<br />
9.1 Misure di prevenzione contro i rischi di origine meccanica<br />
La macchina è dotata di protezioni atte ad evitare contatti accidentali con le resistenze.<br />
In particolare:<br />
• Le resistenze sono protette da una chiusura in acciaio inox fissata mediante viti che ne impediscono il<br />
raggiungimento (pericolo di scottatura).<br />
9.2 Misure di prevenzione contro i rischi di origine elettrica<br />
Contro il pericolo di contatti diretti ed indiretti sono state adottate le misure di prevenzione previste dalla<br />
direttiva 2006/95/CEE e dalla norma EN 60335 e sono state eseguite tutte le prove previste come attestato dalla<br />
dichiarazione di conformità CE (vedi allegato). Sono state inoltre eseguite le prove previste dalle norme<br />
tecniche vigenti per l’attuazione della direttiva CEE sulla EMC (direttiva 2004/108/CEE). In particolare:<br />
• I componenti sono tutti garantiti dai relativi costruttori (su ognuno è riportata la sigla caratteristica).<br />
• Le apparecchiature e tutti gli altri componenti elettrici sono installati all’interno di vani chiusi in modo da<br />
impedire qualsiasi contatti DIRETTO con parti in tensione. Sul pannello di protezione del quadro elettrico è<br />
riportato il segnale di pericolo da corrente elettrica:<br />
• A protezione contro i contatti INDIRETTI tutte le masse metalliche sono collegate a terra con apposito<br />
conduttore. Attraverso il collegamento spina- presa, tale conduttore dovrà garantire la continuità elettrica tra la<br />
macchina e l’impianto generale di terra; l’idoneità e l’efficienza dell’impianto generale e delle apparecchiature<br />
complementari necessarie per interrompere l’alimentazione elettrica in caso di guasto sono a totale carico<br />
dell’utilizzatore della macchina.<br />
Si ricorda che la presa, interbloccata con interruttore, va ubicata ad una altezza di circa 130 cm dal pavimento<br />
ed in posizione tale da non essere esposta ad urti o danneggiamenti.<br />
9.3 Misure di prevenzione per l’igiene<br />
Gli elementi o parti della macchina destinati a venire a contatto con gli alimenti, ovvero ricadenti nella<br />
cosiddetta ZONA ALIMENTARE, sono in vetroceramica.<br />
9.4 Misure di prevenzione contro i rischi originati dal rumore<br />
La macchina non produce rumorosità fastidiose ne dannose.<br />
7
10. SEGNALETICA E SIMBOLOGIA<br />
La segnaletica di sicurezza richiama l’attenzione dell’operatore su eventuali possibili pericoli per salvaguardare<br />
lo stesso ai fini della sicurezza.<br />
PERICOLO! Alimentazione elettrica<br />
Controllare la perfetta conservazione dei colori e delle scritte dei segnali e dei simboli. Al minimo<br />
deperimento, richiederne una copia alla casa costruttrice o al rivenditore autorizzato e sostituirli.<br />
La simbologia presente sul termoregolatore è descritta nel capitolo relativo al suo uso.<br />
11. TRASPORTO, MOVIMENTAZIONE E IMMAGAZZINAMENTO<br />
Si ricorda che pesi e dimensioni di ingombro della macchina sono indicati nel capitolo n°6.<br />
La macchina è stata imballata in un cartone riportante i simboli e le indicazioni per la sua movimentazione.<br />
Successivamente è stata posta su un pallet e caricata su un container o un vagone con l’ausilio di un adeguato<br />
carrello elevatore.<br />
La macchina deve essere sempre movimentata con la massima cautela e prudenza.<br />
Gli operatori addetti alla movimentazione della macchina dovranno essere qualificati e adeguatamente<br />
formati.<br />
Per l’immagazzinamento della macchina, utilizzare locali asciutti ed aerati e proteggere la macchina stessa con<br />
un telo.<br />
La casa costruttrice non risponde dei danni provocati da operazioni mal eseguite.<br />
11.1 Procedure di scarico della macchina con l’ausilio di un carrello elevatore<br />
Fase 1 Scaricare con la massima cautela la macchina ancora imballata dal camion<br />
Fase 2 Appoggiare delicatamente la macchina a terra<br />
Fase 3 Togliere l’imballo e asportare delicatamente la macchina con il carrello elevatore,<br />
avendo cura di non danneggiarla, fino a permettere la rimozione<br />
del bancale inferiore<br />
Fase 4 Appoggiare delicatamente la macchina su una superficie piana, consistente<br />
ed il più vicino possibile al luogo di posizionamento definitivo.<br />
8
12. PREDISPOSIZIONE LOCALI E INSTALLAZIONE DELLA MACCHINA<br />
Il locale nel quale la macchina sarà installata, così come nei vari impianti esistenti, dovrà rispettare le normative<br />
e le specifiche tecniche locali vigenti.<br />
Posizionare la macchina in un luogo asciutto e ben aerato rispettando le norme tecnicosanitarie locali. In<br />
particolare:<br />
• Evitare di posizionare la macchina in prossimità di fonti di calore (caloriferi, forni, fornelli, ecc.) o di correnti<br />
d’aria. Qualora ciò non fosse possibile, è necessario rispettare le seguenti distanze minime: 50 cm da cucine a<br />
carbone o petrolio e 50 cm da cucine elettriche e/o a gas.<br />
• Per evitare il cattivo funzionamento, evitare l’esposizione della macchina ai raggi solari diretti.<br />
• Fare attenzione a non coprire od ostruire le aperture di ventilazione della macchina.<br />
• Per evitare il cattivo funzionamento, si deve lasciare uno spazio libero di 15 cm tutto attorno alla macchina.<br />
Sballare accuratamente la macchina togliendo il cartone principale e successivamente tutti i materiali protettivi<br />
dell’imballo.<br />
All’atto della rimozione dell’imballaggio, controllare la perfetta integrità della macchina e segnalare entro<br />
48 ore dalla ricezione della merce gli eventuali danni rilevati alla casa costruttrice o al rivenditore<br />
autorizzato.<br />
Per l’installazione della macchina, tenere conto dei dati riportati sulla targa di identificazione e delle misure di<br />
ingombro (vedi capitolo n°5 e n°6).<br />
Per l'uso e la manutenzione della macchina è necessario riservare uno spazio libero, valutabile in circa 50 cm<br />
tutto attorno alla macchina.<br />
- Consigliamo al primo utilizzo di riscaldare l’apparecchio eccezionalmente a vuoto (senza alcun cibo) per<br />
non più di 10 minuti alla massima impostazione e di aerare il locale durante questa prima operazione.<br />
- Durante il primo periodo di funzionamento del piano si potrebbe avvertire un odore acre o di bruciato, che<br />
scompare completamente dopo i successivi due o tre funzionamenti.<br />
Vi ricordiamo che la zona utilizzabile è, a parte qualche centimetro ai bordi, quasi tutta la superficie del piano<br />
di mantenimento.<br />
Per ottenere un buon rendimento ed un adeguato consumo di energia elettrica, è indispensabile utilizzare solo<br />
contenitori o vassoi perfettamente piani ed in materiale metallico. Inoltre il fondo degli stessi deve essere pulito<br />
ed asciutto, così come il piano di mantenimento.<br />
È assolutamente vietato l’utilizzo della macchina in luoghi ove esistono effettivi pericoli di esplosione o<br />
di incendio a causa della presenza o sviluppo di polveri, gas o miscele esplosive o infiammabili.<br />
Si ricorda che i materiali impiegati per l’imballo devono essere smaltiti secondo la normativa locale<br />
vigente riguardante i rifiuti industriali e speciali.<br />
13. MESSA IN FUNZIONE, USO E REGOLAZIONE<br />
Per ottenere dal piano caldo prestazioni ottimali, si devono verificare i seguenti criteri:<br />
• Temperatura ambiente = 25°C<br />
• Umidità relativa U.R. = 60 %<br />
• Classe climatica secondo UNI EN 441 = 3H<br />
Prima di mettere in funzione la macchina, osservare le seguenti istruzioni:<br />
1. Verificare che l'impianto ed i collegamenti elettrici siano conformi alle normative locali vigenti.<br />
2. Verificare che il voltaggio della macchina indicato nella targhetta d'identificazione corrisponda alla tensione<br />
di linea esistente nella presa di utilizzo. In caso contrario, non procedere all'allacciamento elettrico ed<br />
interpellare la casa costruttrice o il rivenditore autorizzato.<br />
9
3. Verificare la corretta messa a terra della macchina e la disponibilità di un interruttore bipolare di rete con<br />
differenziale.<br />
4. Se la presa e la spina di alimentazione non sono dello stesso tipo, far sostituire la presa da un tecnico<br />
qualificato. Non utilizzare prolunghe o adattatori multipli. Il cavo e la spina di alimentazione devono<br />
risultare facilmente accessibili dopo l'installazione. Qualora evidenziassero segni di usura o danneggiamenti<br />
devono essere immediatamente sostituiti da un tecnico qualificato.<br />
13.1 Pannello di comando<br />
Il pannello di comando è situato sul basamento e contiene i seguenti comandi:<br />
A Termoregolatore elettronico: consente la regolazione della temperatura della macchina, l’accensione e<br />
lo spegnimento dell’impianto riscaldante e dell’illuminazione (per l’uso del termoregolatore, vedi<br />
istruzioni seguenti). Si consiglia di accendere la luce solamente durante il servizio vero e proprio.<br />
B Pulsante generale: consente l’accensione e lo spegnimento dell’impianto elettrico.<br />
13.2 Regolazione della temperatura<br />
Modifica del set point di temperatura.<br />
1. Visualizzare il valore impostato premendo il tasto Set per un secondo.<br />
2. Per modificarlo, utilizzare i tasti ▲ e ▼.<br />
3. Confermare il nuovo valore premendo Set.<br />
Ripristino della programmazione di fabbrica del termoregolatore in caso di problemi.<br />
1. Staccare la spina di alimentazione dalla rete.<br />
2. Premere e tenere premuto il tasto Prg.<br />
3. Con tasto Prg tenuto premuto, ricollegare la spina di alimentazione alla rete ed attendere alcuni secondi sino<br />
alla comparsa della sigla bn0.<br />
4. Con i tasti ▲ e ▼ scorrere i parametri sul display sino a visualizzare la sigla bnX, dove X si riferisce al<br />
modello di mobile.<br />
5. Premere Set.<br />
Le istruzioni del termoregolatore sono riportate nel libretto riguardante il suo utilizzo.<br />
PULIZIA DELLO STRUMENTO.<br />
Per la pulizia dello strumento non utilizzare alcol etilico, idrocarburi (benzina), ammoniaca e derivati. E’<br />
consigliabile usare detergenti neutri ed acqua.<br />
14. IGIENE ALIMENTARE E PULIZIA<br />
Prima di eseguire qualsiasi operazione di pulizia, disinserire l’interruttore generale e staccare la spina<br />
dalla presa di alimentazione elettrica interbloccata con interruttore.<br />
Ogni giorno<br />
• Pulire tutte le parti della macchina utilizzando un panno imbevuto in acqua tiepida e detergente neutro;<br />
non usare in nessun caso polveri abrasive o detersivi che potrebbero danneggiare l’impianto sia<br />
internamente che esternamente, specialmente sulle parti in vetro o policarbonato.<br />
• Risciacquare ed asciugare con un panno morbido.<br />
In caso di inattività prolungata<br />
• Disinserire il termoregolatore elettronico;<br />
• Disinserire l’interruttore generale;<br />
• Staccare la spina dalla presa di alimentazione elettrica interbloccata con interruttore;<br />
• Togliere tutti i prodotti alimentari;<br />
10
• Pulire accuratamente la macchina con l’ausilio di prodotti disinfettanti e neutri per proteggerla<br />
dall’ossidazione (vedi capitoli n° 14 - 15);<br />
• Coprire l’impianto onde evitare il deposito di polvere.<br />
15. MANUTENZIONE E CONTROLLI<br />
Prima di eseguire qualsiasi operazione di manutenzione, disinserire l'interruttore generale e staccare la<br />
spina dalla presa di alimentazione elettrica interbloccata con interruttore.<br />
Ogni giorno<br />
• Verificare costantemente che il cavo di alimentazione sia integro; in caso contrario sostituirlo con un altro<br />
avente le stesse caratteristiche.<br />
16. ANOMALIE E POSSIBILI RIMEDI<br />
Per la ricerca dei guasti e per le relative riparazioni, fare riferimento alla tabella di seguito riportata<br />
ANOMALIE POSSIBILE CAUSA POSSIBILE RIMEDIO<br />
L’impianto<br />
riscaldante non parte<br />
La spina della macchina è disinserita dalla<br />
presa di corrente.<br />
Il cavo di alimentazione è danneggiato o<br />
interrotto.<br />
11<br />
Inserire correttamente la spina nella<br />
presa di corrente.<br />
Verificare lo stato del cavo. Se<br />
necessario, rivolgersi ad un tecnico<br />
qualificato per sostituirlo con un altro<br />
di pari caratteristiche.<br />
L’interruttore bipolare di rete è disinserito. Inserire correttamente l’interruttore<br />
bipolare di rete.<br />
C’è un’interruzione di corrente nel Verificare lo stato del pannello di<br />
pannello di comando.<br />
comando. Se necessario rivolgersi ad<br />
un tecnico qualificato per ripristinare<br />
la corrente.<br />
Il termoregolatore è spento. Regolare il termoregolatore come<br />
indicato nel capitolo n° 13.<br />
Il termoregolatore presenta valori di Procedere alla taratura del<br />
taratura non esatti.<br />
termoregolatore come indicato nel<br />
capitolo n° 13. Se necessario,<br />
Le resistenze non funzionano.<br />
rivolgersi alla casa costruttrice o al<br />
rivenditore autorizzato per sostituirlo.<br />
Verificare lo stato delle resistenze. Se<br />
necessario, rivolgersi ad un tecnico<br />
qualificato per sostituirlo con un altro<br />
di pari caratteristiche.<br />
La temperatura della Il termoregolatore non è correttamente Regolare il termoregolatore come<br />
macchina non è impostato<br />
indicato nel capitolo n° 13.<br />
sufficientemente La macchina è installata vicino ad una Spostare la macchina dalla sorgente<br />
calda.<br />
sorgente fredda.<br />
fredda come indicato nel capitolo n°<br />
12.<br />
C’è un’interruzione sul circuito Rivolgersi alla casa costruttrice o al<br />
riscaldante.<br />
rivenditore autorizzato.<br />
La temperatura della<br />
macchina è troppo<br />
calda.<br />
Il termoregolatore non è nella posizione<br />
corretta.<br />
Regolare il termoregolatore come<br />
indicato nel capitolo n° 13.
La temperatura<br />
indicata dal display<br />
non corrisponde a<br />
quella reale.<br />
Il termoregolatore<br />
non funziona<br />
correttamente.<br />
La sonda non è calibrata. Calibrare la sonda 1.<br />
I valori impostati non sono corretti. Effettuare il reset del<br />
termoregolatore.<br />
SERVIZIO ASSISTENZA TECNICA<br />
Si consiglia di interpellare la casa costruttrice o il rivenditore autorizzato che provvederanno alla migliore e<br />
razionale esecuzione di qualsiasi lavoro di revisione e riparazione mediante personale specializzato e con<br />
attrezzature appositamente studiate per tale esercizio.<br />
Al servizio di assistenza tecnica devono sempre essere comunicati i dati riportati nella targhetta di<br />
identificazione (vedi capitolo n° 5) e in particolare:<br />
• Il tipo di guasto;<br />
• Il modello di macchina;<br />
• Il numero di matricola della macchina;<br />
• Il vostro indirizzo;<br />
• Il vostro numero telefonico.<br />
17. SITUAZIONI DI EMERGENZA<br />
Un corretto uso della macchina che si possano presentare situazioni di emergenza durante il funzionamento, la<br />
pulizia e la manutenzione, salvo che vengano rispettate le istruzioni prescritte dal presente manuale.<br />
Nel caso di imminente pericolo, disinserire l’interruttore generale, staccare la spina dalla presa di<br />
alimentazione elettrica interbloccata con interruttore e fare intervenire un tecnico elettricista della casa<br />
costruttrice o del rivenditore autorizzato.<br />
Se si dovesse riscontrare una dispersione di corrente rilevabile al contatto con parti metalliche della macchina,<br />
disinserire l’interruttore generale, staccare la spina dalla presa di alimentazione elettrica interbloccata con<br />
interruttore e fare intervenire un tecnico elettricista della casa costruttrice o del rivenditore autorizzato.<br />
18. SMANTELLAMENTO DELLA MACCHINA<br />
La macchina ritenuta fuori uso dovrà essere smaltita secondo la normativa locale vigente riguardante i rifiuti<br />
industriali e speciali. Inoltre, dovrà essere resa inservibile tagliando il cavo di alimentazione elettrica, previo<br />
suo scollegamento.<br />
In particolare, si consiglia di non disperdere nell’ambiente il gas contenuto nell’impianto di refrigerazione, ma<br />
di consegnarlo agli appositi centri di raccolta per il recupero dei gas refrigeranti.<br />
19. ORDINAZIONE RICAMBI<br />
Individuare il codice del pezzo da sostituire.<br />
Nelle ordinazioni citare sempre quanto segue:<br />
- Numero di matricola della macchina (da verificare sulla targhetta)<br />
- Numero di riferimento del pezzo e relativo codice<br />
- Quantità richiesta<br />
- Anno di fabbricazione della macchina<br />
- Mezzo di spedizione più appropriato<br />
12
- Indirizzo del committente<br />
Le notizie tecniche di questo manuale sono indicative. La casa costruttrice si riserva di apportare modifiche in<br />
qualsiasi momento senza alcun preavviso.<br />
13
TABLE OF CONTENTS<br />
Chapter Page<br />
1. Introduction 15<br />
2. General warnings 15<br />
3. General precautions 16<br />
4. Warranty conditions 16<br />
5. Identification plate 16<br />
6. Technical specifications 17<br />
7. Application 17<br />
8. Machine description 17<br />
9. Health and safety precautions 17<br />
10. Signs and symbols 18<br />
11. Transport, handling and storage 19<br />
12. Preparation of premises and machine installation 19<br />
13. Start-up, operation and adjustment 20<br />
14. Food hygiene and cleaning 21<br />
15. Maintenance and checks 21<br />
16. Faults and possible solutions 22<br />
17. Emergencies 23<br />
18. Scrapping the machine 23<br />
19. Ordering spare parts 23<br />
Attachments<br />
Wiring diagrams A<br />
CE declaration of conformity B<br />
14
1. INTRODUCTION<br />
This instruction manual should be read before carrying out any operation on the machine.<br />
This instruction manual has been designed and organised to permit quick easy consultation.<br />
For all topics discussed, illustrations or tables are provided to facilitate comprehension.<br />
The instruction manual is divided into various chapters. Each chapter contains one of the<br />
topics specified in the table of contents.<br />
The signs that you will find inside the manual hare following nearing:<br />
CAUTION!<br />
Safety measures for the user<br />
WARNING:<br />
The machine and/or its components may be damaged<br />
PRECAUTION:<br />
Additional information on the operation underway<br />
SEE:<br />
General instructions<br />
2. GENERAL WARNINGS<br />
This instruction manual is aimed at the owner and/or used of the machine and<br />
employees assigned to handling,installation and scrapping of the machine.<br />
This manual provides detailed information and instructions on:<br />
• Technical specifications of the machine<br />
• Scheduled use of the machine<br />
• Handling and installation of the machine<br />
• Maintenance and scrapping of the machine<br />
This manual should be considered an integral part of the machine which is designfor professional use but can<br />
never be a substitute for adequate preparation and exrience on the part of the user.<br />
The manufactured reminds the customer,user of the machine,of the obligatio comply with the current legislation<br />
concerning health and safety at work.This manual should be considered an integral part of the machine and<br />
must be kept for future consultation until the machine is scrapped.<br />
This manual reflects the state of the art existingat the time of sale of the machine and can not be considered<br />
inadequate due to subsequent updates on the basis of new experience.<br />
The manufactured reserves the right to make any updates necessary to the machine and the instruction manual<br />
without this entailing the obligation to update machines and/or manual pertaining to previous productions.The<br />
manufacturer will nevertheless provide the customer with any further information requested and likewise will<br />
take due account of any proposals for improvement of this manual.<br />
If the machine is sold,the customer is kindly requested to inform the<br />
manufacturer of the address of the new owner.<br />
The manufacturer declines all liability for injuries sustained by persons or animals or damage to<br />
things deriving from:<br />
a. inappropriate use of the machine or use of it by personnel not trained in the use of professional<br />
machines<br />
b. use contrary to the specific national legislation<br />
c. incorrecr installation<br />
d. electrical power supply faults<br />
e. inadequate cleaning and maintance<br />
f. non-authorised modifications or work<br />
15
g. use of non- original spare parts or parts not specific for the model<br />
h. total or partial failure to observe the instructions contained in this manual<br />
i. exceptional events.<br />
3. GENERAL PRECAUTIONS<br />
• Do not leave the machine unattended, especially if there are children in the vicinity.<br />
• Put only hot food (not cold food) on the <strong>PIANO</strong> <strong>CALDO</strong>.<br />
• Before carrying out any installation, cleaning, maintenance or repair operation, turn off the main switch<br />
and unplug the unit from the electrical power socket interlocked by means of a switch..<br />
4. WARRANTY CONDITIONS<br />
The machine warranty conditions are listed below:<br />
• the duration of the warranty is one year (i.e. 12 consecutive months from the date of<br />
purchase);<br />
• the warranty excludes the electrical and electronic parts and components of the machine which, by their very<br />
nature or as a result of their application, are subject to deterioration or wear;<br />
• the warranty lapses if the machine has been used without observing the directions contained in this manual;<br />
• the warranty lapses if the customer disassembles, modifies or attempts to repair the machine on its own or by<br />
means of third parties not authorised by the manufacturer or the authorised dealer;<br />
• all disputes will be referred exclusively to the Court of Padua.<br />
5. IDENTIFICATION PLATE<br />
The identification plate, containing all the data necessary for identification of the machine, is affixed on the<br />
basement.<br />
The following data are provided:<br />
• manufacturer identification;<br />
• machine model;<br />
• serial number;<br />
• year of manufacture;<br />
• CE conformity mark;<br />
• machine climate class;<br />
• technical specifications.<br />
The data contained in the identification plate must be communicated when<br />
making any service requests. The plate shown in the figure is intended purely as<br />
an example.<br />
16
Key<br />
1- name of manufacturer<br />
2- address of manufacturer<br />
3- type of machine<br />
4- serial number<br />
5- model of machine<br />
6. TECHNICAL SPECIFICATIONS<br />
The main technical specifications of the various models are as it follows:<br />
Temperature °C Dimensioni (LxPxH)<br />
cm<br />
Peso kg Potenza assorbita<br />
W<br />
17<br />
Alimentazione elettrica<br />
V/Ph/Hz<br />
A1<strong>PIANO</strong>HOTSB +20/+100 64.2x54.2x8 20 700 230/1/50<br />
A1<strong>PIANO</strong>HOTKSB +20/+100 64.2x54.2x8 20 700 230/1/50<br />
A1<strong>PIANO</strong>2HOTSB +20/+100 108x64.2x8 40 1400 230/1/50<br />
A1<strong>PIANO</strong>2HOTKSB +20/+100 108x64.2x8 40 1400 230/1/50<br />
7. APPLICATION<br />
Hot plates for the catering sector are designed for displaying and storing drinks for consumption and sale in<br />
hotels, restaurants, trattorias, pizzerias, delicatessens and supermarkets.<br />
Any uses for other purposes are not permitted as they are considered dangerous for the user of the<br />
machine and for the machine itself.<br />
8. MACHINE DESCRIPTION<br />
Hot plates for food are made of:<br />
• Pyroceram upper top<br />
• Electric resistance under the plate<br />
• Stainless steel plate support<br />
• Thermostat for automatic control of temperature<br />
• Push button for general power supply<br />
1<br />
2<br />
3<br />
5<br />
4<br />
9. HEALTH AND SAFETY PRECAUTIONS<br />
The manufacturer has designed and built the machine taking account of the results of apreventive accurate<br />
SAFETY and HEALTH risk analysis.<br />
The protections and devices fitted on the machine therefore comply with the safety levels established by the<br />
specific EEC directives.
Information on and illustrations of said protections and devices to enable the machine user to operate in<br />
conditions of maximum possible safety are provided below.<br />
9.1 Mechanical precautions<br />
The machine is supplied with protections in order to prevent accidental contact with the resistances.<br />
N.B.:<br />
- the resistances are protected by a screwed stainless steel closure in order to prevent any user from touching<br />
them (scalding hazard).<br />
9.2 Electrical precautions<br />
The precautions established by the 2006/95/CEE directive and the EN 60335 standard have been adopted to<br />
protect against the danger of direct and indirect contacts and all the scheduled tests have been performed as<br />
certified by the CE declaration of conformity (see attachment C). All the tests provided for by the current<br />
technical regulations for implementation of the EEC directive concerning EMC (2004/108/CEE) have also<br />
been performed. In particular:<br />
• The components are all guaranteed by the manufacturers (each one bears the guaran-tee marking).<br />
• The equipment and all other electrical components are fitted inside closed compartments in order to prevent<br />
any DIRECT contact with live parts. The box containing the electrical wiring is provided with the electrical<br />
current danger sign:<br />
• To protect against INDIRECT contacts, all the metal parts are earthed by means of anappropriate lead. Via the<br />
plug-socket connection, this lead must ensure electrical continuity between the machine and the general earth<br />
system; the suitability and efficiency of the general system and the accessory equipment necessary for cutting<br />
off the power supply in the event of a fault are the responsibility of the machine user..<br />
Remember that the socket, interlocked with the switch, must be positioned at a height of approximately 130 cm<br />
from the floor and in a position that does not expo se it to knocks and damage.<br />
9.3 Hygiene precautions<br />
The elements or parts of the machine that come into contact with the food, i.e. those in the so-called FOOD<br />
AREA, are all made of pyroceram.<br />
9.4 Noise precautions<br />
The machine does not generate any annoying or noxious noise.<br />
10 . SIGN AND SIMBOLS<br />
The safety signs draw the operator's attention to possible dangers for the purposes of safety.<br />
DANGER! Electricity supply<br />
Check the perfect condition of all colours and words on the signs and symbols.<br />
As soon as they become even slightly damaged, request the manufacturer or authorised dealer for a copy and<br />
replace them.<br />
18
11 . TRANSPORT, HANDLING AND STORAGE<br />
The machine weights and dimensions are given in chapter n° 6.<br />
The machine is packed in a cardboard box bearing the symbols and indications for handling. It is subsequently<br />
placed on a pallet and loaded on a container or wagon by means of an adequate forklift truck.<br />
The machine must always be handled with the utmost care and caution.<br />
Operators assigned to handling of the machine must be qualified and adequately trained.<br />
For storage of the machine, use dry ventilated rooms and protect the machine with a tarpaulin.<br />
The manufacturer accepts no liability for damages caused by operations that have been performed incorrectly..<br />
11.1 Procedure for unloading the machine by means of a forklift truck<br />
Step 1: unload the machine, still packed, from the lorry with the utmost caution<br />
Step 2: rest the machine gently on the ground<br />
Step 3: remove the packaging and gently raise the machine with the forklift truck,<br />
being careful not to damage it, until the pallet can be removed<br />
Step 4: rest the machine gently on a flat uniform surface as near as possible to its<br />
final position.<br />
12 . PREPARATION OF PREMISES AND MACHINE INSTALLATION<br />
The room in which the machine will be installed, like the various existing systems, must<br />
comply with current local regulations and technical specifications.<br />
Position the machine in a dry well-ventilated place in compliance with the local technicalhealth<br />
regulations. In particular:<br />
• Avoid positioning the machine near sources of heat (radiators, ovens, burners etc.) or<br />
draughts. If this is not possible, the following minimum distances must be observed:<br />
50 cm from coal or oil cookers and 50 cm from electric/gas cookers.<br />
• To prevent inefficient refrigeration, avoid exposing the machine to direct sunlight.<br />
• To ensure that the refrigeration works properly, leave a 15 cm gap around the entire<br />
machine.<br />
Carefully unpack the machine, removing the main cardboard box and then all the<br />
packaging protection materials.<br />
Once you have removed the packaging, check that the machine is in perfect condition and<br />
notify the manufacturer or authorised dealer of any damage found within 48 hours from<br />
receipt of the goods.<br />
For installation of the machine, take account of the data given on the identification plate<br />
and the overall dimensions (see chapter n° 5 and n° 6).<br />
A free space of approximately 50 cm must be left around the machine for operation and<br />
maintenance.<br />
19
- We suggest therefore, at the very first use of the hot plate, to switch it on at the maximum temperature range<br />
and to let it run without any food on top (exceptionally and not longer than 10 minutes) and to keep windows<br />
and doors open to allow air to circulate during this operation.<br />
- During this first operation, you may notice an acid or burnt odour, which will disappear as soon as the<br />
heating elements are completely heated up.<br />
Please note that heating will take place anywhere on the surface, except around 2-3 cm. From all edges.<br />
For efficient use and adequate energy consumption, it is necessary to use only appropriate metallic cook ware<br />
with flat bottoms. Please keep the heating zones and cook ware bottoms clean at all times.<br />
You are strictly forbidden to use the machine in places where there is the dangerof explosion or fire due<br />
to the presence or development of dust, gas or explosive or flammable mixtures.<br />
The packaging materials must be disposed of in compliance with current local regulations concerning<br />
industrial and special waste.<br />
13 . START-UP, OPERATION AND ADJUSTMENT<br />
To obtain the best performance from the hot plate, the following conditions must<br />
obtain:<br />
• Ambient temperature = 25 ° °C<br />
• Relative humidity R.H. = 60%<br />
• Climate class according to UNI EN 441 = 3S<br />
Before starting the machine, follow the instructions below:<br />
1. Check that the system and the electrical connections comply with the current localregulations.<br />
2. Check that the machine voltage specified in the identification plate corresponds to the line voltage at the<br />
socket. If not, suspend electrical connection and call the manufacturer or authorised dealer.<br />
3. Check correct earthing of the machine and availability of a mains bipolar switch with differential.<br />
4. If the power supply socket and plug are not of the same type, have the socket replaced by a qualified<br />
technician. Do not use extensions or multiple adapters. The power supply cable and plug must be easily<br />
accessible after installation. If they show signs of wear or damage, they must be immediately replaced by a<br />
qualified technician.<br />
13.1 Control panel<br />
The control panel is located on the base and contains the following commands:<br />
A Electronic thermoregulator: permits regulation of the machine temperature, switch-on<br />
and switch-off of the refrigerating system and lighting (for use of the thermoregulator, see<br />
instructions below).<br />
B You are advised to switch the light on only when the unit is actually being used.<br />
13.2 Editing temperature<br />
Edit main compartment temperature set-point<br />
1. Push Set button to display stored value.<br />
2. Edit the value pressing ▲ e ▼.<br />
3. Confirm new value by press Set.<br />
Reset electronic control to the factory setting in case of trouble.<br />
1. Unplug the power cord.<br />
20
2. Keep pushing Prg button.<br />
3. While pushing Prg, plug the power cord and wait a few<br />
seconds till the display shows code bn0.<br />
4. Search parameter bnX by press ▲ e ▼, where X reports<br />
the model as shown in the following table.<br />
5. Push SET.<br />
The termoregulator instructions are inside the booklet about the usage of it.<br />
CLEANING THE INSTRUMENTS.<br />
When cleaning the instrument do not use ethanol, hydrocarbons (petrol), ammonia and<br />
by-products. Use neutral detergents and water.<br />
14. FOOD HYGIENE AND CLEANING<br />
Before carrying out any cleaning operation, turn the main switch off and unplug the unit from the socket<br />
interlocked with switch..<br />
Once a day<br />
• Clean all the machine parts using a cloth soaked in warm water and neutral detergent; never use abrasive<br />
powder or detergents that could damage the system internally or externally, especially the glass or<br />
polycarbonate parts.<br />
• Rinse and dry with a soft cloth.<br />
In the event of prolonged inactivity<br />
• turn the main switch off;<br />
• unplug the unit from the socket interlocked with switch;<br />
• take all the food out;<br />
• thaw and thoroughly clean the machine with neutral disinfectant products to<br />
protect it from oxidisation (see chapter n° 15);<br />
• leave the machine door open (if openable) to prevent the formation of mould,<br />
bad smells and oxidisation;<br />
• cover the system to protect it from dust.<br />
15. MAINTENANCE AND CHECKS<br />
Before carrying out any maintenance operation, turn the main switch off and unplug the unit from the<br />
socket interlocked with switch.<br />
Once a day<br />
• Check that the power supply cable is in perfect condition; if not, replace it with another one of the same<br />
type.<br />
21
16. FAULTS AND POSSIBLE SOLUTIONS<br />
For troubleshooting and related repairs, refer to the table below.<br />
FAULT POSSIBLE CAUSE POSSIBLE SOLUTION<br />
The heating system Themachine is un plugged.<br />
Plug in correctly.<br />
does Not start From the current socket.<br />
The machine<br />
temperature is<br />
Not high.<br />
The machine<br />
temperature is too<br />
high.<br />
The displayed<br />
temperature is not in<br />
conformity with the<br />
real one.<br />
The thermoregulator<br />
does not work<br />
correctly.<br />
The power supplì cable is damaged or<br />
interrupted.<br />
22<br />
Check the condition of the cable.If<br />
necessary contact a qualified technician<br />
to replace it with another one of the<br />
same type.<br />
The mains bipolar switch is off. Turn the mains bipolar switch on.<br />
Power failure on controls. Check the condition of the controls If<br />
necessary,contact a qualified technician<br />
There is a current interruption on the<br />
to restore the current.<br />
Ad just the thermoregulator as come<br />
controls.<br />
shown in chapter n°13.<br />
The resistances don’t work. Check the condition of the resistances.<br />
If necessari contact a qualified<br />
The thermoregulator is not correctly set.<br />
technician to replace it with another one<br />
of the same type.<br />
Ad just the thermoregulator as come<br />
shown in chapter n°13.<br />
The machine is installed near a cold Move the machine a way from the cold<br />
source.<br />
source as described in chapter n°12.<br />
There is an interruption in the heating Contact the producers or to the<br />
circuitor.<br />
authorized retailer.<br />
The thermoregulat or is not set to the<br />
correct position.<br />
The probe is not properly set. Set probe 1.<br />
Ad just the thermoregulator as come<br />
shown in chapter n°13.<br />
The set values are not correct. Reset the thermoregulator.<br />
TECHNICAL SUPPORT SERVICE<br />
You are advised to contact the manufacturer or authorised dealer who will carry out any<br />
overhauling and repair work via specialist personnel using purposely designed equipment.<br />
The data given in the identification plate (see chapter n° 5) must always be communicated<br />
to the technical support service, in particular:<br />
• the type of fault;<br />
• the machine model;<br />
• the machine serial number;<br />
• your address;<br />
• your telephone number.
17. EMERGENCIES<br />
Correct use of the machine ensures that emergency situations cannot occur during operation,<br />
cleaning and maintenance provided that the instructions given in this manual are followed.<br />
In the event of imminent danger, turn the main switch off, unplug the unit from the<br />
socket interlocked with switch and call the manufacturer or authorised dealer to<br />
request the services of a qualified technician.<br />
If current dispersion occurs on contact with metal parts of the machine, turn the main<br />
switch off, unplug the unit from the socket interlocked with switch and call the manufacturer<br />
or authorised dealer to request the services of an electrician.<br />
18. SCRAPPING THE MACHINE<br />
At the end of its life, the machine must be disposed of in compliance with current local regulations<br />
concerning industrial and special waste. It must also be made unserviceable by cutting<br />
the electrical power supply cable, after disconnecting it.<br />
In particular, do not allow the gas contained in the refrigeration system to be dispersed in<br />
the environment; it must be taken to special refrigeration gas recovery centres.<br />
19. ORDERING SPARE PARTS<br />
Find out the code of the part that needs replacing.<br />
Always provide the following information when ordering:<br />
• Machine serial number (on the plate)<br />
• Part reference number and code<br />
• Quantity required<br />
• Year of manufacture of the machine<br />
• Most appropriate means of shipment<br />
• Customer's address<br />
The technical information provided in this manual is intended as a guide. The manufacturer<br />
reserves the right to make changes at any time without notice.<br />
23
ALLEGATO A - SCHEMI ELETTRICI<br />
ATTACHMENT A - WIRING DIAGRAMS<br />
ANNEXE A - SCHEMAS ELECTRIQUES<br />
ANLAGE A - SCHALTPLÄNE<br />
ADJUNTO A - CUADRO ELECTRICOS<br />
24
TERMOREGOLATORE CAREL IR33YOEHxx<br />
T<br />
7 9<br />
6 5 4 3 2<br />
IG<br />
PE<br />
L<br />
N<br />
ST<br />
R<br />
SCHEMA ELETTRICO <strong>PIANO</strong> <strong>CALDO</strong><br />
N.PZ.<br />
COMUN.BASE<br />
PESO<br />
AUTORE<br />
FINITURA/UNIFICAZIONE<br />
DATA REVISIONE<br />
SPESSORE<br />
MATERIALE<br />
CODICE DENOMINAZIONE<br />
DESCRIZIONE REVISIONE<br />
POS<br />
REV<br />
DATA :<br />
REDATT. :<br />
VER/APP.<br />
CODICE:<br />
.<br />
.<br />
.<br />
.<br />
.<br />
.<br />
. ..<br />
. . .<br />
.<br />
.<br />
.<br />
0<br />
*<br />
STAMPATO IL:<br />
A7164 ISO 9001<br />
ENOFRIGO s.r.l.<br />
IL PRESENTE DISEGNO COSTITUISCE PROPRIETA' PRIVATA<br />
TUTELATA SECONDO I TERMINI DELLE LEGGI VIGENTI.<br />
UNI A3 ( 297x420 )
TERMOREGOLATORE CAREL IR33YOEHxx<br />
T<br />
7 9<br />
6 5 4 3 2<br />
IG<br />
PE<br />
L<br />
N<br />
ST<br />
R<br />
R<br />
SCHEMA ELETTRICO <strong>PIANO</strong> <strong>CALDO</strong> DOPPIO<br />
N.PZ.<br />
COMUN.BASE<br />
PESO<br />
AUTORE<br />
FINITURA/UNIFICAZIONE<br />
DATA REVISIONE<br />
SPESSORE<br />
MATERIALE<br />
CODICE DENOMINAZIONE<br />
DESCRIZIONE REVISIONE<br />
POS<br />
REV<br />
DATA :<br />
REDATT. :<br />
VER/APP.<br />
CODICE:<br />
.<br />
.<br />
.<br />
.<br />
.<br />
.<br />
. ..<br />
. . .<br />
.<br />
.<br />
.<br />
0<br />
*<br />
STAMPATO IL:<br />
A7164 ISO 9001<br />
ENOFRIGO s.r.l.<br />
IL PRESENTE DISEGNO COSTITUISCE PROPRIETA' PRIVATA<br />
TUTELATA SECONDO I TERMINI DELLE LEGGI VIGENTI.<br />
UNI A3 ( 297x420 )
ALLEGATO B - DICHIARAZIONE DI CONFORMITÀ CE<br />
ATTACHMENT B - CE DECLARATION OF CONFORMITY<br />
ANNEXE B - DÉCLARATION DE CONFORMITÉ CE<br />
ANLAGE B - CE-KONFORMITÄTSERKLÄRUNG<br />
ADJUNTO B - DECLARACIÓN DE CONFORMIDAD CE<br />
25
DICHIARAZIONE DI CONFORM<strong>ITA</strong>’ GELIJKVORMIGHEIDS VERKLARING<br />
DECLARATION OF CONFORMITY OVERENSSTEMMELSESERKLÆRING<br />
KONFORMITÄTSERKLÄRUNG FÖRSÄKRAN OM ÖVERENSSTÄMMELSE<br />
DÉCLARATION DE CONFORMITÉ YHDENMUKAISUUSVAKUUTUS<br />
DECLARACION DE CONFORMIDAD<br />
DECLARACÃO DE CONFORMIDADE<br />
ΔΗΛΩΣΗΣΥΜΜ ΜΜ ΜΜΟΡΦΩΣΗΣ<br />
ΜΜ<br />
Rev 02 04/07<br />
IT Il sottoscritto, designato a legale rappresentante della Ditta costruttrice, dichiara che i prodotti sottoelencati:<br />
GB-IE The undersigned, an authorised officer of the Manufacturer, hereby declares that the products listed hereunder:<br />
DE-AT Der Unterzeichner, rechtlicher Vertreter des Herstellers, erklärt, daß die nachstehend beschriebenen Produkte:<br />
FR-BE-LU Je soussigné, représentant légal désigné du Constructeur, déclare que les produits énumérés ci-après:<br />
ES El suscrito, nombrado representante legal de la Sociedad Constructora, declara que los productos indicatos a continuación:<br />
PT O abaixo assinado, designado legal representante de Empresa Fabricante, declara que os produtos abaixo indicados:<br />
NL Ondergetekende, aangewezen als wetteliijk vertegenwoortiger van de Fabrikant, verklaart dat de hiernavolgende produkten:<br />
DK Undertegnede, som erudpeget til producentes legale rapraesentant, erklaerer, at nedenstaende producter:<br />
SE Jag den underskrivne, tillverkarens ombud, förklarar att nedan angivna produkter:<br />
FI Valmistajafirman laillisena edustajanaallekirjoittanut vakuuttaa, juridinen edustaja, etta alla mainitut tuotteet:<br />
GR Ο κατωθεν υπογεγραμμενοσ νομιμοσ εκπρσωποσ τησ , δηλωνει οτι τα παρακατω προιοντα, κατασκευασμενα για:<br />
IT Sono conformi a quanto prescritto dalle seguenti direttive:<br />
GB-IE Are in compliance with the following directives:<br />
DE-AT Mit den Vorschriften konform sind, die in den folgenden Richtlinien:<br />
FR-BE-LU Sont conformes aux prescriptions des directives suivantes:<br />
ES Respetan las prescripciones contenidas en las siguientes directivas:<br />
PT Estão em conformidade com as prescrições das seguintes directivas:<br />
NL Conform de voorschriften zijn ven de volgende richtlijnen:<br />
DK Er i overensstemmelse med vilkårene i følgende direktiv:<br />
SE Är i överensstämmelse med vilkoren i följande direktiv:<br />
FI Noudattavat allamainitun direktiivin ehtoja:<br />
GR Ειναι ουμϕωνα με τα οοα καθοριζουν οι παρακατω οδηγιεσ:<br />
IT E dalle seguenti norme:<br />
GB-IE And with the following standards:<br />
DE-AT Und Normen stehen:<br />
FR-BE-LU Et des normes ci-apres:<br />
ES Y en las siguientes normas:<br />
PT E das seguintes normas:<br />
NL En van de volgende normen:<br />
DK Samt følgende lovkrav:<br />
SE Samt följande lagkrav:<br />
FI Sekä allamainittuja lakivaatimuksia:<br />
GR Και οι εξησ κανονιμοι:<br />
IT E, in applicazione a quanto previsto dalle direttive citate, sono state dotate di marcatura CE ed é stato predisposto un adeguato fascicolo tecnico presso la ns. sede.<br />
GB-IE And, pursuant of the above-mentioned directives, the CE mark has been applied. Furthermore, adeguate technical file has been prepared and is available from our offices.<br />
DE-AT Und daß sie in Übereinstimmung mit den Vorschriften der obengenannten Richtlinien mit dem CE-Zeichen versehen sind und daß für Sie ein angemessenes technisches Heft erstellt wurde,<br />
das bei uns in der Firma zur Verfügung steht.<br />
FR-BE-LU En application des directives citées, ils portent la marque CE et un dossier technique est deposé de notre siège.<br />
ES Y, conforme con lo previsto en las citadas directivas, han recibido la marca CE. Existe asimismo un especifico prospecto técnico relativo disponible en nuestra sede.<br />
PT E, em aplicação de quanto previsto pelas referidas directivas, receberam a marca CE, tendo sido preparado um fascículo técnico adequado disponivel na nossa sede.<br />
NL En in toepassing van de bepalingen van de genoemde richtlijnen zijn voorzien van CE markering en uitgerust met een bij ons kantoor verkrijgbaar geschikt technische boekje.<br />
DK I henhold til vilkårene i ovennævnte direktiv har virksomheden forestået CE mærkning af produkterne samtredigering af en udførlig teknisk beskrivelse, som kan findes hos os.<br />
SE I enlighet med villkoren i ovannämnda direktiv har företaget ombesörjt CE märkning av produkterna samt redigering av en utförlig teknisk beskrivning som återfinns hos oss.<br />
FI Yliämainitum direktiivin chtojen mukaisesti yritys on hoitanut tuotteiden CE merkinnät sekä muokannut täydellistä teknistä kuvausta, joka on tiloissamme.<br />
GR Kai, eis ejarmogh twn oown kaqorizoun oi parapanw odhgies jeroun to ohma CE kai uharcei ena katallhlo tecniko julladio pou diatiqetai othn edra has.<br />
Codice Fiscale Ditta/Manufacturer’s identify number/Identifizierungsnummer des Herstellers<br />
Numéro d’identification de la Société/Nùmero de idebtificaciòn de la Empresa 00813890282<br />
26<br />
• 2006/95/CEE<br />
• 93/68/CEE<br />
• 2006/42/CEE<br />
• 2004/108/CEE<br />
• EN 60335-1<br />
• EN 60335-2-12/24/50<br />
• EN 55014-1<br />
• EN 61000-3-2/3<br />
• EN 292-I-II<br />
• EN 294