3.021522 - Immergas
3.021522 - Immergas
3.021522 - Immergas

You also want an ePaper? Increase the reach of your titles
YUMPU automatically turns print PDFs into web optimized ePapers that Google loves.
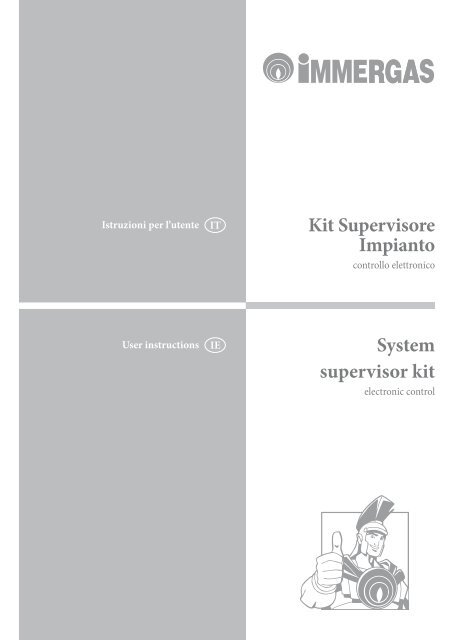
Istruzioni per l’utente<br />
IT<br />
Kit Supervisore<br />
Impianto<br />
controllo elettronico<br />
User instructions<br />
IE<br />
System<br />
supervisor kit<br />
electronic control
CONDIZIONI INERENTI LA GARANZIA CONVENZIONALE IMMERGAS<br />
La garanzia convenzionale <strong>Immergas</strong> rispetta tutti i termini della garanzia legale e si riferisce alla “conformità al contratto” in<br />
merito ai kit supervisore impianto <strong>Immergas</strong>; in aggiunta, la garanzia convenzionale <strong>Immergas</strong> offre i seguenti ulteriori vantaggi:<br />
- verifica iniziale gratuita ad opera di un Centro Assistenza Tecnica Autorizzato <strong>Immergas</strong>;<br />
- decorrenza dalla data di verifica iniziale.<br />
1) OGGETTO DELLA GARANZIA CONVENZIONALE<br />
La presente garanzia convenzionale <strong>Immergas</strong> viene offerta da <strong>Immergas</strong> S.p.A., con sede a Brescello (RE) Via Cisa Ligure<br />
95, sui kit supervisore impianto <strong>Immergas</strong> come specificato nel seguente paragrafo “Campo di applicazione”.<br />
La citata garanzia viene offerta tramite i Centri Assistenza Tecnica Autorizzati <strong>Immergas</strong> nel territorio della Repubblica Italiana,<br />
Repubblica di San Marino e Città del Vaticano.<br />
2) CAMPO DI APPLICAZIONE<br />
<strong>Immergas</strong> offre la presente garanzia convenzionale su tutti i componenti facenti parte dei kit supervisore impianto <strong>Immergas</strong><br />
per la durata di 2 anni. La garanzia convenzionale <strong>Immergas</strong> prevede la sostituzione o la riparazione gratuita di ogni parte<br />
che presentasse difetti di fabbricazione o conformità al contratto. La verifica iniziale non prevede interventi sugli impianti<br />
(idraulico, elettrico, ecc…) quali ultimazioni di collegamenti e qualsiasi modifica.<br />
3) DECORRENZA<br />
La garanzia convenzionale <strong>Immergas</strong> decorre dalla data di verifica iniziale di cui al successivo punto “ATTIVAZIONE”.<br />
4) ATTIVAZIONE<br />
L’utente che intende avvalersi della garanzia convenzionale <strong>Immergas</strong> deve, per prima cosa, essere in possesso della necessaria<br />
documentazione a corredo del suo impianto (dichiarazione di conformità od altro documento equivalente, progetto - ove<br />
richiesto - ecc). Successivamente il Cliente dovrà contattare un Centro Assistenza Tecnica Autorizzato <strong>Immergas</strong> che (entro un<br />
congruo termine) provvederà ad effettuare la verifica iniziale gratuita e l’avvio della garanzia convenzionale <strong>Immergas</strong>, mediante<br />
la corretta compilazione del modulo di garanzia. La richiesta di verifica deve essere effettuata entro 10 giorni della messa in<br />
servizio (eseguita dall’installatore) e comunque entro un mese dalla messa in funzione dell’impianto; in aggiunta la richiesta<br />
deve essere compiuta entro 8 anni dalla data di messa in commercio dei prodotti ed entro l’eventuale data ultima di messa in<br />
servizio prevista dalla legislazione vigente.<br />
5) MODALITA’ DI PRESTAZIONE<br />
L’esibizione al Centro Assistenza Tecnica Autorizzato <strong>Immergas</strong> della ”copia Cliente” del modulo di garanzia debitamente<br />
compilato consente all’Utente di usufruire delle prestazioni gratuite previste dalla garanzia convenzionale. Il Centro Assistenza<br />
Tecnica Autorizzato <strong>Immergas</strong> interviene dopo un congruo tempo dalla chiamata dell’Utente, in funzione anche del livello oggettivo<br />
di criticità e dell’ anteriorità della chiamata; la denuncia del vizio deve avvenire entro e non oltre 10 giorni dalla scoperta.<br />
Trascorsi i termini di garanzia, l’assistenza tecnica viene eseguita addebitando al Cliente il costo dei ricambi, della manodopera<br />
ed il diritto fisso di chiamata. Il materiale sostituito in garanzia è di esclusiva proprietà della <strong>Immergas</strong> S.p.A. e deve essere reso<br />
senza ulteriori danni (pena la decadenza della garanzia), munito degli appositi tagliandi debitamente compilati ad opera del<br />
Centro Assistenza Tecnica Autorizzato <strong>Immergas</strong>.<br />
6) ESCLUSIONI<br />
La manutenzione ordinaria periodica non rientra nei termini di gratuità della garanzia convenzionale <strong>Immergas</strong>.<br />
La garanzia convenzionale non comprende danni e difetti dei kit supervisore impianto <strong>Immergas</strong> derivanti da:<br />
• trasporto di terzi non rientranti nella responsabilità del produttore o della sua rete commerciale;<br />
• mancato rispetto delle istruzioni o delle avvertenze riportate sul presente libretto istruzioni ed avvertenze;<br />
• negligente conservazione del prodotto;<br />
• manomissione o interventi effettuati da personale non facente parte della rete dei Centri Assistenza Tecnica Autorizzati <strong>Immergas</strong>;<br />
• allacciamenti ad impianti elettrici non conformi alle norme vigenti, nonché inadeguato fissaggio delle strutture di supporto<br />
dei componenti;<br />
• utilizzo di componenti non idonei alla tipologia dei kit supervisore impianto installati o non originali <strong>Immergas</strong>;<br />
• agenti atmosferici diversi da quelli previsti nel presente libretto di istruzioni ed avvertenze, nonché calamità atmosferiche o<br />
telluriche, incendi, furti, atti vandalici;<br />
• installazione in ambiente (esterno o interno ) non idoneo;<br />
• permanenza in cantiere, in ambiente non riparato, nonché prematura installazione;<br />
• forzata o prolungata sospensione del funzionamento dei kit supervisore impianto <strong>Immergas</strong>.<br />
7) ULTERIORI CONDIZIONI<br />
Eventuali componenti che, anche difettosi, risultassero manomessi non rientreranno nei termini della garanzia convenzionale<br />
<strong>Immergas</strong> gratuita. L’eventuale necessità di utilizzo, per la sostituzione di componenti in garanzia, di strutture temporanee di<br />
supporto o sostegno (ad es. ponteggi), sistemi o automezzi per il sollevamento o la movimentazione (ad es. gru) non rientra nei<br />
termini di gratuità della presente garanzia convenzionale <strong>Immergas</strong>.
Gentile Cliente,<br />
Ci complimentiamo con Lei per aver scelto un prodotto <strong>Immergas</strong> di alta qualità in grado di assicurarLe per lungo<br />
tempo benessere e sicurezza.<br />
Quale Cliente <strong>Immergas</strong> Lei potrà sempre fare affidamento su un qualificato Servizio di Assistenza Autorizzato, preparato<br />
ed aggiornato per garantire costante efficienza del Suo “Kit Supervisore Impianto”.<br />
Ci permettiamo di fornirLe alcune importanti indicazioni il cui rispetto confermerà la Sua soddisfazione per il prodotto<br />
<strong>Immergas</strong>:<br />
• Legga con attenzione le pagine che seguono: potrà trarne utili suggerimenti sul corretto utilizzo dell’apparecchio.<br />
• Si rivolga sempre per eventuali necessità di intervento e manutenzione ordinaria ai “Centri Autorizzati<br />
<strong>Immergas</strong>”: essi dispongono di ricambi originali e vantano una specifica preparazione.<br />
INDICE<br />
Premessa................................................................................................................................................................................ 4<br />
Avvertenze generali............................................................................................................................................................. 4<br />
Pulizia del rivestimento....................................................................................................................................................... 4<br />
Avvertenza............................................................................................................................................................................ 4<br />
1 Descrizioni comandi.................................................................................................................................................... 5<br />
1.1 Descrizione pulsanti.................................................................................................................................................... 5<br />
1.2 Descrizione display...................................................................................................................................................... 6<br />
1.3 Messa in funzione........................................................................................................................................................ 7<br />
1.3.1 Programmazione ora e giorno corrente............................................................................................................... 7<br />
1.4 Selezione modalità di funzionamento....................................................................................................................... 7<br />
1.4.1 Funzionamento in modalità stand-by.................................................................................................................. 7<br />
1.4.2 Funzionamento in modalità estate........................................................................................................................ 7<br />
1.4.3 Funzionamento in modalità estate con raffrescamento..................................................................................... 8<br />
1.4.4 Funzionamento in modalità inverno.................................................................................................................... 8<br />
1.4.5 Funzionamento in modalità party........................................................................................................................ 9<br />
1.4.6 Funzionamento automatico forzato...................................................................................................................... 9<br />
1.4.7 Funzione antigelo ambiente................................................................................................................................... 9<br />
2 Programmazione “kit supervisore impianto”.........................................................................................................10<br />
2.1 Impostazione temperatura acqua sanitaria.............................................................................................................10<br />
2.2 Impostazione temperatura ambiente comfort e ridotta........................................................................................10<br />
2.3 Programmazione orario di funzionamento in modalità comfort........................................................................11<br />
2.3.1 Programma orario giornaliero.............................................................................................................................11<br />
2.3.2 Programma orario settimanale............................................................................................................................11<br />
2.3.3 Programma vacanze..............................................................................................................................................12<br />
3 Informazioni...............................................................................................................................................................13<br />
4 Diagnostica ed errori”...............................................................................................................................................14<br />
4.1 Diagnostica.................................................................................................................................................................14<br />
4.2 Reset errori..................................................................................................................................................................14<br />
5 Menù assistenza..........................................................................................................................................................15<br />
5.1 Funzioni protette da codice......................................................................................................................................16<br />
6 Schemi idraulici .........................................................................................................................................................17<br />
6.1 Schema idraulico con pompa di calore e caldaia...................................................................................................17<br />
6.2 Schema idraulico con pompa di calore e resistenza elettrica...............................................................................18<br />
7 Schemi elettrici ..........................................................................................................................................................19<br />
7.1 Schema elettrico kit gestore con espansioni, comandi di zona e integrazione con resistenza.........................19<br />
7.2 Schema elettrico kit gestore con espansioni, comandi di zona, alta temperatura e integrazione<br />
con caldaia...................................................................................................................................................................20<br />
7.3 Schema elettrico kit gestore con alta temperatura, 2 circolatori solari e integrazione con caldaia.................21<br />
pag.<br />
3
PREMESSA<br />
Il “Kit supervisore impianto” programmabile “<strong>Immergas</strong>”<br />
è stato progettato per garantire condizioni di<br />
temperatura ideali in ogni momento del giorno e della<br />
notte per ogni singolo giorno della settimana, utilizzando<br />
sempre la fonte energetica economicamente più<br />
conveniente in base alle caratteristiche dei componenti<br />
installati e dalle condizioni ambientali.<br />
Le possibilità di controllo sono:<br />
1. Impianto diretto senza valvole miscelatrici e senza<br />
deumidificatore con integrazione o tramite resistenza<br />
o caldaia e gestione del solare con una falda.<br />
2. Impianto fino a 3 zone, con miscelatore a 3 punti, e<br />
gestione di una zona in alta temperatura con integrazione<br />
tramite caldaia.<br />
3. Impianto con 2 zone miscelate con miscelatore a 3<br />
punti incluso le caratteristiche precedenti e 1 fissa.<br />
4. Come casi precedenti ma con la possibilità di gestire<br />
la parte solare su due falde e gestione di una zona in<br />
alta temperatura.<br />
5. Come casi precedenti ma con la possibilità di gestire<br />
un puffer per l’integrazione solare del riscaldamento.<br />
In base alle proprie necessità, è possibile modificare a<br />
piacere il programma di base.<br />
La programmazione del “Kit supervisore impianto” è di<br />
estrema facilità ed un ampio display permette un costante<br />
controllo di tutti i valori impostati.<br />
AVVERTENZE GENERALI<br />
Il presente manuale è stato redatto per l’Utilizzatore.<br />
• Leggere attentamente le avvertenze contenute nel<br />
presente documento in quanto servono per indicare<br />
l’utilizzo del “Kit supervisore impianto” previsto dalle<br />
ipotesi di progetto, le caratteristiche tecniche, programmazione,<br />
regolazione e uso.<br />
• L’esecuzione dell’impianto deve essere rispondente alle<br />
norme CEI vigenti.<br />
• Il manuale istruzioni è da considerare parte del “Kit<br />
supervisore impianto” e deve essere “conservato per<br />
futuri riferimenti”.<br />
• Il “Kit supervisore impianto” è destinato soltanto all’uso<br />
per il quale è stato espressamente concepito. Ogni altro<br />
uso è da considerarsi improprio e quindi pericoloso.<br />
• I Nostri prodotti sono realizzati in conformità alle<br />
vigenti normative di sicurezza per cui si raccomanda<br />
l’uso di tutti quei dispositivi o attenzioni in modo che<br />
l’utilizzo non rechi danno a persone o a cose.<br />
• Non smontare parti del “Kit supervisore impianto”<br />
quando questo è in funzione.<br />
• Non usare il “Kit supervisore impianto” esposto a fonti<br />
di calore o sotto il sole cocente.<br />
• Il costruttore si ritiene sollevato da eventuali responsabilità<br />
nei seguenti casi:<br />
a) Installazione non corretta.<br />
b) Difetti di funzionamento delle apparecchiature ai<br />
quali è applicato il “Kit supervisore impianto”.<br />
c) Modifiche o interventi non autorizzati.<br />
d) Inosservanza totale o parziale delle istruzioni.<br />
e) Eventi eccezionali ecc.<br />
PULIZIA DEL RIVESTIMENTO<br />
Per pulire il rivestimento del “Kit supervisore impianto”<br />
usare panni umidi. Non usare detersivi abrasivi o in<br />
polvere.<br />
AVVERTENZA<br />
<strong>Immergas</strong> si riserva la facoltà, ferme restando le caratteristiche<br />
essenziali del modello qui descritto ed illustrato,<br />
di apportare miglioramenti e modifiche a particolari<br />
ed accessori.<br />
4
1<br />
DESCRIZIONI<br />
COMANDI<br />
7<br />
1<br />
2<br />
3<br />
4<br />
5<br />
6<br />
Fig. 1-1<br />
Legenda:<br />
1. Pulsante modifica modalità di funzionamento estate/<br />
inverno/party/stand-by ( ).<br />
2. Pulsante accesso ai sottomenù ( ).<br />
3. Pulsante risalita da un menù al precedente ( ).<br />
4. Pulsante scorrimento verso il basso menù/valori,<br />
pulsante decremento parametri ( ).<br />
5. Pulsante scorrimento verso l’alto menù\valori, incremento<br />
parametri ( ).<br />
6. Pulsante di conferma variazione parametro ( ).<br />
7. Display di visualizzazione.<br />
N.B.: Alcuni pulsanti possono assumere significati e<br />
funzioni diverse a seconda del contesto visualizzato.<br />
1.1 DESCRIZIONE PULSANTI<br />
Il pulsante (1 Fig. 1-1) permette di modificare la modalità<br />
di funzionamento del sistema e più precisamente:<br />
• Estate (solo gestione del sanitario).<br />
• Estate con raffrescamento (climatizzazione estiva).<br />
• Inverno (climatizzazione invernale).<br />
• Party (tutte le zone vengono portate in modalità<br />
comfort fino al prossimo evento della condizione<br />
“automatico”).<br />
• Stand-by (nessuna richiesta di calore viene passata<br />
ai generatori e al circolatore dell’impianto solare ad<br />
eccezione della protezione antigelo ambiente che verrà<br />
attivata per temperatura ambiente < 5°C).<br />
5
Il pulsante (2 Fig. 1-1) permette di accedere ai sottomenù:<br />
- Menù selezione SetPoint ambiente comfort e ridotto;<br />
- Menù programmazione orologio e fasce orarie (4 fasce<br />
di on-off giornaliere per la temperatura comfort);<br />
- Menù “info”, per visualizzare i dati di ingresso al<br />
“Kit supervisore impianto” (es. temperatura esterna,<br />
temperatura di mandata, set temperatura di mandata,<br />
temperatura sanitario, temperatura sonda solare boiler);<br />
- Storico allarmi;<br />
- Menù assistenza.<br />
Il pulsante (3 Fig. 1-1) permette di risalire da un menù<br />
al precedente.<br />
I pulsanti (4 e 5 Fig. 1-1) permettono di scorrere ciclicamente<br />
i menù presenti sul display. Nella schermata<br />
principale permettono di visualizzare:<br />
- “Set sanitario”;<br />
- “Set ambiente e mandata zona 1”;<br />
- “Set ambiente e mandata zona 2”;<br />
- “Set ambiente e mandata zona 3”;<br />
- “Set ambiente e mandata zona 4”;<br />
Durante la visualizzazione del “Set sanitario”, del “Set<br />
ambiente”, del “Set mandata”, premendo il pulsante<br />
(6 Fig. 1-1) sarà possibile accedere e modificare i dati<br />
visualizzati; alla variazione del valore “Set ambiente” il<br />
dispositivo si porterà in funzionamento manuale fino<br />
al cambio di stato comandato della prima fascia oraria<br />
presente nella condizione “automatico”. La variazione del<br />
“Set sanitario” o del “Set mandata” modificheranno solo<br />
i relativi valori; la variazione del set mandata, nel caso<br />
di utilizzo sonda esterna, sarà recepito dal supervisore<br />
come un offset rispetto al valore determinato dalla retta<br />
impostata. Il set mandata inviato alla pompa di calore e/o<br />
alla caldaia di integrazione sarà pari al valore massimo<br />
impostato ± 15°C.<br />
In caso di intervento di anomalie, pervenute dalla pompa<br />
di calore, comparirà la schermata con visualizzata<br />
l’anomalia corrente e la possibilità di verificarla nel menù<br />
storico allarmi. All’interno di tale menù è possibile resettare<br />
lo storico degli allarmi o inviare il comando di reset<br />
alla macchina (vedi paragrafo 4.2), è possibile inviare un<br />
massimo di 3 ripristini consecutivi; al termine dei tre<br />
tentativi verrà fornita una nuova richiesta di ripristino<br />
dopo un ora.<br />
1.2 DESCRIZIONE DISPLAY<br />
inverno - vengono abilitate le funzioni di riscaldamento<br />
acqua calda sanitaria e riscaldamento<br />
ambiente;<br />
estate - viene abilitata solo la funzione di riscaldamento<br />
acqua calda sanitaria;<br />
temperatura comfort attiva;<br />
funzionamento con programma automatico;<br />
funzionamento con programma manuale;<br />
funzionamento con programma vacanze;<br />
funzionamento con programma risparmio<br />
energetico (ridotta);<br />
simbolo presenza anomalia;<br />
richiesta riscaldamento ambiente in corso;<br />
richiesta acqua calda sanitaria in corso;<br />
raffrescamento e riscaldamento acqua calda<br />
sanitaria;<br />
funzionamento in modalità “Party”;<br />
richiesta riscaldamento e raffrescamento ambiente;<br />
funzionamento pannelli solari in corso;<br />
Impianto in stand-by;<br />
richiesta raffrescamento ambiente in corso;<br />
N.B.: Alcune icone possono assumere significati diversi<br />
a seconda del contesto, vedi i paragrafi successivi per<br />
identificare le funzioni attivate dalla presenza di più icone<br />
contemporaneamente.<br />
6
1.3 MESSA IN FUNZIONE<br />
1.3.1 Programmazione ora e giorno corrente<br />
08:50 VE 10/06/11 M01<br />
Salotto<br />
T: 00.0 °C<br />
U: 00.0 %<br />
per entrare nel menù navi-<br />
Fig. 1-2<br />
Premere il pulsante<br />
gazione.<br />
Premere i pulsanti<br />
“02. FASCE ORARIE”.<br />
M e n ù n a v i g a z i o n e<br />
01. SET-POINT<br />
02. Fasce orarie<br />
03. Info<br />
Fig. 1-3<br />
Premere il pulsante<br />
e Giorno” corrente.<br />
fino a selezionare il menù<br />
per entrare in modalità “Ora<br />
O r o l o g i o K 0 1<br />
Impostazione orologio:<br />
09:50<br />
Venerdì 10/06/11<br />
Fig. 1-4<br />
Premere nuovamente il pulsante per far lampeggiare<br />
il valore indicante le ore.<br />
Premendo le frecce regolare al valore desiderato.<br />
Al termine, premere il pulsante per confermare e<br />
far lampeggiare il valore indicante i minuti.<br />
Procedere quindi nel medesimo modo alla regolazione<br />
dei minuti, del giorno della settimana, del giorno, del<br />
mese e dell’anno.<br />
Al termine premere 2 volte il pulsante per tornare<br />
alla videata principale.<br />
1.4 SELEZIONE MODALITÀ DI FUNZIONAMENTO<br />
Il “Kit supervisore impianto” a seconda della modalità<br />
di funzionamento selezionata, provvede ad eseguire le<br />
richieste dell’utente visualizzandone i risultati sul display.<br />
Mediante la pressione del pulsante si passa in<br />
sequenza dallo stato stand-by, al funzionamento estate,<br />
estate con raffrescamento, inverno e party.<br />
Inoltre è prevista la funzione antigelo nella modalità:<br />
stand-by, estate ed inverno.<br />
1.4.1 Funzionamento in modalità stand-by<br />
Con il “Kit supervisore impianto” in modalità standby<br />
sul display compare il simbolo (vedi fig. 1-5).<br />
L’impianto può funzionare solo in caso di richiesta<br />
antigelo ambiente. In questo stato viene comunque visualizzato<br />
il giorno e l’ora corrente, eventuali anomalie<br />
di funzionamento, la percentuale di umidità presente e<br />
la temperatura ambiente nella zona principale.<br />
N.B.: premendo le frecce è possibile visualizzare<br />
gli stessi parametri per le altre eventuali zone<br />
memorizzate.<br />
08:50 VE 10/06/11 M01<br />
Salotto<br />
T: 00.0 °C<br />
U: 00.0 %<br />
Fig. 1-5<br />
1.4.2 Funzionamento in modalità estate<br />
Mediante la pressione del pulsante si passa al<br />
funzionamento estate ( ) il “Kit supervisore impianto”<br />
abilita l’impianto alla sola produzione di acqua calda<br />
sanitaria escludendo il riscaldamento ambienti (vedi<br />
fig. 1-6). Sul display viene visualizzato il giorno e l’ora<br />
corrente, eventuali anomalie di funzionamento, la temperatura<br />
ambiente e la percentuale di umidità presente<br />
nella zona principale.<br />
N.B.: premendo le frecce è possibile visualizzare<br />
gli stessi parametri per le altre eventuali zone<br />
memorizzate.<br />
08:50 VE 10/06/11 M01<br />
Salotto<br />
T: 00.0 °C<br />
U: 00.0 %<br />
Fig. 1-6<br />
7
1.4.3 Funzionamento in modalità estate con<br />
raffrescamento<br />
Mediante la pressione del pulsante si passa al<br />
funzionamento estate con raffrescamento: il “Kit supervisore<br />
impianto” abilita sia la produzione di acqua calda<br />
sanitaria che il raffrescamento ambienti (vedi fig. 1-7).<br />
Sul display viene visualizzato il giorno e l’ora corrente,<br />
eventuali anomalie di funzionamento, la temperatura<br />
ambiente e la percentuale di umidità presente nella<br />
zona principale.<br />
N.B.: premendo le frecce è possibile visualizzare<br />
gli stessi parametri per le altre eventuali zone<br />
memorizzate.<br />
08:50 VE 10/06/11 M01<br />
Salotto<br />
T: 00.0 °C<br />
U: 00.0 %<br />
1.4.4 Funzionamento in modalità inverno<br />
Mediante la pressione del pulsante si passa al<br />
funzionamento inverno il “Kit supervisore impianto”<br />
abilita sia la produzione di acqua calda sanitaria che<br />
il riscaldamento ambienti (vedi fig. 1-8). Sul display<br />
viene visualizzato il giorno e l’ora corrente, eventuali<br />
anomalie di funzionamento, la temperatura ambiente e<br />
la percentuale di umidità presente nella zona principale.<br />
N.B.: premendo le frecce è possibile visualizzare<br />
gli stessi parametri per le altre eventuali zone<br />
memorizzate.<br />
08:50 VE 10/06/11 M01<br />
Salotto<br />
T: 00.0 °C<br />
U: 00.0 %<br />
Fig. 1-8<br />
Fig. 1-7<br />
Il “Kit supervisore impianto” consente il funzionamento<br />
automatico in raffrescamento in cui un programma<br />
orario gestisce la temperatura ambiente durante le ore<br />
della giornata.<br />
La temperatura ambiente desiderata può essere regolata<br />
su due livelli indipendenti: comfort ( ) e ridotta (<br />
). La distribuzione di tali livelli nell’arco del giorno<br />
o della settimana è gestita dalla programmazione oraria<br />
(vedi Parag. 2.3).<br />
Il “Kit supervisore impianto” è impostato di fabbrica con<br />
un programma standard riportato nella tabella che segue.<br />
Nel caso questo non soddisfi le vostre esigenze è possibile<br />
modificarlo come descritto nei capitoli successivi.<br />
Giorni 28°C 25°C<br />
Lun-Ven<br />
dalle 23 alle 6<br />
dalle 8 alle 11<br />
dalle 13 alle 17<br />
dalle 6 alle 8<br />
dalle 11 alle 13<br />
dalle 17 alle 23<br />
Sab-Dom dalle 23 alle 7 dalle 7 alle 23<br />
N.B.: il sistema è progettato per funzionare su dei<br />
livelli di temperatura comfort e ridotta in funzione del<br />
programma orario impostato. Quindi anche durante il<br />
funzionamento in condizioni di temperatura ambiente<br />
ridotta se la temperatura misurata è maggiore di quella<br />
impostata, l’impianto può accendersi.<br />
Il “Kit supervisore impianto” consente il funzionamento<br />
automatico in riscaldamento in cui un programma<br />
orario gestisce la temperatura ambiente durante le ore<br />
della giornata.<br />
La temperatura ambiente desiderata può essere regolata<br />
su due livelli indipendenti: comfort ( ) e ridotta (<br />
). La distribuzione di tali livelli nell’arco del giorno<br />
o della settimana è gestita dalla programmazione oraria<br />
(vedi Parag. 2.3).<br />
Il “Kit supervisore impianto” è impostato di fabbrica con<br />
un programma standard riportato nella tabella che segue.<br />
Nel caso questo non soddisfi le vostre esigenze è possibile<br />
modificarlo come descritto nei capitoli successivi.<br />
Giorni 16°C 20°C<br />
Lun-Ven<br />
dalle 23 alle 6<br />
dalle 8 alle 11<br />
dalle 13 alle 17<br />
dalle 6 alle 8<br />
dalle 11 alle 13<br />
dalle 17 alle 23<br />
Sab-Dom dalle 23 alle 7 dalle 7 alle 23<br />
N.B.: il sistema è progettato per funzionare su dei<br />
livelli di temperatura comfort e ridotta in funzione del<br />
programma orario impostato. Quindi anche durante il<br />
funzionamento in condizioni di temperatura ridotta se<br />
la temperatura ambiente misurata è minore di quella<br />
impostata, l’impianto può accendersi.<br />
8
1.4.5 Funzionamento in modalità party<br />
Mediante l’ulteriore pressione del pulsante si passa<br />
al funzionamento party il “Kit supervisore impianto”<br />
abilita la produzione di acqua calda sanitaria e porta in<br />
modalità “comfort” tutte le zone fino al prossimo evento<br />
della condizione “automatico” (vedi fig. 1-9). Sul display<br />
viene visualizzato il giorno e l’ora corrente, eventuali<br />
anomalie di funzionamento, la temperatura ambiente e<br />
la percentuale di umidità presente nella zona principale.<br />
La modalità riscaldamento o raffrescamento, dipenderà<br />
dallo stato precedentemente utilizzato.<br />
N.B.: premendo le frecce è possibile visualizzare<br />
gli stessi parametri per le altre eventuali zone<br />
memorizzate.<br />
1.4.7 Funzione antigelo ambiente<br />
N.B.: tale funzione è attiva solo nella modalità inverno,<br />
stand-by e estate.<br />
La funzione antigelo ha la priorità massima rispetto a<br />
qualsiasi altra impostazione. Quando la temperatura<br />
ambiente scende sotto i 5°C viene effettuata una richiesta<br />
riscaldamento al set minimo. Tale situazione rimane attiva<br />
fino a che non si avrà una variazione di temperatura<br />
ambiente di 1°C pari a 6°C misurati nella zona dove è<br />
stata rilevata la temperatura inferiore ai 5°C”.<br />
08:50 VE 10/06/11 M01<br />
Salotto<br />
T: 00.0 °C<br />
U: 00.0 %<br />
Fig. 1-9<br />
1.4.6 Funzionamento automatico forzato<br />
Durante il funzionamento automatico, in qualsiasi<br />
modalità, è possibile modificare manualmente la temperatura<br />
ambiente.<br />
Premere le frecce fino a visualizzare nel display<br />
l’ambiente desiderato (es. Fig. 1-10).<br />
Premere il tasto per far lampeggiare il valore “Set<br />
ambiente”.<br />
Premendo le frecce , regolare al valore desiderato.<br />
Al termine premere il pulsante per confermare<br />
e far lampeggiare il successivo valore di “Offset<br />
mand.” o “Temp. mandata”, dipendente dalla modalità<br />
di regolazione del set di mandata selezionato all’atto<br />
dell’installazione. Procedere quindi nel medesimo modo<br />
per la regolazione di tale valore. In questa modalità la<br />
temperatura ambiente verrà regolata al valore impostato<br />
fino alla successiva fase di accensione o spegnimento del<br />
programma automatico impostato.<br />
08:50 VE 10/06/11 M03<br />
Salotto<br />
T: 20.0 °C<br />
U: 00.0 %<br />
Set ambiente: 25.0 °C<br />
Offset mand.: 04.0 °C<br />
☐ ☐<br />
Fig. 1-10<br />
9
2<br />
PROGRAMMAZIONE “KIT SU-<br />
PERVISORE IMPIANTO”<br />
La programmazione del “Kit supervisore impianto”<br />
permette di impostare / modificare i seguenti parametri:<br />
- temperatura acqua sanitaria;<br />
- livelli di temperatura comfort e ridotta;<br />
- programma orario giornaliero / settimanale di funzionamento/<br />
programma vacanze.<br />
- menù assistenza.<br />
2.1 IMPOSTAZIONE TEMPERATURA ACQUA<br />
SANITARIA<br />
Dalla videata principale, premere le frecce fino<br />
a far comparire sul display il valore della temperatura<br />
sanitaria (Fig. 2-1).<br />
Premere il pulsante<br />
indicante il set sanitari.<br />
Premendo le frecce<br />
per far lampeggiare il valore<br />
regolare al valore desiderato.<br />
Al termine premere nuovamente il pulsante<br />
confermare.<br />
08:50 VE 10/06/11 M02<br />
Sanitario<br />
T: 20.0 °C<br />
Set sanitari: 40.0 °C<br />
Fig. 2-1<br />
per<br />
2.2 IMPOSTAZIONE TEMPERATURA<br />
AMBIENTE COMFORT E RIDOTTA<br />
Premere il pulsante per entrare nel menù navigazione.<br />
Premere i pulsanti fino a selezionare il menù<br />
“01. SET-POINT”.<br />
Premere il pulsante<br />
ambiente (Estate).<br />
per entrare nel primo set<br />
S e t a m b i e n t e D 0 2<br />
ESTATE<br />
Cucina<br />
Comfort: 25.0 °C<br />
Ridotto: 28.0 °C<br />
Umidità: 50.0 %<br />
Fig. 2-3<br />
Premere nuovamente il pulsante per far lampeggiare<br />
il primo valore (Comfort).<br />
Premendo le frecce regolare al valore desiderato.<br />
Al termine premere il pulsante per confermare e<br />
far lampeggiare il valore successivo (Ridotto). Procedere<br />
quindi nel medesimo modo di tale regolazione per poi<br />
passare all’ultimo valore (Umidità).<br />
Premendo il pulsante il cursore non lampeggierà<br />
più e tramite i pulsanti sarà possibile cambiare<br />
videata e passare alla regolazione dei valori dei successivi<br />
set ambienti (Estate con raffrescamento, Inverno) per<br />
ogni zona configurata.<br />
I valori di default saranno 25°/20° (T. comfort estate/<br />
inverno) e 28°/16° (T. ridotta estate/inverno) e del 50%<br />
(umidità).<br />
I limiti per la temperatura ambiente sarà da 5° a 35°<br />
mentre per l’umidità relativa sarà 30% al 60%.<br />
N.B.: i nuovi valori impostati verranno utilizzati alla<br />
prossima variazione della fascia oraria o portando il<br />
sistema momentaneamente in stand-by.<br />
Al termine premere 2 volte il pulsante per tornare<br />
alla videata principale.<br />
M e n ù n a v i g a z i o n e<br />
05. Assistenza<br />
01. SET-POINT<br />
02. Fasce orarie<br />
Fig. 2-2<br />
10
2.3 PROGRAMMAZIONE ORARIO DI<br />
FUNZIONAMENTO IN MODALITÀ<br />
COMFORT<br />
Seguendo i punti di seguito descritti è possibile creare o<br />
modificare il programma orario.<br />
2.3.1 Programma orario giornaliero<br />
per entrare nel menù navi-<br />
Premere il pulsante<br />
gazione.<br />
Premere i pulsanti<br />
“02. FASCE ORARIE”.<br />
M e n ù n a v i g a z i o n e<br />
01. SET-POINT<br />
02. Fasce orarie<br />
03. Info<br />
Fig. 2-4<br />
Premere il pulsante<br />
Premere i pulsanti<br />
“Fasce T. Comfort.”.<br />
fino a selezionare il menù<br />
per entrare nel menù.<br />
fino ad accedere alla videata<br />
F a s c e T . c o m f o r t K 0 2<br />
Z1: Salotto<br />
☐→ LUNEDI’<br />
F1: 00:00 - 00:00<br />
F2: 00:00 - 00:00<br />
F3: 00:00 - 00:00<br />
F4: 00:00 - 00:00<br />
Fig. 2-5<br />
Premere nuovamente il pulsante per far lampeggiare<br />
la zona da programmare (es. Salotto).<br />
Premendo le frecce per variare la zona da<br />
programmare.<br />
Al termine premere il pulsante per confermare e<br />
far lampeggiare il giorno della settimana da regolare.<br />
Premere le frecce per impostare il giorno<br />
desiderato.<br />
Al termine premere il pulsante per confermare e<br />
far lampeggiare l’orario della prima delle 4 fasce con cui<br />
è possibile definire l’orario di accensione e l’orario di<br />
spegnimento dell’impianto per mantenere la temperatura<br />
Comfort.<br />
Premere le frecce per modificare l’orario. Premere<br />
il pulsante per convalidare la modifica.<br />
Procedere quindi nel medesimo modo per impostare le<br />
successive fasce orarie.<br />
Nel caso non si utilizzino tutte e 4 le fasce orarie, impostare<br />
quelle non utilizzate con orario di accensione e<br />
spegnimento sulle “00:00”.<br />
Procedere allo stesso modo per programmare tutti i<br />
giorni della settimana. Nel caso in cui la programmazione<br />
si ripeta è possibile copiarla da un giorno già programmato<br />
seguendo quanto riportato nel paragrafo “2.3.2<br />
Programma orario settimanale”.<br />
2.3.2 Programma orario settimanale<br />
Premere il pulsante per entrare nel menù navigazione.<br />
Premere i pulsanti fino a selezionare il menù<br />
“02. FASCE ORARIE” (Fig. 2-4).<br />
Premere il pulsante per entrare nel menù.<br />
Scorrere le videate con i pulsanti fino ad accedere<br />
al menù “Copia fasce.” (Fig. 2-6).<br />
All’interno di questa videata sarà possibile copiare le<br />
impostazioni di una giornata sugli altri giorni della<br />
stessa zona, oppure copiare le impostazioni di una zona<br />
su una zona diversa.<br />
C o p i a f a s c e K 0 3<br />
Z1: Salotto<br />
L→ Settimana intera<br />
L→ Z1: Salotto<br />
☐ Lu ☐ Ma ☐ Me ☐ Gi<br />
☐ Ve ☐ Sa ☐ Do<br />
Avvia copia fasce: No<br />
Fig. 2-6<br />
Zona da cui copiare le fasce (es. Z1: Salotto)<br />
Premere il pulsante per far lampeggiare la zona da<br />
programmare (es. Z2: Camera da letto).<br />
Premendo le frecce variare la zona da programmare.<br />
Al termine premere nuovamente il pulsante per<br />
confermare e far lampeggiare la funzione “TUTTE”;<br />
tramite il pulsante è possibile selezionare tutti i giorni<br />
della settimana contemporaneamente. Altrimenti scorrere<br />
singolarmente i giorni premendo il pulsante<br />
e tramite il pulsante selezionare il giorno da cui si<br />
vuole copiare le fasce orarie (es da Z1: Salotto) (Fig. 2-5).<br />
Una volta selezionato i giorni da cui copiare le fasce<br />
orarie, premere il pulsante per far lampeggiare la<br />
funzione “Avvia copia fasce”. Premendo il pulsante<br />
comparirà a fianco della scritta “Avvio copia fasce” la<br />
scritta “SI”. Confermare tramite il pulsante l’avvio<br />
della copia.<br />
Al termine premere 2 volte il pulsante per tornare<br />
alla videata principale.<br />
11
2.3.3 Programma vacanze<br />
Premere il pulsante per entrare nel menù navigazione.<br />
Premere i pulsanti fino a selezionare il menù<br />
“02. FASCE ORARIE” (Fig. 2-4).<br />
Premere il pulsante per entrare nel menù.<br />
Scorrere le videate con i pulsanti fino ad accedere<br />
al menù “Fasce orarie”.<br />
F a s c e o r a r i e K 0 4<br />
Periodo vacanza:<br />
30/06/11 - 30/06/11<br />
Abilita vacanza: No<br />
Fig. 2-7<br />
Premere il pulsante per far lampeggiare il valore<br />
indicante la data di inizio della vacanza.<br />
Premendo le frecce , regolare il giorno/mese/e<br />
anno.<br />
Procedere quindi nel medesimo modo alla regolazione<br />
della data di fine vacanza.<br />
La data di inizio e di fine (il riavvio avverrà nel giorno<br />
di fine) andrà ad inibire il funzionamento sanitario e<br />
del riscaldamento/raffrescamento; impostazione del<br />
set riscaldamento a 5°C (tutte le zone) per la gestione<br />
dell’antigelo ambiente. Rimarranno attive tutte le modalità<br />
di funzionamento per la gestione del solare termico,<br />
se attivato nei menù di configurazione.<br />
Al termine premere 2 volte il pulsante per tornare<br />
alla videata principale.<br />
L’attivazione della funzione vacanze viene indicata<br />
dall’accensione dell’icona sulla videata principale<br />
(Fig. 2-8).<br />
08:50 VE 10/06/11 M01<br />
Salotto<br />
T: 00.0 °C<br />
U: 00.0 %<br />
Fig. 2-8<br />
12
3 INFORMAZIONI<br />
Premere il pulsante per entrare nel menù programmazione.<br />
Premere i pulsanti fino a selezionare il menù<br />
“03. INFO” (Fig. 3-1).<br />
M e n ù n a v i g a z i o n e<br />
02. Fasce orarie<br />
03. INFO<br />
04. Storico allarmi<br />
Fig. 3-1<br />
Premere il pulsante per entrare nel menù.<br />
All’interno del menù, utilizzando le frecce , sarà<br />
possibile visualizzare i dati di interesse per l’utente.<br />
- Temperatura sonde pompa di calore<br />
I n f o I 0 1<br />
Temperatura sonde<br />
Pompa di calore<br />
Esterna: 00.0 °C<br />
Mandata: 00.0 °C<br />
Ritorno: 00.0 °C<br />
Fig. 3-2<br />
- Set-point mandata<br />
I n f o I 0 2<br />
SET-POINT MANDATA<br />
Impianto: 00.0 °C<br />
Zona 01: 00.0 °C<br />
- Temperatura sonde sanitario<br />
I n f o I 0 4<br />
Temperatura sonde<br />
Sanitario<br />
T. Acqua: 00.0 °C<br />
Fig. 3-5<br />
- Temperatura sonde delle zone<br />
I n f o I 0 5<br />
Temperatura sonde<br />
Salotto<br />
T. Mandata: 00.0 °C<br />
T. Ambiente: 00.0 °C<br />
U. Ambiente: 000.0 %<br />
Fig. 3-6<br />
- Inverter<br />
08:50 VE 10/06/11 I11<br />
Inverter<br />
Modalità: Standby<br />
Frequenza: 00.0 Hz<br />
Richiesta: 000.0 %<br />
Fig. 3-7<br />
- Rendimento COP macchina<br />
I n f o I 1 2<br />
Calcolo COP<br />
Fig. 3-3<br />
- Punto di rugiada<br />
I n f o I 0 3<br />
PUNTO DI RUGIADA<br />
Zona 01: 00.0 °C<br />
Minimo: 00.000<br />
Audax: 00.000<br />
Fig. 3-8<br />
Fig. 3-4<br />
13
4 DIAGNOSTICA<br />
ED ERRORI”<br />
4.1 DIAGNOSTICA.<br />
Il “Kit supervisore impianto” controlla continuamente<br />
lo stato di funzionamento dell’intero impianto e segnala<br />
eventuali anomalie riportando il corrispondente codice<br />
di errore sul display.<br />
In caso di guasto non resettabile rivolgersi ad un tecnico<br />
abilitato (ad esempio il servizio Assistenza Tecnica<br />
<strong>Immergas</strong>).<br />
Sul display in caso di errore compare il codice dell’allarme<br />
(es. A036, Fig. 4-1), il simbolo e l’icona sopra<br />
il relativo pulsante.<br />
08:50 VE 10/06/11 M01<br />
Salotto<br />
T: 00.0 °C<br />
U: 00.0 % A036<br />
Fig. 4-1<br />
Premere il pulsante per visualizzare lo “Storico<br />
allarmi”; in questa sezione verranno visualizzati gli<br />
allarmi occorsi, non ancora resettati, visualizzati dal più<br />
recente al più vecchio.<br />
Premere le frecce per scorrere e visualizzare tutti<br />
gli allarmi presenti.<br />
S t o r i c o a l l a r m i H 0 1<br />
N° 04 09:50 10/06/11<br />
Fig. 4-2<br />
Allarme off-line<br />
Audax<br />
A036<br />
Le anomalie gestite dal “Kit supervisore impianto” sono:<br />
- Anomalia sonde boiler (superiore, inferiore e per<br />
riscaldamento)<br />
- Anomalie sonda collettore solare<br />
- Anomalia sonde di mandata per le zone<br />
- Anomalia sonda di ritorno (solare)<br />
- Anomalie da pompa di calore<br />
- Anomalia di caldaia<br />
- Funzionamento solare disabilitato<br />
- Anomalia deumidificatore<br />
- Anomalia sonda ambiente e umidità (per tutte le zone)<br />
Se non è intervenuto alcun allarme, è comunque possibile<br />
consultare lo “Storico allarmi” procedendo come<br />
descritto di seguito:<br />
- premere il pulsante ;<br />
- scorrere con i pulsanti il menù navigazione e<br />
selezionare “04. STORICO ALLARMI”.<br />
M e n ù n a v i g a z i o n e<br />
03. Info<br />
04. STORICO ALLARMI<br />
05. Assistenza<br />
Fig. 4-3<br />
- Premere il pulsante per entrare nel menù.<br />
Oltre ai codici errori riferiti allo stato di funzionamento<br />
dell’impianto il “Kit supervisore impianto” controlla il<br />
proprio stato di funzionamento segnalando eventuali<br />
malfunzionamenti.<br />
4.2 RESET ERRORI<br />
Premere il pulsante per visualizzare lo “Storico<br />
allarmi” o tramite il menù di navigazione (Fig. 4-3).<br />
Tenendo premuto il tasto RES (Fig. 4-2) verrà visualizzata<br />
la videata in cui sarà possibile resettare lo storico degli<br />
allarmi e della pompa di calore (Fig. 4-4).<br />
S t o r i c o a l l a r m i H 0 2<br />
Reset storico?<br />
Reset all. Audax:<br />
Fig. 4-4<br />
No<br />
No<br />
Premere il pulsante per far lampeggiare l’opzione<br />
“Reset storico”.<br />
Premendo le frecce sarà possibile confermare<br />
(SI) o annullare (NO) l’eventuale reset. Al termine, premere<br />
il pulsante per confermare e far lampeggiare<br />
l’opzione “Reset all. Audax”. Procedere quindi nel medesimo<br />
modo per resettare gli eventuali allarmi della pompa.<br />
Al termine premere 2 volte il pulsante per tornare<br />
alla videata principale.<br />
14
5 MENÙ<br />
ASSISTENZA<br />
Premere il pulsante per entrare nel menù navigazione.<br />
Premere i pulsanti fino a selezionare il menù<br />
“05. ASSISTENZA” (Fig. 5-1).<br />
M e n ù n a v i g a z i o n e<br />
04. Storico allarmi<br />
05. ASSISTENZA<br />
01. Set-point<br />
Fig. 5-1<br />
Premere il pulsante per entrare nel menù.<br />
Da questa videata si avrà la possibilità di accedere a sottomenù<br />
per la gestione e configurazione dei parametri di<br />
lavoro per le periferiche installate nell’impianto. Alcuni<br />
di questi sottomenù sono protetti da codice (solo ad<br />
esclusivo uso del tecnico <strong>Immergas</strong>) mentre altri sono<br />
visibili anche dall’utente.<br />
I sottomenù utilizzabili dall’utente sono:<br />
• Lingua; sarà possibile scegliere il linguaggio da utilizzare<br />
nell’applicativo (italiano o inglese)<br />
Premere le frecce e selezionare “01. Lingua”.<br />
Premere il pulsante per entrare nel sottomenù.<br />
L i n g u a L 0 1<br />
Lingua corrente:<br />
• Informazione; sarà possibile visualizzare la versione<br />
del software e firmware del dispositivo.<br />
Premere le frecce e selezionare “02. Informazioni”.<br />
Premere il pulsante per entrare nel sottomenù.<br />
I n f o r m a t i o n N 0 1<br />
Codice software:<br />
SZIMMGI01 - rev. beta6<br />
del 27/05/11<br />
Fig. 5-3<br />
Premendo le frecce sarà possibile visualizzare<br />
le varie versioni.<br />
Al termine premere il pulsante per tornare al menù<br />
“ASSISTENZA”.<br />
• SetPoint; All’interno del menù è possibile impostare<br />
i setpoint per la pompa di calore, raffrescamento e<br />
riscaldamento, che verranno utilizzati nel caso in cui<br />
non sia abilitato l’utilizzo della sonda esterna.<br />
Premere le frecce e selezionare “03. SET-<br />
POINT”.<br />
Premere il pulsante per entrare nel sottomenù.<br />
S e t - p o i n t m a n d a t a S 0 1<br />
Raffrescam.: 20.0 °C<br />
Riscaldam.: 40.0 °C<br />
ITALIANO<br />
Fig. 5-4<br />
Fig. 5-2<br />
Premere nuovamente il pulsante per far lampeggiare<br />
la lingua da modificare.<br />
Premendo le frecce selezionare la lingua desiderata.<br />
Al termine premere il pulsante per tornare al menù<br />
“ASSISTENZA”.<br />
Al termine premere il pulsante<br />
“ASSISTENZA”.<br />
per tornare al menù<br />
15
• Ore di funzionamento; sarà possibile leggere le ore<br />
di funzionamento della pompa di calore, del riscaldamento<br />
ausiliario e della pompa del solare.<br />
Premere le frecce<br />
ZIONAMENTO”.<br />
Premere il pulsante<br />
e selezionare “04. ORE FUN-<br />
per entrare nel sottomenù.<br />
O r e f u n z i o n a m e n t o H 0 1<br />
P. di calore: 0000000 h<br />
Fig. 5-5<br />
Premendo le frecce sarà possibile visualizzare<br />
le ore di funzionamento dei dispositivi utilizzati<br />
nell’impianto.<br />
Al termine premere il pulsante per tornare al menù<br />
“ASSISTENZA”.<br />
5.1 FUNZIONI PROTETTE DA CODICE<br />
I sottomenù elencati di seguito, presenti nel menù “05.<br />
ASSISTENZA” (Fig. 5-1) sono impostazioni di carattere<br />
avanzato (riservate ad un tecnico abilitato) e per accedervi<br />
è necessario inserire una password.<br />
- Termoregolazione.<br />
- Sanitario.<br />
- Definizione impianto.<br />
- Solare.<br />
- Integrazione.<br />
- Configurazione BMS.<br />
- Impostazione contatore.<br />
- Gestione manuale.<br />
- Inizializzazione.<br />
16
6<br />
SCHEMI<br />
IDRAULICI<br />
6.1 SCHEMA IDRAULICO CON POMPA DI CALORE E CALDAIA.<br />
Legenda:<br />
A13 Gestore impianto<br />
A14-1 Comando di zona<br />
A14-2 Comando di zona<br />
A14-3 Comando di zona<br />
A14-4 Comando di zona<br />
A15-1 Espansione zona 1<br />
A15-2 Espansione zona 2<br />
A15-3 Espansione zona 3<br />
A15-4 Espansione zona alta<br />
temperatura<br />
B2 Sonda boiler<br />
B3-1 Sonda mandata zona 1<br />
B3-2 Sonda mandata zona 2<br />
B3-3 Sonda mandata zona 3<br />
B11 Sonda collettore solare<br />
B11-2 Sonda collettore<br />
solare 2<br />
B12 Sonda bolitore solare<br />
Fig. 6-1<br />
17
6.2 SCHEMA IDRAULICO CON POMPA DI CALORE E RESISTENZA ELETTRICA.<br />
Legenda:<br />
A13 Gestore impianto<br />
A14-1 Comando di zona<br />
A14-2 Comando di zona<br />
A14-3 Comando di zona<br />
A15-1 Espansione zona 1<br />
A15-2 Espansione zona 2<br />
A15-3 Espansione zona 3<br />
B2 Sonda boiler<br />
B3-1 Sonda mandata zona 1<br />
B3-2 Sonda mandata zona 2<br />
B3-3 Sonda mandata zona 3<br />
B11 Sonda collettore solare<br />
B11-2 Sonda collettore solare 2<br />
B12 Sonda bolitore solare<br />
Fig. 6-2<br />
18
7<br />
SCHEMI<br />
ELETTRICI<br />
7.1 SCHEMA ELETTRICO KIT GESTORE CON ESPANSIONI, COMANDI DI ZONA E<br />
INTEGRAZIONE CON RESISTENZA.<br />
Fig. 7-1<br />
Legenda:<br />
A13 Supervisore impianto<br />
A14-1 Controllo zona 1 B.T. (opt)<br />
A14-2 Controllo zona 2 B.T. (opt)<br />
A14-3 Controllo zona 3 B.T. (opt)<br />
A15-1 Espansione zona 1 B.T. (opt)<br />
A15-2 Espansione zona 2 B.T. (opt)<br />
A15-3 Espansione zona 3 B.T. (opt)<br />
B2 Sonda sanitario (opt)<br />
B11-1 Sonda collettore solare 1 (opt)<br />
B11-2 Sonda collettore solare 2 (opt)<br />
B12 Sonda boiler solare (opt)<br />
K1 Relè res. integr. impianto (opt)<br />
K2 Relè res. integr. sanitario (opt)<br />
M6 Circolatore circuito solare (opt)<br />
M50 Valvola tre vie precedenza (opt)<br />
S20 Termostato ambiente (opt)<br />
T1 Trasformatore (opt)<br />
19
7.2 SCHEMA ELETTRICO KIT GESTORE CON ESPANSIONI, COMANDI DI ZONA, ALTA<br />
TEMPERATURA E INTEGRAZIONE CON CALDAIA.<br />
Fig. 7-2<br />
Legenda:<br />
A13 Supervisore impianto<br />
A14-1 Controllo zona 1 B.T. (opt)<br />
A14-2 Controllo zona 2 B.T. (opt)<br />
A14-3 Controllo zona 3 B.T. (opt)<br />
A14-4 Controllo zona A.T. (opt)<br />
A15-1 Espansione zona 1 B.T. (opt)<br />
A15-2 Espansione zona 2 B.T. (opt)<br />
A15-3 Espansione zona 3 B.T. (opt)<br />
A15-4 Espansione zona A.T. (opt)<br />
B2 Sonda sanitario (opt)<br />
B11-1 Sonda collettore solare 1 (opt)<br />
B11-2 Sonda collettore solare 2 (opt)<br />
B12 Sonda boiler solare (opt)<br />
M6 Circolatore circuito solare (opt)<br />
M50 Valvola tre vie precedenza (opt)<br />
S20 Termostato ambiente (opt)<br />
T1 Trasformatore (opt)<br />
20
7.3 SCHEMA ELETTRICO KIT GESTORE CON ALTA TEMPERATURA, 2 CIRCOLATORI SOLARI E<br />
INTEGRAZIONE CON CALDAIA.<br />
Fig. 7-3<br />
Legenda:<br />
A13 Supervisore impianto<br />
A15-4 Espansione puffer e solare<br />
B2 Sonda sanitario (opt)<br />
B11-1 Sonda collettore solare 1 (opt)<br />
B11-2 Sonda collettore solare 2 (opt)<br />
B12 Sonda boiler solare (opt)<br />
B20 Sonda ritorno solare (opt)<br />
M6-1 Circolatore circuito solare 1 (opt)<br />
M6-2 Circolatore circuito solare 2 (opt)<br />
M50 Valvola tre vie sanit. (opt)<br />
S20 Termostato ambiente B.T. (opt)<br />
S20-4 Termostato ambiente A.T. (opt)<br />
T1 Trasformatore 24 Vac (opt)<br />
Y5 Comando zona A.T. (opt)<br />
Y6 Comando integrazione (opt)<br />
21
Dear Client,<br />
Our compliments for having chosen a top-quality <strong>Immergas</strong> product, able to assure well-being and safety for a long<br />
period of time.<br />
As an <strong>Immergas</strong> customer you can also count on a qualified after-sales service, prepared and updated to guarantee<br />
constant efficiency of your "System supervisor kit".<br />
We would like to supply you with some important indications, the respect of which will confirm your satisfaction with<br />
the <strong>Immergas</strong> product:<br />
• Read the following pages carefully: you will obtain useful suggestions regarding the correct use of the appliance.<br />
• For any interventions or routine maintenance contact "<strong>Immergas</strong> Authorised Centres": they have original<br />
spare parts and specific preparation.<br />
INDEX<br />
page<br />
Foreword.............................................................................................................................................................................24<br />
General recommendations...............................................................................................................................................24<br />
Case cleaning......................................................................................................................................................................24<br />
Warning...............................................................................................................................................................................24<br />
1 Description of controls..............................................................................................................................................25<br />
1.1 Description of the buttons........................................................................................................................................25<br />
1.2 Description of display................................................................................................................................................26<br />
1.3 Start-up........................................................................................................................................................................27<br />
1.3.1 Programming current day and time...................................................................................................................27<br />
1.4 Selection of functioning mode.................................................................................................................................27<br />
1.4.1 Operation in stand-by mode................................................................................................................................27<br />
1.4.2 Functioning in summer mode.............................................................................................................................27<br />
1.4.3 Functioning in summer mode will cooling.......................................................................................................28<br />
1.4.4 Functioning in winter mode................................................................................................................................28<br />
1.4.5 Operation in "Party" mode...................................................................................................................................29<br />
1.4.6 Forced automatic functioning..............................................................................................................................29<br />
1.4.7 Room anti-freeze function...................................................................................................................................29<br />
2 Programming the “system supervisor kit”..............................................................................................................30<br />
2.1 DHW temperature setting........................................................................................................................................30<br />
2.2 Setting comfort and reduced room temperature...................................................................................................30<br />
2.3 Programming the operating time in comfort mode..............................................................................................31<br />
2.3.1 Programming the daily time schedule................................................................................................................31<br />
2.3.2 Programming the weekly time schedule............................................................................................................31<br />
2.3.3 Holiday program....................................................................................................................................................32<br />
3 Information.................................................................................................................................................................33<br />
4 Diagnostics and errors”.............................................................................................................................................34<br />
4.1 Diagnostics..................................................................................................................................................................34<br />
4.2 Reset errors.................................................................................................................................................................34<br />
5 Support menu.............................................................................................................................................................35<br />
5.1 Functions protected by code.....................................................................................................................................36<br />
6 Hydraulic diagrams ...................................................................................................................................................37<br />
6.1 Hydraulic diagram with heat pump and boiler......................................................................................................37<br />
6.2 Hydraulic diagram with heat pump and electric resistance.................................................................................38<br />
7 Electrical diagrams ....................................................................................................................................................39<br />
7.1 Electrical diagram of the operator kit with expansions, area controls and integration with resistance.........39<br />
7.2 Electrical diagram of the operator kit with expansions, area controls, high temperature and integration with<br />
boiler............................................................................................................................................................................40<br />
7.3 Electrical diagram of the operator kit with high temperature, 2 solar pumps and integration with boiler...41<br />
23
FOREWORD<br />
The programmable “<strong>Immergas</strong>” “System supervisor<br />
kit” has been designed to guarantee ideal temperature<br />
conditions at any time of the day and night for each<br />
individual day of the week by always using the most<br />
cost-effective source of energy based on the features of<br />
the components installed and environmental conditions.<br />
Controls include:<br />
1. Direct system without mixing valves and dehumidifier<br />
with integration or through resistance or boiler<br />
and solar system managed with a sloping roof.<br />
2. System coveting up to 3 areas, with 3-point mixer<br />
and management of a high temperature area with<br />
integration via a boiler.<br />
3. System covering 2 mixer areas with 3-point mixer,<br />
includeing the features mentioned above and 1 fixed.<br />
4. Like the previous cases but with the possibility of<br />
managing the solar part of the two sloping roofs and<br />
running a high temperature zone.<br />
5. Like the previous cases but with the possibility of<br />
managing a puffer for the solar integration of the<br />
heating system.<br />
The customer can modify the basic program according<br />
to requirements.<br />
Programming of the "System supervisor kit" is extremely<br />
easy and a wide display allows constant control of all<br />
values set.<br />
GENERAL RECOMMENDATIONS<br />
This manual has been drawn-up for the User.<br />
• Carefully read the warnings contained in this document<br />
as they are required to indicate the use of the<br />
"System supervisor kit" envisioned by the design<br />
hypothesis, the technical features, programming,<br />
adjustment and use instructions.<br />
• The system must be in compliance with the IEC Standards<br />
in force.<br />
• The instruction manual must be considered a part<br />
of the "System supervisor kit" and must be “kept for<br />
future reference”.<br />
• The "System supervisor kit" is intended only for the use<br />
for which it has been expressly designed. Any other use<br />
must be considered improper and therefore dangerous.<br />
• Our products are realised in compliance with the Safety<br />
Standards in force, it is therefore recommended to use<br />
all those devices or attentions in a way that injury/<br />
damage is not caused to persons or objects.<br />
• Do not remove parts of the "System supervisor kit"<br />
when it is operating.<br />
• Do not use the "System supervisor kit" exposed to heat<br />
sources or under the scorching sun.<br />
• The manufacture is relieved from any liability in the<br />
following cases:<br />
a) Incorrect installation.<br />
b) Operating defects of the equipment on which the<br />
"System supervisor kit" is applied.<br />
c) Unauthorised modifications or interventions.<br />
d) Total or partial failure to comply with instructions.<br />
e) Exceptional events etc.<br />
CASE CLEANING<br />
To clean the case of "System supervisor kit" use damp<br />
cloths. Never use abrasive or powder detergents.<br />
WARNING<br />
<strong>Immergas</strong> reserves the right to make improvements<br />
and modifications to details and accessories, excepting<br />
the essential features of the model described and<br />
illustrated herein.<br />
24
1<br />
DESCRIPTION<br />
OF CONTROLS<br />
7<br />
1<br />
2<br />
3<br />
4<br />
5<br />
6<br />
Fig. 1-1<br />
Key:<br />
1. Button to edit the summer/winter/party/standby<br />
operating mode ( ).<br />
2. Button to access the submenus ( ).<br />
3. Button to go back to the previous menu ( ).<br />
4. Button to scroll down the menu/values, button to<br />
decrease parameters ( ).<br />
5. Button to scroll up the menu/values, increase parameters<br />
( ).<br />
6. Button to confirm the parameter changed ( ).<br />
7. Display.<br />
N.B.:Some buttons may take on different meanings and<br />
functions according to the context displayed.<br />
1.1 DESCRIPTION OF THE BUTTONS<br />
The button (1 Figure 1-1) allows to change the operating<br />
mode of the system, namely:<br />
• Summer (DHW control only).<br />
• Summer with cooling (summer air conditioning).<br />
• Winter (winter air conditioning).<br />
• Party (all the areas are set to comfort mode until the<br />
next event of the “automatic” condition).<br />
• Standby (no demand for heat is passed to the generatos<br />
and the pump of the solar system,with the exception<br />
of the anti-freeze protection that will be activated for<br />
ambient temperature
The button (2 Figure 1-1) provides access to the submenus:<br />
- Menu comfort and reduced room SetPoint;<br />
- Menu to program clock and time ranges (4 daily on-off<br />
ranges for the comfort temperature);<br />
- “Info” menu to display the data entering the “System<br />
supervisor kit” (eg. outside temperature, flow temperature,<br />
set flow temperature, DHW temperature, storage<br />
tank solar probe temperature);<br />
- Alarm log;<br />
- Support menu.<br />
The button (3 Fig. 1-1) allows to go back to the previous<br />
menu.<br />
The buttons (4 and 5 Fig. 1-1) allow you to cyclically<br />
scroll through the menus on the display. In the main<br />
screen they display the:<br />
- “DHW set”;<br />
- “Area 1 room e flow set”;<br />
- “Area 2 room e flow set”;<br />
- “Area 3 room e flow set”;<br />
- “Area 4 room e flow set”;<br />
While viewing the “SHW set”, the “Room set”, the “Flow<br />
set”, by pressing the button (6 Fig. 1-1) you can access<br />
and edit the data displayed. When the “Room set” value<br />
is changed, the device will go to manual mode until the<br />
set status change of the first time range in “automatic”<br />
mode. The change of the “DHW set” or the “Flow set”<br />
will only change the relative values; changing the flow<br />
set when using external probe, will be implemented<br />
by the supervisor as an offset with respect to the value<br />
determined by the line set. The flow set sent sent to the<br />
heat pump and/or integration boiler will be equal to the<br />
maximum value set ± 15°C.<br />
In the case of anomalies sent to the heat pump, you will<br />
see a screen displaying the current anomaly and the<br />
possibility of checking it in the alarm log menu. Inside<br />
this menu you can reset the alarm log or send the reset<br />
command to the machine (see paragraph 4.2). You can<br />
send a maximum of 3 consecutive resets; after three<br />
attempts a new reset request will be sent after an hour.<br />
1.2 DESCRIPTION OF DISPLAY<br />
winter - DHW heating and room central heating<br />
buttons are enabled;<br />
summer - only the DHW central heating function<br />
is enabled;<br />
comfort temperature active;<br />
operation with automatic program;<br />
operation with manual program;<br />
functioning with holiday timer program;<br />
operation with energy saving program (reduced);<br />
anomaly symbol;<br />
room central heating request in progress;<br />
request for DHW in progress;<br />
cooling and DHW heating;<br />
operation in "Party" mode;<br />
room central heating and cooling request;<br />
solar panels operation in progress;<br />
System in stand-by;<br />
room central cooling request in progress;<br />
N.B.: Some icons can assume different meanings according<br />
to the context, see the successive paragraphs to<br />
identify the functions activated by the presence of several<br />
icons at the same time.<br />
26
1.3 START-UP<br />
1.3.1 Programming current day and time<br />
<br />
08:50 FRI 10/06/11 M01<br />
Sitting room<br />
T: 00.0 °C<br />
H: 00.0 %<br />
Fig. 1-2<br />
Press the button to enter the navigation menu.<br />
Press the buttons until you select the “02. TIME<br />
RANGES” menu.<br />
Navigation<br />
menu<br />
01. SET-POINT<br />
02. Time ranges<br />
03. Info<br />
1.4 SELECTION OF FUNCTIONING MODE<br />
According to the functioning mode selected, the "System<br />
supervisor kit" performs the requests of the user, displaying<br />
the results on the display.<br />
By pressing the button you switch through the<br />
stand-by, summer operation, summer cooling, winter<br />
and party status.<br />
Moreover, there is an anti-freeze function with a standby,<br />
summer and winter mode.<br />
1.4.1 Operation in stand-by mode<br />
With the “System supervisor kit” in stand-by mode the<br />
symbol appears on the display (see fig. 1-5). The<br />
system can only operate in the event of room anti-freeze<br />
request. In this status, the day, current time, any operating<br />
anomalies, the percentage of humidity and room<br />
temperature in the main area are displayed.<br />
N.B.: by pressing the arrows you can view the<br />
same parameters for any other areas saved.<br />
<br />
08:50 FRI 10/06/11 M01<br />
Sitting room<br />
T: 00.0 °C<br />
H: 00.0 %<br />
Fig. 1-3<br />
Press the<br />
Day" mode.<br />
button to enter the current "Time and<br />
Clock<br />
K01<br />
Setting the clock:<br />
09:50<br />
Friday 10/06/11<br />
Fig. 1-4<br />
Press the button again so that the value indicating<br />
the time starts to flash.<br />
Adjust the desired value by pressing the arrows.<br />
At the end, press the button to confirm, so that the<br />
value indicating the minutes starts to flash.<br />
Proceed in the same way to adjust the minutes, day of<br />
the week, day, month and year.<br />
At the end, press the button twice to go back to<br />
the main screen.<br />
Fig. 1-5<br />
1.4.2 Functioning in summer mode<br />
By pressing the button you can switch to the summer<br />
operating mode( ). The “System supervisor kit”<br />
enables the system to generate DHW only and excludes<br />
room heating (see fig. 1-6). The day, current time, any<br />
operating anomalies, the percentage of humidity and<br />
room temperature in the main area are displayed.<br />
N.B.: by pressing the arrows you can view the<br />
same parameters for any other areas saved.<br />
<br />
08:50 FRI 10/06/11 M01<br />
Sitting room<br />
T: 00.0 °C<br />
H: 00.0 %<br />
Fig. 1-6<br />
27
1.4.3 Functioning in summer mode will cooling<br />
By pressing the button, you can switch to the<br />
summer operationg with cooling: the "System supervisor<br />
kit" enables the production of domestic hot water and<br />
cooling of rooms (see fig. 1-7). The day, current time,<br />
any operating anomalies, the percentage of humidity<br />
and room temperature in the main area are displayed.<br />
N.B.: by pressing the arrows you can view the<br />
same parameters for any other areas saved.<br />
<br />
08:50 FRI 10/06/11 M01<br />
Sitting room<br />
T: 00.0 °C<br />
H: 00.0 %<br />
1.4.4 Functioning in winter mode<br />
By pressing the button you can switch to the winter<br />
operating mode. The “System supervisor kit” enables<br />
the system to generate DHW and the room heating (see<br />
fig. 1-8). The day, current time, any operating anomalies,<br />
the percentage of humidity and room temperature in the<br />
main area are displayed.<br />
N.B.: by pressing the arrows you can view the<br />
same parameters for any other areas saved.<br />
<br />
08:50 FRI 10/06/11 M01<br />
Sitting room<br />
T: 00.0 °C<br />
H: 00.0 %<br />
Fig. 1-7<br />
The "System supervisor kit" allows automatic operation<br />
in cooling mode, in which a time-based program manages<br />
the room temperature during the hours of the day.<br />
The desired room temperature can be adjusted onto two<br />
independent levels: comfort ( ) and reduced ( ).<br />
The distribution of these levels during the day or week is<br />
managed by the time-base programming (see Parag. 2.3).<br />
The "System supervisor kit" is factory-set with a standard<br />
program stated in the table that follows. If this should<br />
not satisfy requirements, it is possible to modify it as<br />
described in the following chapters.<br />
Days 28°C 25°C<br />
Mon - Fri<br />
from 23 to 6<br />
from 8 to 11<br />
from 13 to 17<br />
from 6 to 8<br />
from 11 to 13<br />
from 17 to 23<br />
Sat - Sun from 23 to 7 from 7to 23<br />
N.B.: the system is designed to function on comfort<br />
and reduced temperature levels depending on the hour<br />
program set. Therefore also during functioning in reduced<br />
temperature conditions, if the room temperature<br />
measured is above that set, the system can switch-on.<br />
Fig. 1-8<br />
The "System supervisor kit" allows automatic operation<br />
in heating mode, in which a time-based program manages<br />
the room temperature during the hours of the day.<br />
The desired room temperature can be adjusted onto two<br />
independent levels: comfort ( ) and reduced ( ).<br />
The distribution of these levels during the day or week is<br />
managed by the time-base programming (see Parag. 2.3).<br />
The "System supervisor kit" is factory-set with a standard<br />
program stated in the table that follows. If this should<br />
not satisfy requirements, it is possible to modify it as<br />
described in the following chapters.<br />
Days 16°C 20°C<br />
Mon - Fri<br />
from 23 to 6<br />
from 8 to 11<br />
from 13 to 17<br />
from 6 to 8<br />
from 11 to 13<br />
from 17 to 23<br />
Sat - Sun from 23 to 7 from 7to 23<br />
N.B.: the system is designed to function on comfort<br />
and reduced temperature levels depending on the hour<br />
program set. Therefore also during functioning in reduced<br />
temperature conditions, if the room temperature<br />
measured is lower that the set temperature, the system<br />
can switch-on.<br />
28
1.4.5 Operation in "Party" mode<br />
By pressing the button again you can switch<br />
to the party operating mode. The “System supervisor<br />
kit” enables the system to generate DHW and sets all<br />
the areas in "comfort" mode until the next event of the<br />
"automatic" condition (see fig. 1-9). The day, current time,<br />
any operating anomalies, the percentage of humidity<br />
and room temperature in the main area are displayed.<br />
The heating or cooling mode will depend on the status<br />
previously used.<br />
N.B.: by pressing the arrows you can view the<br />
same parameters for any other areas saved.<br />
<br />
08:50 FRI 10/06/11 M01<br />
Sitting room<br />
T: 00.0 °C<br />
H: 00.0 %<br />
1.4.7 Room anti-freeze function<br />
N.B.: this function is only active in winter, stand-by and<br />
summer mode.<br />
The anti-freeze function has maximum priority with<br />
respect to other settings. When the room temperature<br />
drops below 5°C a central heating request is sent to the<br />
minimum set. This situation remains active until there<br />
is a variation in room temperature of 1°C equal to 6°C<br />
measured in the room where the temperature below<br />
5°C was detected.<br />
Fig. 1-9<br />
1.4.6 Forced automatic functioning<br />
It is possible to manually change the room temperature<br />
during automatic operation, in any mode.<br />
Press the arrows until the desired room appears<br />
on the display (eg. Fig. 1-10).<br />
Press the button so that the "Room set" value set<br />
starts to flash.<br />
Adjust the desired value by pressing the arrows.<br />
When finished, press the button to confirm, so<br />
that the next value, "Flow offset" or "Flow temp." starts<br />
to flash, depending on the adjustment mode of the flow<br />
set selected at the time of installation. Proceed in the<br />
same way to adjust this value. In this mode, the room<br />
temperature will be regulated to the value set until the<br />
next switch-on or switch-off phase of the automatic<br />
program set.<br />
<br />
08:50 FRI 10/06/11 M03<br />
Sitting room<br />
T: 20.0 °C<br />
H: 00.0 %<br />
Room set: 25.0 °C<br />
Flow offset: 04.0 °C<br />
☐ ☐<br />
Fig. 1-10<br />
29
2<br />
PROGRAMMING THE “SYSTEM<br />
SUPERVISOR KIT”<br />
Programming the “System supervisor kit” allows to set/<br />
modify the following parameters:<br />
- DHW temperature;<br />
- comfort and reduced temperature levels;<br />
- programming daily / weekly operating time / holiday<br />
program.<br />
- support menu.<br />
2.1 DHW TEMPERATURE SETTING<br />
On the main screen, press the arrows until the<br />
domestic hot water temperature value appears on the<br />
display (Fig. 2-1).<br />
Press the button so that the value indicating the<br />
DHW set starts to flash.<br />
Adjust the desired value by pressing the<br />
At the end, press the<br />
<br />
button to confirm.<br />
arrows.<br />
08:50 FRI 10/06/11 M02<br />
Domestic hot water<br />
T: 20.0 °C<br />
DHW set: 40.0 °C<br />
Fig. 2-1<br />
2.2 SETTING COMFORT AND REDUCED<br />
ROOM TEMPERATURE<br />
Press the button to enter the navigation menu.<br />
Press the buttons until you select the “01. SET-<br />
POINT” menu.<br />
Press the button to enter the first room set (Summer).<br />
<br />
Set room D02<br />
SUMMER<br />
Kitchen<br />
Comfort: 25.0 °C<br />
Reduced: 28.0 °C<br />
Humidity: 50.0 %<br />
Fig. 2-3<br />
Press the button again so that the first value (Comfort)<br />
starts to flash.<br />
Adjust the desired value by pressing the arrows.<br />
At the end, press the button to confirm, so<br />
that the next value starts to flash (Reduced). Proceed in<br />
the same way to adjust the value and then go to the last<br />
value (Humidity).<br />
By pressing the button the cursor will stop flashing<br />
and by using the buttons it is possible to change<br />
the screen and go to next set of values of the next room<br />
sets (Summer with cooling, Winter) set up for each area.<br />
The default values are 25°/20° (comfortable T. for summer/winter)<br />
and 28°/16° (reduced T. for summer/winter)<br />
and 50% (humidity).<br />
The limit for the ambient temperature is 5° to 35° while<br />
the relative humidity is 30% to 60%.<br />
N.B.: the new values set will be used the next time slot is<br />
changed or by temporarily setting the system to stand-by.<br />
At the end, press the<br />
the main screen.<br />
button twice to go back to<br />
Navigation menu<br />
05. Support<br />
01. SET-POINT<br />
02. Time ranges<br />
Fig. 2-2<br />
30
2.3 PROGRAMMING THE OPERATING TIME<br />
IN COMFORT MODE<br />
By following the points described below, it is possible to<br />
create or modify the time program.<br />
2.3.1 Programming the daily time schedule<br />
Press the button to enter the navigation menu.<br />
Press the buttons until you select the “02. TIME<br />
RANGES” menu.<br />
Navigation menu<br />
01. SET-POINT<br />
02. Time ranges<br />
03. Info<br />
Fig. 2-4<br />
Press the button to enter the menu.<br />
Press the buttons to access the “T. Comfort.<br />
Ranges” screen<br />
Comfort T. ranges<br />
K02<br />
Z1: Sitting room<br />
☐→ MONDAY<br />
F1: 00:00 - 00:00<br />
F2: 00:00 - 00:00<br />
F3: 00:00 - 00:00<br />
F4: 00:00 - 00:00<br />
Fig. 2-5<br />
Press the button again so that the area to program<br />
(eg. Sitting Room) starts to flash.<br />
Change the area to program by pressing the<br />
arrows.<br />
At the end, press the button to confirm, so that the<br />
day of the week to adjust starts to flash.<br />
Set the desired day by pressing the arrows.<br />
When finished, press the button to confirm and<br />
the time of the first of the 4 ranges - with which you can<br />
define the time to start and stop the system to maintain<br />
the Comfort temperature - start to flash.<br />
Use the arrows to adjust the time. Press the<br />
button to confirm.<br />
Proceed in the same way to set the next time ranges.<br />
If you are not using all 4 time ranges, set the on and off<br />
time of unused ranges to “00:00”.<br />
Follow the same procedure to program every day of the<br />
week. If you need to set the same program, you can copy<br />
it from one day that has already been programmed by<br />
following the instructions given in section “2.3.2 Programming<br />
the weekly time schedule”.<br />
2.3.2 Programming the weekly time schedule<br />
Press the button to enter the navigation menu.<br />
Press the buttons until you select the “02. TIME<br />
RANGES” (Fig. 2-4) menu.<br />
Press the button to enter the menu.<br />
Scroll through the screens using the buttons<br />
until you access the “Copy ranges” menu (Fig. 2-6).<br />
Within this screen you can copy the settings of a day on<br />
other days of the same area, or you can copy the settings<br />
of an area on a different area.<br />
<br />
Copy ranges K03<br />
Z1: Sitting room<br />
L→ Whole week<br />
L→ Z1: Sitting room<br />
☐ Mon ☐ Tues ☐ Wed ☐ Thus<br />
☐ Fri ☐ Sat ☐ Sun<br />
Start copy ranges: No<br />
Fig. 2-6<br />
Area from which it is necessary to copy the ranges (eg.<br />
A1: Sitting room)<br />
Press the button so that the area to program (eg.<br />
Z2: Bedroom) starts to flash.<br />
Change the area to program by pressing the<br />
arrows.<br />
At the end, press the button to confirm, so that the<br />
function “ALL” starts to flash; by using the button<br />
it is possible to simultaneously select all the days of the<br />
week. Otherwise scroll through each day by pressing the<br />
button and using the button select the day on<br />
which you want to copy the time ranges (eg. from Z1:<br />
Sitting room) (Fig. 2-5).<br />
Once you have selected the day from which you wish to<br />
copy the time ranges, press the button, so that “Start<br />
range copy” starts to flash. Pressing the button “YES”<br />
will appear next to “Starting to copy ranges”. Confirm<br />
you intend to start copying by pressing the button.<br />
At the end, press the button twice to go back to<br />
the main screen.<br />
31
2.3.3 Holiday program<br />
Press the button to enter the navigation menu.<br />
Press the buttons until you select the “02. TIME<br />
RANGES” (Fig. 2-4) menu.<br />
Press the button to enter the menu.<br />
Scroll through the screens using the buttons<br />
until you access the “Time ranges” menu.<br />
<br />
Time ranges K04<br />
Holiday period:<br />
30/06/11 - 30/06/11<br />
Enable holiday: No<br />
Fig. 2-7<br />
Press the button so that the value indicating the<br />
date the holiday starts begins to flash.<br />
Adjust the day/month/year by pressing the<br />
arrows.<br />
Proceed in the same way to adjust the holiday end date.<br />
The start and end date (the system will restart on the<br />
end date) will prevent DHW and heating/cooling from<br />
operation; the heating will be set at 5°C (all areas) to manage<br />
the anti-freeze function. All the operating modes to<br />
manage the solar heating system will continue to operate,<br />
if enabled in the configuration menu.<br />
At the end, press the button twice to go back to<br />
the main screen.<br />
The activation of the holiday function is indicated by the<br />
flashing of the icon and the main screen (Fig. 2-8).<br />
<br />
08:50 FRI 10/06/11 M01<br />
Sitting room<br />
T: 00.0 °C<br />
U: 00.0 %<br />
Fig. 2-8<br />
32
3 INFORMATION<br />
Press the button to enter the programming menu.<br />
Press the buttons until you select the “03. INFO”<br />
menu (Fig. 3-1).<br />
Navigation menu<br />
02. Time ranges<br />
03. INFO<br />
04. Alarm log<br />
Fig. 3-1<br />
Press the button to enter the menu.<br />
You will be able to view the data of interest to you inside<br />
the menu using the arrows.<br />
- Heat pump probes temperature<br />
I n f o I 0 1<br />
Probe temperature<br />
Heat pump<br />
External: 00.0 °C<br />
Flow: 00.0 °C<br />
Return: 00.0 °C<br />
Fig. 3-2<br />
- Flow set point<br />
I n f o I 0 2<br />
FLOW SET-POINT<br />
System: 00.0 °C<br />
Area 01: 00.0 °C<br />
- Domestic hot water probe temperature<br />
I n f o I 0 4<br />
Probe temperature<br />
Domestic hot water<br />
Water T: 00.0 °C<br />
Fig. 3-5<br />
- Area probes temperature<br />
I n f o I 0 5<br />
Probe temperature<br />
Sitting room<br />
Flow T: 00.0 °C<br />
Room T: 00.0 °C<br />
Room U: 000.0 %<br />
Fig. 3-6<br />
- Inverter<br />
08:50 VE 10/06/11 I11<br />
Inverter<br />
Mode: Standby<br />
Frequency: 00.0 Hz<br />
Demand: 000.0 %<br />
Fig. 3-7<br />
- Machine COP performance<br />
I n f o I 1 2<br />
COP calculation<br />
Fig. 3-3<br />
- Dew point<br />
I n f o I 0 3<br />
DEW POINT<br />
Area 01: 00.0 °C<br />
Minimum: 00.000<br />
Audax: 00.000<br />
Fig. 3-8<br />
Fig. 3-4<br />
33
4<br />
DIAGNOSTICS<br />
AND ERRORS”<br />
4.1 DIAGNOSTICS.<br />
The "System supervisor kit" continually controls the functioning<br />
status of the whole system and signals any anomalies,<br />
stating the corresponding error code on the display.<br />
In the case of a fault that cannot be reset, contact a qualified<br />
technician (e.g. the <strong>Immergas</strong> After-Sales Technical<br />
Assistance Service).<br />
In the event of an error, the display shows the alarm code<br />
(eg. A036, Fig. 4-1) , the symbol and the icon<br />
above the corresponding button.<br />
<br />
08:50 FRI 10/06/11 M01<br />
Sitting room<br />
T: 00.0 °C<br />
H: 00.0 % A036<br />
Fig. 4-1<br />
Press the button to display the "Alarm log". Yhis<br />
section displays the alarms that occurred and which<br />
have not been reset yet, and these are displayed from<br />
the newest to the oldest.<br />
Press the arrows to scroll through and view all<br />
the alarms available.<br />
If none of the alarms have tripped, you can still browse<br />
through the "Alarm log" as illustrated below:<br />
- press the button;<br />
- using the buttons scroll though the navigation<br />
menu and select "04. ALARMS LOG".<br />
Navigation menu<br />
03. Info<br />
04. ALARM LOG<br />
05. Support<br />
Fig. 4-3<br />
- Press the button to enter the menu.<br />
As well as the error codes referring to the functioning<br />
state of the system, the "System supervisor kit" also checks<br />
its own functioning state, indicating any malfunctions.<br />
4.2 RESET ERRORS<br />
Press the button to view the "Alarms log" or using<br />
the navigation menu (Fig. 4-3).<br />
While pressing the RES button (Fig. 4-2) the display<br />
shows the screen where you can reset the alarm and the<br />
heat pump log (Fig. 4-4).<br />
Alarm log<br />
H02<br />
Alarm log H01<br />
N° 04 09:50 10/06/11<br />
Allarm off-line<br />
Audax<br />
A036<br />
Reset log?<br />
Reset all. Audax:<br />
Fig. 4-4<br />
No<br />
No<br />
Fig. 4-2<br />
The anomalies managed by the "System supervisor<br />
kit" are:<br />
- Boiler probes anomaly (top, bottom and for heating)<br />
- Solar collector probe anomaly<br />
- Flow probe for the areas anomaly<br />
- Return probe anomaly (solar)<br />
- Heat pump anomalies<br />
- Boiler anomaly<br />
- Solar functioning disabled<br />
- Dehumidifier anomaly<br />
- Room and humidity sensor anomaly (for all areas)<br />
Press the button so that the "Reset log" option<br />
starts to flash.<br />
By pressing the arrows you can confirm (YES)<br />
or cancel (NO) the reset. At the end, press the<br />
button to confirm, so that the "Reset all. Audax" starts<br />
to flash. Proceed in the same way to adjust any alarms<br />
related to the pump.<br />
At the end, press the button twice to go back to<br />
the main screen.<br />
34
5 SUPPORT<br />
MENU<br />
Press the button to enter the navigation menu.<br />
Press the buttons until you select the “05. SUP-<br />
PORT” menu (Fig. 5-1).<br />
Navigation menu<br />
04. Alarm log<br />
05. SUPPORT<br />
01. Set-point<br />
• Information; the display shows the software and<br />
firmware version of the device.<br />
Press the arrows and select “02. Information”.<br />
Press the button to enter the submenu.<br />
Information<br />
N01<br />
Software code:<br />
SZIMMGI01 - rev. beta6<br />
dated 27/05/11<br />
Fig. 5-3<br />
Fig. 5-1<br />
Press the button to enter the menu.<br />
From this screen you can access the submenus to manage<br />
and setup the operating parameters for the devices<br />
installed on the system. Some of these submenus are<br />
protected by a code (to be used by <strong>Immergas</strong> technical<br />
stall only) while others are visible to the user, too.<br />
The submenus that can be accessed by the user are:<br />
• Language; it is possible to select the language to use in<br />
the application (Italian or English)<br />
Press the arrows and select “01. Language”.<br />
Press the button to enter the submenu.<br />
You can view the various versions by pressing the<br />
arrows.<br />
At the end, press the button to go back to the<br />
“SUPPORT” menu.<br />
• SetPoint;Inside the menu you can set the setpoints for<br />
the heat pump, cooling and heating, which will be used<br />
if the use of the external probe has not been enabled.<br />
Press the arrows and select “03. SET-POINT”.<br />
Press the button to enter the submenu.<br />
Flow set point S01<br />
Cooling: 20.0 °C<br />
Heating: 40.0 °C<br />
Language<br />
Current language:<br />
L01<br />
ITALIAN<br />
Fig. 5-4<br />
Fig. 5-2<br />
Press the button again so that the language you<br />
need to change starts to flash.<br />
Select the desired language by pressing the<br />
arrows.<br />
At the end, press the button to go back to the<br />
“SUPPORT” menu.<br />
At the end, press the<br />
“SUPPORT” menu.<br />
button to go back to the<br />
35
• Operating hours; it is possible read the operating hours<br />
of the heat pump, the auxiliary heating system and the<br />
solar pump.<br />
Press the arrows and select “04. OPERATING<br />
HOURS”.<br />
Press the button to enter the submenu.<br />
Operating hours<br />
H01<br />
Heat pump: 0000000 h<br />
Fig. 5-5<br />
You can view the operating hours of the devices used in<br />
the system by pressing the arrows.<br />
At the end, press the button to go back to the<br />
“SUPPORT” menu.<br />
5.1 FUNCTIONS PROTECTED BY CODE<br />
The submenus listed below, included in the “05. SUP-<br />
PORT” menu (Fig. 5-1) are advanced settings (reserved<br />
to an enabled technician) and a password is required to<br />
access them.<br />
- Heat adjustment.<br />
- Domestic hot water.<br />
- System definition.<br />
- Solar.<br />
- Integration.<br />
- BMS setup.<br />
- Meter setting.<br />
- Manual operations.<br />
- Initialisation.<br />
36
6<br />
HYDRAULIC<br />
DIAGRAMS<br />
6.1 HYDRAULIC DIAGRAM WITH HEAT PUMP AND BOILER.<br />
Key:<br />
A13 System operator<br />
A14-1 Area control<br />
A14-2 Area control<br />
A14-3 Area control<br />
A14-4 Area control<br />
A15-1 Area 1 expansion<br />
A15-2 Area 2 expansion<br />
A15-3 Area 3 expansion<br />
A15-4 High temperature<br />
area expansion<br />
B2 Storage tank probe<br />
B3-1 Area 1 flow probe<br />
B3-2 Area 2 flow probe<br />
B3-3 Area 3 flow probe<br />
B11 Solar collector probe<br />
B11-2 Solar collector probe 2<br />
B12 Solar storage tank probe<br />
Fig. 6-1<br />
37
6.2 HYDRAULIC DIAGRAM WITH HEAT PUMP AND ELECTRIC RESISTANCE.<br />
Key:<br />
A13 System operator<br />
A14-1 Area control<br />
A14-2 Area control<br />
A14-3 Area control<br />
A15-1 Area 1 expansion<br />
A15-2 Area 2 expansion<br />
A15-3 Area 3 expansion<br />
B2 Storage tank probe<br />
B3-1 Area 1 flow probe<br />
B3-2 Area 2 flow probe<br />
B3-3 Area 3 flow probe<br />
B11 Solar collector probe<br />
B11-2 Solar collector probe 2<br />
B12 Solar storage tank probe<br />
Fig. 6-2<br />
38
7<br />
ELECTRICAL<br />
DIAGRAMS<br />
7.1 ELECTRICAL DIAGRAM OF THE OPERATOR KIT WITH EXPANSIONS, AREA CONTROLS AND<br />
INTEGRATION WITH RESISTANCE.<br />
Fig. 7-1<br />
230 vac<br />
power supply<br />
MIXING KIT<br />
N.B. Configure the<br />
addresses as indicated<br />
in the instruction book<br />
24 vac<br />
power supply<br />
Key:<br />
A13 System supervisor<br />
A14-1 Area 1 B.T. control (opt)<br />
A14-2 Area 2 B.T. control (opt)<br />
A14-3 Area 3 B.T. control (opt)<br />
A15-1 Area 1 B.T. expansion (opt)<br />
A15-2 Area 2 B.T. expansion (opt)<br />
A15-3 Area 3 B.T. expansion (opt)<br />
B2 DHW probe (opt)<br />
B11-1 Solar collector probe 1 (opt)<br />
B11-2 Solar collector probe 2 (opt)<br />
B12 Solar storage tank probe (opt)<br />
K1 System integr. res. relay (opt)<br />
GENERAL ALARM<br />
INPUT<br />
REMOVE TO<br />
CONNECT T.A.<br />
K2 DHW integr. res. relay (opt)<br />
M6 Solar circuit pump (opt)<br />
M50 Priority three-way valve (opt)<br />
S20 Room thermostat (opt)<br />
T1 Transformer (opt)<br />
39
7.2 ELECTRICAL DIAGRAM OF THE OPERATOR KIT WITH EXPANSIONS, AREA CONTROLS,<br />
HIGH TEMPERATURE AND INTEGRATION WITH BOILER.<br />
Fig. 7-2<br />
230 vac 50 Hz<br />
power supply<br />
MIXING KIT<br />
N.B. Configure the<br />
addresses as indicated in<br />
the instruction book<br />
24 vac 50 Hz<br />
power supply<br />
Key:<br />
A13 System supervisor<br />
A14-1 Area 1 B.T. control (opt)<br />
A14-2 Area 2 B.T. control (opt)<br />
A14-3 Area 3 B.T. control (opt)<br />
A14-4 Area A.T. control (opt)<br />
A15-1 Area 1 B.T. expansion (opt)<br />
A15-2 Area 2 B.T. expansion (opt)<br />
A15-3 Area 3 B.T. expansion (opt)<br />
A15-4 Area A.T. expansion (opt)<br />
B2 DHW probe (opt)<br />
B11-1 Solar collector probe 1 (opt)<br />
B11-2 Solar collector probe 2 (opt)<br />
GENERAL ALARM<br />
INPUT<br />
REMOVE TO<br />
CONNECT T.A.<br />
B12 Solar storage tank probe (opt)<br />
M6 Solar circuit pump (opt)<br />
M50 Priority 3-way valve (opt)<br />
S20 Room thermostat (opt)<br />
T1 Transformer (opt)<br />
BOILERS<br />
With Victrix 26 and 12 kW<br />
boilers the board must be<br />
replaced with that without<br />
resistance R2<br />
40
7.3 ELECTRICAL DIAGRAM OF THE OPERATOR KIT WITH HIGH TEMPERATURE, 2 SOLAR<br />
PUMPS AND INTEGRATION WITH BOILER.<br />
Fig. 7-3<br />
REMOVE TO<br />
CONNECT T.A.<br />
Key:<br />
A13 System supervisor<br />
A15-4 Puffer and solar expansion<br />
B2 DHW probe (opt)<br />
B11-1 Solar collector probe 1 (opt)<br />
B11-2 Solar collector probe 2 (opt)<br />
B12 Solar storage tank probe (opt)<br />
B20 Solar return probe (opt)<br />
M6-1 Solar circuit pump 1 (opt)<br />
AT THE ZONE<br />
CONTROLS<br />
AT THE ZONE<br />
EXPANSIONS<br />
M6-2 Solar circuit pump 2 (opt)<br />
M50 DHW three-way valve (opt)<br />
S20 B.T. room thermostat (opt)<br />
S20-4 A.T. room thermostat (opt)<br />
T1 24 Vac transformer (opt)<br />
Y5 A.T. area control (opt)<br />
Y6 Integration control (opt)<br />
GENERAL ALARM<br />
INPUT<br />
REMOVE TO<br />
CONNECT T.A.<br />
230 vac 50 Hz<br />
power supply<br />
BOILERS<br />
With Victrix 26 and 12 kW<br />
boilers the board must be<br />
replaced with that without<br />
resistance R2<br />
41
Il libretto istruzioni è realizzato in carta ecologica.<br />
Cod. 1.033105 rev. 15.036414/001 - 07/2011<br />
<strong>Immergas</strong> S.p.A.<br />
42041 Brescello (RE) - Italy<br />
Tel. 0522.689011<br />
Fax 0522.680617<br />
immergas.com