catalogo generale 1 - OML accessori per il bagno
catalogo generale 1 - OML accessori per il bagno
catalogo generale 1 - OML accessori per il bagno

You also want an ePaper? Increase the reach of your titles
YUMPU automatically turns print PDFs into web optimized ePapers that Google loves.
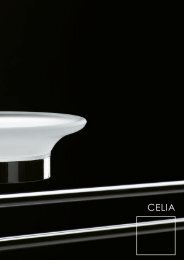
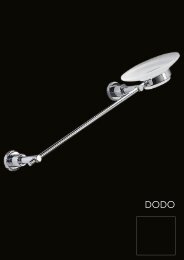
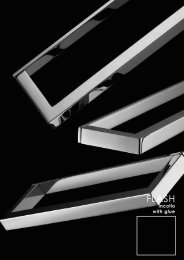
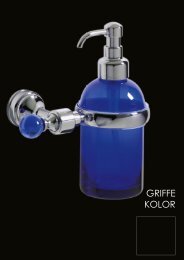
COLLEZIONE GLUE<br />
Realizzata in due versioni ad incollo, come da istruzioni<br />
qui a fianco <strong>per</strong> chi non vuole forare le pareti, fac<strong>il</strong>e da<br />
intallare. Tutti lo possono fare, con la possib<strong>il</strong>ità di rimuovere<br />
l'<strong>accessori</strong>o anche dopo tanto tempo senza danneggiare<br />
le piastrelle e lo stesso <strong>accessori</strong>o. Realizziamo anche<br />
la versione con fissaggio a tasselli tradizionale da (pag<br />
16) di questo <strong>catalogo</strong>. Nelle due versioni sono previsti i<br />
Complementi in ceramica bianca rotondi e quadrati. Le<br />
parti metalliche sono in ottone ed alluminio nella versione<br />
cromato lucido, sono disponib<strong>il</strong>i anche Piantane in 22<br />
versioni diverse.<br />
GLUE COLLECTION<br />
Two versions ava<strong>il</strong>able: gluing <strong>accessori</strong>es (as <strong>per</strong> instructions<br />
sideways), suitable for those pleople who do not want<br />
to <strong>per</strong>forate the wall. They are easy to glue on the wall,<br />
everybody can do it by themselves. The <strong>accessori</strong>es can<br />
be removed after a long time without damaging either<br />
the t<strong>il</strong>es or the accessory itself. Fixing <strong>accessori</strong>es, we also<br />
produce a version with traditional fixing plugs (from page<br />
16 of this Catalogue). Both versions include round-shaped<br />
and square-shaped complements made of White Ceramic.<br />
The metal parts are made of Polished Chromium-plated<br />
Brass or Aluminium. Stands are also ava<strong>il</strong>able in 22 different<br />
items.<br />
COLLECTION GLUE<br />
Réalisée en deux versions: à coller, selon les mode d’emploi<br />
de côté, pour ceux qui ne veulent pas <strong>per</strong>cer les murs,<br />
fac<strong>il</strong>e à installer pour touts. On peux enlever l’accessoire<br />
longtemps après sans endommager les carreaux ou<br />
l’accessoire. Nous réalisons aussi la version avec chev<strong>il</strong>les<br />
de fixation traditionnel, de la page 16 de ce Catalogue.<br />
Les deux versions comprennent les compléments en<br />
Céramique Blanche de forme Rondes et Carrée. Les pièces<br />
métalliques sont en cuivre et aluminium chromés luisants.<br />
Les colonnes sont aussi disponible en 22 versions différents.<br />
KOLLEKTION GLUE<br />
Kollektion Glue in zwei Klebeausführungen, laut den<br />
nebenstehenden Anweisungen. Die Te<strong>il</strong>e sind von allen<br />
denjenigen, die keine Löcher in die Wände bohren<br />
wollen, einfach zu installieren. Das Zubehörte<strong>il</strong> kann auch<br />
nach längerer Zeit, ohne die Fliesen oder das Te<strong>il</strong> selbst zu<br />
beschädigen, entfernt werden. Wir liefern ebenfalls ein<br />
Modell mit traditioneller Dübelbefestigung, ab Seite 16<br />
dieses Katalogs. In den beiden Ausführungen sind runde und<br />
viereckige Ergänzungen aus weißer Keramik vorgesehen.<br />
Die Metallte<strong>il</strong>e sind in den Ausführungen verchromt/<br />
glänzend aus Messing und Aluminium. Es sind ebenfalls<br />
Ständer in 22 verschiedenen Ausführungen lieferbar.<br />
COLECCIÓN GLUE<br />
Realizada en dos versiones: para pegar, según las<br />
instrucciones al lado, para quienes no quieren <strong>per</strong>forar las<br />
paredes, de fác<strong>il</strong> instalación para todos, después de mucho<br />
tiempo los <strong>accessori</strong>os se pueden quitar sin estropear ni<br />
los azulejos ni el <strong>accessori</strong>o en sí. Realizamos también la<br />
versión tradicional con tacos para fijar el <strong>accessori</strong>o a<br />
la pared, desde la página 16 de este Catálogo. Ambas<br />
versiones incluyen los Complementos en Cerámica Blanca<br />
Redondos y Cuadrados. Las partes metálicas son de Latón<br />
y Aluminio Cromados Br<strong>il</strong>lantes. También están disponibles<br />
los elementos de pies en 22 versiones diferentes.<br />
1<br />
2<br />
3<br />
4<br />
5<br />
6<br />
7<br />
8<br />
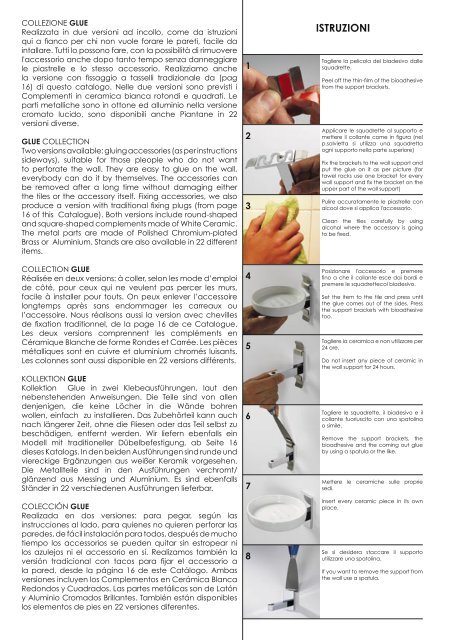
ISTRUZIONI<br />
Togliere la pelicola del biadesivo dalle<br />
squadrette.<br />
Peel off the thin-f<strong>il</strong>m of the bioadhesive<br />
from the support brackets.<br />
Applicare le squadrette al supporto e<br />
mettere <strong>il</strong> collante come in figura (nel<br />
p.salvietta si ut<strong>il</strong>izza una squadretta<br />
ogni supporto nella parte su<strong>per</strong>iore)<br />
Fix the brackets to the wall support and<br />
put the glue on it as <strong>per</strong> picture (for<br />
tawel racks use one bracket for every<br />
wall support and fix the bracket on the<br />
up<strong>per</strong> part of the wall support)<br />
Pulire accuratamente le piastrelle con<br />
alcool dove si applica l'<strong>accessori</strong>o.<br />
Clean the t<strong>il</strong>es carefully by using<br />
alcohol where the accessory is going<br />
to be fixed.<br />
Posizionare l'<strong>accessori</strong>o e premere<br />
fino a che <strong>il</strong> collante esce dai bordi e<br />
premere le squadrettecol biadesivo.<br />
Set the item to the t<strong>il</strong>e and press unt<strong>il</strong><br />
the glue comes out of the sides. Press<br />
the support brackets with bioadhesive<br />
too.<br />
Togliere la ceramica e non ut<strong>il</strong>izzare <strong>per</strong><br />
24 ore.<br />
Do not insert any piece of ceramic in<br />
the wall support for 24 hours.<br />
Togliere le squadrette, <strong>il</strong> biadesivo e <strong>il</strong><br />
collante fuoriuscito con una spatolina<br />
o sim<strong>il</strong>e.<br />
Remove the support brackets, the<br />
bioadhesive and the coming out glue<br />
by using a spatula or the like.<br />
Mettere le ceramiche sulle proprie<br />
sedi.<br />
Insert every ceramic piece in its own<br />
place.<br />
Se si desidera staccare <strong>il</strong> supporto<br />
ut<strong>il</strong>izzare una spatolina.<br />
If you want to remove the support from<br />
the wall use a spatula.