drive - Leister
drive - Leister
drive - Leister

You also want an ePaper? Increase the reach of your titles
YUMPU automatically turns print PDFs into web optimized ePapers that Google loves.
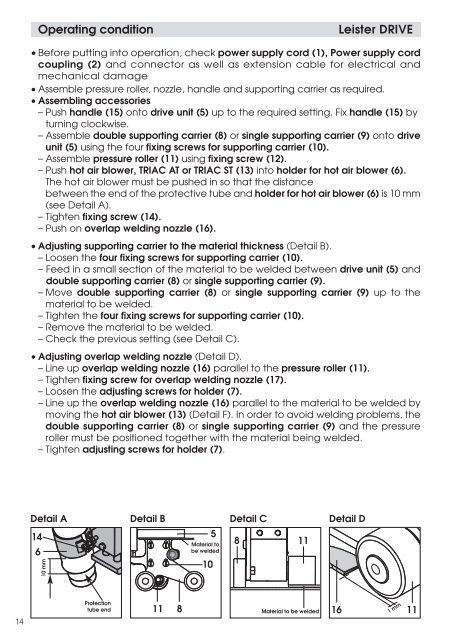
Operating condition<br />
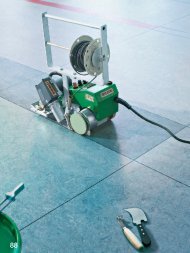
<strong>Leister</strong> DRIVE<br />
• Before putting into operation, check power supply cord (1), Power supply cord<br />
coupling (2) and connector as well as extension cable for electrical and<br />
mechanical damage<br />
• Assemble pressure roller, nozzle, handle and supporting carrier as required.<br />
• Assembling accessories<br />
– Push handle (15) onto <strong>drive</strong> unit (5) up to the required setting. Fix handle (15) by<br />
turning clockwise.<br />
– Assemble double supporting carrier (8) or single supporting carrier (9) onto <strong>drive</strong><br />
unit (5) using the four fixing screws for supporting carrier (10).<br />
– Assemble pressure roller (11) using fixing screw (12).<br />
– Push hot air blower, TRIAC AT or TRIAC ST (13) into holder for hot air blower (6).<br />
The hot air blower must be pushed in so that the distance<br />
between the end of the protective tube and holder for hot air blower (6) is 10 mm<br />
(see Detail A).<br />
– Tighten fixing screw (14).<br />
– Push on overlap welding nozzle (16).<br />
• Adjusting supporting carrier to the material thickness (Detail B).<br />
– Loosen the four fixing screws for supporting carrier (10).<br />
– Feed in a small section of the material to be welded between <strong>drive</strong> unit (5) and<br />
double supporting carrier (8) or single supporting carrier (9).<br />
– Move double supporting carrier (8) or single supporting carrier (9) up to the<br />
material to be welded.<br />
– Tighten the four fixing screws for supporting carrier (10).<br />
– Remove the material to be welded.<br />
– Check the previous setting (see Detail C).<br />
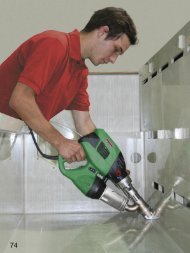
• Adjusting overlap welding nozzle (Detail D).<br />
– Line up overlap welding nozzle (16) parallel to the pressure roller (11).<br />
– Tighten fixing screw for overlap welding nozzle (17).<br />
– Loosen the adjusting screws for holder (7).<br />
– Line up the overlap welding nozzle (16) parallel to the material to be welded by<br />
moving the hot air blower (13) (Detail F). In order to avoid welding problems, the<br />
double supporting carrier (8) or single supporting carrier (9) and the pressure<br />
roller must be positioned together with the material being welded.<br />
– Tighten adjusting screws for holder (7).<br />
Detail A Detail B Detail C Detail D<br />
14<br />
6<br />
10 mm<br />
10<br />
5<br />
Material to<br />
be welded<br />
8 11<br />
14<br />
Protection<br />
tube end<br />
11<br />
8<br />
Material to be welded<br />
16<br />
1 mm11