Snooper+ WOW! 5.0.0 - WOW! Würth Online World GmbH
Snooper+ WOW! 5.0.0 - WOW! Würth Online World GmbH
Snooper+ WOW! 5.0.0 - WOW! Würth Online World GmbH

You also want an ePaper? Increase the reach of your titles
YUMPU automatically turns print PDFs into web optimized ePapers that Google loves.
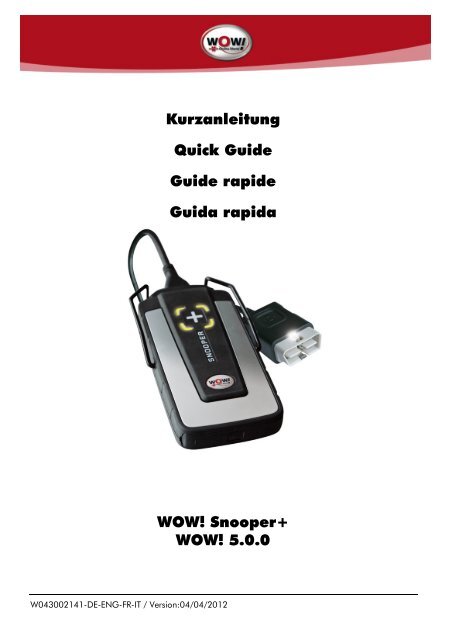
Kurzanleitung<br />
Quick Guide<br />
Guide rapide<br />
Guida rapida<br />
<strong>WOW</strong>! <strong>Snooper+</strong><br />
<strong>WOW</strong>! <strong>5.0.0</strong><br />
W043002141-DE-ENG-FR-IT / Version:04/04/2012
1 Beschreibung <strong>Snooper+</strong> ............................................................................................... 2<br />
1.1 Signalbeschreibung Anzeige ......................................................................................... 3<br />
1.2 Technische Daten ......................................................................................................... 5<br />
1.3 Zubehör ...................................................................................................................... 6<br />
2 Erste Schritte ............................................................................................................... 7<br />
2.1 Software installieren ..................................................................................................... 7<br />
2.2 Software registrieren .................................................................................................... 7<br />
2.3 <strong>Snooper+</strong> Konfiguration ............................................................................................... 8<br />
2.3.1 Firmware Update ............................................................................................... 9<br />
3 Erste Diagnose .......................................................................................................... 10<br />
1 Description of hardware ............................................................................................. 12<br />
1.1 Display signal description ........................................................................................... 13<br />
1.2 Minimum computer requirements ................................................................................ 14<br />
1.3 Specifications ............................................................................................................. 15<br />
1.4 Accessoires ................................................................................................................ 16<br />
2 First steps ................................................................................................................. 17<br />
2.1 Installing software ...................................................................................................... 17<br />
2.2 Registering software ................................................................................................... 17<br />
2.3 Program settings ........................................................................................................ 18<br />
2.3.1 Firmware update.............................................................................................. 19<br />
3 First diagnosis ........................................................................................................... 20<br />
1 Description du matériel .............................................................................................. 22<br />
1.1 Affichage description du signal ................................................................................... 23<br />
1.2 Configuration minimale pour l'ordinateur .................................................................... 24<br />
1.3 Caractéristiques techniques......................................................................................... 25<br />
1.4 Accessoires ................................................................................................................ 26<br />
2 Premiers pas ............................................................................................................. 27<br />
2.1 Installation du logiciel ................................................................................................ 27<br />
2.2 Enregistrement du logiciel ........................................................................................... 27<br />
2.3 Configuration programme .......................................................................................... 29<br />
2.3.1 Mise à jour du micrologiciel .............................................................................. 30<br />
3 Premier diagnostic ..................................................................................................... 31<br />
1 Descrizione hardware ................................................................................................ 32<br />
1.1 Descrizione segnale Indicatore .................................................................................... 33<br />
1.2 Requisiti minimi per il computer .................................................................................. 34<br />
1.3 Dati tecnici ................................................................................................................ 35<br />
1.4 Accessori ................................................................................................................... 36<br />
2 Primi passi ............................................................................................................... 37<br />
2.1 Installazione del software ............................................................................................ 37<br />
2.2 Registrazione del software .......................................................................................... 37<br />
2.3 Impostazioni .............................................................................................................. 39<br />
2.3.1 Aggiornamento firmware .................................................................................. 40<br />
3 Prima diagnosi.......................................................................................................... 41<br />
- 1 -
1 Beschreibung <strong>Snooper+</strong><br />
1. OBD 16-pin OBD-II Stecker (SAE J1962)<br />
mit integrierter Beleuchtung<br />
2. Mehrfarbige Anzeige<br />
zeigt Status der Verbindung und der<br />
Kommunikation<br />
2<br />
1<br />
3. Micro SD-Kartenschacht<br />
Für Speicherkarte Typ Micro SD<br />
4. Flight Recorder Taster<br />
Für Start / Stopp und setzen einer Markierung<br />
(Trigger) während der Flightrecorder<br />
Aufzeichnung<br />
5. USB-Anschluss<br />
3<br />
4<br />
5<br />
- 2 -
1.1 Signalbeschreibung Anzeige<br />
Funktion Farbe Kommentar Sound<br />
Spannung Weiß Dauerlicht bei Spannungsversorgung Still<br />
PC-<br />
Verbindung<br />
Diagnose<br />
Blau Bei USB oder Bluetooth Verbindung Still<br />
Grün /<br />
Blau<br />
Bei aktiver Diagnosesitzung<br />
Grün / Blau im Wechsel (50%)<br />
Sound<br />
Beschreibung<br />
Still<br />
Diagnose<br />
PC<br />
Verbindung<br />
verloren<br />
Grün /<br />
Blau<br />
blinkend<br />
Verlorene PC Verbindung wird nur<br />
bei aktiver Diagnose angezeigt<br />
Warnton!<br />
PC<br />
Verbindung<br />
verloren<br />
4 kurze hohe<br />
Töne<br />
Spannung / Batterie niedrig<br />
Batterie<br />
niedrig<br />
Aktuelle<br />
Farbe /<br />
Rot<br />
blinkend<br />
PC-Verbindung / Batterie niedrig<br />
Flightrecorder / Batterie niedrig<br />
Warnton!<br />
Batterie<br />
niedrig<br />
4 kurze tiefe<br />
Töne<br />
Batterie<br />
niedrig und<br />
PC<br />
Verbindung<br />
verloren<br />
Flightrecorder<br />
Start OK<br />
FR Start Nicht<br />
OK<br />
Grün,<br />
Rot und<br />
Blau<br />
blinkend<br />
Gelb<br />
Diagnose / Batterie niedrig<br />
Flightrecorder Session gestartet,<br />
Daten werden nicht gespeichert<br />
(Kommunikation wird aufgebaut)<br />
- Keine gültige FR Konfiguration<br />
FR Stop - Stoppt Flightrecorder Session<br />
FR Datenaufzeichnung<br />
FR Datenaufzeichnung<br />
keine gültige<br />
Antwort<br />
FR Trigger -<br />
Keine<br />
Firmware<br />
Gelb<br />
Lauflicht<br />
-<br />
Rot<br />
Keine gültige Antwort innerhalb 10<br />
ECU Anfragen<br />
Benutzer drückt Taster, um<br />
Markierung zu setzen<br />
- 3 -<br />
Bestätigung<br />
FR-Start<br />
Bestätigung<br />
FR keine<br />
Konfiguration<br />
Bestätigung<br />
FR-Stop<br />
Warnton!<br />
FR keine<br />
gültigen<br />
Daten<br />
Bestätigung<br />
FR-Trigger<br />
4 tiefe, Pause,<br />
4 hohe Töne<br />
Langer tiefer<br />
Ton<br />
Langer tiefer<br />
Ton<br />
Still<br />
1 kurzer<br />
niedriger Ton<br />
1 kurzer hoher<br />
Ton<br />
Still
Laden<br />
Firmware<br />
Wächter -<br />
Rot<br />
Blinkt in Bezug auf<br />
Datenübertragung<br />
Kontrollmechanismus, Verhinderung<br />
das die Einheit sich aufhängt<br />
Warnton!<br />
Wächter<br />
Still<br />
Verschiedene<br />
Töne<br />
Mindestanforderungen für den Computer:<br />
Intel® Pentium® II 400 MHz (oder vergleichbar)<br />
Windows 7, Windows Vista®, Windows 2000 SP4, Windows® XP(*) SP3<br />
512 MB RAM<br />
1500 MB freier Festplattenplatz<br />
Bildschirm mit einer Auflösung von 800 x 600<br />
DVD-Laufwerk<br />
Internetzugang<br />
Bluetooth (SPP) oder USB<br />
Microsoft .NET Framework 3.5<br />
Adobe Acrobat Reader 4.0 oder höher<br />
HINWEIS!<br />
Es werden sowohl 32-Bit als auch 64-Bit-Betriebssystemen unterstützt, beachten Sie, dass 64-Bit<br />
Betriebssystem eine spezielle Behandlung bei der Installation der USB-Treiber erfordern.<br />
HINWEIS!<br />
Das <strong>WOW</strong>!-Programm kann nur als Administrator oder mit einem Konten ohne<br />
eingeschränkten Benutzerrechten gestartet werden. Es ist nicht möglich, das Programm von<br />
einem Gastkonto starten.<br />
Wo finde ich die notwendigen zusätzlichen Programme<br />
Microsoft .NET Framework 3.5 http://www.microsoft.com<br />
Adobe Acrobat Reader<br />
http://www.adobe.com<br />
- 4 -
1.2 Technische Daten<br />
Bezeichnung<br />
Art.Nr.<br />
Produktbeschreibung<br />
Spannungsaufnahme<br />
Abmessungen<br />
Gewicht<br />
<strong>Snooper+</strong><br />
W071000000<br />
Fahrzeug-Kommunikations-Schnittstelle für Multi-Marke Diagnose.<br />
Verbindung zum PC via Bluetooth oder USB.<br />
6-36 V, max power consumption: 500 mA<br />
180mm x 85mm x 30mm<br />
0.48 kg<br />
Arbeitstemperatur -20 °C - 70 °C<br />
Kabel-Spezifikation<br />
Kabellänge<br />
Anschluss<br />
Spezifikation<br />
UL2517 16Cx26AWG + AL 6.8mm schwarz, abnehmbar (mit 26pin<br />
Hd D-Sub)<br />
1600 mm<br />
ISO 15031-3 (SAE J1962) with LED lamp (2 CR1216 batteries)<br />
Mehrfarbige LED, Summer, Micro-SD-Karte, Trigger<br />
Taste, USB Typ B, OBD 16-poligen Stecker,<br />
beleuchtet.<br />
Unterstütze Protokolle ISO 9141-2<br />
ISO/DIS 11519-4 PWM – SAE J1850 PWM<br />
ISO/DIS 11519-4 VPW – SAE J1850 VPW<br />
ISO/DIS 14230-4 (Keyword 2000)(5-Baud fast)<br />
ISO/DIS 15765-4 (CAN)<br />
- 5 -
1.3 Zubehör<br />
Folgende Zubehöradapter stehen für den <strong>Snooper+</strong> zur Verfügung und können über unser<br />
Serviceteam bestellt werden.<br />
Art.Nr.<br />
Bezeichnung<br />
0900 964 718<br />
Snooper Kabelkit<br />
0900 200 650 2-poliger Adapter Audi/VW ●<br />
0900 200 651 14-poliger Adapter Mercedes-Benz ●<br />
0900 200 652 10-poliger Adapter Opel ●<br />
0900 200 653 2-poliger Adapter Peugeot* ●<br />
0900 200 654 30-poliger Adapter PSA ●<br />
0900 200 655 11-poliger Adapter Renault ●<br />
0900 200 656 10-poliger Adapter Saab ●<br />
0900 200 657 3-poliger Adapter Fiat* ●<br />
0900 200 658 20-poliger Adapter BMW ●<br />
0900 200 659 38-poliger Adapter Mercedes-Benz ●<br />
0900 200 660 F.V.V. Universal für Blinkdiagnose* ●<br />
0900 200 917 Power Adapter Snooper ●<br />
0900 200 673 38-poliger Adapter Iveco ●<br />
0900 300 515 ZB-Adapter-Diagnose System-Bluetooth/USB 39,00<br />
* Zusätzlich wird der Poweradapter 0900 200 917 benötigt.<br />
- 6 -
2 Erste Schritte<br />
Vor der Diagnose<br />
Bevor Sie mit dem <strong>WOW</strong>! Diagnosesystem arbeiten können, muss der <strong>Snooper+</strong> und die Software<br />
konfiguriert werden.<br />
<strong>WOW</strong>! Komplettsystemen die einen Computer beinhalten sind bereits vorkonfiguriert und für Sie<br />
registriert. In diesem Fall müssen keine weiteren Einstellungen vorgenommen werden. Sie können<br />
sofort mit der Arbeit beginnen.<br />
2.1 Software installieren<br />
Legen Sie die im Lieferumfang enthaltene DVD in das Laufwerk Ihres Computers. Die Installation<br />
startet nach einigen Sekunden automatisch. Falls das Startfenster nicht angezeigt wird, klicken Sie auf<br />
Start > Ausführen. Geben Sie E:\install.exe ein und klicken Sie auf OK. Der Buchstabe<br />
„E“ steht für den Laufwerksbuchstaben des DVD-Laufwerkes.<br />
Die einzelnen Schritte sind im Installationsprogramm beschrieben. Folgen Sie den Anweisungen.<br />
Nach vollständiger Installation der Software startet das Programm selbstständig.<br />
2.2 Software registrieren<br />
1. Klicken Sie auf Registrierung (1)<br />
1<br />
2. Klicken Sie auf Registrierungsformular (2)<br />
2<br />
3. Füllen Sie alle mit * gekennzeichneten Felder<br />
aus.<br />
Ihre Kunden-Nummer finden Sie z.B. auf dem<br />
Lieferschein.<br />
Benutzername und Passwort sind frei wählbar.<br />
Achten Sie auf Groß- und Kleinschreibung.<br />
Klicken Sie Weiter (3).<br />
3<br />
- 7 -
4. Wählen Sie ein Produkt (4) aus und klicken dann<br />
auf Hinzufügen.<br />
Drucken Sie das Formular aus (5).<br />
4<br />
5. Setzen Sie sich jetzt mit Ihrem Servicepartner in<br />
Verbindung um die Registrierung durchzuführen.<br />
5<br />
6. Tragen Sie den Registriercode und Ihre<br />
Kundennummer in die dafür vorgesehenen<br />
Felder ein (6). Klicken Sie jeweils auf<br />
Freischalten (7).<br />
Klicken Sie auf Zurück um in die<br />
Anmeldemaske zu gelangen.<br />
7<br />
6<br />
7. Tragen Sie den Benutzernamen und das<br />
Passwort ein. Klicken Sie auf Login<br />
2.3 <strong>Snooper+</strong> Konfiguration<br />
1. Klicken Sie auf Programmeinstellungen (1)<br />
1<br />
2. Wählen Sie im Register Geräte Diagnose-Box<br />
3. Wählen Sie SNOOPER+BT (2)<br />
Klicken Sie auf Suche (3)<br />
Die Verbindung zum <strong>Snooper+</strong> wird<br />
Konfiguriert.<br />
Die Anwendung ist im Programmablauf genau<br />
beschrieben. Bitte folgen Sie den Anweisungen.<br />
3<br />
2<br />
- 8 -
4. Treiber installieren<br />
Wenn der <strong>Snooper+</strong> das erste Mal über das USB<br />
Kabel mit dem Computer verbunden wird müssen<br />
die Gerätetreiber installiert werden.<br />
Der Installationsassistent startet automatisch.<br />
Sollten die Treiber nicht automatisch gefunden<br />
werden, wählen sie das <strong>WOW</strong>!<br />
Installationsverzeichnis z.B.<br />
C:\Programme\wow\ac_diagnosis_module<br />
\drivers<br />
oder<br />
C:\benutzer\öffentlich (WIN7)<br />
Anschlussschema <strong>Snooper+</strong><br />
Verbinden Sie den <strong>Snooper+</strong> über den<br />
Diagnosestecker mit einem Fahrzeug, damit die<br />
Spannungsversorgung gewährleistet ist.<br />
Verbinden Sie dem Computer über das USB-<br />
Kabel mit dem <strong>Snooper+</strong>.<br />
2.3.1 Firmware Update<br />
Die Firmware ist das Betriebssystem für den <strong>Snooper+</strong>. Mit den Erweiterungen der<br />
Diagnosefunktionalitäten der <strong>WOW</strong>! Software wird von Zeit zu Zeit eine neue Firmware benötigt.<br />
Diese wird Ihnen per <strong>Online</strong>- oder über ein DVD-Update zur Verfügung gestellt und muss nach dem<br />
Softwareupdate auf den <strong>Snooper+</strong> übertragen werden.<br />
1. Wählen Sie Firmware erneuern. (1)<br />
Die Anwendung ist im Programmablauf genau<br />
beschrieben. Bitte folgen Sie den Anweisungen.<br />
1<br />
- 9 -
3 Erste Diagnose<br />
Starten Sie die <strong>WOW</strong>! Software über das <strong>WOW</strong>!<br />
Icon auf dem Desktop.<br />
Tragen Sie im Startbildschirm des <strong>WOW</strong>!<br />
Programms, falls erforderlich, Ihren Benutzernamen<br />
und Ihr Passwort ein.<br />
1. Fahrzeugauswahl<br />
Wählen Sie das Fahrzeug über Hersteller ><br />
Modelljahr > Typ (1)<br />
Weitere Informationen zur Fahrzeugauswahl finden<br />
Sie in den Hilfen (2) und auf www.wow-portal.com<br />
1<br />
2<br />
2. Systemauswahl<br />
Klicken Sie im Hauptmenü auf<br />
Diagnose (3)<br />
3<br />
Wählen Sie die Systemgruppe und dann das zu<br />
prüfende System.<br />
Beispiel: Service > Instrumente.<br />
Ebenso können Sie einen Systemerkennung (4)<br />
starten die alle verbauten Systeme im Fahrzeug<br />
ermittelt und die Fehlerspeicher ausliest.<br />
4<br />
3. Starten Sie die Diagnose über die<br />
Funktionsschaltflächen (5)<br />
Je nach System und Hersteller sind die<br />
Diagnosemöglichkeiten, die Ihnen das Programm<br />
anbietet unterschiedlich.<br />
- Steckerposition<br />
- Fehlerspeicher<br />
- Datenlisten<br />
- Funktion<br />
4. Der weitere Ablauf der Diagnose ist im Programm<br />
beschrieben, bitte befolgen Sie die Hinweise und<br />
Beschreibungen.<br />
5<br />
Sie haben nun die ersten Schritte mit Ihrem neuen <strong>WOW</strong>! Diagnosesystem durchgeführt. Um den<br />
vollen Funktionsumfang Ihres Diagnose- und Informationssystem zu nutzen, empfehlen wir Ihnen eine<br />
unserer Schulungen zu belegen. Genauere Informationen erhalten Sie auch im Handbuch, welches in<br />
der Software hinterlegt ist. Dies erreichen Sie über die Schaltfläche Hilfe<br />
und auf www.wow-portal.com.<br />
in der Symbolleiste<br />
- 10 -
- 11 -
1 Description of hardware<br />
1. 16-pin OBD-II connector (SAE J1962)<br />
With built-in flash light<br />
2. Displays status of connection and<br />
communication<br />
2<br />
1<br />
3. Micro SD card slot<br />
For memory card type Micro SD<br />
4. Flight Recorder button<br />
For start/stop and set triggers in the<br />
flight recorder function<br />
3<br />
5. USB-connection for PC<br />
4<br />
5<br />
- 12 -
1.1 Display signal description<br />
Function Colour Comment Sound<br />
Voltage White Continuous light for voltage supply Silent<br />
PC<br />
connection<br />
Diagnosis<br />
Blue USB or Bluetooth connection Silent<br />
Green /<br />
Blue<br />
Active diagnostic session<br />
Green / Blue alternating (50%)<br />
Sound<br />
description<br />
Silent<br />
Diagnosis<br />
PC<br />
connection<br />
lost<br />
Green /<br />
Blue<br />
flashing<br />
Lost PC connection is displayed only<br />
when diagnosis is active<br />
Warning sound!<br />
PC connection<br />
lost<br />
4 short high<br />
sounds<br />
Voltage / battery low<br />
Battery low<br />
Current<br />
colour /<br />
Red<br />
flashing<br />
PC connection / battery low<br />
Flight recorder / battery low<br />
Warning sound!<br />
Battery low<br />
4 short low<br />
sounds<br />
Battery low<br />
and PC<br />
connection<br />
lost<br />
Flight<br />
recorder<br />
start OK<br />
FR start not<br />
OK<br />
Green,<br />
Red and<br />
Blue<br />
flashing<br />
Yellow<br />
Diagnosis / battery low<br />
Flight recorder session started, data<br />
are not saved (communication is<br />
being established)<br />
- No valid FR configuration<br />
FR stop - Stops flight recorder session<br />
FR data<br />
recording<br />
FR data<br />
recording no<br />
valid<br />
response<br />
Yellow<br />
sequence<br />
light<br />
-<br />
No valid response within 10 ECU<br />
inquiries<br />
FR trigger - User presses button to set marking<br />
Acknowledgment<br />
FR start<br />
Acknowledgment<br />
FR no<br />
configuration<br />
Acknowledgment<br />
FR stop<br />
Warning sound!<br />
FR no valid data<br />
Acknowledgment<br />
FR trigger<br />
4 low<br />
sounds,<br />
pause, 4<br />
high sounds<br />
Long low<br />
sound<br />
Long low<br />
sound<br />
Silent<br />
1 short low<br />
sound<br />
1 short high<br />
sound<br />
No firmware Red Silent<br />
- 13 -
Load<br />
firmware<br />
Monitor -<br />
Red Flashes in relation to data transfer Silent<br />
Monitoring mechanism, prevents the<br />
unit from hanging<br />
Warning sound!<br />
Monitor<br />
Different<br />
sounds<br />
1.2 Minimum computer requirements<br />
Intel® Pentium® II 400 MHz (or similar)<br />
Windows 7, Windows Vista®, Windows 2000 SP4, Windows® XP(*) SP3<br />
512 MB RAM<br />
1500 MB free hard disk space<br />
Screen with resolution 800 x 600<br />
DVD-unit<br />
Access to internet<br />
Bluetooth (SPP) or USB<br />
Microsoft .NET Framework 3.5<br />
Adobe Acrobat Reader 4.0 or laterPrior to diagnosis<br />
Note!<br />
Both 32-bit and 64-bit operating systems are supported, note that 64-bit OS require special<br />
handling during installation of USB drivers.<br />
Note! The program can only be started from accounts with administrator or limited user rights.<br />
It is not possible to start the program from a Guest account.<br />
Where do I find the necessary additional programs<br />
Microsoft .NET Framework 3.5<br />
Adobe Acrobat Reader<br />
http://www.microsoft.com<br />
http://www.adobe.com<br />
- 14 -
1.3 Specifications<br />
Name<br />
Art.Nr.<br />
Product description<br />
Power Range<br />
Dimensions<br />
Weight<br />
<strong>Snooper+</strong><br />
W071000000<br />
Vehicle communication interface for multi brand diagnose.<br />
Connection to PC via Bluetooth or USB.<br />
6-36 V, max power consumption: 500 mA<br />
180mm x 85mm x 30mm<br />
0.48 kg<br />
Operating temp. -20 °C - 70 °C<br />
Cable specification<br />
Length<br />
UL2517 16Cx26AWG+AL 6.8mm black, detachable (with 26pin Hd<br />
D-sub)<br />
1600 mm<br />
Connector<br />
ISO 15031-3 (SAE J1962) with LED lamp (2 CR1216 batteries)<br />
Specification multi color LED, buzzer, micro-SD card, trigger button, USB type B,<br />
OBD 16 pin male connector, illuminated<br />
Supported protocols ISO 9141-2<br />
ISO/DIS 11519-4 PWM – SAE J1850 PWM<br />
ISO/DIS 11519-4 VPW – SAE J1850 VPW<br />
ISO/DIS 14230-4 (Keyword 2000)(5-Baud fast)<br />
ISO/DIS 15765-4 (CAN)<br />
- 15 -
1.4 Accessoires<br />
The following accessories are available for the <strong>Snooper+</strong> and can be ordered from our Service team.<br />
Art.No.<br />
Description<br />
0900 964 718<br />
<strong>Snooper+</strong> cable kit<br />
0900 200 650 2-pin Adapter Audi/VW ●<br />
0900 200 651 14-pin Adapter Mercedes-Benz ●<br />
0900 200 652 10-pin Adapter Opel ●<br />
0900 200 653 2-pin Adapter Peugeot* ●<br />
0900 200 654 30-pin Adapter PSA ●<br />
0900 200 655 11-pin Adapter Renault ●<br />
0900 200 656 10-pin Adapter Saab ●<br />
0900 200 657 3-pin Adapter Fiat* ●<br />
0900 200 658 20-pin Adapter BMW ●<br />
0900 200 659 38-pin Adapter Mercedes-Benz ●<br />
0900 200 660 F.V.V. universal adapter for blinking diagnosis * ●<br />
0900 200 917 Power Adapter <strong>Snooper+</strong> ●<br />
0900 200 673 38-pin Adapter Iveco ●<br />
0900 300 515 ZB-Adapter-Diagnose System-Bluetooth/USB ●<br />
* In addition, the power adapter is required 0900 200 917.<br />
- 16 -
2 First steps<br />
Prior to diagnosis<br />
Before you can work with the <strong>WOW</strong>! diagnosis system, you must first configure the Snooper and the<br />
software.<br />
<strong>WOW</strong>! complete systems which contain a computer are already preconfigured and registered for you.<br />
In this case, you do not have to make any further settings. You can begin work straight away.<br />
2.1 Installing software<br />
Insert the supplied DVD "<strong>WOW</strong>! X.X.X" in your computer's DVD drive. Installation starts<br />
automatically after a few seconds. If the Start window fails to appear, click on Start > Run. Enter<br />
E:\install.exe and click on OK. The letter "E" represents the letter denoting the DVD drive.<br />
The individual steps are described in the installation program. Follow the instructions.<br />
The program starts automatically once the software has been fully installed.<br />
2.2 Registering software<br />
1. Click on Registration (1).<br />
1<br />
2. Click on Registration form (2).<br />
2<br />
3. Complete all the boxes marked with *.<br />
You will find your client number, for example, on<br />
the delivery note.<br />
You have a free choice of user ID and<br />
password/codeword.<br />
Pay attention to upper- and lower-case letters.<br />
Click on Continue (3).<br />
3<br />
- 17 -
4. Select a product (4), and click Add (5).<br />
5. Print out this form through (6) and contact<br />
their service provider to the registry.<br />
4<br />
5<br />
6<br />
6. Enter the registration code received (7) and your<br />
client number in the designated boxes. Click on<br />
Activate (8) in each case.<br />
Click on Back to go to the Login mask/screen.<br />
8<br />
7<br />
7. Enter the user name and the<br />
password/codeword. Click on Login.<br />
2.3 Program settings<br />
1. Click on Program settings (1).<br />
1<br />
2. In the tab index Devices select Diagnosis-<br />
Box<br />
3. Select SNOOPER+BT (2)<br />
Click on Find (3)<br />
The connection to the <strong>Snooper+</strong> is configured.<br />
The application is described in detail in the<br />
program run. Please follow the instructions.<br />
3<br />
2<br />
- 18 -
4. Driver installation<br />
The device drivers must be installed when the<br />
<strong>Snooper+</strong> is connected to the computer for the<br />
first time.<br />
The installation wizard starts automatically. If the<br />
drivers are not found automatically, select the<br />
<strong>WOW</strong>! install directory, for example:<br />
C:\Programs\wow\ac_diagnosis_module\<br />
drivers<br />
or<br />
C:\user\public (WIN7)<br />
5. <strong>Snooper+</strong> connection arrangement<br />
Connect the <strong>Snooper+</strong> via the diagnosis<br />
connector to a vehicle so as to ensure the power<br />
supply.<br />
Connect the computer to the <strong>Snooper+</strong> via the<br />
USB cable.<br />
To update the firmware the <strong>Snooper+</strong> should be<br />
connected to the computer via the USB cable.<br />
2.3.1 Firmware update<br />
The firmware is the operating system for the <strong>Snooper+</strong>. With the expansions of the diagnostic<br />
functions of the <strong>WOW</strong>! software new firmware is required from time to time. This is made available to<br />
you online or by way of a DVD update and must be transferred to the <strong>Snooper+</strong> after the software<br />
update.<br />
1. Select Replace firmware (1).<br />
The application is described in detail in the<br />
program run.<br />
Please follow the instructions.<br />
1<br />
- 19 -
3 First diagnosis<br />
1. Start the WoW! software via the <strong>WOW</strong>! icon on the<br />
desktop.<br />
Enter in the Start screen of the <strong>WOW</strong>! program, if<br />
necessary, your user name and your password/<br />
codeword.<br />
2. Vehicle selection<br />
Select the vehicle via Manufacturer > Model<br />
year > Type (1)<br />
Further information on vehicle selection can be<br />
found in the help section (2) and on www.wowportal.com<br />
1<br />
2<br />
1. System selection<br />
Click in the main menu on Diagnosis (3). 3<br />
Select the system group and then the system<br />
to be tested.<br />
Example: Service > Instruments.<br />
You can also start a System detection (4),<br />
which determines all the systems installed in the<br />
vehicle and reads out the fault memories.<br />
4<br />
2. Start the diagnosis via the function<br />
buttons (5).<br />
The diagnostic options that the program offers you<br />
differ, depending on the system and the<br />
manufacturer.<br />
- Plug position<br />
- Fault memory<br />
- Data lists<br />
- Function<br />
3. The subsequent diagnosis procedure is described<br />
in the program. Please follow the directions and<br />
descriptions.<br />
5<br />
You have now completed the first steps with your new <strong>WOW</strong>! diagnosis system. To utilise the full<br />
scope of functions of your diagnosis and information system, we recommend that you enrol for one of<br />
our training courses. Further information can be found in the manual which is stored in the software.<br />
You can access this via the Help<br />
button in the toolbar.<br />
- 20 -
- 21 -
1 Description du matériel<br />
1. Connecteur OBD-II 16-pin OBD (SAE J1962)<br />
avec<br />
illumination intégré<br />
2. Affichage multicouleur indique le statut de la<br />
connexion et de la communication<br />
2<br />
1<br />
3. Emplacement pour carte Micro SD-<br />
Pour type de carte memoire Micro SD<br />
4. Bouton „Flightrecorder“pour démarrer /<br />
arrêter et définir des déclencheurs dans la<br />
fonction Flightrecorder“<br />
3<br />
5. Connexion USB pour PC<br />
4<br />
5<br />
- 22 -
1.1 Affichage description du signal<br />
Fonction Couleur Commentaire Son<br />
Tension<br />
Blanc<br />
Lumière permanente à l'alimentation<br />
électrique<br />
Description<br />
du son<br />
Muet<br />
Connexion PC Bleu Avec connexion USB ou Bluetooth Muet<br />
Diagnostic<br />
Vert / Bleu<br />
Avec session de diagnostic active<br />
Vert / Bleu en alternance (50 %)<br />
Muet<br />
Diagnostic<br />
Connexion PC<br />
perdue<br />
Vert / Bleu<br />
clignotant<br />
La connexion PC perdue n'est<br />
affichée que si le diagnostic est actif<br />
Signal<br />
sonore !<br />
Connexion<br />
PC perdue<br />
4 sons aigus<br />
brefs<br />
Tension / Batterie faible<br />
Batterie faible<br />
Couleur<br />
actuelle /<br />
Rouge<br />
clignotant<br />
Connexion PC / Batterie faible<br />
Flightrecorder / Batterie faible<br />
Signal<br />
sonore !<br />
Batterie<br />
faible<br />
4 sons graves<br />
brefs<br />
Batterie faible<br />
et connexion<br />
PC perdue<br />
Flightrecorder<br />
Start OK<br />
Démarrage FR<br />
non OK<br />
Vert,<br />
rouge et<br />
bleu<br />
clignotant<br />
Jaune<br />
Diagnostic / Batterie faible<br />
La session Flightrecorder a démarré,<br />
les données ne sont pas enregistrées<br />
(établissement de la communication)<br />
- Configuration FR non valable<br />
Arrêt FR - Arrête la session Flightrecorder<br />
Enregistrement<br />
des données<br />
FR<br />
Enregistrement<br />
des données<br />
FR – pas de<br />
réponse<br />
valable<br />
Défilement<br />
lumière<br />
jaune<br />
-<br />
Pas de réponse valable à l'intérieur<br />
de 10 demandes ECU<br />
Confirmation<br />
démarrage<br />
FR<br />
Confirmation<br />
pas de<br />
configuration<br />
FR<br />
Confirmation<br />
Arrêt FR<br />
Signal<br />
sonore !<br />
Pas de<br />
donnée FR<br />
valable<br />
4 sons<br />
graves,<br />
pause, 4 sons<br />
aigus<br />
Son grave<br />
long<br />
Son grave<br />
long<br />
Muet<br />
1 son bref<br />
faible<br />
- 23 -
Déclencheur<br />
FR<br />
Pas de<br />
micrologiciel<br />
Chargement<br />
micrologiciel<br />
Contrôleur -<br />
-<br />
Rouge<br />
Rouge<br />
L'utilisateur appuie sur le bouton<br />
pour activer un repère<br />
Clignote en fonction de la<br />
transmission de données<br />
Mécanisme de contrôle, empêche<br />
l'unité de s'accrocher<br />
Confirmation<br />
Déclencheur<br />
FR<br />
Signal<br />
sonore !<br />
Contrôleur<br />
1 son bref<br />
aigu<br />
Muet<br />
Muet<br />
Divers sons<br />
1.2 Configuration minimale pour l'ordinateur<br />
Intel® Pentium® II 400 MHz (ou similaire)<br />
Windows 7, Windows Vista®, Windows 2000 SP4, Windows® XP(*) SP3<br />
512 MB RAM<br />
1500 Mo d'espace libre sur le disque dur<br />
Écran avec une résolution 800 x 600<br />
DVD-unit<br />
Accès à Internet<br />
Bluetooth (SPP) ou USB<br />
Microsoft .NET Framework 3.5<br />
Adobe Acrobat Reader 4.0 ou laterPrior à un diagnostic<br />
Notez! Deux systèmes d'exploitation 32-bit et 64-bit sont supportés, notons que 64-bit OS<br />
nécessitent un traitement spécial lors de l'installation des pilotes USB.<br />
Notez! Le programme ne peut être démarré à partir des comptes avec des droits administrateur<br />
ou utilisateur limités. Il n'est pas possible de démarrer le programme à partir d'un compte Invité.<br />
Où puis-je trouver les programmes supplémentaires nécessaires<br />
Microsoft .NET Framework 3.5<br />
Adobe Acrobat Reader<br />
http://www.microsoft.com<br />
http://www.adobe.com<br />
- 24 -
1.3 Caractéristiques techniques<br />
Désignation<br />
Référence<br />
Description produit<br />
Puissance électrique<br />
Dimensions<br />
<strong>Snooper+</strong><br />
W071000000<br />
Interface de communication avec le véhicule pour un Diagnostic multimarques.<br />
Connexion au PC via Bluetooth ou USB.<br />
6-36 V, courant absorbé maxi : 500 mA<br />
180 mm x 85 mm x 30 mm<br />
Poids<br />
0.48 kg<br />
Température de service -20 °C - 70 °C<br />
Spécification du câble<br />
UL2517 16Cx26AWG + AL 6.8 mm noir, amovible (avec 26pin Hd<br />
D-Sub)<br />
Longueur de câble<br />
Raccordement<br />
Spécification<br />
1600 mm<br />
ISO 15031-3 (SAE J1962) avec DEL (2 piles CR1216)<br />
DEL multicolore, Summer, carte micro-SD, touche déclencheur,<br />
USB type B, OBD connecteur 16 contacts, éclairé<br />
Protocoles supportés ISO 9141-2<br />
ISO/DIS 11519-4 PWM – SAE J1850 PWM<br />
ISO/DIS 11519-4 VPW – SAE J1850 VPW<br />
ISO/DIS 14230-4 (Keyword 2000)(5-Baud fast)<br />
ISO/DIS 15765-4 (CAN)<br />
- 25 -
1.4 Accessoires<br />
Les accessoires suivants sont disponibles pour le <strong>Snooper+</strong> et peuvent être commandés auprès de<br />
notre équipe service.<br />
Référence<br />
Désignation<br />
0900 964 718<br />
Kit câble <strong>Snooper+</strong><br />
0900 200 650 Adaptateur 2 contacts Audi/VW ●<br />
0900 200 651 Adaptateur 14 contacts Mercedes-Benz ●<br />
0900 200 652 Adaptateur 10 contacts Opel ●<br />
0900 200 653 Adaptateur 2 contacts Peugeot* ●<br />
0900 200 654 Adaptateur 3+2 contacts PSA ●<br />
0900 200 655 Adaptateur 12 contacts Renault ●<br />
0900 200 656 Adaptateur 10 contacts Saab ●<br />
0900 200 657 Adaptateur 3 contacts Fiat* ●<br />
0900 200 658 Adaptateur 20 contacts BMW ●<br />
0900 200 659 Adaptateur 38 contacts Mercedes-Benz ●<br />
0900 200 660 F.V.V. Adaptateur universel pour le flash de diagnostic * ●<br />
0900 200 917 Adaptateur Power <strong>Snooper+</strong> ●<br />
0900 200 673 Adaptateur 38 contacts Iveco ●<br />
0900 300 515<br />
Ensemble adaptateur système de diagnostic<br />
Bluetooth/USB<br />
●<br />
* En plus l´adaptateur puissance (Poweradapter) 0900 200 917 est nécessaire.<br />
- 26 -
2 Premiers pas<br />
Avant le diagnostic<br />
Avant de pouvoir travailler avec le système de diagnostic <strong>WOW</strong>!, vous devez configurer le Snooper et<br />
le logiciel.<br />
Les systèmes <strong>WOW</strong>! complets, qui comprennent un ordinateur, sont déjà configurés initialement et<br />
enregistrés pour vous. Dans ce cas, vous n'avez aucun autre réglage à effectuer. Vous pouvez<br />
commencer immédiatement le travail.<br />
2.1 Installation du logiciel<br />
Insérez le DVD “<strong>WOW</strong>! X.X.X” fourni dans le lecteur DVD de votre ordinateur. L'installation<br />
démarre automatiquement au bout de quelques secondes. Si la fenêtre de démarrage ne s'affiche<br />
pas, cliquez sur Démarrage > Exécuter. Entrez E:\install.exe puis cliquez sur OK. La lettre<br />
“E” désigne la lettre identifiant le lecteur DVD.<br />
Les différentes étapes sont décrites dans le programme d'installation. Suivez les instructions.<br />
Une fois l'installation du logiciel terminée, le programme démarre automatiquement.<br />
2.2 Enregistrement du logiciel<br />
1. Cliquez sur Enregistrement (1)<br />
1<br />
2. Cliquez sur Formulaire<br />
d'enregistrement (2)<br />
2<br />
- 27 -
3. Remplissez tous les champs repérés par *.<br />
Vous trouverez votre numéro de client par<br />
exemple sur le bordereau de livraison.<br />
Vous pouvez choisir librement le nom<br />
d'utilisateur et le mot de passe.<br />
Respectez les majuscules et minuscules.<br />
Cliquez sur Suivant (3).<br />
3<br />
4. Sélectionnez un produit (4), et cliquez sur<br />
Ajouter (5).<br />
5. Imprimez ce formulaire à (6) et de contacter leur<br />
fournisseur de service dans le Registre.<br />
5<br />
4<br />
6<br />
6. Inscrivez le code d’enregistrement (7) et votre<br />
numéro de client dans les cases prévues à cet<br />
effet. Cliquez à chaque fois sur Valider (8).<br />
Cliquez sur Retour pour accéder au masque de<br />
connexion.<br />
8<br />
7<br />
7. Inscrivez le nom d'utilisateur et le mot de passe.<br />
Cliquez sur Ouverture de session<br />
- 28 -
2.3 Configuration programme<br />
1. Cliquez sur Configuration programme (1)<br />
1<br />
2. Sous l'onglet Appareil, choisissez Boîtier<br />
de diagnostic<br />
3. Choisissez SNOOPER+BT (2)<br />
Cliquez sur Chercher (3)<br />
La configuration de la connexion au <strong>Snooper+</strong><br />
s'effectue.<br />
L'application est décrite en détail dans le<br />
déroulement du programme. Veuillez suivre les<br />
instructions.<br />
3<br />
2<br />
4. L'installation du pilote.<br />
Les pilotes de périphériques doivent être installés<br />
lorsque le <strong>Snooper+</strong> est connecté à l'ordinateur<br />
pour la première fois.<br />
L'assistant d'installation démarre<br />
automatiquement.<br />
Si les pilotes ne se trouvent pas<br />
automatiquement, sélectionnez le <strong>WOW</strong>! le<br />
répertoire d'installation, par exemple:<br />
C:\Programmes\wow\ac_diagnosis_module\<br />
drivers<br />
ou<br />
C:\user\public (WIN7)<br />
5. Schéma de raccordement Snooper +<br />
Raccordez le <strong>Snooper+</strong> à un véhicule par la prise<br />
de diagnostic de façon à garantir l'alimentation<br />
électrique.<br />
Reliez l'ordinateur au <strong>Snooper+</strong> avec le câble<br />
USB.<br />
Pour mettre à jour le micrologiciel, le <strong>Snooper+</strong><br />
doit être relié à l'ordinateur par câble USB.<br />
- 29 -
2.3.1 Mise à jour du micrologiciel<br />
Le micrologiciel est le système d'exploitation du <strong>Snooper+</strong>. Les extensions des fonctionnalités de<br />
diagnostic du logiciel <strong>WOW</strong>! imposent de temps en temps le recours à un nouveau micrologiciel.<br />
Celui-ci est mis à votre disposition par mise en jour en ligne ou par DVD, et doit être transmis au<br />
<strong>Snooper+</strong> après la mise à jour du logiciel.<br />
6. Sélectionnez Remplacer le firmware (1).<br />
L'application est décrite en détail dans l'exécution<br />
du programme.<br />
S'il vous plaît suivez les instructions.<br />
1<br />
- 30 -
3 Premier diagnostic<br />
1. Démarrez le logiciel WoW! en passant par l'icône<br />
WoW! sur le bureau.<br />
Si nécessaire, inscrivez sur l'écran de démarrage<br />
du programme <strong>WOW</strong>! votre nom d'utilisateur et<br />
votre mot de passe.<br />
2. Sélection véhicule<br />
Sélectionnez le véhicule par Constructeur ><br />
Année-modèle > Type (1)<br />
Vous trouverez d'autres informations sur la<br />
sélection du véhicule dans les aides (2) et sur<br />
www.wow-portal.com<br />
1<br />
2<br />
3. Sélection du système<br />
Cliquez dans le menu principal sur<br />
3<br />
Diagnostic (3)<br />
Choisissez le groupe de systèmes puis le<br />
système à contrôler.<br />
Exemple : Entretien > Instruments.<br />
De la même façon, vous pouvez démarrer<br />
une détection de système (4)<br />
qui détermine tous les systèmes installés dans le<br />
véhicule et relève les mémoires de défauts.<br />
4<br />
4. Démarrez le diagnostic par les boutons de<br />
fonction (5)<br />
Selon le système et le constructeur, les possibilités<br />
de diagnostic offertes par ce programme sont<br />
différentes.<br />
- Position des connecteurs<br />
- Mémoire de défauts<br />
- Liste de données<br />
- Fonction<br />
5<br />
5. La suite du diagnostic est décrite dans le<br />
programme, veuillez suivre les instructions et<br />
descriptions.<br />
Vous venez d'effectuer les premiers pas avec votre nouveau système de diagnostic <strong>WOW</strong>! Afin<br />
d'exploiter toutes les fonctionnalités de votre système de diagnostic et d'information, nous vous<br />
recommandons de suivre l'une de nos formations. Vous trouvez aussi des informations plus détaillées<br />
dans le manuel enregistré avec le logiciel. Pour y accéder, veuillez cliquer sur le bouton Aide<br />
dans la barre d'outils.<br />
- 31 -
1 Descrizione hardware<br />
1. Spina 16-pin OBD (SAE J1962) con<br />
illuminazione incorporata<br />
2. L’indicatore policromo mostra lo stato della<br />
connessione e della comunicazione<br />
2<br />
1<br />
3. Slot per scheda Micro SD<br />
Per le memory card di tipo Micro SD<br />
4. Tasto Flight Recorder (registration dati) per<br />
Start/Stop e impostazione di un<br />
contrassegno (Trigger) durante la<br />
registrazione del Flightrecorder<br />
5. Porta USB<br />
3<br />
4<br />
5<br />
- 32 -
1.1 Descrizione segnale Indicatore<br />
Funzione Colore Commento Suono<br />
Tensione<br />
Collegamento<br />
a PC<br />
Diagnosi<br />
Bianco<br />
Luce fissa per alimentazione di<br />
tensione<br />
Descrizione<br />
suono<br />
Silenzioso<br />
Blu Per connessione USB o Bluetooth Silenzioso<br />
Verde / blu<br />
A sessione di diagnosi attiva<br />
Verde/blu alternati (50%)<br />
Silenzioso<br />
Diagnosi<br />
collegamento<br />
a PC perso<br />
Verde / blu<br />
lampeggiante<br />
Il collegamento a PC perso viene<br />
visualizzato solo con diagnosi attiva<br />
Segnale<br />
acustico!<br />
Collegamento<br />
a<br />
PC perso<br />
4 brevi segnali<br />
ad alto volume<br />
Livello batteria<br />
basso<br />
Colore<br />
attuale /<br />
rosso<br />
lampeggiante<br />
Tensione / livello batteria basso<br />
Collegamento a PC / livello batteria<br />
basso<br />
Flight recorder / livello batteria basso<br />
Segnale<br />
acustico!<br />
Livello<br />
batteria<br />
basso<br />
4 brevi segnali<br />
a basso<br />
volume<br />
Livello batteria<br />
basso e<br />
collegamento<br />
a PC perso<br />
Flight recorder<br />
Start OK<br />
FR Start non<br />
OK<br />
Verde, rosso<br />
e blu<br />
lampeggiante<br />
Giallo<br />
Diagnosi / livello batteria basso<br />
Sessione Flight recorder iniziata, i<br />
dati non vengono salvati (la<br />
comunicazione viene instaurata)<br />
- Nessuna configurazione FR valida<br />
FR Stop - Arresta la sessione Flight recorder<br />
Registrazione<br />
dati FR<br />
Luce a<br />
scorrimento<br />
gialla<br />
Conferma<br />
FR Start<br />
Conferma<br />
FR<br />
nessuna<br />
configurazione<br />
Conferma<br />
FR Stop<br />
4 segnali<br />
acustici a basso<br />
volume, pausa,<br />
4 segnali<br />
acustici ad alto<br />
volume<br />
Segnale<br />
acustico lungo<br />
a basso<br />
volume<br />
Segnale<br />
acustico lungo<br />
a basso<br />
volume<br />
Silenzioso<br />
- 33 -
Registrazione<br />
dati FR -<br />
nessuna<br />
risposta valida<br />
FR Trigger -<br />
Nessun<br />
firmware<br />
Caricare<br />
firmware<br />
Interruttore di<br />
comando<br />
-<br />
Rosso<br />
Rosso<br />
-<br />
Nessuna risposta valida tra<br />
10 domande ECU<br />
L'utilizzatore preme il tasto per<br />
impostare il segnale<br />
Lampeggia in funzione della<br />
trasmissione dati<br />
Meccanismo di controllo, impedisce<br />
che l'unità si arresti<br />
Segnale<br />
acustico!<br />
FR<br />
nessun<br />
dato<br />
valido<br />
Conferma<br />
FR Trigger<br />
Segnale<br />
acustico!<br />
Interruttore<br />
di<br />
comando<br />
1 segnale<br />
acustico breve<br />
e a basso<br />
volume<br />
1 segnale<br />
acustico breve<br />
e ad alto<br />
volume<br />
Silenzioso<br />
Silenzioso<br />
Segnali<br />
acustici diversi<br />
1.2 Requisiti minimi per il computer<br />
Intel® Pentium® II 400 MHz (o simile)<br />
Windows 7, Windows Vista®, Windows 2000 SP4, Windows® XP(*) SP3<br />
512 MB RAM<br />
1500 MB spazio libero su disco<br />
Screen con risoluzione 800 x 600<br />
DVD-unit<br />
Accesso a internet<br />
Bluetooth (SPP) o USB<br />
Microsoft .NET Framework 3.5<br />
Adobe Acrobat Reader 4.0 Prima o dopo la diagnosi<br />
Note! Entrambi i sistemi operativi a 32-bit e 64-bit sono supportati, si noti che 64-bit OS<br />
richiedono un trattamento speciale durante l'installazione del driver USB.<br />
Note! Il programma <strong>WOW</strong>! può essere avviato solo da amministratore o account con diritti<br />
utente limitati. Non è possibile avviare il programma da un account Guest.<br />
Dove posso trovare ulteriori programmi necessari<br />
Microsoft .NET Framework 3.5<br />
Adobe Acrobat Reader<br />
http://www.microsoft.com<br />
http://www.adobe.com<br />
- 34 -
1.3 Dati tecnici<br />
Denominazione<br />
N.Art.<br />
Descrizione prodotto<br />
Presa di tensione<br />
Dimensioni<br />
<strong>Snooper+</strong><br />
W071000000<br />
Interfaccia di comunicazione veicolo per diagnosi multimarca.<br />
Collegamento a PC via Bluetooth o USB.<br />
6-36 V, consumo elettrico max: 500 mA<br />
180mm x 85mm x 30mm<br />
Peso<br />
0.48 kg<br />
Temperatura di lavoro -20 °C - 70 °C<br />
Specifica dei cavi<br />
Lunghezza cavi<br />
Presa<br />
UL2517 16Cx26AWG + AL 6.8mm nero, estraibile (con 26pin D-Sub HD)<br />
1600 mm<br />
ISO 15031-3 (SAE J1962) con lampada LED (2 batterie CR1216)<br />
Specifica LED multicolor, cicalino, scheda micro SD, tasto trigger, USB tipo B,<br />
connettore OBD a 16 pin, illuminato<br />
Protocolli supportati ISO 9141-2<br />
ISO/DIS 11519-4 PWM – SAE J1850 PWM<br />
ISO/DIS 11519-4 VPW – SAE J1850 VPW<br />
ISO/DIS 14230-4 (Keyword 2000)(velocità 5 Baud)<br />
ISO/DIS 15765-4 (CAN)<br />
- 35 -
1.4 Accessori<br />
I seguenti accessori sono utilizzabili con lo <strong>Snooper+</strong> e possono essere ordinati tramite il nostro<br />
Service Team.<br />
N. Art. Descrizione<br />
0900 964 718<br />
Kit cavi <strong>Snooper+</strong><br />
0900 200 650 Adattatore a 2 poli Audi/VW ●<br />
0900 200 651 Adattatore a 14 poli Mercedes-Benz ●<br />
0900 200 652 Adattatore a 10 poli Opel ●<br />
0900 200 653 Adattatore a 2 poli Peugeot* ●<br />
0900 200 654 Adattatore a 3+2 poli PSA ●<br />
0900 200 655 Adattatore a 12 poli Renault ●<br />
0900 200 656 Adattatore a 10 poli Saab ●<br />
0900 200 657 Adattatore a 3 poli Fiat* ●<br />
0900 200 658 Adattatore a 20 poli BMW ●<br />
0900 200 659 Adattatore a 38 poli Mercedes-Benz ●<br />
0900 200 660 F.V.V. universal adapter for blinking diagnosis * ●<br />
0900 200 917 Adattatore elettrico <strong>Snooper+</strong> ●<br />
0900 200 673 Adattatore a 38 poli Iveco ●<br />
0900 300 515 Diagnosi adattatore sistema Bluetooth/USB ●<br />
* Inoltre e`necessario il Poweradapter Alimentatore 0900 200 917<br />
- 36 -
2 Primi passi<br />
Prima della diagnosi<br />
Prima di lavorare con il sistema di diagnosi <strong>WOW</strong>! è necessario configurare lo Snooper e il software.<br />
<strong>WOW</strong>! I sistemi completi che comprendono un computer, sono già preconfigurati e registrati. In<br />
questo caso non è necessario effettuare altre impostazioni e si può iniziare subito a lavorare.<br />
2.1 Installazione del software<br />
Inserire il DVD in dotazione"<strong>WOW</strong>! X.X.X" nella relativa unità DVD del computer. L'installazione si<br />
avvia automaticamente dopo qualche secondo. Se non viene visualizzata la finestra di avvio, fare clic<br />
su Avvio > Esegui. Immettere E:\install.exe e fare clic su OK. La lettera "E" identifica<br />
un'unità DVD.<br />
I singoli passi vengono descritti nel programma di installazione. Seguire le indicazioni.<br />
Dopo l'installazione completa del software, il programma si avvia automaticamente.<br />
2.2 Registrazione del software<br />
1. Fare clic su Registrazione (1)<br />
1<br />
2. Fare clic su Modulo di registrazione (2)<br />
2<br />
3. I campi contrassegnati da * sono obbligatori.<br />
Il numero cliente si trova ad es. sulla bolla di<br />
consegna.<br />
Il nome utente e la password possono essere<br />
selezionati a piacere.<br />
Prestare attenzione a quali caratteri scrivere in<br />
maiuscolo e quali in minuscolo.<br />
Fare clic su Avanti (3)<br />
3<br />
- 37 -
4. Selezionare un prodotto (4), e fare clic su<br />
Aggiungi (5).<br />
Stampate il modulo via (6) e contattare il proprio<br />
fornitore di servizi per il Registro di sistema.<br />
4<br />
5<br />
6<br />
5. Una volta ricevuti il codice di abilitazione (7) e il<br />
numero cliente, inserirli negli appositi campi.<br />
Fare clic su Abilitazione (8).<br />
Fare clic su Indietro per visualizzare la<br />
maschera di registrazione.<br />
8<br />
7<br />
6. Inserire il nome utente e la password. Fare clic<br />
su Login<br />
- 38 -
2.3 Impostazioni<br />
1. Fare clic su Impostazioni (1)<br />
1<br />
2. Selezionare nella scheda Dispositivi<br />
Scatola di diagnosi<br />
3. Selezionare SNOOPER+BT (2)<br />
Fare clic su Ricerca (3)<br />
Il collegamento allo <strong>Snooper+</strong> viene<br />
configurato.<br />
L'utilizzo viene descritto dettagliatamente<br />
all'avviamento del programma. Seguire le<br />
indicazioni.<br />
3<br />
2<br />
4. Installazione del driver<br />
Quando lo <strong>Snooper+</strong> viene collegato per la<br />
prima volta al computer, è necessario che siano<br />
installati i driver.<br />
L'installazione guidata si avvia automaticamente.<br />
Se i driver non vengono trovati automaticamente,<br />
selezionare la directory di installazione <strong>WOW</strong>!,<br />
ad esempio:<br />
C:\Programme\wow\ac_diagnosis_module\<br />
drivers<br />
C:\user\public (WIN7)<br />
5. Schema di collegamento <strong>Snooper+</strong><br />
Collegare lo <strong>Snooper+</strong> ad un veicolo tramite il<br />
connettore di diagnosi, in modo che venga<br />
garantita l'alimentazione di tensione.<br />
Collegare il computer tramite il cavo USB allo<br />
<strong>Snooper+</strong>.<br />
Per aggiornare il firmware, lo <strong>Snooper+</strong><br />
dovrebbe essere collegato al computer mediante<br />
cavo USB.<br />
- 39 -
2.3.1 Aggiornamento firmware<br />
Il firmware è il sistema operativo per lo <strong>Snooper+</strong>. Con la continua estensione delle funzionalità di<br />
diagnosi del software <strong>WOW</strong>!, è necessario di volta in volta un nuovo firmware. Questo potrà essere<br />
ottenuto on-line o tramite aggiornamento su DVD e dovrà essere registrato sullo <strong>Snooper+</strong> dopo<br />
l'aggiornamento software.<br />
1. Selezionare Sostituisci firmware (1).<br />
L'applicazione è descritta in dettaglio nel<br />
esecuzione del programma.<br />
Si prega di seguire le istruzioni.<br />
1<br />
- 40 -
3 Prima diagnosi<br />
1. Avviare il software <strong>WOW</strong>! facendo clic sulla<br />
relativa icona <strong>WOW</strong>! sul desktop.<br />
Nella schermata di avvio del programma <strong>WOW</strong>!,<br />
se richiesto, inserire il proprio nome utente e la<br />
password.<br />
2. Selezione del veicolo<br />
Selezionare il veicolo tra Costruttore > Anno<br />
modello > Tipo (1)<br />
Ulteriori informazioni sulla scelta del veicolo sono<br />
contenute nelle Guide (2) e su www.wowportal.com<br />
1<br />
2<br />
3. Selezione di sistema<br />
3<br />
Fare clic nel menu principale su Diagnosi (3)<br />
Selezionare il Gruppo di sistema e poi il<br />
Sistema da controllare.<br />
Esempio: Service > Strumenti.<br />
È anche possibile avviare un Rilevamento del<br />
sistema (4) che individua tutti i sistemi installati<br />
nel veicolo e legge la memoria guasti.<br />
4<br />
4. Avviare la diagnosi mediante i Tasti<br />
funzione (5)<br />
A seconda del sistema e del costruttore, le<br />
possibilità di diagnosi che offre il programma sono<br />
diverse.<br />
- Posizione connettore<br />
- Memoria errori<br />
- Elenco dati<br />
- Funzionen<br />
5<br />
5. La successiva esecuzione della diagnosi è descritta<br />
nel programma. Seguire le indicazioni e<br />
descrizioni.<br />
Questi sono solo i primi passi con il nuovo sistema di diagnosi <strong>WOW</strong>!. Per utilizzare appieno le<br />
funzionalità del sistema di diagnosi e informazione, si consiglia di seguire i nostri corsi di formazione.<br />
Per maggiori informazioni,si consiglia anche di consultare il manuale contenuto nel software in<br />
dotazione. A tal fine, selezionare il pulsante Aiuto<br />
nella barra degli strumenti.<br />
- 41 -
Declaration of conformity<br />
- 42 -
International Offices<br />
GERMANY<br />
<strong>WOW</strong>! Würth <strong>Online</strong> <strong>World</strong><br />
<strong>GmbH</strong><br />
Schliffenstraße Falkhof<br />
74653 Künzelsau<br />
+49 (0) 7940/15-1770<br />
+49 (0)7940/15-3299<br />
Kfz-Technik-Hotline:<br />
0180 / 5005078<br />
e-Mail: info@wowportal.com<br />
http://www.wow-portal.com<br />
AUSTRIA<br />
Würth Handelsgesellschaft<br />
m.b.H.<br />
Würth Straße 1<br />
3071 Böheimkirchen<br />
AUSTRIA<br />
+43 5 08242 0<br />
+43 5 08242 5 33 33<br />
e-Mail: info@wuerth.at<br />
http://www.wuerth.at<br />
BELGIUM<br />
Würth België N.V.<br />
Everdongenlaan 29<br />
2300 Turnhout<br />
+32 14 445 566<br />
+32 14 445 567<br />
e-Mail: info@wurth.be<br />
http://www.wurth.be<br />
BOSNIA AND<br />
HERZEGOVINA<br />
WURTH BH d.o.o.<br />
Binjezevo bb<br />
71240 Hadzici, BiH<br />
+387 33 775 000<br />
+387 33 775 019<br />
e-Mail: info@wurth.ba<br />
http://www.wurth.ba<br />
BULGARIA<br />
Würth Bulgarien EOOD<br />
Mladost 4<br />
Business Park Sofia 1<br />
1715 Sofia<br />
+359 2 965 99 55<br />
+359 2 965 99 66<br />
e-Mail: office@wuerth.bg<br />
http://www.wuerth.bg<br />
CROATIA<br />
Würth-Hrvatska d.o.o.<br />
Franje Lucica 23/III<br />
10000 Zagreb<br />
CROATIA<br />
+385 1 349 87 84<br />
+385 1 349 87 83<br />
e-Mail:<br />
wurth.hrvatska@wuerth.com.<br />
hr<br />
http://www.wuerth.com.hr<br />
CYPRUS<br />
Wurth Cyprus Ltd.<br />
4, Vitona Str.<br />
2033 Strovolos Industrial<br />
Estate<br />
2083 Lefkosia<br />
+357 22 512 086<br />
+357 22 512 091<br />
e-Mail:<br />
wuerthcy@cytanet.com.cy<br />
CZECH REPUBLIK<br />
Würth, spol. s r.o.<br />
Prumyslová zóna<br />
Neprevázka 137<br />
29301 Mladá Boleslav<br />
+420 326 345 111<br />
+420 326 345 119<br />
e-Mail: info@wuerth.cz<br />
http://www.wuerth.cz<br />
DENMARK<br />
Würth Danmark A/S<br />
Montagevej 6<br />
DK-6000 Kolding<br />
+45 79 323 232<br />
+45 79 323 242<br />
e-Mail: mail@wuerth.dk<br />
http://www.wuerth.dk<br />
FRANCE<br />
Würth France SA<br />
Z.I. Ouest<br />
Rue Georges Besse - BP 13<br />
67158 Erstein Cedex<br />
+33 3 88 645 300<br />
+33 3 88 64 60 94<br />
http://www.wurth.fr<br />
Assistance technique <strong>WOW</strong>!<br />
+33 3 88 64 54 42<br />
du lundi au vendredi<br />
de 8h00 à 12h00 et<br />
de 13h30 à 17h00<br />
GREAT BRITAIN<br />
Würth U.K. Ltd.<br />
1 Centurion Way<br />
Erith<br />
Kent DA 18 4 AE<br />
+44 208 319 60 00<br />
+44 208 319 64 00<br />
e-Mail: info@wurth.co.uk<br />
http://www.wurth.co.uk<br />
GREECE<br />
Würth Hellas S.A.<br />
23rd Klm. National Road<br />
Athens-Lamia<br />
145 68 Krioneri<br />
+30 210 6 290 800<br />
+30 210 8 161 691<br />
e-Mail: info@wurth.gr<br />
http://www.wurth.gr<br />
HUNGARY<br />
Würth Szereléstechnika KFT<br />
Gyár utca 2<br />
2040 Budaörs<br />
+36 23 418 130<br />
+36 23 421 777<br />
e-Mail: wuerth@wuerth.hu<br />
http://www.wuerth.hu<br />
IRELAND<br />
Würth Ireland Ltd.<br />
Monaclinoe Industrial Estate<br />
Ballysimon Road<br />
Limerick<br />
+353 61 430 200<br />
+353 61 412 428<br />
e-Mail: cs@wuerth.ie<br />
http://www.wuerth.ie<br />
ISRAEL<br />
Würth Israel Ltd.<br />
Hatohen 2<br />
Zone 34<br />
Caesarea Industrial Park<br />
P.O. Box 3585<br />
+972 4 632 88 00<br />
+972 4 627 09 99<br />
e-Mail: wurth@wurth.co.il<br />
http://www.wurth.co.il<br />
ITALY<br />
Würth S.r.l.<br />
Bahnhofstraße 51<br />
39044 Neumarkt (BZ)<br />
+39 0471 828 111<br />
+39 0471 828 600<br />
e-Mail: vendite@wuerth.it<br />
http://www.wuerth.it<br />
Assistenza <strong>WOW</strong>!<br />
+39 0471 827 789<br />
MACEDONIA<br />
Wuerth - Macedonia<br />
d.o.o.e.l.<br />
ul. Prvomajska b.b.<br />
1000 Skopje<br />
+389 2 272 80 80<br />
+389 2 272 88 72<br />
e-Mail:<br />
contact@wurth.com.mk<br />
http://www.wurth.com.mk<br />
NETHERLANDS<br />
Würth Nederland B.V.<br />
Het Sterrenbeeld 35<br />
5215 MK 's-Hertogenbosch<br />
Postbus 344<br />
5201 AH 's-Hertogenbosch<br />
+31 73 6 291 911<br />
+31 73 6 291 922<br />
e-Mail: info@wurth.nl<br />
http://www.wurth.nl<br />
NORWAY<br />
Würth Norge AS<br />
Morteveien 12,<br />
Gjellerasen Naeringspark<br />
1481 Hagan<br />
+47 464 01 500<br />
+47 464 01 501<br />
e-Mail: kontakt@wuerth.no<br />
http://www.wuerth.no<br />
POLAND<br />
Würth Polska Sp. z o.o.<br />
u. Plochocinska 33<br />
03-044 Warszawa<br />
+48 22 5 102 000<br />
+48 22 5 102 001<br />
e-Mail: biuro@wurth.pl<br />
http://www.wurth.pl<br />
SERBIA<br />
Wurth d.o.o.<br />
Pancevacki put 38<br />
11210 Krnjaca - Beograd<br />
+381 11 2 078 200<br />
+381 11 2 078 225<br />
e-Mail: office@wurth.co.yu<br />
http://www.wurth.co.yu<br />
SLOVAKIA<br />
Würth s.r.o.<br />
Pribylinská ul. c. 2<br />
83255 Bratislava 3<br />
+421 2 49 201 211<br />
+421 2 49 201 299<br />
e-Mail: wurth@wurth.sk<br />
http://www.wurth.sk<br />
SWITZERLAND<br />
Würth AG<br />
Dornwydenweg 11<br />
4144 Arlesheim<br />
+41 61 705 91 11<br />
+41 61 705 94 94<br />
e-Mail: info@wuerth-ag.ch<br />
http://www.wuerth-ag.ch<br />
SOUTH AFRICA<br />
Wuerth South Africa (Pty.) Ltd.<br />
P.O. Box 616<br />
Isando 1600<br />
Johannesburg<br />
+27 11 281 1000<br />
+27 11 974 6169<br />
e-Mail: wurthsa@wurth.co.za<br />
http://www.wurth.co.za<br />
TURKEY<br />
Würth Sanayi Ürünleri Tic.<br />
Ltd. Sti.<br />
Eski Silivri Caddesi No. 46<br />
34535 Mimarsinan<br />
Büyükcekmece<br />
+90 212 866 6200<br />
+90 212 866 84 85<br />
e-Mail: info@wurth.com.tr<br />
http://www.wurth.com.tr<br />
W043002141-DE-ENG-FR-IT / Version:04/04/2012