
Create successful ePaper yourself
Turn your PDF publications into a flip-book with our unique Google optimized e-Paper software.
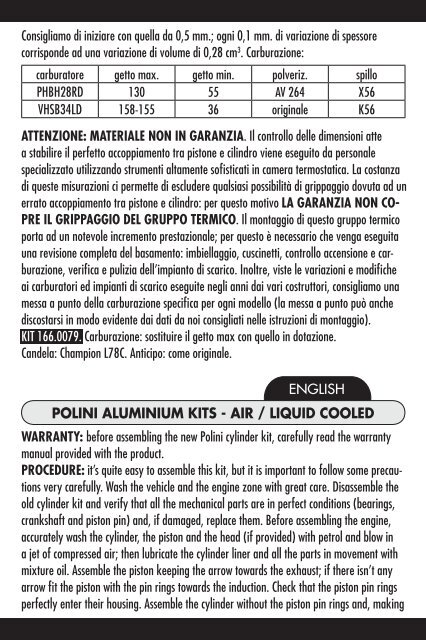
Consigliamo di iniziare con quella da 0,5 mm.; ogni 0,1 mm. di variazione di spessore<br />
corrisponde ad una variazione di volume di 0,28 cm 3 . Carburazione:<br />
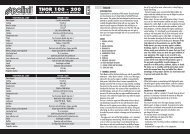
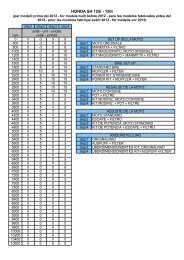
carburatore getto max. getto min. polveriz. spillo<br />
PHBH28RD 130 55 AV 264 X56<br />
VHSB34LD 158-155 36 originale K56<br />
ATTENZIONE: MATERIALE NON IN GARANZIA. Il controllo delle dimensioni atte<br />
a stabilire il perfetto accoppiamento tra pistone e cilindro viene eseguito da personale<br />
specializzato utilizzando strumenti altamente sofisticati in camera termostatica. La costanza<br />
di queste misurazioni ci permette di escludere qualsiasi possibilità di grippaggio dovuta ad un<br />
errato accoppiamento tra pistone e cilindro: per questo motivo LA GARANZIA NON CO-<br />
PRE IL GRIPPAGGIO DEL GRUPPO TERMICO. Il montaggio di questo gruppo termico<br />
porta ad un notevole incremento prestazionale; per questo è necessario che venga eseguita<br />
una revisione completa del basamento: imbiellaggio, cuscinetti, controllo accensione e carburazione,<br />
verifica e pulizia dell’impianto di scarico. <strong>In</strong>oltre, viste le variazioni e modifiche<br />
ai carburatori ed impianti di scarico eseguite negli anni dai vari costruttori, consigliamo una<br />
messa a punto della carburazione specifica per ogni modello (la messa a punto può anche<br />
discostarsi in modo evidente dai dati da noi consigliati nelle istruzioni di montaggio).<br />
KIT 166.0079. Carburazione: sostituire il getto max con quello in dotazione.<br />
Candela: Champion L78C. Anticipo: come originale.<br />
ENGLISH<br />
POLINI ALUMINIUM KITS - AIR / LIQUID COOLED<br />
WARRANTY: before assembling the new Polini cylinder kit, carefully read the warranty<br />
manual provided with the product.<br />
PROCEDURE: it’s quite easy to assemble this kit, but it is important to follow some precautions<br />
very carefully. Wash the vehicle and the engine zone with great care. Disassemble the<br />
old cylinder kit and verify that all the mechanical parts are in perfect conditions (bearings,<br />
crankshaft and piston pin) and, if damaged, replace them. Before assembling the engine,<br />
accurately wash the cylinder, the piston and the head (if provided) with petrol and blow in<br />
a jet of compressed air; then lubricate the cylinder liner and all the parts in movement with<br />
mixture oil. Assemble the piston keeping the arrow towards the exhaust; if there isn’t any<br />
arrow fit the piston with the pin rings towards the induction. Check that the piston pin rings<br />
perfectly enter their housing. Assemble the cylinder without the piston pin rings and, making<br />
the crankshaft rotate, check that the piston slides freely. If a problem happens, detect the<br />
cause and eliminate it. Place the base gasket and fit the cylinder and the head with the<br />
related gasket. Lock the nuts in cross-way. Head with water pipe (if provided): fit the pipe as<br />
per drawing A. Because of the great power increase, in order to avoid the risk of exceeding<br />
the maximum number of revolutions and of racing the engine, we suggest your using longer<br />
transmission gears by substituting the gear set and/or the sprocket - gear set.<br />
Attention: silencers and exhaust systems which have been modified to replace the original<br />
ones need a specific carburator’s setting up to work in the correct way. Different calibrations<br />
which can pointedly move away from the data and jets we recommended.<br />
If you decide to fit other Polini products together with the cylinder kit, please look up in our<br />
catalogues or visit our web site www.polini.com.<br />
RUNNING IN - During the first 500 Km don’t exceed the ¾ of the accelerator opening and<br />
avoid covering long upward runs putting with engine under strain.<br />
GENERAL SUGGESTIONS - Both during the running-in and after never try getting the<br />
highest power before achieving the best running temperature. The bedding of the various<br />
parts will be obtained after an average of about 500 km. We suggest a careful setting up of<br />
the engine, the carburettor and the variator. This kit has been studied for extreme performance<br />
at high revolutions. A wrong calibration could compromise the engine performance.<br />
We suggest your using original Polini Motori spare parts only.<br />
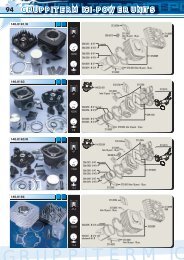
KIT 107.0028. Remove the bearing and the oil seal from the original cylinder, using a Ø9,5<br />
drift (fig. B); fit the original bearing and the oil seal (provided) in the Polini cylinder, using<br />
the provided clamp (fig. C). Modification to the valve guide clamp (fig. D): lower the clamp<br />
till the dimension of 8,5mm. <strong>In</strong>sert the provided valve and check that the “A” and “B”<br />
surfaces are perfectly aligned. Fit the valve, with the datum line upwards.<br />
Attention: some of the 1987 models fit the 1988 version valve: you have to buy the right<br />
Polini valve (you can detect the right diameter, measuring the diameter of the stem. Fig. D).<br />
Ref. 176.0200 Cagiva C9, stem Ø7,9 - 176.0210 Cagiva C10, stem Ø 9,4. For kit Cagiva C9:<br />
insert the provided screw (M5x27) in the valve cover, as indicated per figure E.<br />
Modification of the head dome (fig. F): turn the dome head up to Ø 62. Choose among the<br />
provided gaskets the appropriate one, measuring the thickness of the original base gasket.<br />
Place the gasket on the crankcase surface, fit the cylinder, insert the O-rings in the head<br />
and assemble the head itself. Compression ratio: as soon as you have done the assembling,<br />
without the exhaust system and the spark plug, bring the piston up to the top dead centre<br />
(T.D.C.) and inject, using a graduated syringe, some oil in the spark plug hole; fill the<br />
combustion chamber, including the spark plug hole thread. The oil volume should be included