DVR 4 CH H.264 CON VGA Sch. 1093/004 H.264 4CH ... - Golmar
DVR 4 CH H.264 CON VGA Sch. 1093/004 H.264 4CH ... - Golmar
DVR 4 CH H.264 CON VGA Sch. 1093/004 H.264 4CH ... - Golmar

You also want an ePaper? Increase the reach of your titles
YUMPU automatically turns print PDFs into web optimized ePapers that Google loves.
DS<strong>1093</strong>-027<br />
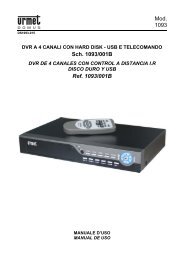
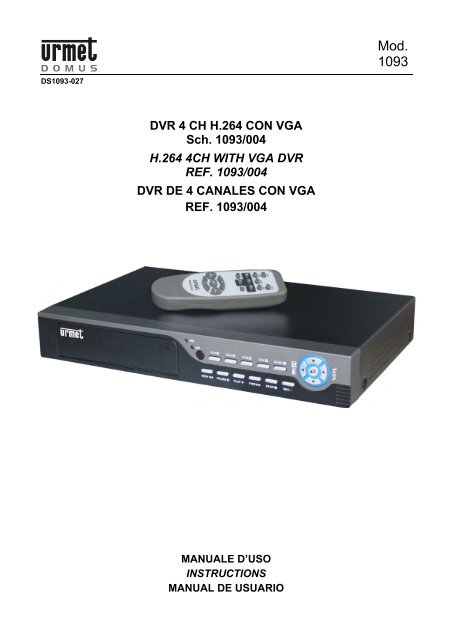
<strong>DVR</strong> 4 <strong>CH</strong> <strong>H.264</strong> <strong>CON</strong> <strong>VGA</strong><br />
<strong>Sch</strong>. <strong>1093</strong>/<strong>004</strong><br />
<strong>H.264</strong> 4<strong>CH</strong> WITH <strong>VGA</strong> <strong>DVR</strong><br />
REF. <strong>1093</strong>/<strong>004</strong><br />
<strong>DVR</strong> DE 4 CANALES <strong>CON</strong> <strong>VGA</strong><br />
REF. <strong>1093</strong>/<strong>004</strong><br />
MANUALE D’USO<br />
INSTRUCTIONS<br />
MANUAL DE USUARIO<br />
Mod.<br />
<strong>1093</strong>
ITALIANO<br />
INDICE<br />
1 Informazioni generali ............................................................................................................................... 4<br />
1.1 Descrizione prodotto................................................................................................................. 4<br />
1.1.1 Caratteristiche generali..................................................................................................................................... 4<br />
1.2 Apertura della confezione......................................................................................................... 4<br />
1.2.1 Contenuto della confezione .............................................................................................................................. 4<br />
1.3 Avvertenze................................................................................................................................ 5<br />
1.3.1 Alimentazione .................................................................................................................................................. 5<br />
1.3.2 Precauzioni per la sicurezza .......................................................................................................................... 5<br />
1.3.3 Precauzioni per l’installazione........................................................................................................................ 5<br />
1.3.4 Pulizia del dispositivo...................................................................................................................................... 5<br />
1.3.5 Disco rigido (hard disk) ................................................................................................................................... 5<br />
1.3.6 Registrazioni immagini.................................................................................................................................... 6<br />
1.3.7 Privacy e Copyright ......................................................................................................................................... 6<br />
2 Descrizione delle parti ............................................................................................................................. 7<br />
2.1 Pannello frontale....................................................................................................................... 7<br />
2.2 Pannello posteriore................................................................................................................... 9<br />
2.3 Telecomando I.R. ................................................................................................................... 11<br />
2.3.1 Batterie............................................................................................................................................................ 12<br />
3 Avvio del <strong>DVR</strong>......................................................................................................................................... 13<br />
3.1 Accensione e spegnimento .................................................................................................... 13<br />
3.2 Interfaccia principale............................................................................................................... 13<br />
4 Configurazione del <strong>DVR</strong> ........................................................................................................................ 14<br />
4.1 Struttura del menu principale ................................................................................................. 14<br />
4.2 Menu principale ...................................................................................................................... 15<br />
4.2.1 Programmazione della telecamera.............................................................................................................. 15<br />
4.2.2 Impostazione della registrazione ................................................................................................................. 17<br />
4.2.3 Programmazione della rete .......................................................................................................................... 18<br />
4.2.4 Ricerca registrazioni...................................................................................................................................... 19<br />
4.2.5 Visualizzatore (Multi player) ......................................................................................................................... 20<br />
4.2.6 Gestione del dispositivo................................................................................................................................ 22<br />
4.2.6.1 Configurazione Hard Disk .............................................................................................................................22<br />
4.2.6.2 Impostazione allarmi .....................................................................................................................................23<br />
4.2.6.3 Programmazione dell’allarme inviato via email .............................................................................................24<br />
4.2.6.4 Impostazione PTZ .........................................................................................................................................25<br />
4.2.6.5 Mobile............................................................................................................................................................25<br />
4.2.6.6 Motion Detection ...........................................................................................................................................28<br />
4.2.7 Sistema .......................................................................................................................................................... 29<br />
4.2.7.1 Impostazione ora...........................................................................................................................................29<br />
4.2.7.2 Password.......................................................................................................................................................29<br />
4.2.7.3 Standard Video..............................................................................................................................................30<br />
4.2.7.4 Informazioni...................................................................................................................................................30<br />
4.2.7.5 Manutenzione del sistema.............................................................................................................................30<br />
4.3 Blocco Menu........................................................................................................................... 31<br />
4.4 Ricerca Video ......................................................................................................................... 31<br />
4.5 Comandi PTZ ......................................................................................................................... 31<br />
4.6 Avvio Registrazione Manuale................................................................................................. 32<br />
4.7 Stop Registrazione Manuale .................................................................................................. 32<br />
4.8 Avvio/Stop funzione Cruise .................................................................................................... 32<br />
4.9 Avvia autosequenza ............................................................................................................... 32<br />
4.10 Modalità PIP ........................................................................................................................... 32<br />
4.11 Zoom digitale .......................................................................................................................... 32<br />
5 Varie......................................................................................................................................................... 33<br />
5.1 Rimozione del cassettino estraibile dell’Hard Disk................................................................. 33<br />
6 Specifiche tecniche................................................................................................................................ 34<br />
7 Uso programma Netviewer.................................................................................................................... 35<br />
7.1 Download dei Plug-in e installazione...................................................................................... 35<br />
7.2 Accesso al programma NetViewer......................................................................................... 35<br />
DS<strong>1093</strong>-027 2
7.3 Interfaccia principale del NetViewer....................................................................................... 35<br />
7.3.1 Menu principale............................................................................................................................................... 36<br />
7.3.1.1 Menu Live......................................................................................................................................................36<br />
7.3.1.2 Menu Replay .................................................................................................................................................36<br />
7.3.1.3 Programmazione ...........................................................................................................................................36<br />
7.3.1.4 Informazioni...................................................................................................................................................38<br />
7.3.2 Menu PTZ ...................................................................................................................................................... 38<br />
7.3.3 Menu di controllo del live e della riproduzione ........................................................................................... 38<br />
Appendice: installazione Active X ................................................................................................................. 39<br />
DS<strong>1093</strong>-027 3
1 INFORMAZIONI GENERALI<br />
Il presente documento descrive come installare ed utilizzare il modello di Video Registratore Digitale URMET Domus<br />
S.p.A. <strong>Sch</strong>.<strong>1093</strong>/<strong>004</strong>.<br />
Prima di usare l’apparecchiatura, leggere il presente manuale che ne descrive l’uso corretto e sicuro.<br />
Conservare questo manuale con attenzione ed in un luogo facilmente reperibile per poterlo consultare prontamente<br />
quando necessario.<br />
1.1 DESCRIZIONE PRODOTTO<br />
Il prodotto URMET Domus S.p.A. è un videoregistratore digitale triplex con interfaccia Ethernet, in grado di registrare più<br />
telecamere su hard disk interno mentre simultaneamente si riproducono immagini in PlayBack oppure in Live.<br />
1.1.1 CARATTERISTI<strong>CH</strong>E GENERALI<br />
�� Modalità Triplex (registrazione, riproduzione e trasmissione su rete contemporanee)<br />
�� Formato compressione video H. 264, con risoluzioni D1, HD1 e CIF<br />
�� Registrazione delle immagini in tempo reale<br />
�� Registrazione di canali singoli o multipli<br />
�� Dimensione programmabile dei files di registrazione<br />
�� Funzione di doppio stream (Main Stream e Sub Stream) per l’utilizzo ottimale della banda di trasmissione<br />
�� Formato di compressione audio ADPCM<br />
�� Possibilità di controlli remoti multipli<br />
�� Controllo remoto tramite reti mobili<br />
�� Gestione completa degli allarmi<br />
�� Modalità registrazione di più allarmi<br />
�� Invio di allarmi via email<br />
�� Modalità di auto-manutenzione<br />
�� Gestione delle operazioni PTZ tramite connessione RS-485<br />
�� Hard Disk estraibile per eventuale sostituzione (NOTA BENE: non si prevede l’uso dell Hard Disk connesso ad<br />
un PC)<br />
�� Possibilità di backup su porta USB 2.0 (flash drive o hard disk)<br />
�� Utilizzo del Mouse USB per una navigazione più veloce dei menu<br />
�� Disponibilità di telecomando<br />
�� Possibilità di controllo remoto tramite SW client dedicato o tramite browser Internet Explorer<br />
�� OSD multilingue<br />
�� Dimensioni compatte<br />
1.2 APERTURA DELLA <strong>CON</strong>FEZIONE<br />
Verificare che l’imballo ed il contenuto non presentino danni visibili. Se alcune parti non sono presenti o risultano<br />
danneggiate, contattare immediatamente il rivenditore. In questi casi non tentare di utilizzare il dispositivo. Se il prodotto<br />
dovesse essere rimandato al fornitore, assicurarsi di spedirlo con il suo imballo originale.<br />
1.2.1 <strong>CON</strong>TENUTO DELLA <strong>CON</strong>FEZIONE<br />
�� Videoregistratore digitale<br />
�� Alimentatore<br />
�� INPUT � 100-240 Vac 50/60Hz 1A<br />
�� OUTPUT � 12Vdc 4A<br />
�� Manuale istruzioni<br />
�� Viti di fissaggio hard disk<br />
�� MINICD-ROM contenente software di visualizzazione<br />
�� Un mouse<br />
�� Un telecomando I.R. (compreso 2 pile size AAA)<br />
�� Due chiavi per rimozione cassettino disco rigido<br />
�� Una presa Shuko<br />
�� Una presa Italiana<br />
�NOTA BENE<br />
La composizione degli accessori a corredo può essere variata senza alcun preavviso.<br />
DS<strong>1093</strong>-027 4
1.3 AVVERTENZE<br />
1.3.1 ALIMENTAZIONE<br />
�� Questo dispositivo deve essere alimentato esclusivamente con l’alimentatore fornito in dotazione. Verificare il<br />
valore della tensione di rete alla quale l’alimentatore dovrà essere collegato.<br />
�� Connettere il cavo di alimentazione alla rete solo a collegamenti ultimati.<br />
�� Per scollegare il cavo di alimentazione dalla presa impugnare la spina evitando di tirare il cavo.<br />
�� Per spegnere il dispositivo occorre staccare la presa di alimentazione. Questa operazione non deve essere<br />
assolutamente eseguita quando il <strong>DVR</strong> si trova in fase di registrazione, in fase di riproduzione oppure quando ci<br />
si trova nei menù di configurazione. Per evitare di rovinare irreparabilmente l’hard disk occorre arrestare le<br />
registrazioni e le riproduzioni in corso prima di togliere alimentazione al dispositivo.<br />
1.3.2 PRECAUZIONI PER LA SICUREZZA<br />
�� Per prevenire il rischio di incendio e folgorazione evitare di esporre il dispositivo alla pioggia o all'umidità e di<br />
introdurre al suo qualsiasi oggetto solido o liquido. Se ciò dovesse avvenire scollegare il dispositivo dalla rete di<br />
alimentazione e farlo controllare da personale qualificato.<br />
�� In nessun caso il dispositivo deve essere aperto. Per qualsiasi intervento di riparazione rivolgersi a personale<br />
qualificato oppure contattare il centro assistenza tecnico autorizzato.<br />
�� Conservare questa apparecchiatura lontano dalla portata dei bambini; in caso contrario questi potrebbero<br />
danneggiarla, o danneggiarla accidentalmente.<br />
�� Non toccare questa apparecchiatura con le mani bagnate per evitare scosse elettriche o danni meccanici.<br />
�� Se l’apparecchiatura dovesse cadere o il contenitore esterno dovesse risultare danneggiato, cessarne l’utilizzo.<br />
Se si continuasse ad utilizzarla in queste condizioni, potrebbe essere provocata una scossa elettrica. In questo<br />
caso contattare il rivenditore, o l’installatore autorizzato.<br />
1.3.3 PRECAUZIONI PER L’INSTALLAZIONE<br />
�� Per prevenire il surriscaldamento del dispositivo, collocarlo in una posizione che permetta il passaggio dell'aria<br />
attraverso i fori previsti sullo chassis. Nel caso di installazione all’interno di un rack, assicurarsi che vi siano<br />
almeno 5 cm di spazio libero. Per lo stesso motivo non deve essere installato vicino a fonti di calore come<br />
radiatori o condotti d'aria calda o in posizioni dove sia esposto direttamente all’irradiazione solare, così come non<br />
deve essere installato in locali soggetti a eccessiva polvere, vibrazioni meccaniche o urti.<br />
�� Non posizionare questa apparecchiatura su alcuna superficie instabile come un tavolo traballante o inclinato. In<br />
caso contrario l’apparecchiatura potrebbe cadere con conseguenti lesioni o guasti meccanici.<br />
�� Non installare questa apparecchiatura in alcun luogo dove possa essere esposta a umidità o acqua. Non<br />
bagnarla con un getto d’acqua diretto per evitare la possibilità di incendio, scosse elettriche o guasto meccanico.<br />
�� Se all’interno dell’apparecchiatura dovesse penetrare acqua o qualche altro materiale estraneo cessarne l’utilizzo<br />
al fine di evitare la possibilità di incendio e scosse elettriche. In questo caso contattare il rivenditore, o<br />
l’installatore autorizzato.<br />
�� Non posare sul dispositivo oggetti pesanti o che generino calore, dato che ciò può danneggiare il mobile o far<br />
aumentare la temperatura interna, causando anomalie di funzionamento.<br />
�� Non coprire l’apparecchiatura con un panno quando sta funzionando per evitare deformazioni del contenitore<br />
esterno e surriscaldamento delle parti interne con conseguente possibilità di incendio, scosse elettriche o guasto<br />
meccanico.<br />
�� Non avvicinare magneti od oggetti magnetizzati al dispositivo in quanto ciò potrebbe causare anomalie di<br />
funzionamento.<br />
�� Non usare questa apparecchiatura in ambienti con presenza di fumo, vapore, umidità, polvere, o vibrazioni<br />
intense.<br />
�� Non mettere in funzione il dispositivo immediatamente dopo il trasporto da un luogo freddo ad un luogo caldo e<br />
viceversa. Attendere mediamente tre ore: questo intervallo di tempo è necessario al dispositivo per adattarsi al<br />
nuovo ambiente (temperatura, umidità, ecc... ).<br />
1.3.4 PULIZIA DEL DISPOSITIVO<br />
�� Usare un panno asciutto e strofinare leggermente per eliminare polvere e sporcizia.<br />
�� Nel caso in cui la sporcizia non fosse eliminabile con un panno asciutto, compiere l’operazione con un panno<br />
inumidito con detergente neutro.<br />
�� Non usare liquidi volatili come benzina, alcool, solventi ecc. o panni trattati chimicamente per pulire il dispositivo<br />
al fine di evitare deformazioni, deterioramenti o graffi della finitura della vernice.<br />
1.3.5 DISCO RIGIDO (HARD DISK)<br />
�� Il disco rigido installato su questo dispositivo è sensibile agli urti, agli sbalzi di temperatura ed alle vibrazioni.<br />
L’inosservanza di tali avvertenze oltre a compromettere il corretto funzionamento del dispositivo potrebbe<br />
causare la perdita dei dati contenuti sul disco rigido.<br />
�� In caso di riparazione, prima di portare l’apparecchio al centro assistenza è consigliabile effettuare il salvataggio<br />
dei dati considerati importanti. La società URMET Domus S.p.A. non assume nessuna responsabilità per<br />
l’eventuale perdita di dati memorizzati.<br />
DS<strong>1093</strong>-027 5
1.3.6 REGISTRAZIONI IMMAGINI<br />
�� Questa apparecchiatura non è progettata come antifurto ma per registrare immagini. Perciò, qualora l’utilizzatore<br />
subisca un furto, la società URMET Domus S.p.A. non può essere considerata responsabile di alcuna perdita o<br />
danno conseguente.<br />
�� Effettuare una registrazione di prova prima di utilizzare l’apparecchiatura per verificare che l’operazione avvenga<br />
correttamente. Tenere in considerazione che se l’utente subisce qualche perdita o danno a causa di errata<br />
impostazione di osservazione, utilizzo, funzionamento improprio o malfunzionamento dell’apparecchiatura, la<br />
società URMET Domus S.p.A. non può essere considerata responsabile per l’eventuale perdita di dati<br />
memorizzati.<br />
�� Questa apparecchiatura contiene componenti elettronici di precisione. Per garantire la registrazione corretta delle<br />
immagini, non sottoporla ad urti o colpi durante tale operazione.<br />
1.3.7 PRIVACY E COPYRIGHT<br />
�� Il videoregistratore digitale <strong>1093</strong>/<strong>004</strong> è un dispositivo per sistemi TVCC. La registrazione delle immagini è<br />
subordinata alle leggi vigenti nel paese di utilizzo. È inoltre vietata la registrazione di immagini protette da<br />
Copyright.<br />
�� Gli utenti del prodotto sono responsabili per il controllo ed il rispetto di tutte le norme e gli statuti locali relativi al<br />
monitoraggio e alla registrazione di segnali video. Il produttore NON potrà essere ritenuto responsabile per un<br />
utilizzo di questo prodotto che non sia in conformità con le norme in vigore. Per maggiori informazioni consultare<br />
l’indirizzo web http://www.garanteprivacy.it<br />
DS<strong>1093</strong>-027 6
2 DESCRIZIONE DELLE PARTI<br />
2.1 PANNELLO FRONTALE<br />
Sportello chiuso<br />
<strong>H.264</strong> 4<strong>CH</strong> Digital Video Recorder<br />
PARTICOLARE DESCRIZIONE<br />
Led Power: indica che il dispositivo è alimentato.<br />
Led HDD: indica che l’hard disk è in uso (lettura / scrittura).<br />
Sensore IR: ricevitore segnali I.R. inviati dal telecomando<br />
Tasto <strong>CH</strong>1: è il tasto che visualizza a schermo intero le immagini della telecamera 1.<br />
Tasto <strong>CH</strong>2: è il tasto che visualizza a schermo intero le immagini della telecamera 2.<br />
Tasto <strong>CH</strong>3: è il tasto che visualizza a schermo intero le immagini della telecamera 3.<br />
Tasto <strong>CH</strong>4: è il tasto che visualizza a schermo intero le immagini della telecamera 4.<br />
Tasto QUAD: è il tasto che visualizza tutte le telecamere.<br />
Tasto REW: è il tasto di fast backward; consente lo spostamento verso sinistra nei menu / il<br />
riavvolgimento in riproduzione.<br />
Tasto PAUSE: è il tasto di fermo immagine; per riavviare la riproduzione premere il tasto play.<br />
Consente la riproduzione frame per frame.<br />
Tasto PLAY: è il tasto di riproduzione; svolge la funzione di start. Entra nel menù di riproduzione.<br />
Tasto FWD: è il tasto di fast forward; consente la riproduzione veloce delle immagini su diverse<br />
velocità; premere più volte per modificare la velocità.<br />
Tasto STOP: è il tasto di stop; interrompe le funzioni play e record.<br />
Tasto REC: è il tasto di registrazione; svolge la funzione di start.<br />
Tasto �: nel menù di configurazione sposta il cursore verso l’alto.<br />
Tasto � EDIT �: è il tasto di selezione. Consente l’accesso al menu pop-up e ai vari sottomenù. È il<br />
tasto di conferma nel menù di configurazione.<br />
DS<strong>1093</strong>-027 7
Sportello aperto<br />
Tasto �: nel menù di configurazione sposta il cursore verso il basso.<br />
Tasto � � MENU/ESC: consente di accedere/uscire dal menù di configurazione o di tornare al menù<br />
precedente.<br />
Tasto ��. Consente l’accesso al menu pop-up.<br />
Per aprire lo sportello frontale, è necessario esercitare su di esso una leggera pressione in corrispondenza del simbolo "�”.<br />
A<br />
PARTICOLARE DESCRIZIONE<br />
A<br />
Cassetto estraibile: contiene l’unità di memorizzazione delle immagini. NON estrarre il cassettino<br />
quando il dispositivo è alimentato: il disco rigido ed il <strong>DVR</strong> potrebbero danneggiarsi!<br />
B Porta USB: porta a cui connettere un dispositivo USB (Flash Drive, Hard Drive).<br />
C Serratura cassettino estraibile: è la serratura di sicurezza del cassettino estraibile.<br />
�NOTA BENE<br />
La porta USB sul pannello frontale non è destinata alla connessione del mouse a corredo.<br />
Questo deve essere collegato sulla porta USB posta sul pannello posteriore (vedi oltre).<br />
DS<strong>1093</strong>-027 8<br />
B<br />
C
2.2 PANNELLO POSTERIORE<br />
PARTICOLARE DESCRIZIONE<br />
Interruttore di accensione / spegnimento.<br />
Presa di alimentazione: utilizzare l’adattatore in dotazione per alimentare il dispositivo.<br />
Connettori BNC uscita video: sono i connettori a cui collegare il monitor.<br />
Connettore BNC ingresso video canale 1 / 2 / 3 / 4: sono i connettori a cui collegare le<br />
telecamere. Sono terminati a 75 �.<br />
Morsettiera 12 poli RS-485/Sensori/Allarme: è la morsettiera a cui si collegano i sensori di<br />
ingresso / l’uscita di allarme e Interfaccia RS485.<br />
Uscita di areazione: evitare di ostruire il passaggio dell’aria - il dispositivo potrebbe<br />
danneggiarsi.<br />
Connettore al terminale di massa / filo di massa.<br />
Uscita video <strong>VGA</strong>: connessione uscita monitor <strong>VGA</strong><br />
Porta Ethernet: connessione intranet, internet (rj45). utilizzare un cavo incrociato (non fornito a<br />
corredo) sia per la connessione ad un router/switch che per la connessione ad un pc. sarà<br />
naturamente possibile anche usare un cavo dirotto per la connessione ad un router/switch.<br />
DS<strong>1093</strong>-027 9
Dettagli Porta RS485/Sensori/Allarme<br />
�<br />
�<br />
�<br />
�<br />
�<br />
�<br />
�<br />
�<br />
�<br />
�<br />
�� Pin 1: RS-485-<br />
�� Pin 2: RS-485+<br />
Porta USB: connessione mouse USB<br />
Ingressi audio: connessione canali audio 1-4 (RCA)<br />
Uscita audio: connessione uscita segnale audio (RCA)<br />
�� Pin 3-4: ingresso Sensore 1 (polarità programmabile)<br />
�� Pin 5-6: ingresso Sensore 2 (polarità programmabile)<br />
�� Pin 7-8: ingresso Sensore 3 (polarità programmabile)<br />
�� Pin 9-10: ingresso Sensore 4 (polarità programmabile)<br />
�� Pin 11-12: Uscita Allarme (relè NC)<br />
DS<strong>1093</strong>-027 10<br />
1<br />
2<br />
3<br />
4<br />
5<br />
6<br />
7<br />
8<br />
9 11<br />
10 12
2.3 TELECOMANDO I.R.<br />
Il telecomando fornito a corredo del dispositivo è stato studiato in modo da conferirgli la massima robustezza ed un’eccezionale<br />
funzionalità.<br />
Esso deve essere comunque maneggiato con alcune avvertenze, evitando di:<br />
�� lasciarlo esposto alla pioggia.<br />
�� versare liquidi sulla tastiera o farlo cadere in acqua.<br />
�� fargli subire forti urti o lasciarlo cadere su superfici dure.<br />
�� lasciarlo esposto ai raggi solari.<br />
�� interporre degli ostacoli tra il telecomando e il dispositivo mentre si utilizza il telecomando.<br />
Il telecomando costituisce l’interfaccia tra l’utente ed il dispositivo. È quindi particolarmente importante conoscere le parti del<br />
telecomando che permettono tale interfacciamento.<br />
TASTO DESCRIZIONE<br />
1-8<br />
9�0<br />
ALL<br />
Menu<br />
�<br />
�<br />
� /<br />
SEL<br />
�<br />
�<br />
Audio<br />
Mute<br />
Selezione canali 1-4 ; Tasto numerico<br />
Tasto numerico<br />
Selezione tutti i canali in Quad<br />
Entrata/Uscita menu principale<br />
Tasto per salire<br />
Tasto per scendere<br />
Tasto Sinistra / Destra<br />
Tasto per selezionare / modificare<br />
Tasto per tornare indietro<br />
Tasto per la riproduzione, accesso al menu di ricerca registrazioni<br />
Tasto avanzamento<br />
Registrazione manuale<br />
Pausa / Riproduzione per frame<br />
Stop registrazione manuale; Stop riproduzione<br />
Non disponibile<br />
Non disponibile<br />
DS<strong>1093</strong>-027 11
Operazioni con il Mouse<br />
Tasto sinistro del<br />
mouse<br />
Tasto destro del<br />
mouse<br />
In modalità Lock, permette di entrare nel menu e selezionare uno qualunque dei sub menu per aprire la<br />
finestra di Log-in; in modalità Unlock, permette di entrare nel menu e premere il tasto sinistro per entrare<br />
direttamente in uno qualunque dei sub menu.<br />
Permette di cambiare lo stato della casella di controllo o dell’area del Motion Detection.<br />
Permette di regolare la barra di controllo del colore e la barra di controllo del volume.<br />
Permette di selezionare valori nelle programmazioni e l’inserimento di vocaboli, simboli speciali, numeri e<br />
caratteri. Può anche sostituire l’uso dell’ [Enter- ] o del [Backspace ]<br />
Permette la riproduzione di una registrazione e visualizza le informazioni della stessa nella modalità Ricerca<br />
Video menu, funzione [Lista File] del Menu<br />
Permette la visualizzazione del menu in modalità Live<br />
Permette l’uscita dal menu in modalità menu principale o sub menu<br />
Doppio click sul<br />
tasto sinistro Permette l’ingrandimento dello schermo in modalità Live o riproduzione.<br />
Spostamento del<br />
mouse<br />
Trascinamento del<br />
mouse<br />
Permette la Selezione della voce di menu.<br />
In modalità Motion permette la selezione dell’area di motion. In modalità [Setup Colore], permette la<br />
regolazione della barra di controllo del colore e della barra di controllo del volume.<br />
2.3.1 BATTERIE<br />
Il telecomando è alimentato da due pile ministilo tipo AAA, fornite in dotazione. Per installarle basta far scorrere il coperchietto del<br />
vano porta-pile ed inserirle nel vano rispettando la polarità indicata. Una volta inserite, riposizionare il coperchietto. Per usare il<br />
telecomando, puntarlo verso il ricevitore del <strong>DVR</strong>.<br />
In caso di sostituzione delle batterie, si<br />
raccomanda di non disperderle nell’ambiente ma<br />
di riporle negli appositi contenitori per la raccolta<br />
differenziata.<br />
�NOTA BENE<br />
Entrambe le batterie devono essere sostituite contemporaneamente.<br />
Estrarre le batterie in caso di prolungato periodo di inutilizzo del telecomando.<br />
DS<strong>1093</strong>-027 12
3 AVVIO DEL <strong>DVR</strong><br />
3.1 ACCENSIONE E SPEGNIMENTO<br />
Premendo il tasto , posizionato sul retro dell’unità, sul pannello frontale si accende la spia<br />
visualizzata la videata sottostante:.<br />
Il sistema si avvierà e comincerà l’inizializzazione<br />
3.2 INTERFACCIA PRINCIPALE<br />
DS<strong>1093</strong>-027 13<br />
PWR , mentre sul monitor verrà<br />
Quando l’inizializzazione del sistema sarà terminata, sarà possibile entrare<br />
nell’interfaccia principale. La figura rappresenta l’interfaccia principale sistema priva<br />
di immagini, vale a dire priva di ingressi video. In presenza di ingressi video,<br />
l’interfaccia mostrerà immagini dal vivo relative ai diversi canali. In questa modalità,<br />
facendo doppio click sulle immagini dal vivo l’immagine s’ingrandirà a schermo<br />
intero; facendo di nuovo doppio click, le immagini ritorneranno alle dimensioni<br />
precedenti. Premendo il tasto destro del mouse, si entrerà nel menu pop-up;<br />
premendo il tasto sinistro, si potranno selezionare le opzioni del menu; facendo click<br />
col tasto destro al di fuori dei menu si uscirà dagli stessi.
4 <strong>CON</strong>FIGURAZIONE DEL <strong>DVR</strong><br />
MENU IN POP UP<br />
4.1 STRUTTURA DEL MENU PRINCIPALE<br />
Menu<br />
Principale<br />
TeleCamera<br />
Registrazione<br />
Rete<br />
Ricerca Video<br />
Gestione<br />
Dispositivo<br />
Sistema<br />
Dopo aver terminato l’inizializzazione del sistema, premete il tasto destro del<br />
mouse per entrare nel menu in pop-up. Adesso si può procedere alla<br />
programmazione dei parametri, alla registrazione, ecc.<br />
Colore<br />
DS<strong>1093</strong>-027 14<br />
Cerca<br />
Riproduzione<br />
Lista file File Backup<br />
Gestione HD<br />
Imposta Allarme<br />
Imposta PTZ<br />
Mobile<br />
Motion<br />
Data/Ora<br />
Password Utente<br />
Imposta Video<br />
Seleziona Lingua<br />
Informazioni Sistema<br />
Manutenzione<br />
Imposta Email<br />
Imposta Area
4.2 MENU PRINCIPALE<br />
4.2.1 PROGRAMMAZIONE DELLA TELECAMERA<br />
Per il miglior uso in interni, si consiglia di agire sulle regolazioni di luminosità e contrasto.<br />
DS<strong>1093</strong>-027 15<br />
Premendo il tasto destro del mouse, sullo schermo comparirà il menu in pop-up.<br />
Per entrare nell’interfaccia del menu principale selezionare la voce [menu<br />
principale] sul menu. E’ possibile anche utilizzare il tasto menu sul pannello<br />
frontale per aprire la finestra e agire sui tasti FWD e REW per spostarsi all’interno<br />
del menu, e sul tasto SEL per selezionare l’icona ed entrare. Premere il tasto ESC<br />
per tornare alla finestra precedente.<br />
Nella modalità Menu principale è possibile programmare tutte le configurazioni del<br />
dispositivo.<br />
NOTA BENE:L’accesso al Menu Principale può essere limitato ai possosiri di<br />
Password.<br />
La Password di Default per il primo accesso ad amministratore è 123456.<br />
Si consiglia di cambiarla appena possibile con la propria e di conservarla in un<br />
luogo sicuro<br />
Per impostare la visualizzazione del nome e della posizione di ciascun canale<br />
andare su [Menu Principale � Telecamera]. Cliccando sulle singole voci si<br />
accede alle modifiche dei testi e dei parametri. Si possono inoltre regolare la<br />
luminosità dell’immagine, il grado d’intensità, il contrasto e le impostazioni di<br />
colore di ciascun canale dopo essere entrati nel Menu [Colore]<br />
È possibile configurare delle Privacy Zones (aree di riservatezza) selezionando<br />
la voce “Privacy Zone”.<br />
È possibile impostare il tempo di ciclata dei canali in rotazione selezionando il<br />
tasto “AUTOSEQ”.<br />
E’ anche possibile programmare la visualizzazione in Live di ciascun canale.<br />
NOTA BENE: il nome di ciascun canale può essere di massimo otto<br />
caratteri.<br />
Selezionare [AUTOSEQ] per avviare la funzione di visione in sequenza dei<br />
canali. Dopo aver avviato questa funzione, i segnali video dei canali <strong>CH</strong>1, <strong>CH</strong>2,<br />
<strong>CH</strong>3, <strong>CH</strong>4 e in quad ruoteranno ciclicamente.<br />
Il tempo di sosta su ciascun canale è configurabile tra 0 e 10 secondi (Default:<br />
5 secondi)<br />
NOTA BENE:<br />
�� Per avviare la funzione AUTOSEQ sarà necessario cliccare<br />
sull’opzione AUTOSEQ disponibile sul Menu pop-up (vedi capitolo 4)<br />
�� Per arrestare la funzione AutoSEQ sarà necessario fare un click con il<br />
Mouse.<br />
La figura rappresenta il Menu nel quale è possibile regolare la luminosità<br />
dell’immagine, il grado d’intensità, il contrasto e le impostazioni di colore di ciascun<br />
canale.<br />
NOTA BENE:<br />
�� Per eseguire le modifiche premere il tasto [APPLICA] al fondo delle<br />
finestre di sub-menu per salvare la modifica e infine premere il tasto [OK].<br />
�� Se si vuole cancellare una modifica, premere il tasto [USCITA] per uscire<br />
dal menu.<br />
�� Premendo il tasto [DEFAULT], tutti i valori saranno riprogrammati ai valori<br />
di fabbrica (default).
Privacy Zone<br />
DS<strong>1093</strong>-027 16<br />
Per abilitare le Privacy Zone selezionare “ON” per ciascuna Telecamera , a<br />
questo punto è possibile selezionare fino ad un massimo di 4 aree di<br />
Privacy.<br />
Per disabilitare le Privacy Zone selezionare “OFF”.<br />
Selezionando “SETUP” è possibile impostare le Aree di privacy che si<br />
possono spostare, ingrandire o ridurre a seconda delle esigenze.
4.2.2 IMPOSTAZIONE DELLA REGISTRAZIONE<br />
Selezionare [Menu Principale] �[Registrazione] per entrare nel menu<br />
[Registrazione]<br />
Funzioni<br />
1. Il menu [MODO REC] permette l’impostazione delle registrazioni: 24 ore,<br />
su Motion o a un orario stabilito.<br />
2. [<strong>CH</strong>IUDI FILE OGNI] indica la durata massima dei file registrati (15, 30,<br />
45, 60 min).<br />
Il menu [Registrazione] permette di abilitare la registrazione (on/off) di ciascun canale, e permette anche di programmare la<br />
risoluzione e la qualità dell’immagine durante la registrazione, come anche di abilitare l’audio. Quando un canale è impostato su<br />
“on” il canale è abilitato in registrazione; se è su “off” non avverrà alcuna registrazione. Le opzioni di risoluzione sono D1, HD1 e<br />
CIF; le opzioni di Qualità sono Migliore, Buona Normale.<br />
Quando l’audio è impostato su “on”, il sistema registrerà anche l’audio dai canali; se è impostato su “off” non sarà possibile<br />
registrare l’audio.<br />
Per registrare tutte le 24 ore di una giornata impostare il Modo Rec su Sempre. Per registrare su motion o ad un orario<br />
programmato, selezionare Registrazione Temporizzata e selezionare l’opzione “Calendario”, L’interfaccia Calendario si aprirà,<br />
come mostra nella figura seguente:<br />
TEMPI MASSIMI DI REGISTRAZIONE <strong>CON</strong> HARD DISK DA 320GB<br />
Le opzioni di scelta del canale da registrare includono rispettivamente Tutti,<br />
<strong>CH</strong>-1, <strong>CH</strong>-2, <strong>CH</strong>-3, <strong>CH</strong>-4. Facendo click sul canale desiderato, questo si<br />
evidenzierà con il colore blu, mentre i canali non selezionati saranno grigi.<br />
Per programmare orari settimanali, fare click nella casella corrispondente alla<br />
impostazione di registrazione desiderata (Allarme, Normale, oppure No REC),<br />
poi fare click su ciascuna casella del calendario al quale si vuole applicare<br />
questo metodo<br />
Si possono utilizzare i menu a tendina [Da – A] e il tasto Copia per copiare le<br />
programmazioni da un giorno all’altro o a tutti i giorni. Una volta completate le<br />
programmazioni premere il tasto [Applica]<br />
Nota bene: I tempi massimi di registrazione si riferiscono a registrazioni effettuate su tutti i canali impostando i parametri<br />
di risoluzione e qualità come indicato in tabella.<br />
Risoluzione<br />
Durata HD (in giorni)<br />
Qualità Ottima Qualità Buona Qualità Normale<br />
D1 7,4 9,9 14,8<br />
HD1 7,5 9,9 14,8<br />
CIF 9,7 14,8 19,8<br />
DS<strong>1093</strong>-027 17
4.2.3 PROGRAMMAZIONE DELLA RETE<br />
Entrare nel [Menu Principale�Rete] per accedere alla programmazione della rete:<br />
Selezionando DHCP, il server DHCP stabilirà automaticamente l’indirizzo IP del <strong>DVR</strong>.<br />
Dopo aver programmato i protocolli di rete (DHCP, PPPoE) e le porte<br />
è possibile connettere il <strong>DVR</strong> alla rete.<br />
Per selezionare PPPoE, è necessario inserire nome utente e<br />
password e configurare la porta web.<br />
Per selezionare un indirizzo statico è necessario impostare l’indirizzo IP, la<br />
subnet mask, il gateway e la porta web.<br />
Se si richiede il servizio DDNS e si impostano i parametri di rete del <strong>DVR</strong>, è<br />
possibile connettere il <strong>DVR</strong> via IE browser<br />
NOTA BENE:<br />
�� E’ possibile connettersi al <strong>DVR</strong> fino a un massimo di 5 PC contemporaneamente.<br />
�� Dopo qualunque modifica sul Menu rete e dopo aver salvato è necessario riavviare il dispositivo.<br />
DS<strong>1093</strong>-027 18
4.2.4 RICERCA REGISTRAZIONI<br />
�<br />
Selezionare [Menu Principale�Ricerca] per entrare nel menu [Ricerca Video].<br />
Se si vuole connettere il <strong>DVR</strong> via Internet, è necessario programmare le porte<br />
all’indirizzo pubblico del <strong>DVR</strong>.<br />
Riproduzione di una registrazione ricercata:<br />
Se si inserisce una data specifica e si seleziona [CERCA], si visualizzeranno tutte le<br />
registrazioni di quella data. Selezionando la Data, si otterranno le riproduzioni dei 4<br />
canali.<br />
Premendo il tasto [Lista File], sarà visualizzata una lista di file da riprodurre o<br />
salvare.<br />
E’ possibile riprodurre i video a velocità 2x, 4x, e 8x, 1/2x, 1/4x, e 1/8x, a velocità normale, fare una visualizzazione frame per<br />
frame, e regolare il volume premendo o facendo scorrere la barra di controllo.<br />
A riproduzione finita, il sistema tornerà al menu precedente.<br />
Elenco file<br />
In modalità menu [Ricerca Video], selezionare [Lista File] per far comparire la tabella delle registrazioni.<br />
Questa opzione permetterà di prendere visione di tutti i file disponibili per canale e tipo.<br />
E’ possibile selezionare un file e premere il tasto SEL per riprodurre il file oppure selezionare l’opzione [BACK] e salvare il file<br />
selezionato. E’ anche possibile mettere un segno di spunta nella casella al fondo dei file se si vuole salvare più di un file.<br />
PRIMA (Prima Pagina) indica la prima pagina della lista. Se si consultano altre<br />
pagine,premere il tasto [Prima] per tornare a pagina 1.<br />
PRECEDENTE (Pagina precedente): quando si consulta la lista degli eventi,<br />
premendo il tasto [PRECED] si tornerà alla pagina precedente.<br />
AVANTI (Pagina seguente): quando si consulta la lista degli eventi, premendo il<br />
tasto [AVANTI] porterà alla pagina seguente.<br />
ULTIMO (Ultima pagina): Indica l’ultima pagina della lista. Quando si consultano<br />
altre pagine, premendo il tasto [ULTIMO] si tornerà all’ultima pagina.<br />
TUTTI (Seleziona Tutto): Permette di selezionare tutti gli eventi sulla pagina<br />
corrente.<br />
DS<strong>1093</strong>-027 19<br />
INVERSA (Seleziona Inversa): Permette di selezionare altri eventi sulla pagina<br />
corrente eccetto quelli già selezionati.
Backup del file registrato<br />
Se si vuole salvare un file registrato dalla lista dei file, si deve selezionare la registrazione e premere il tasto [Backup].<br />
Quando il backup sarà completato sarà segnalato. Premere il tasto [OK] per salvare il backup.<br />
NOTA BENE:<br />
�� Il file salvato sarà nel formato H264 e sarà possibile convertirlo al formato AVI utilizzando il programma Multimedia<br />
Player fornito insieme al <strong>DVR</strong> oppure utilizzando il programma net-viewer su IE.<br />
�� Se per l’operazione di Backup si utilizza un Hard Disk USB con dimensione superiore a 160 GB collegato al<br />
dispositivo è necessaria una doppia alimentazione; si consiglia pertanto di dotarsi di cassettino con alimentazione<br />
per l’Hard Disk USB.<br />
4.2.5 VISUALIZZATORE (MULTI PLAYER)<br />
1 Copiare il file salvato sul proprio PC.<br />
2 Aprire il Visualizzatore Playback Software e selezionare [File� Local (X) in cui X rappresenta l’unità di memoria utilizzata]<br />
per trovare/selezionare il file, poi premere il tasto [open].<br />
Nota: Il tipo di file selezionato deve essere del formato *.264.<br />
3. Aprire il file:<br />
DS<strong>1093</strong>-027 20<br />
Premere il menu [Play] per riprodurre il file salvato<br />
Premere il tasto [Play] del menu a tendina.
Il menu in basso al visualizzatore presenta le seguenti funzioni:<br />
Data: La data di registrazione del file si trova nell’angolo di destra.<br />
Tempo di registrazione (24H): si trova sotto il menu [Date]. Il numero in grassetto indica la registrazione di tipo Normale<br />
nell’ora corrente.<br />
0~60 Durata registrazione: la parte verde sulla barra Play indica l’avanzamento per un’ora di registrazione.<br />
Uso dei singoli comandi<br />
1 Play 10 Tutte le finestre<br />
2 File precedente 11 Aggiungi finestra<br />
3 Pausa 12 Start<br />
4 Stop 13 Taglia<br />
5 Frame precedente / Frame seguente 14 Cancella<br />
6 Slow play, Normal play, Fast Play 15 Convert AVI<br />
7 Ora seguente 16 OSD<br />
8 Cattura un immagine 17 Mute<br />
9 Riduci finestra 18 Regola volume<br />
4. Per la configurazione delle riproduzioni dei video fare riferimento alle procedure seguenti:<br />
DS<strong>1093</strong>-027 21<br />
Accedere al menu Setting -> Video play setting -> Normal video<br />
Bar.<br />
Selezionare il canale che si vuole visualizzare e selezionare per<br />
riprodurre il video. Premere OK
5. Per la configurazione delle riproduzioni dell’audio fare riferimento alla procedure seguenti (la programmazione dei parametri<br />
sarà disponibile dopo aver riavviato il visualizzatore in seguito alla configurazione).<br />
Accedere al menu Setting � Audio channel setting � Normal video Bar.<br />
Selezionare il canale di cui riprodurre l’audio e selezionare per riprodurre il video. Premere OK<br />
� �<br />
Una volta completata la programmazione, riproducendo il video del canale corrente si potrà aprire anche la funzione audio.<br />
4.2.6 GESTIONE DEL DISPOSITIVO<br />
4.2.6.1 Configurazione Hard Disk<br />
Selezionare [Menu Principale�Dispositivi � Gestione HD] per entrare nel<br />
menu [Gestione HD]<br />
SOVRASCRITTURA: Selezionando “ON”, nel momento in cui l’Hard Disk è pieno il<br />
sistema sovrascriverà automaticamente le registrazioni più vecchie ed è quindi<br />
possibile determinare la permanenza, in giorni, delle registrazioni sull’Hard Disk.<br />
Selezionando “OFF”, nel momento in cui l’Hard Disk è pieno, la registrazione si<br />
fermerà.<br />
DURATA GIORNI: Definisce il tempo (in giorni) di permanenza delle registrazioni<br />
effettuate su tutti i canali del dispositivo.<br />
E’ possibile impostare un valore compreso nell’intervallo 1 ÷ 255 (giorni). Il Valore di<br />
Default è 30.<br />
FORMATTA HD: Questa opzione serve per formattare l’Hard Disk; non è infatti<br />
possibile registrare i file nell’HD se questo non è stato formattato. Selezionare il<br />
tasto [Formatta HD] per iniziare la formattazione; il sistema chiederà: “La<br />
formattazione dell’HD causerà la perdita di tutti i dati, confermi?”; premendo “OK”, il<br />
sistema informerà: “Formattazione in corso …” e “formattazione completata”;<br />
successivamente il sistema si riavvierà automaticamente.<br />
FORMATTA USB: Questa opzione serve per formattare I dispositivi USB.<br />
Quando si installa un Hard Disk, il sistema rileverà automaticamente se l’ HD è<br />
formattato oppure no. Se l’HD ha bisogno di essere formattato, lo stato dell’HD sarà<br />
visualizzato come “Non formattato”; in caso contrario, lo stato dell’HD sarà visualizzato<br />
come “OK”.<br />
DS<strong>1093</strong>-027 22<br />
SPAZIO TOTALE: Indica lo spazio totale disponibile sull’HD<br />
SPAZIO LIBERO: Indica lo spazio inutilizzato disponibile sull’ HD.<br />
TEMPO DI REGISTRAZIONE UTILIZZABILE: Basandosi su i livelli di qualità e frame<br />
rate del video corrente, il sistema mostrerà una stima del tempo disponibile rimanente.
4.2.6.2 Impostazione allarmi<br />
Notifica differenziata degli allarmi<br />
Selezionare [Menu Principale � Dispositivi � Allarmi] per accedere al menu<br />
[Allarme] e impostare i parametri di allarme.<br />
STATO I/O Le opzioni includono NO (Normalmente Aperti), NC (Normalmente<br />
Chiusi) e OFF. Impostare “Normalmente Aperti” nel caso in cui si tratti di sensori<br />
esterni Normalmente Aperti, impostare “Normalmente Chiusi” nel caso in cui si tratti<br />
di sensori esterni normalmente Chiusi. Impostare su “OFF” se non si ha intenzione<br />
di utilizzare sensori esterni (uso del solo Motion).<br />
E’ possibile selezionare/deselezionare per ciascun evento (Motion Detection, allarme in ingresso, perdita segnale video, HD<br />
pieno, guasto HD) la notifica da effettuare tramite:<br />
�� BUZZER temporizzato: è possibile selezionare “OFF”, “10sec”, “20sec”, “40 sec”, “60sec”<br />
�� USCITA ALLARME temporizzata: è possibile selezionare “OFF”, “10sec”, “20sec”, “40 sec”, “60sec”<br />
�� EMAIL (solo per Motion Detection e allarme in ingresso)<br />
�� S<strong>CH</strong>ERMO INTERO (solo per Motion Detection e allarme in ingresso)<br />
Selezione del tempo di allarme<br />
Definisce il tempo per cui l'evento di allarme (Motion Detection o allarme in ingresso) rimane visualizzato a schermo intero sul<br />
monitor anche dopo che l'evento stesso è terminato.<br />
Si possono impostare i seguenti valori: “10sec”, “30sec”, “1min”, “2min”.<br />
���������������� ���������<br />
����������������������<br />
�����������������<br />
Viene generato un allarme quando manca il segnale video (per esempio a causa di<br />
un danneggiamento della telecamera, un cavo interrotto o danneggiato o un<br />
malfunzionamento dell’alimentatore)<br />
Viene generato un allarme quando un oggetto si sposta nell’area di motion detection.<br />
E’ possibile regolare il livello di sensibilità per adattarla alle necessità reali<br />
dell’ambiente di applicazione.<br />
����������� Il sistema può segnalare un allarme rilevato da un sensore esterno.<br />
����������<br />
DS<strong>1093</strong>-027 23<br />
Viene generato un allarme quando l’Hard Disk non viene rilevato oppure se l’autosovrascrittura<br />
dell’HD è disabilitata e lo spazio sull’HD non è sufficiente.
4.2.6.3 Programmazione dell’allarme inviato via email<br />
Selezionare il menu [Email setup] per entrare nel suo sottomenu.<br />
SSL è un security link transport protocol. E’ possibile criptare le proprie<br />
communicazioni (inclusa l’email) tramite SSL, per impedire l’intercettazione<br />
della posta elettronica, di informazioni e della password.<br />
Impostare SSL su “On” sul server di posta elettronica utilizzato e impostare su “Off” sugli altri server. Se la programmazione non<br />
è riuscita si prega di contattare l’Amministratore del server di posta al quale ci si è rivolti per la configurazione del server SMTP e<br />
il SSL della mail box.<br />
Porta SMTP: indica la porta di uscita del server SMTP. Generalmente il valore della porta dell’ SMTP è 25, ma ci sono delle<br />
eccezioni, per esempio la porta SMTP del server G-mail dovrebbe essere 465.<br />
Server SMTP: indica l’indirizzo del server in uso. Nel caso di Gmail, il server relativo dovrebbe essere smtp.gmail.com<br />
Email mittente: indica l’indirizzo di posta elettronica del mittente. L’indirizzo email dovrebbe essere compatibile con il server in<br />
uso. Questo vuol dire che, se si utilizza l’indirizzo di posta elettronica – aaa@gmail.com.<br />
Indirizzo destinatario: indica l’indirizzo email del destinatario.<br />
NOTA BENE:<br />
�� Per disattivare l’invio di Email sarà necessario selezionare OFF, in ogni caso le impostazioni per l’invio di Email<br />
sullo stato ON (SMTP Server, Mittente, Destinatario ecc.) precedentemente salvate non andranno perse.<br />
�� Nella configurazione delle notifiche per Email, per garantire il corretto funzionamento si consiglia di impostare un<br />
account utente (cioè indirizzo mittente e password) della stesso indirizzo del SMTP Server.<br />
Ad esempio se si utilizza un indirizzo del tipo mario.rossi@dominio.it, l’SMTP deve essere del tipo “smtp.dominio.it”<br />
DS<strong>1093</strong>-027 24
4.2.6.4 Impostazione PTZ<br />
4.2.6.5 Mobile<br />
Accesso al telefono cellulare<br />
Entrare nel [Menu Principale � Dispositivi ( PTZ] per selezionare il<br />
canale su cui è collegato il dispositivo PTZ che si vuole controllare,<br />
impostare il protocollo, Baud rate (1200, 2400, 4800, 9600), Data bit (8,<br />
7, 6, 5), Stop bit (1, 2), Parità (NO, Dispari, Pari, Mark Space) e<br />
l’indirizzo.<br />
NOTA BENE: le impostazioni menzionate devono corrispondere a quelle<br />
del dispositivo PTZ.<br />
Selezionare il [Menu Principale � Dispositivi � Mobile] per entrare nel menu<br />
[Mobile].<br />
Nome utente: indica il nome dell’utente del <strong>DVR</strong>.<br />
Password utente: indica la password dell’utente del <strong>DVR</strong>.<br />
Porta Server: porta del server Mobile. Il range di programmazione è<br />
compreso fra 1024 e 65535.<br />
NOTA BENE:<br />
Connettere il <strong>DVR</strong> a Internet prima di impostare il numero di porta del <strong>DVR</strong> e<br />
il numero di porta del server che non è uguale a quello della rete.<br />
Dopo qualunque modifica sul Menu Mobile è necessario riavviare il<br />
dispositivo dopo aver salvato.<br />
Il <strong>DVR</strong> è compatibile con telefoni cellulari con sistemi operativi Windows Mobile e Symbian.<br />
Prima di accedere al <strong>DVR</strong> da un telefono cellulare è necessario programmare la configurazione di rete sul <strong>DVR</strong>. Per le istruzioni<br />
relative a questa programmazione, andare alla sezione – Programmazione rete – di questo manuale. Bisogna inoltre andare al<br />
Menu principale/Gestione Dispositivo/Mobile e digitare il proprio nome utente e password e poi programmare la porta del server<br />
con 18600. Questa porta deve essere la stessa configurata nel menu [Mobile] del <strong>DVR</strong>.<br />
NOTA BENE: Da un telefono cellulare è possibile vedere un canale per volta. La velocità di visualizzazione dipende dalla<br />
velocità della connessione internet.<br />
Per i dispositivi Windows Mobile usare la seguente procedura:<br />
1. Installazione sul cellulare<br />
Prima di tutto è necessario installare il programma QQEye incluso nel CD allegato al <strong>DVR</strong> copiando il file “QQeye.CAB” sul<br />
telefono cellulare.<br />
Fig 1 Fig 2 Fig 3<br />
DS<strong>1093</strong>-027 25
2. Andare sulla cartella del telefono (casella rossa di Fig 1) e scegliere il file “QQeye” che aprirà la finestra della Fig. 2. Scegliere<br />
poi se installare il programma sul telefono o sulla Memory Card.<br />
3. Premere il tasto [Install] (casella rossa di Fig. 3) per far partire l’installazione (fare riferimento al display di Fig. 4).<br />
Fig 4<br />
Fig 5<br />
4. Quando l’installazione sarà finita, andare sull’icona QQeye (casella rossa di Fig. 5) per dare l’avvio al programma. Verrà<br />
visualizzato lo schermo del programma di Fig. 6.<br />
5. Impostazioni: premere il tasto [Setting] (casella rossa di Fig. 6) per entrare nel menu Setting come mostra la Fig. 7.<br />
Fig. 7<br />
Fig. 8<br />
Nome utente: stessa procedura adottata per la programmazione del nome utente nel <strong>DVR</strong>.<br />
Password: stessa procedura adottata per la programmazione della password nel <strong>DVR</strong>.<br />
Indirizzo del server: Indirizzo IP a cui il <strong>DVR</strong> è collegato.<br />
Porta del server: stessa procedura adottata per la programmazione della porta del server nel <strong>DVR</strong>. Occorre inoltrare l’indirizzo<br />
all’IP del <strong>DVR</strong> (range di programmazione compreso tra 1024 e 65535, l’impostazione di default è 18600).<br />
NOTA BENE: Questa porta è in aggiunta alle porte usate per l’accesso remoto standard.<br />
Canale: Selezionare il canale del <strong>DVR</strong> che si vuole monitorare e premere il tasto [OK] (casella rossa di Fig. 7) per visualizzare lo<br />
schermo di Fig. 8 e dare inizio alla connessione video.<br />
6. Opzioni disponibili (Fig. 8)<br />
Premere il tasto [Disconnect] per interrompere la visualizzazione dell’immagine live del canale.<br />
Premere il tasto [Setting] per modificare le impostazioni.<br />
7. Visualizzazione della connessione video<br />
Modalità normale:<br />
Le Informazioni sullo stato di connessione alla rete si trovano sotto all’immagine video:<br />
Visualizzazione sull’angolo sinistro: Velocità di trasmissione alla rete, , Frame rate e Risoluzione.<br />
Visualizzazione sull’angolo destro: percentuale di buffer utilizzato, successo della connessione, fallimento della connessione,<br />
Play e Stop.<br />
Funzioni dei tasti sotto l’immagine video da sinistra verso destra: controllo PTZ (sinistra, destra,alto e basso), selezione area<br />
(Zoom out and Zoom in), Fuoco, Iris e Snap per catturare l’immagine dello schermo.<br />
8. Modalità display: E’ possibile convertire la visualizzazione normale in una visualizzazione a schermo intero premendo lo<br />
schermo sul telefono cellulare (come illustra la Fig. 9).<br />
DS<strong>1093</strong>-027 26<br />
Fig. 6<br />
Fig. 9
Per i dispositivi Symbian usare la seguente procedura:<br />
1. Installazione sul cellulare<br />
Prima di tutto è necessario installare il programma QQEye incluso nel CD allegato al <strong>DVR</strong> copiando il file “QQeye” sul<br />
telefono cellulare.<br />
2. Selezionare l’icona QQEye (casella rossa di Fig. 2) per installarlo: si visualizzerà la Fig. 3.<br />
Fig. 1 Fig. 2<br />
Quando il telefono avrà finito la preparazione visualizzerà la Fig. 4, nella quale chiederà il permesso di installare il programma.<br />
Selezionare il tasto Yes (casella rossa di Fig. 4). Si visualizzerà la finestra della Fig. 5.<br />
Fig. 3<br />
Fig.4 Fig.5 Fig.6<br />
3. Premere il tasto Continue (casella rossa di Fig. 5) nella casella informazioni che visualizza il programma e la versione corrente.<br />
Si visualizzerà la finestra di Fig. 6.<br />
4. Scegliere dove si vuole installare il programma, sulla memoria del telefono o sulla scheda di memoria, e premere l’opzione<br />
Seleziona (Casella rossa di Fig. 6). A questo punto comparirà la finestra di Fig. 7: premendo Continua (casella rossa di Fig. 7) si<br />
visualizzerà lo schermo di Fig. 8, il quale informerà l’utente che è in corso l’installazione del programma (casella rossa di Fig. 8).<br />
Fig. 7<br />
5. Una volta completata l’installazione, la finestra di Fig. 9 si aprirà per informare l’utente che l’installazione è andata a buon fine.<br />
A questo punto andare sulla cartella Applicazioni, selezionare il programma QQEye (casella bianca di Fig. 10) e scegliere<br />
l’opzione Apri (casella rossa di Fig. 10 10) per visualizzare i menu di programmazione. Dopo aver completato la programmazione,<br />
Fig. 8<br />
premere il tasto Done (casella rossa di Fig. 11): comparirà la finestra di Fig. 12.<br />
DS<strong>1093</strong>-027 27<br />
Fig. 9
Open<br />
Fig.10 Fig.11<br />
Punto di accesso di Default<br />
Inserire il punto di accesso. Il default di sistema per il punto di accesso è la connessione GPRS.<br />
Indirizzo server<br />
Inserire l’indirizzo IP pubblico del router a cui il <strong>DVR</strong> è collegato.<br />
Fig.12<br />
Porta del server: stessa procedura adottata per la programmazione della porta del server nel <strong>DVR</strong>. Occorre inoltrare<br />
l’indirizzo all’indirizzo IP del <strong>DVR</strong> (range di programmazione compreso tra 1024 e 65535, l’impostazione di default è 18600).<br />
NOTA BENE: Questa porta è in aggiunta alle porte usate per l’accesso remoto standard.<br />
Nome utente: stessa procedura adottata per la programmazione del nome utente nel <strong>DVR</strong>.<br />
Password: stessa procedura adottata per la programmazione della password nel <strong>DVR</strong>.<br />
Indirizzo del server: Indirizzo IP a cui il <strong>DVR</strong> è collegato.<br />
Canale: Selezionare il canale del <strong>DVR</strong> che si vuole monitorare e premere il tasto [OK].<br />
Stato di connessione della rete: percentuale di buffer utilizzato, successo della connessione, fallimento della connessione,<br />
Play e Stop<br />
Funzioni dei tasti sotto l’immagine video da sinistra verso destra: controllo PTZ (sinistra, destra,alto e basso), selezione area<br />
(Zoom out and Zoom in), Fuoco, Iris e Snap per catturare l’immagine dello schermo. E’ possibile convertire la visualizzazione<br />
normale in una visualizzazione a schermo intero premendo lo schermo sul telefono cellulare (come illustra la Fig. 13)<br />
Fig. 13<br />
4.2.6.6 Motion Detection<br />
DS<strong>1093</strong>-027 28<br />
Per la programmazione della registrazione, premere [Menu<br />
Principale�Dispositivi�Motion] per accedere al menu [Motion Detection].<br />
Il menu [Motion detection] ha tre sezioni: Stato, Sensibilità e Area Motion Detection.<br />
STATO: Questa opzione permette di abilitare la motion detection su tutti i canali.<br />
SENSIBILITA’: Questa opzione permette di programmare il livello di sensitivity della<br />
motion detection: Altissimo (valore 4), Alto (valore 3), Normale (valore 2) e Basso,<br />
(valore 1).
4.2.7 SISTEMA<br />
4.2.7.1 Impostazione ora<br />
4.2.7.2 Password<br />
DS<strong>1093</strong>-027 29<br />
AREA MD: Questa opzione permette di selezionare l’area che si vuole sia sensibile al<br />
movimento. Lo schermo è suddiviso in un’area 13*10 . Quando un oggetto si muove<br />
nell’area di motion detection, e l’area in cui si trova l’oggetto appare colorata di rosso,<br />
scatterà l’allarme. Nell’area semi trasparente la motion detection non è attiva.<br />
NOTA BENE: Le modifiche sono operative dal momento in cui queste vengono salvate<br />
(tasto [APPLICA]).<br />
Il menu di [Sistema] include i seguenti sotto menu: Programmazione ora,<br />
Password utente, programmazione Audio/Video, Selezione lingua,<br />
Informazioni sul sistema e manutenzione del sistema.<br />
Dopo essere entrati nel [Sistema], è possibile configurare il sistema a<br />
seconda delle proprie necessità.<br />
Premere [Menù Principale�Sistema�Data/Ora] per accedere al menu<br />
[Data/Ora]. Oltre a modificare la data, l’ora e il formato, è anche possibile<br />
impostare l’ora legale (tasto [DST] ON/OFF).<br />
Questa opzione permette di programmare l’indirizzo del dispositivo per il <strong>DVR</strong> e<br />
abilitare la password , se è necessaria. Le nuove password saranno disponibili<br />
premendo il tasto [APPLICA].<br />
Mettendo su “ON” Abilita Password, è possibIle programmare una password<br />
utente e una password amministratore. La password può contenere fino a un<br />
Massimo di 6 caratteri.<br />
NOTA BENE:<br />
�� Si possono configurare fino ad un massimo di 2 Utenti sul <strong>DVR</strong>.<br />
�� Si possono configurare fino ad un massimo di 5 Utenti su Internet<br />
Explorer o Client Software.<br />
�� La Password di Default per amministratore è 123456.
4.2.7.3 Standard Video<br />
4.2.7.4 Lingue<br />
4.2.7.4 Informazioni.<br />
4.2.7.5 Manutenzione del sistema<br />
DS<strong>1093</strong>-027 30<br />
Premere [Menù Principale�Sistema�Video] per programmare la risoluzione <strong>VGA</strong> e lo<br />
standard video.<br />
Entrare nel menu [LINGUA] per selezionare la lingua che si intende utilizzare<br />
sul <strong>DVR</strong> e premere il tasto [APPLICA]. La selezione sarà disponibile non<br />
appena il sistema sarà riavviato.<br />
Premere [Menu Principale� Sistema�Info] per accedere al menu [INFO SISTEMA]<br />
che fornisce le Informazioni sul sistema, quali per esempio il tipo di dispositivo, la<br />
versione Software (firmware), l’indirizzo MAC ecc.<br />
Grazie a questa opzione è possible riprogrammare il <strong>DVR</strong> alle impostazioni di default<br />
di fabbrica, aggiornare il software di sistema (firmware) e programmare l’auto<br />
manutenzione del sistema.<br />
Premere [Menù Principale�Sistema(Manutenzione] per entrare nel menu<br />
[Manutenzione Sistema].<br />
Attivando la funzione di auto manutenzione, si può far ripartire il sistema regolarmente.
4.3 BLOCCO MENU<br />
4.4 RICERCA VIDEO<br />
Per aumentare la sicurezza del sistema, andare sul menu [MENU’ BLOCCO] per<br />
bloccare l’accesso ai menu Principale, Ricerca Video e PTZ. Da questo momento<br />
in poi l’accesso sarà possibile solo tramite Password.<br />
NOTA BENE: L’utente ha l’autorità di cercare le registrazioni, mentre<br />
l’Amministratore ha piena autorità su tutte le operazioni dal menu principale.<br />
Questo menu permette di ricercare registrazioni effettuate dal dispositivo. Andare sul menu pop-up e cliccare su [Ricerca Video].<br />
Per ulteriori informazioni su questo tipo di operazione fare riferimento alla sezione relativa alla ricerca video del Menu Principale.<br />
4.5 COMANDI PTZ<br />
NOTA BENE<br />
Imposta CRUISE<br />
Selezionare nel pop-up menu l’opzione PTZ e sarà visualizzata l’interfaccia di controllo PTZ.<br />
E’ possibile regolare i tasti ZOOM, FUOCO e IRIS.<br />
NOTA BENE:<br />
�� Al fine di muovere in maniera fluida la DOME esercitare più click consecutivi<br />
con il mouse sule frecce direzionali dell’interfaccia PTZ.<br />
Per impostare la funzione di Cruise selezionare CRUISE SET sull’interfaccia PTZ. A<br />
questo punto sarà possibile impostare per ciascun canale i preset che si vogliono<br />
memorizzare e il tempo di sosta della Dome su ciascun preset.<br />
Seleziona Canale: Seleziona il Canale in modalità PTZ relativo alla DOME<br />
Totale: Conta il numero di Preset memorizzati<br />
Punto: Di default è impostato su 1. Tiene conto del corrente punto di preset che si stà<br />
per memorizzare o richiamare.<br />
Sosta: imposta il tempo di stazionamento tra il preset corrente e quello successivo.<br />
GOTO�Si sposta su un singolo preset precedentemente memorizzato sulla Dome.<br />
Set: Salva e memorizza un preset sulla Dome.<br />
Dopo aver impostato tutti I punti di preset, selezionare il pulsante [Salva] per salvare le<br />
impostazioni. Se si vuole cambiare il fuoco, l’iris e lo zoom tornare al menu precedente<br />
selezionando [Uscita], effettuare le regolazioni desiderate e poi rientrare in [Cruise Set]<br />
per memorizzare nuovamente il preset cliccando su [Set]. Premere nuovamente [Salva]<br />
se si vogliono salvare le nuove impostazioni.<br />
PULIZIA: cancella tutti i preset e le relative impostazioni riportando ai valori di default.<br />
Il <strong>DVR</strong> supporta fino a 100 preset memorizzabili. Questo numero dipende però anche<br />
dal numero massimo di preset memorizzabili sulla Dome<br />
�� Si consiglia di utilizzare la funzione del Cruise disponibile nel menu della speed-dome. In caso di interruzione<br />
dell'energia elettrica o riavvio del <strong>DVR</strong> la funzione Cruise sul <strong>DVR</strong> potrebbe non funzionare correttamente.<br />
DS<strong>1093</strong>-027 31
4.6 AVVIO REGISTRAZIONE MANUALE<br />
Il comando [INIZIA REGISTRAZIONE] del menu pop-up avvia la registrazione manuale.<br />
4.7 STOP REGISTRAZIONE MANUALE<br />
Il comando [FERMA REGISTRAZIONE] del menu pop-up interrompe la registrazione manuale.<br />
4.8 AVVIO/STOP FUNZIONE CRUISE<br />
La funzione Cruise è costituita dall’attivazione sequenziale di comandi di Preset da attivarsi sulla Speed Dome (o dispositivo<br />
PTZ) collegata al <strong>DVR</strong>.<br />
Dopo aver impostato il Cruise sarà necessario avviare tale funzione dal Menu pop-up. Durante l’esecuzione è possibile<br />
arrestare il Cruise sempre dal Menu pop-up.<br />
NOTA BENE: ricordarsi di abilitare la funzione Cruise nel menu [SETUP PTZ]<br />
Si consiglia di utilizzare la funzione del Cruise disponibile nel menu della speed-dome. In caso di interruzione dell'energia<br />
elettrica o riavvio del <strong>DVR</strong> la funzione Cruise sul <strong>DVR</strong> potrebbe non funzionare correttamente.<br />
4.9 AVVIA AUTOSEQUENZA<br />
La funzione “AUTOSEQ” avvierà la sequenza ciclica dei canali a seconda dei tempi programmati (Vedi CAPITOLO 4). Per<br />
arrestarla sarà necessario cliccare con il mouse sullo schermo.<br />
4.10 MODALITÀ PIP<br />
4.11 ZOOM DIGITALE<br />
DS<strong>1093</strong>-027 32<br />
Tale opzione permette di monitorare a schermo intero e in miniatura tutti i canali<br />
LIVE.<br />
Selezionando tale opzione dal Menu pop-up, il primo canale andrà a schermo<br />
intero mentre il canale 2 e il canale 3 potranno essere visualizzati in miniatura a<br />
seconda dell’opzione selezionata (1X1 o 1X2); infatti selezionando l’opzione<br />
1X1 le immagini LIVE del secondo canale compariranno in basso a sinistra, se<br />
si è selezionata l’opzione 1X2 le immagini LIVE del secondo e terzo canale<br />
miniaturizzati compariranno in basso a sinistra e a destra.<br />
Cliccando con il mouse sia sul canale visualizzato a schermo intero che sulle<br />
miniature, le telecamere visualizzate a monitor cambieranno. Per disattivare<br />
tale funzione sarà necessario effettuare un click con il tasto destro del mouse.<br />
Tale opzione permette di selezionare un canale a schermo intero effettuando<br />
uno ZOOM dell’immagine in LIVE.<br />
Cliccando con il tasto destro del mouse su un canale visualizzato a schermo<br />
intero, è possibile selezionare l’opzione ZOOM DIGITALE.<br />
A questo punto è possibile selezionare l’area che si vuole ingrandire con il<br />
mouse, tenendo premuto il tasto sinistro e trascinando l’area stessa.<br />
In basso a destra sarà disponibile, in miniatura, il canale intero con l’area da<br />
ingrandire, selezionata in un riquadro rosso. Per disattivare tale funzione sarà<br />
necessario effettuare un doppio click con il tasto destro del mouse.
5 VARIE<br />
5.1 RIMOZIONE DEL CASSETTINO ESTRAIBILE DELL’HARD DISK<br />
Nel caso di rimozione del cassettino estraibile dell’hard disk, procedere nel seguente modo.<br />
1. Togliere l’alimentazione per spegnere il <strong>DVR</strong>.<br />
2. Inserire e ruotare in senso antiorario la chiavetta sulla slitta dell’hard disk (posizione ”aperto”).<br />
chiuso aperto<br />
3. Utilizzare l’apposita sede con l’indicazione “PULL” al fine di estrarre, tirando, il cassettino dalla propria sede.<br />
�NOTA BENE<br />
Prima di rimuovere l’hard disk, onde evitare di danneggiarlo, è necessario accertarsi che non sia in uso.<br />
Per il riposizionamento eseguire all’inverso i punti precedentemente indicati.<br />
DS<strong>1093</strong>-027 33
6 SPECIFI<strong>CH</strong>E TECNI<strong>CH</strong>E<br />
Voce Specifiche<br />
Formato compressione Video: <strong>H.264</strong> / Audio: 8kHz*16bit ADPCM<br />
Ingressi/Uscite video 4-<strong>CH</strong> BNC Ingresso/ 2-<strong>CH</strong> BNC Uscita<br />
Audio I/O 4-<strong>CH</strong> RCA Ingresso / 1-<strong>CH</strong> RCA Uscita<br />
Risoluzione Display D1: 704×576<br />
Frame rate Singolo canale: 25 fps<br />
Risoluzione Registrazione CIF(352*288), HD1(704*288), D1 (704*576)<br />
Frame Rate Registrazione 25 fps@D1, 50 fps@HD1, 100 fps@CIF<br />
Modalità Registrazione Sempre / Orario / Manuale / Motion Detection / Allarmi Esterni<br />
Dimensione File Registrazione 15/30/45/60min<br />
Sub Stream Configurabile su Rete o Client Software come NETWORK: INTERNET<br />
Memoria<br />
Backup Video<br />
Hard Disk 320 GB (default)*<br />
Chiavetta USB / HD rimovibile / Masterizzatore USB / Rete (files AVI)<br />
Modalità riproduzione PLAY /SLOW /FWD/Frame by Frame<br />
Allarme I/O 4-<strong>CH</strong> ingressi allarme, 1-<strong>CH</strong> uscita di allarme<br />
Tipo di allarmi Motion/ Allarmi Esterni / Allarmi ingresso / Video loss / Spazio HD/ Guasto HD<br />
N° Massimo di PC che si possono connettere<br />
contemporaneamente<br />
Controllo PTZ Tramite RS-485 con protocollo PELCO-D<br />
Porta USB 2.0 Supporta mouse e HD rimovibile<br />
Ethernet Interfaccia RJ-45 10M/100MB self-adaptable<br />
Protocolli Rete TCP/IP, DHCP, UDP, DDNS, PPPOE<br />
Consumo 15W<br />
Alimentazione 12V / 3A<br />
Temperatura operativa 5°C – 40°C<br />
Dimensioni<br />
(larghezza x altezza x profondità)<br />
5<br />
340x50x220 mm<br />
Peso ~3 kg<br />
�NOTA BENE<br />
�� Le caratteristiche tecniche possono essere soggette a variazione senza alcun preavviso.<br />
�� È possibile installare un Hard Disk con capacità massima fino a 1 TB.<br />
�� Non si prevede l’uso dell’ Hard Disk connesso ad un PC.<br />
DS<strong>1093</strong>-027 34
7 USO PROGRAMMA NETVIEWER<br />
7.1 DOWNLOAD DEI PLUG-IN E INSTALLAZIONE<br />
Connettersi a Internet, aprire il browser IE e inserire l’indirizzo IP e la porta del <strong>DVR</strong>, con un comando quale, ad esempio,<br />
http://172.18.6.202:80/.<br />
Nota Bene: Se il programma non viene scaricato correttamente, controllare che il livello di sicurezza del browser o l’impostazione<br />
di firewall lo permettano (vedi Appendice: Installazione dell’ActiveX al fondo del manuale). Fare anche riferimento alla<br />
impostazione rete per assicurarsi che la configurazione della rete sia corretta.<br />
Oppure lanciare il Client Software Viewer disponibile a corredo e sarà visualizzata direttamente la schermata di Login.<br />
7.2 ACCESSO AL PROGRAMMA NETVIEWER<br />
7.3 INTERFACCIA PRINCIPALE DEL NETVIEWER<br />
Dopo che il programma è stato installato, selezionare la lingua del log-in, inserire la<br />
password e premere il tasto [Log-in]: ora si può vedere il <strong>DVR</strong> a distanza tramite il<br />
NetViewer.<br />
La password di default è vuota. Il sistema permette all’Amministratore di impostare<br />
una nuova password come per le istruzioni nella sezione relativa al menu<br />
[Password].<br />
Se NETWORK è selezionato come LAN i flussi video saranno disponibili in Main<br />
Stream; viceversa, se NETWORK è selezionato come INTERNET, i flussi video<br />
saranno disponibili in Sub-Stream.<br />
NOTA BENE: se si vuole cancellare una vecchia versione, digitare “regsvr32/u<br />
dvrocx.ocx” su Start/Esegui del PC.<br />
Una volta installato il Net-viewer, saranno visualizzate le immagini<br />
Live grazie alla connessione automatica audio/video.<br />
Le principali sezioni dell’interfaccia sono iI menu principale (numero (1)), il menu PTZ (numeri da (2) a (5)) e il menu di<br />
controllo (numeri da (6) a (10)).<br />
DS<strong>1093</strong>-027 35
7.3.1 Menu principale<br />
Il menu principale include il menu [Live], il menu [Replay], il menu [Setup] e il menu [Logout].<br />
7.3.1.1 Menu Live<br />
Dopo aver fatto il log-in del sistema, questo menu attiva una connessione Live.<br />
7.3.1.2 Menu Replay<br />
Tasto Play: [Play]/[Pause]<br />
Tasto Stop: interruzione della riproduzione.<br />
Tasto F.F.: avanzamento veloce della riproduzione.<br />
Tasto Slow: avanzamento lento della riproduzione.<br />
Next Frame: riproduzione frame per frame.<br />
Tasto 264 TO AVI: conversione del file dal formato <strong>H.264</strong> al formato AVI.<br />
Questo menu permette di riprodurre le registrazioni a distanza.<br />
Selezionare prima il giorno, il canale e il tipo di evento nella<br />
lista dei risultati della ricerca.<br />
E’ possibile controllare la velocità di riproduzione scorrendo la<br />
barra di controllo situata in basso.<br />
Il formato nativo dei file di backup è <strong>H.264</strong>; è possibile convertire il formato <strong>H.264</strong> nel formato più familiare AVI agendo sul tasto<br />
264 TO AVI.<br />
7.3.1.3 Programmazione<br />
Andare sul menu [Setup] per entrare nei suoi sotto menu, che comprendono il menu [Recording Mode], il menu [Alarm Mode], il<br />
menu [PTZ Control], il menu [Network Setting], il menu [System Setting] e il menu [Host Info].<br />
NOTA BENE: è possibile modificare e salvare i parametri a distanza del <strong>DVR</strong> solo quando questo si trova nello stato di<br />
visualizzazione Live. Il metodo è lo stesso usato in locale sul <strong>DVR</strong>.<br />
Registrazione<br />
DS<strong>1093</strong>-027 36<br />
Entrare nel sotto menu [Recording Mode], dal quale è possibile attivare<br />
ogni canale e regolare i parametri di registrazione (risoluzione, qualità,<br />
audio, modalità REC e Orario) a distanza via Netviewer.<br />
Premere il menu [<strong>Sch</strong>edule] per entrare nel suo sotto menu.<br />
I metodi per la programmazione remota sono gli stessi della<br />
programmazione del <strong>DVR</strong> locale. Fare quindi riferimento alla sezione<br />
“Impostazione registrazione”
�������<br />
��������������<br />
.<br />
Rete<br />
�����<br />
DS<strong>1093</strong>-027 37<br />
Premere il menu [Alarm] per entrare nel suo sotto menu.<br />
Si può programmare l’uso degli allarm esterni per ogni canale, l’allarme di<br />
Motion Detection, gli allarmi di video loss, spazio non sufficiente su Hard<br />
Disk, ecc.<br />
Per dettagli sul metodo di programmazione fare riferimento alla sezione<br />
relativa del <strong>DVR</strong>.<br />
Il sistema permette all’utente di programmare a distanza i parametri del Motion<br />
Detector per ogni canale del <strong>DVR</strong><br />
Premere [PTZ control] per comandare i dispositivi PTZ. Il metodo è<br />
la stesso della programmazione del <strong>DVR</strong> locale.<br />
Premere [Network] per entrare nel menu [Network]. La<br />
metodologia da seguire per la programmazione remota è<br />
la stessa della programmazione del <strong>DVR</strong> locale.
���������������<br />
7.3.1.4 Informazioni<br />
�������������<br />
7.3.2 MENU PTZ<br />
Il menu PTZ presenta gli stessi controlli presenti sulle interfacce PTZ e CRUISE del <strong>DVR</strong>.<br />
7.3.3 MENU DI <strong>CON</strong>TROLLO DEL LIVE E DELLA RIPRODUZIONE<br />
Andare sul menu [setting] ed entrare nell’interfaccia del menu.<br />
Premere il tasto […] per stabilire il percorso per salvare le registrazioni e<br />
le catture delle immagini.<br />
Il menu permette anche di impostare la password utente, di attivare o<br />
disattivare l’ora legale, ecc.<br />
Premere [Host Info.] per accedere al sotto menu visualizzato. Da qui è<br />
possibile controllare i parametri dell’HD, il tempo di registrazione<br />
disponibile, la versione software e l’indirizzo MAC.<br />
�� Visualizzazione Live On / Off [ ]: quando lo stato di visualizzazione Live è “On”, premendo il tasto si chiuderà<br />
la visualizzazione. Quando lo stato di visualizzazione è “Off”, premendo il tasto si attiverà la visualizzazione Live.<br />
�� Capture [ ]: cattura l’immagine dello schermo e la salva sul PC come immagine *bmp.<br />
�� Registrazione [ ]: fa partire la registrazione sul <strong>DVR</strong> a distanza.<br />
�� Visualizzazione canali [ ]: le icone rappresentano la visualizzazione del singolo canale, la<br />
visualizzazione in Quad, e le visualizzazione 3x3 e 4x4 dei canali.<br />
�� Controllo volume [ ]: Fare click o scorrere sulla barra di controllo per regolare l’intensità di volume.<br />
DS<strong>1093</strong>-027 38
APPENDICE: INSTALLAZIONE ACTIVE X<br />
Prima di effettuare la connessione con Pc remoto occorre procedere con la configurazione di protezione attenendosi alla<br />
seguente procedura:<br />
�� Aprire il browser Internet Explorer facendo doppio click sull’icona .<br />
�� Apparirà la seguente videata (o comunque la pagina iniziale predefinita).<br />
�� Fare doppio click sull’icona .<br />
�� Apparirà la schermata di “Proprietà – Protezione Internet”.<br />
�� Selezionare l’area “Siti attendibili” assicurandosi che il livello di protezione sia impostato su “bassa”.<br />
�� Cliccare sulla voce “Siti…”.<br />
�� Apparirà la seguente videata.<br />
DS<strong>1093</strong>-027 39
�� Aggiungere l’indirizzo IP del dispositivo (visualizzabile premendo il tasto “F2” sul pannello frontale del dispositivo) nel<br />
campo “Aggiungi il sito web all’area”.<br />
�� Cliccare sulla voce “Aggiungi”.<br />
�� Apparirà la seguente videata di conferma.<br />
�NOTA BENE<br />
Non selezionare la voce “Richiedi verifica server (https:) per tutti i siti dell’area”.<br />
�� Cliccare ripetutamente su “OK” per concludere.<br />
�� Procedere con l’installazione dell’“Active X”.<br />
�NOTA BENE<br />
Terminata la procedura di installazione dell’”Active X” è possibile ripristinare il livello di protezione di I.E. desiderato per i siti<br />
attendibili.<br />
DS<strong>1093</strong>-027 40
ENGLISH<br />
TABLE OF <strong>CON</strong>TENTS<br />
1 General information ............................................................................................................................... 43<br />
1.1 Product description................................................................................................................. 43<br />
1.1.1 General features ............................................................................................................................................. 43<br />
1.2 Opening the box ..................................................................................................................... 43<br />
1.2.1 Contents of the box......................................................................................................................................... 43<br />
1.3 Warnings ................................................................................................................................ 44<br />
1.3.1 Power ............................................................................................................................................................. 44<br />
1.3.2 Safety precautions......................................................................................................................................... 44<br />
1.3.3 Installation precautions ................................................................................................................................. 44<br />
1.3.4 Cleaning the device....................................................................................................................................... 44<br />
1.3.5 Hard disk ........................................................................................................................................................ 44<br />
1.3.6 Image recording............................................................................................................................................. 44<br />
1.3.7 Privacy and copyright.................................................................................................................................... 44<br />
2 Description of the parts ......................................................................................................................... 45<br />
2.1 Front panel ............................................................................................................................. 45<br />
2.2 Rear panel .............................................................................................................................. 47<br />
2.3 IR remote control.................................................................................................................... 49<br />
2.3.1 Batteries .......................................................................................................................................................... 50<br />
3 <strong>DVR</strong> Boot up ........................................................................................................................................... 51<br />
3.1 Power on and off .................................................................................................................... 51<br />
3.2 Main Interface......................................................................................................................... 51<br />
4 <strong>DVR</strong> configuration.................................................................................................................................. 52<br />
4.1 Main menu preview ................................................................................................................ 52<br />
4.2 Main menu.............................................................................................................................. 53<br />
4.2.1 Camera setup ................................................................................................................................................ 53<br />
4.2.2 Record setup.................................................................................................................................................. 55<br />
4.2.3 Network set .................................................................................................................................................... 56<br />
4.2.4 Recording search .......................................................................................................................................... 57<br />
4.2.5 Multi player..................................................................................................................................................... 58<br />
4.2.6 Device management ..................................................................................................................................... 60<br />
4.2.6.1 HDD management.........................................................................................................................................60<br />
4.2.6.2 Alarm Set.......................................................................................................................................................61<br />
4.2.6.3 Email Alarm Notification ................................................................................................................................62<br />
4.2.6.4 PTZ setup......................................................................................................................................................63<br />
4.2.6.5 Mobile............................................................................................................................................................63<br />
4.2.6.6 Motion Detection ...........................................................................................................................................67<br />
4.2.7 System function............................................................................................................................................. 67<br />
4.2.7.1 Time Set ........................................................................................................................................................67<br />
4.2.7.2 Password.......................................................................................................................................................67<br />
4.2.7.3 Video Setup...................................................................................................................................................68<br />
4.2.7.4 Info ................................................................................................................................................................68<br />
4.2.7.5 System Maintenance.....................................................................................................................................68<br />
4.3 Menu lock ............................................................................................................................... 69<br />
4.4 Video search........................................................................................................................... 69<br />
4.5 Setup PTZ .............................................................................................................................. 69<br />
4.6 Start recording ........................................................................................................................ 70<br />
4.7 Stop recording ........................................................................................................................ 70<br />
4.8 Start/stop cruise...................................................................................................................... 70<br />
4.9 Launch sequence ................................................................................................................... 70<br />
4.10 PIP mode................................................................................................................................ 70<br />
4.11 Digital zoom............................................................................................................................ 70<br />
5 Miscellaneous......................................................................................................................................... 71<br />
5.1 Removing the extractable hard disk drawer........................................................................... 71<br />
6 Specifications (PAL format) .................................................................................................................. 72<br />
7 Use of Netviewer..................................................................................................................................... 73<br />
DS<strong>1093</strong>-027 41
7.1 Plug-ins download and installation......................................................................................... 73<br />
7.2 Log-in to Netviewer................................................................................................................. 73<br />
7.3 Main interface of Netviewer.................................................................................................... 73<br />
7.3.1 Menu column................................................................................................................................................... 74<br />
7.3.1.1 Live................................................................................................................................................................74<br />
7.3.1.2 Replay ...........................................................................................................................................................74<br />
7.3.1.3 Setup .............................................................................................................................................................74<br />
7.3.1.4 Log out ..........................................................................................................................................................76<br />
7.3.2 PTZ Control.................................................................................................................................................... 76<br />
7.3.3 Live Play Control............................................................................................................................................. 76<br />
Appendix: Active X installation...................................................................................................................... 77<br />
DS<strong>1093</strong>-027 42
1 GENERAL INFORMATION<br />
This document describes how to install and use the URMET Domus digital video recorder ref. <strong>1093</strong>/<strong>004</strong>.<br />
Read this manual which contains information for correct, safe use carefully.<br />
Keep this manual at hand so that you can refer to it when needed.<br />
1.1 PRODUCT DESCRIPTION<br />
The URMET Domus S.p.A. product is a digital video recorder capable of recording from several cameras to internal hard<br />
disk and viewing the content on a PC via a USB port.<br />
1.1.1 GENERAL FEATURES<br />
�� Triplex mode (recording, play and network transmission at the same time)<br />
�� H. 264 video compression, with D1, HD1 e CIF resolutions<br />
�� Real time recording<br />
�� Multiple or single recording<br />
�� Main Stream e Sub Stream network transmission<br />
�� ADPCM audio compression<br />
�� Remote control (via browser and via client)<br />
�� Remote control through mobile<br />
�� Alarm management<br />
�� Multiple alarm recording<br />
�� Alarm notification through email<br />
�� Auto-maintenance mode<br />
�� PTZ controls via RS-485<br />
�� Removable Hard Disk for replacement<br />
�� Backup on USB 2.0 port (flash drive o hard disk)<br />
�� Use of USB Mouse<br />
�� Remote Control<br />
�� Multilanguage OSD<br />
1.2 OPENING THE BOX<br />
Check that the packing and the contents are not visibly damaged. Contact the retailer immediately if parts are either<br />
missing or damaged. Do not attempt to use the device in this case. Send the product back in its original packing if it is<br />
damaged.<br />
1.2.1 <strong>CON</strong>TENTS OF THE BOX<br />
�� <strong>DVR</strong><br />
�� Power unit<br />
�� INPUT � 100�240 Vac 50/60Hz 1A<br />
�� OUTPUT � 12Vdc 4A<br />
�� Instruction manual<br />
�� Fastening screws<br />
�� CD-ROM containing software<br />
�� Mouse<br />
�� IR remote control<br />
�� Two keys from extracting hard disk tray.<br />
�� Shuko plug<br />
�� Italian plug<br />
�IMPORTANT NOTE<br />
Accessories may be changed without prior notice.<br />
DS<strong>1093</strong>-027 43
1.3 WARNINGS<br />
1.3.1 POWER<br />
�� Only use the power unit provided to power the device. Check mains rating before plugging the power unit in.<br />
�� Do not pull the cable to unplug the device.<br />
�� Switch the device off before unplugging power unit. This operation must not be performed when the <strong>DVR</strong> is<br />
recording, playing or from the configuration menu. Stop recordings and playback in progress before<br />
disconnecting power from the device to prevent damaging the hard disk beyond repair.<br />
1.3.2 SAFETY PRECAUTIONS<br />
�� Keep the device away from rain and humidity to prevent risk of fire and electrocution. Do not introduce material<br />
(solid or liquid) inside. If this should accidentally occur, disconnect the device from the mains and have it<br />
inspected by qualified personnel.<br />
�� Never open the device. In all cases, contact a qualified personnel or authorised service centre for repairs.<br />
�� Keep the device away from children, to prevent accidental damage.<br />
�� Do not touch the device with wet hands to prevent electrical shock or mechanical damage.<br />
�� Do not use the device if it should fall or the external casing is damaged. Risk of electrocution if the device is<br />
used in such conditions. Contact the retailer or authorised installer.<br />
1.3.3 INSTALLATION PRECAUTIONS<br />
�� To prevent overheating the device, arrange it in a position allowing the flow of air through the slots in the casing.<br />
Ensure at least 5 cm of free space when installing inside a rack. For the same reason, do not install sources of<br />
heat, such as radiators or hot air ducts. Keep away from direct sunlight. Do not install in areas subject to<br />
excessive dust, mechanical vibrations or shocks.<br />
�� Do not arrange this device on an unstable surface, such as a tottering or slanted table. The device could fall<br />
causing injury or mechanical failures.<br />
�� Do not install the device in a place where it could be exposed to humidity or water. Do not direct a jet of water<br />
onto the device: risk of fire, electrocution or mechanical failure.<br />
�� Stop using the device if water or other material should penetrate inside: risk of fire and electrocution. Contact the<br />
retailer or authorised installer.<br />
�� Do not place heavy or heat generating objects on top of the device: this could damage the casing and/or increase<br />
internal temperature causing faults.<br />
�� Do not cover the device with a cloth while it is running to prevent deforming the external casing and overheating<br />
the internal parts: risk of fire, electrocution and mechanical failure.<br />
�� Keep magnets and magnetised objects away from the device to prevent faults.<br />
�� Do not use the device in presence of smoke, vapour, humidity, dust or intense vibrations.<br />
�� Wait for a while before operating a device immediately after transporting it from a cold place to a warm place and<br />
vice versa. Wait on average for three hours: this will allow the device to adapt to the new ambient (temperature,<br />
humidity, etc.).<br />
1.3.4 CLEANING THE DEVICE<br />
�� Rub delicately with a dry cloth to remove dust and dirt.<br />
�� Dip the cloth in neutral detergent if dirt cannot be eliminated with a dry cloth alone.<br />
�� Do not use volatile liquids (such a petrol, alcohol, solvents, etc.) or chemically treated clothes to clean the device<br />
to prevent deformation, deterioration or scratches to the paint finish.<br />
1.3.5 HARD DISK<br />
�� The hard disk installed in this device is sensitive to shocks, differences in temperature and vibrations. Disrespect<br />
of these precautions can compromise correct operation of the device and loss of data stored on the hard disk.<br />
�� If repairs are required, it is advisable to backup all important data before taking the device to the service centre.<br />
URMET Domus S.p.A. is not liable for loss of stored data.<br />
1.3.6 IMAGE RECORDING<br />
�� This device was designed to record images, not as a burglar alarm. URMET Domus S.p.A. cannot be held liable<br />
for loss or damage following theft sustained by the user.<br />
�� Make a test recording before using the device to make sure that is working correctly. Please note that URMET<br />
Domus S.p.A. is not liable for loss of stored data consequent to loss or damage caused by incorrect observation<br />
installation, use, improper use or malfunctioning of the device.<br />
�� This device contains precision electronic components. Protect the device from shocks to ensure correct<br />
recording of images.<br />
1.3.7 PRIVACY AND COPYRIGHT<br />
�� The <strong>1093</strong>/<strong>004</strong> digital video recorder is a device for CCTV systems. Recording of images is subject to the laws in<br />
force in your country. Recording of images protected by copyright is forbidden.<br />
�� Product users shall be responsible for checking and respecting all local rules and regulations concerning<br />
monitoring and recording video signals. The manufacturing SHALL NOT BE LIABLE for use of this product not in<br />
compliance with the laws in force.<br />
DS<strong>1093</strong>-027 44
2 DESCRIPTION OF THE PARTS<br />
2.1 FRONT PANEL<br />
Closed flap<br />
<strong>H.264</strong> 4<strong>CH</strong> Digital Video Recorder<br />
PART DESCRIPTION<br />
Power LED: This indicates that the device is powered.<br />
HDD LED: This indicates that the hard disk is in use.<br />
IR sensor: Receives the IR signals from the remote control.<br />
<strong>CH</strong>1 button: this button displays the pictures of camera 1 full screen. I<br />
<strong>CH</strong>2 button: this button displays the pictures of camera 2 full screen.<br />
<strong>CH</strong>3 button: this button displays the pictures of camera 3 full screen.<br />
<strong>CH</strong>4 button: this button displays the pictures of camera 4 full screen.<br />
QUAD button: this button shows all cameras.<br />
REW button: The fast backward button is used to play the images fast backward<br />
PAUSE button: Press this button to still and press Play to resume playback.<br />
PLAY button: This is button starts playback and starts functions. It is used to access the playback<br />
menu.<br />
FWD button: The fast forward function can be used to play the images at various speeds. Press<br />
repeatedly to change the speed.<br />
STOP button: This button stops play and record functions.<br />
REC button: This is button starts recording and starts functions.<br />
� button: In configuration menu, shifts the cursor upwards.<br />
� EDIT � button: This is used to select. This is used to access the pop-up menu and submenu. his is<br />
used to confirm in the configuration menu.<br />
DS<strong>1093</strong>-027 45
Flap open<br />
Press lightly at “�” to open the front flap.<br />
A<br />
� button: In configuration menu, shifts the cursor downwards.<br />
� � MENU/ESC button: This is used to access/quit the configuration menu and to return to the<br />
previous menus.<br />
��button�.his is used to access the pop-up menu.<br />
PART DESCRIPTION<br />
A<br />
�IMPORTANT NOTE<br />
Extractable HD tray: It contains the image storage medium. DO NOT extract the tray when the device<br />
is powered: The HD and the <strong>DVR</strong> could be damaged.<br />
B USB Port: Port where to connect the USB device (Flash Drive, Hard Drive).<br />
C Extractable tray lock: This is the extractable tray safety lock.<br />
Don't use the USB port located on the front panel for the mouse.<br />
The mouse must be connected on the USB port located on the back panel.<br />
DS<strong>1093</strong>-027 46<br />
B<br />
C
2.2 REAR PANEL<br />
PART DESCRIPTION<br />
Power on/off switch.<br />
Power socket: Use the adapter provided to power the device.<br />
Video output BNC sockets: These connectors are used to connect the monitor.<br />
BNC video channel 1 / 2 / 3 / 4 input connector: These connectors are used to connect the<br />
cameras. They have 75 �����������.<br />
RS-485/Sensor/Alarm port 12-pin terminal board<br />
Ventilation vent: Do not obstruct the flow of air: the device could be damaged.<br />
Ground terminal/wire connector.<br />
Video <strong>VGA</strong> Output: connection for a <strong>VGA</strong> monitor<br />
LAN Port: intranet, internet connection (RJ45). Use a crossed-cable (not supplied) for<br />
router/switch and PC connection.<br />
DS<strong>1093</strong>-027 47
RS485/Sensor/Alarm port<br />
�<br />
�<br />
�<br />
�<br />
�<br />
�<br />
�<br />
�<br />
�<br />
�<br />
Pin 1: RS-485A<br />
Pin 2: RS-485B<br />
Pin 3-4: Sensor 1 input<br />
Pin 5-6: Sensor 2 input<br />
Pin 7-8: Sensor 3 input<br />
Pin 9-10: Sensor 4 input<br />
Pin 11-12: Alarm Output<br />
USB Port: port for connecting a USB mouse<br />
Audio input: these are used to connect the audio channels 1-4 (RCA)<br />
Audio output RCA sockets: these are used to connect the audio autput (RCA)<br />
DS<strong>1093</strong>-027 48<br />
1<br />
2<br />
3<br />
4<br />
5<br />
6<br />
7<br />
8<br />
9 11<br />
10 12
2.3 IR REMOTE <strong>CON</strong>TROL<br />
Although the remote control handset supplied with the appliance is designed to be as robust and practical to use as<br />
possible, please handle with the due care and attention.<br />
Do not:<br />
�� expose to rain, spill any liquids on the keypad or drop in water<br />
�� subject to violent knocks or drop on hard surfaces<br />
�� expose to sunlight<br />
�� introduce obstacles between the remote control and the appliance while using the remote control.<br />
The remote control constitutes an interface between the User and the Appliance. Therefore, it is particularly important to<br />
be familiar with the controls on the remote handset.<br />
BUTTON DESCRIPTION<br />
1-8<br />
9�0<br />
ALL<br />
Menu<br />
�<br />
�<br />
� /<br />
SEL<br />
�<br />
�<br />
Audio<br />
Mute<br />
Channel Select 1-8 ; Numeric key<br />
Numeric Key<br />
Preview all Channel<br />
Enter/Exit Main Menu<br />
Up Key<br />
Down Key<br />
Left / Right Key<br />
Select Key/ Edit Key<br />
Rewind key<br />
Play Key, Enter to recording search menu<br />
Forward Key<br />
Manual Recording<br />
Pause / Frame Play<br />
Stop manual recording; Stop Playback<br />
Undefined<br />
Undefined<br />
DS<strong>1093</strong>-027 49
Mouse Operation<br />
Click left key of<br />
Mouse<br />
Click right key of<br />
Mouse<br />
In menu lock mode, Enter into pop-up menu and clicking any sub menu to pop up Log-in window; on<br />
menu unlock mode, enter into pop-up menu, and then clicking left key to enter into any sub menu<br />
directly.<br />
After entering main menu, clicking left key could enter into any sub menu; On[Detailed file] menu<br />
mode, clicking left key could playback one recording file.<br />
Change the status of check box and motion detection area.<br />
Clicking combo box to access pull-down menu<br />
By clicking left key you can adjust Color control bar and volume control bar.<br />
By clicking left key you can select values in edit boxes or pull-down menu, special symbol, numeric<br />
and character input, use instead of [Enter] or [Backspace]<br />
In the [Detailed file] menu mode, clicking left key will playback one recording file.<br />
In live display mode, clicking right key will display pop-up menu<br />
In Main menu or sub menu mode, clicking right key will exit current menu.<br />
Double-click Left key<br />
of Mouse In live display or playback mode, double-clicking left key will maximize the screen.<br />
Moving Mouse Select menu item<br />
Sliding Mouse On motion mode, sliding mouse will select motion area; On [Color set] menu mode, sliding mouse will<br />
adjust color control bar and volume control bar.<br />
2.3.1 BATTERIES<br />
The remote control is powered by two size AAA batteries (included). To install, slide the battery compartment cover open and<br />
insert in the compartment respecting the polarity shown. Close the cover after inserting the batteries. Point the remote towards<br />
the <strong>DVR</strong> receiver to use it.<br />
�IMPORTANT NOTE<br />
Dispose of used batteries correctly in the<br />
specifically provided special collection bins.<br />
Always change both batteries at the same time.<br />
Remove the batteries if the remote control is not used for long periods.<br />
DS<strong>1093</strong>-027 50
3 <strong>DVR</strong> BOOT UP<br />
3.1 POWER ON AND OFF<br />
Press on the back of the unit. The<br />
The system will boot-up and start initializing.<br />
3.2 MAIN INTERFACE<br />
DS<strong>1093</strong>-027 51<br />
PWR LED on the front panel will light up. The following will appear on the monitor.<br />
After finishing system initialization the system will enter into main interface. Picture is<br />
the main interface displayed by system, which is showing no video input status.<br />
Once there are video inputs, the interface will display live images from the cameras.<br />
In main interface mode, if you use the mouse to double-click the live image of any<br />
channel, the image will be maximized to full screen, by double-clicking again, the<br />
display will be come back to quad mode displaying all cameras; clicking the right<br />
button of the mouse, will enter into Pop-up Menu; by clicking the left button of the<br />
mouse, you select menu items; when clicking any area outside the menu, you will<br />
exit the Pop-up menu.
4 <strong>DVR</strong> <strong>CON</strong>FIGURATION<br />
POP UP MENU<br />
4.1 MAIN MENU PREVIEW<br />
Main Menu<br />
After finishing system initialization, click right key of mouse on main interface mode to<br />
enter into Pop-up Menu. Now you could proceed parameter setting and operate for<br />
Main Menu, Menu Lock, Video Search, PTZ, Start record, Stop Record and also<br />
operate for Start Cruise after successful PTZ parameter setting etc.<br />
Camera<br />
Recording<br />
Network<br />
Rec. Search<br />
Device<br />
Management<br />
System<br />
DS<strong>1093</strong>-027 52<br />
Color set<br />
Dwell time display<br />
Search<br />
Playback<br />
File List<br />
HDD Management<br />
Alarm Setting<br />
PTZ Setting<br />
Mobile<br />
Motion<br />
Time Setting<br />
User password<br />
Video Setting<br />
Language Select<br />
System Information<br />
System Maintenance<br />
Area setting<br />
E-mail setting
4.2 MAIN MENU<br />
4.2.1 CAMERA SETUP<br />
For the best use in indoor, adjust Brightnes and Contrast accordingly.<br />
DS<strong>1093</strong>-027 53<br />
After clicking right button of mouse, pop-up menu will be displayed on the screen.<br />
You can click [main menu] button on pop-up menu to enter into Main menu<br />
interface. You can also use the Menu button on the front panel to bring up the<br />
window, when using the front panel buttons use the FWD and REW button to<br />
move in the menu, and the SEL button to select the icon. You use the ESC button<br />
to return to previous window. In Main Menu mode, you can control device<br />
management settings, such as Camera, Recording, Network, Recording search,<br />
HDD, Alarm, PTZ Control, Mobile Phone & motion detection etc, you can also set<br />
system function settings, such as Time setting, User password, Audio/Video<br />
setting, Language select, and access system information, system maintenance<br />
etc.<br />
Go to [Main Menu � Camera] to set up the name display and position display of<br />
each channel, You can also adjust image brightness, saturation and contrast<br />
settings of each channel after entering into [Color] Menu and set up whether<br />
each channel can be previewed or not under Live display and/or Recording<br />
mode.<br />
It is possible to configure some Privacy Zones by selecting the button “Privacy”.<br />
The dwell time can be set by selecting the option "AUTOSEQ".<br />
Please note that the name of each channel supports up to eight characters.<br />
Click [AUTOSEQ] button to start auto rotation function. (setting sub menu<br />
shown as Picture). After starting auto rotation function, system will auto rotate<br />
the video images among <strong>CH</strong>1, <strong>CH</strong>2, <strong>CH</strong>3, <strong>CH</strong>4 and Quad in turn.<br />
Default rotation time: 5 second<br />
Settable time range: 0~10 second<br />
Below is the Color Menu where you can adjust image brightness, saturation and<br />
contrast parameters of each channel<br />
Explanation:<br />
1�The modifications will be available after clicking [APPLY] button on<br />
the bottom of the sub-menu windows and being prompted to save and<br />
then clicking [ok] button.<br />
2. If you want to cancel the modification, click [Exit] button to exit the<br />
menu.<br />
3. When clicking [DEFAULT] button, all system default values will be<br />
reset to default value.<br />
4. System default value indicates the value pre-set at the factory.
Privacy Zone<br />
DS<strong>1093</strong>-027 54<br />
Privacy Zones (up to 4 per channel) can be enabled/disabled by selecting<br />
ON/OFF for each channel.<br />
It is possible to select, for each camera, 4 privacy zones that can be<br />
moved, enlarged or reduced according to requirements (SETUP).
4.2.2 RECORD SETUP<br />
The [Record Setup] menu allows you set up recording status (on/off) of each channel, it also allows you setup recording<br />
image resolution and quality, and turn audio on/off. This menu also allows you select recording mode (recording after power on<br />
and scheduled recording) and recording file length.<br />
Once a channel is set to “on” the channel can record, if it is set to “off” the video from the channel will not be recorded.<br />
Resolution options are D1, HD1 and CIF; and Quality options are Best, Good and Normal.<br />
When Audio is set to “On”, system will also record audio from the channels and will have audio output on playback mode; if it<br />
is set to “off” you can not record audio and will have no audio output available on playback mode.<br />
To record 24 hours a day set the Rec Mode to Always. To record on motion or a set schedule, select Time <strong>Sch</strong>edule Record and<br />
click the “<strong>Sch</strong>edule” option, the <strong>Sch</strong>edule interface will open as shown in the following picture:<br />
MAXIMUM RECORDING TIME WITH 320GB HARD DISK<br />
The following list contains recording maximum times with 320GB HD for 4 recording channels.<br />
Resolution<br />
Click [Main Menu] �[Record] to enter into [Record Setup] menu (Shown as<br />
Picture)<br />
Functions:<br />
1:The [Rec Mode] button allows you to setup recording 24 hours, on motion,<br />
or on a set schedule.<br />
2:[PACK time] indicates maximum continuous time length of recorded files<br />
(15, 30, 45, 60 min).<br />
Recording options include All, <strong>CH</strong>-1, <strong>CH</strong>-2, <strong>CH</strong>-3, <strong>CH</strong>-4 respectively. Please click<br />
the channel you need, the channel you select will be highlighted in “Blue” unselected<br />
channels will be “Grey”.<br />
To setup weekly schedules, click on the box of the recording status you want (Alarm,<br />
General, or No Record) and then click on each box in the schedule time line that you<br />
want this method to apply to. You can use the [From – To] pull-down menus and Copy<br />
button to copy settings from one day to another day or all days. After you complete the<br />
schedule you activate it by clicking the [Apply] button.<br />
You can also click on the Default button to use the system defaults. The system<br />
default settings are:<br />
01:00 am-07:59 am : No recording<br />
08:00 am-18:59 pm : Normal recording<br />
19:00 pm- 00:59 pm : Alarm recording<br />
HDD time (days)<br />
Best quality Good quality Standard quality<br />
D1 7,4 9,9 14,8<br />
HD1 7,5 9,9 14,8<br />
CIF 9,7 14,8 19,8<br />
DS<strong>1093</strong>-027 55
4.2.3 NETWORK SET<br />
Enter into [Main Menu�Network Set] to proceed network set:<br />
When selecting DHCP, DHCP server will allocate <strong>DVR</strong> IP address automatically.<br />
NOTE:<br />
�� It is possibile to connect 5 PCs simultaneously<br />
DS<strong>1093</strong>-027 56<br />
After selecting network mode - such as DHCP, PPPOE and static<br />
allocation and setup web port, you could visit <strong>DVR</strong> remotely via network.<br />
When selecting PPPoE, you need to input user and password<br />
provided by ISP supplier and set up web port (details please refer to<br />
the below picture)<br />
When selecting static allocation, you need to setup IP address, net-mask,<br />
gateway and web port<br />
If you apply for DDNS service and set up net parameter of <strong>DVR</strong> accordingly,<br />
you could visit <strong>DVR</strong> remotely via IE browser
4.2.4 RECORDING SEAR<strong>CH</strong><br />
Click [Main menu� search] to enter into [Video Search] menu<br />
If you need to visit <strong>DVR</strong> via Internet, you should setup the video port at the<br />
public address of the <strong>DVR</strong><br />
Searched playback:<br />
If you input specific date and click [Search], you will find all the recordings for<br />
that day. When you select [Date] item, you will playback the recordings in 4 channel<br />
mode; or, click [File list] button to display File list interface, where you can playback<br />
or backup the file you selected. See File List heading below.<br />
You can play video Forward at 2x, 4x, and 8x speeds, Slow play at 1/2x, 1/4x, and 1/8x, normal play, pause and play frame by<br />
frame using the playback control bar, and adjust volume by clicking or sliding tune control bar. When playback has finished,<br />
system will return to previous menu.<br />
File list<br />
On the [Video search] menu mode, click [File list] to pop up the sub-menu shown below.<br />
This option will allow you to view all of the available files by channel and type (all, normal, or alarm).<br />
You can select a file and push the SEL button to playback the file, or use the FWD button and down button to select the<br />
option and backup the recording file you selected. You can also put a checkmark in the box at the end of multiple files if you want<br />
to backup more then one file.<br />
First: Indicates the first page of recording history you have searched. When you<br />
view other pages, clicking [First] button brings you back to Page one.<br />
PRE (Previous page): When viewing event list, clicking [Previous page] button<br />
will take you back to page before the one you are currently viewing (except the first<br />
page).<br />
NEXT (Next page): When viewing event list, clicking [Next page] button will<br />
take you to the page after the one you are currently viewing (except the last page).<br />
LAST (Last page): Indicates the last page of recording history you have<br />
searched. When you view other pages, clicking [Last page] button will take you to<br />
the Last page.<br />
DS<strong>1093</strong>-027 57<br />
ALL (Select All): Allows you to select all the events on the current page.<br />
INVERSE (Select Invert): Allows you to select other events on the current page<br />
except those you have currently selected.
Recording File Backup<br />
If you want to backup one recording from the file list, you just select the recording and click [Backup] button. When the<br />
backup is completed you will be notified. Please click [OK] button to save your backup.<br />
Explanation:<br />
�� Backup file will be in H264 format, you can convert it to AVI format using the Multimedia Player program that<br />
comes with the <strong>DVR</strong> or through the net-viewer program, so you can use any player which supports AVI format.<br />
�� In order to use a USB hard disk greater than 160 GB connected to the device, a dual power supply must be used.<br />
4.2.5 MULTI PLAYER<br />
For this reason it is suggested to use USB devices with external power supply.<br />
1: Copy backup file to your PC.<br />
2:Open multimedia player and click [File� Local (F)] to find/select the backup file, and then click [open] button<br />
Note: the file type you have selected should be *.264 format.<br />
3. Open the file:<br />
DS<strong>1093</strong>-027 58<br />
(1) Click [Play] menu (P) on the top of multimedia player interface to select playing<br />
the backup file;
2. Click pop-up menu button on the bottom of multimedia player and [Play- ] button, then the backup file will be<br />
played on the according channel.<br />
3. The Menu brief on the bottom of multimedia player:<br />
Date: recording date for the current backup file shown as right corner;<br />
24H recording time: lies under [Date] menu. Black number button stands for current recording playback in normal<br />
recording for the time line.<br />
0~60 Minute recording time: Green part on play processing bar stand for recording length for one hour recording.<br />
Recording date and time processing for the current recording file<br />
1 Play 10 All the windows<br />
2 Previous recording file 11 Add window<br />
3 Pause 12 Start<br />
4 Stop 13 Cut<br />
5 Previous frame / Next frame 14 Delete<br />
6 Slow play, Normal play, Fast Play 15 Convert AVI<br />
7 Next Hour 16 OSD<br />
8 Capture picture 17 Mute switch<br />
9 Reduce window 18 Volume adjust<br />
4. Please refer to the below [Video on] setting procedure (System default - video for every channel is on)<br />
DS<strong>1093</strong>-027 59<br />
Setting�Video play setting �Normal video Bar�Select the<br />
channel you want to display� Select to play the<br />
video�Apply�OK
5. Refer to below for [Audio on] setting procedure. (Setting parameter will be available after re-starting multimedia player after<br />
[Audio on] set up.)<br />
Setting�Audio channel setting � Normal video Bar�Select the channel you want to playback the audio�Select the channel<br />
has audio files�Apply�OK<br />
� �<br />
After successfully setting the above, when you playback the current channel, you can open the channel’s audio function at<br />
the same time as the video<br />
4.2.6 DEVICE MANAGEMENT<br />
4.2.6.1 HDD management<br />
Options in device management include Hard drive, External Alarm, PTZ<br />
control, Mobile Phone Monitoring, and Motion Detection.<br />
When you install a HDD, the system will automatically detect if HDD is formatted<br />
or not; If HDD needs to be formatted, HDD status will be shown as “Not format”,<br />
otherwise, the HDD status will be shown as “Normal”<br />
TOTAL SPACE: Indicates total space available on Hard Drive.<br />
FREE SPACE: Indicates unused space available on the Hard Drive.<br />
USEABLE REC TIME: Based on current image detail/quality and frame rate,<br />
system will show you how Recording time you have left on the Hard Drive.<br />
OVERWRITE: If you select “on” the system will automatically overwrite the<br />
oldest recordings once the hard drive is full. If the overwriting option is<br />
configured, it is possible to define the save time (days) of recordings on the<br />
Hard Disk, before they are deleted. If you select “off”, recording will stop once<br />
the hard drive is full.<br />
It defines the save time (in days) of recordings of all the device channels.<br />
It is possible to set a value included in the interval 1 ÷ 255 (days). The default<br />
value is 30.<br />
DS<strong>1093</strong>-027 60<br />
HDD FORMAT: You use this option to format the hard drive, you can not record<br />
files to the hard drive until it has been formatted. Click [Format HDD] button to<br />
start formatting. When selecting [Format HDD] option the system will prompt<br />
you – “Format HDD will loss all the data, do you confirm?” ; click “OK”, system<br />
will prompt you – “Is formatting…” and “successful format”; and then system will<br />
restart automatically.<br />
USB FORMAT: Use this option to format USB devices
4.2.6.2 Alarm Set<br />
DIFFERENTIATED ALARM SIGNALLING<br />
Click [Main Menu�Device � Alarm] to enter into [Alarm setup] menu to setup Alarm<br />
warnings.<br />
It is possible to select/deselect for each event type (Motion Detection, Alarm input, Video signal loss, HD full, HD loss) the signal<br />
type by choosing among the following:<br />
�� Timed BUZZER. The following values can be configured: “OFF”, “10sec”, “20sec”, “40 sec”, “60sec”<br />
�� Timed ALARM OUTPUT. The following values can be configured: “OFF”, “10sec”, “20sec”, “40 sec”, “60sec”<br />
�� EMAIL (only for Motion Detection and Alarm input)<br />
�� FULL SCREEN (only for Motion Detection and Alarm input)<br />
SELECTION OF ALARM TIME<br />
It defines the visualization time (Motion Detection or Alarm input) of an alarm event, displayed in full screen mode on the monitor,<br />
also after the event has ended.<br />
The following values can be configured: 10sec - 30sec - 1min - 2min.<br />
����������� ���������<br />
�����������<br />
�����������������<br />
�����������<br />
���������<br />
����������������������������������������������������������������������������������������<br />
��������������������������������������<br />
�����������������������������������������������������������������������������������������<br />
����������������������������������������������������������������������������<br />
���������������������������������������������������������������������������������������<br />
��������<br />
������������������������������������������������������������������������������������<br />
����������������������������������������������������������������������������<br />
DS<strong>1093</strong>-027 61
4.2.6.3 Email Alarm Notification<br />
(to send notice to email account when motion alarm is triggered)<br />
service.<br />
Click the [Email setup] menu to enter into its sub menu<br />
Please set SSL to “On” on the used mail server, and set to “Off” to other mail servers.<br />
Selezionare il menu [Email setup] per entrare nel suo sottomenu.<br />
SSL: is a security link transport protocol. You can encrypt your communication<br />
info (including your email) using SSL to prevent hackers from monitoring your<br />
email or communication info and even your password<br />
If your setting is still not right, please contact the Mail Administrator for the correct settings of the SMTP server and the SSL<br />
SMTP Port: indicates sender port of SMTP server. Generally the SMTP port value is 25, but there are exceptions: for<br />
example, the SMTP port of G-mail server should be 465.<br />
SMTP server: indicates server address you use.<br />
Sender email: indicates sender’s email address. The email address should be consistent with the server you use. That is to<br />
say, when you use email address – aaa@gmail.com, the according server should be smtp.gmail.com.<br />
Receiver address: indicates receiver’s email address. The email address is used to receive image transmitted from motion<br />
detection alarm of <strong>DVR</strong>. Please clear the images you have received as soon as possible to avoid overloading your email<br />
account.<br />
Explanation:<br />
When configuring the messages sent via e-mail (Main menu � Devices � Alarms), to ensure the correct operation it is<br />
suggested to configure a user account (that is sender address and password) with the same address as the SMTP Server. For<br />
example, if an address like mario.rossi@dominio.it is used, the SMTP must be “smtp.dominio.it”.<br />
DS<strong>1093</strong>-027 62
4.2.6.4 PTZ setup<br />
4.2.6.5 Mobile<br />
Mobile Phone Access<br />
Enter into [Main menu�Device� PTZ Setup] to select the channel you<br />
want to control and set PTZ protocol (Pelco-D or Pelco-P), Baud Rate<br />
(1200, 2400, 4800, 9600), Stop bit (1, 2), Parity Check (None, Odd,<br />
Even Mark Space), Address Code and Cruise status respectively.<br />
Please note the above mentioned channel settings must match the<br />
settings of the PTZ camera.<br />
Click [Main menu�Device�Mobile] to enter into [Mobile] menu.<br />
User Name: indicate user name of <strong>DVR</strong>.<br />
User password: indicate user password of <strong>DVR</strong><br />
Server port: Mobile monitoring port. Setting range is between 1024 and<br />
65535.<br />
NOTE: Please connect <strong>DVR</strong> to Internet before setting <strong>DVR</strong> port number and<br />
be sure the server port number is not equal to the one used on the network.<br />
The <strong>DVR</strong> is currently compatible with mobile phones running Windows Mobile and Symbian operating systems on 3G<br />
networks.<br />
Before you can access the <strong>DVR</strong> from a mobile phone you need to setup the Network Configuration on the <strong>DVR</strong> (refer to<br />
Network Setup). You also need to go to the Main Menu/Devices/Mobile and enter your username and password, and set the<br />
Server Port to 18600. This port must be the same set in the [Mobile] menu of the <strong>DVR</strong>.<br />
NOTE: You can only see one channel at a time when viewing from a mobile phone. The speed of the display<br />
depends on the speed of the internet connection.<br />
When accessing from a mobile phone with Windows Mobile operating system, use the following procedure:<br />
1. Installation on the mobile<br />
First you need to install the program that is included on the CD that comes with the <strong>DVR</strong> by copying the “QQeye.CAB” file to<br />
the mobile phone. You can do this by attaching the mobile phone to a computer and copying the file from the CD to the memory<br />
card on the phone, or by copying the file from the computer to the phone’s memory card through a memory card reader or<br />
through a Bluetooth connection.<br />
Pic 1 Pic 2 Pic 3<br />
2. Click the windows mobile folder (red box in Pic 1) and choose the file QQeye”. Select the file which will open the window in<br />
Pic 3. The file is generally to be saved as Device (shown in Pic 3) but you can save it to the Storage Card.<br />
DS<strong>1093</strong>-027 63
3. Choose storage location and click [Install] button (red box in Pic 3) to start the installation (please refer to display in Pic 4<br />
below)<br />
Pic 4 Pic 5 Pic 6<br />
4. After installation finishes, click the icon named QQeye (red box in Pic 5) to run the program. This will display the program<br />
screen in Pic 6.<br />
5. Settings: Click [Setting] button (red box in Pic 6) to enter the Setting menu shown as Pic 7<br />
Pic 7<br />
Pic 8<br />
User name: same as user name setup in <strong>DVR</strong> under Menu/Devices/Mobile<br />
Password: same as password setup in <strong>DVR</strong> under Menu/Devices/Mobile<br />
Server address: Public IP address of router <strong>DVR</strong> is connected to.<br />
Web port: Same as the Server Port you setup in the <strong>DVR</strong>, it needs to be forwarded to the IP address of the <strong>DVR</strong>, setting<br />
range is between 1024 and 65535, the default setting is 18600. Note: this port is in addition to the ports used for standard remote<br />
access.<br />
Channel: Select the channel from the <strong>DVR</strong> you want to monitor and click [OK] button (red box in Pic 7) to display the screen<br />
in Pic 8 and start video connection.<br />
6. Main interface operation (Pic 8)<br />
Click [Disconnect] button to stop displaying live image of the channel.<br />
Click [Setting] button to modify the settings.<br />
7. Video connection Display<br />
Normal Mode:<br />
You will find network connection status info under the video image:<br />
�� on the left corner: Network transmission speed, Frame rate and Resolution.<br />
�� on right corner: percentage of buffer display, Connection success,Connection fail, Play and Stop.<br />
Function of Buttons under the video image from left to right: PTZ control (Left, Right, Up and Down), area select<br />
(Zoom out and Zoom in), Focus (“+” and “-”) and Iris (“+” and “-”) and Snap to capture screen image.<br />
8. Display mode: You can convert normal display into full-screen display by clicking<br />
the screen on the mobile phone (displayed as Pic 9)<br />
DS<strong>1093</strong>-027 64<br />
Pic 9
When accessing from a mobile phone with Symbian operating system, use the following procedure:<br />
1. Installation on the mobile<br />
First you need to install the program that is included on the CD that comes with the <strong>DVR</strong> by copying the “QQeye.CAB” file to<br />
the mobile phone. You can do this by attaching the mobile phone to a computer and copying the file from the CD to the memory<br />
card on the phone, or by copying the file from the computer to the phone’s memory card through a memory card reader or<br />
through a Bluetooth connection.<br />
2. Select the QQEye icon in this window (red box in Pic 2) to install it, this will display Pic 3).<br />
Pic 1 Pic 2<br />
Pic 3<br />
After the phone finishes preparation it will display Pic 4 asking for permission to install the program. Select the Yes button<br />
(red box in Pic 4). This will display the window in Pic 5.<br />
Pic 4<br />
Pic 5 Pic 6<br />
3. Click the Continue button (red box in Pic 5) on the information box displaying the program and current version. This will<br />
display the window in Pic 6.<br />
4. Next choose where you want to install the program, to phone memory or to the memory card, and click on the Select option<br />
(red box in Pic 6). This will display the window in Pic 7, click on Continue (red box in Pic 7) which will display the screen in Pic 8<br />
and tell you it is installing the program (red box in Pic 8).<br />
Pic 7<br />
5. Once the installation is completed the window in Pic 9 will be displayed to tell you that installation is completed. Then you<br />
can go to the Applications folder and select the QQEye program (white box in Pic 10) and click on the Open option (red box in Pic<br />
10) to display the settings menu. After you complete the settings and click on the Done button (red box in Pic 11) the Video<br />
window in Pic 12 will be displayed.<br />
DS<strong>1093</strong>-027 65<br />
Pic 8<br />
Pic 9
Open<br />
Pic 10<br />
Default Access Point:<br />
Input the access point. System default for the access point is GPRS connection.<br />
Pic 11 Pic 12<br />
Server Address:<br />
Input the public IP address of the router the <strong>DVR</strong> is attached to (refer to section 5.2.3 Network Setup on page 14 of the<br />
product manual).<br />
Server Port:<br />
Web port: Same as the web port setting on the <strong>DVR</strong>, you need to forward this port from the Router to the <strong>DVR</strong>. Setting range<br />
is between 1024 and 65535, the default setting is 18600. Note: this port is in addition to the ports used for standard remote<br />
access.<br />
User Name:<br />
Same as user name setup in <strong>DVR</strong> under Menu, Devices, Mobile<br />
Password:<br />
Same as password setup on <strong>DVR</strong>. (Please press Function key to save the password, left soft key won’t be able to save the<br />
password)<br />
Channel:<br />
Select the channel you want to monitor and click [OK] button to start video connection<br />
Network connection status: percentage of buffer display, connection success, connection fail, play and stop.<br />
Channel select, PTZ control, Zoom in/out, Focus and Iris<br />
Play/Stop, Full screen/ Normal Display, Capture, Parameter setting and Exit.<br />
By clicking on the image you can see it full screen as in Pic 13<br />
Fig. 13<br />
DS<strong>1093</strong>-027 66
4.2.6.6 Motion Detection<br />
4.2.7 SYSTEM FUNCTION<br />
4.2.7.1 Time Set<br />
4.2.7.2 Password<br />
DS<strong>1093</strong>-027 67<br />
Click [Main�Device�Motion] to enter into the [Motion Detection] menu to setup<br />
motion detection recording.<br />
The [Motion detection] Menu has three sections, including Channel Status,<br />
Sensitivity and Motion area.<br />
Channel STATUS: This option allow you enable motion detection on any channel.<br />
SENSITIVITY: This option allows you to set sensitivity level of motion detection<br />
from 1 to 4 with 4 being the most sensitive<br />
MD AREA: This option allows you to select the area you want to be sensitive to<br />
motion. The channel is separated into a 13*10 area. When any object moves into the<br />
motion detection area, and the area where the object is located is displayed in red,<br />
recording will be triggered. In the semi-transparent area the motion detection is off<br />
The [System] Menu includes the below sub-menus: Time Set, User<br />
Password, Audio/Video Setting, Language select, System Info and System<br />
Maintenance.<br />
After entering into the [System], you can configure the system to meet your<br />
needs<br />
Click the [Main menu�System�Date/Time] in order to enter into the time<br />
setup menu. You can modify system date, time, date/time format and time<br />
zone and also setup DST (day saving time) status and mode<br />
This option allows you set the device ID for the <strong>DVR</strong> and set the system<br />
password if you want to use one. The new passwords will be available after<br />
clicking [APPLY] button.
4.2.7.3 Video Setup<br />
4.2.7.4 Languages<br />
4.2.7.4 Info<br />
4.2.7.5 System Maintenance<br />
DS<strong>1093</strong>-027 68<br />
When you set Password Enabled to “ON”, you can setup a user password and<br />
administrator password respectively. The password supports up to 6 characters<br />
NOTE:<br />
�� The defualt Password is: 123456.<br />
Click [Main Menu�System�VIDEO] to setup Video, here you can set <strong>VGA</strong> Resolution<br />
and Camera system: PAL, NTSC<br />
Enter into [System Language] menu to select the language you want to use on<br />
the <strong>DVR</strong> and click [APPLY] button. The selection will be available after system<br />
restart<br />
Click [Main Menu� System�Info] to enter into [System Information] menu to view<br />
system info, including Device type, Software (firmware) version and MAC address etc<br />
This option allows you reset the <strong>DVR</strong> to factory default settings, update system<br />
software (firmware), and set system auto-maintenance. Click [Main<br />
menu�System�Maintain] to enter into the [System Maintain] menu<br />
When you enable auto-maintain function, you can setup system to restart regularly.
4.3 MENU LOCK<br />
4.4 VIDEO SEAR<strong>CH</strong><br />
As a system safety feature you can click [Menu Lock] menu to lock menu<br />
when leaving the <strong>DVR</strong>. If you want to login to the <strong>DVR</strong>, you would input device<br />
code and password.<br />
Explanation: User only has the authority to search recordings, but<br />
Administrator has full authority over Main Menu operations<br />
Click pop-up menu video search to enter into [Video Search] menu you search files and playback recordings. For more<br />
information on this operation refer to the previous section.<br />
4.5 SETUP PTZ<br />
Cruise Set<br />
�IMPORTANT NOTE<br />
Select PTZ option from the po-up menu. You can adjust ZOOM, FOCUS e IRIS.<br />
Open Cruise Set if you want to setup cruise function (system default: on) and set up cruise<br />
channel, cur point, stop time etc<br />
Channel select: select the channel with the PTZ camera<br />
Total: counter of the used Presets<br />
Cur Point: System has default starting (current) cruise point as 01. You can use this option to<br />
set additional cruise points.<br />
Stop time: sets the pause time at each stop.<br />
GOTO�select this option to go to specific preset points<br />
Set: save the preset point. After setting channel and setting the position by adjusting PTZ<br />
direction key you click [Set] button to setup the pre-set point. Please note you will click the<br />
[Save] button to finish the setting successfully. If you want to combine Zoom, Iris, Focus and<br />
direction keys into the pre-set setting, please return to previous menu to add additional<br />
settings, and then enter into Cruise Set again and click [Set] and [Save] to make sure your<br />
setting is setup successfully.<br />
Clean: remove settings.<br />
Note: this <strong>DVR</strong> model supports up to 100 pre-set points. But actual quantities may be<br />
restricted by the PTZ camera you are using.<br />
�� It is strongly reccomended to use Cruise Function available in Speed-Dome Camera. After a blackout or <strong>DVR</strong> reboot,<br />
Cruise function in <strong>DVR</strong> Menu could not work correctly.<br />
DS<strong>1093</strong>-027 69
4.6 START RECORDING<br />
I f you want to start recording, click [ Rec ] button to start manual recording<br />
4.7 STOP RECORDING<br />
If you want to stop manual recording, click [Stop Record.] menu or [Stop] button.<br />
4.8 START/STOP CRUISE<br />
Cruise function performs a sequenze of Presets on the Speed Dome (or PTZ device) connected to the <strong>DVR</strong>.<br />
You cant start and stop this function by the pop-up menu.<br />
NOTE: Cruise must be enabled in the [SETUP PTZ] menu<br />
It is strongly reccomended to use Cruise Function available in Speed-Dome Camera. After a blackout or <strong>DVR</strong> reboot, Cruise<br />
function in <strong>DVR</strong> Menu could not work correctly.<br />
4.9 LAUN<strong>CH</strong> SEQUENCE<br />
The function "AUTOSEQ" launches the sequence display of channels; the sequence dwell time can be set by users (see<br />
Chapter 4). Left mouse click on screen to stop the sequence.<br />
4.10 PIP MODE<br />
4.11 DIGITAL ZOOM<br />
DS<strong>1093</strong>-027 70<br />
This option allows to monitor in full screen mode and in a smaller window (PIP<br />
screen) all the channels in LIVE mode.<br />
By selecting this option from the pop-up Menu, the first channel will be<br />
displayed in full screen mode and channel 2 and channel 3 can be displayed in<br />
PIP screen, according to the selected option (1X1 or 1X2). By selecting the<br />
option 1X1, LIVE images of the second channel will be displayed on the bottom<br />
left, by selecting the option 1X2, LIVE images of the second and third channel<br />
will be displayed in PIP screen,on the bottom left and right.<br />
By clicking on the channel displayed in full screen mode and in PIP screen, the<br />
displayed cameras will change. To disable this function, right click.<br />
This option allows to select a channel in full screen mode and zoom in on the<br />
image in LIVE mode. By right clicking on the channel displayed in full screen<br />
mode, it is possible to select the option DIGITAL ZOOM.<br />
Now it is possible to select the area to be enlarged with the mouse, by keeping<br />
the left button pressed and dragging the area. On the bottom right the user can<br />
see in a window the whole channel images with the area to be enlarged,<br />
selected in a red box. To disable this function, right click.
5 MISCELLANEOUS<br />
5.1 REMOVING THE EXTRACTABLE HARD DISK DRAWER<br />
Proceed as follows to remove the extractable hard disk drawer.<br />
1. Switch off the <strong>DVR</strong>.<br />
2. Insert and turn the key on the hard disk tray (“open” position).<br />
close<br />
chiuso aperto<br />
open<br />
3. Pull on the specific seat with the word “PULL” to extract the hard disk from its seat.<br />
�IMPORTANT NOTE<br />
Make sure the hard disk is not in use before removing it to prevent damage.<br />
Reverse the procedure above to reposition the hard disk.<br />
DS<strong>1093</strong>-027 71
6 SPECIFICATIONS (PAL FORMAT)<br />
Item Specifications<br />
Video System NTSC / PAL<br />
Compression Format Video: <strong>H.264</strong> / Audio: 8kHz*16bit ADPCM<br />
Video Output 4-<strong>CH</strong> BNC Input/ 2-<strong>CH</strong> BNC Output / 1-<strong>VGA</strong> output<br />
Audio I/O 4-<strong>CH</strong> RCA audio Input / 2-<strong>CH</strong> RCA audio Output<br />
Display Resolution D1: 704×576 (PAL)<br />
Frame rate<br />
Recording Resolution<br />
Single <strong>CH</strong> PAL: 25 fps<br />
PAL: CIF(352*288), HD1(704*288), D1 (704*576<br />
Recording Frame Rate (shared) PAL: 25 fps@D1, 50 fps@HD1, 100 fps@CIF<br />
�IMPORTANT NOTE<br />
HDD 1 SATA HDD (up to 1024GB), USB removable HDD<br />
Video Mode Always / schedule / manual /motion detection / sensor triggered<br />
Record Pack Time<br />
15/30/45/60min<br />
Video backup USB flash disk / removable HDD; USB Burner, Network backup to AVI File<br />
Format<br />
Playback Mode PLAY /SLOW /FWD/Frame by Frame<br />
Alarm I/O 4-<strong>CH</strong> alarm inputs, 1-<strong>CH</strong> alarm output<br />
Alarm Type Motion/ sensor triggered/Video loss/HDD Space/HDD Loss<br />
PTZ Control Built-in RS-485 port, supports PELCO-P & PELCO-D<br />
USB 2.0 Port<br />
Supports USB mouse; removable HDD or USB flash drive to backup to AVI<br />
file and upgrade system<br />
Ethernet One RJ-45 10M/100M self-adaptable Ethernet interface<br />
Network Protocol Supports TCP/IP, DHCP, UDP, DDNS, PPPOE network Protocol<br />
Network Function<br />
Support preview live display remotely via mobile phone and real time monitoring<br />
via IE-based browser and/or network, and support parameter setting of <strong>DVR</strong><br />
remotely.<br />
Power consumption 15W (exclude HDD)<br />
Power Adapter DC 12V / 3A<br />
Working Temperature 10� to 40�<br />
Working humidity 10%~90%<br />
Dimensions<br />
(width x height x depth)<br />
340x50x220 mm<br />
Weight ~3 kg<br />
�� Product specifications may be subject to change without prior notice<br />
�� MAX Hard Disk capacity is 1 TB.<br />
�� The removable Hard Disk is not intended to be used with a PC.<br />
DS<strong>1093</strong>-027 72
7 USE OF NETVIEWER<br />
7.1 PLUG-INS DOWNLOAD AND INSTALLATION<br />
Open IE browser and input IP address and web port of <strong>DVR</strong>, such as http://172.18.6.202:80/.<br />
Reminder: If the plug-in is not successfully downloaded, please check if your browser’s safety level or firewall setting (see<br />
Appendix: ActiveX installation). Also refer to Network Setup to make sure network configuration is correct.<br />
Or start Viewer Software Client that is supplied inside the CD with the <strong>DVR</strong>.<br />
7.2 LOG-IN TO NETVIEWER<br />
Picture 6-1<br />
Picture 6-2<br />
7.3 MAIN INTERFACE OF NETVIEWER<br />
Picture 6.3<br />
Netviewer shows the following sections on the screen:<br />
o Menu column (Section 1 on Picture 6-3)<br />
o PTZ Control (Numbers 2, 3, 4 on Picture 6-3)<br />
o Live Play Control (Numbers 6 through 10 on Picture 6-3)<br />
DS<strong>1093</strong>-027 73<br />
After plug-in installation, please select log-in language and enter<br />
password and click [Log-in] button, and now you can view <strong>DVR</strong><br />
remotely through NetViewer.<br />
Please note default password is empty. System allows<br />
Administrator to set new password.<br />
If NETWORK is selected as LAN, video stream will be performed in<br />
Main Stream; otherwise, if NETWORK is selected as INTERNET,<br />
video stream will be performed in Sub-Stream.<br />
NOTE: If you want to delete old IE webcam at <strong>DVR</strong> system<br />
update, run the command characters: “regsvr32/u dvrocx.ocx”<br />
After successful Log-in to Net-viewer, system will enter into live<br />
display interface, automatically connecting audio/video (shown as<br />
Picture 6-2).
7.3.1 MENU COLUMN<br />
Menu column includes [Live] menu, [Replay] menu and [Setup] menu and [Logout] menu.<br />
7.3.1.1 Live<br />
After Logging-in to system, system will enter into Live display (shown as Picture 6-3).<br />
7.3.1.2 Replay<br />
Picture 6-4<br />
Play button: [Play]/[Pause]<br />
Stop button: stop playing recording.<br />
F.F. button: fast forward playback recording<br />
Slow button: slow playback recording.<br />
Next Frame: play frame by frame.<br />
264 TO AVI button: convert file from <strong>H.264</strong> format to AVI format<br />
This option allows you to playback recordings remotely.<br />
First select the day, channel and type and proceed<br />
searching and refreshing; second select any event from<br />
search result list to playback.<br />
Please note you can control playing speed by sliding the<br />
playing-control bar on the bottom of the interface (shown as<br />
Picture 6-4).<br />
The native format of the backup files is <strong>H.264</strong>, you can convert <strong>H.264</strong> format into more familiar AVI format by clicking the key<br />
of 264 to AVI.<br />
7.3.1.3 Setup<br />
Click [Setup] menu to enter into its sub menu, including [Recording Mode] menu, [Alarm Mode] menu, [PTZ Control] Menu,<br />
[Network Setting] menu, [System Setting] menu and [Host Info] menu.<br />
NOTE: you can modify and save the <strong>DVR</strong> parameters remotely only when this one is on the status of live display. The<br />
modification method to <strong>DVR</strong> via Net-viewer is the same as local adjustment of <strong>DVR</strong>.<br />
� Record<br />
Picture 6-5<br />
Picture 6-6<br />
DS<strong>1093</strong>-027 74<br />
Enter into sub menu – [Recording Mode] menu, you can select on/off<br />
for every channel, and adjust recording parameters (resolution, quality,<br />
audio, REC mode and <strong>Sch</strong>edule) remotely via Net-viewer.<br />
Click the [<strong>Sch</strong>edule] menu to enter into its sub menu (shown as<br />
Picture 6-6).<br />
Remote setup methods are the same as local <strong>DVR</strong> setup. Please<br />
refer to Section 5.2.2 Record Setup
� Alarm<br />
Picture 6-8<br />
� PTZ Control<br />
� Network<br />
� Setting<br />
Picture 6-7<br />
Picture 6-9<br />
Picture 6-10<br />
DS<strong>1093</strong>-027<br />
Picture 6-11<br />
75<br />
Click [Alarm] menu to enter into its sub menu (shown as Picture 6-7).<br />
You can set I/O alarm for every channel, motion detection alarm,<br />
motion recording, motion trace, motion sensitivity, video loss alarm, HDD not<br />
enough space alarm, HDD not found alarm and alarm output time etc.<br />
For details on setup method please refer to section 5.2.5.2.<br />
System allows you setup motion detection settings for each channel of <strong>DVR</strong><br />
remotely (shown as Picture 6-8)<br />
Click [PTZ control] to setup PTZ cameras. Remote setup<br />
methods are the same as local <strong>DVR</strong> setup.<br />
Please refer to Section 5.2.5.3 (shown as Picture 6-9).<br />
Click [Network] to enter into [Network] menu.<br />
Remote setup methods are the same as local <strong>DVR</strong> setup.<br />
Please refer to Section 5.2.3. – Network Set.<br />
Click [setting] menu to enter into the menu interface (shown as<br />
Picture 6-11);<br />
Click […] button to preview net-viewer recording saving path and<br />
screen capture saving path.<br />
The menu also allows you to set a lower bandwidth for Internet<br />
video transmission, set user password, turn daylight saving time on/off,<br />
etc.
� Host Info<br />
7.3.1.4 Log out<br />
Log out of the system.<br />
Picture 6-12<br />
Click [Host Info.] to enter into the sub menu (shown as Picture 6-12).<br />
Here you can check Usage rate of HDD, available recording time, software<br />
version and MAC address.<br />
7.3.2 PTZ <strong>CON</strong>TROL<br />
The PTZ controls and the Cruise function are performed in the same way they are performed on the <strong>DVR</strong>.<br />
7.3.3 LIVE PLAY <strong>CON</strong>TROL<br />
On / Off Live display [ ]: when Live display status is “On”, the button closes Live display. When “Off”, the button opens<br />
the Live display.<br />
Capture [ ]: performs a Capture Screen image and save to PC as *bmp image.<br />
Recording [ ]: operate <strong>DVR</strong> remotely recording<br />
Channel display [ ]: the icons stand for Single Channel display, Quad Channel display, 3x3 Channel<br />
display and 4x4 Channel display respectively.<br />
Volume control [ ]: click or slide the control bar to adjust sound volume.<br />
DS<strong>1093</strong>-027 76
Configure security as follows before connecting to a remote PC.<br />
�� Open Internet Explorer by double clicking on .<br />
�� The following page (or the home page) will appear.<br />
�� Double click on .<br />
�� The “Properties - Internet Security” window will appear.<br />
APPENDIX: ACTIVE X INSTALLATION<br />
�� Select “Trusted sites” and check that the protection level is ‘low’.<br />
�� Click on “Sites…”<br />
�� The following screen will appear.<br />
DS<strong>1093</strong>-027 77
�� Add the IP address of the device (to display the address, press “F2” on the front panel of the device) in the “Add this<br />
website to the zone” field.<br />
�� Click on “Add”.<br />
�� The following confirmation screen will appear.<br />
�IMPORTANT NOTE<br />
�� Do not check “Requie server verification (https) for all sites in this zone.<br />
�� Click on “OK” several times to end the procedure.<br />
�� Proceed by installing “Active X”.<br />
�IMPORTANT NOTE<br />
You can reset the required I.E. protection level for trusted sites after installing “Active X”.<br />
DS<strong>1093</strong>-027 78
ESPAÑOL<br />
ÍNDICE<br />
1 Información general ............................................................................................................................... 81<br />
1.1 Descripción del producto........................................................................................................ 81<br />
1.1.1 Características generales ............................................................................................................................... 81<br />
1.2 Comprobación del paquete .................................................................................................... 81<br />
1.2.1 Contenido del paquete.................................................................................................................................... 81<br />
1.3 Advertencias........................................................................................................................... 82<br />
1.3.1 Alimentación.................................................................................................................................................... 82<br />
1.3.2 Precauciones de seguridad ............................................................................................................................ 82<br />
1.3.3 Precauciones de instalación ........................................................................................................................... 82<br />
1.3.4 Limpieza del dispositivo.................................................................................................................................. 82<br />
1.3.5 Disco duro....................................................................................................................................................... 82<br />
1.3.6 Grabación de imágenes.................................................................................................................................. 83<br />
1.3.7 Privacidad y Copyright .................................................................................................................................... 83<br />
2 Descripción de los componentes......................................................................................................... 84<br />
2.1 Panel frontal ........................................................................................................................... 84<br />
2.2 Panel posterior ....................................................................................................................... 86<br />
2.3 Control remoto de infrarrojos.................................................................................................. 88<br />
2.3.1 Baterías........................................................................................................................................................... 89<br />
3 Arranque del <strong>DVR</strong>................................................................................................................................... 90<br />
3.1 Encendido y apagado............................................................................................................. 90<br />
3.2 Interfaz principal ..................................................................................................................... 90<br />
4 Configuración del <strong>DVR</strong> .......................................................................................................................... 91<br />
4.1 Estructura del menú principal................................................................................................. 91<br />
4.2 Menú principal ........................................................................................................................ 92<br />
4.2.1 Configuración de la cámara............................................................................................................................ 92<br />
4.2.2 Configuración de la grabación ........................................................................................................................ 94<br />
4.2.3 Configuración de red....................................................................................................................................... 95<br />
4.2.4 Búsqueda de las grabaciones......................................................................................................................... 96<br />
4.2.5 Multimedia Player............................................................................................................................................ 97<br />
4.2.6 Gestión del dispositivo.................................................................................................................................... 99<br />
4.2.6.1 Configuración del disco duro.........................................................................................................................99<br />
4.2.6.2 Configuración de la alarma .........................................................................................................................100<br />
4.2.6.3 Notificación de alarmas por correo electrónico ...........................................................................................101<br />
4.2.6.4 Configuración PTZ ......................................................................................................................................102<br />
4.2.6.5 Teléfono móvil .............................................................................................................................................102<br />
4.2.6.6 Detección de movimiento ............................................................................................................................106<br />
4.2.7 Configuración del sistema............................................................................................................................. 107<br />
4.2.7.1 Ajuste de fecha y hora.................................................................................................................................107<br />
4.2.7.2 Contraseña..................................................................................................................................................107<br />
4.2.7.3 Ajuste de vídeo............................................................................................................................................108<br />
4.2.7.4 Idioma..........................................................................................................................................................108<br />
4.2.7.5 Información del sistema ..............................................................................................................................108<br />
4.2.7.6 Mantenimiento del sistema..........................................................................................................................108<br />
4.3 Bloqueo de menu ................................................................................................................. 109<br />
4.4 Búsqueda de vídeo............................................................................................................... 109<br />
4.5 Configuración PTZ................................................................................................................ 109<br />
4.6 Iniciar la grabación manual .................................................................................................. 109<br />
4.7 Detener la grabación manual ............................................................................................... 109<br />
4.8 Iniciar/detener Cruise ........................................................................................................... 110<br />
4.9 Auto secuencia (autoseq)..................................................................................................... 110<br />
4.10 Modo PIP.............................................................................................................................. 110<br />
4.11 Zoom digital .......................................................................................................................... 110<br />
5 Varios..................................................................................................................................................... 111<br />
5.1 Retirar el disco duro extraíble .............................................................................................. 111<br />
6 Especificaciones (formato PAL) ......................................................................................................... 112<br />
7 Uso de NetViewer ................................................................................................................................. 113<br />
DS<strong>1093</strong>-027 79
7.1 Descarga e instalación del plug-in ....................................................................................... 113<br />
7.2 Inicio de sesión en NetViewer .............................................................................................. 113<br />
7.3 interfaz principal de NetViewer............................................................................................. 113<br />
7.3.1 Menú principal............................................................................................................................................... 114<br />
7.3.1.1 Menú Live....................................................................................................................................................114<br />
7.3.1.2 Menú Replay ...............................................................................................................................................114<br />
7.3.1.3 Programación ..............................................................................................................................................114<br />
7.3.1.4 Información..................................................................................................................................................116<br />
7.3.2 Control PTZ................................................................................................................................................... 116<br />
7.3.3 Control de reproducción en tiempo real........................................................................................................ 116<br />
Apéndice: Instalación de ActiveX ................................................................................................................ 117<br />
DS<strong>1093</strong>-027 80
1 INFORMACIÓN GENERAL<br />
En este documento se describe cómo instalar y utilizar el grabador de vídeo digital Ref. <strong>1093</strong>/<strong>004</strong> de URMET Domus.<br />
Lea con atención este manual, ya que contiene información sobre el uso correcto y seguro de los dispositivos.<br />
Guarde el manual en un lugar fácilmente accesible para poder consultarlo cuando sea necesario.<br />
1.1 DESCRIPCIÓN DEL PRODUCTO<br />
El producto URMET Domus S.p.A. es un grabador de vídeo digital que permite almacenar en un disco duro interno las<br />
imágenes grabadas desde distintas cámaras para verlas en un PC mediante un puerto USB.<br />
1.1.1 CARACTERÍSTICAS GENERALES<br />
�� Modo tríplex (grabar, reproducir y transmitir por red simultáneamente)<br />
�� Compresión de vídeo <strong>H.264</strong>, con resolución D1, HD1 o CIF<br />
�� Grabación en tiempo real<br />
�� Grabación de uno o varios canales<br />
�� Transmisión por la red Main-Stream y Sub-Stream<br />
�� Compresión de audio ADPCM<br />
�� Control remoto (por navegador web o software cliente)<br />
�� Control remoto a través de teléfono móvil<br />
�� Gestión de alarmas<br />
�� Grabación de varias alarmas<br />
�� Notificación de alarmas por correo electrónico<br />
�� Mantenimiento automático<br />
�� Control PTZ a través de RS-485<br />
�� Disco duro extraíble<br />
�� Volcado a USB 2.0 (pendrive o disco duro)<br />
�� Ratón USB<br />
�� Mando a distancia<br />
�� Menú OSD multilingüe<br />
1.2 COMPROBACIÓN DEL PAQUETE<br />
Compruebe visualmente que el paquete y su contenido no presentan ningún daño. Si falta algún componente o está<br />
dañado, póngase en contacto con su distribuidor. En este caso, no intente utilizar el dispositivo. Si el producto presenta<br />
daños, devuélvalo en su embalaje original.<br />
1.2.1 <strong>CON</strong>TENIDO DEL PAQUETE<br />
�� <strong>DVR</strong><br />
�� Alimentador<br />
�� ENTRADA � 100-240 VAC, 50/60 Hz, 1 A<br />
�� SALIDA � 12 VDC, 4 A<br />
�� Manual de usuario<br />
�� Tornillos de sujeción<br />
�� CD-ROM con software<br />
�� Ratón<br />
�� Control remoto de infrarrojos<br />
�� Dos llaves para extraer el disco duro<br />
�� Un enchufe <strong>Sch</strong>uko<br />
�� Enchufe italiano<br />
�NOTA<br />
Los accesorios están sujetos a modificaciones sin previo aviso.<br />
DS<strong>1093</strong>-027 81
1.3 ADVERTENCIAS<br />
1.3.1 ALIMENTACIÓN<br />
�� Utilice únicamente el alimentador suministrado con el equipo. Compruebe la tensión eléctrica AC antes de<br />
conectar el alimentador.<br />
�� Para desconectar el cable de alimentación del dispositivo, no tire del cable sino del conector.<br />
�� Apague el dispositivo antes de desconectar el alimentador. Esta operación no debe realizarse cuando el<br />
grabador esté grabando, reproduciendo o en el menú de configuración. Para evitar dañar el disco duro<br />
irreparablemente, conviene detener la grabación y reproducción en curso antes de desconectar la alimentación<br />
del dispositivo.<br />
1.3.2 PRECAUCIONES DE SEGURIDAD<br />
�� Para evitar cualquier riesgo de incendio y descargas eléctricas, no exponga el dispositivo a la lluvia o a la<br />
humedad. No introduzca dentro ningún material sólido o líquido. Si esto se produjera de manera accidental,<br />
desconecte el equipo de la red eléctrica y haga que lo inspeccione personal cualificado.<br />
�� No intente en ningún caso abrir el dispositivo o repararlo por su cuenta. En caso de avería, póngase en contacto<br />
con personal cualificado o con el servicio de asistencia técnica.<br />
�� Mantenga el equipo alejado de los niños, para evitar daños accidentales.<br />
�� No opere el equipo con las manos húmedas, para evitar descargas eléctricas o daños mecánicos.<br />
�� No utilice el equipo si se ha caído o si la carcasa externa está dañada, ya que podría producirse una descarga<br />
eléctrica. En este caso, contacte con el distribuidor o instalador autorizado.<br />
1.3.3 PRECAUCIONES DE INSTALACIÓN<br />
�� Para que el equipo no se sobrecaliente, colóquelo de tal forma que no se obstruya el paso de aire a través de las<br />
ranuras de la carcasa. Si el equipo se instala en un rack, asegúrese de dejar un espacio libre de al menos 5 cm.<br />
Asimismo, no lo instale junto a fuentes de calor, como radiadores o conductos de aire caliente, ni lo exponga a la<br />
luz solar directa. No instale el dispositivo en zonas con mucho polvo, o sometidas a vibraciones mecánicas o<br />
choques.<br />
�� No coloque el dispositivo sobre una superficie inestable, como una mesa tambaleante o inclinada, ya que podría<br />
caerse y causar lesiones o fallos mecánicos.<br />
�� No instale el dispositivo en un lugar expuesto a la humedad o al agua. No dirija un chorro de agua directamente<br />
sobre el dispositivo ya que podría producirse un incendio, una descarga eléctrica o un fallo mecánico.<br />
�� Si entra agua o cualquier otro material extraño dentro del dispositivo, desconéctelo inmediatamente a fin de<br />
evitar cualquier riesgo de incendio o descarga eléctrica. En este caso, contacte con el distribuidor o instalador<br />
autorizado.<br />
�� No coloque objetos pesados o que generen calor sobre el equipo, ya que podrían dañar la carcasa o aumentar<br />
la temperatura interna, causando un mal funcionamiento.<br />
�� No cubra el equipo con una tela mientras esté funcionando para evitar deformar la carcasa y sobrecalentar las<br />
piezas internas, con el consiguiente riesgo de incendio, descarga eléctrica o fallo mecánico.<br />
�� No deje imanes u objetos magnéticos cerca del equipo ya que podrían causar fallos.<br />
�� No utilice este equipo en presencia de humo, vapor, humedad, polvo o vibraciones intensas.<br />
�� No ponga en funcionamiento el dispositivo inmediatamente después de transportarlo de un lugar frío a otro<br />
caliente o viceversa. Espere unas tres horas para que el dispositivo se adapte al nuevo ambiente (temperatura,<br />
humedad, etc.).<br />
1.3.4 LIMPIEZA DEL DISPOSITIVO<br />
�� Frote delicadamente el dispositivo con un paño seco para quitar el polvo y la suciedad.<br />
�� Si la suciedad no desaparece con el paño seco, utilice un paño humedecido en detergente neutro.<br />
�� No utilice líquidos volátiles (como gasolina, alcohol, disolventes, etc.) ni paños tratados químicamente en la<br />
limpieza del equipo para evitar la deformación, deterioro o arañazos en su superficie.<br />
1.3.5 DISCO DURO<br />
�� El disco duro instalado en este dispositivo es sensible a los choques, diferencias de temperatura y vibraciones.<br />
El hacer caso omiso de estas precauciones puede tener como consecuencia un funcionamiento incorrecto y la<br />
pérdida de los datos almacenados en el disco duro.<br />
�� Antes de llevar el equipo al centro de reparaciones, se recomienda realizar una copia de seguridad de todos los<br />
datos importantes. URMET Domus S.p.A. no se responsabiliza de la pérdida de los datos almacenados.<br />
DS<strong>1093</strong>-027 82
1.3.6 GRABACION DE IMAGENES<br />
�� Este equipo está diseñado como grabador de imágenes, no como alarma de robo. URMET Domus S.p.A. no se<br />
responsabiliza de las pérdidas o daños como consecuencia de robo sufrido por el usuario.<br />
�� Haga una prueba de grabación antes de usar el equipo para asegurarse de que funciona correctamente. Tenga<br />
en cuenta que URMET Domus S.p.A. no se responsabiliza de la pérdida de los datos almacenados como<br />
consecuencia de la pérdida o daños causados por una instalación o uso incorrectos, o por el uso inadecuado o<br />
negligente del equipo.<br />
�� Como el equipo integra componentes electrónicos de precisión, proteja el equipo contra los golpes para<br />
garantizar una grabación correcta de las imágenes.<br />
1.3.7 PRIVACIDAD Y COPYRIGHT<br />
�� El grabador de vídeo digital <strong>1093</strong>/<strong>004</strong> es un equipo para sistemas CCTV. La grabación de imágenes está sujeta<br />
a la legislación vigente en cada país. Se prohíbe grabar imágenes que estén protegidas por derechos de autor.<br />
�� Los usuarios del producto son responsables de conocer y cumplir todas las normas y reglamentos locales<br />
relativos a la vigilancia y grabación de señales de vídeo. El fabricante no se hace responsable del uso de este<br />
producto no conforme con la legislación vigente.<br />
DS<strong>1093</strong>-027 83
2 DESCRIPCIÓN DE LOS COMPONENTES<br />
2.1 PANEL FRONTAL<br />
Tapa cerrada<br />
ESPAÑOL<br />
COMPONENTE DESCRIPCIÓN<br />
LED de alimentación: indica que el equipo está alimentado eléctricamente.<br />
LED HDD: indica que se está usando el disco duro.<br />
Sensor infrarrojo: recibe las señales infrarrojas desde el control remoto.<br />
Botón <strong>CH</strong>1: muestra las imágenes de la cámara 1 a pantalla completa.<br />
Botón <strong>CH</strong>2: muestra las imágenes de la cámara 2 a pantalla completa.<br />
Botón <strong>CH</strong>3: muestra las imágenes de la cámara 3 a pantalla completa.<br />
Botón <strong>CH</strong>4: muestra las imágenes de la cámara 4 a pantalla completa.<br />
Botón QUAD: muestra todas las cámaras.<br />
Botón REW: reproduce la imagen en rebobinado rápido.<br />
Botón PAUSE: detiene la imagen; pulse PLAY para reanudar la reproducción.<br />
Botón PLAY: inicia la reproducción y otras funciones. Se utiliza para acceder al menú de<br />
reproducción.<br />
Botón FWD: reproduce rápidamente la imagen. Pulse varias veces para cambiar la velocidad.<br />
Botón STOP: detiene las funciones de reproducción y grabación.<br />
Botón REC: inicia la grabación y otras funciones.<br />
Botón �: en el menú de configuración, desplaza el cursor hacia arriba.<br />
Botón � EDIT �: se utiliza para seleccionar, acceder al menú emergente y a los submenús, y para<br />
confirmar.<br />
DS<strong>1093</strong>-027 84
Tapa abierta<br />
Botón �: en el menú de configuración, desplaza el cursor hacia abajo.<br />
Botón � � MENU/ESC: se usa para acceder o salir del menú de configuración y volver al menú<br />
anterior.<br />
Botón �: se usa para acceder al menú emergente.<br />
Presione ligeramente en la marca “�” para abrir la tapa.<br />
A<br />
COMPONENTE DESCRIPCIÓN<br />
�NOTA<br />
A<br />
Disco duro extraíble: contiene el soporte de almacenamiento de imágenes. NO extraiga el disco duro<br />
mientras el equipo esté encendido, ya que el disco duro o el <strong>DVR</strong> podrían averiarse.<br />
B Puerto USB: puerto al que se conecta un dispositivo USB (pendrive, disco duro).<br />
C<br />
Bloqueo de extracción del disco duro: es un bloqueo de seguridad para impedir la extracción del<br />
disco duro.<br />
No use el puerto USB del panel frontal para el ratón.<br />
El ratón debe conectarse al puerto USB del panel posterior.<br />
DS<strong>1093</strong>-027 85<br />
B<br />
C
2.2 PANEL POSTERIOR<br />
COMPONENTE DESCRIPCIÓN<br />
Interruptor de encendido/apagado.<br />
Toma de alimentación: conecte el alimentador de tensión suministrado.<br />
Conectores BNC de salida de vídeo: se usan para conectar el monitor.<br />
Conectores BNC de entrada de vídeo de los canales 1, 2, 3 y 4: se usan para conectar las<br />
cámaras. Disponen de terminación de 75 �.<br />
Regleta de terminales de 12 pines para el puerto RS-485/Sensor/Alarma.<br />
Salida de ventilación: no obstruya el flujo de aire, ya que podría averiarse el equipo<br />
Terminal de masa.<br />
Salida de vídeo <strong>VGA</strong>: para conectar un monitor <strong>VGA</strong>.<br />
Puerto LAN: conexión RJ45 a intranet e internet. Use un cable cruzado (no suministrado) para<br />
conectar un router/switch o un PC.<br />
DS<strong>1093</strong>-027 86
Detalle del puerto RS485/Sensor/Alarma�<br />
�<br />
�<br />
�<br />
�<br />
�<br />
�<br />
�<br />
�<br />
�<br />
�<br />
�� Pin 1: RS-485-<br />
�� Pin 2: RS-485+<br />
Puerto USB: para la conexión de un ratón USB.<br />
Entradas de audio: conectores RCA usados para conectar los canales de audio 1 a 4.<br />
Salidas de audio: conectores RCA para conectar la salida de audio.<br />
1<br />
2<br />
3<br />
4<br />
5<br />
6<br />
7<br />
8<br />
9 11<br />
10 12<br />
�� Pines 3 y 4: Entrada sensor 1 (polaridad programable)<br />
�� Pines 5 y 6: Entrada sensor 2 (polaridad programable)<br />
�� Pines 7 y 8: Entrada sensor 3 (polaridad programable)<br />
�� Pines 9 y 10: Entrada sensor 4 (polaridad programable)<br />
�� Pines 11 y 12: Salida de alarma (relé NC)<br />
DS<strong>1093</strong>-027 87
2.3 <strong>CON</strong>TROL REMOTO DE INFRARROJOS<br />
El control remoto suministrado con el equipo está diseñado para ofrecer la máxima resistencia y una funcionalidad<br />
excepcional.<br />
Sin embargo, debe manejarlo con cuidado y evitar particularmente:<br />
�� Dejarlo expuesto a la lluvia.<br />
�� Derramar líquido sobre el teclado o hacerlo caer en el agua.<br />
�� Someterlo a choques fuertes o dejarlo caer sobre superficies duras.<br />
�� Exponerlo a los rayos solares.<br />
�� Interponer obstáculos entre el control remoto y el dispositivo mientras se utiliza el control remoto.<br />
El control remoto constituye la interfaz entre el usuario y el equipo, por lo que se recomienda familiarizarse con sus teclas.<br />
TECLA DESCRIPCIÓN<br />
1-8 Selección de canal 1 a 8; Teclado numérico<br />
9, 0� Teclado numérico<br />
ALL Visualizar todos los canales en cuadrante<br />
MENU Entrar/Salir del menú principal<br />
� Tecla Arriba<br />
�� Tecla Abajo<br />
� /<br />
Tecla Izquierda/Derecha<br />
SEL Tecla Seleccionar/Editar<br />
�<br />
�<br />
�<br />
�<br />
�<br />
Tecla Rebobinado rápido<br />
Tecla Reproducción/Acceso al menú de búsqueda de grabaciones<br />
Tecla Avance rápido<br />
Grabación manual<br />
Pausa/Reproducción cuadro a cuadro<br />
Detención de la grabación manual o de la reproducción<br />
AUDIO No disponible<br />
MUTE No disponible<br />
DS<strong>1093</strong>-027 88
Funcionamiento con el ratón<br />
Clic con el botón<br />
izquierdo del ratón<br />
Clic con el botón<br />
derecho del ratón<br />
Doble clic con el botón<br />
izquierdo del ratón<br />
En el modo bloqueado, permite acceder al menú emergente y seleccionar cualquiera de los<br />
submenús para abrir el menú de Inicio de sesión. En el modo desbloqueado, permite acceder al<br />
menú emergente y pulsar el botón izquierdo para entrar directamente en cualquiera de los<br />
submenús.<br />
Permite cambiar el estado de la casilla de verificación o del área de detección de movimiento.<br />
Permite ajustar los controles de color y de volumen.<br />
Permite seleccionar los valores programados e insertar palabras, símbolos especiales, números y<br />
caracteres. También puede reemplazar el uso de [ ] o [ ].<br />
Permite reproducir una grabación y mostrar la información correspondiente en el menú Búsqueda<br />
de vídeo, función [Lista de archivos].<br />
Permite visualizar el menú emergente en el modo de reproducción en tiempo real.<br />
Permite salir del menú principal o del submenú.<br />
Permite maximizar la pantalla en modo de reproducción en tiempo real.<br />
Movimiento del ratón Permite seleccionar una opción de menú.<br />
Arrastre del ratón En el modo movimiento permite seleccionar el área de movimiento. En el menú [Configuración de<br />
color] permite ajustar los controles de color y de volumen.<br />
2.3.1 BATERÍAS<br />
El control remoto se alimenta con 2 baterías de tipo AAA suministradas. Para instalar las baterías, deslice la tapa del<br />
compartimento de baterías e insértelas teniendo en cuenta la polaridad. Una vez instaladas las baterías, cierre la tapa. Apunte el<br />
control remoto al receptor infrarrojo del <strong>DVR</strong> para usarlo.<br />
�NOTA<br />
Lleve las baterías gastadas a un punto de<br />
recogida autorizado para su posterior reciclaje.<br />
Cambie siempre las dos baterías al mismo tiempo.<br />
Quite las baterías si no va a usar el control remoto durante mucho tiempo.<br />
DS<strong>1093</strong>-027 89
3 ARRANQUE DEL <strong>DVR</strong><br />
3.1 ENCENDIDO Y APAGADO<br />
Pulse el interruptor del panel posterior del equipo. El LED<br />
la siguiente pantalla:<br />
El sistema arrancará y empezará a inicializarse.<br />
3.2 INTERFAZ PRINCIPAL<br />
DS<strong>1093</strong>-027 90<br />
PWR del panel frontal se iluminará. En el monitor aparecerá<br />
Cuando haya terminado la inicialización, el sistema entrará en la interfaz<br />
principal. La figura representa la interfaz principal de un sistema sin entradas<br />
de vídeo. Cuando haya alguna entrada de vídeo, la interfaz mostrará las<br />
imágenes en tiempo real de las cámaras. En esta interfaz principal, si hace<br />
doble clic sobre la imagen de algún canal, se maximizará dicha imagen a<br />
pantalla completa; si vuelve a hacer doble clic, la imagen volverá a su<br />
tamaño anterior para mostrar todas las cámaras en cuadrante. Al pulsar el<br />
botón derecho del ratón, aparece un menú emergente; si pulsa el botón<br />
izquierdo del ratón, podrá seleccionar una opción de menú; para salir del<br />
menú emergente, haga clic con el botón derecho fuera del mismo.
4 <strong>CON</strong>FIGURACIÓN DEL <strong>DVR</strong><br />
MENÚ EMERGENTE<br />
4.1 ESTRUCTURA DEL MENÚ PRINCIPAL<br />
Menú<br />
principal<br />
Cámara<br />
Grabación<br />
Red<br />
Buscar<br />
Cuando haya terminado la inicialización del sistema, haga clic con el botón derecho<br />
del ratón para que aparezca el menú emergente. Ahora podrá configurar parámetros y<br />
operar con el menú principal, bloquear el menú, buscar vídeos, controlar el modo PTZ,<br />
iniciar o detener la grabación, y operar el modo Cruise después de configurar<br />
correctamente los parámetros PTZ, etc.<br />
Dispositivos<br />
Sistema<br />
DS<strong>1093</strong>-027 91<br />
Color<br />
Buscar<br />
Reproducción<br />
Lista archivos Volcado<br />
Gestión HD<br />
Alarma<br />
PTZ<br />
Móvil<br />
Movimiento<br />
Fecha/Hora<br />
Contraseña<br />
Vídeo<br />
Idioma<br />
Información<br />
Mantenimiento<br />
Configuración Email<br />
Área de detección
4.2 MENÚ PRINCIPAL<br />
�<br />
4.2.1 <strong>CON</strong>FIGURACION DE LA CAMARA<br />
Para aplicaciones en interiores, se recomienda ajustar el brillo y el contraste.<br />
DS<strong>1093</strong>-027 92<br />
Cuando haya terminado la inicialización, el sistema entrará en la<br />
interfaz principal. La figura representa la interfaz principal de un<br />
sistema sin entradas de vídeo. Cuando haya alguna entrada de vídeo,<br />
la interfaz mostrará las imágenes en tiempo real de las cámaras. En<br />
esta interfaz principal, si hace doble clic sobre la imagen de algún<br />
canal, se maximizará dicha imagen a pantalla completa; si vuelve a<br />
hacer doble clic, la imagen volverá a su tamaño anterior para mostrar<br />
todas las cámaras en cuadrante. Al pulsar el botón derecho del ratón,<br />
aparece un menú emergente; si pulsa el botón izquierdo del ratón,<br />
podrá seleccionar una opción de menú; para salir del menú<br />
emergente, haga clic con el botón derecho fuera del mismo.<br />
En [Menú principal] � [Cámara] podrá configurar el nombre y la<br />
posición de cada canal en el cuadrante, así como ajustar el brillo,<br />
saturación y contraste de la imagen de cada canal en el menú<br />
[COLOR] y configurar si desea visionar en tiempo real.<br />
Es posible configurar zonas de privacidad seleccionando<br />
“PRIVACIDAD”. El tiempo de secuencia puede ajustarse con la<br />
opción "AUTOSEQ".<br />
Nota: tenga en cuenta que el nombre de cada canal admite hasta<br />
8 caracteres.<br />
Haga clic en el botón [AUTOSEQ] para iniciar la secuencia<br />
automática de imágenes. Después de activar esta función, la señal de<br />
vídeo cambiará cíclicamente entre <strong>CH</strong>1, <strong>CH</strong>2, <strong>CH</strong>3, <strong>CH</strong>4 y modo<br />
Cuadrante.<br />
Tiempo de permanencia por defecto de cada canal: 5 segundos.<br />
Intervalo configurable del tiempo de permanencia de cada canal: 0 a<br />
10 segundos<br />
En el menú Color podrá ajustar el brillo, la saturación y el contraste de<br />
la imagen de cada canal.<br />
�<br />
Explicación:�<br />
�� Los cambios serán efectivos después de hacer clic en el<br />
botón [APLICAR] y [<strong>CON</strong>FIRMAR] de la parte inferior.<br />
�� Si no desea realizar ningún cambio, haga clic en el botón<br />
[SALIR].<br />
�� Si hace clic en el botón [POR DEFECTO], se restablecerán<br />
todos los valores por defecto del sistema.
Privacidad<br />
DS<strong>1093</strong>-027 93<br />
Las Zonas de Privacidad (hasta 4 por cámara) pueden ser habilitadas /<br />
deshabilitadas seleccionando ON/OFF por cada cámara.<br />
Es possible seleccionar, para cada cámara, 4 zonas de privacidad que<br />
pueden ser movidas, cambiadas de tamaño de acuerdo con las<br />
necesidades (<strong>CON</strong>FIG).
4.2.2 <strong>CON</strong>FIGURACION DE LA GRABACION<br />
El menú [Configuración de grabación] permite activar o desactivar la grabación (ON/OFF) de cada canal, así como configurar la<br />
resolución y calidad de la imagen, y activar o desactivar el audio.<br />
Para grabar un canal, establézcalo en “ON”; si no desea grabarlo, establézcalo en “OFF”. Las opciones de Resolución son D1,<br />
HD1 y CIF. Las opciones de Calidad son MEJOR, BUENA y NORMAL.<br />
Cuando el Audio está en “ACTIVAR”, se grabará también el audio de los canales y durante la reproducción se oirá el audio; si<br />
está en “DESACTIVAR” no podrá grabar el audio ni reproducirlo después.<br />
Para grabar permanentemente, establezca el Modo de grabación en SIEMPRE. Para grabar en función de un calendario<br />
programado, seleccione GRABACIÓN POR TIEMPO y haga clic en la opción CALENDARIO para que pueda configurarlo:<br />
TIEMPO DE GRABACIÓN MÁXIMA <strong>CON</strong> DISCO DURO DE 320GB<br />
La siguiente tabla contiene los tiempos de grabación máximos para los 4 canales.<br />
Resolución<br />
Las opciones de grabación son TODOS, <strong>CH</strong>-1, <strong>CH</strong>-2, <strong>CH</strong>-3, <strong>CH</strong>-4.<br />
Seleccione el canal que desea configurar, el cual aparecerá resaltado en<br />
color azul, mientras que los canales no seleccionados aparecerán<br />
resaltados en color gris.<br />
Para configurar un calendario semanal, marque la casilla de verificación<br />
del estado de grabación que desee (ALARMA, NORMAL o SIN<br />
GRABACIÓN) y seleccione el periodo deseado. Utilice las listas<br />
desplegables [DESDE] y [A] y el botón COPIA para copiar la configuración<br />
de un día a otro, o a todos los días. Haga clic en el botón [APLICAR]<br />
cuando haya terminado.<br />
Si hace clic en el botón [POR DEFECTO], utilizará los valores por defecto.<br />
La configuración predeterminada es:<br />
�� 01:00 am a 07:59 am: Sin grabación<br />
�� 08:00 am a 18:59 pm: Grabación normal<br />
�� 19:00 pm a 00:59 pm: Grabación en alarma<br />
Duración del disco (días)<br />
Mejor calidad Calidad buena Calidad normal<br />
D1 7,4 9,9 14,8<br />
HD1 7,5 9,9 14,8<br />
CIF 9,7 14,8 19,8<br />
DS<strong>1093</strong>-027 94
4.2.3 <strong>CON</strong>FIGURACION DE RED<br />
Seleccione [Menú principal] ��[Red] para entrar en la configuración de red:<br />
�<br />
Si selecciona DHCP, el servidor DHCP asignará automáticamente la dirección IP del <strong>DVR</strong>.<br />
�<br />
NOTA:<br />
�� Puede conectar hasta 5 PC simultáneamente.<br />
DS<strong>1093</strong>-027 95<br />
�<br />
�<br />
Una vez seleccionados el protocolo de red (DHCP o PPPOE)<br />
y el puerto, podrá acceder al <strong>DVR</strong> a través de la red.<br />
Si selecciona PPPoE, deberá introducir el nombre de usuario y<br />
contraseña suministrados por su proveedor ISP, así como<br />
configurar el puerto web.<br />
Si selecciona la asignación estática, deberá configurar la<br />
dirección IP, la máscara de subred, la puerta de enlace y el<br />
puerto web.<br />
Si decide utilizar DDNS y configurar los parámetros de red en<br />
el <strong>DVR</strong>, podrá conectarse al <strong>DVR</strong> a través del navegador<br />
Internet Explorer.
4.2.4 BUSQUEDA DE LAS GRABACIONES<br />
Haga clic en [Menú principal] � [Buscar] para entrar en el menú [Búsqueda de vídeo].<br />
�<br />
Si desea acceder al <strong>DVR</strong> a través de internet, debe configurar<br />
el puerto de vídeo en la dirección pública del <strong>DVR</strong>.�<br />
Reproducción de grabaciones buscadas:<br />
�<br />
Introduzca una determinada fecha y haga clic en [BUSCAR] para<br />
encontrar todas las grabaciones de dicho día. Si selecciona el<br />
elemento [FE<strong>CH</strong>A], se reproducirán los 4 canales. Haga clic en el<br />
botón [LISTA DE AR<strong>CH</strong>IVOS] para ver una lista de archivos en la que<br />
podrá reproducir o guardar los archivos que necesite.<br />
Puede reproducir el vídeo a velocidad 2x, 4x, 8x, 1x, 1/2x, 1/4x, 1/8x, detenerlo o reproducirlo cuadro a cuadro mediante la barra<br />
de control de reproducción, y ajustar el volumen con la barra de deslizamiento. Cuando haya terminado la reproducción, la<br />
pantalla volverá al menú anterior.<br />
Lista de ficheros<br />
En el menú [BÚSQUEDA DE VÍDEO], haga clic en [LISTA DE AR<strong>CH</strong>IVOS] para que aparezca el siguiente submenú.<br />
Esta opción permite ver todos los archivos existentes por canal y tipo (TODOS, NORMAL o ALARMA).<br />
Puede seleccionar un archivo, pulsar el botón SEL para reproducir el archivo, o los botones FWD y ABAJO para seleccionar la<br />
opción y volcar el archivo grabado seleccionado. También puede marcar la casilla al final de la línea del archivo si desea volcar<br />
más de un archivo.<br />
�<br />
�<br />
�<br />
�<br />
�<br />
DS<strong>1093</strong>-027 96<br />
�<br />
PRIMERO: Indica que se ha llegado a la primera página de la lista.<br />
Si hace clic en el botón [PRIMERO] cuando está en otra página,<br />
vuelve a la primera página.<br />
ANTERI. (Página anterior): Si hace clic en el botón [ANTERI.]<br />
mientras se consulta la lista, se vuelve a la página inmediatamente<br />
anterior a la actual (excepto para la primera página).<br />
SIGUIE. (Página siguiente): Si hace clic en el botón [SIGUIE.]<br />
mientras se consulta la lista, se vuelve a la página inmediatamente<br />
posterior a la actual (excepto para la última página).<br />
ÚLTIMO (Última página): Indica que se ha llegado a la última<br />
página de la lista. Si hace clic en el botón [ÚLTIMO] vuelve a la<br />
última página.<br />
TODOS (Seleccionar todos): Selecciona todas las líneas de la<br />
página actual.<br />
INVERSO (Selección inversa): Selecciona las líneas de esta<br />
página que no están actualmente seleccionadas.
Volcado de los archivos grabados<br />
Si desea volcar una grabación de la lista, selecciónela de la lista y haga clic en el botón [VOLCADO]. Cuando haya terminado el<br />
volcado, recibirá un mensaje de confirmación. Haga clic en el botón [<strong>CON</strong>FIRMAR] para guardar el volcado.<br />
Explicación:<br />
�� El archivo de volcado tiene el formato H264, que podrá convertir al formato AVI mediante el programa Multimedia<br />
Player suministrado con el <strong>DVR</strong> o mediante el programa NetViewer, para que pueda visionarlo con un reproductor<br />
compatible con el formato AVI.<br />
�� Si se desea utilizar un disco de más de 160Gb se necesitará una fuente adicional. Por esta razón se recomienda<br />
utilizar dispositivos USB con alimentador externo.<br />
�<br />
4.2.5 MULTIMEDIA PLAYER<br />
1: Copie el archivo de volcado a su PC.<br />
2: Ejecute Multimedia Player y haga clic en [File � Local (F)] para buscar y seleccionar el archivo de volcado; a<br />
continuación, haga clic en el botón [Abrir]<br />
�<br />
�<br />
�<br />
�<br />
�<br />
�<br />
�<br />
�<br />
�<br />
�<br />
�<br />
�<br />
Nota: el tipo de archivo deber ser *.264.<br />
3. Abra el archivo:<br />
DS<strong>1093</strong>-027 97<br />
(1) Haga clic en el menú [Play] (P) para reproducir el archivo volcado;<br />
�
Menú de la parte inferior del Multimedia Player:�<br />
Fecha: en la esquina derecha se muestra la fecha de grabación del archivo volcado actual;<br />
Hora de la grabación (formato 24 horas): se encuentra bajo el menú [Fecha]. Una fuente de color negro indica una<br />
grabación de tipo Normal.<br />
Duración de la grabación. 0 a 60 minutos de tiempo de grabación: La zona de color verde en la barra de progreso de<br />
reproducción indica la duración de la grabación para una grabación de 1 hora.<br />
Comandos:<br />
1 Reproducir� 10 Todas las ventanas�<br />
2 Archivo grabado anterior� 11 Añadir ventana�<br />
3 Pausa� 12 Inicio (Start)�<br />
4 Detener� 13 Cortar�<br />
5 Cuadro anterior/Cuadro siguiente� 14 Borrar�<br />
6 Reproducción lenta, normal o rápida� 15 Convertir a AVI<br />
7 Siguiente hora� 16 OSD�<br />
8 Capturar imagen� 17 Silenciar audio�<br />
9 Reducir ventana� 18 Ajustar volumen�<br />
4. Consulte el procedimiento siguiente para configurar la reproducción de vídeo.<br />
Setting ��Video play setting ��Normal video Bar ��Seleccione<br />
el canal que desee visualizar �� Marque para reproducir el<br />
vídeo ��Apply ��OK<br />
5. Consulte el siguiente procedimiento para configurar el audio. La programación de la configuración estará disponible<br />
después de reiniciar Multimedia Player.<br />
Setting �� Audio channel setting � Normal video Bar�� Seleccione el canal cuyo audio desea reproducir �� Marque la<br />
casilla “The channel has audio files” ��Apply ��OK<br />
Una vez realizada la configuración anterior, al reproducir el vídeo del canal actual también dispondrá del audio.<br />
DS<strong>1093</strong>-027 98<br />
�
4.2.6 GESTIÓN DEL DISPOSITIVO<br />
4.2.6.1 Configuración del disco duro<br />
Las opciones del menú DISPOSITIVO incluyen gestión del disco<br />
duro, Alarma externa, control PTZ, teléfono móvil y detección de<br />
movimiento.<br />
Cuando instala un disco duro (o HD, por sus siglas en inglés de Hard<br />
Disk) el sistema detectará automáticamente si el disco duro está<br />
formateado: si necesita formatearse, el estado del disco duro será<br />
“SIN FORMATO”; en caso contrario, el estado del disco duro será<br />
“NORMAL”<br />
DS<strong>1093</strong>-027 99<br />
CAPACIDAD TOTAL: Indica el espacio total del disco duro.<br />
ESPACIO LIBRE: Indica el espacio libre del disco duro.<br />
TIEMPO RESTANTE: En función del frame rate y de la<br />
resolución/calidad de la imagen, el sistema le indicará el tiempo<br />
restante de grabación disponible en el disco duro.�<br />
SOBRESCRIBIR: Si activa esta opción, el sistema sobrescribirá<br />
automáticamente las grabaciones más antiguas cuando se llena el<br />
disco duro; Si la acción sobreescribir está activada, es possible<br />
ajustar los días de duración maxima del disco duro antes de ser<br />
eliminadas las imágenes. Si la desactiva, se detendrá la grabación en<br />
cuanto se llene el disco duro.<br />
Define el tiempo de duración (en días) de las grabaciones. Es posible<br />
ajustar este valor entre 1-255 (días). El valor por defecto es 30.<br />
FORMATEAR HD: Seleccione esta opción para formatear el disco<br />
duro; tenga en cuenta que no podrá grabar en el disco duro hasta que<br />
haya formateado el disco duro. Haga clic en el botón [FORMATEAR<br />
HD] para empezar el formateo; el sistema le solicitará confirmación<br />
“ATENCIÓN: TODOS LOS DATOS SE BORRARÁN. ¿QUIERE<br />
FORMATEAR? Haga clic en “<strong>CON</strong>FIRMAR” para que el sistema le<br />
indique “FORMATEANDO. ESPERE POR FAVOR…” y “FORMATEO<br />
<strong>CON</strong> ÉXITO”; a continuación, el sistema se reiniciará<br />
automáticamente.�<br />
FORMATEAR USB: Seleccione esta opción para formatear<br />
dispositivos USB.
4.2.6.2 Configuración de la alarma<br />
�<br />
ACCIONES DE ALARMA<br />
Seleccione [Menú principal] � [Dispositivos] � [Alarma] para<br />
entrar en el menú [Configuración de alarma] y configurar los avisos<br />
de alarma.<br />
Es posible habilitar/deshabilitar para cada tipo de evento (Detección de movimiento, Alarma, Pérdida de vídeo, disco duro lleno,<br />
Pérdida de disco duro) una acción de alarma como las siguientes:<br />
�� Zumbador: Puede ser configurado como “OFF”, “10s”, “20s”, “40 s”, “60s”<br />
�� SALIDA DE ALARMA (SALIDA). Puede ser ajustado como “OFF”, “10s”, “20s”, “40 s”, “60s”<br />
�� EMAIL (solo para detección de movimiento y entrada de alarma)<br />
�� PANTALLA COMPLETA (sólo válido para Detección de movimiento y Alarma)<br />
SELECCIÓN DEL TIEMPO DE ALARMA (DURACIÓN)<br />
Define el tiempo de visualización del evento (Detección de Movimiento o Alarma) a pantalla completa en el monmitor, incluso<br />
después de que termine el evento.<br />
Se puede ajustar como: 10sec - 30sec - 1min - 2min.<br />
Tipo de alarma Función<br />
Pérdida de vídeo<br />
Envía una alarma si el <strong>DVR</strong> no recibe señal de vídeo, por ejemplo, en caso de avería<br />
en la cámara, un cable cortado o dañado, o un problema en la alimentación eléctrica.<br />
Detección de movimiento<br />
Se genera una alarma cuando un objeto se mueve en el área de detección de<br />
movimiento. Puede ajustar el nivel de sensibilidad más adecuado.<br />
I/O Estado<br />
El sistema puede enviar una alarma a partir de una señal proveniente de un sensor<br />
externo.<br />
Se genera una alarma si no se detecta el disco duro (posible avería en el disco duro<br />
Pérdida HD o problema en la alimentación eléctrica), o si el modo Sobrescritura está desactivado<br />
y no hay espacio suficiente en el disco duro.<br />
DS<strong>1093</strong>-027 100
4.2.6.3 Notificación de alarmas por correo electrónico<br />
Seleccione el menú [<strong>CON</strong>FIGURACIÓN DE EMAIL] para entrar en<br />
el submenú.�<br />
SSL: es un protocolo que proporciona comunicaciones seguras.<br />
Puede encriptar sus comunicaciones (incluido el correo<br />
electrónico) mediante SSL para que los piratas informáticos<br />
(hackers) no puedan espiar sus comunicaciones o su<br />
contraseña.<br />
Seleccione “ON” para SSL en el servidor de correo utilizado, y “OFF” para el resto de servidores.<br />
Si la configuración no es correcta, póngase en contacto con su Administrador de correo para configurar el servidor SMTP y el<br />
servicio SSL.<br />
PUERTO SMTP: indica el puerto de salida del servidor SMTP. Normalmente, el puerto SMTP es 25, pero también son posibles<br />
otros valores: por ejemplo, el puerto SMTP del servidor de Gmail es 465.<br />
SMTP: indica la dirección del servidor utilizado. En el caso de Gmail, la dirección del servidor debe ser smtp.smtp.com.<br />
ENVÍA EMAIL: indica la dirección electrónica del remitente, que debería ser coherente con el servidor utilizado. Por ejemplo,<br />
para el caso de Gmail, el correo electrónico debería ser de la forma aaa@gmail.com.<br />
DEST. EMAIL: indica la dirección electrónica del destinatario del correo electrónico.<br />
Cuando se configuran mensajes vía e-mail (Menú Principal � Dispositivos � Alarmas), para asegurar el correcto<br />
funcionamiento se aconseja configurar la cuenta de usuario (email y contraseña del remitente) con el servidor SMTP de la<br />
dirección de email. Por ejemplo, si se configure el remitente como mario.rossi@dominio.it , el servidor SMTP debe ser<br />
“smtp.dominio.it”.<br />
DS<strong>1093</strong>-027 101
4.2.6.4 Configuración PTZ<br />
4.2.6.5 Teléfono móvil<br />
Acceso desde un teléfono móvil<br />
�<br />
�<br />
Seleccione [Menú principal] � [Dispositivo] � [PTZ] para<br />
seleccionar el canal al que está conectado el dispositivo que desea<br />
controlar y configurar los parámetros PTZ (Pelco-D o Pelco-P), la<br />
velocidad de transferencia o Baud Rate (1200, 2400, 4800, 9600),<br />
el bit de parada (1, 2), la comprobación de paridad (NO, PAR,<br />
IMPAR), la dirección y el estado del modo Cruise. Nota: esta<br />
configuración del canal debe coincidir con la configuración de la<br />
cámara PTZ.<br />
Seleccione [Menú principal] � [Dispositivo] � Móvil].<br />
Nombre usuario: indica el nombre de usuario del <strong>DVR</strong>.<br />
Contraseña usuario: indica la contraseña de usuario del <strong>DVR</strong>.<br />
Puerto servidor: puerto del servidor para teléfono móvil. El intervalo<br />
de valores es de 1024 a 65535.<br />
NOTA: conecte el <strong>DVR</strong> a internet antes de configurar el puerto del<br />
<strong>DVR</strong> y asegúrese de que el puerto del servidor es diferente al<br />
usado en la red.<br />
En la actualidad, el <strong>DVR</strong> es compatible con los móviles basados en los sistemas operativos Windows Mobile y Symbian.<br />
Antes de acceder al <strong>DVR</strong> desde un teléfono móvil, debe configurar correctamente la red del <strong>DVR</strong> (consulte la Configuración de<br />
red). También deberá seleccionar [Menú principal] � [Dispositivos] � [Móvil], introducir un nombre de usuario y contraseña, y<br />
establecer el puerto del servidor en 18600, que debe coincidir con el del menú [MÓVIL] del <strong>DVR</strong>.<br />
NOTA: Cuando acceda desde un móvil, no podrá ver más un canal simultáneamente. La velocidad de visualización<br />
dependerá de la velocidad de la conexión a internet.<br />
Siga el siguiente procedimiento cuando acceda con un teléfono móvil con el sistema operativo Windows Mobile:<br />
1. Instalación en el teléfono móvil<br />
Instale el programa incluido en el CD suministrado con el <strong>DVR</strong>; para ello, copie el archivo “QQeye.CAB” a su teléfono móvil.<br />
Necesitará conectar el móvil a un PC y copiar el archivo desde el CD a la tarjeta de memoria del móvil, ya sea a través de un<br />
lector de tarjetas o de una conexión Bluetooth.<br />
Fig. 1<br />
Fig. 2<br />
2. Haga clic en la carpeta “windows mobile” (cuadro rojo en la Fig. 1) y seleccione el archivo “QQeye”. A continuación, elija si<br />
desea instalar el programa en su teléfono o tarjeta de memoria (Fig. 3).<br />
DS<strong>1093</strong>-027 102<br />
Fig. 3
3. Seleccione una de las 2 posibilidades y haga clic en [Install] (cuadro rojo en la Fig. 3) para empezar la instalación (Fig. 4).<br />
Fig. 4<br />
Fig. 5 Fig. 6<br />
4. Cuando haya terminado la instalación, haga clic en el icono QQeye (cuadro rojo en la Fig. 5) para ejecutar el programa.<br />
Aparecerá la pantalla de la Fig. 6.<br />
5. Configuración: Haga clic en el botón [Setting] (cuadro rojo en la Fig. 6) para entrar en el menú de la Fig. 7<br />
Fig. 7<br />
Fig. 8<br />
Fig. 9<br />
User name: igual que el nombre de usuario configurado en el <strong>DVR</strong> [Menú principal] � [Dispositivos] � [Móvil].<br />
Password: igual que la contraseña configurada en el <strong>DVR</strong> [Menú principal] � [Dispositivos] � [Móvil].<br />
Server address: Dirección IP pública del router conectado al <strong>DVR</strong>.<br />
Web port: igual que el Puerto servidor configurado en el <strong>DVR</strong>; es necesario reenviar este puerto a la dirección IP del <strong>DVR</strong>, en el<br />
intervalo de 1024 a 65535, con un valor por defecto de 18600. Nota: este puerto es complementario a los puertos utilizados para<br />
el acceso remoto estándar.<br />
Channel: seleccione el canal del <strong>DVR</strong> que desea monitorizar y haga clic en el botón [OK] (cuadro rojo en la Fig. 7) para llegar a<br />
la pantalla de la Fig. 8 e iniciar la conexión de vídeo.<br />
6. Opciones disponible en la Fig. 8:<br />
Botón [Disconnect] para dejar de visualizar imágenes del canal en tiempo real.<br />
Botón [Setting] para modificar la configuración.<br />
7. Visualización de la conexión de vídeo<br />
Modo Normal:<br />
El estado de la conexión de red se encuentra debajo de la imagen de vídeo:<br />
�� en la esquina izquierda: velocidad de transmisión por la red, frame rate y resolución.<br />
�� en la esquina derecha: porcentaje del búfer utilizado, conexión correcta, fallo de conexión, Reproducir y Detener.<br />
Función de los botones situados debajo de la imagen de vídeo, de izquierda a derecha: control PTZ (izquierda, derecha,<br />
arriba y abajo), selección de área (alejar y acercar el zoom), enfoque (“+” y “-”), iris (“+” y “-”) y captura de la imagen en<br />
pantalla.<br />
8. Modo de visualización: Puede cambiar el modo de visualización a pantalla completa (Fig. 9) si hace clic en la pantalla del<br />
teléfono móvil.<br />
DS<strong>1093</strong>-027 103
Siga el siguiente procedimiento cuando acceda con un teléfono móvil con sistema operativo Symbian:<br />
1. Instalación en el teléfono móvil<br />
Instale el programa incluido en el CD suministrado con el <strong>DVR</strong>; para ello, copie el archivo “QQeye.CAB” a su teléfono móvil.<br />
Necesitará conectar el móvil a un PC y copiar el archivo desde el CD a la tarjeta de memoria del móvil, ya sea a través de un<br />
lector de tarjetas o de una conexión Bluetooth.<br />
2. Seleccione el icono QQEye en esta ventana (cuadro rojo en Fig. 2) para instalarlo (Fig. 3).<br />
Fig. 1 Fig. 2<br />
Fig. 3<br />
Cuando el teléfono móvil haya terminado los preparativos, se mostrará la Fig. 4 para solicitar confirmación para instalar el<br />
programa. Seleccione el botón Yes (cuadro rojo en Fig. 4). Aparecerá la pantalla de la Fig. 5.<br />
Fig. 4<br />
Fig. 5 Fig. 6<br />
3. Haga clic en el botón Continue (cuadro rojo en Fig. 5) en el cuadro de información que muestra el nombre del programa y la<br />
versión del mismo. Aparecerá la pantalla de la Fig. 6.<br />
4. A continuación, seleccione la ubicación para instalar el programa: memoria del móvil o tarjeta de memoria, y haga clic en el<br />
botón Select (cuadro rojo en Fig. 6). Aparecerá la pantalla de la Fig. 7. Haga clic en el botón Continue (cuadro rojo en Fig. 7)<br />
para que aparezca la pantalla de la Fig. 8 como indicación de que se está instalando el programa (cuadro rojo en Fig. 8).<br />
Fig. 7<br />
DS<strong>1093</strong>-027 104<br />
Fig. 8<br />
Fig. 9
5. Cuando haya terminado la instalación, se mostrará la pantalla de la Fig. 9. A continuación, vaya a la carpeta Applications y<br />
seleccione el programa QQEye (cuadro blanco en Fig. 10) y haga clic en el botón Open (cuadro rojo en Fig. 10) para ver el menú<br />
de configuración (Setting). Cuando haya terminado la configuración, haga clic en el botón Done (cuadro rojo en Fig. 11) para que<br />
se muestre la pantalla de la Fig. 12 con el vídeo.<br />
Default Access Point:<br />
Open<br />
Fig. 10<br />
Fig. 11 Fig. 12<br />
Introduzca el punto de acceso. El punto de acceso por defecto del sistema es una conexión GPRS.<br />
Server Address:<br />
Introduzca la dirección IP pública del router conectado al <strong>DVR</strong> (consulte el apartado “Configuración de red” del manual).<br />
Server Port:<br />
Puerto web: Igual que el puerto web configurado en el <strong>DVR</strong>; es necesario reenviar este puerto del router al <strong>DVR</strong>. El intervalo de<br />
valores es de 1024 a 65535, mientras que el valor por defecto es 18600. Nota: este puerto es complementario a los puertos<br />
utilizados para el acceso remoto estándar.<br />
User Name:<br />
Igual que el nombre de usuario configurado en el <strong>DVR</strong> [Menú principal] � [Dispositivos] � [Móvil].<br />
Password:<br />
Igual que la contraseña configurada en el <strong>DVR</strong>.<br />
Channel:<br />
Seleccione el canal que desea monitorizar y haga clic en el botón [OK] para iniciar la conexión de vídeo.<br />
Network connection status: Porcentaje del búfer utilizado, conexión correcta, fallo de conexión, Reproducir y Detener.<br />
Función de los botones situados debajo de la imagen de vídeo, de izquierda a derecha: control PTZ (izquierda, derecha, arriba y<br />
abajo), selección de área (alejar y acercar el zoom), foco (“+” y “-”), iris (“+” y “-”) y captura de la imagen en pantalla.<br />
Puede cambiar al modo de visualización a pantalla completa (Fig. 13) si hace clic en la pantalla del teléfono móvil.<br />
Fig. 13<br />
DS<strong>1093</strong>-027 105
4.2.6.6 Detección de movimiento<br />
�<br />
DS<strong>1093</strong>-027 106<br />
Seleccione [Menú principal] ���Dispositivos] ���Movimiento] para<br />
entrar en el menú [DETECCIÓN DE MOVIMIENTO] y configurar la<br />
grabación por detección de movimiento.<br />
El menú [DETECCIÓN DE MOVIMIENTO] tiene tres secciones:<br />
Estado del canal, Sensibilidad y Área de detección.<br />
�<br />
ESTADO: permite activar la detección de movimiento en cualquier<br />
canal.<br />
SENSIBILIDAD: permite ajustar el nivel de sensibilidad en la<br />
detección de movimiento de 1 a 4, siendo el valor 4 el más<br />
sensible.�<br />
ÁREA DE DET.: Esta opción le permite seleccionar el área en la<br />
que va a detectar el movimiento. El canal se divide en una<br />
cuadrícula de 13x10 celdas. Cuando un objeto se mueve dentro del<br />
área de detección de movimiento (color rojo), se inicia la grabación.<br />
En el área semitransparente no está activada la detección de<br />
movimiento.
4.2.7 <strong>CON</strong>FIGURACIÓN DEL SISTEMA<br />
4.2.7.1 Ajuste de fecha y hora<br />
4.2.7.2 Contraseña<br />
DS<strong>1093</strong>-027 107<br />
El menú [SISTEMA] incluye los siguientes submenús: Ajuste de<br />
Fecha/hora, Contraseña, Ajuste de Audio y Vídeo, Idioma del<br />
sistema, Información del sistema, y Mantenimiento del sistema.<br />
En el menú [SISTEMA] podrá configurar el sistema.<br />
Seleccione [Menú principal] ��[Sistema] ��[Fecha/Hora]. Cambie<br />
la fecha, hora, el formato de fecha/hora, la zona horaria y el horario<br />
de verano (o DST, por sus siglas en inglés de Day Saving Time) del<br />
sistema.<br />
Esta opción permite establecer el identificador del <strong>DVR</strong> y una<br />
contraseña opcional del sistema. Las nuevas contraseñas serán<br />
efectivas después de hacer clic en el botón [APLICAR].<br />
Cuando activa el uso de contraseñas (“ON”) podrá establecer una<br />
contraseña de usuario y una contraseña de administrador. La<br />
contraseña admite hasta 6 caracteres.<br />
NOTA:<br />
�� La contraseña por defecto es 123456.
4.2.7.3 Ajuste de vídeo<br />
4.2.7.4 Idioma<br />
4.2.7.5 Información del sistema<br />
4.2.7.6 Mantenimiento del sistema<br />
DS<strong>1093</strong>-027 108<br />
Seleccione [Menú principal] ��[Sistema] ��[VÍDEO] para cambiar<br />
la resolución <strong>VGA</strong> y el estándar de vídeo: PAL o NTSC.<br />
En el menú [IDIOMA SISTEMA] seleccione el idioma de la interfaz<br />
del <strong>DVR</strong>, y haga clic en el botón [APLICAR]. El cambio será<br />
efectivo cuando se reinicie el sistema.<br />
Seleccione [Menú principal] � [Sistema] �� [Información] para<br />
entrar en el menú [INFORMACIÓN SISTEMA] en el que podrá ver<br />
la información del sistema: tipo de dispositivo, versión de software<br />
(firmware), dirección MAC, etc.<br />
En este menú podrá restablecer el <strong>DVR</strong> a su configuración original<br />
de fábrica, actualizar el software del sistema (firmware) y realizar<br />
tareas automáticas de mantenimiento del sistema. Seleccione<br />
[Menú principal] ��[Dispositivo] ��[Mantenimiento].<br />
Si activa la función de mantenimiento automático, el sistema se<br />
reiniciará periódicamente.
4.3 BLOQUEO DE MENU<br />
Como medida de seguridad se puede seleccionar [BLOQUEO DE MENU] cuando<br />
no se está delante del grabador. Si se desea abrir una nueva sesión se<br />
necesitará introducir un código y contraseña.<br />
Por ejemplo: Usuario sólo puede ver las imágenes en vivo y las grabaciones,<br />
mientras que el Administrador puede tener control total del equipo, incluso hacer<br />
cambios en la configuración.<br />
4.4 BÚSQUEDA DE VÍDEO<br />
Haga clic en el menú emergente de búsqueda de vídeos para entrar en el menú [BÚSQUEDA DE VÍDEO] y buscar archivos<br />
grabados. Para obtener más información, consulte el apartado correspondiente.<br />
4.5 <strong>CON</strong>FIGURACIÓN PTZ<br />
�NOTA<br />
Configuración Cruise<br />
Seleccione la opción PTZ en el menú emergente para ajustar el zoom, el enfoque y el iris.�<br />
Abra <strong>CON</strong>FIGURACIÓN CRUISE si desea configurar la función Cruise: canal, punto de<br />
actuación y tiempo de parada.<br />
Selector de canales: seleccione el canal en modo PTZ correspondiente a la cámara.<br />
Total: contador de las posiciones predefinidas utilizadas<br />
Pun. Actu.: el punto de Cruise por defecto del sistema es 01. Puede utilizar esta opción<br />
para establecer puntos de Cruise adicionales<br />
Tie. Para.: establece el tiempo de cada parada.<br />
IR: seleccione esta opción para ir a una posición predefinida.<br />
Ajustar: guarda en memoria la posición predefinida. Después de establecer el canal y<br />
configurar la posición con el mando PTZ, puede hacer clic en el botón [Ajustar] para<br />
guardar la posición predefinida. Haga clic en el botón [Guardar] para guardar la nueva<br />
configuración. Si desea cambiar el Zoom, Iris, Enfoque y la dirección de una posición<br />
predefinida, seleccione Salir para volver al menú anterior y añadir la posición predefinida<br />
necesaria y, a continuación, entre de nuevo en el modo Configuración Cruise y haga clic en<br />
[Ajustar] y [Guardar] para guardar la nueva configuración.<br />
Borrar: elimina todas las posiciones predefinidas.<br />
�<br />
Nota: aunque este modelo de <strong>DVR</strong> admite hasta 100 posiciones predefinidas, el valor<br />
máximo puede estar limitado por la cámara PTZ.�<br />
�� Se aconseja utilizar la funcion del cruise disponible en el menu del Speed-Dome. En caso de interrupcion de la energia<br />
electrica o reinicio del <strong>DVR</strong> la funcion cruise sobre el <strong>DVR</strong> podria no funcionar correctamente.<br />
4.6 INICIAR LA GRABACIÓN MANUAL<br />
Si desea empezar a grabar, haga clic en [INICIAR GRABACIÓN] del menú emergente para empezar la grabación manual.<br />
4.7 DETENER LA GRABACIÓN MANUAL<br />
Si desea detener la grabación, haga clic en [DETENER GRABACIÓN] del menú emergente para detener la grabación manual.<br />
DS<strong>1093</strong>-027 109
4.8 INICIAR/DETENER CRUISE<br />
La función Cruise ejecuta una secuencia de posiciones predefinidas en el domo (o equipo PTZ) conectado al <strong>DVR</strong>.<br />
Puede iniciar o detener esta función mediante el menú emergente.<br />
NOTA: es necesario que la función Cruise esté activada en el menú [Configuración PTZ]<br />
Se aconseja utilizar la funcion del cruise disponible en el menu del Speed-Dome. En caso de interrupcion de la energia electrica o<br />
reinicio del <strong>DVR</strong> la funcion cruise sobre el <strong>DVR</strong> podria no funcionar correctamente<br />
4.9 AUTO SECUENCIA (AUTOSEQ)<br />
La función "AUTOSEQ" lanza la secuencia de las cámaras; el tiempo de secuencia puede ser ajustado por el usuario (descrito<br />
en el Capítulo 4). Pulsar el botón izquierdo del ratón para parar la secuencia.<br />
4.10 MODO PIP<br />
4.11 ZOOM DIGITAL<br />
DS<strong>1093</strong>-027 110<br />
Esta opción permit ever una cámara a pantalla complete y en una pequeña<br />
ventana (ventana PIP) las cámaras en directo.<br />
Seleccionando esta opción del menú contextual el canal 1 será mostrado a<br />
pantalla complete y los canales 2 y 3 pueden ser mostrados en pequeñas<br />
ventanas, dependiendo si se escoge la opción 1X1 o 1X2. Seleccionando la<br />
opción , las imágenes en vivo del canal 2 se mostrarán en la ventana inferior<br />
izquierda, seleccionando la opción 1X2 las imágenes en vivo del canal 3 se<br />
mostrarán en la ventana inferior derecha.<br />
Haciendo click en la cámara mostrada a pantalla completa y en las ventanas<br />
PIP, estas cambiarán.Para deshabilitar esta función pulsar botón derecho del<br />
ratón.<br />
Esta opción permite seleccionar un canal a pantalla complete y hacer un zoom<br />
en una imagen en directo. Haciendo click derecho en la cámara seleccionada a<br />
pantalla completa es posible elegir la opción ZOOM DIGITAL.<br />
Después seleccionar el area a realizar zoom con el ratón, manteniendo pulsado<br />
el botón izquierdo del ratón y arrastrando el área. En la parte inferior derecha el<br />
usuario puede ver la cámara completa. Para deshabilitar esta función pulsar<br />
botón derecho del ratón.
5 VARIOS<br />
5.1 RETIRAR EL DISCO DURO EXTRAÍBLE<br />
Siga el siguiente procedimiento para retirar el disco duro extraíble.<br />
5. Desconecte el <strong>DVR</strong> de la alimentación eléctrica.<br />
6. Inserte la llave y gírela hasta su posición “abierto”.<br />
Abierto<br />
p<br />
Cerrado<br />
7. Tire desde el punto marcado con “PULL” para extraer el disco duro de su emplazamiento.<br />
�NOTA<br />
Asegúrese de que no está utilizando el disco duro antes de extraerlo.<br />
Siga el procedimiento inverso para colocar de nuevo el disco duro.<br />
DS<strong>1093</strong>-027 111
6 ESPECIFICACIONES (FORMATO PAL)<br />
�NOTA<br />
Especificaciones<br />
Sistema de vídeo NTSC/PAL<br />
Formato de compresión Vídeo: <strong>H.264</strong>; Audio: 8 kHz, 16 bit, ADPCM<br />
Entradas/Salidas de vídeo Entrada: 4 canales BNC; Salida: 2 canales BNC, 1 salida <strong>VGA</strong><br />
Entrada/Salida de audio Entrada: 4 canales RCA; Salida: 2 canales RCA<br />
Resolución de pantalla D1: 704×576 (PAL)<br />
Frame rate<br />
Canal PAL único: 25 fps<br />
Resolución de grabación PAL CIF (352*288), HD1 (704*288), D1 (704*576)<br />
Frame rate de grabación (compartido) PAL 25 fps para D1; 50 fps para HD1; 100 fps para CIF<br />
Disco duro 1 SATA (hasta 1.024 GB), disco duro USB extraíble<br />
Modo de vídeo Siempre/Calendario/Manual/Detección de movimiento/Disparado por sensor<br />
Tiempo de grabación a archivo<br />
Copia de seguridad del vídeo<br />
15, 30, 45, 60 minutos<br />
Pendrive, disco duro extraíble, grabador USB, por red a archivo en formato AVI<br />
Modo de reproducción Reproducción normal, lenta/avance rápido/cuadro a cuadro<br />
Entrada/Salida de alarmas 4 canales de entrada de alarma, 1 canal de salida de alarma<br />
Tipo de alarma<br />
Movimiento/Disparado por sensor/Pérdida de vídeo/Espacio insuficiente en<br />
disco duro/Pérdida de disco duro<br />
Control PTZ Puerto RS-485 integrado, compatible con PELCO-P y PELCO-D<br />
Puerto USB 2.0<br />
Admite ratón USB; disco duro extraíble o unidad flash USB para copias de<br />
seguridad a archivo AVI y actualización del sistema<br />
Ethernet 1 conector Ethernet RJ-45 10/100 autoadaptable<br />
Protocolos de red TCP/IP, DHCP, UDP, DDNS, PPPOE<br />
Funciones de red<br />
Permite la visualización remota en teléfono móvil y la monitorización en tiempo<br />
real en una red o navegador web Internet Explorer, y también la configuración<br />
remota de los parámetros del <strong>DVR</strong>.<br />
Consumo 15 W (sin disco duro)<br />
Alimentador de tensión DC 12 V, 3 A<br />
Temperatura de funcionamiento 10 ºC a 40 ºC<br />
Humedad de funcionamiento 10% a 90%<br />
Dimensiones<br />
(anchura x altura x profundidad)<br />
340 x 50 x 220 mm<br />
Peso 3 kg (aprox.)<br />
�� Las especificaciones del producto pueden sufrir variaciones sin previo aviso.<br />
�� Máxima capacidad del disco duro: 1 TB.<br />
�� No usar el disco duro extraíble con un PC.<br />
DS<strong>1093</strong>-027 112
7 USO DE NETVIEWER<br />
�<br />
7.1 DESCARGA E INSTALACIÓN DEL PLUG-IN<br />
Abra el navegador Internet Explorer e introduzca la dirección IP y puerto web del <strong>DVR</strong>, por ejemplo, http://172.18.6.202:80/.<br />
Nota: Si no se descarga correctamente el plug-in, compruebe el nivel de seguridad de su navegador o la configuración del<br />
cortafuegos (consulte el Apéndice: Instalación de ActiveX). Consulte también el apartado Configuración de red para confirmar<br />
que todo es correcto.<br />
�<br />
De forma alternativa, inicie el software NetViewer incluido en el CD suministrado con el <strong>DVR</strong>.<br />
7.2 INICIO DE SESION EN NETVIEWER<br />
�<br />
�<br />
�<br />
�<br />
�<br />
�<br />
�<br />
�<br />
�<br />
�<br />
�<br />
�<br />
Fig. 6-1<br />
Fig. 6-2<br />
7.3 INTERFAZ PRINCIPAL DE NETVIEWER<br />
Fig. 6.3<br />
NetViewer divide la pantalla en las siguientes secciones:<br />
o Menú principal (Sección 1 de la Fig. 6-3)<br />
o Control PTZ (Secciones 2, 3 y 4 de la Fig. 6-3)<br />
DS<strong>1093</strong>-027 113<br />
Una ver instalado el plug-in, seleccione el idioma para iniciar<br />
sesión, introduzca la contraseña y haga clic en el botón [LOGIN]<br />
para poder ver el <strong>DVR</strong> remotamente a través de NetViewer.<br />
Tenga en cuenta que la contraseña por defecto está vacía. El<br />
sistema permite al Administrador establecer una nueva contraseña.<br />
Si el valor de NETWORK es LAN, el vídeo se verá en modo Main-<br />
Stream; en cambio, si el valor de NETWORK es INTERNET, el<br />
vídeo se verá en modo Sub-Stream.<br />
NOTA: Si desea eliminar una versión antigua, ejecute el siguiente<br />
comando: “regsvr32/u dvrocx.ocx”�<br />
Una vez iniciada la sesión en NetViewer, el sistema visualizará<br />
las imágenes, con audio y vídeo (Fig. 6-2).
o Control de reproducción (Secciones 6 a 10 de la Fig. 6-3)<br />
7.3.1 MENÚ PRINCIPAL<br />
El menú principal incluye los menús [Live], [Replay], [Setup] y [Logout].<br />
7.3.1.1 Menú Live<br />
Al iniciar sesión en el sistema, se entrará en este menú.<br />
7.3.1.2 Menú Replay<br />
�<br />
�<br />
�<br />
�<br />
�<br />
�<br />
�<br />
�<br />
�<br />
�<br />
�<br />
�<br />
Botón PLAY: [Play]/[Pause]<br />
Botón STOP: detención de la reproducción<br />
Botón F.F.: avance rápido Fig. 6-4 de la reproducción<br />
Botón SLOW: avance lento de la reproducción<br />
Next Frame (Siguiente cuadro): reproducción cuadro a cuadro<br />
Botón 264 TO AVI: conversión de un archivo en formato <strong>H.264</strong> a AVI<br />
Este menú permite reproducir las grabaciones de forma<br />
remota.<br />
Seleccione el día, canal y tipo de evento en la lista de<br />
resultados de la búsqueda.<br />
Puede controlar la velocidad de reproducción con el control<br />
deslizante situado en la parte inferior de la interfaz.<br />
El formato original de los archivos de volcado es <strong>H.264</strong>; después podrá convertirlos al formato AVI más conocido.<br />
7.3.1.3 Programación<br />
Seleccione el menú [Setup] para entrar en el submenú, que consta de los menús [Recording Mode], [Alarm Mode], [PTZ Control],<br />
[Network Setting], [System Setting] y [Host Info].<br />
NOTA: puede modificar y guardar remotamente los parámetros del <strong>DVR</strong> únicamente cuando la visualización está en modo Live.<br />
El procedimiento de modificación mediante NetViewer es el mismo que en local.<br />
Grabación<br />
Fig. 6-5<br />
DS<strong>1093</strong>-027 114<br />
En el submenú [Recording Mode] podrá activar o desactivar cada canal, y<br />
ajustar remotamente los parámetros de grabación (resolución, calidad,<br />
audio, modo de grabación y calendario) mediante NetViewer.
Alarma<br />
Fig. 6-8<br />
Control PTZ<br />
Red<br />
Picture 6-6<br />
Fig. 6-7<br />
Fig. 6-9<br />
Picture 6-10<br />
DS<strong>1093</strong>-027 115<br />
Seleccione el menú [<strong>Sch</strong>edule] para entrar en su submenú.<br />
El procedimiento de configuración remota es el mismo que en local.<br />
Consulte el apartado 4.2.2 Configuración de la grabación<br />
Seleccione el menú [Alarm] para entrar en su submenú.<br />
Puede programar las alarmas externas para cada canal, alarmas de<br />
detección de movimiento, alarma de pérdida de vídeo, alarma de espacio<br />
insuficiente en el disco duro, etc.<br />
Para obtener más información sobre la configuración, consulte el apartado<br />
correspondiente.<br />
El sistema permite configurar remotamente la detección de movimiento<br />
para cada canal del <strong>DVR</strong>.<br />
Seleccione [PTZ control] para configurar las cámaras PTZ. El<br />
procedimiento de configuración remota es el mismo que en local.<br />
Seleccione [Network] para entrar en el menú [Network]. El<br />
procedimiento de configuración remota es el mismo que en local.
Configuración<br />
Fig. 6-11<br />
7.3.1.4 Información<br />
Fig. 6-12<br />
7.3.2 <strong>CON</strong>TROL PTZ<br />
Los controles PTZ y la función Cruise se implementan de la misma manera que con el <strong>DVR</strong>.�<br />
�<br />
7.3.3 <strong>CON</strong>TROL DE REPRODUCCION EN TIEMPO REAL<br />
Seleccione el menú [Setting] para entrar en la interfaz de menú.<br />
Haga clic en el botón […] para determinar la ruta de volcado de las<br />
grabaciones y de captura de las imágenes.<br />
El menú también permite establecer una contraseña de usuario,<br />
activar el horario de verano, etc.�<br />
�� Visualización en tiempo real activa o desactivada [ ]: si el estado es “On”, al hacer clic sobre el botón se<br />
cerrará la visualización en tiempo real. Si el estado es “Off”, el botón abrirá la visualización en tiempo real.<br />
�� Captura [ ]: captura una imagen de la pantalla y la guarda en el PC en formato *bmp.<br />
�� Grabación [ ]: inicia la grabación remota del <strong>DVR</strong>.�<br />
�� Visualización de los canales [ ]: los iconos significan: 1 canal, cuadrante de 2x2, 3x3 y 4x4,<br />
respectivamente.�<br />
�� Volumen [ ]: haga clic o deslice el control para ajustar el volumen de sonido.<br />
DS<strong>1093</strong>-027 116
APÉNDICE: INSTALACIÓN DE ACTIVEX<br />
Antes de conectar el equipo a un PC remoto, configure la seguridad como se indica a continuación:<br />
�� Abra Internet Explorer haciendo doble clic en .<br />
�� Aparecerá la siguiente página (o la página de inicio).<br />
�� Haga doble clic en .<br />
�� Aparecerá la pantalla “Propiedades de Seguridad Internet”.<br />
�� Seleccione “Sitios de confianza” y compruebe que el nivel de protección es ‘bajo’.<br />
�� Haga clic en “Sitios…”<br />
�� Aparecerá la siguiente pantalla:<br />
DS<strong>1093</strong>-027 117
�� Agregue la dirección IP del equipo (para ver la dirección, pulse “F2” en el panel frontal del equipo) en el campo “Agregar<br />
este sitio Web a la zona”.<br />
�� Haga clic en “Agregar”.<br />
�� Aparecerá la siguiente pantalla de confirmación:<br />
�NOTA<br />
�� No active la casilla “Requerir comprobación del servidor (https:) para todos los sitios de esta zona”.<br />
�� Haga clic en el botón “Aceptar” varias veces para salir del procedimiento.<br />
�� A continuación, instale “ActiveX”.<br />
�NOTA<br />
Después de instalar el control “ActiveX” puede cambiar la configuración del nivel de protección de Internet Explorer requerido<br />
para los sitios de confianza.<br />
DS<strong>1093</strong>-027 118
DS<strong>1093</strong>-027 119
DS<strong>1093</strong>-027<br />
FILIALI<br />
20151 MILANO – V. Gallarate 218<br />
Tel. 02.380.111.75 - Fax 02.380.111.80<br />
0<strong>004</strong>3 CIAMPINO (ROMA) V. L.Einaudi 17/19A<br />
Tel. 06.791.07.30 - Fax 06.791.48.97<br />
80013 CASALNUOVO (NA) V. Nazionale delle Puglie 3<br />
Tel. 081.193.661.20 - Fax 081.193.661.04<br />
30030 VIGONOVO (VE) – Via del Lavoro 71<br />
Tel. 049.738.63.00 r.a. - Fax 049.738.63.11<br />
66020 S.GIOVANNI TEATINO (<strong>CH</strong>) - Via Nenni 17<br />
DS<strong>1093</strong>-027<br />
loc. Sambuceto Tel. 085.44.64.851<br />
Tel. 085.44.64.033 - Fax 085.44.61.862<br />
http://www.urmetdomus.com<br />
120<br />
e-mail: info@urmetdomus.it<br />
Prodotto in Cina su specifica URMET Domus<br />
Made in China to URMET Domus specification<br />
SEDE<br />
URMET DOMUS S.p.A.<br />
10154 TORINO (ITALY)<br />
VIA BOLOGNA 188/C<br />
Telef. 011.24.00.000 (RIC.AUT.)<br />
Fax 011.24.00.300 - 323<br />
Area Tecnica<br />
Servizio Clienti 011.23.39.810