Register and win! - KARCHER SATTER
Register and win! - KARCHER SATTER
Register and win! - KARCHER SATTER

Create successful ePaper yourself
Turn your PDF publications into a flip-book with our unique Google optimized e-Paper software.
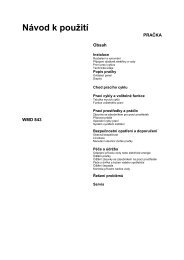
Illustration<br />
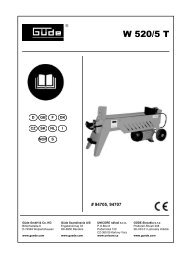
Remove the lid from the Plug 'n' Clean detergent<br />
bottle <strong>and</strong> press the detergent bottle<br />
into the detergent connection with the<br />
opening facing down.<br />
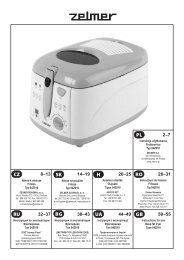
Illustration<br />
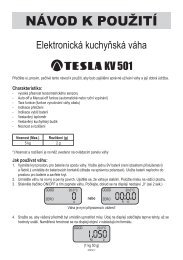
Adjust the suction volume of the detergent<br />
solution by means of the dosage regulator<br />
for detergents.<br />
Use spray lance with pressure regulation<br />
(Vario Power).<br />
Turn the spray lance to "Mix" position.<br />
Note: This will mix the detergent with the<br />
water stream.<br />
Note: If required, the washing brushes can be<br />
used to work with detergent.<br />
Recommended cleaning method<br />
Spray the detergent sparingly on the dry<br />
surface <strong>and</strong> allow it to react, but not to dry.<br />
Spray off loosened dirt with the high-pressure<br />
jet.<br />
Interrupting operation<br />
Release the lever on the trigger gun.<br />
Lock the lever on the trigger gun.<br />
During longer breaks (more than 5 minutes),<br />
also turn the appliance off using the<br />
"0/OFF" switch.<br />
Insert the trigger gun in its holder.<br />
Finish operation<br />
Caution<br />
Only separate the high-pressure hose from<br />
the trigger gun or the appliance while there is<br />
no pressure in the system.<br />
Remove the Plug 'n' Clean detergent bottle<br />
from the intake <strong>and</strong> close it with the lid.<br />
To store, place into the intake rotated by<br />
180°.<br />
Release the lever on the trigger gun.<br />
Turn off the appliance "0/OFF".<br />
Turn off tap.<br />
Detach the appliance from the water supply.<br />
Caution: When disconnecting the supply<br />
or high pressure hose, warm water may<br />
leak from the connections after operation.<br />
Press the lever on the trigger gun to release<br />
any remaining pressure in the system.<br />
Lock the lever on the trigger gun.<br />
Pull out the mains plug.<br />
18 EN – 6<br />
Transport<br />
Caution<br />
In order to prevent accidents or injuries, keep<br />
in mind the weight of the appliance during<br />
transport (see Specifications).<br />
When transporting by h<strong>and</strong><br />
Lift appliance by the carrying h<strong>and</strong>le <strong>and</strong><br />
carry it.<br />
Pull the appliance by its transport h<strong>and</strong>le.<br />
When transporting in vehicles<br />
Prior to horizontal transport: Remove the<br />
Plug 'n' Clean detergent bottle from the intake<br />
<strong>and</strong> close it with the lid.<br />
Secure the appliance against shifting <strong>and</strong><br />
tipping over.<br />
Storage<br />
Caution<br />
In order to prevent accidents or injuries, keep<br />
in mind the weight of the appliance when selecting<br />
a storage location for it (see Specifications).<br />
Storing the Appliance<br />
Park the machine on an even surface.<br />
Press the disconnect on the h<strong>and</strong> spray<br />
gun <strong>and</strong> remove the high pressure hose<br />
from the h<strong>and</strong> spray gun.<br />
Push the casing of the quick coupling for<br />
the high pressure hose toward the rear<br />
<strong>and</strong> disconnect the high pressure hose<br />
from the appliance.<br />
Insert the h<strong>and</strong> spray gun with the spray<br />
lance into the holder for the h<strong>and</strong> spray<br />
gun.<br />
Stow away the mains cable, the highpressure<br />
hose <strong>and</strong> accessory at the appliance.<br />
Prior to extended storage periods, as during<br />
the <strong>win</strong>ter, also observe the instructions in the<br />
Care section.