
You also want an ePaper? Increase the reach of your titles
YUMPU automatically turns print PDFs into web optimized ePapers that Google loves.
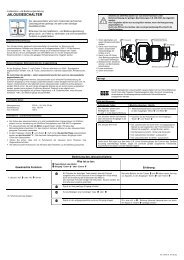
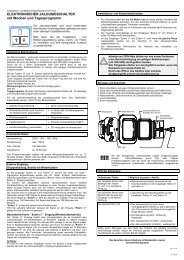
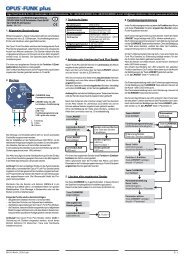
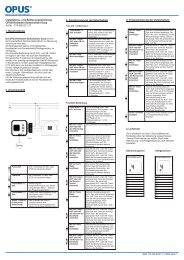
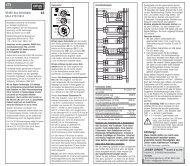
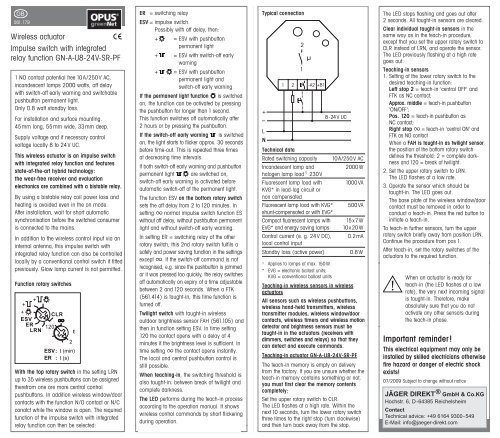
GB561.179Wireless actuatorImpulse switch with integratedrelay function GN-A-U8-24V-SR-PF1 NO contact potential free 10A/250V AC,incandescent lamps 2000 watts, off delaywith switch-off early warning and switchablepushbutton permanent light.Only 0.8 watt standby loss.For installation and surface mounting.45mm long, 55mm wide, 33mm deep.Supply voltage and if necessary controlvoltage locally 8 to 24V UC.This wireless actuator is an impulse switchwith integrated relay function and featuresstate-of-the-art hybrid technology:the wear-free receiver and evaluationelectronics are combined with a bistable relay.By using a bistable relay coil power loss andheating is avoided even in the on mode.After installation, wait for short automaticsynchronisation before the switched consumeris connected to the mains.In addition to the wireless control input via aninternal antenna, this impulse switch withintegrated relay function can also be controlledlocally by a conventional control switch if fittedpreviously. Glow lamp current is not permitted.Function rotary switchesWith the top rotary switch in the setting LRNup to 35 wireless pushbuttons can be assignedtherefrom one ore more central controlpushbuttons. In addition wireless window/doorcontacts with the function N/O contact or N/Cconatct while the window is open. The requiredfunction of the impulse switch with integratedrelay function can then be selected:yER = switching relayESV = impulse switch.Possibly with off delay, then:+ = ESV with pushbuttonpermanent light+ = ESV with switch-off earlywarning+ = ESV with pushbuttonpermanent light andswitch-off early warningIf the permanent light function is switchedon, the function can be activated by pressingthe pushbutton for longer than 1 second.This function switches off automatically after2 hours or by pressing the pushbutton.If the switch-off early warning is switchedon, the light starts to flicker approx. 30 secondsbefore time-out. This is repeated three timesat decreasing time intervals.If both switch-off early warning and pushbuttonpermanent light are switched on,switch-off early warning is activated beforeautomatic switch-off of the permanent light.The function ESV on the bottom rotary switchsets the off delay from 2 to 120 minutes. Insetting normal impulse switch function ESwithout off delay, without pushbutton permanentlight and without switch-off early warning.In setting ER = switching relay of the otherrotary switch, this 2nd rotary switch fulfils asafety and power saving function in the settingsexcept . If the switch-off command is notrecognised, e.g. since the pushbutton is jammedor it was pressed too quickly, the relay switchesoff automatically on expiry of a time adjustablebetween 2 and 120 seconds. When a FTK(561.414) is taught-in, this time function isturned off.Twilight switch with taught-in wirelessoutdoor brightness sensor FAH (561.105) andthen in function setting ESV. In time setting120 the contact opens with a delay of 4minutes if the brightness level is sufficient. Intime setting the contact opens instantly.The local and central pushbutton control isstill possible.When teaching-in, the switching threshold isalso taught-in: between break of twilight andcomplete darkness.The LED performs during the teach-in processaccording to the operation manual. It showswireless control commands by short flickeringduring operation.during operation.Typical connectionTechnical dataRated switching capacity 10A/250V ACIncandescent lamp and2000Whalogen lamp load 1)230VFluorescent lamp load with 1000VAKVG* in lead-lag circuit ornon compensatedFluorescent lamp load with KVG* 500VAshunt-compensated or with EVG*Compact fluorescent lamps with 15x7WEVG* and energy saving lamps 10x20WControl current (e. g. 24V DC), 0.2mAlocal control inputStandby loss (active power) 0.8W1)Applies to lamps of max. 150W.* EVG = electronic ballast units;KVG = conventional ballast unitsTeaching-in wireless sensors in wirelessactuatorsAll sensors such as wireless pushbuttons,wireless hand-held transmitters, wirelesstransmitter modules, wireless window/doorcontacts, wireless timers and wireless motiondetector and brightness sensors must betaught-in in the actuators (receivers withdimmers, switches and relays) so that theycan detect and execute commands.Teaching-in actuator GN-A-U8-24V-SR-PFThe teach-in memory is empty on deliveryfrom the factory. If you are unsure whether theteach-in memory contains something or not,you must first clear the memory contentscompletely:Set the upper rotary switch to CLR.The LED flashes at a high rate. Within thenext 10 seconds, turn the lower rotary switchthree times to the right stop (turn clockwise)and then turn back away from the stop.The LED stops flashing and goes out afterand then turn back away from the stop.The LED stops flashing and goes out after2 seconds. All taught-in sensors are cleared.Clear individual taught-in sensors in thesame way as in the teach-in procedure,except that you set the upper rotary switch toCLR instead of LRN, and operate the sensor.The LED previously flashing at a high rategoes out.Teaching-in sensors1. Setting of the lower rotary switch to thedesired teaching-in function:Left stop 2 = teach-in 'central OFF' andFTK as NC contact;Approx. middle = teach-in pushbutton'ON/OFF';Pos. 120 = teach-in pushbutton asNC contact;Right stop = teach-in 'central ON' andFTK as NO contactWhen a FAH is taught-in as twilight sensor,the position of the bottom rotary switchdefines the threshold: 2 = complete darknessand 120 = break of twilight.2. Set the upper rotary switch to LRN.The LED flashes at a low rate.3. Operate the sensor which should betaught-in. The LED goes out.The base plate of the wireless window/doorcontact must be removed in order toconduct a teach-in. Press the red button toinitiate a teach-in.To teach-in further sensors, turn the upperrotary switch briefly away from position LRN.Continue the procedure from pos 1.After teach-in, set the rotary switches of theactuators to the required function.After teach in, set the rotary switches of theactuators to the required function.!When an actuator is ready forteach-in (the LED flashes at a lowrate), the very next incoming signalis taught-in. Therefore, makeabsolutely sure that you do notactivate any other sensors duringthe teach-in phase.the teach-in phase.Important reminder!This electrical equipment may only beinstalled by skilled electricians otherwisefire hazard or danger of electric shockexists!07/2009 Subject to change without noticeJÄGER DIREKT ® GmbH & Co.KGHochstr. 6, D-64385 ReichelsheimContactTechnical advice: +49 6164 9300-549E-Mail: info@jaeger-direkt.com