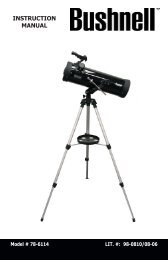
11-8321 ImageView 6LIM - Bushnell
11-8321 ImageView 6LIM - Bushnell
11-8321 ImageView 6LIM - Bushnell

You also want an ePaper? Increase the reach of your titles
YUMPU automatically turns print PDFs into web optimized ePapers that Google loves.
8<br />
DOWNLOADING THE PICTURES TO YOUR COMPUTER:<br />
1. The camera will be recognized as a USB mass storage device, which means no special drivers are<br />
required for all operating systems later than Windows 98 (Me, 2000, XP). Mac OS 9 and OSX are<br />
also compatible. If you have a PC running Windows 98, you must install the driver found on the<br />
included CD-ROM BEFORE CONNECTING THE CAMERA TO YOUR PC.<br />
2. If you have a computer OS as listed above that is USB mass storage compliant, a new disc icon will<br />
appear in Windows Explorer (under “My Computer”) as a new “Removable Disc” after plugging in<br />
the USB cable from the Imageview. Mac users will see the new disc device appear on their desktop.<br />
Clicking on the new disc icon will show the contents, a folder named “DCIM”. The image folder<br />
inside this contains your photos, stored as JPEGs (.jpg file format). They may then be opened,<br />
edited, renamed and saved using any photo or graphics software that accepts .jpg files. If you do not<br />
have software that will open .jpg files, you should install MGI Photosuite (Windows only) from the<br />
included CD-ROM. See “Software Installation” for instructions.<br />
3. After you have copied or opened and saved the photo files to your computers hard drive, you<br />
may disconnect the Imageview camera (NEVER disconnect the camera while files are still being<br />
transferred to your computer). Before disconnecting, you should “eject” or stop the removable disc<br />
representing the camera to avoid an error message.<br />
<strong>11</strong>-<strong>8321</strong> <strong>ImageView</strong> <strong>6LIM</strong> 10-<strong>11</strong><br />
2/24/04, <strong>11</strong>:09 AM<br />
CONNECTING TO THE COMPUTER - System Requirements:<br />
Pentium 166MMX minimum (Recommended Pentium 266)<br />
Windows 98 / ME / Windows 2000 / XP<br />
Minimum 32MB of RAM<br />
USB port<br />
Minimum 200MB of Hard Drive space with additional 65 MB space for IE and DirectX<br />
CD-ROM driver<br />
Super VGA Monitor and video card<br />
SOFTWARE INSTALLATION<br />
Load software prior to connecting your camera to your computer if the OS is Windows 98. If the OS<br />
is Windows2000/ME/XP, there is no need to install driver. Simply plug in the camera and use.To load<br />
software insert the CD into your CD-ROM drive and it will self-start. The CD contains the Roxio<br />
Photo Suite software as well as the drivers that will allow your computer to recognize your camera.<br />
Follow the “On Screen” instructions. If your computer does not have an auto play function and will not<br />
automatically run CDs, open the CD in the “My Computer” window and click on the “autorun.exe”.<br />
After the drivers are successfully installed, click on “Roxio Photo Suite ”to install the photo imaging<br />
software.<br />
WARNING: Make sure you download any picture from your camera<br />
before you remove the batteries from the camera.<br />
Follow the instructions on the software to successfully download and save the pictures on your computer.<br />
An installation screen will automatically guide you through the installation process.<br />
9