APRIL PP 2-41 - Arts & Activities Magazine
APRIL PP 2-41 - Arts & Activities Magazine
APRIL PP 2-41 - Arts & Activities Magazine
- TAGS
- april
- arts
- activities

Create successful ePaper yourself
Turn your PDF publications into a flip-book with our unique Google optimized e-Paper software.
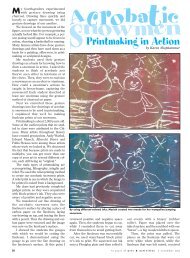
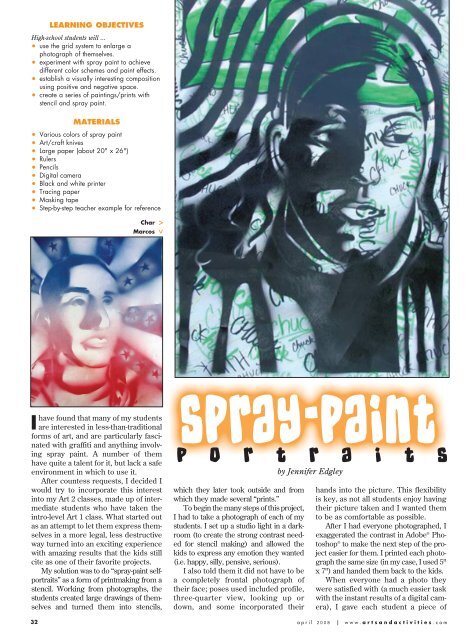
Gibrantracing paper big enough to cover theirentire photo, a piece of masking tapeand a ruler. The students taped thetracing paper on top of their photosand used a pencil to break their photosinto only “black and white” (or positiveand negative space)—no gray values.This is the most difficult step formany students, but the most important,because they will be creatingstencils from these drawings. In thisstep, they are essentially tracing, butthey will have to draw from their tracingin the next step. The key thing toremember in this step is that all theareas they leave “white” must connect;if they don’t, the stencil will fall apart.It is helpful for students to find theshadows (obvious “blacks”) and colorthem in first, and then decide if theneutrals are going to be “black” or“white.” This takes some artisticNico thoughtfully experimentedwith color for aninteresting composition.>Tony created negative images by placingleaves on top of his stencil.Matteolicense, which is why I do this with amore advanced level of students. Oncethey have completed their tracingpaper drawings, they are ready to grid.Since the students’ photographswere all 5" x 7", I had them create a 1-inch grid over the entire photo. On a20" x 26" piece of paper, this translatesproportionately to a 3.5-inch grid,which I also had them create. Whenthe grids are complete, the studentscan begin enlarging their tracing paperdrawings onto the larger paper.These larger, gridded drawings arewhat will eventually become the students’stencils. For this reason, it is importantthat the paper be thin enough to cut withan art/craft knife, but not flimsy. As theydraw, they can shade in the “black” areasand leave the connected “whites” alone.When the enlarged drawings arefinished, the students are ready toMichelle peeled back herstar-strewn stencil to revealher self-portrait.High-school student artistsspray-painted their selfportraitsoutside on a tarp.begin creating the stencil to use forspray-painting. They will each need aknife and a scrap piece of cardboard ormat board to place under their drawingsto save their desks from being cutup. Since the white areas are all connected,they will use the knives toremove all the areas they have chosento be black. Any mistakes made by cuttingthrough the white areas can beeasily fixed with tape. When they havedone this, the remaining areas willform one large, connected white area,which will be the actual stencil.Once the students’ stencils are completed,they are ready for the fun part!I purchased a long roll of painter’s tarp(to protect the grass) and with the permissionof our maintenance team,staked it into the ground outside ofschool. I brought a large stack of more20" x 26" paper outside, along withtape and spray paint (you’ll go throughquite a bit), and let the kids loose.Some students used the masking tapeto lightly affix their stencils on top ofthe new paper to keep them from blowingaway, but most went without.The students experimented withusing several colors of spray paint, andalso took advantage of the differenteffects it is possible to achieve with thisnew medium. Holding the can close tothe paper gives a pooled, saturated look,while holding it further back creates afuzzier, softer effect. They also foundways to make drips and used things likeleaves to create negative space designs.They had a blast! When we returned tothe classroom, each student had a seriesof self-portraits to show for their hardwork over the past few weeks.Not only is this a fun project with greatresults, it is also a great way to get the studentsoutside for a change in scenery. ■Jennifer Edgley, a former student of <strong>Arts</strong>& <strong>Activities</strong> Contributing Editor GeriGreenman, teaches art at West LeydenHigh School in Northlake, Illinois.www.artsandactivities.com ❘ april 2008 33