Handleiding-CMFe - Wolter en dros
Handleiding-CMFe - Wolter en dros
Handleiding-CMFe - Wolter en dros

Create successful ePaper yourself
Turn your PDF publications into a flip-book with our unique Google optimized e-Paper software.
<strong>Handleiding</strong><br />
Manuel<br />
Manual<br />
Anleitung<br />
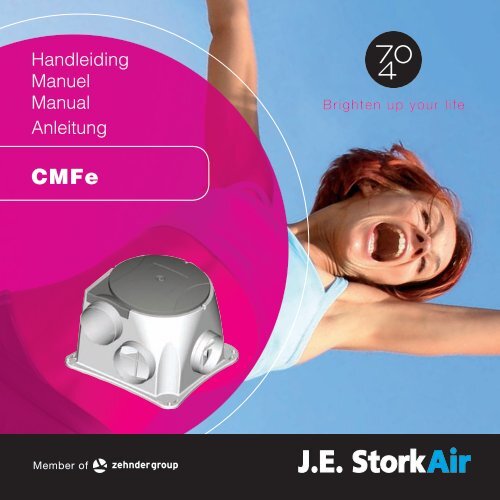
<strong>CMFe</strong><br />
Member of
INTRODUCTIE<br />
Deze handleiding is bedoeld voor gebruikers <strong>en</strong> installateurs van<br />
het mechanisch v<strong>en</strong>tilatiesysteem van het type <strong>CMFe</strong>.<br />
Deze handleiding bevat belangrijke informatie over de bedi<strong>en</strong>ing<br />
<strong>en</strong> installatie van de <strong>CMFe</strong>, uitvoering met e<strong>en</strong> gelijkstroommotor.<br />
Doelstelling<br />
De <strong>CMFe</strong> is uitsluit<strong>en</strong>d bedoeld voor de v<strong>en</strong>tilatie van woning<strong>en</strong><br />
zoals omschrev<strong>en</strong> in deze handleiding. De informatie in deze<br />
handleiding is toegespitst op het bedoelde gebruik van de <strong>CMFe</strong>.<br />
Garantie <strong>en</strong> aansprakelijkheid<br />
J.E. StorkAir verle<strong>en</strong>t garantie voor e<strong>en</strong> periode van 24<br />
maand<strong>en</strong> na installatie tot e<strong>en</strong> maximum van 30 maand<strong>en</strong> na<br />
productiedatum van de <strong>CMFe</strong>. De garantie vervalt indi<strong>en</strong>:<br />
• de installatie niet volg<strong>en</strong>s de geld<strong>en</strong>de voorschrift<strong>en</strong> is<br />
uitgevoerd,<br />
• de gebrek<strong>en</strong> zijn ontstaan door verkeerde aansluiting,<br />
ondeskundig gebruik of vervuiling van de <strong>CMFe</strong>,<br />
• er wijziging<strong>en</strong> in de bedrading zijn aangebracht of reparaties<br />
door onbevoegd<strong>en</strong> zijn verricht.<br />
(De)montagekost<strong>en</strong> ter plaatse vall<strong>en</strong> buit<strong>en</strong> de<br />
garantiebepaling<strong>en</strong>. Indi<strong>en</strong> binn<strong>en</strong> de garantietermijn e<strong>en</strong> defect<br />
optreedt, dan di<strong>en</strong>t dit te word<strong>en</strong> gemeld bij de installateur.<br />
Indi<strong>en</strong> de <strong>CMFe</strong> onderdel<strong>en</strong> of procedures op e<strong>en</strong> andere wijze<br />
word<strong>en</strong> gebruikt dan in deze handleiding beschrev<strong>en</strong>, of indi<strong>en</strong><br />
zonder onze toestemming wijziging<strong>en</strong> aan de <strong>CMFe</strong> word<strong>en</strong><br />
aangebracht, dan vervalt de geldigheid van de CE-markering.<br />
J.E. StorkAir behoudt zich het recht voor om de constructie <strong>en</strong>/<br />
of configuratie van haar product<strong>en</strong> op elk mom<strong>en</strong>t te wijzig<strong>en</strong><br />
zonder de verplichting eerder geleverde product<strong>en</strong> aan te pass<strong>en</strong>.<br />
De gegev<strong>en</strong>s in deze handleiding hebb<strong>en</strong> betrekking op de meest<br />
rec<strong>en</strong>te informatie. Ze kunn<strong>en</strong> op e<strong>en</strong> later tijdstip gewijzigd<br />
word<strong>en</strong> zonder voorafgaande waarschuwing.<br />
Demontage <strong>en</strong> verwijder<strong>en</strong><br />
Aan het eind van de lev<strong>en</strong>sduur van de <strong>CMFe</strong> is de<br />
gebruiker verantwoordelijk voor e<strong>en</strong> veilige demontage van de<br />
<strong>CMFe</strong> <strong>en</strong> voor e<strong>en</strong> afvoer van de onderdel<strong>en</strong>, overe<strong>en</strong>komstig<br />
de ter plaatse geld<strong>en</strong>de wett<strong>en</strong> of verord<strong>en</strong>ing<strong>en</strong>.<br />
OVERZICHT EN PRINCIPE<br />
Het mechanisch v<strong>en</strong>tilatiesysteem van J.E. StorkAir bestaat<br />
uit e<strong>en</strong> c<strong>en</strong>traal opgestelde v<strong>en</strong>tilator, e<strong>en</strong> kanaalsysteem <strong>en</strong><br />
v<strong>en</strong>tilatiev<strong>en</strong>tiel<strong>en</strong> in keuk<strong>en</strong>, badkamer, toilet <strong>en</strong> overige te<br />
v<strong>en</strong>tiler<strong>en</strong> ruimt<strong>en</strong>. De <strong>CMFe</strong> wordt bedi<strong>en</strong>d met e<strong>en</strong> driestand<strong>en</strong>schakelaar.<br />
De <strong>CMFe</strong> kan ook word<strong>en</strong> uitgerust met e<strong>en</strong> motorloze<br />
wasemkap, geplaatst bov<strong>en</strong> het kooktoestel. Dankzij deze<br />
instelmogelijkhed<strong>en</strong> word<strong>en</strong> kookluchtjes <strong>en</strong> vocht optimaal via<br />
het c<strong>en</strong>trale systeem naar buit<strong>en</strong> afgevoerd.<br />
Bij het ontwerp<strong>en</strong> van het v<strong>en</strong>tilatiesysteem is ervan uitgegaan<br />
dat de installatie 24 uur per dag in bedrijf is. Om zo zuinig<br />
mogelijk met <strong>en</strong>ergie om te gaan, is e<strong>en</strong> elektromotor toegepast<br />
met e<strong>en</strong> laag stroomverbruik.<br />
ELEKTRISCHE GEVAREN<br />
Tijd<strong>en</strong>s de installatie of gedur<strong>en</strong>de onderhoud, bestaat het<br />
gevaar van e<strong>en</strong> elektrische schok. Overtuig u van de volg<strong>en</strong>de<br />
veiligheidsmaatregel<strong>en</strong> alvor<strong>en</strong>s te start<strong>en</strong> met de installatie of<br />
onderhoud:<br />
• Schakel altijd eerst de spanning uit of neem de steker uit<br />
de contactdoos voordat er onderhoud aan de <strong>CMFe</strong> wordt<br />
uitgevoerd.<br />
• Schakel de elektrische spanning pas in of steek de steker pas<br />
in de contactdoos wanneer de <strong>CMFe</strong> is geïnstalleerd <strong>en</strong> de<br />
deksel is geslot<strong>en</strong>.<br />
ELEKTROSTATISCHE ONTLADING (ESD)<br />
Indi<strong>en</strong> er bedrukte bedrading<strong>en</strong> (printplat<strong>en</strong>) met<br />
compon<strong>en</strong>t<strong>en</strong> moet<strong>en</strong> word<strong>en</strong> uitgewisseld dan bestaat het<br />
gevaar van elektrostatische ontlading<strong>en</strong>, waarbij de printplat<strong>en</strong><br />
defect kunn<strong>en</strong> rak<strong>en</strong>. Neem daarom bij het omgaan met<br />
printplat<strong>en</strong> altijd ESD remm<strong>en</strong>de maatregel<strong>en</strong>, zoals het drag<strong>en</strong><br />
van e<strong>en</strong> geaarde polsband.<br />
MECHANISCHE GEVAREN<br />
Tijd<strong>en</strong>s de installatie of gedur<strong>en</strong>de onderhoud, bestaat het<br />
gevaar van verwonding<strong>en</strong> t<strong>en</strong>gevolge van draai<strong>en</strong>de del<strong>en</strong>. Maak<br />
daarom de <strong>CMFe</strong> nooit op<strong>en</strong> of koppel nooit slang<strong>en</strong> af terwijl de<br />
<strong>CMFe</strong> in bedijf is.
BEDIENING BEDIENING<br />
Voor het goed functioner<strong>en</strong> van de <strong>CMFe</strong> moet aan e<strong>en</strong> aantal<br />
belangrijke voorwaard<strong>en</strong> word<strong>en</strong> voldaan:<br />
• Zorg voor voldo<strong>en</strong>de luchttoevoer. Op<strong>en</strong> daarvoor bijvoorbeeld<br />
e<strong>en</strong> klapraampje of de v<strong>en</strong>tilatieroosters bov<strong>en</strong> de ram<strong>en</strong>.<br />
• Indi<strong>en</strong> de woning is voorzi<strong>en</strong> van niet-afsluitbare<br />
luchttoevoerop<strong>en</strong>ing<strong>en</strong>, zoals luchtroosters bov<strong>en</strong> de ram<strong>en</strong>,<br />
laat deze dan op<strong>en</strong>. Plak deze roosters niet af of stop ze niet<br />
dicht.<br />
Indi<strong>en</strong> e<strong>en</strong> motorloze wasemkap is geplaatst bov<strong>en</strong> het<br />
kooktoestel, dan wordt de <strong>CMFe</strong> bedi<strong>en</strong>d met de schakelaar van<br />
de wasemkap. Hiermee wordt het systeem in de hoog- (kook-),<br />
midd<strong>en</strong>- of laagstand geschakeld.<br />
Wanneer er ge<strong>en</strong> motorloze wasemkap is geïnstalleerd, dan<br />
bevindt zich op de keuk<strong>en</strong>muur e<strong>en</strong> drie-stand<strong>en</strong>schakelaar,<br />
waarmee de <strong>CMFe</strong> in drie verschill<strong>en</strong>de stand<strong>en</strong> geschakeld<br />
kan word<strong>en</strong>.<br />
Het is niet toegestaan e<strong>en</strong> wasemkap met motor op het<br />
systeem aan te sluit<strong>en</strong>.<br />
INFORMATIE VOOR DE INSTALLATEUR<br />
De <strong>CMFe</strong> bestaat uit e<strong>en</strong> v<strong>en</strong>tilatorhuis waarin e<strong>en</strong> slakk<strong>en</strong>huis is<br />
opg<strong>en</strong>om<strong>en</strong>. In het v<strong>en</strong>tilatorhuis is het v<strong>en</strong>tilatordeel gemonteerd,<br />
waarin de motor/vleugelcombinatie, de elektrische aansturing <strong>en</strong><br />
de typeplaat zijn opg<strong>en</strong>om<strong>en</strong>.<br />
Mechanische aansluiting<strong>en</strong><br />
De <strong>CMFe</strong> is voorzi<strong>en</strong> van vijf zuigaansluiting<strong>en</strong> <strong>en</strong> e<strong>en</strong> persaansluiting.<br />
Van de zuigaansluiting<strong>en</strong> zijn er standaard drie afgedopt.<br />
Vier aansluitmogelijkhed<strong>en</strong> bevind<strong>en</strong> zich aan de zijkant<strong>en</strong><br />
van de <strong>CMFe</strong> <strong>en</strong> één aansluitmogelijkheid aan de achterzijde.<br />
De bodem- <strong>en</strong> de persaansluiting moet<strong>en</strong> altijd aansluit<strong>en</strong><br />
aan e<strong>en</strong> kanaal met e<strong>en</strong> l<strong>en</strong>gte van t<strong>en</strong>minste 90cm.<br />
Monteer de installatie met zo min mogelijk luchtweerstand <strong>en</strong><br />
vrij van lekkage. Minimaliseer het gebruik van flexibele leiding<strong>en</strong>.<br />
Dop de niet gebruikte op<strong>en</strong>ing<strong>en</strong> aan de zuigzijde af. Sluit de<br />
pers-mond altijd aan. Monteer de <strong>CMFe</strong> aan e<strong>en</strong> wand of plafond<br />
met voldo<strong>en</strong>de massa.<br />
Elektrische aansluiting<strong>en</strong><br />
De <strong>CMFe</strong> moet word<strong>en</strong> aangeslot<strong>en</strong> conform NEN 1010 <strong>en</strong> de<br />
plaatselijk geld<strong>en</strong>de voorschrift<strong>en</strong>.<br />
De <strong>CMFe</strong> is voorzi<strong>en</strong> van e<strong>en</strong> snoer met e<strong>en</strong> Perilex steker voor<br />
de elektrische aansluiting (zie afb. D). Plaats de Perilex steker pas<br />
in de wandcontactdoos als alles is geïnstalleerd. Het toestel is<br />
niet geschikt voor aansluiting op het draaistroomnet.<br />
Het toestel is standaard te schakel<strong>en</strong> op drie stand<strong>en</strong> <strong>en</strong> moet<br />
word<strong>en</strong> aangeslot<strong>en</strong> volg<strong>en</strong>s bijgevoegd schema (zie afb. C).<br />
De aansturingsprint is voorzi<strong>en</strong> van e<strong>en</strong> 0-10VDC<br />
connector, waarmee het v<strong>en</strong>tilatiesysteem ook door e<strong>en</strong><br />
extern besturingssysteem kan word<strong>en</strong> aangestuurd.<br />
De aansluiting van e<strong>en</strong> extern besturingssysteem mag nooit<br />
in combinatie word<strong>en</strong> gebruikt met de RF-afstandsbedi<strong>en</strong>ing. Dit<br />
kan schade aan de elektrische aansturing tot gevolg hebb<strong>en</strong>.<br />
Inregel<strong>en</strong> v<strong>en</strong>tiel<strong>en</strong><br />
Schakel de <strong>CMFe</strong> in de hoogste stand. Sluit de ram<strong>en</strong> <strong>en</strong> deur<strong>en</strong>.<br />
Zet het systeem in de hoogste stand <strong>en</strong> zet de v<strong>en</strong>tiel<strong>en</strong> maximaal<br />
op<strong>en</strong>. Meet de totale luchthoeveelheid op de v<strong>en</strong>tiel<strong>en</strong>. Stel m.b.v.<br />
de dipswitches het systeem af op de juiste totaalcapaciteit. Regel<br />
de v<strong>en</strong>tiel<strong>en</strong> in op het juiste debiet per ruimte. Kruis de stand<strong>en</strong><br />
van de dipswitches aan in de tabel.<br />
Instelling<strong>en</strong> DIP-switches<br />
Op de aansturingsprint zijn e<strong>en</strong> aantal schakelaars (DIP)<br />
aanwezig, waarmee e<strong>en</strong> aantal extra instelling<strong>en</strong> kunn<strong>en</strong> word<strong>en</strong><br />
gedaan. Met de schakelaars 1 t/m 4 (zie tab. 1) kan de snelheid<br />
van de v<strong>en</strong>tilator nog extra word<strong>en</strong> aangepast bij alle stand<strong>en</strong>.<br />
Dit kan nodig zijn indi<strong>en</strong> er lange aan- of afvoerkanal<strong>en</strong> word<strong>en</strong><br />
gebruikt. Schakelaar 5 <strong>en</strong> 6 (zie tab. 2) word<strong>en</strong> gebruikt voor de<br />
instelling<strong>en</strong> bij e<strong>en</strong> externe aansturing van het v<strong>en</strong>tilatiesysteem.<br />
Let op: Verwijder de spanning om de gemaakt instelling<strong>en</strong> te<br />
activer<strong>en</strong>.<br />
ONDERHOUD DOOR DE GEBRUIKER<br />
De gebruiker di<strong>en</strong>t er op toe te zi<strong>en</strong> dat de <strong>CMFe</strong> jaarlijks wordt<br />
gecontroleerd door de installateur <strong>en</strong>, indi<strong>en</strong> nodig, gereinigd.<br />
Reinig<strong>en</strong> v<strong>en</strong>tilatiev<strong>en</strong>tiel<strong>en</strong><br />
Reinig de v<strong>en</strong>tilatiev<strong>en</strong>tiel<strong>en</strong> met water <strong>en</strong> zeep. Neem hiervoor de<br />
v<strong>en</strong>tiel<strong>en</strong> uit het kanaalsysteem.<br />
Let op: Zorg dat de v<strong>en</strong>tiel<strong>en</strong> niet onderling word<strong>en</strong> verwisseld <strong>en</strong><br />
dat de instelling<strong>en</strong> niet word<strong>en</strong> gewijzigd.<br />
ONDERHOUD DOOR DE INSTALLATEUR<br />
Het onderhoud di<strong>en</strong>t te geschied<strong>en</strong> met elektrisch afgeschakelde<br />
motor <strong>en</strong> met de steker uit de contactdoos.<br />
Reinig<strong>en</strong> v<strong>en</strong>tilator<br />
Demonteer het deksel <strong>en</strong> het v<strong>en</strong>tilatordeel volg<strong>en</strong>s de hierna<br />
g<strong>en</strong>oemde procedures. Reinig de v<strong>en</strong>tilator met water <strong>en</strong> zeep.<br />
Let op: Voorkom dat er water of zeep in de motor komt. Voorkom<br />
onbalans; zorg dat al het vuil is verwijderd.
Deksel<br />
Onder het deksel bevind<strong>en</strong> zich het typeplaatje, het v<strong>en</strong>tilatordeel<br />
<strong>en</strong> de aansturing van de motor.<br />
• Demontage: Draai het deksel van de v<strong>en</strong>tilator zodanig dat de<br />
uitsparing in het deksel bij de persmond komt te zitt<strong>en</strong>. Maak<br />
nu de klikverbinding in het midd<strong>en</strong> van het deksel m.b.v. e<strong>en</strong><br />
schroev<strong>en</strong>draaier los <strong>en</strong> neem het deksel eraf (zie afb. A).<br />
• Montage: Zorg dat de del<strong>en</strong> onder het deksel goed zijn<br />
gemonteerd <strong>en</strong> niet bov<strong>en</strong> de rand uitstek<strong>en</strong>. Houd het deksel<br />
zodanig dat de uitsparing in het deksel teg<strong>en</strong>over de uitvoer<br />
van de snoer<strong>en</strong> komt te zitt<strong>en</strong>. Druk nu het deksel op de<br />
klikverbinding. Controleer of het deksel goed vast zit.<br />
V<strong>en</strong>tilatordeel<br />
Verwijder het v<strong>en</strong>tilatordeksel alvor<strong>en</strong>s het v<strong>en</strong>tilatordeel te<br />
demonter<strong>en</strong>.<br />
• Demontage: Steek e<strong>en</strong> schroev<strong>en</strong>draaier (ca. 8mm) tuss<strong>en</strong><br />
e<strong>en</strong> klikverbinding van het v<strong>en</strong>tilatordeel <strong>en</strong> het v<strong>en</strong>tilatorhuis<br />
<strong>en</strong> beweeg het v<strong>en</strong>tilatordeel iets omhoog (zie afb. B).<br />
De klikverbinding gaat dan los. Maak met behulp van de<br />
schroev<strong>en</strong>draaier ook de andere klikverbinding<strong>en</strong> los <strong>en</strong> neem<br />
het v<strong>en</strong>tilatordeel rechtstandig uit het v<strong>en</strong>tilatorhuis.<br />
• Montage: Houd het v<strong>en</strong>tilatordeel recht bov<strong>en</strong> het<br />
v<strong>en</strong>tilatorhuis <strong>en</strong> wel zodanig dat de snoeruitvoer recht bov<strong>en</strong><br />
e<strong>en</strong> uitsparing zit. Duw nu het v<strong>en</strong>tilatordeel zo recht mogelijk<br />
in het huis zodat het op alle punt<strong>en</strong> goed vast klikt.<br />
Aansturingsprint<br />
De aansturingsprint bevindt zich aan de bov<strong>en</strong>zijde van het<br />
v<strong>en</strong>tilatordeel. Verwijder daarom eerst het v<strong>en</strong>tilatordeksel<br />
alvor<strong>en</strong>s de aansturingsprint te demonter<strong>en</strong>.<br />
• Demontage: Druk met e<strong>en</strong> schroev<strong>en</strong>draaier e<strong>en</strong> klikverbinding<br />
aan één kant van de aansturingsprint opzij <strong>en</strong> trek tegelijkertijd<br />
de print iets omhoog (zie afb. E). Maak nu ook de andere<br />
klikverbinding<strong>en</strong> los. Neem de print uit het v<strong>en</strong>tilatordeel <strong>en</strong><br />
koppel de aansluiting<strong>en</strong> los.<br />
• Montage: Sluit de bedrading van de v<strong>en</strong>tilator aan op de<br />
aansturingsprint. Druk de print recht tuss<strong>en</strong> de klikverbinding<strong>en</strong><br />
op het v<strong>en</strong>tilatordeel. Druk de print nu aan totdat de<br />
verbinding<strong>en</strong> vast klikk<strong>en</strong>. Zorg dat de printplaat niet buigt!<br />
SPECIFICATIES<br />
Voedingsspanning:<br />
Minimum<br />
omgevingstemperatuur:<br />
Maximum<br />
omgevingstemperatuur:<br />
Luchtvochtigheid<br />
(continu):<br />
230V±10%,<br />
<strong>en</strong>kelfase, 50Hz<br />
-10°C<br />
+40°C<br />
95% (motor), niet cond<strong>en</strong>ser<strong>en</strong>d<br />
85% (elektronica), niet<br />
cond<strong>en</strong>ser<strong>en</strong>d
EG-verklaring van overe<strong>en</strong>stemming<br />
Zehnder Group Nederland B.V.<br />
Ling<strong>en</strong>straat 2<br />
8028 PM Zwolle-NL<br />
Tel.: +31 (0)38-4296911<br />
Fax: +31 (0)38-4225694<br />
Handelsregister Zwolle 05022293<br />
Omschrijving: Woonhuisv<strong>en</strong>tilator <strong>CMFe</strong><br />
Voldoet aan richtlijn<strong>en</strong>: Machinerichtlijn (2006/42/EEG)<br />
Laagspanningsrichtlijn (93/68/EEG)<br />
EMC richtlijn (98/13/EEG)<br />
Zwolle, 12 februari 2010<br />
Zehnder Group Nederland B.V.<br />
E. van Heuveln,<br />
Algeme<strong>en</strong> Directeur
INTRODUCTION<br />
Ce manuel a été rédigé pour les utilisateurs et les installateurs du<br />
système de v<strong>en</strong>tilation mécanique du type <strong>CMFe</strong>.<br />
Ce manuel conti<strong>en</strong>t des informations importantes sur la<br />
commande et l’installation du <strong>CMFe</strong>, un modèle équipé d’un<br />
moteur à courant continu.<br />
Objectif<br />
Le <strong>CMFe</strong> a été conçu pour la v<strong>en</strong>tilation des habitations telle<br />
que décrit dans ce manuel. Les informations dans ce manuel<br />
serapport<strong>en</strong>t à l’utilisation du <strong>CMFe</strong>.<br />
Garantie et responsabilité<br />
J.E. StorkAir fournit la garantie pour une période de 24 mois<br />
après l’installation pour un maximum de 30 mois après la date de<br />
production de l’R <strong>CMFe</strong>. La garantie est annulée si:<br />
• l’installation n’a pas été effectuée suivant les instructions <strong>en</strong><br />
vigueur,<br />
• les défauts sont dus à un mauvais raccordem<strong>en</strong>t, à une<br />
utilisation incompét<strong>en</strong>te ou à l’<strong>en</strong>crassem<strong>en</strong>t du <strong>CMFe</strong>,<br />
• des modifications ont été apportées au câblage ou si <strong>en</strong> des<br />
réparations ont été effectuées par des tiers.<br />
Les frais de (dé)montage sur place sont exclus des clauses de<br />
garantie. Si un défaut se produisait dans le délai de garantie, il<br />
faut alors le signaler à l’installateur.<br />
Si le <strong>CMFe</strong>, les composants ou les procédures sont utilisés à des<br />
fins autres que décrites dans le manuel, ou si des modifications<br />
ont été apportées au <strong>CMFe</strong> sans notre autorisation, le marquage<br />
CE devi<strong>en</strong>dra nul et non av<strong>en</strong>u.<br />
J.E. StorkAir se réserve le droit de modifier la construction et/<br />
ou configuration de ses produits à tout mom<strong>en</strong>t sans l’obligation<br />
d’adapter des produits déjà fournis. Les données dans ce manuel<br />
sont basées sur les informations les plus réc<strong>en</strong>tes. Les données<br />
peuv<strong>en</strong>t être modifiées ultérieurem<strong>en</strong>t sans préavis.<br />
Démontage et évacuation<br />
Démontage et évacuation<br />
A la fin du cycle de vie du <strong>CMFe</strong>, l’utilisateur est responsable<br />
du démontage sécurisé du <strong>CMFe</strong> et de l’évacuation des<br />
composants conformém<strong>en</strong>t aux lois et aux arrêtées <strong>en</strong> vigueur.<br />
SOMMAIRE ET PRINCIPE DE FONCTIONNEMENT<br />
Le système de v<strong>en</strong>tilation mécanique de J.E. StorkAir est<br />
composé d’un v<strong>en</strong>tilateur monté de façon c<strong>en</strong>trale, d’un système<br />
de canaux et de bouches de v<strong>en</strong>tilation dans la cuisine, la salle<br />
de bains, les toilettes et dans les autres pièces à v<strong>en</strong>tiler.<br />
Le <strong>CMFe</strong> est commandé par une tinterrupteur à 3 positions.<br />
Le <strong>CMFe</strong> peut égalem<strong>en</strong>t être doté d’une hotte d’aspiration<br />
non motorisée, placée au-dessus de la cuisinière. Grâce à ces<br />
possibilités de réglage, les odeurs de cuisine et l’humidité sont<br />
évacuées de façon optimale par le système c<strong>en</strong>tral.<br />
Lors de la conception du système de v<strong>en</strong>tilation, on s’est basé<br />
sur un fonctionnem<strong>en</strong>t de l’installation de 24 heures sur 24. Afin<br />
de pouvoir économiser l’énergie, le v<strong>en</strong>tilateur est équipé d’un<br />
électromoteur avec une consommation d’électricité basse.<br />
DANGERS ÉLECTRIQUES<br />
P<strong>en</strong>dant l’installation ou les travaux d’<strong>en</strong>treti<strong>en</strong> il existe des<br />
risques de chocs électriques. Pr<strong>en</strong>ez les dispositions de sécurité<br />
suivantes avant de comm<strong>en</strong>cer l’installation ou l’<strong>en</strong>treti<strong>en</strong>:<br />
• Arrêtez ou débranchez toujours le système avant d’effectuer<br />
des travaux d’<strong>en</strong>treti<strong>en</strong> au <strong>CMFe</strong>.<br />
• Remettez le système <strong>en</strong> marche ou branchez le système après<br />
l’installation du <strong>CMFe</strong> et la fermeture du couvercle.<br />
DÉCHARGE ÉLECTROSTATIQUE<br />
Si des cartes de circuit imprimé avec des composants<br />
doiv<strong>en</strong>t être remplacées, il existe un risque de décharge<br />
électrostatique qui peut <strong>en</strong>dommager les cartes de circuit<br />
imprimé. Des mesures contre les décharges électrostatiques<br />
comme un bracelet mis à la terre s’impos<strong>en</strong>t lors de la<br />
manipulation des cartes de circuit imprimé.<br />
DANGERS MÉCANIQUES<br />
P<strong>en</strong>dant l’installation ou les travaux d’<strong>en</strong>treti<strong>en</strong> il existe des<br />
risques de blessures provoqués par les pièces tournantes. C’est<br />
pourquoi il ne faut jamais ouvrir le <strong>CMFe</strong> ou débrancher les<br />
tuyaux lorsque le <strong>CMFe</strong> est <strong>en</strong> service.
UTILISATION<br />
Afin de garantir le bon fonctionnem<strong>en</strong>t du <strong>CMFe</strong> il faut remplir<br />
certaines conditions importantes:<br />
• S’assurer d’une arrivée d’air suffisante. Ouvrez une f<strong>en</strong>être<br />
basculante ou les grilles d’aération au-dessus des f<strong>en</strong>êtres.<br />
• Si la maison est équipée d’orifices d’arrivée d’air non<br />
verrouillables commes des grilles d’aération au-dessus<br />
des f<strong>en</strong>êtres, il faut les laisser ouvertes. Ils ne doiv<strong>en</strong>t pas<br />
êtrecouverts ni obstrués.<br />
Si une hotte d’aspiration non motorisée a été installée au-dessus<br />
de la cuisinière, le <strong>CMFe</strong> peut être pilotée à l’aide de l’interrupteur<br />
de la hotte d’aspiration. Ceci permet de changer les positions<br />
haute (du mode cuisine), moy<strong>en</strong>ne et basse du système.<br />
Dans l’abs<strong>en</strong>ce d’une hotte d’aspiration non motorisée, un<br />
interrupteur à trois positions est installé sur le mur de la cuisine<br />
pour <strong>en</strong>cl<strong>en</strong>cher le <strong>CMFe</strong> dans les trois différ<strong>en</strong>tes positions.<br />
Il est interdit de raccorder une hotte d’aspiration motorisée<br />
au système.<br />
INFORMATIONS POUR L’INSTALLATEUR<br />
Le <strong>CMFe</strong> est composé d’un caisson de v<strong>en</strong>tilateur cont<strong>en</strong>ant<br />
une volute. La partie v<strong>en</strong>tilateur est montée dans le caisson du<br />
v<strong>en</strong>tilateur et compr<strong>en</strong>d l’<strong>en</strong>semble moteur/ailette, la commande<br />
électrique et la plaque signalétique.<br />
Raccords mécaniques<br />
Le <strong>CMFe</strong> est équipé de cinq raccords d’aspiration et un raccord<br />
de refoulem<strong>en</strong>t. Trois raccords d’aspiration sont bouchés <strong>en</strong><br />
standard. Quatre raccords sont situés aux côtés du <strong>CMFe</strong> et un<br />
raccord est situé sur la face arrière du système.<br />
Le raccord de base et le raccord de refoulem<strong>en</strong>t doiv<strong>en</strong>t<br />
toujours être connectés à un conduit avec une longueur d’au<br />
moins 90 cm.<br />
L’installation doit être montée avec le moins de résistance<br />
possible à l’air et l’abs<strong>en</strong>ce de fuites. L’utilisation de conduits<br />
flexibles doit être réduite au minimum. Les ouvertures non<br />
utilisées du coté d’aspiration doiv<strong>en</strong>t être bouchées. La bouche<br />
de refoulem<strong>en</strong>t doit toujours être raccordée. Installez le <strong>CMFe</strong> au<br />
mur ou au plafond avec une masse suffisante.<br />
Raccordem<strong>en</strong>ts électriques<br />
Le <strong>CMFe</strong> doit être raccordé conformém<strong>en</strong>t aux normes NEN 1010<br />
et aux prescriptions locales.<br />
Le <strong>CMFe</strong> est équipé d’un fil avec une fiche Perilex pour le<br />
raccordem<strong>en</strong>t électrique (voir l’illustration D). Ne branchez la<br />
fiche Perilex dans la prise murale qu’une fois que l’installation<br />
est complète. L’appareil ne convi<strong>en</strong>t pas à un raccordem<strong>en</strong>t au<br />
réseau triphasé.<br />
L’appareil peut être réglé <strong>en</strong> standard sur trois positions et doit<br />
être raccordé selon le schéma ci-joint (voir l’illustration C).<br />
La carte de commande est équipée d’un connecteur 0-10 V<br />
CC qui permet de commander le système de v<strong>en</strong>tilation par un<br />
système de commande externe.<br />
Le raccordem<strong>en</strong>t d’un système de commande externe ne<br />
peut jamais être utilisé avec la télécommande radio. Ceci peut<br />
<strong>en</strong>dommager la commande électrique.<br />
Réglage des bouches<br />
Mettez le <strong>CMFe</strong> dans la position la plus haute. Fermez les<br />
f<strong>en</strong>êtres et les portes. Mettez le système dans la position la plus<br />
haute et ouvrez les bouches <strong>en</strong>tièrem<strong>en</strong>t. Mesurez la quantité<br />
d’air des bouches. Réglez le système à l’aide des interrupteurs<br />
DIP à la capacité totale requise. Réglez les bouches <strong>en</strong> fonction<br />
du débit requis par pièce. Marquez les positions des interrupteurs<br />
DIP dans le tableau.<br />
Réglages des interrupteurs DIP<br />
Des interrupteurs DIP sont embarqués sur la carte de commande<br />
et peuv<strong>en</strong>t être utilisés pour des réglages supplém<strong>en</strong>taires.<br />
Les interrupteurs 1 à 4 (voir tableau 1) permett<strong>en</strong>t une adaptation<br />
supplém<strong>en</strong>taire de la vitesse du v<strong>en</strong>tilateur à toutes les positions.<br />
Ceci peut être nécessaire dans le cas d’une utilisation de<br />
conduits d’insufflation ou d’extraction longs. Les interrupteurs<br />
5 et 6 (voir tableau 2) sont utilisés pour les réglages quand le<br />
système de v<strong>en</strong>tilation est équipé d’un système de commande<br />
externe.<br />
Att<strong>en</strong>tion: Enlever la t<strong>en</strong>sion faite pour les paramètres pr<strong>en</strong>n<strong>en</strong>t<br />
effet.<br />
ENTRETIEN PAR L’UTILISATEUR<br />
L’utilisateur doit veiller à ce que le <strong>CMFe</strong> soit inspecté chaque<br />
année par l’installateur et nettoyé si besoin.<br />
Nettoyage des bouches de v<strong>en</strong>tilation<br />
Nettoyez les bouches de v<strong>en</strong>tilation avec de l’eau savonneuse.<br />
Retirez les bouches du système de canaux.<br />
Att<strong>en</strong>tion: Faites att<strong>en</strong>tion à ce que les bouches ne soi<strong>en</strong>t pas<br />
interv<strong>en</strong>ties et que les réglages ne soi<strong>en</strong>t pas changés.<br />
ENTRETIEN PAR L’INSTALLATEUR<br />
La maint<strong>en</strong>ance doit être effectuée avec l’électromoteur coupé et<br />
la fiche débranchée.<br />
Nettoyage du v<strong>en</strong>tilateur
Démontez le capot et la partie v<strong>en</strong>tilateur selon les procédures<br />
suivantes. Nettoyez le v<strong>en</strong>tilateur avec de l’eau savonneuse.<br />
Att<strong>en</strong>tion: Faites att<strong>en</strong>tion à ce que de l’eau savonneuse ne<br />
s’infiltre pas dans le moteur. Empêchez le déséquilibre et assurezvous<br />
que toutes les impurétés ont été <strong>en</strong>levées.<br />
Couvercle<br />
La plaque signalétique, la partie v<strong>en</strong>tilateur et la commande du<br />
moteur se trouv<strong>en</strong>t sous le capot.<br />
• Démontage: Tournez le capot du v<strong>en</strong>tilateur d’une telle façon<br />
que l’échancrure dans le couvercle est situé près de la bouche<br />
de refoulem<strong>en</strong>t. Déverrouillez le dispositif de verrouillage au<br />
milieu du capot à l’aide d’un tournevis et retirez le couvercle<br />
(voir l’illustration A).<br />
• Montage: Assurez-vous que les composants sous le capot<br />
sont bi<strong>en</strong> installés et ne dépass<strong>en</strong>t pas le bord. Maint<strong>en</strong>ez le<br />
capot d’une telle façon que l’échancrure dans le couvercle<br />
se trouve <strong>en</strong> face de la sortie des fils. Enfoncez le capot<br />
maint<strong>en</strong>ant sur le dispositif de verrouillage. Vérifiez si le capot<br />
est bi<strong>en</strong> fixé.<br />
Partie v<strong>en</strong>tilateur<br />
Retirez le capot du v<strong>en</strong>tilateur avant de démonter la partie<br />
v<strong>en</strong>tilateur.<br />
• Démontage: Introduisez un tournevis (<strong>en</strong>viron 8 mm) <strong>en</strong>tre le<br />
dispositif de verrouillage de la partie v<strong>en</strong>tilateur et du caisson<br />
du v<strong>en</strong>tilateur et remontez la partie v<strong>en</strong>tilateur légèrem<strong>en</strong>t (voir<br />
l’illustration B). Le dispositif de verrouillage est déverrouillé.<br />
Désserrez aussi les autres dispositifs de verrouillage à l’aide<br />
du tournevis et retirez la partie v<strong>en</strong>tilateur verticalem<strong>en</strong>t du<br />
caisson du v<strong>en</strong>tilateur.<br />
• Montage: T<strong>en</strong>ez la partie v<strong>en</strong>tilateur droit au-dessus du caisson<br />
du v<strong>en</strong>tilateur de sorte que la sortie de fil se trouve au-dessus<br />
d’une échancrure. Poussez la partie v<strong>en</strong>tilateur maint<strong>en</strong>ant<br />
droit dans le caisson de sorte que la pièce s’<strong>en</strong>clique dans<br />
tous les points.<br />
Carte de commande<br />
La carte de commande est montée sur la face supérieure de la<br />
partie v<strong>en</strong>tilateur. Retirez donc d’abord le capot du v<strong>en</strong>tilateur<br />
avant de démonter la carte de commande.<br />
• Démontage: Poussez un dispositif de verrouillage à l’aide d’un<br />
tournevis sur un côté de la carte de commande sur le côté et<br />
tirez la carte de commande légèrem<strong>en</strong>t vers le haut <strong>en</strong> même<br />
temps (voir l’illustration E). Débranchez maint<strong>en</strong>ant aussi les<br />
autres dispositifs de verrouillage. Retirez la carte de la partie<br />
v<strong>en</strong>tilateur et débranchez les raccordem<strong>en</strong>ts.<br />
• Montage: Branchez le câblage du v<strong>en</strong>tilateur sur la carte<br />
de commande. Poussez la carte de façon droite <strong>en</strong>tre les<br />
dispositifs de verrouillage sur la partie v<strong>en</strong>tilateur. Poussez<br />
la carte maint<strong>en</strong>ant jusqu’à ce que les raccordem<strong>en</strong>ts<br />
s’<strong>en</strong>cliqu<strong>en</strong>t. Assurez-vous que la carte de circuit imprimé ne<br />
se plie pas !<br />
CARACTÉRISTIQUES<br />
T<strong>en</strong>sion<br />
d’alim<strong>en</strong>tation:<br />
Température<br />
ambiante minimale:<br />
Température<br />
ambiante maximale:<br />
Humidité<br />
atmosphérique<br />
(continue):<br />
230 V ±10 %, monophasé, 50 Hz<br />
-10°C<br />
+40°C<br />
95 % (moteur), non cond<strong>en</strong>sée<br />
85 % (électronique), non<br />
cond<strong>en</strong>sée
Déclaration CE de conformité<br />
Zehnder Group Nederland B.V.<br />
Ling<strong>en</strong>straat 2<br />
8028 PM Zwolle-NL<br />
Tel.: +31 (0)38-4296911<br />
Fax: +31 (0)38-4225694<br />
Registre du commerce Zwolle 05022293<br />
Description de l’appareil: Résid<strong>en</strong>ce fan <strong>CMFe</strong><br />
Conforme aux directives: Directive machines (2006/42/EEG)<br />
Directive basse t<strong>en</strong>sion (93/68/EEG)<br />
Directive compatibilité<br />
électromagnétique (98/13/EEG)<br />
Zwolle, le 12 Février 2010<br />
Zehnder Group Nederland B.V.<br />
E. van Heuveln,<br />
Présid<strong>en</strong>t-directeur général
INTRODUCTION<br />
This manual is int<strong>en</strong>ded for users and fitters of mechanical<br />
v<strong>en</strong>tilation system type <strong>CMFe</strong>.<br />
This manual contains important information about the operation<br />
and installation of the <strong>CMFe</strong>, a DC motor version.<br />
Objective<br />
The <strong>CMFe</strong> is designed for the sole purpose of domestic<br />
v<strong>en</strong>tilation as described in this manual. The information in this<br />
manual applies specifically to the correct use of the <strong>CMFe</strong>.<br />
Guarantee and liability<br />
J.E. StorkAir provides warranty for a period of 24 months after<br />
installation to a maximum of 30 months after production date of<br />
the <strong>CMFe</strong>.<br />
The warranty becomes invalid if:<br />
• the installation has not be<strong>en</strong> carried out according to the<br />
applicable regulations,<br />
• the defects are due to incorrect connection, or inexpert use or<br />
contamination of the <strong>CMFe</strong>,<br />
• unauthorised person or persons have either altered the wiring<br />
or made repairs.<br />
On-site dismantling and assembly costs are not covered by the<br />
terms of the warranty. If a defect occurs during the warranty<br />
period, please notify the fitter.<br />
If the <strong>CMFe</strong> compon<strong>en</strong>ts or procedures are applied in a way not<br />
described in this manual, or if alterations to the <strong>CMFe</strong> are made<br />
without our permission, th<strong>en</strong> the CE marking becomes invalid.<br />
J.E. StorkAir retains the right to change the construction and/or<br />
configuration of its products at any time without being obliged<br />
to alter previously delivered products. The details giv<strong>en</strong> in this<br />
manual refer to the latest information. They may be changed at a<br />
later date without prior warning.<br />
Dismantling and removal.<br />
At the <strong>en</strong>d of the lifespan of the <strong>CMFe</strong>, the user is<br />
responsible for the safe dismantling of the <strong>CMFe</strong> and for<br />
removal of the parts in compliance with locally applicable<br />
legislation and statutes.<br />
SUMMARY AND PRINCIPLE<br />
The mechanical v<strong>en</strong>tilation system of J.E. StorkAir consists of<br />
a c<strong>en</strong>trally located fan, a duct system and v<strong>en</strong>tilation valves in<br />
kitch<strong>en</strong>, bathroom, toilet and other rooms requiring v<strong>en</strong>tilation.<br />
The <strong>CMFe</strong> is operated with an 3-position switch. The <strong>CMFe</strong> can<br />
also be equipped with a non-powered extractor hood, positioned<br />
above the cooker. Correct use of these settings will <strong>en</strong>sure<br />
optimal extraction of cooking smells and moisture through the<br />
c<strong>en</strong>tral system.<br />
The system has be<strong>en</strong> designed to be in operation 24 hours a day.<br />
For <strong>en</strong>ergy saving purposes, a low-curr<strong>en</strong>t electric motor has<br />
be<strong>en</strong> fitted.<br />
ELECTRICAL DANGERS<br />
There is a risk of electric shock during installation or<br />
maint<strong>en</strong>ance. Acquaint yourself with the following safety<br />
measures prior to comm<strong>en</strong>cing installation or maint<strong>en</strong>ance:<br />
• Always disconnect the power first or remove the plug from<br />
the connection box prior to carrying out maint<strong>en</strong>ance on the<br />
<strong>CMFe</strong>.<br />
• Only reconnect electrical power or re-insert the plug in the<br />
connection box wh<strong>en</strong> the <strong>CMFe</strong> has be<strong>en</strong> fitted and the cover<br />
closed.<br />
ELECTROSTATIC DISCHARGE (ESD)<br />
There is a risk that printed circuits (PCBs) with compon<strong>en</strong>ts<br />
might be damaged by an electrostatic discharge wh<strong>en</strong> being<br />
exchanged. For this reason, always take ESD-inhibiting<br />
measures wh<strong>en</strong> dealing with PCBs, such as wearing an antistatic<br />
wristband.<br />
MECHANICAL DANGERS<br />
There is a risk of injury from moving parts during installation<br />
or maint<strong>en</strong>ance. So never op<strong>en</strong> the <strong>CMFe</strong> or uncouple hoses<br />
while the <strong>CMFe</strong> is in operation.<br />
OPERATION<br />
A number of important conditions must be met to <strong>en</strong>sure the<br />
<strong>CMFe</strong> functions properly:<br />
• Ensure a suffici<strong>en</strong>t supply of air. For example, op<strong>en</strong> a small<br />
window or a v<strong>en</strong>tilation grille above a window.<br />
• If the dwelling is fitted with non-lockable v<strong>en</strong>tilation op<strong>en</strong>ings,<br />
such as air grilles above the windows, th<strong>en</strong> leave these op<strong>en</strong>.<br />
Do not cover or block them.
If a non-powered extractor hood is installed above the cooker,<br />
th<strong>en</strong> the <strong>CMFe</strong> can be operated with the switch on the extractor<br />
hood itself. This allows the system to be switched to the high<br />
(cooking), medium or low setting.<br />
Wh<strong>en</strong> a non-powered extractor hood is not fitted, a 3-position<br />
switch can be fitted to the kitch<strong>en</strong> wall in order to switch the<br />
<strong>CMFe</strong> betwe<strong>en</strong> the three differ<strong>en</strong>t settings.<br />
It is not permitted to connect a motorised extractor hood to<br />
the system.<br />
INFORMATION FOR THE FITTER<br />
The <strong>CMFe</strong> consists of a fan casing which includes a volute<br />
casing. The fan casing accommodates the fan section, which<br />
incorporates the motor/impeller combination, the electrical<br />
control unit and the id<strong>en</strong>tification plate.<br />
Mechanical connections<br />
The <strong>CMFe</strong> is fitted with five suction ports and one delivery port.<br />
Three suction ports are blanked off as standard. Four ports are<br />
located on the sides of the <strong>CMFe</strong> and one port at the rear.<br />
The lower port and the delivery port must always be<br />
connected to a duct of least 90 cm long.<br />
Assemble the system with minimum air resistance and free<br />
from air leakage. Minimalise the use of flexible ducting. Unused<br />
suction ports must be blanked off. Always connect the delivery<br />
port. Mount the <strong>CMFe</strong> on a suffici<strong>en</strong>tly sturdy wall or ceiling.<br />
Electrical connections<br />
The <strong>CMFe</strong> must be connected in conformity to NEN 1010 and the<br />
locally applicable regulations.<br />
The <strong>CMFe</strong> is fitted with a cable and a Perilex plug for electrical<br />
connection (see illustration D). Do not plug in the Perilex plug until<br />
the <strong>en</strong>tire system has be<strong>en</strong> fitted. The system is not suited for<br />
connection to three-phase power supplies.<br />
The system has 3 settings as standard and should be connected<br />
according to the <strong>en</strong>closed diagram (see illustration C).<br />
The control PCB is equipped with a 0-10VDC connector, so the<br />
v<strong>en</strong>tilation system can also be controlled by an external control<br />
system.<br />
An external control system may never be connected or used<br />
in combination with the RF remote control. This could result in<br />
damage to the electronic control system.<br />
Valve set-up<br />
Switch the <strong>CMFe</strong> to the highest position. Close windows and<br />
doors. Set the system to its highest position and op<strong>en</strong> the<br />
valves to their maximum. Measure the total air volume at the<br />
valves. Adjust the system to the correct total capacity using the<br />
dipswitches. Regulate the valves to the required flow per room.<br />
Tick the position of the dipswitches in the table.<br />
Settings DIP-switches<br />
The control PCB has some (DIP) switches with which a number of<br />
extra settings can be set. Using the switches 1 to 4 (see table 1),<br />
the speed of the fan at each position can be adjusted further. This<br />
might be necessary if long supply and exhaust ducts are used.<br />
Switches 5 and 6 (see table 2) are used to set external controls<br />
for the v<strong>en</strong>tilation system.<br />
Take note: For the settings to take effect remove the power.<br />
MAINTENANCE BY THE USER<br />
The user should <strong>en</strong>sure that the <strong>CMFe</strong> is checked annually by the<br />
fitter and cleaned wh<strong>en</strong> necessary.<br />
Cleaning v<strong>en</strong>tilation valves<br />
Clean the v<strong>en</strong>tilation valves with soap and water. For this<br />
purpose, remove the valves from the duct system.<br />
Take note: Do not mix the valves and do not alter any settings.<br />
MAINTENANCE BY THE FITTER<br />
Maint<strong>en</strong>ance should be carried out wh<strong>en</strong> the motor is electrically<br />
isolated and the plug disconnected.<br />
Cleaning fan<br />
Dismantle the cover and the fan according to the procedures<br />
giv<strong>en</strong> below. Clean the fan with soap and water.<br />
Take note: Prev<strong>en</strong>t water or soap getting into the motor.<br />
Prev<strong>en</strong>t imbalance; remove the grime.
Cover<br />
The id<strong>en</strong>tification plate, the fan and the motor control unit are<br />
located below the cover.<br />
• Dismantling: Rotate the fan cover until the recess in the<br />
cover is adjac<strong>en</strong>t to the delivery mouth. Now loos<strong>en</strong> the click<br />
connector in the c<strong>en</strong>tre of the cover using a screwdriver and<br />
th<strong>en</strong> remove the cover (see illustration A).<br />
• Assembly: Ensure that parts under the cover are correctly<br />
assembled and do not ext<strong>en</strong>d above the rim. Hold the cover in<br />
such a way that the recess in the cover is adjac<strong>en</strong>t to the cable<br />
output. Now press the cover on the click connectors. Check<br />
that the cover is properly secured.<br />
Fan<br />
Remove the fan cover prior to dismantling the fan.<br />
• Dismantling: Insert a screwdriver (about 8mm) betwe<strong>en</strong> one of<br />
the fan’s click connectors and the fan casing and raise the fan<br />
slightly (see illustration B). The click connector th<strong>en</strong> unclicks.<br />
Using the screwdriver, unclick the other click connectors and<br />
remove the fan vertically from the fan casing.<br />
• Assembly: Hold the fan directly above the fan casing and in<br />
such a way that the cable output is precisely adjac<strong>en</strong>t to the<br />
recess. Now press the fan as upright as possible into its casing<br />
so that it clicks securely into place.<br />
Control PCB<br />
The control PCB can be found on top of the fan unit. Remove the<br />
fan cover before dismantling the control PCB.<br />
• Dismantling: Using a screwdriver, apply lateral pressure<br />
to a click connector on one side of the control PCB and<br />
simultaneously lift the PCB slightly (see illustration E). Th<strong>en</strong> free<br />
the other click connectors. Remove the PCB from the fan unit<br />
and uncouple the connectors.<br />
• Assembly: Connect the fan wiring to the PCB. Press the PCB<br />
upright betwe<strong>en</strong> the click connectors on the fan unit. Th<strong>en</strong><br />
press it till the click connectors are fast<strong>en</strong>ed. Do not allow the<br />
PCB to b<strong>en</strong>d!<br />
SPECIFICATIONS<br />
Power supply voltage:<br />
Minimum ambi<strong>en</strong>t<br />
temperature<br />
Maximum ambi<strong>en</strong>t<br />
temperature:<br />
Air volume<br />
(continued):<br />
230V±10%,<br />
single-phase, 50Hz<br />
-10°C<br />
+40°C<br />
95% (motor), non-cond<strong>en</strong>sing<br />
85% (electronics),<br />
non-cond<strong>en</strong>sing
EEC declaration of conformity<br />
Zehnder Group Nederland B.V.<br />
Ling<strong>en</strong>straat 2<br />
8028 PM Zwolle-NL<br />
Tel.: +31 (0)38-4296911<br />
Fax: +31 (0)38-4225694<br />
Company register Zwolle 05022293<br />
Machine description: Resid<strong>en</strong>ce Fan <strong>CMFe</strong><br />
Complies with the<br />
following directives: Machinery Directive (2006/42/EEC)<br />
Low Voltage Directive (93/68/EEC)<br />
EMC Directive (98/13/EEC)<br />
Zwolle, 12 February 2010<br />
Zehnder Group Nederland B.V.<br />
E. van Heuveln,<br />
Managing Director.
EINFÜHRUNG<br />
Diese Bedi<strong>en</strong>ungsanleitung richtet sich an B<strong>en</strong>utzer und<br />
Installateure des mechanisch<strong>en</strong> V<strong>en</strong>tilationsssystems <strong>CMFe</strong>.<br />
Diese Bedi<strong>en</strong>ungsanleitung <strong>en</strong>thält wichtige Information<strong>en</strong> über<br />
die Bedi<strong>en</strong>ung und Installation des <strong>CMFe</strong> in der Ausführung mit<br />
Gleichstrommotor.<br />
Zweck<br />
Der <strong>CMFe</strong> ist ausschließlich für die Belüftung von Wohnhäusern<br />
gemäß d<strong>en</strong> Vorgab<strong>en</strong> in dieser Bedi<strong>en</strong>ungsanleitung vorgeseh<strong>en</strong>.<br />
Die Information<strong>en</strong> in dieser Bedi<strong>en</strong>ungsanleitung basier<strong>en</strong> auf der<br />
zweckgerecht<strong>en</strong> Nutzung des Produktes <strong>CMFe</strong>.<br />
Garantie und Haftung<br />
J.E. StorkAir bietet Gewähr für ein<strong>en</strong> Zeitraum von 24<br />
Monat<strong>en</strong> nach der Installation auf maximal 30 Monate nach<br />
Herstellungsdatum der <strong>CMFe</strong>. Die Garantie erlischt, w<strong>en</strong>n:<br />
• die Installation nicht vorschriftsgemäß durchgeführt wurde<br />
• die Mängel infolge von verkehrt<strong>en</strong> Anschluss, unsachgemäßem<br />
Gebrauch oder Verschmutzung des <strong>CMFe</strong> auftret<strong>en</strong><br />
• die Verkabelung geändert wurde oder auf eig<strong>en</strong>e<br />
Verantwortung Reparatur<strong>en</strong> durchgeführt wurd<strong>en</strong><br />
Kost<strong>en</strong> für Montage bzw. Demontage vor Ort sind nicht Teil<br />
der Garantiebestimmung<strong>en</strong>. Falls währ<strong>en</strong>d der Garantiezeit ein<br />
Defekt auftritt, so muss dies dem Installateur gemeldet werd<strong>en</strong>.<br />
Werd<strong>en</strong> im <strong>CMFe</strong> Bestandteile bzw. Verfahr<strong>en</strong> in einer andere<br />
Weise verw<strong>en</strong>det als in dieser Bedi<strong>en</strong>ungsanleitung beschrieb<strong>en</strong>,<br />
oder werd<strong>en</strong> ohne unsere G<strong>en</strong>ehmigung Änderung<strong>en</strong> am <strong>CMFe</strong><br />
vorg<strong>en</strong>omm<strong>en</strong>, verfällt die Gültigkeit der CE-K<strong>en</strong>nzeichnung.<br />
J.E. StorkAir behält sich das Recht vor, die Konstruktion bzw.<br />
Konfiguration seiner Produkte jederzeit zu ändern, ohne dabei die<br />
Verpflichtung einzugeh<strong>en</strong>, zuvor gelieferte Produkte umzurüst<strong>en</strong><br />
Die Dat<strong>en</strong> in dieser Bedi<strong>en</strong>ungsanleitung beruh<strong>en</strong> auf d<strong>en</strong><br />
neuest<strong>en</strong> verfügbar<strong>en</strong> Information<strong>en</strong>. Sie könn<strong>en</strong> zu späterem<br />
Zeitpunkt ohne vorherige Warnung geändert werd<strong>en</strong>.<br />
Demontage und Entfernung<br />
Am Ende der Leb<strong>en</strong>sdauer des <strong>CMFe</strong> ist der B<strong>en</strong>utzer selbst<br />
für eine sichere Demontage des <strong>CMFe</strong> und für eine Entsorgung<br />
der Einzelteile nach d<strong>en</strong> örtlich gelt<strong>en</strong>d<strong>en</strong> Gesetz<strong>en</strong> und<br />
Verordnung<strong>en</strong> verantwortlich.<br />
ÜBERSICHT UND FUNKTIONSWEISE<br />
Das mechanische V<strong>en</strong>tilationssystem von J.E. StorkAir besteht<br />
aus einem z<strong>en</strong>tral angebracht<strong>en</strong> V<strong>en</strong>tilator, einem Kanalsystem<br />
und V<strong>en</strong>tilationsv<strong>en</strong>til<strong>en</strong> in Küche, Badezimmer, Toilette sowie in<br />
d<strong>en</strong> übrig<strong>en</strong> ev<strong>en</strong>tuell zu belüft<strong>en</strong>d<strong>en</strong> Räum<strong>en</strong>.<br />
Der <strong>CMFe</strong> wird mit Hilfe einer 3-Stuf<strong>en</strong>schalter bedi<strong>en</strong>t. Der<br />
<strong>CMFe</strong> kann auch mit einer motorlos<strong>en</strong> Dunstabzugshaube<br />
über der Kochstelle ausgestattet werd<strong>en</strong>. Dank dieser<br />
Einstellmöglichkeit<strong>en</strong> werd<strong>en</strong> Küch<strong>en</strong>gerüche und Feuchtigkeit<br />
optimal über das z<strong>en</strong>trale System nach drauß<strong>en</strong> geleitet.<br />
Bei der Entwicklung des V<strong>en</strong>tilationssystems wurde von einem<br />
24- stündig<strong>en</strong> Betrieb des Systems ausgegang<strong>en</strong>. Um möglichst<br />
sparsam mit Energie umzugeh<strong>en</strong>, wurde ein Elektromotor mit<br />
niedrigem Stromverbrauch verw<strong>en</strong>det.<br />
ELEKTRISCHE GEFAHREN<br />
Währ<strong>en</strong>d der Installation bzw. Wartung besteht<br />
Stromstoßgefahr. Vergewissern Sie sich, dass vor der Installation<br />
bzw. Wartung folg<strong>en</strong>de Sicherheitsmaßnahm<strong>en</strong> beachtet wurd<strong>en</strong>:<br />
• Schalt<strong>en</strong> Sie vor jeglich<strong>en</strong> Wartungsarbeit<strong>en</strong> am <strong>CMFe</strong> in<br />
jedem Fall die Spannung aus bzw. zieh<strong>en</strong> Sie d<strong>en</strong> Netzstecker.<br />
• Schalt<strong>en</strong> Sie die elektrische Spannung erst dann ein bzw.<br />
verbind<strong>en</strong> Sie d<strong>en</strong> Stecker erst dann mit der Steckdose, w<strong>en</strong>n<br />
der <strong>CMFe</strong> installiert und der Deckel geschloss<strong>en</strong> wurde.<br />
ELEKTROSTATISCHE ENTLADUNG (ESD)<br />
W<strong>en</strong>n Platin<strong>en</strong> mit Kompon<strong>en</strong>t<strong>en</strong> ausgetauscht werd<strong>en</strong><br />
müss<strong>en</strong>, besteht die Gefahr einer elektrostatisch<strong>en</strong> Entladung,<br />
wodurch die Platin<strong>en</strong> beschädigt werd<strong>en</strong> könnt<strong>en</strong>. Ergreif<strong>en</strong> Sie<br />
daher beim Umgang mit Platin<strong>en</strong> in jedem Fall <strong>en</strong>tsprech<strong>en</strong>de<br />
Maßnahm<strong>en</strong>, z. B. trag<strong>en</strong> eines geerdet<strong>en</strong> Armbandes.<br />
MECHANISCHE GEFAHREN<br />
Währ<strong>en</strong>d der Installation bzw. Wartung besteht<br />
Verletzungsgefahr infolge von dreh<strong>en</strong>d<strong>en</strong> Teil<strong>en</strong>. Öffn<strong>en</strong> Sie daher<br />
keinesfalls ein<strong>en</strong> in Betrieb befindlich<strong>en</strong> <strong>CMFe</strong> und klemm<strong>en</strong> Sie<br />
in einem solch<strong>en</strong> Fall auch keine Schläuche ab.
BEDIENUNG<br />
Um eine ordnungsgemäße Funktion des <strong>CMFe</strong> zu gewährleist<strong>en</strong>,<br />
müss<strong>en</strong> einige wichtige Bedingung<strong>en</strong> erfüllt werd<strong>en</strong>:<br />
• Ausreich<strong>en</strong>de Luftzufuhr sicherstell<strong>en</strong>. Öffn<strong>en</strong> Sie z. B. ein<br />
Klappf<strong>en</strong>ster bzw. die Lüftungsgitter über d<strong>en</strong> F<strong>en</strong>stern.<br />
• Ist die Wohnung mit nicht abschließbar<strong>en</strong> Luftzufuhröffnung<strong>en</strong><br />
(z. B. Lüftungsgitter über d<strong>en</strong> F<strong>en</strong>stern) ausgestattet, lass<strong>en</strong><br />
Sie diese geöffnet. Kleb<strong>en</strong> Sie diese Gitter nicht ab bzw.<br />
verstopf<strong>en</strong> Sie sie nicht.<br />
Wird eine motorlose Dunstabzugshaube über der Kochstelle<br />
montiert, wird der <strong>CMFe</strong> mit dem Schalter der Dunstabzugshaube<br />
bedi<strong>en</strong>t. Damit kann das System in der hoh<strong>en</strong> (Koch-), mittler<strong>en</strong><br />
oder niedrig<strong>en</strong> Stufe geschaltet werd<strong>en</strong>.<br />
Ist keine motorlose Dunstabzugshaube montiert, befindet<br />
sich an der Küch<strong>en</strong>wand ein 3-Stuf<strong>en</strong>schalter, mit<br />
dem der <strong>CMFe</strong> in drei Stuf<strong>en</strong> geschaltet werd<strong>en</strong> kann.<br />
Es ist nicht zulässig, eine Dunstabzugshaube mit Motor an<br />
das System anzuschließ<strong>en</strong><br />
HINWEISE FÜR DEN INSTALLATEUR<br />
Der <strong>CMFe</strong> besteht aus einem V<strong>en</strong>tilatorgehäuse, in das ein<br />
Schneck<strong>en</strong>haus aufg<strong>en</strong>omm<strong>en</strong> wurde. Im V<strong>en</strong>tilatorgehäuse<br />
ist ein V<strong>en</strong>tilatorteil montiert, in dem sich die Motor- /<br />
Rotorblattkombination, eine elektrische Steuerung und ein<br />
Typ<strong>en</strong>schild befind<strong>en</strong>.<br />
Mechanische Anschlüsse<br />
Der <strong>CMFe</strong> ist mit fünf Sauganschlüss<strong>en</strong> und einem<br />
Pressanschluss ausgestattet. Von d<strong>en</strong> Sauganschlüss<strong>en</strong><br />
sind in der Standardausführung drei verschloss<strong>en</strong>. Vier<br />
Anschlussmöglichkeit<strong>en</strong> befind<strong>en</strong> sich an d<strong>en</strong> Seit<strong>en</strong> des<br />
<strong>CMFe</strong>. Eine weitere Anschlussmöglichkeit befindet sich an der<br />
Rückseite.<br />
Der Bod<strong>en</strong>- und der Pressanschluss müss<strong>en</strong> in jedem Fall<br />
Anschluss an ein<strong>en</strong> Kanal mit einer Mindestlänge von 90 cm<br />
hab<strong>en</strong>.<br />
Die Anlage muss mit möglichst geringem Luftwiderstand und<br />
luftdicht montiert werd<strong>en</strong>. Minimier<strong>en</strong> Sie die Nutzung der<br />
flexibl<strong>en</strong> Leitung<strong>en</strong>. Verschließ<strong>en</strong> Sie die nicht verw<strong>en</strong>det<strong>en</strong><br />
Öffnung<strong>en</strong> an der Ansaugseite. Schließ<strong>en</strong> Sie in jedem Fall d<strong>en</strong><br />
Pressmund an. Montier<strong>en</strong> Sie d<strong>en</strong> <strong>CMFe</strong> an einer Wand bzw.<br />
Decke mit ausreich<strong>en</strong>d Masse.<br />
Elektrische Anschlüsse<br />
Der <strong>CMFe</strong> muss gemäß NEN 1010 und im Einklang mit d<strong>en</strong><br />
örtlich<strong>en</strong> Vorschrift<strong>en</strong> angeschloss<strong>en</strong> werd<strong>en</strong>.<br />
Der <strong>CMFe</strong> ist für d<strong>en</strong> elektrisch<strong>en</strong> Anschluss mit einem Kabel und<br />
Perilex-Stecker verseh<strong>en</strong> (siehe Abb. D). Nur d<strong>en</strong> Perilex-Stecker<br />
in die Steckdose steck<strong>en</strong>, nachdem alles installiert wurde. Das<br />
Gerät ist nicht für d<strong>en</strong> Anschluss an ein Drehstromnetz geeignet.<br />
Das Gerät lässt sich in der Standardausführung in drei Stuf<strong>en</strong><br />
schalt<strong>en</strong> und muss in Übereinstimmung mit dem beilieg<strong>en</strong>d<strong>en</strong><br />
Schaltplan angeschloss<strong>en</strong> werd<strong>en</strong> (siehe Abb. C).<br />
Die Steuerplatine ist mit einem 0-10VDC-Stecker ausgestattet,<br />
der eine Steuerung des V<strong>en</strong>tilationssystems auch über ein<br />
externes Steuersystem ermöglicht.<br />
Bei Anschluss eines extern<strong>en</strong> Steuersystems darf die<br />
RF-Fernbedi<strong>en</strong>ung keinesfalls verw<strong>en</strong>det werd<strong>en</strong>. Hierdurch<br />
könnte die elektronische Steuerung beschädigt werd<strong>en</strong>.<br />
Einstellung der V<strong>en</strong>tile<br />
Schalt<strong>en</strong> Sie d<strong>en</strong> <strong>CMFe</strong> auf die höchste Stufe. Schließ<strong>en</strong> Sie<br />
F<strong>en</strong>ster und Tür<strong>en</strong>. Stell<strong>en</strong> Sie das System auf die höchste Stufe<br />
ein und öffn<strong>en</strong> Sie die V<strong>en</strong>tile maximal. Misst d<strong>en</strong> gesamt<strong>en</strong><br />
Volum<strong>en</strong>strom in d<strong>en</strong> V<strong>en</strong>til<strong>en</strong>. Stell<strong>en</strong> Sie das System mit Hilfe<br />
der DIP-Schalter auf die <strong>en</strong>tsprech<strong>en</strong>de Gesamtkapazität ein.<br />
Stell<strong>en</strong> Sie die V<strong>en</strong>tile auf d<strong>en</strong> richtig<strong>en</strong> Durchfluss je Raum ein.<br />
Kreuz<strong>en</strong> Sie die Stellung<strong>en</strong> der DIP-Schalter in der Tabelle an.<br />
Einstellung<strong>en</strong> der DIP-Schalter<br />
Auf der Steuerplatine sind einige (DIP-)Schalter vorhand<strong>en</strong>, mit<br />
d<strong>en</strong><strong>en</strong> einige zusätzliche Einstellung<strong>en</strong> vorg<strong>en</strong>omm<strong>en</strong> werd<strong>en</strong><br />
könn<strong>en</strong>. Mit d<strong>en</strong> Schaltern 1 bis 4 (siehe Tab. 1) kann die Drehzahl<br />
des V<strong>en</strong>tilators bei sämtlich<strong>en</strong> Stuf<strong>en</strong> noch zusätzlich angeglich<strong>en</strong><br />
werd<strong>en</strong>. Dies könnte erforderlich sein, w<strong>en</strong>n lange Luftzufuhrbzw.<br />
Luftableitungskanäle verw<strong>en</strong>det werd<strong>en</strong>. Schalter 5 und<br />
6 (siehe Tab. 2) werd<strong>en</strong> für die Einstellung<strong>en</strong> bei einer extern<strong>en</strong><br />
Steuerung des V<strong>en</strong>tilationssystems verw<strong>en</strong>det.<br />
Achtung: Entfern<strong>en</strong> Sie die Spannung für die vorg<strong>en</strong>omm<strong>en</strong><strong>en</strong><br />
Einstellung<strong>en</strong> wirksam werd<strong>en</strong>.<br />
WARTUNG DURCH DEN BENUTZER<br />
Der B<strong>en</strong>utzer hat darauf zu acht<strong>en</strong>, dass der <strong>CMFe</strong> jährlich vom<br />
Installateur überprüft und ggf. gereinigt wird.<br />
Reinigung der V<strong>en</strong>tilationsv<strong>en</strong>tile<br />
Reinig<strong>en</strong> Sie die V<strong>en</strong>tilationsv<strong>en</strong>tile mit Wasser und Seife.<br />
Entfern<strong>en</strong> Sie hierzu die V<strong>en</strong>tile aus dem Kanalsystem.<br />
Achtung: Acht<strong>en</strong> Sie darauf, dass die V<strong>en</strong>tile nicht untereinander<br />
ausgetauscht werd<strong>en</strong> und dass die Einstellung<strong>en</strong> nicht geändert<br />
werd<strong>en</strong>.
WARTUNG DURCH DEN INSTALLATEUR<br />
Die Wartung hat bei elektrisch ausgeschaltetem Motor und<br />
gezog<strong>en</strong>em Netzstecker zu erfolg<strong>en</strong>.<br />
Reinig<strong>en</strong> des V<strong>en</strong>tilators<br />
Demontier<strong>en</strong> Sie d<strong>en</strong> Deckel und d<strong>en</strong> V<strong>en</strong>tilatorteil nach d<strong>en</strong><br />
nachsteh<strong>en</strong>d beschrieb<strong>en</strong><strong>en</strong> Verfahr<strong>en</strong>. Reinig<strong>en</strong> Sie d<strong>en</strong><br />
V<strong>en</strong>tilator mit Wasser und Seife.<br />
Achtung: Acht<strong>en</strong> Sie darauf, dass Wasser und Seife nicht in d<strong>en</strong><br />
Motor gelang<strong>en</strong>. Verhindern Sie Unwucht. Acht<strong>en</strong> Sie darauf,<br />
dass sämtlicher Schmutz <strong>en</strong>tfernt wurde.<br />
Abdeckung<br />
Unter dem Deckel befind<strong>en</strong> sich das Typ<strong>en</strong>schild und die<br />
Steuerung des Motors.<br />
• Demontage: Dreh<strong>en</strong> Sie d<strong>en</strong> Deckel des V<strong>en</strong>tilators so, dass<br />
sich die Aussparung im Deckel am Pressmund befindet.<br />
Lockern Sie anschließ<strong>en</strong>d die Klickverbindung in der Mitte mit<br />
Hilfe eines Schraub<strong>en</strong>ziehers und nehm<strong>en</strong> Sie d<strong>en</strong> Deckel ab<br />
(siehe Abb. A).<br />
• Montage: Acht<strong>en</strong> Sie darauf, dass die Teile unter dem Deckel<br />
ord<strong>en</strong>tlich montiert sind und nicht über d<strong>en</strong> Rand hinaus rag<strong>en</strong>.<br />
Halt<strong>en</strong> Sie d<strong>en</strong> Deckel so, dass die Aussparung des Deckels<br />
d<strong>en</strong> Kabeln geg<strong>en</strong>über liegt. Drück<strong>en</strong> Sie nun d<strong>en</strong> Deckel auf<br />
die Klickverbindung. Kontrollier<strong>en</strong> Sie, ob der Deckel ord<strong>en</strong>tlich<br />
fest sitzt.<br />
V<strong>en</strong>tilatorteil<br />
Entfern<strong>en</strong> Sie d<strong>en</strong> V<strong>en</strong>tilatordeckel, bevor Sie das V<strong>en</strong>tilatorteil<br />
demontier<strong>en</strong>.<br />
• Demontage: Steck<strong>en</strong> Sie ein<strong>en</strong> Schraub<strong>en</strong>dreher (ca. 8mm<br />
zwisch<strong>en</strong> eine Klickverbindung des V<strong>en</strong>tilatorteils und das<br />
V<strong>en</strong>tilatorgehäuse und beweg<strong>en</strong> Sie das V<strong>en</strong>tilatorteil etwas<br />
nach ob<strong>en</strong>(siehe Abb. B). Die Klickverbindung löst sich.<br />
Lockern Sie mit Hilfe des Schraub<strong>en</strong>drehers auch die ander<strong>en</strong><br />
Klickverbindung<strong>en</strong> und nehm<strong>en</strong> Sie das V<strong>en</strong>tilatorteil aufrecht<br />
aus dem V<strong>en</strong>tilatorgehäuse heraus.<br />
• Montage: Halt<strong>en</strong> Sie das V<strong>en</strong>tilatorteil gerade über das<br />
V<strong>en</strong>tilatorgehäuse, so dass sich der Kabelausgang g<strong>en</strong>au<br />
über einer Aussparung befindet. Setz<strong>en</strong> Sie das V<strong>en</strong>tilatorteil<br />
möglichst gerade in das Gehäuse ein und drück<strong>en</strong> Sie es an,<br />
bis es einrastet.<br />
Steuerplatine<br />
Die Steuerplatine befindet sich an der ober<strong>en</strong> Seite des<br />
V<strong>en</strong>tilatorteils. Entfern<strong>en</strong> Sie daher zunächst d<strong>en</strong> V<strong>en</strong>tilatordeckel,<br />
bevor Sie die Steuerplatine demontier<strong>en</strong>.<br />
• Demontage: Drück<strong>en</strong> Sie mit Hilfe eines Schraub<strong>en</strong>drehers<br />
eine Klickverbindung an einer Seite der Steuerplatine beiseite<br />
und zieh<strong>en</strong> Sie gleichzeitig die Platine leicht hoch (siehe Abb.<br />
E). Lös<strong>en</strong> Sie anschließ<strong>en</strong>d die ander<strong>en</strong> Klickverbindung<strong>en</strong>.<br />
Nehm<strong>en</strong> Sie die Platine aus dem V<strong>en</strong>tilatorteil heraus und<br />
koppeln Sie die Anschlüsse ab.<br />
• Montage: Schließ<strong>en</strong> Sie die V<strong>en</strong>tilatorkabel an die<br />
Steuerplatine an. Drück<strong>en</strong> Sie die Platine g<strong>en</strong>au zwisch<strong>en</strong><br />
die Klickverbindung<strong>en</strong> auf dem V<strong>en</strong>tilatorteil. Drück<strong>en</strong> Sie die<br />
Platine an, bis die Verbindung<strong>en</strong> einrast<strong>en</strong>. Acht<strong>en</strong> Sie darauf,<br />
dass sich die Platine nicht verbiegt!<br />
SPEZIFIKATIONEN<br />
Speisespannung: 230V±10%, einphasig, 50Hz<br />
Minimale<br />
Umgebungstemperatur:<br />
Maximale<br />
Umgebungstemperatur:<br />
Luftfeuchtigkeit<br />
(kontinuierlich):<br />
w<br />
-10°C<br />
+40°C<br />
95% (Motor),<br />
nicht kond<strong>en</strong>sier<strong>en</strong>d<br />
85% (Elektronik)<br />
nicht kond<strong>en</strong>sier<strong>en</strong>d
EWG-Konformitätserklärung<br />
Zehnder Group Nederland B.V.<br />
Ling<strong>en</strong>straat 2<br />
8028 PM Zwolle-NL<br />
Tel.: +31 (0)38-4296911<br />
Fax: +31 (0)38-4225694<br />
Handelsregister Zwolle 05022293<br />
Bezeichnung des Geräts: Resid<strong>en</strong>ce Fan <strong>CMFe</strong><br />
Entspricht d<strong>en</strong> Richtlini<strong>en</strong>: Maschin<strong>en</strong>richtlinie (2006/42/EWG)<br />
Niederspannungsvorschrift<br />
(93/68/EWG)<br />
EMC-Vorschrift (98/13/EWG)<br />
Zwolle, 12. Februar, 2010<br />
Zehnder Group Nederland B.V.<br />
E. van Heuveln,<br />
Allgemeiner Geschäftsführer
Tab. 1<br />
Setting Speed DIP-1 DIP-2 DIP-3 DIP-4<br />
Low 1<br />
Medium 2 On On<br />
3 On<br />
4<br />
5<br />
On<br />
High 6 On On<br />
7 On<br />
8<br />
9<br />
On<br />
Tab. 2<br />
Adjustm<strong>en</strong>t 0-10V mode DIP-5 DIP-6<br />
Variabl<br />
e<br />
Fixed speed 3 steps<br />
On<br />
On/<br />
Off<br />
Ling<strong>en</strong>straat 2<br />
8028 PM<br />
Postbus 621<br />
8000 AP Zwolle<br />
Tel.: 0900-555 19 37 (€ 0,10 per minuut)<br />
Fax: (038) 422 56 94<br />
helpdesk@jestorkair.nl<br />
www.jestorkair.nl<br />
www.bright<strong>en</strong>upyourlife.nl Member of the<br />
849050800-0710