Battery powered energizer installation instructions - Gallagher.eu
Battery powered energizer installation instructions - Gallagher.eu
Battery powered energizer installation instructions - Gallagher.eu

You also want an ePaper? Increase the reach of your titles
YUMPU automatically turns print PDFs into web optimized ePapers that Google loves.
English<br />
8<br />
<strong>Battery</strong> <strong>powered</strong> <strong>energizer</strong> <strong>installation</strong> <strong>instructions</strong><br />
This <strong>energizer</strong> is designed for simple <strong>installation</strong> and operation. Please read these<br />
<strong>instructions</strong>.<br />
1. Mount the <strong>energizer</strong><br />
Permanent fence <strong>installation</strong><br />
1<br />
7<br />
2<br />
8<br />
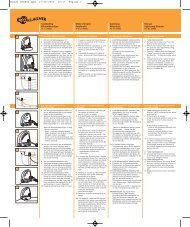
1 Energizer<br />
2 Earth stake<br />
3 Strain insulator<br />
4 Post insulator<br />
Installation under cover (No Solar Panel):<br />
9<br />
a. Mount the <strong>energizer</strong> on a wall out of reach of children.<br />
Install where there is no risk of the <strong>energizer</strong> incurring<br />
fire or mechanical damage and if possible away from<br />
heavy electrical equipment e.g. pumps or other items<br />
that may cause electrical interference.<br />
b. Using the drilling template on centre pages, drill 2<br />
holes (A and B). Use a 4mm (5/32 inch) diameter drill<br />
for posts or timber walls, or use a suitable wall plug for<br />
brick or concrete walls.<br />
c. Using the screws clipped to the <strong>energizer</strong>, secure a<br />
screw in hole (A).<br />
d. Hang the <strong>energizer</strong> on the screw. Fit screw through<br />
<strong>energizer</strong> into hole (B) for extra stability if necessary.<br />
3 4 5 6<br />
12<br />
5 Wire tightener<br />
6 Warning sign<br />
7 Earth (Green)<br />
8 Live (Red)<br />
10<br />
9 Cut out switch<br />
10 Joint clamps<br />
11 Strain post<br />
12 Line post<br />
11