Hardwood Flooring with glue-free locking system ... - Bjoorn
Hardwood Flooring with glue-free locking system ... - Bjoorn
Hardwood Flooring with glue-free locking system ... - Bjoorn

You also want an ePaper? Increase the reach of your titles
YUMPU automatically turns print PDFs into web optimized ePapers that Google loves.
Note! Do not use a piece of board as a tapping<br />
tool. After installing three to four rows (Image<br />
14), adjust the wooden fl oor’s expansion gap in relation<br />
to the wall using wedges.<br />
LAST ROW<br />
Measure the width required by the last row of boards<br />
at several points (note the expansion gap), mark the<br />
cutting line and cut the boards to the appropriate size.<br />
Install the boards and tighten them into place using e.g.<br />
a crowbar or tightening bar. Use protection between the<br />
wall and bar. If the last row of boards must be installed<br />
under a door frame, cut away the <strong>locking</strong> edge, apply<br />
<strong>glue</strong> to the groove and install the board (Images 16<br />
and 17). Install the tightening wedges. With pipe<br />
through holes (Image 18), measure the board to the<br />
correct length/width. Mark the pipe’s diameter on the<br />
board using a set square. Measure the pipe’s distance<br />
from the installed board and mark it on the board to<br />
be drilled. Mark the other pipe’s position in a similar<br />
manner. Mark the pipe centres on the board. Drill pipe<br />
holes <strong>with</strong> diameters 20 mm larger than the pipes’<br />
outer measures. Cut out the piece to be placed behind<br />
the pipes using a keyhole saw. Keep the saw at a 45degree<br />
angle when sawing between the holes. Install<br />
the board. Apply <strong>glue</strong> to all sides of the cut-out piece<br />
and install it.<br />
FINISHING<br />
Remove the wedges after installing the last row of<br />
boards and wipe any <strong>glue</strong> stains off the fl oor <strong>with</strong> a<br />
damp cloth. Install the skirting boards and thresholds.<br />
Do not install the skirtings too tightly against the fl oor<br />
or fasten the threshold through the wooden fl oor as<br />
this will restrict the fl oor’s natural movement. Cover<br />
the pipe through-holes <strong>with</strong> fi pe fi nials. If required,<br />
fi nish the cracks etc. <strong>with</strong> putty suitable for the kind of<br />
wood in question.<br />
Protect the fi nished fl oor <strong>with</strong> pieces of clean<br />
cardboard if work continues on the premises. The<br />
wooden materials change colour due to UV radiation.<br />
Unprotected areas will change colour faster than<br />
protected areas but the differences will even out in time<br />
due to the effects of light.<br />
Note! The protective sheets should not contain plastic<br />
materials and should be taped together, not to the fl oor.<br />
The installation of the wooden fl oor should be the last<br />
phase of interior decoration.<br />
INSTALLATION TIPS<br />
Narrow hallways: If the installation direction is<br />
crosswise to e.g. a narrow hallway, you can prevent the<br />
boards from changing shape by cutting the base veneer<br />
of all the boards at two or three points. These cuts<br />
should be made diagonally at a 45 degree angle either<br />
by using a saw or carpet knife, and should not exceed<br />
the veneer’s thickness. In a narrow hallway, you should<br />
make an end joint for every third row of boards at a<br />
minimum.<br />
Removing the <strong>locking</strong> edge: When installing a<br />
board, if you cannot tilt it lengthwise or width-wise, you<br />
should remove the <strong>locking</strong> edge from the length required<br />
using a chisel or other tool and install it by sliding<br />
it horizontally. In these cases you should apply <strong>glue</strong><br />
to the tongue-and-groove structure. These situations<br />
may arise when fi tting the last board of a row, when installing<br />
boards underneath radiators or stairs, and <strong>with</strong><br />
doorways and lead-throughs under door frames etc.<br />
Leading boards under radiators: The short sides<br />
of boards can be fi xed into place by sliding them from<br />
the side and tapping from the side <strong>with</strong> a hitting block<br />
when the boards are laid out evenly on the subfl oor.<br />
In these cases, in order to attach the side tongue-andgroove<br />
structure, it must be possible to lift the edge of<br />
the board 2 to 3 cm to fi x the structure into place.<br />
Covering strips: All strips, skirtings and thresholds<br />
should be fi xed into place so that the fl oor functions<br />
as a fl oating fl oor. We do not recommend using caulking<br />
compounds for expansion joints and strip fastening<br />
because of their low elasticity. Similarly, you should not<br />
place cables, antenna wires etc. in an expansion joint.<br />
Installation direction: You can also install the<br />
tongue-and-groove fl oor “backwards”, <strong>with</strong> regard to<br />
the tongue-and-groove structure on the side as well<br />
as the end. This makes it possible to install it around<br />
kitchen fi xtures.<br />
FLOOR MAINTENANCE<br />
The boards are delivered from the factory fi nished,<br />
either covered in UV hardening varnish or oiled <strong>with</strong><br />
UV-cured natural based oils. The fi nished boards do<br />
not contain formaldehyde or other harmful substances.<br />
Follow these instructions carefully to maintain your<br />
wooden fl oor’s beautiful appearance for a long time.<br />
Stop dirt at the front door. Place suitable mats on both<br />
sides of the front door and beneath the shoe rack to<br />
prevent grit and water from getting into the rooms.<br />
Pieces of felt attached under the legs of furniture will<br />
help protect your fl oor from scratching. Do not walk on<br />
the wooden fl oor <strong>with</strong> stiletto heels. Do not use copious<br />
amounts of water when cleaning. Immediately wipe<br />
away spilled water from the fl oor. Remove stains when<br />
they are fresh, either <strong>with</strong> water or a mild cleanser and<br />
dry the fl oor. Avoid scrubbing <strong>with</strong> hard cleaning implements.<br />
For daily maintenance, it is enough to vacuum<br />
the fl oor or wipe it <strong>with</strong> an almost dry fl oor wiper. Thus<br />
the fl oor surface will dry immediately <strong>with</strong>out visible<br />
drop stains appearing. Dirtier fl oors should be wiped<br />
<strong>with</strong> a fl oor cloth dipped in a mild cleansing solution<br />
(pH 6-8), and subsequently dried. Always avoid using<br />
copious amounts of water when cleaning the wooden<br />
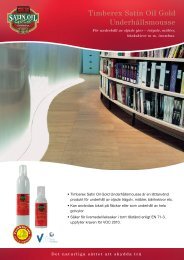
fl oor. With oiled products, you should use the Osmo<br />
Color Wash & Care cleaning concentrate <strong>with</strong> water.<br />
Room air<br />
Wood is a natural material and is subjected to heavy<br />
stress by air humidity variations (it expands and<br />
contracts), in the Nordic countries in particular. It<br />
is therefore important to maintain the relative air<br />
humidity (RH) at 40 to 60 % and room temperature at<br />
+18 to 24 °C. If conditions deviate signifi cantly from<br />
these values, gaps may appear in the wooden fl oor<br />
or it may expand, for which the manufacturer, retailer<br />
or installer cannot be held liable. You can minimise<br />
changes in the wooden fl oor’s shape from occurring by<br />
using an air humidifi er during dry times and heating in<br />
humid conditions. If you stay away for longer periods<br />
in the dry season, you can maintain the air humidity<br />
at a higher level by bringing the temperature down<br />
to +15 to 18°C and setting the air conditioning to its<br />
minimum level. You should acquire a moisture meter<br />
for your apartment, since the aforementioned humidity<br />
and temperature values are healthier for you and<br />
your family. During the winter season, so-called air<br />
hygrometers display readings that are on average 10 to<br />
15 % too high, if they are not calibrated at least once<br />
a month. We recommend buying a digital temperature/<br />
moisture combo meter. Beech, jatoba and maple react<br />
more intensely to changes in air humidity than other<br />
kinds of wood.<br />
Maintaining the wooden fl oor is easy and<br />
pleasant as long as you bear these essential<br />
points in mind: the correct humidity and temperature<br />
conditions <strong>with</strong> regard to fl oor heating as well,<br />
door mats on both sides of the front door, sparing use<br />
of water when cleaning, immediate removal of stains,<br />
pieces of felt under furniture legs.<br />
Stain removal<br />
Stain Stain remover<br />
Juice, wine, coffee, tea, chocolate Cleansing solution<br />
Oil, grease, soot, pitch, shoe polish White spirit<br />
Magic marker, ball-point pen, lipstick Denatured alcohol and<br />
water<br />
Blood Cold water<br />
PVAC <strong>glue</strong> pH9 cleansing solution<br />
FINISHED WOODEN FLOOR:<br />
Reconditioning the varnished surface<br />
You will fi nd instructions for revarnishing the fl oor on<br />
the manufacturer’s website. We do not recommend<br />
waxing the fl oor since it may hinder revarnishing.<br />
OILED WOODEN FLOOR:<br />
Cleaning and maintenance<br />
During weekly cleaning, you should use Osmo Color<br />
Wash & Care cleaning concentrate <strong>with</strong> water in accordance<br />
<strong>with</strong> the manufacturer’s dose instructions. For<br />
fl oor maintenance, you can use conditioners designed<br />
for oiled surfaces (e.g. Tikkurila’s Nostalgia conditioning<br />
wax, Osmo Color Liquid Wax Cleaner or Trip Trap conditioning<br />
oil) in accordance <strong>with</strong> the manufacturer’s instructions.<br />
Remove loose dust and dirt from the fl oor<br />
<strong>with</strong> a vacuum cleaner or fl oor wiper. Wipe the fl oor<br />
one small area at a time <strong>with</strong> a cleaning cloth or fl oor<br />
wiper moisturised <strong>with</strong> a conditioner.<br />
Stain removal<br />
You can also clean and maintain the abrasions and<br />
scratches on the fl oor and remove persistent stains<br />
<strong>with</strong> the conditioner. Apply a thin layer of conditioner<br />
<strong>with</strong> a clean cloth to the surface to be cleaned and<br />
scrub lightly until the dirt attaches to the cloth. Let the<br />
conditioner dry for around 30 min and, if required, wipe<br />
<strong>with</strong> a dry cloth. You can also use the Osmo Color conditioning<br />
and cleansing wax spray.<br />
Oil surface reconditioning<br />
Remove loose dust and dirt from the fl oor <strong>with</strong> a<br />
vacuum cleaner or fl oor wiper. Clean the worn or<br />
damaged surface. There is no need to sand the surface.<br />
Apply a thin layer of base oil (e.g. Osmo Color oil wax,<br />
Tikkurila’s Nostalgia base oil or Trip Trap base oil) <strong>with</strong> a<br />
clean cloth to the area to be reconditioned, scrub lightly<br />
<strong>with</strong> a fl oor cloth and let it dry. If required, polish <strong>with</strong><br />
a soft cloth.