R1020(MIL) IM ed5.indd - Millarco
R1020(MIL) IM ed5.indd - Millarco
R1020(MIL) IM ed5.indd - Millarco
Create successful ePaper yourself
Turn your PDF publications into a flip-book with our unique Google optimized e-Paper software.
UK<br />
27<br />
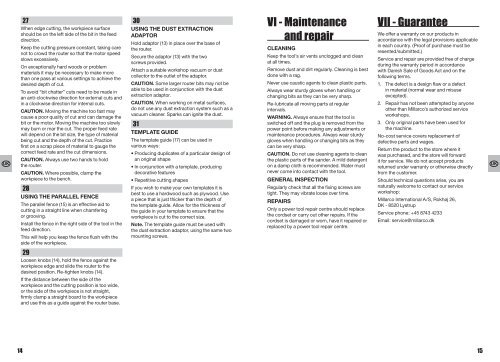
When edge cutting, the workpiece surface<br />
should be on the left side of the bit in the feed<br />
direction.<br />
Keep the cutting pressure constant, taking care<br />
not to crowd the router so that the motor speed<br />
slows excessively.<br />
On exceptionally hard woods or problem<br />
materials it may be necessary to make more<br />
than one pass at various settings to achieve the<br />
desired depth of cut.<br />
To avoid “bit chatter” cuts need to be made in<br />
an anti-clockwise direction for external cuts and<br />
in a clockwise direction for internal cuts.<br />
CAUTION. Moving the machine too fast may<br />
cause a poor quality of cut and can damage the<br />
bit or the motor. Moving the machine too slowly<br />
may burn or mar the cut. The proper feed rate<br />
will depend on the bit size, the type of material<br />
being cut and the depth of the cut. Practice<br />
first on a scrap piece of material to gauge the<br />
correct feed rate and the cut dimensions.<br />
CAUTION. Always use two hands to hold<br />
the router.<br />
CAUTION. Where possible, clamp the<br />
workpiece to the bench.<br />
28<br />
USING THE PARALLEL FENCE<br />
The parallel fence (15) is an effective aid to<br />
cutting in a straight line when chamfering<br />
or grooving.<br />
Install the fence in the right side of the tool in the<br />
feed direction.<br />
This will help you keep the fence flush with the<br />
side of the workpiece.<br />
29<br />
Loosen knobs (14), hold the fence against the<br />
workpiece edge and slide the router to the<br />
desired position. Re-tighten knobs (14).<br />
If the distance between the side of the<br />
workpiece and the cutting position is too wide,<br />
or the side of the workpiece is not straight,<br />
firmly clamp a straight board to the workpiece<br />
and use this as a guide against the router base.<br />
14<br />
30<br />
USING THE DUST EXTRACTION<br />
ADAPTOR<br />
Hold adaptor (13) in place over the base of<br />
the router.<br />
Secure the adaptor (13) with the two<br />
screws provided.<br />
Attach a suitable workshop vacuum or dust<br />
collector to the outlet of the adaptor.<br />
CAUTION. Some larger router bits may not be<br />
able to be used in conjunction with the dust<br />
extraction adaptor.<br />
CAUTION. When working on metal surfaces,<br />
do not use any dust extraction system such as a<br />
vacuum cleaner. Sparks can ignite the dust.<br />
31<br />
TEMPLATE GUIDE<br />
The template guide (17) can be used in<br />
various ways:<br />
• Producing duplicates of a particular design of<br />
an original shape<br />
• In conjunction with a template, producing<br />
decorative features<br />
• Repetitive cutting shapes<br />
If you wish to make your own templates it is<br />
best to use a hardwood such as plywood. Use<br />
a piece that is just thicker than the depth of<br />
the template guide. Allow for the thickness of<br />
the guide in your template to ensure that the<br />
workpiece is cut to the correct size.<br />
Note. The template guide must be used with<br />
the dust extraction adaptor, using the same two<br />
mounting screws.<br />
VI - Maintenance<br />
and repair<br />
CLEANING<br />
Keep the tool’s air vents unclogged and clean<br />
at all times.<br />
Remove dust and dirt regularly. Cleaning is best<br />
done with a rag.<br />
Never use caustic agents to clean plastic parts.<br />
Always wear sturdy gloves when handling or<br />
changing bits as they can be very sharp.<br />
Re-lubricate all moving parts at regular<br />
intervals.<br />
WARNING. Always ensure that the tool is<br />
switched off and the plug is removed from the<br />
power point before making any adjustments or<br />
maintenance procedures. Always wear sturdy<br />
gloves when handling or changing bits as they<br />
can be very sharp.<br />
CAUTION. Do not use cleaning agents to clean<br />
the plastic parts of the sander. A mild detergent<br />
on a damp cloth is recommended. Water must<br />
never come into contact with the tool.<br />
GENERAL INSPECTION<br />
Regularly check that all the fixing screws are<br />
tight. They may vibrate loose over time.<br />
REPAIRS<br />
Only a power tool repair centre should replace<br />
the cordset or carry out other repairs. If the<br />
cordset is damaged or worn, have it repaired or<br />
replaced by a power tool repair centre.<br />
VII - Guarantee<br />
We offer a warranty on our products in<br />
accordance with the legal provisions applicable<br />
in each country. (Proof of purchase must be<br />
resented/submitted.)<br />
Service and repair are provided free of charge<br />
during the warranty period in accordance<br />
with Danish Sale of Goods Act and on the<br />
following terms.<br />
1. The defect is a design flaw or a defect<br />
in material (normal wear and misuse<br />
excepted).<br />
2. Repair has not been attempted by anyone<br />
other than <strong>Millarco</strong>’s authorized service<br />
workshops.<br />
3. Only original parts have been used for<br />
the machine.<br />
No-cost service covers replacement of<br />
defective parts and wages.<br />
Return the product to the store where it<br />
was purchased, and the store will forward<br />
it for service. We do not accept products<br />
returned under warranty or otherwise directly<br />
from the customer.<br />
Should technical questions arise, you are<br />
naturally welcome to contact our service<br />
workshop:<br />
<strong>Millarco</strong> International A/S, Rokhøj 26,<br />
DK - 8520 Lystrup<br />
Service phone: +45 8743 4233<br />
Email: service@millarco.dk<br />
15<br />
UK


