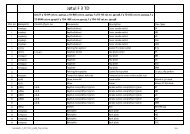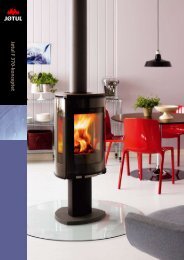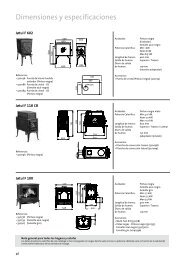
Jøtul FS 162 - 370 - Jøtul stoves and fireplaces
Jøtul FS 162 - 370 - Jøtul stoves and fireplaces
Jøtul FS 162 - 370 - Jøtul stoves and fireplaces

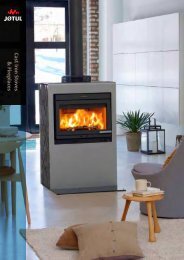
Create successful ePaper yourself
Turn your PDF publications into a flip-book with our unique Google optimized e-Paper software.
ENGLISH<br />
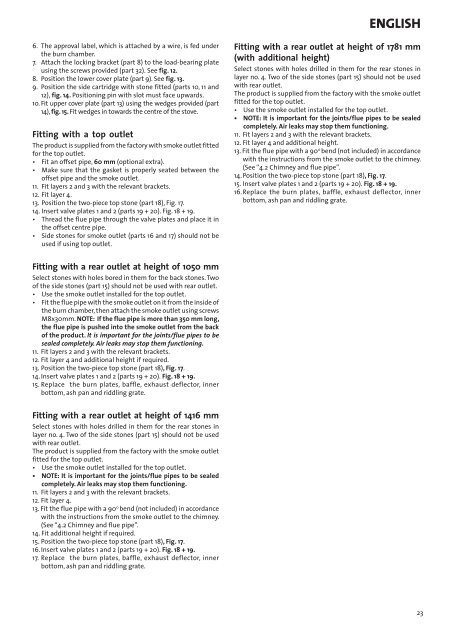
6. The approval label, which is attached by a wire, is fed under<br />
the burn chamber.<br />
7. Attach the locking bracket (part 8) to the load-bearing plate<br />
using the screws provided (part 32). See fig. 12.<br />
8. Position the lower cover plate (part 9). See fig. 13.<br />
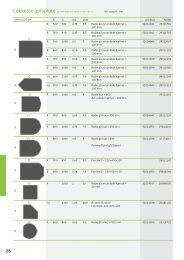
9. Position the side cartridge with stone fitted (parts 10, 11 <strong>and</strong><br />
12), fig. 14. Positioning pin with slot must face upwards.<br />
10. Fit upper cover plate (part 13) using the wedges provided (part<br />
14), fig. 15. Fit wedges in towards the centre of the stove.<br />
Fitting with a top outlet<br />
The product is supplied from the factory with smoke outlet fitted<br />
for the top outlet.<br />
• Fit an offset pipe, 60 mm (optional extra).<br />
• Make sure that the gasket is properly seated between the<br />
offset pipe <strong>and</strong> the smoke outlet.<br />
11. Fit layers 2 <strong>and</strong> 3 with the relevant brackets.<br />
12. Fit layer 4.<br />
13. Position the two-piece top stone (part 18), Fig. 17.<br />
14. Insert valve plates 1 <strong>and</strong> 2 (parts 19 + 20). Fig. 18 + 19.<br />
• Thread the flue pipe through the valve plates <strong>and</strong> place it in<br />
the offset centre pipe.<br />
• Side stones for smoke outlet (parts 16 <strong>and</strong> 17) should not be<br />
used if using top outlet.<br />
Fitting with a rear outlet at height of 1781 mm<br />
(with additional height)<br />
Select stones with holes drilled in them for the rear stones in<br />
layer no. 4. Two of the side stones (part 15) should not be used<br />
with rear outlet.<br />
The product is supplied from the factory with the smoke outlet<br />
fitted for the top outlet.<br />
• Use the smoke outlet installed for the top outlet.<br />
• NOTE: It is important for the joints/flue pipes to be sealed<br />
completely. Air leaks may stop them functioning.<br />
11. Fit layers 2 <strong>and</strong> 3 with the relevant brackets.<br />
12. Fit layer 4 <strong>and</strong> additional height.<br />
13. Fit the flue pipe with a 90 0 bend (not included) in accordance<br />
with the instructions from the smoke outlet to the chimney.<br />
(See “4.2 Chimney <strong>and</strong> flue pipe”.<br />
14. Position the two-piece top stone (part 18), Fig. 17.<br />
15. Insert valve plates 1 <strong>and</strong> 2 (parts 19 + 20). Fig. 18 + 19.<br />
16. Replace the burn plates, baffle, exhaust deflector, inner<br />
bottom, ash pan <strong>and</strong> riddling grate.<br />
Fitting with a rear outlet at height of 1050 mm<br />
Select stones with holes bored in them for the back stones. Two<br />
of the side stones (part 15) should not be used with rear outlet.<br />
• Use the smoke outlet installed for the top outlet.<br />
• Fit the flue pipe with the smoke outlet on it from the inside of<br />
the burn chamber, then attach the smoke outlet using screws<br />
M8x30mm. NOTE: If the flue pipe is more than 350 mm long,<br />
the flue pipe is pushed into the smoke outlet from the back<br />
of the product. It is important for the joints/flue pipes to be<br />
sealed completely. Air leaks may stop them functioning.<br />
11. Fit layers 2 <strong>and</strong> 3 with the relevant brackets.<br />
12. Fit layer 4 <strong>and</strong> additional height if required.<br />
13. Position the two-piece top stone (part 18), Fig. 17.<br />
14. Insert valve plates 1 <strong>and</strong> 2 (parts 19 + 20). Fig. 18 + 19.<br />
15. Replace the burn plates, baffle, exhaust deflector, inner<br />
bottom, ash pan <strong>and</strong> riddling grate.<br />
Fitting with a rear outlet at height of 1416 mm<br />
Select stones with holes drilled in them for the rear stones in<br />
layer no. 4. Two of the side stones (part 15) should not be used<br />
with rear outlet.<br />
The product is supplied from the factory with the smoke outlet<br />
fitted for the top outlet.<br />
• Use the smoke outlet installed for the top outlet.<br />
• NOTE: It is important for the joints/flue pipes to be sealed<br />
completely. Air leaks may stop them functioning.<br />
11. Fit layers 2 <strong>and</strong> 3 with the relevant brackets.<br />
12. Fit layer 4.<br />
13. Fit the flue pipe with a 90 0 bend (not included) in accordance<br />
with the instructions from the smoke outlet to the chimney.<br />
(See “4.2 Chimney <strong>and</strong> flue pipe”.<br />
14. Fit additional height if required.<br />
15. Position the two-piece top stone (part 18), Fig. 17.<br />
16. Insert valve plates 1 <strong>and</strong> 2 (parts 19 + 20). Fig. 18 + 19.<br />
17. Replace the burn plates, baffle, exhaust deflector, inner<br />
bottom, ash pan <strong>and</strong> riddling grate.<br />
23