InstallationINDRollingShutter_GREN_Motor-MDF_Dec2017

You also want an ePaper? Increase the reach of your titles
YUMPU automatically turns print PDFs into web optimized ePapers that Google loves.
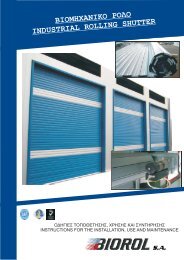
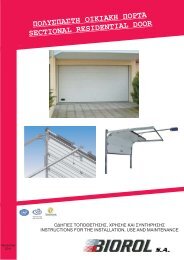
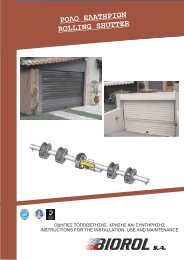
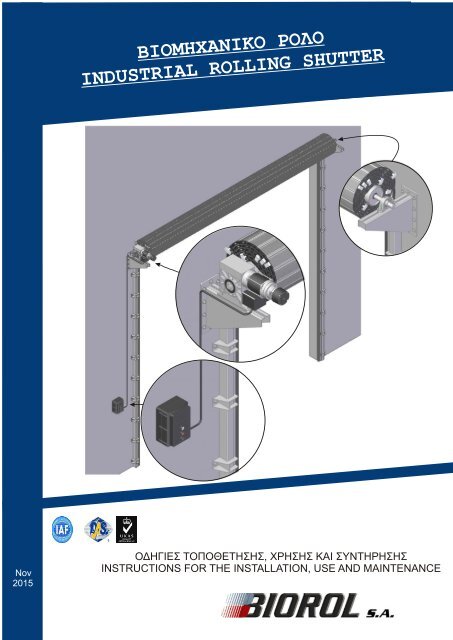
ΒΙΟΜΗΧΑΝΙΚΟ ΡΟΛΟ<br />
INDUSTRIAL ROLLI NG SHUTTER<br />
Nov<br />
2015<br />
ΟΔΗΓΙΕΣ ΤΟΠΟΘΕΤΗΣΗΣ, ΧΡΗΣΗΣ ΚΑΙ ΣΥΝΤΗΡΗΣΗΣ<br />
INSTRUCTIONS FOR THE INSTALLATION, USE AND MAINTENANCE
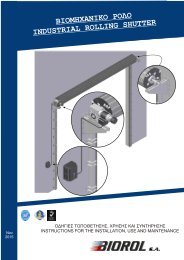
ΒΙΟΜΗΧΑΝΙΚΟ ΡΟΛΟ<br />
INDUSTRIAL ROLLING DOOR<br />
Χρήσιμες Διαστάσεις Η < 4,5m<br />
Useful Dimensions Η < 4,5m<br />
B 175 W<br />
175 B<br />
A<br />
60 60<br />
510<br />
W+350+B<br />
Side Mount (Βάση) B<br />
SUPR15 (1:5) 70<br />
SUPR17 (1:7) 120<br />
SUPB-GK 164<br />
H h h3<br />
ΒΙΟΜΗΧΑΝΙΚΟ ΡΟΛΟ<br />
INDUSTRIAL ROLLING DOOR<br />
Χρήσιμες Διαστάσεις H=4,5m εως 10m<br />
Useful Dimensions H=4,5m to 10m<br />
B 175 W<br />
175 B<br />
120 55<br />
55 120<br />
b<br />
60<br />
y<br />
A<br />
y<br />
60<br />
510<br />
bm<br />
D=Φ159<br />
H (m) y (mm)<br />
4,5 - 5,5 40<br />
5,5 - 6,5 60<br />
6,5 - 8 80<br />
8 - 10 100<br />
D=Φ200<br />
H (m) y (mm)<br />
4,5 - 6 40<br />
6 - 8 60<br />
8 - 9,5 80<br />
9,5 - 10 100<br />
W+350+B<br />
Side Mount (Βάση) B<br />
SUPR15 (1:5) 70<br />
SUPR17 (1:7) 120<br />
SUPB-GK 164<br />
H h h3<br />
> 4,5 m < 7,5 m 460 730<br />
> 7,5 m < 10 m 520 810<br />
Drive Bearing Δh<br />
Type d1 h1 b bm d2 h2 h1-h2<br />
<strong>MDF</strong> 30-30-12 30 145 122 122 30 43 102<br />
<strong>MDF</strong> 30-42-12 40 145 120 120 40 49 96<br />
<strong>MDF</strong> 30-50-12 40 145 122 122 40 49 96<br />
<strong>MDF</strong> 60-100-9 50 185 140 140 50 57 128<br />
<strong>MDF</strong> 60-140-9 50 185 140 194 50 57 128<br />
<strong>MDF</strong> 70-165-8 55 200 160 194 55 64 136<br />
<strong>MDF</strong> 70-200-8 55 200 160 216 55 64 136<br />
ERA 30-75-10 40 145 122 122 40 49 96<br />
Drive<br />
A<br />
d1<br />
A<br />
Bearing<br />
d2<br />
h3<br />
h1<br />
Δh<br />
h2<br />
h<br />
150<br />
40 40<br />
H+h<br />
H<br />
H<br />
page 2a
ΒΙΟΜΗΧΑΝΙΚΟ ΡΟΛΟ<br />
INDUSTRIAL ROLLING DOOR<br />
Περιεχόμενα συσκευασίας<br />
Package contents<br />
Οδηγοί Ρολού / Guides<br />
Αριστερός<br />
Left<br />
Δεξιός<br />
Right<br />
Βάσεις στήριξης Κινητήρα & Ρουλεμάν<br />
Drive and Bearing Supports<br />
Ρουλεμάν<br />
Bearing<br />
Στηρίγματα οδηγών<br />
Guide Supports<br />
Εξαρτήματα Στήριξης<br />
Accessories<br />
Κινητήρας<br />
Drive<br />
Πίνακας ελέγχου<br />
Control Panel<br />
Συσκευασία Ρολού<br />
Rolling Shutter Package<br />
page 3
ΒΙΟΜΗΧΑΝΙΚΟ ΡΟΛΟ<br />
INDUSTRIAL ROLLING DOOR<br />
Τοποθέτηση βάσεων<br />
Installation of Supports<br />
4.1<br />
Σημαδέψτε το κέντρο του άξονα<br />
σε ύψος H+h (δες σελίδα 2)<br />
4.1<br />
Mark the centre of the winding shaft<br />
in a level H+h (see page 2)<br />
4.2<br />
Τοποθετήστε τις βάσεις στήριξης κινητήρα<br />
και ρουλεμάν στις κατάλληλες θέσεις και<br />
σημαδέψτε τις θέσεις τους.<br />
(δες διαστάσεις στη σελίδα 2)<br />
Πρέπει να ληφθεί υπ’ όψιν η πλευρά<br />
τοποθέτησης του κινητήρα και του ρουλεμάν<br />
και η υψομετρική διαφορά των βάσεών τους (Δh)<br />
H<br />
Put the supports of the Drive and the bearing<br />
at the appropriate places and<br />
mark their positions.<br />
(see dimensions on page 2)<br />
It should be appreciated the mounting side<br />
of the drive and the bearing and the elevation<br />
difference between the supports (Δh)<br />
H+h<br />
W<br />
4.2<br />
h2<br />
h<br />
Δh<br />
175<br />
W+350+B<br />
h1<br />
175<br />
W<br />
H<br />
page 4
5.1<br />
Τα υλικά στερέωσης εξαρτώνται<br />
από την κατασκευή του κτηρίου.<br />
Βάλτε πρώτα τις βίδες στερέωσης<br />
στις οβάλ τρύπες για να ρυθμίσετε<br />
την κατάλληλη θέση και στη συνέχεια<br />
τις υπόλοιπες βίδες<br />
5.1<br />
ΒΙΟΜΗΧΑΝΙΚΟ ΡΟΛΟ<br />
INDUSTRIAL ROLLING DOOR<br />
Στήριξη βάσεων-Τοποθέτηση οδηγών<br />
Fastening of Supports - Installation of Guides<br />
h2<br />
The fastening materials are dependent<br />
on the building construction.<br />
Put first the fastening screws<br />
in the oval holes in order to adjust<br />
the appropriate place and then<br />
the rest screws<br />
5.2<br />
Τοποθετήστε τους οδηγούς του ρολού<br />
κατακόρυφα αριστερά και δεξιά<br />
του ανοίγματος<br />
Put the guides vertically on the left and<br />
the right side of the opening<br />
5.3<br />
Με τους οδηγούς σε κατακόρυφη θέση<br />
και σε μεταξύ τους ίση απόσταση πάνω<br />
και κάτω (W+230) σημαδεύουμε<br />
τη θέση τους<br />
With the guides in vertically position<br />
and at equal distance between them on the top<br />
and the bottom (W +230), mark their position<br />
h1<br />
Δh<br />
5.2<br />
5.3<br />
W+230<br />
W+230<br />
page 5
ΒΙΟΜΗΧΑΝΙΚΟ ΡΟΛΟ<br />
INDUSTRIAL ROLLING DOOR<br />
Στήριξη οδηγών<br />
Fastening of guides<br />
6.1<br />
Τα υλικά στερέωσης εξαρτώνται<br />
από την κατασκευή του κτηρίου.<br />
Σε μπετόν ανοίξτε τρύπες Φ6,5 ομόκεντρα<br />
στις ήδη ανοιγμένες τρύπες των οδηγών<br />
και στερεώστε με τσιμεντόβιδες Φ7,5 (TORX)<br />
6.1<br />
Φ10<br />
Φ27<br />
Φ6,5<br />
The fastening materials are dependent<br />
on the building construction.<br />
In case of concrete, holes Φ6,5 are drilled<br />
concentric to the drilled holes in the guides<br />
and fasten with concrete screws Φ7, 5 (TORX)<br />
Φ7,5 (TORX)<br />
500<br />
115 W<br />
115<br />
500<br />
6.2<br />
Βάλτε τις τάπες στις οπές Φ27 των οδηγών<br />
Put the sealing plugs onto the holes in the guides<br />
6.2<br />
page 6
ΒΙΟΜΗΧΑΝΙΚΟ ΡΟΛΟ<br />
INDUSTRIAL ROLLING DOOR<br />
Στήριξη οδηγών<br />
Fastening of guides<br />
7.1<br />
Τα υλικά στερέωσης εξαρτώνται<br />
από την κατασκευή του κτηρίου.<br />
Τοποθετώντας τα στηρίγματα των οδηγών<br />
στις κατάλληλες θέσεις, σημαδέψτε τα σημεία<br />
στερέωσης. Ανοίξτε τρύπες Φ10<br />
7.1<br />
The fastening materials are dependent<br />
on the building construction.<br />
Put the Guide Supports in the appropriate places<br />
and mark the points of mounting. Drill holes Φ10<br />
7.2<br />
Με τα στηρίγματα των οδηγών στις κατάλληλες θέσεις,<br />
τοποθετήστε τα κτυπητά βύσματα στις τρύπες Φ10<br />
With the Guides Supports in the appropriate places,<br />
insert the plugs into the holes Φ10<br />
7.3<br />
Σφίξτε τα παξιμάδια των κτυπητών βυσμάτων για να<br />
εξασφαλιστεί η σωστή στερέωση.<br />
Tighten the nuts of the plugs to ensure the proper fixation.<br />
7.2 7.3<br />
page 7
ΒΙΟΜΗΧΑΝΙΚΟ ΡΟΛΟ<br />
INDUSTRIAL ROLLING DOOR<br />
Τοποθέτηση του ρολού<br />
Installation of the rolling shutter<br />
8.1<br />
Βάλτε το συσκευασμένo ρολό<br />
μπροστά στο άνοιγμα προς<br />
την κατεύθυνση της λειτουργίας.<br />
Γρασσάρετε τα άκρα του<br />
άξονα περιέλιξης.<br />
Βάλτε τον Κινητήρα και<br />
το ρουλεμάν στον άξονα περιέλιξης.<br />
8.1<br />
Put the rolling shutter package<br />
in front of the opening in the<br />
direction of operation.<br />
Grease the end of the winding shaft.<br />
Put the Drive and the bearing<br />
onto the winding shaft.<br />
8.2<br />
Βάλτε το συσκευασμένo ρολό<br />
με τον κινητήρα και το ρουλεμάν<br />
πάνω στις βάσεις στήριξης.<br />
Προσοχή! Για να αποφύγετε<br />
σωματικές βλάβες, κανείς δεν πρέπει<br />
να στέκεται κάτω από το ρολό<br />
μέχρι να βιδωθούν ο κινητήρας<br />
και το ρουλεμάν.<br />
8.2<br />
Put the rolling shutter package<br />
with the Drive and the bearing<br />
onto the supports.<br />
Attention! To prevent personal injuries<br />
occuring, nobody may stand under<br />
the rolling shutter until the drive and<br />
the bearing have been screwed on.<br />
page 8
ΒΙΟΜΗΧΑΝΙΚΟ ΡΟΛΟ<br />
INDUSTRIAL ROLLING DOOR<br />
Τοποθέτηση του ρολού<br />
Installation of the rolling shutter<br />
9.1<br />
A<br />
9.1<br />
Ρυθμίστε την απόσταση από τον τοίχο<br />
ώστε να είναι ίση και στις δύο πλευρές<br />
Set up the distance to the wall to be<br />
equal on both sides<br />
A<br />
9.2<br />
Βιδώστε τον κινητήρα και<br />
το ρουλεμάν σταθερά<br />
στα στηρίγματα.<br />
9.2<br />
Screw the drive and the bearing<br />
firmly to the supports.<br />
9.3<br />
Tape<br />
9.3<br />
Αφαιρέστε τα υλικά συσκευασίας του ρολού.<br />
Μην αφαιρέσετε τις ταινίες στα άκρα<br />
του ρολού, αυτό εμποδίζει το ρολό<br />
από την πτώση λόγω απροσεξίας.<br />
Tape<br />
Remove the packaging material<br />
of the rolling shutter.<br />
Do not remove the tapes at the ends<br />
of the roll, this prevents the roll from<br />
falling down inadvertently<br />
page 9
ΒΙΟΜΗΧΑΝΙΚΟ ΡΟΛΟ<br />
INDUSTRIAL ROLLING DOOR<br />
Τοποθέτηση του ρολού στους οδηγούς<br />
Inserting the roll into the guides<br />
10.1<br />
Βάλτε το ρολό με το κατωκάσι<br />
στη θέση που φαίνεται στο σχήμα,<br />
μέσω χειροκίνητης λειτουργίας<br />
του κινητήρα.<br />
Put the roll with the end aluminioum<br />
profile to the position shown<br />
in the figure, by manual operation<br />
of the drive<br />
10.1<br />
~ 60°<br />
10.2<br />
Αφαιρέστε τις ταινίες από τις δύο<br />
πλευρές του ρολού και εισάγετε<br />
την κουρτίνα στους οδηγούς<br />
μέσω χειροκίνητης λειτουργίας<br />
του κινητήρα, έως το μισό<br />
ύψος των οδηγών.<br />
Remove the tapes from both sides of the roll and insert the curtain into the guides, by manual operation of the drive,<br />
until the half height of the guides<br />
10.2<br />
Η/2<br />
Η/2<br />
page 10
ΒΙΟΜΗΧΑΝΙΚΟ ΡΟΛΟ<br />
INDUSTRIAL ROLLING DOOR<br />
Τοποθέτηση του ρολού στους οδηγούς<br />
Inserting the roll into the guides<br />
11.1 & 11.2<br />
Με το ρολό κατεβασμένο<br />
μέχρι το μισό ύψος των οδηγών<br />
ελέγξτε την εισαγωγή<br />
του ρολού στους οδηγούς<br />
και αν χρειάζεται ρυθμίστε<br />
(εμπρός ή πίσω)<br />
την θέση του κινητήρα<br />
και του ρουλεμάν πάνω<br />
στις βάσεις στήριξης<br />
With the roll closed until<br />
the half height of the guides<br />
check the introduction<br />
of the roll into the guides<br />
and adjust if necessary<br />
(front or rear)<br />
the position of the drive<br />
and the bearing on<br />
the supports<br />
11.1<br />
11.2<br />
11.3<br />
Τοποθετείστε το ρολό<br />
έτσι ώστε τα άκρα του<br />
να έχουν ίσες αποστάσεις<br />
από τους πυθμένες<br />
των οδηγών.<br />
Place the roll so that their ends<br />
have equal distances<br />
from the bottoms of the guides<br />
11.4<br />
Σφίξτε τις βίδες στο ρουλεμάν<br />
Tighten the screws on the bearing<br />
11.3 = = 11.4<br />
page 11
ΒΙΟΜΗΧΑΝΙΚΟ ΡΟΛΟ<br />
INDUSTRIAL ROLLING DOOR<br />
Σύνδεση του κινητήρα - Ρυθμίσεις<br />
Connecting the drive - Adjustments<br />
12.1<br />
Συνδέστε τον κινητήρα στον<br />
πίνακα ελέγχου ακολουθώντας<br />
τις οδηγίες του κατασκευαστή.<br />
Συνδέστε όλους τους τερματικούς<br />
διακόπτες και τους μηχανισμούς<br />
ασφαλείας.<br />
Συνδέστε με το ηλεκτρικό δίκτυο.<br />
12.1<br />
Connect the drive to the<br />
control panel following the<br />
instructions of the<br />
manufacturer.<br />
Connect all the limit switches<br />
and the safety devices.<br />
Connect to the mains<br />
12.2<br />
Ρυθμίστε τη θέση ΑΝΟΙΓΜΑΤΟΣ<br />
έτσι ώστε η κουρτίνα του ρολού<br />
να μη βγεί έξω από τους οδηγούς<br />
Adjust the OPEN position so that<br />
the curtain of the roll do not move<br />
out from the guides<br />
12.3<br />
Ρυθμίστε τη θέση ΚΛΕΙΣΙΜΑΤΟΣ<br />
έτσι ώστε η κουρτίνα του ρολού<br />
να μη παραμορφώνεται και<br />
το κατωκάσι να μη πιέζεται πολύ.<br />
Adjust the position CLOSE<br />
so that the curtain of the roll<br />
not deformed and the end aluminium<br />
profile not pressed too.<br />
12.2<br />
12.3<br />
page 12
ΒΙΟΜΗΧΑΝΙΚΟ ΡΟΛΟ<br />
INDUSTRIAL ROLLING DOOR<br />
ΟΔΗΓΙΕΣ ΧΕΙΡΙΣΜΟΥ - ΑΣΦΑΛΕΙΑΣ:<br />
Διαβάστε προσεκτικά και φυλάξτε για ενδεχόμενη μελλοντική ενημέρωση.<br />
1 ) Το ρολό προορίζεται για περιοδική χρήση (ενδιάμεση διακοπή: 3,5 min). Αποφύγετε τους<br />
περιττούς ή πάρα πολύ συχνούς χειρισμούς για την αποφυγή υπερθέρμανσης του κινητήρα,<br />
αν και προστατεύεται από ένα θερμικό που διακόπτει την τροφοδοσία σε περίπτωση<br />
υπερθέρμανσης και αποκαθιστά την κανονική λειτουργία μετά από μια περίοδο ψύξης.<br />
Εν πάση περιπτώσει,<br />
ΜΗΝ ΕΠΙΤΡΕΨΕΤΕ ΣΕ ΠΑΙΔΙΑ ΝΑ ΧΡΗΣΙΜΟΠΟΙΟΥΝ ΤΟΝ ΑΥΤΟΜΑΤΙΣΜΟ.<br />
2 ) ΠΑΡΑΚΟΛΟΥΘΕΙΤΕ τη μετακίνηση του ρολού και κρατήστε οποιοδήποτε άτομο σε απόσταση<br />
έως ότου τελειώσει τον κύκλο του (άνοιγμα ή κλείσιμο)<br />
3 ) ΕΛΕΓΧΕΤΕ τη σωστή λειτουργία των μετακινήσεων (ανοικτό-κλειστό-όρια)<br />
και των μηχανισμών ασφάλειας<br />
4 ) Εάν ο χρήστης δεν μπορεί να λειτουργήσει τον αυτοματισμό ή δημιουργηθεί πρόβλημα<br />
στη λειτουργία, πρέπει να καλέσει αμέσως τον εγκαταστάτη.<br />
ΠΡΟΣΟΧΗ: ΤΟ ΡΟΛΟ ΜΕ ΠΡΟΦΙΛ ΔΙΠΛΟ ΜΕ ΜΟΝΩΣΗ ΔΕΝ ΠΡΕΠΕΙ ΠΟΤΕ ΝΑ<br />
ΤΥΛΙΞΕΙ ΑΝΤΙΣΤΡΟΦΑ<br />
ΠΡΟΣΟΧΗ: ΣΕ ΠΕΡΙΠΤΩΣΗ ΜΕΓΑΛΗΣ ΕΝΤΑΣΗΣ ΑΝΕΜΟΥ ΤΟ ΡΟΛΟ ΝΑ ΠΑΡΑΜΕΝΕΙ<br />
ΚΛΕΙΣΤΟ ΚΑΙ ΝΑ ΜΗΝ ΛΕΙΤΟΥΡΓΕΙ ΓΙΑ ΛΟΓΟΥΣ ΑΣΦΑΛΕΙΑΣ<br />
INSTRUCTION OF USE AND SAFETY:<br />
Read carefully and store for eventual future consulting<br />
1 ) The rolling shutter is conceived for intermittant use: 3,5 min. Avoid unnecessary or too frequent<br />
manoeuvres for avoiding overheating; the motor is anyhow protected by a thermic probe that<br />
interrupts feeding in case of overheating, and restores normal functions after a cooling period.<br />
In any case, DO NOT ALLOW CHILDREN TO USE THE AUTOMATION.<br />
2 ) MONITOR the movement of the shutter, and keep anyone at a distance<br />
until it has finished its cycle.<br />
3 ) CHECK the correct functioning of the movements (open-close-limits),<br />
and of the safety devices<br />
4 ) If the user is not able to operate the automation, or shhould he note anomalies,<br />
he should call immediately upon the installer.<br />
WARNING: THE DOUBLE PROFILE WITH INSULATION SHUTTER MUST NEVER<br />
BE WRAPPED INSIDE OUT<br />
WARNING: IN CASE OF HIGH WIND SPEED THE SHUTTER MUST REMAIN<br />
CLOSED AND SHOULD NOT OPERATE FOR SAFETY REASONS<br />
page 13
ΒΙΟΜΗΧΑΝΙΚΟ ΡΟΛΟ<br />
INDUSTRIAL ROLLING DOOR<br />
ΟΔΗΓΙΕΣ ΣΥΝΤΗΡΗΣΗΣ:<br />
Για να διατηρείται σε ισχύ η εγγύηση και πιστοποίηση του προϊόντος, θα πρέπει<br />
να γίνεται οπωσδήποτε ετήσια συντήρηση του, από εξουσιοδοτημένο συνεργείο.<br />
Συνιστάται τουλάχιστον δύο φορές το χρόνο να προβείτε σε:<br />
- Έλεγχο του συστήματος μετάδοσης κίνησης<br />
- Έλεγχο του σωστού τυλίγματος του ρολού στον άξονα, των φύλλων για ενδεχόμενες<br />
παραμορφώσεις και τυχόν ασυνήθιστου θορύβου κατά τη λειτουργία<br />
- Έλεγχο της θέσης και στήριξης της σφήνας του άξονα του κινητήρα και της σύσφιξης<br />
των βιδών του ρουλεμάν<br />
- Έλεγχο της θέσης του άξονα και των βιδών συγκρατήσεως του κινητήρα<br />
και του ρουλεμάν στις βάσεις τους και σύσφιξη αυτών αν απαιτείται<br />
- Έλεγχο φθορών των πλαστικών συνδετήριων ταπών των φύλλων των ρολών<br />
και τυχόν αντικατάσταση των υπερβολικά φθαρμένων<br />
- Έλεγχο όλων των ηλεκτροσυγκολλήσεων για τυχόν ρωγμές και ενδεχόμενη ενίσχυσή τους<br />
- Έλεγχο των τερματικών στις θέσεις ανοίγματος και κλεισίματος<br />
και ρύθμισή τους αν απαιτείται.<br />
- Έλεγχο της σωστής λειτουργίας του φρένου του κινητήρα<br />
- Έλεγχο της σωστής λειτουργίας της χειροκίνητης λειτουργίας<br />
INSTRUCTIONS OF MAINTENANCE:<br />
The maintenance of the product should take place annually, by an authorized<br />
technician. When this condition is not met then the warranty and certification of<br />
the product automatically stops.<br />
It is recommended at least twice a year:<br />
- Check the transmission system (Drive)<br />
- Check the right position of role on the axis during the movement, the leaves for<br />
potential deformities and any chance extraordinary noise during the operation<br />
- Check the place of wedge of axis and fix them if it is needed (Drive) and fixing<br />
screws of bearing.<br />
- Check the place of Drive and bearing on the support and<br />
tightening the fixing screws if it is required<br />
- Check the plastic end of the leaves of roll and replace the excessively worn out<br />
- Check all welding for cracks and repair if it is required<br />
- Check the limits-switches and regulate if it is required.<br />
- Check the right operation of motor brake<br />
- Check the right manual operation<br />
page 14
ENGLISH - WARRANTY CONDITIONS<br />
»»<br />
BIOROL S.A covers the product with warranty for a period<br />
of two (2) years starting from the date indicated on the<br />
purchased documents.<br />
»»<br />
“WARRANTY CONFIRMATION” must be filled by the installator<br />
and sent to the manufacturer. Failure to complete and send<br />
the “WARRANTY CONFIRMATION” automatically voids its<br />
validity.<br />
»»<br />
“WARRANTY CERTIFICATE” must be filled by the costumer<br />
and sent to the manufacturer within a month from the installation<br />
date. Failure to complete and send the “WARRANTY<br />
CERTIFICATE” automatically voids its validity.<br />
»»<br />
This warranty is limited and concerns the products manufactured<br />
by Biorol sa. Any other accessory / product, including<br />
but not limited to motors, electronics, etc., is accompanied<br />
by the warranty of the corresponding manufacturer.<br />
»»<br />
Installation must be performed by a certified technician.<br />
»»<br />
Warranty includes technical support and additional repairs<br />
or replacements of any components/spare parts presenting<br />
approved manufacturing problems.<br />
»»<br />
Repairs, interventions and / or changes covered by this<br />
warranty do not extend its duration or allow for the<br />
suspension of payments.<br />
»»<br />
The materials / parts that have been replaced by either the<br />
manufacturer or under written authorization, within the<br />
warranty coverage, are returned back without any further<br />
damage.<br />
»»<br />
The customer must be able to show the warranty document<br />
in order to be able to use it.<br />
»»<br />
Any legal dispute will be finally solved in the courts of<br />
Katerini, Greece.<br />
ΕΛΛΗΝΙΚΑ - ΟΡΟΙ ΕΓΓΥΗΣΗΣ<br />
»»<br />
Η ΒΙΟΡΟΛ Α.Β.Ε.Ε. παρέχει εγγύηση καλής λειτουργίας του<br />
προϊόντος για περίοδο δύο (2) ετών αρχής γενομένης από<br />
την ημερομηνία αγοράς (τιμολογίου/δελτίου αποστολής).<br />
»»<br />
Η «ΕΠΙΒΕΒΑΙΩΣΗ ΕΓΓΥΗΣΗΣ» πρέπει να συμπληρωθεί από τον<br />
εγκαταστάτη και να σταλεί στον κατασκευαστή/παραγωγό. Η<br />
μη συμπλήρωση και αποστολή της «ΕΠΙΒΕΒΑΙΩΣΗΣ ΕΓΓΥΗΣΗΣ»<br />
αυτόματα ακυρώνει την ισχύ της.<br />
»»<br />
Το «ΠΙΣΤΟΠΟΙΗΤΙΚΟ ΕΓΓΥΗΣΗΣ» πρέπει να συμπληρωθεί από<br />
τον πελάτη και να σταλεί στον κατασκευαστή/ παραγωγό σε<br />
περίοδο ενός (1) μήνα από την τοποθέτηση. Η μη συμπλήρωση<br />
και αποστολή του «ΠΙΣΤΟΠΟΙΗΤΙΚΟΥ ΕΓΓΥΗΣΗΣ» αυτόματα<br />
ακυρώνει την ισχύ της.<br />
»»<br />
Η παρούσα εγγύηση περιορίζεται και αφορά στο αντικείμενο/<br />
προιόν που κατασκευάσθηκε από την ΒΙΟΡΟΛ ΑΒΒΕ. Όποιο<br />
άλλο εξάρτημα/προιόν, συμπεριλαμβανομένων και μη<br />
περιορισμένων σε κινητήρες, ηλεκτρονικά, κλπ, συνοδεύονται<br />
από την εγγύηση του εκάστοτε κατασκευαστή.<br />
»»<br />
Η τοποθέτηση του προϊόντος πρέπει να γίνετε από<br />
πιστοποιημένο εγκαταστάτη/τεχνικό.<br />
»»<br />
Η εγγύηση περιλαμβάνει τεχνική υποστήριξη και επιπλέον<br />
επιδιόρθωση ή αλλαγή οποιουδήποτε εξαρτήματος<br />
παρουσιάσει, αποδεδειγμένα, εργοστασιακό/κατασκευαστικό<br />
πρόβλημα ή αστοχία.<br />
»»<br />
Επιδιορθώσεις, παρεμβάσεις ή/και αλλαγές που καλύπτονται<br />
από την παρούσα εγγύηση δεν παρατείνουν την διάρκειά της<br />
ούτε επιτρέπουν την παύση πληρωμών.<br />
»»<br />
Τα υλικά/εξαρτήματα που αντικαταστάθηκαν είτε από τον<br />
κατασκευαστή είτε με την έγγραφη εξουσιοδότηση του, με την<br />
κάλυψη της εγγύησης, επιστρέφονται πίσω σε αυτόν αυτούσια.<br />
»»<br />
Ο πελάτης πρέπει να επιδείξει την εγγύηση ώστε να<br />
μπορέσει να χρησιμοποιήσει τους όρους της.<br />
»»<br />
10. Για οποιαδήποτε νόμιμη διεκδίκηση αρμόδια είναι τα<br />
δικαστήρια Κατερίνης, Ελλάδα.<br />
THE WARRANTY DOESN’T COVER:<br />
Damages caused:<br />
»»<br />
by improper transportation or storage from any thirt parties<br />
or improper installation or normal wear and tear .<br />
»»<br />
by external factors such as weather, fire (fire), chemicals<br />
(caustic, acids, etc.), salts, water, scratches, natural<br />
phenomena, vandalism, accidents, and so on.<br />
»»<br />
by a lack of routine maintenance according to the instructions<br />
delivered to the buyer and contained in the manufacturer’s<br />
manual on handling and care of the door<br />
»»<br />
by excessive use. Normal use is considered when the door<br />
makes 4 to 5 cycles of operation per day (1 duty cycle is<br />
equivalent to 1 opening and 1 closing).<br />
»»<br />
by the use of non-original spare parts or non-certified parts<br />
by the manufacturer<br />
»»<br />
by sabotage or maintenance or repair by unauthorized or<br />
unqualified technical personnel<br />
»»<br />
by use of parts and / or spare parts of another company or<br />
any other intervention without the written consent of the<br />
manufacturer.<br />
»»<br />
by power supply grid problems<br />
»»<br />
by misinterpretation of the manual’s instructions<br />
»»<br />
by sabotage or interference or intervention by one of the<br />
security/safety components<br />
»»<br />
by involuntary or intentional, direct or indirect negligence,<br />
omission or misuse (handling)<br />
»»<br />
on products not labeled by the manufacturer<br />
»»<br />
by normal wear and tear resulting from exposure to UV<br />
radiation<br />
»»<br />
by any deformation caused, to dark colored products, by<br />
exposure to sunlight<br />
This document replaces each previous versions.<br />
Η ΕΓΓΥΗΣΗ ΔΕΝ ΚΑΛΥΠΤΕΙ:<br />
Ζημιές που προκλήθηκαν:<br />
»»<br />
από κακή μεταφορά ή αποθήκευση από τρίτους ή κακή<br />
τοποθέτηση ή φυσιολογική φθορά.<br />
»»<br />
Εξωγενείς παράγοντες όπως καιρικές συνθήκες, πυρκαγιά<br />
(φωτιά), χημικά προϊόντα (καυστικά, οξέα κλπ), άλατα, νερό,<br />
γρατσουνιές, φυσικά φαινόμενα, βανδαλισμοί, ξυσίματα,<br />
ατύχημα, κ.ο.κ.<br />
»»<br />
από έλλειψη συντήρησης σύμφωνα με τις οδηγίες που παραδόθηκαν<br />
στον αγοραστή και περιέχονται στο εγχειρίδιο του κατασκευαστή<br />
σχετικά με τον χειρισμό και την φροντίδα της πόρτας<br />
»»<br />
από υπερβολική χρήση. Φυσιολογική χρήση νοείται όταν η<br />
πόρτα κάνει 4 έως 5 κύκλους λειτουργίας, το μέγιστο, ανά ημέρα<br />
(1 κύκλος λειτουργίας ισοδυναμεί με 1 άνοιγμα και 1 κλείσιμο).<br />
»»<br />
από την χρήση μη γνήσιων ανταλλακτικών ή μη πιστοποιημένων<br />
εξαρτημάτων από τον κατασκευαστή<br />
»»<br />
από δολιοφθορά ή συντήρηση ή επισκευή από μη<br />
εξουσιοδοτημένο ή μη εξειδικευμένο τεχνικό προσωπικό<br />
»»<br />
Χρήση εξαρτημάτων ή/και ανταλλακτικών άλλης εταιρείας ή<br />
οποιαδήποτε άλλη παρέμβαση χωρίς την έγγραφη συγκατάθεση<br />
του κατασκευαστή.<br />
»»<br />
από προβλήματα του ηλεκτρικού δικτύου τροφοδοσίας<br />
»»<br />
από εσφαλμένη ερμηνεία των οδηγιών των εγχειριδίων<br />
»»<br />
από δολιοφθορά ή παρέμβαση ενός από τα εξαρτήματα<br />
ασφάλειας<br />
»»<br />
Ακούσια ή εκούσια, άμεση ή έμμεση αμέλεια, παράλειψη ή κακή<br />
χρήση (χειρισμός)<br />
»»<br />
σε προϊόντα που δεν φέρουν την ετικέτα του κατασκευαστή<br />
»»<br />
από φυσιολογική φθορά που προέρχεται από την έκθεση σε UV<br />
ακτινοβολία<br />
»»<br />
από τυχόν παραμόρφωση που προκαλείται από την έκθεση<br />
σκούρων χρωμάτων στο ηλιακό φως<br />
Το παρόν καταργεί κάθε προηγούμενο
ΙNSTALLATION DATE:<br />
_____________________________________________<br />
STAMP AND SIGNATURE OF THE TECHNICIAN:<br />
ΗΜΕΡΟΜΗΝΙΑΣ ΤΟΠΟΘΕΤΗΣΗΣ :<br />
_______________________________________<br />
ΣΦΡΑΓΙΔΑ ΚΑΙ ΥΠΟΓΡΑΦΗ ΤΟΥ ΕΓΚΑΤΑΣΤΑΤΗ:<br />
CUSTOMER NAME & SIGNATURE:<br />
ΟΝΟΜΑΤΕΠΩΝΥΜΟ & ΥΠΟΓΡΑΦΗ ΤΟΥ ΠΕΛΑΤΗ<br />
WARRANTY CERTIFICATE<br />
(To be filled from costumer and sent to the<br />
manufacturer in a period of 30 days)<br />
DATE:________________________<br />
PURCHASE DOCUMENT DATE:_____________________<br />
MODEL:_____________ SERIAL N:____________________<br />
HEIGHT:_________mm x WIDTH:_________mm<br />
AUTOMATION: YES NO<br />
ACCESSORIES:<br />
ΠΙΣΤΟΠΟΙΗΤΙΚΟ ΕΓΓΥΗΣΗΣ<br />
(Να συμπληρωθεί από τον πελάτη και να αποσταλεί<br />
στον κατασκευαστή εντός ενός (1) μήνα)<br />
ΗΜΕΡΟΜΗΝΙΑ:____________<br />
ΗΜ/ΝΙΑ ΕΚΔΟΣΗΣ ΠΑΡΑΣΤΑΤΙΚΟΥ:_______________<br />
ΜΟΝΤΕΛΟ: ______________________________________<br />
ΑΡΙΘΜΟΣ ΣΕΙΡΑΣ ΠΑΡΑΓΩΓΗΣ:___________________<br />
ΥΨΟΣ:__________mm x ΠΛΑΤΟΣ:__________mm<br />
ΑΥΤΟΜΑΤΗ: ΝΑΙ ΟΧΙ<br />
ΕΞΑΡΤΗΜΑΤΑ: ________________<br />
SURNAME / NAME / SIGNATURE (costumer):<br />
SURNAME / NAME / SIGNATURE (costumer):<br />
WARRANTY CONFIRMATION<br />
(To be filled from installator and sent to the<br />
manufacturer)<br />
DATE:_____________<br />
MODEL:___________<br />
SERIAL N:__________<br />
HEIGHT:__________mm x WIDTH:_________mm<br />
AUTOMATION: YES NO<br />
ACCESSORIES:<br />
ΕΠΙΒΕΒΑΙΩΣΗ ΕΓΓΥΗΣΗΣ<br />
(Να συμπληρωθεί από τον τεχνικό τοποθέτησης και να<br />
αποσταλεί στον κατασκευαστή)<br />
ΗΜΕΡΟΜΗΝΙΑ:____________<br />
ΜΟΝΤΕΛΟ: _________________<br />
ΑΡΙΘΜΟΣ ΣΕΙΡΑΣ ΠΑΡΑΓΩΓΗΣ:<br />
ΥΨΟΣ:__________mm x ΠΛΑΤΟΣ:__________mm<br />
ΑΥΤΟΜΑΤΗ: ΝΑΙ ΟΧΙ<br />
ΕΞΑΡΤΗΜΑΤΑ: ________________<br />
I certify that the installations was completed according to<br />
manufacturer’s manual of installation.<br />
SURNAME / NAME / STAMP & SIGNATURE (installator):<br />
Επιβεβαιώνω πως η τοποθέτηση έγινε σύμφωνα με το εγχειρίδιο του<br />
κατασκευαστή.<br />
ΟΝΟΜΑΤΕΠΩΝΥΜΟ/ΣΦΡΑΓΙΔΑ & ΥΠΟΓΡΑΦΉ (τεχνικός<br />
τοποθέτησης):
Rolling Shutter - Residential Doors - Industrial Doors Automations<br />
10 Km Old National Road Katerini-Thessaloniki P.O. 600 62<br />
Tel: +30 23510 41860 Fax: +30 23510 42252 www.biorol.gr e-mail: info@biorol.gr