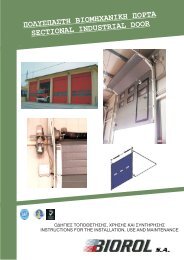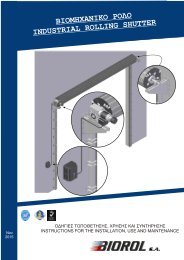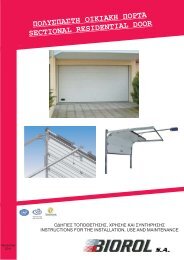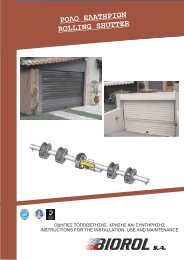
Collapsible-Grills-Installation_GREN_May2017

You also want an ePaper? Increase the reach of your titles
YUMPU automatically turns print PDFs into web optimized ePapers that Google loves.
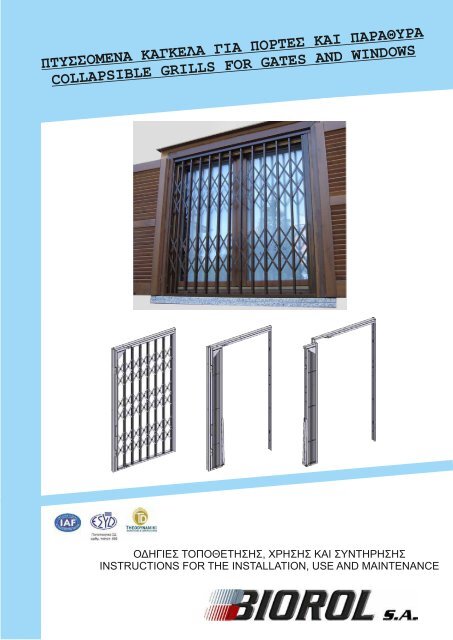
ΠΤΥΣΣΟΜΕΝΑ ΚΑΓΚΕΛΑ ΓΙΑ ΠΟΡΤΕΣ ΚΑΙ ΠΑΡΑΘΥΡΑ<br />
COLLAPSIBLE GRILLS FOR GATES AND WINDOWS<br />
ΟΔΗΓΙΕΣ ΤΟΠΟΘΕΤΗΣΗΣ, ΧΡΗΣΗΣ ΚΑΙ ΣΥΝΤΗΡΗΣΗΣ<br />
INSTRUCTIONS FOR THE INSTALLATION, USE AND MAINTENANCE
ΕΞΑΡΤΗΜΑΤΑ<br />
ACCESSORIES<br />
3<br />
4 5<br />
2<br />
6<br />
1<br />
19 20<br />
7<br />
16<br />
17 18<br />
8<br />
15<br />
14<br />
10<br />
9<br />
13<br />
11<br />
12<br />
1. Βέργα 3 οπών<br />
2. Βέργα 5 οπών<br />
3. Στοπ πτυσσόμενης<br />
4. Στήριγμα Οδηγού<br />
5. Βαγονέτο Νάυλον<br />
6. Οδηγός<br />
7. Μπινί<br />
8. Κάσα<br />
9. Σύρτης με Γάντζο<br />
10. Κλειδαριά<br />
11. Πι 15Χ15<br />
12. Κατωκάσι<br />
13. Μεντεσές για κατωκάσι<br />
14. Νάυλον Αποστάτης 12Χ14<br />
15. Αποστάτης 8Χ40<br />
16. Περτσίνι 5Χ47<br />
17. Φλαντζωτό σωληνάκι<br />
18. Περτσίνι 4,7Χ13<br />
19. Μεντεσές πτυσσόμενης<br />
20. Κοιλοδοκός 50Χ30<br />
1. Bar 3 holes<br />
2. Bar 5 holes<br />
3. Stop for collapsible<br />
4. Guide support<br />
5. Carriage Naylon<br />
6. Guide<br />
7. Bini<br />
8. Casing<br />
9. Latch with hook<br />
10. Lock<br />
11. U 15Χ15<br />
12. Lower guide<br />
13. Hinge for lower guide<br />
14. Naylon tube 12Χ14<br />
15. Tube 8Χ40<br />
16. Rivet 5Χ47<br />
17. Flanged tube<br />
18. Rivet 4,7Χ13<br />
19. Hinge for collapsible<br />
20. Hollow section 50Χ30<br />
1
ΤΥΠΟΙ ΠΤΥΣΣΟΜΕΝΩΝ<br />
TYPES OF COLLAPSIBLE<br />
Μονή Πόρτα<br />
Single door<br />
Μονή Σπαστή Πόρτα<br />
Single openable door<br />
Διπλή Πόρτα<br />
Double door<br />
Διπλή Σπαστή Πόρτα<br />
Double openable door<br />
- Η μονή πόρτα μαζεύεται δεξιά ή αριστερά<br />
- Η διπλή πόρτα συνιστάται για μεγάλα<br />
ανοίγματα ή για λόγους συμμετρίας<br />
- Η μονή σπαστή πόρτα μαζεύεται και<br />
περιστρέφεται 180° για απελευθέρωση<br />
όλου του ανοίγματος<br />
- Η διπλή σπαστή πόρτα μαζεύεται στις δύο<br />
πλευρές και με περιστροφή 180° του κάθε<br />
φύλλου απελευθερώνεται όλο το άνοιγμα<br />
Για ύψος 1,20 έως 1,60 m τοποθετούνται<br />
2 σειρές χιαστί κάγκελων με μήκος βέργας<br />
5 οπών 400 mm<br />
Για ύψος 1,60 έως 2,00 m τοποθετούνται<br />
3 σειρές χιαστί κάγκελων με μήκος βέργας<br />
5 οπών 400 mm<br />
Για ύψος 2,00 έως 2,40 m τοποθετούνται<br />
3 σειρές χιαστί κάγκελων με μήκος βέργας<br />
5 οπών 510 mm<br />
- The single door is collapsed to the right or left<br />
- The double door is recommended for big<br />
openings or for symmetry reasons<br />
- The single openable door is collapsed and<br />
turned 180° for the releasing all the opening<br />
- The double openable door is collapsed in both<br />
sides and turned 180° each one for the<br />
releasing all the opening<br />
For height 1,20 until 1,60 m, 2 series of grill<br />
are placed with the bar 5 holes length 400 mm<br />
For height 1,60 until 2,00 m, 3 series of grill<br />
are placed with the bar 5 holes length 400 mm<br />
For height 2,00 until 2,40 m 3 series of grill<br />
are placed with the bar 5 holes length 510 mm<br />
Άνοιγμα Σπαστής Πόρτας<br />
Openable door<br />
2
ΤΕΧΝΙΚΑ ΧΑΡΑΚΤΗΡΙΣΤΙΚΑ<br />
TECHNICAL SPECIFICATIONS<br />
Τα πτυσσόμενα κάγκελα για πόρτες και παράθυρα κατασκευάζονται σε όλες τις επιθυμητές διαστάσεις ύψους και πλάτους.<br />
Είναι εξ ολοκλήρου συναρμολογημένα με περτσίνια και βίδες (χωρίς κολλήσεις) με συνέπεια να έχουν<br />
μεγαλύτερη αντοχή στις διαβρώσεις. Διατίθενται γαλβανισμένα ή βαμμένα σε RAL αποχρώσεις<br />
Η κάσα, ο οδηγός, το κατωκάσι, το μπινί, οι σύρτες της κλειδαριάς και τα κάθετα κάγκελα<br />
κατασκευάζονται από γαλβανισμένη εν θερμώ ατσαλολαμαρίνα πάχους 1,5 mm<br />
Τα χιαστί κάγκελα κατασκευάζονται από γαλβανισμένες εν θερμώ βέργες 5 και 3 οπών,<br />
πάχους 3 mm περτσινωμένα στα κάθετα κάγκελα (ΠΙ 15Χ15) με παρεμβολή νάυλον αποστατών,<br />
σε δύο ή τρείς σειρές ανάλογα με το ύψος της κατασκευής.<br />
Για πόρτες χρησιμοποιούνται βέργες 5 οπών μήκους 510 mm και για παράθυρα βέργες 5 οπών<br />
μήκους 400 mm (σε κάθε άκρη χρησιμοποιούνται δύο βέργες 3 οπών κατάλληλου μήκους).<br />
Η ανάρτηση από τον επάνω οδηγό γίνεται με βαγονέτα νάυλον, καθένα των οποίων φέρει<br />
δύο ράουλα επενδυμένα με νάυλον. Βαγονέτα τοποθετούνται ανά τρία κάθετα κάγκελα και<br />
στα ενδιάμεσα τοποθετούνται στηρίγματα οδηγού.<br />
Η νάυλον επένδυση των ράουλων και οι νάυλον αποστάτες στις αρθρώσεις των χιαστί<br />
κάγκελων καθιστά αθόρυβη την λειτουργία της πτυσσόμενης πόρτας.<br />
Τα ακριανά κάθετα κάγκελα στηρίζονται στην κάσα και στο μπινί με φρεζάτες βίδες Μ6<br />
και λαμάκια πάχους 3 mm που φέρουν αντίστοιχο σπείρωμα.<br />
Η κλειδαριά ασφαλείας είναι χωνευτή στο μπινί με ορατή την μια πλευρά του μύλου, παρέχοντας μεγαλύτερη ασφάλεια, καθόσον<br />
δεν μπορεί να γίνει εξώθησή του σε προσπάθεια παραβίασης της κλειδαριάς. Η κλειδαριά σπρώχνει σε αντίθετες κατευθύνσεις<br />
δύο σύρτες, χωνευτούς στο μπινί της πτυσσόμενης, με ενσωματωμένους γάντζους που στην κλειστή θέση συρταρώνουν σε αντίστοιχη<br />
οπή που υπάρχει στο αντικρυστό μπινί της κάσας. Το ζεύγος των αντικρυστών μπινί παρέχει μεγαλύτερη<br />
ασφάλεια καθώς δεν υπάρχει ορατό διάκενο μεταξύ τους, εξασφαλίζοντας έτσι τους σύρτες.<br />
Το κατωκάσι με κατάλληλο μεντεσέ μπορεί να αναδιπλωθεί πάνω στην συνεπτυγμένη πόρτα αφήνοντας<br />
ελεύθερο το κάτω μέρος του ανοίγματος για καθαρισμό και διέλευση χωρίς εμπόδιο.<br />
Στον τύπο της σπαστής πτυσσόμενης, με αναδιπλωμένο το κατωκάσι στην συνεπτυγμένη πόρτα, μπορεί<br />
να ανοίξει με περιστροφή 180° αφήνοντας ελεύθερο όλο το άνοιγμα. Ο πάνω οδηγός είναι χωρισμένος σε<br />
δύο τμήματα, το ένα των οποίων έχει μήκος κατάλληλο να δεχθεί την συνεπτυγμένη πόρτα και στηρίζεται<br />
στον κοιλοδοκό της πόρτας με πρόσθετες ενισχύσεις. Στην κλειστή θέση τα δύο τμήματα του οδηγού<br />
ευθυγραμμίζονται με ειδικό ρυθμιζόμενο μάνδαλο.<br />
The collapsible grills for doors and windows are manufactured in all desirable dimensions of height and width.<br />
They are assembled entirely by rivets and screws, so they have a bigger resistance in corrosion.<br />
They are available galvanized or dyed in RAL tints<br />
The casing, the guide, the lower guide, the bini profile, the latches of lock and vertical U15X15 are produced<br />
by galvanized sheet metal in a thickness 1,5 mm<br />
The grills are manufactured by galvanized bars 5 and 3 holes in a thickness 3 mm connected to the vertical U15X15 via rivets with<br />
interjection tube and nylon apostates, in two or three series depending of the height.<br />
Bars 5 holes with a length of 510 mm are used for the grills of doors and bars 5 holes with a length of 400 mm are used for the grills<br />
of windows. In both side of each grill two bars 3 holes are used by suitable length.<br />
The collapsible grill is draged in the upper guide via nylon carriage , with two bearings coated by nylon.<br />
The carriage are placed per three vertical U15X15 and two guide supports intermediary are placed<br />
The nylon coat of the bearing and the nylon apostates in the grill articulations renders a noiseless operation of collapsible door.<br />
The lateral vertical U15X15 are supported on the casing and on bini profile via screws M6 and plates with thread and a thickness of 3 mm<br />
The safety lock inside the bini profile with visible a side of mill, providing bigger safety, in as far as it cannot become his extrusion<br />
in effort of violation of lock. The lock pushes in opposite directions two latches with incorporated hooks, that get into the corresponding<br />
apertures of the casing bini.<br />
The pair of two bini profiles provides bigger safety, as it does not exist visible gap between them, ensuring thus the latches.<br />
The lower guide with suitable hinge can sit up on the shrunk door leaving free the down part of opening for cleaning and<br />
passage without obstacle.<br />
In case of openable collapsible grills, when the lower guide sit up on the shrunk door, it can open with rotation 180° leaving free<br />
all opening. The upper guide consists of two separated departments, one of them has a suitable length to accept the shrunk door<br />
and it is fixed on the hollow section via additional reinforcements. In the closed position the two departments of the guide are aligned<br />
with a adjustable spring latch.<br />
3
ΤΟΠΟΘΕΤΗΣΗ ΜΟΝΗΣ ΠΤΥΣΣΟΜΕΝΗΣ ΠΟΡΤΑΣ<br />
INSTALLATION INSTRUCTIONS FOR SINGLE DOOR<br />
Βήμα 1: Στερέωση πτυσσόμενης<br />
Step 1: Screwing the collapsible<br />
Στερεώνουμε την κάσα ΠΙ, στην οποία είναι ενσωματωμένη η πτυσσόμενη πόρτα, στην κατακόρυφη πλευρά<br />
του ανοίγματος, χρησιμοποιώντας ούπα και φρεζάτες βίδες ή ειδικές βίδες Φ7 που βιδώνουν σε ανοιγμένη οπή Φ6<br />
The casing U, in that is incorporated the collapsible door, is fixed on the vertical side of the opening,<br />
using dowels and countersunk screws or special screws Φ7 that screwed into an opened aperture Φ6<br />
Σημείωση: Μετά την ολοκλήρωση της τοποθέτησης και τον τελικό έλεγχο καταστρέφουμε<br />
το κεφάλι κάθε βίδας στήριξης για να μη μπορούν να ξεβιδωθούν<br />
Note: After the completion of the installation and the final inspection the head of each screw<br />
must be destroyed in order to do not can unscrewed<br />
4
ΤΟΠΟΘΕΤΗΣΗ ΜΟΝΗΣ ΠΤΥΣΣΟΜΕΝΗΣ ΠΟΡΤΑΣ<br />
INSTALLATION INSTRUCTIONS FOR SINGLE DOOR<br />
Βήμα 2: Στερέωση πάνω οδηγού<br />
Step 2: Screwing the upper guide<br />
Περνάμε τον πάνω οδηγό, έτσι ώστε τα βαγονέτα και τα στηρίγματα να μπουν στη σχισμή του και η επάνω<br />
πλευρά του να ακουμπήση στο πάνω μέρος του ανοίγματος. Στερεώνουμε τον οδηγό, χρησιμοποιώντας ούπα<br />
και φρεζάτες βίδες ή ειδικές βίδες Φ7 που βιδώνουν σε ανοιγμένη οπή Φ6.<br />
Σε περίπτωση που το πάνω μέρος του ανοίγματος δεν είναι επίπεδο και οριζόντιο, παρεμβάλουμε λαμάκια<br />
ώστε κατά το βίδωμα να μη παραμορφωθεί ο οδηγός.<br />
The upper guide passes so that the carriages and the supports to be entered in his slot and his above side<br />
is tangent on the upper side of the opening. The guide is fixed, using dowels and countersunk screws or<br />
special screws Φ7 that screwed into an opened aperture Φ6.<br />
In the case of the up side of the opening it is not level and horizontal, plates are interfered in order that<br />
during screwing the guide is not deformed<br />
5
ΤΟΠΟΘΕΤΗΣΗ ΜΟΝΗΣ ΠΤΥΣΣΟΜΕΝΗΣ ΠΟΡΤΑΣ<br />
INSTALLATION INSTRUCTIONS FOR SINGLE DOOR<br />
Βήμα 3: Στερέωση κάσας<br />
Step 3: Screwing the casing<br />
2<br />
1<br />
2<br />
1<br />
1<br />
2<br />
Ξεβιδώνουμε τις βίδες (1) που συγκρατούν το μπινί στην κάσα ΠΙ ώστε να αποχωριστεί από την κάσα.<br />
Στερεώνουμε την κάσα ΠΙ στην κατακόρυφη πλευρά του ανοίγματος, χρησιμοποιώντας ούπα<br />
και φρεζάτες βίδες (2) ή ειδικές βίδες Φ7 που βιδώνουν σε ανοιγμένη οπή Φ6.<br />
Τοποθετούμε το μπινί μέσα στην κάσα ΠΙ και ξαναβιδώνουμε τις βίδες (1).<br />
The screws (1) , that they retain the bini profile on the casing U, are unscrewed so it is separated from the casing.<br />
The casing U is fixed on the vertical side of opening, using dowels and countersunk screws (2) or special screws Φ7<br />
that screwed into an opened aperture Φ6.<br />
The bini profile is placed into the casing and the screws (1) are screwed again.<br />
6
ΤΟΠΟΘΕΤΗΣΗ ΜΟΝΗΣ ΠΤΥΣΣΟΜΕΝΗΣ ΠΟΡΤΑΣ<br />
INSTALLATION INSTRUCTIONS FOR SINGLE DOOR<br />
Βήμα 4: Έλεγχος σωστής λειτουργίας<br />
Step 4: Control of the right operation<br />
1<br />
3<br />
2<br />
2a<br />
2<br />
1<br />
x<br />
a<br />
b<br />
Μετά την τοποθέτηση ελέγχουμε την σωστή λειτουργία:<br />
Απασφαλίζουμε το μάνδαλο κατωκασιού (1), κατεβάζουμε το κατωκάσι (2)* έτσι ώστε οι δύο πλευρές του άκρου του<br />
να μπούν στο ΠΙ της κάσας και τραβάμε τα πτυσσόμενα κάγκελα (3) μέχρις ότου το μπινί της πόρτας να πατήσει<br />
στο μπινί της κάσας. Γυρίζουμε το κλειδί της κλειδαριάς (a) για κλείδωμα και ξεκλείδωμα. Αντίστοιχα θα κινηθούν<br />
αντιθέτως οι γάντζοι (b) των συρτών της κλειδαριάς για να ασφαλίσουν την πόρτα στο μπινί της κάσας.<br />
* Οταν το κατωκάσι έχει μήκος μεγαλύτερο από 1,5 m τοποθετείται στη μέση του κατωκασιού πείρος που εισέρχεται σε αντίστοιχη<br />
τρύπα που ανοίγουμε στο δάπεδο (2a)<br />
Σημείωση: Σε περίπτωση που τα ορθογώνια ανοίγματα στο μπινί πόρτας και κάσας δεν αντικρύζουν ακριβώς και υπάρχει πρόβλημα<br />
στο κλείδωμα, λασκάρουμε τις βίδες που συγκρατούν το μπινί της πόρτας (1) και μετατοπίζουμε λίγο το μπινί (με την κλειδαριά και<br />
τους σύρτες) προς τα πάνω ή κάτω (Χ) ώστε οι γάτζοι να μπαίνουν ελεύθερα στα ανοίγματα του μπινί της κάσας.<br />
Afterwards the placement it take place the control for the right operation :<br />
Unlocking the locking plate of lower guide (1), the lower guide is rotated (2) until his two sides are entered in the casing U<br />
and the collapsible grill (3) is pulled until the bini of door is touched the bini of casing. The key of lock (a) is rotated<br />
for locking and unlocking. Respectively the latches with the hooks (b) will be moved on the contrary in order to they<br />
secure the door.<br />
* When the lower guide is longer than 1,5 m, a pin is placed in the middle of it, that is entered in a corresponding hole which is opened<br />
in the floor (2a)<br />
Note: In case of the rectangles apertures of bini of the door and the bini of casing are not contacted precisely and a problem exists<br />
to the locking, the screws that they retain the bini of the door (1) are loosed and the bini (with lock and the latches) is moved to the<br />
up or down (X) in order that the hooks are entered freely in the apertures of bini of casing.<br />
7
ΤΟΠΟΘΕΤΗΣΗ ΔΙΠΛΗΣ ΠΤΥΣΣΟΜΕΝΗΣ ΠΟΡΤΑΣ<br />
INSTALLATION INSTRUCTIONS FORE DOUBLE DOOR<br />
Βήμα 1: Στερέωση μιας πλευράς της πτυσσόμενης<br />
Step 1: Screwing the first side of collapsible<br />
Στερεώνουμε την κάσα ΠΙ, στην οποία είναι ενσωματωμένη η μια πλευρά της πτυσσόμενης πόρτας,<br />
στην κατακόρυφη πλευρά του ανοίγματος, χρησιμοποιώντας ούπα και φρεζάτες βίδες ή<br />
ειδικές βίδες Φ7 που βιδώνουν σε ανοιγμένη οπή Φ6<br />
The casing U, in that is incorporated the one side of collapsible door, is fixed on the vertical side of the opening,<br />
using dowels and countersunk screws or special screws Φ7 that screwed into an opened aperture Φ6<br />
Σημείωση: Μετά την ολοκλήρωση της τοποθέτησης και τον τελικό έλεγχο καταστρέφουμε<br />
το κεφάλι κάθε βίδας στήριξης για να μη μπορούν να ξεβιδωθούν<br />
Note: After the completion of the installation and the final inspection the head of each screw<br />
must be destroyed in order to do not can unscrewed<br />
8
ΤΟΠΟΘΕΤΗΣΗ ΔΙΠΛΗΣ ΠΤΥΣΣΟΜΕΝΗΣ ΠΟΡΤΑΣ<br />
INSTALLATION INSTRUCTIONS FOR DOUBLE DOOR<br />
Βήμα 2: Στερέωση πάνω οδηγού<br />
Step 2: Screwing the upper guide<br />
2<br />
3<br />
1<br />
Περνάμε την δεύτερη πλευρά της πτυσσόμενης στον πάνω οδηγό , έτσι ώστε τα βαγονέτα και τα στηρίγματά της<br />
να μπουν στη σχισμή του (1), περνάμε την άλλη άκρη του οδηγού στην τοποθετημένη (μαζεμένη) πρώτη πλευρά,<br />
έτσι ώστε τα βαγονέτα και τα στηρίγματά της να μπουν στη σχισμή του (2) και τοποθετούμε τον οδηγό στη θέση του (3),<br />
(η επάνω πλευρά του να ακουμπήση στο πάνω μέρος του ανοίγματος).<br />
Στερεώνουμε τον οδηγό, χρησιμοποιώντας ούπα και φρεζάτες βίδες ή ειδικές βίδες Φ7 που βιδώνουν σε<br />
ανοιγμένη οπή Φ6. Σε περίπτωση που το πάνω μέρος του ανοίγματος δεν είναι επίπεδο και οριζόντιο,<br />
παρεμβάλουμε λαμάκια ώστε κατά το βίδωμα να μη παραμορφωθεί ο οδηγός.<br />
The second side of the collapsible door passes into the upper guide, so that the carriages and the supports to be entered<br />
in his slot (1), the opposite end of the guide passes into the first side that is installed and collapsed, so that the carriages<br />
and the supports to be entered in his slot (2) and the guide is put at his place (3), so that his above side<br />
is tangent on the upper side of the opening.<br />
The guide is fixed, using dowels and countersunk screws or special screws Φ7 that screwed into an opened aperture Φ6.<br />
In the case of the up side of the opening it is not level and horizontal, plates are interfered in order that during screwing<br />
the guide is not deformed<br />
9
ΤΟΠΟΘΕΤΗΣΗ ΔΙΠΛΗΣ ΠΤΥΣΣΟΜΕΝΗΣ ΠΟΡΤΑΣ<br />
INSTALLATION INSTRUCTIONS FOR DOUBLE DOOR<br />
Βήμα 3: Στερέωση της δεύτερης πλευράς<br />
Step 3: Screwing the second side of collapsible<br />
Στερεώνουμε την κάσα ΠΙ, στην οποία είναι ενσωματωμένη η δεύτερη πλευρά της πτυσσόμενης πόρτας,<br />
στην απέναντι κατακόρυφη πλευρά του ανοίγματος, χρησιμοποιώντας ούπα και φρεζάτες βίδες ή ειδικές βίδες Φ7<br />
που βιδώνουν σε ανοιγμένη οπή Φ6<br />
The casing U, in that is incorporated the second side of collapsible door, is fixed on the opposite vertical side of<br />
the opening, using dowels and countersunk screws or special screws Φ7 that screwed into an opened aperture Φ6.<br />
Σημείωση: Μετά την ολοκλήρωση της τοποθέτησης και τον τελικό έλεγχο καταστρέφουμε<br />
το κεφάλι κάθε βίδας στήριξης για να μη μπορούν να ξεβιδωθούν<br />
Note: After the completion of the installation and the final inspection the head of each screw<br />
must be destroyed in order to do not can unscrewed<br />
10
ΤΟΠΟΘΕΤΗΣΗ ΔΙΠΛΗΣ ΠΤΥΣΣΟΜΕΝΗΣ ΠΟΡΤΑΣ<br />
INSTALLATION INSTRUCTIONS FOR DOUBLE DOOR<br />
Βήμα 4: Έλεγχος σωστής λειτουργίας<br />
Step 4: Control of the right operation<br />
6<br />
3<br />
1<br />
5<br />
4<br />
2<br />
4<br />
4<br />
1<br />
x<br />
a<br />
b<br />
Μετά την τοποθέτηση ελέγχουμε την σωστή λειτουργία:<br />
Απασφαλίζουμε το μάνδαλο κατωκασιού της μιας πλευράς (1), κατεβάζουμε το κατωκάσι (2), απασφαλίζουμε<br />
το μάνδαλο κατωκασιού της αλλης πλευράς (3), κατεβάζουμε το κατωκάσι (4) έτσι ώστε να μπει στο ΠΙ του πρώτου<br />
κατωκασιού και να ευθυγραμιστεί με αυτό. Ενας πείρος στο σημείο σύνδεσης του κατωκασιού εισέρχεται σε αντίστοιχη<br />
τρύπα που ανοίγουμε στο δάπεδο<br />
Τραβάμε τα πτυσσόμενα κάγκελα (5 & 6) μέχρις ότου τα δύο μπινί της πόρτας να πατήσουν μεταξύ τους.<br />
Γυρίζουμε το κλειδί της κλειδαριάς (a) για κλείδωμα και ξεκλείδωμα. Αντίστοιχα θα κινηθούν αντιθέτως οι γάντζοι (b)<br />
των συρτών της κλειδαριάς για να ασφαλίσουν την πόρτα.<br />
Σημείωση: Σε περίπτωση που τα ορθογώνια ανοίγματα στα μπινί της πόρτας δεν αντικρύζουν ακριβώς και υπάρχει πρόβλημα<br />
στο κλείδωμα, λασκάρουμε τις βίδες που συγκρατούν το μπινί της πόρτας (1) και μετατοπίζουμε λίγο το μπινί (με την κλειδαριά και<br />
τους σύρτες) προς τα πάνω ή κάτω (Χ) ώστε οι γάτζοι να μπαίνουν ελεύθερα στα ανοίγματα του απέναντι μπινί.<br />
Afterwards the placement it take place the control for the right operation :<br />
Unlocking the locking plate of lower guide of one side (1), the lower guide is rotated (2), unlocking the locking plate<br />
of lower guide of second side (3), the lower guide is rotated (4) until it is entered in the profile U of first one and it is<br />
aligned with this. A pin at the connection point is entered in a corresponding hole which is opened in the floor<br />
The collapsible grills of two sides are pulled (5 & 6) until the two bini profiles of the door are touched between them.<br />
The key of lock (a) is rotated for locking and unlocking. Respectively the latches with the hooks (b) will be moved<br />
on the contrary in order to they secure the door.<br />
Note: In case of the rectangles apertures of two bini of the door are not contacted precisely and a problem exists to the locking,<br />
the screws that they retain the bini of the door (1) are loosed and the bini (with lock and the latches) is moved to the up or down (X)<br />
in order that the hooks are entered freely in the apertures of bini of casing.<br />
11
ΤΟΠΟΘΕΤΗΣΗ ΜΟΝΗΣ ΣΠΑΣΤΗΣ ΠΤΥΣΣΟΜΕΝΗΣ<br />
INSTALLATION INSTRUCTIONS FOR SINGLE OPENABLE<br />
Βήμα 1: Στερέωση κοιλοδοκού σπαστής<br />
Step 1: Screwing the hollow section of openable<br />
Στερεώνουμε τον κοιλοδοκό με τους μεντεσέδες, στον οποίο θα τοποθετηθεί η σπαστή πτυσσόμενη πόρτα,<br />
στην κατακόρυφη πλευρά του ανοίγματος, χρησιμοποιώντας ούπα και φρεζάτες βίδες ή ειδικές βίδες Φ7<br />
που βιδώνουν σε ανοιγμένη οπή Φ6<br />
The hollow section, onto that the collapsible openable door will be put, is fixed on the vertical side of the opening,<br />
using dowels and countersunk screws or special screws Φ7 that screwed into an opened aperture Φ6.<br />
12
ΤΟΠΟΘΕΤΗΣΗ ΜΟΝΗΣ ΣΠΑΣΤΗΣ ΠΤΥΣΣΟΜΕΝΗΣ<br />
INSTALLATION INSTRUCTIONS FOR SINGLE OPENABLE<br />
Βήμα 2: Στερέωση πάνω οδηγού<br />
Step 2: Screwing the upper guide<br />
2<br />
1<br />
3<br />
Ανοίγουμε τρύπες (Φ7) στον κοιλοδοκό με τον ενσωματωμένο οδηγό (1), περνάμε το άκρο του κοιλοδοκού<br />
στο τακάκι του κάθετου κοιλοδοκού που τοποθετήσαμε (2) και τον τοποθετούμε έτσι ώστε η επάνω πλευρά του<br />
να ακουμπήση στο πάνω μέρος του ανοίγματος (3). Στερεώνουμε τον κοιλοδοκό με τον οδηγό, χρησιμοποιώντας<br />
ούπα και φρεζάτες βίδες ή ειδικές βίδες Φ7 που βιδώνουν σε ανοιγμένη οπή Φ6.<br />
Σε περίπτωση που το πάνω μέρος του ανοίγματος δεν είναι επίπεδο και οριζόντιο, παρεμβάλουμε λαμάκια<br />
ώστε κατά το βίδωμα να μη παραμορφωθεί ο οδηγός.<br />
Holes Φ7 are opened on the hollow section with the incorporated upper guide (1), the end of this hollow section<br />
passes to the protrusion of the vertical hollow section that already was installed (2) and it is placed so that<br />
his above side is tangent on the upper side of the opening (3). The guide is fixed, using dowels and countersunk<br />
screws or special screws Φ7 that screwed into an opened aperture Φ6.<br />
In the case of the up side of the opening it is not level and horizontal, plates are interfered in order that<br />
during screwing the guide is not deformed<br />
13
ΤΟΠΟΘΕΤΗΣΗ ΜΟΝΗΣ ΣΠΑΣΤΗΣ ΠΤΥΣΣΟΜΕΝΗΣ<br />
INSTALLATION INSTRUCTIONS FOR SINGLE OPENABLE<br />
Βήμα 3: Στερέωση κάσας<br />
Step 3: Screwing the casing<br />
2<br />
1<br />
2<br />
1<br />
1<br />
2<br />
Ξεβιδώνουμε τις βίδες (1) που συγκρατούν το μπινί στην κάσα ΠΙ ώστε να αποχωριστεί από την κάσα.<br />
Στερεώνουμε την κάσα ΠΙ στην κατακόρυφη πλευρά του ανοίγματος, χρησιμοποιώντας ούπα<br />
και φρεζάτες βίδες (2) ή ειδικές βίδες Φ7 που βιδώνουν σε ανοιγμένη οπή Φ6.<br />
Τοποθετούμε το μπινί μέσα στην κάσα ΠΙ και ξαναβιδώνουμε τις βίδες (1).<br />
The screws (1) , that they retain the bini profile on the casing U, are unscrewed so it is separated from the casing.<br />
The casing U is fixed on the vertical side of opening, using dowels and countersunk screws (2) or special screws Φ7<br />
that screwed into an opened aperture Φ6.<br />
The bini profile is placed into the casing and the screws (1) are screwed again.<br />
14
ΤΟΠΟΘΕΤΗΣΗ ΜΟΝΗΣ ΣΠΑΣΤΗΣ ΠΤΥΣΣΟΜΕΝΗΣ<br />
INSTALLATION INSTRUCTIONS FOR SINGLE OPENABLE<br />
Βήμα 4: Τοποθέτηση της σπαστής και ρύθμιση του στοπ<br />
Step 4: Placement of the openable and adjustment the stop<br />
b<br />
a<br />
2<br />
1<br />
Τοποθετούμε την πτυσσόμενη πόρτα στους μεντεσέδες του τοποθετημένου κάθετου κοιλοδοκού.<br />
Περιστρέφουμε την πτυσσόμενη πόρτα έτσι ώστε ο οδηγός της να ευθυγραμμιστεί με τον πάνω οδηγό και να<br />
συγκρατηθεί σε αυτή τη θέση από τον πείρο του στοπ (με ενσωματωμένο ελατήριο).<br />
Σε περίπτωση που η συγκράτηση γίνεται δύσκολα, χαλαρώνουμε το παξιμάδι (1) και βιδώνουμε το παξιμάδι (2)<br />
ώστε ο πείρος του στοπ να μετακινηθεί προς την κατεύθυνση (a). Ξανασφίγγουμε το παξιμάδι (1)<br />
Σε περίπτωση που δεν γίνεται συγκράτηση, χαλαρώνουμε το παξιμάδι (1) και ξεβιδώνουμε το παξιμάδι (2)<br />
ώστε ο πείρος του στοπ να μετακινηθεί προς την κατεύθυνση (b). Ξανασφίγγουμε το παξιμάδι (1)<br />
The collapsible door is placed on the hinges of the vertical hollow section that is already installed.<br />
The collapsible door is rotated, so its guide will be aligned with the upper guide and it is retained in this place<br />
by the pin of the stop (with incorporated spring).<br />
In case of the withholding is difficulty, the nut (1) is loosed and the nut (2) is screwed in order that the pin of the stop<br />
will be moved to the direction (a). The nut (1) is screwed again.<br />
In case of the withholding is loose, the nut (1) is loosed and the nut (2) is unscrewed in order that the pin of the stop<br />
will be moved to the direction (b). The nut (1) is screwed again.<br />
15
ΤΟΠΟΘΕΤΗΣΗ ΜΟΝΗΣ ΣΠΑΣΤΗΣ ΠΤΥΣΣΟΜΕΝΗΣ<br />
INSTALLATION INSTRUCTIONS FOR SINGLE OPENABLE<br />
Βήμα 5: Έλεγχος σωστής λειτουργίας<br />
Step 5: Control of the right operation<br />
4<br />
2<br />
1<br />
3<br />
3<br />
1<br />
x<br />
a<br />
b<br />
Μετά την τοποθέτηση ελέγχουμε την σωστή λειτουργία:<br />
Από την πλήρως ανοιχτή θέση, περιστρέφουμε την πτυσσόμενη ώστε να συγκρατηθεί στο στοπ και να ευθυγραμμιστούν<br />
οι οδηγοί (1), απασφαλίζουμε το μάνδαλο κατωκασιού (2), κατεβάζουμε το κατωκάσι (3)* έτσι ώστε οι δύο πλευρές του<br />
άκρου του να μπούν στο ΠΙ της κάσας και τραβάμε τα πτυσσόμενα κάγκελα (4) μέχρις ότου το μπινί της πόρτας να<br />
πατήσει στο μπινί της κάσας. Γυρίζουμε το κλειδί της κλειδαριάς (a) για κλείδωμα και ξεκλείδωμα. Αντίστοιχα θα κινηθούν<br />
αντιθέτως οι γάντζοι (b) των συρτών της κλειδαριάς για να ασφαλίσουν την πόρτα στο μπινί της κάσας.<br />
* Οταν το κατωκάσι έχει μήκος μεγαλύτερο από 1,5 m τοποθετείται στη μέση του κατωκασιού πείρος που εισέρχεται σε αντίστοιχη<br />
τρύπα που ανοίγουμε στο δάπεδο<br />
Σημείωση: Σε περίπτωση που τα ορθογώνια ανοίγματα στο μπινί πόρτας και κάσας δεν αντικρύζουν ακριβώς και υπάρχει πρόβλημα<br />
στο κλείδωμα, λασκάρουμε τις βίδες που συγκρατούν το μπινί της πόρτας (1) και μετατοπίζουμε λίγο το μπινί (με την κλειδαριά και<br />
τους σύρτες) προς τα πάνω ή κάτω (Χ) ώστε οι γάτζοι να μπαίνουν ελεύθερα στα ανοίγματα του μπινί της κάσας.<br />
Afterwards the placement it take place the control for the right operation :<br />
The collapsible door, from the completely open position is rotated until its guide will be aligned with the upper guide and<br />
it is retained by the pin of stop (1), the locking plate unlocks the lower guide (2), the lower guide is rotated (3)* until his<br />
two sides are entered in the casing U and the collapsible grill (4) is pulled until the bini of door is touched the bini of casing.<br />
The key of lock (a) is rotated for locking and unlocking. Respectively the latches with the hooks (b) will be moved on<br />
the contrary in order to they secure the door.<br />
* When the lower guide is longer than 1,5 m, a pin is placed in the middle of it, that is entered in a corresponding hole which is opened<br />
in the floor<br />
Note: In case of the rectangles apertures of bini of the door and the bini of casing are not contacted precisely and a problem exists<br />
to the locking, the screws that they retain the bini of the door (1) are loosed and the bini (with lock and the latches) is moved to the<br />
up or down (X) in order that the hooks are entered freely in the apertures of bini of casing.<br />
16
ΤΟΠΟΘΕΤΗΣΗ ΔΙΠΛΗΣ ΣΠΑΣΤΗΣ ΠΤΥΣΣΟΜΕΝΗΣ<br />
INSTALLATION INSTRUCTIONS FOR DOUBLE OPENABLE<br />
Βήμα 1: Στερέωση κοιλοδοκού μιας πλευράς της σπαστής<br />
Step 1: Screwing the hollow section of first side of openable<br />
Στερεώνουμε τον κοιλοδοκό με τους μεντεσέδες, στον οποίο θα τοποθετηθεί η μια πλευρά της διπλής σπαστής<br />
πτυσσόμενης πόρτας, στην κατακόρυφη πλευρά του ανοίγματος, χρησιμοποιώντας ούπα και φρεζάτες βίδες ή<br />
ειδικές βίδες Φ7 που βιδώνουν σε ανοιγμένη οπή Φ6<br />
The hollow section, onto that the one side of double collapsible openable door will be put, is fixed on the vertical<br />
side of the opening, using dowels and countersunk screws or special screws Φ7 that screwed into an opened<br />
aperture Φ6.<br />
17
ΤΟΠΟΘΕΤΗΣΗ ΔΙΠΛΗΣ ΣΠΑΣΤΗΣ ΠΤΥΣΣΟΜΕΝΗΣ<br />
INSTALLATION INSTRUCTIONS FOR DOUBLE OPENABLE<br />
Βήμα 2: Στερέωση πάνω οδηγού<br />
Step 2: Screwing the upper guide<br />
3<br />
4<br />
1<br />
2<br />
Ανοίγουμε τρύπες (Φ7) στον κοιλοδοκό με τον ενσωματωμένο οδηγό (1), περνάμε το τακάκι του κοιλοδοκού της<br />
δεύτερης πλευράς στον κοιλοδοκό του πάνω οδηγού (2), περνάμε την άλλη άκρη του κοιλοδοκού του οδηγού<br />
στο τακάκι του κάθετου κοιλοδοκού που τοποθετήσαμε (3) και τοποθετούμε τον οδηγό στη θέση του (4),<br />
(η επάνω πλευρά του να ακουμπήση στο πάνω μέρος του ανοίγματος).<br />
Στερεώνουμε τον οδηγό, χρησιμοποιώντας ούπα και φρεζάτες βίδες ή ειδικές βίδες Φ7 που βιδώνουν σε<br />
ανοιγμένη οπή Φ6. Σε περίπτωση που το πάνω μέρος του ανοίγματος δεν είναι επίπεδο και οριζόντιο,<br />
παρεμβάλουμε λαμάκια ώστε κατά το βίδωμα να μη παραμορφωθεί ο οδηγός.<br />
Holes Φ7 are opened on the hollow section with the incorporated upper guide (1), the protrusion of the hollow section<br />
of the second side passes into the hollow section of the upper guide (2), the opposite end of the hollow section of the<br />
guide passes into the protrusion of the vertical hollow section that is installed (3) and the guide is put at his place (4),<br />
so that his above side is tangent on the upper side of the opening.<br />
The guide is fixed, using dowels and countersunk screws or special screws Φ7 that screwed into an opened aperture Φ6.<br />
In the case of the up side of the opening it is not level and horizontal, plates are interfered in order that during screwing<br />
the guide is not deformed<br />
18
ΤΟΠΟΘΕΤΗΣΗ ΔΙΠΛΗΣ ΣΠΑΣΤΗΣ ΠΤΥΣΣΟΜΕΝΗΣ<br />
INSTALLATION INSTRUCTIONS FOR DOUBLE OPENABLE<br />
Βήμα 3: Στερέωση του κοιλοδοκού της δεύτερης πλευράς<br />
Step 3: Screwing the hollow section of second side<br />
Στερεώνουμε τον κοιλοδοκό με τους μεντεσέδες, στον οποίο θα τοποθετηθεί η δεύτερη πλευρά της διπλής σπαστής<br />
πτυσσόμενης πόρτας, στην κατακόρυφη πλευρά του ανοίγματος, χρησιμοποιώντας ούπα και φρεζάτες βίδες ή<br />
ειδικές βίδες Φ7 που βιδώνουν σε ανοιγμένη οπή Φ6<br />
The hollow section, onto that the second side of double collapsible openable door will be put, is fixed on the vertical<br />
side of the opening, using dowels and countersunk screws or special screws Φ7 that screwed into an opened<br />
aperture Φ6.<br />
19
ΤΟΠΟΘΕΤΗΣΗ ΔΙΠΛΗΣ ΣΠΑΣΤΗΣ ΠΤΥΣΣΟΜΕΝΗΣ<br />
INSTALLATION INSTRUCTIONS FOR DOUBLE OPENABLE<br />
Βήμα 4: Τοποθέτηση της σπαστής και ρύθμιση του στοπ<br />
Step 4: Placement of the openable and adjustment the stop<br />
b<br />
a<br />
2<br />
1<br />
b<br />
a<br />
Τοποθετούμε τις δύο πλευρές της πτυσσόμενης πόρτας στους μεντεσέδες των τοποθετημένων κάθετων κοιλοδοκών.<br />
Περιστρέφουμε την κάθε πλευρά της πτυσσόμενης πόρτας έτσι ώστε οι οδηγοί τους να ευθυγραμμιστούν με τον πάνω<br />
οδηγό και να συγκρατηθούν σε αυτή τη θέση από τον πείρο του αντίστοιχου στοπ (με ενσωματωμένο ελατήριο).<br />
Σε περίπτωση που η συγκράτηση γίνεται δύσκολα, χαλαρώνουμε το παξιμάδι (1) και βιδώνουμε το παξιμάδι (2)<br />
ώστε ο πείρος του στοπ να μετακινηθεί προς την κατεύθυνση (a). Ξανασφίγγουμε το παξιμάδι (1)<br />
Σε περίπτωση που δεν γίνεται συγκράτηση, χαλαρώνουμε το παξιμάδι (1) και ξεβιδώνουμε το παξιμάδι (2)<br />
ώστε ο πείρος του στοπ να μετακινηθεί προς την κατεύθυνση (b). Ξανασφίγγουμε το παξιμάδι (1)<br />
The two sides of collapsible door are placed on the hinges of the vertical hollow sections that are already installed.<br />
Each side of the collapsible door is rotated, so its guide will be aligned with the upper guide and it is retained in this place<br />
by the pin of the stop (with incorporated spring).<br />
In case of the withholding is difficulty, the nut (1) is loosed and the nut (2) is screwed in order that the pin of the stop<br />
will be moved to the direction (a). The nut (1) is screwed again.<br />
In case of the withholding is loose, the nut (1) is loosed and the nut (2) is unscrewed in order that the pin of the stop<br />
will be moved to the direction (b). The nut (1) is screwed again.<br />
20
ΤΟΠΟΘΕΤΗΣΗ ΔΙΠΛΗΣ ΣΠΑΣΤΗΣ ΠΤΥΣΣΟΜΕΝΗΣ<br />
INSTALLATION INSTRUCTIONS FOR DOUBLE OPENABLE<br />
Βήμα 5: Έλεγχος σωστής λειτουργίας<br />
Step 5: Control of the right operation<br />
2<br />
4<br />
7<br />
1<br />
6<br />
1<br />
5<br />
3<br />
5<br />
5<br />
1<br />
x<br />
a<br />
b<br />
Μετά την τοποθέτηση ελέγχουμε την σωστή λειτουργία:<br />
Από την πλήρως ανοιχτή θέση, περιστρέφουμε τις δύο πλευρές της πτυσσόμενης ώστε να συγκρατηθουν στα στοπ και<br />
να ευθυγραμμιστούν οι οδηγοί (1), απασφαλίζουμε το μάνδαλο κατωκασιού της μιας πλευράς (2) και κατεβάζουμε το<br />
κατωκάσι (3). Απασφαλίζουμε το μάνδαλο κατωκασιού της αλλης πλευράς (4) και κατεβάζουμε το κατωκάσι (5), έτσι<br />
ώστε να μπεί στο ΠΙ του πρώτου κατωκασιού και να ευθυγραμμιστεί με αυτό. Ενας πείρος στο σημείο σύνδεσης του<br />
κατωκασιού εισέρχεται σε αντίστοιχη τρύπα που ανοίγουμε στο δάπεδο<br />
Τραβάμε τα πτυσσόμενα κάγκελα (6 & 7) μέχρις ότου τα δύο μπινί της πόρτας να πατήσουν μεταξύ τους.<br />
Γυρίζουμε το κλειδί της κλειδαριάς (a) για κλείδωμα και ξεκλείδωμα. Αντίστοιχα θα κινηθούν αντιθέτως οι γάντζοι (b)<br />
των συρτών της κλειδαριάς για να ασφαλίσουν την πόρτα.<br />
Σημείωση: Σε περίπτωση που τα ορθογώνια ανοίγματα στα μπινί πόρτας δεν αντικρύζουν ακριβώς και υπάρχει πρόβλημα στο<br />
κλείδωμα, λασκάρουμε τις βίδες που συγκρατούν το μπινί της πόρτας (1) και μετατοπίζουμε λίγο το μπινί (με την κλειδαριά και<br />
τους σύρτες) προς τα πάνω ή κάτω (Χ) ώστε οι γάτζοι να μπαίνουν ελεύθερα στα ανοίγματα του απέναντι μπινί.<br />
Afterwards the placement it take place the control for the right operation :<br />
Each side of the collapsible door, from the completely open position is rotated until its guide will be aligned with the<br />
upper guide and it is retained by the pin of stop (1), the locking plate of one side unlocks the lower guide (2) and the<br />
lower guide is rotated (3). The locking plate of the other side unlocks the lower guide (4) and the lower guide is<br />
rotated (5) untill it is entered in the profile U of the first one and it is aligned with this. A pin at the connection point<br />
is entered in a corresponding hole which is opened in the floor<br />
The collapsible grills of two sides are pulled (6 & 7) until the two bini of the door are touched between them.<br />
The key of lock (a) is rotated for locking and unlocking. Respectively the latches with the hooks (b) will be moved on<br />
the contrary in order to they secure the door.<br />
Note: In case of the rectangles apertures of two bini of the door are not contacted precisely and a problem exists<br />
to the locking, the screws that they retain the bini of the door (1) are loosed and the bini (with lock and the latches)<br />
is moved to the up or down (X) in order that the hooks are entered freely in the apertures of the opposite bini.<br />
21
ΟΔΗΓΙΕΣ ΧΡΗΣΗΣ ΚΑΙ ΣΥΝΤΗΡΗΣΗΣ<br />
ΟΔΗΓΙΕΣ ΧΡΗΣΗΣ<br />
Κλείδωμα:<br />
Σε περίπτωση μονής ή διπλής σπαστής, από την πλήρως ανοιχτή θέση, περιστρέφουμε<br />
την μαζεμένη πτυσσόμενη (και τις δύο πλευρές της για διπλή) ώστε να συγκρατηθεί στα<br />
στοπ και να ευθυγραμμιστούν οι οδηγοί.<br />
Σε όλες τις πτυσσόμενες ακολουθείται η παρακάτω διαδικασία κλεισίματος:<br />
1. Απασφαλίζουμε το μάνδαλο κατωκασιού και κατεβάζουμε το κατωκάσι, έτσι ώστε<br />
οι δύο πλευρές του άκρου του να μπούν στο ΠΙ της κάσας. Σε περίπτωση διπλής το δεύτερο<br />
κατωκάσι να μπεί στο ΠΙ του πρώτου κατωκασιού και να ευθυγραμμιστεί με αυτό.<br />
2. Τραβάμε τα πτυσσόμενα κάγκελα, πιάνοντάς τα από το μπινί που φέρει την κλειδαριά και<br />
αφού ανοίξουν τόσο που να χωράει η παλάμη του χεριού μας, βάζουμε την παλάμη στην<br />
αντίθετη πλευρά του μπινί (ανάμεσα στα κάγκελα) και σπρώχνουμε την πόρτα μέχρις ότου<br />
το μπινί της πόρτας να πατήσει στο μπινί της κάσας και οι γάντζοι του να μπουν στις<br />
αντίστοιχες υποδοχές.<br />
Σε περίπτωση διπλής, το μπινί της δεύτερης πλευράς τραβιέται και σπρώχνεται ομοίως<br />
μέχρις ότου τα δύο μπινί πατήσουν μεταξύ τους και οι γάντζοι του ενός μπούν στις<br />
αντίστοιχες υποδοχές του άλλου.<br />
3. Κρατώντας τα μπινί σε επαφή, γυρίζουμε το κλειδί της κλειδαριάς για κλείδωμα.<br />
Αντίστοιχα θα κινηθούν αντιθέτως οι γάντζοι των συρτών της κλειδαριάς για να<br />
ασφαλίσουν την πόρτα.<br />
Ξεκλείδωμα:<br />
1. Γυρίζουμε το κλειδί της κλειδαριάς για ξεκλείδωμα. Αντίστοιχα θα κινηθούν αντιθέτως<br />
οι γάντζοι των συρτών της κλειδαριάς για να απασφαλίσουν την πόρτα.<br />
2. Τραβάμε τα πτυσσόμενα κάγκελα, πιάνοντάς τα από το μπινί που φέρει την κλειδαριά<br />
(ανάμεσα στα κάγκελα) ώστε να κλείσουν τόσο που να χωράει η παλάμη του χεριού μας<br />
στην αντίθετη πλευρά του μπινί.<br />
Προσοχή! αν τα κάγκελα κλείσουν πολύ υπάρχει κίνδυνος τραυματισμού, καθώς μπορεί<br />
να εγκλωβιστεί η παλάμη του χεριού μας ανάμεσά τους.<br />
3. Βάζουμε την παλάμη στην αντίθετη πλευρά του μπινί (πλευρά του ανοίγματος) και<br />
σπρώχνουμε την πόρτα μέχρις ότου μαζευτεί εντελώς.<br />
Σε περίπτωση διπλής, το μπινί της δεύτερης πλευράς τραβιέται και σπρώχνεται ομοίως<br />
μέχρις ότου και η δεύτερη πλευρά μαζευτεί εντελώς.<br />
4. Σηκώνουμε το κατωκάσι πάνω στην μαζεμένη πτυσσόμενη και το ασφαλίζουμε με το<br />
αντίστοιχο μάνδαλο κατωκασιού. Σε περίπτωση διπλής σηκώνουμε και ασφαλίζουμε ομοίως<br />
το δεύτερο κατωκάσι<br />
5. Σε περίπτωση μονής ή διπλής σπαστής, περιστρέφουμε την μαζεμένη πτυσσόμενη<br />
(και τις δύο πλευρές της για διπλή) προς την πλήρως ανοιχτή θέση, ώστε να μείνει<br />
ελεύθερο όλο το άνοιγμα.<br />
ΟΔΗΓΙΕΣ ΣΥΝΤΗΡΗΣΗΣ<br />
Πρακτικά λόγω του τρόπου κατασκευής τους τα πτυσσόμενα κάγκελα δεν χρειάζονται ιδιαίτερη<br />
συντήρηση.<br />
Συνιστάται όμως, ανάλογα με το περιβάλον, να καθαρίζονται τακτικά προκειμένου να<br />
απομακρυνθούν τυχόν ακαθαρσίες και σκόνη, καθώς και να λιπαίνονται τα κινούμενα μέρη<br />
(αρθρώσεις κάγκελων, ράουλα βαγονέτων, κλειδαριά) με σπρέυ σιλικονούχας βάσης.<br />
22
USE AND MAINTENANCE INSTRUCTIONS<br />
USE INSTRUCTIONS<br />
Locking:<br />
In case of single or double openable, the collapsible door, from the completely open position,<br />
is rotated (the two sides for double) until its guide will be aligned with the upper guide and<br />
it is retained by the pin of the stop.<br />
In all collapsible doors, it is excecuted the following process of closure:<br />
1. The locking plate unlocks the lower guide and the lower guide is rotated until his two sides<br />
are entered in the casing U. In case of double, the second lower guide is rotated until it is<br />
entered into the profile U of the first one and it is aligned with this.<br />
2. The collapsible grills are pulled touching them from the bini that brings the lock, and<br />
afterwards they open so much that is enough space to put our hand, we put our hand in the<br />
opposite side of bini (between the grills) and push the door until the bini of the door is touched<br />
the bini of casing and its hooks are entered in the corresponding receptions.<br />
In case of double, the bini the second side is pulled and pushed similarly until the two bini<br />
are touched between them and the hooks of one will be entered into the corresponding<br />
receptions of the other.<br />
3. Keeping the bini in contact, the key of the lock is rotated for the locking. Respectively<br />
the latches with the hooks will be moved on the contrary in order to they secure the door.<br />
Unlocking:<br />
1. The key of the lock is rotated for the unlocking. Respectively the latches with the hooks<br />
will be moved on the contrary in order to they release the door.<br />
2. The collapsible grills are pulled touching them from the bini that brings the lock,<br />
(between the grills) untill they close so much that is enough space to put our hand in the<br />
opposite side of bini.<br />
Attention! if the grills are closed a lot, a danger of wound exists, because our hand may<br />
be enclaved between them.<br />
3. We put our hand in the opposite side of bini (side of opening) and push the door until<br />
it is gathered completely.<br />
In case of double, the bini of the second side it is pulled and it pushed similarly until also<br />
the second side is gathered completely.<br />
4. We lift the lower guide onto the gathered collapsible door and it is secured by the<br />
corresponding locking plate.<br />
In case of double we similarly lift and secure the second lower guide<br />
5. In case of single or double openable, the gathered collapsible door is rotated<br />
(the two sides for double) towards the completely open position, so that all the opening<br />
remains free .<br />
MAINTENANCE INSTRUCTIONS<br />
Practically because of the manufacture way of collapsible grills, they do not need particular<br />
maintenance.<br />
It is recommended however, depending on environment conditions, they are cleaned regularly<br />
so that are removed any impurities and dust, as well as the moving parts (articulations of the<br />
grills, carriage rollers, lock) are lubricated with a spray based on silicone.<br />
23
ENGLISH - WARRANTY CONDITIONS<br />
»»<br />
BIOROL S.A covers the product with warranty for a period<br />
of two (2) years starting from the date indicated on the<br />
purchased documents.<br />
»»<br />
“WARRANTY CONFIRMATION” must be filled by the installator<br />
and sent to the manufacturer. Failure to complete and send<br />
the “WARRANTY CONFIRMATION” automatically voids its<br />
validity.<br />
»»<br />
“WARRANTY CERTIFICATE” must be filled by the costumer<br />
and sent to the manufacturer within a month from the installation<br />
date. Failure to complete and send the “WARRANTY<br />
CERTIFICATE” automatically voids its validity.<br />
»»<br />
This warranty is limited and concerns the products manufactured<br />
by Biorol sa. Any other accessory / product, including<br />
but not limited to motors, electronics, etc., is accompanied<br />
by the warranty of the corresponding manufacturer.<br />
»»<br />
<strong>Installation</strong> must be performed by a certified technician.<br />
»»<br />
Warranty includes technical support and additional repairs<br />
or replacements of any components/spare parts presenting<br />
approved manufacturing problems.<br />
»»<br />
Repairs, interventions and / or changes covered by this<br />
warranty do not extend its duration or allow for the<br />
suspension of payments.<br />
»»<br />
The materials / parts that have been replaced by either the<br />
manufacturer or under written authorization, within the<br />
warranty coverage, are returned back without any further<br />
damage.<br />
»»<br />
The customer must be able to show the warranty document<br />
in order to be able to use it.<br />
»»<br />
Any legal dispute will be finally solved in the courts of<br />
Katerini, Greece.<br />
ΕΛΛΗΝΙΚΑ - ΟΡΟΙ ΕΓΓΥΗΣΗΣ<br />
»»<br />
Η ΒΙΟΡΟΛ Α.Β.Ε.Ε. παρέχει εγγύηση καλής λειτουργίας του<br />
προϊόντος για περίοδο δύο (2) ετών αρχής γενομένης από<br />
την ημερομηνία αγοράς (τιμολογίου/δελτίου αποστολής).<br />
»»<br />
Η «ΕΠΙΒΕΒΑΙΩΣΗ ΕΓΓΥΗΣΗΣ» πρέπει να συμπληρωθεί από τον<br />
εγκαταστάτη και να σταλεί στον κατασκευαστή/παραγωγό. Η<br />
μη συμπλήρωση και αποστολή της «ΕΠΙΒΕΒΑΙΩΣΗΣ ΕΓΓΥΗΣΗΣ»<br />
αυτόματα ακυρώνει την ισχύ της.<br />
»»<br />
Το «ΠΙΣΤΟΠΟΙΗΤΙΚΟ ΕΓΓΥΗΣΗΣ» πρέπει να συμπληρωθεί από<br />
τον πελάτη και να σταλεί στον κατασκευαστή/ παραγωγό σε<br />
περίοδο ενός (1) μήνα από την τοποθέτηση. Η μη συμπλήρωση<br />
και αποστολή του «ΠΙΣΤΟΠΟΙΗΤΙΚΟΥ ΕΓΓΥΗΣΗΣ» αυτόματα<br />
ακυρώνει την ισχύ της.<br />
»»<br />
Η παρούσα εγγύηση περιορίζεται και αφορά στο αντικείμενο/<br />
προιόν που κατασκευάσθηκε από την ΒΙΟΡΟΛ ΑΒΒΕ. Όποιο<br />
άλλο εξάρτημα/προιόν, συμπεριλαμβανομένων και μη<br />
περιορισμένων σε κινητήρες, ηλεκτρονικά, κλπ, συνοδεύονται<br />
από την εγγύηση του εκάστοτε κατασκευαστή.<br />
»»<br />
Η τοποθέτηση του προϊόντος πρέπει να γίνετε από<br />
πιστοποιημένο εγκαταστάτη/τεχνικό.<br />
»»<br />
Η εγγύηση περιλαμβάνει τεχνική υποστήριξη και επιπλέον<br />
επιδιόρθωση ή αλλαγή οποιουδήποτε εξαρτήματος<br />
παρουσιάσει, αποδεδειγμένα, εργοστασιακό/κατασκευαστικό<br />
πρόβλημα ή αστοχία.<br />
»»<br />
Επιδιορθώσεις, παρεμβάσεις ή/και αλλαγές που καλύπτονται<br />
από την παρούσα εγγύηση δεν παρατείνουν την διάρκειά της<br />
ούτε επιτρέπουν την παύση πληρωμών.<br />
»»<br />
Τα υλικά/εξαρτήματα που αντικαταστάθηκαν είτε από τον<br />
κατασκευαστή είτε με την έγγραφη εξουσιοδότηση του, με την<br />
κάλυψη της εγγύησης, επιστρέφονται πίσω σε αυτόν αυτούσια.<br />
»»<br />
Ο πελάτης πρέπει να επιδείξει την εγγύηση ώστε να<br />
μπορέσει να χρησιμοποιήσει τους όρους της.<br />
»»<br />
Για οποιαδήποτε νόμιμη διεκδίκηση αρμόδια είναι τα<br />
δικαστήρια Κατερίνης, Ελλάδα.<br />
THE WARRANTY DOESN’T COVER:<br />
Damages caused:<br />
»»<br />
by improper transportation or storage from any thirt parties<br />
or improper installation or normal wear and tear .<br />
»»<br />
by external factors such as weather, fire (fire), chemicals<br />
(caustic, acids, etc.), salts, water, scratches, natural<br />
phenomena, vandalism, accidents, and so on.<br />
»»<br />
by a lack of routine maintenance according to the instructions<br />
delivered to the buyer and contained in the manufacturer’s<br />
manual on handling and care of the door<br />
»»<br />
by excessive use. Normal use is considered when the door<br />
makes 4 to 5 cycles of operation per day (1 duty cycle is<br />
equivalent to 1 opening and 1 closing).<br />
»»<br />
by the use of non-original spare parts or non-certified parts<br />
by the manufacturer<br />
»»<br />
by sabotage or maintenance or repair by unauthorized or<br />
unqualified technical personnel<br />
»»<br />
by use of parts and / or spare parts of another company or<br />
any other intervention without the written consent of the<br />
manufacturer.<br />
»»<br />
by power supply grid problems<br />
»»<br />
by misinterpretation of the manual’s instructions<br />
»»<br />
by sabotage or interference or intervention by one of the<br />
security/safety components<br />
»»<br />
by involuntary or intentional, direct or indirect negligence,<br />
omission or misuse (handling)<br />
»»<br />
on products not labeled by the manufacturer<br />
»»<br />
by normal wear and tear resulting from exposure to UV<br />
radiation<br />
»»<br />
by any deformation caused, to dark colored products, by<br />
exposure to sunlight<br />
This document replaces each previous versions.<br />
Η ΕΓΓΥΗΣΗ ΔΕΝ ΚΑΛΥΠΤΕΙ:<br />
Ζημιές που προκλήθηκαν:<br />
»»<br />
από κακή μεταφορά ή αποθήκευση από τρίτους ή κακή<br />
τοποθέτηση ή φυσιολογική φθορά.<br />
»»<br />
Εξωγενείς παράγοντες όπως καιρικές συνθήκες, πυρκαγιά<br />
(φωτιά), χημικά προϊόντα (καυστικά, οξέα κλπ), άλατα, νερό,<br />
γρατσουνιές, φυσικά φαινόμενα, βανδαλισμοί, ξυσίματα,<br />
ατύχημα, κ.ο.κ.<br />
»»<br />
από έλλειψη συντήρησης σύμφωνα με τις οδηγίες που παραδόθηκαν<br />
στον αγοραστή και περιέχονται στο εγχειρίδιο του κατασκευαστή<br />
σχετικά με τον χειρισμό και την φροντίδα της πόρτας/προϊόντος από<br />
υπερβολική χρήση. Φυσιολογική χρήση (για πόρτα) νοείται<br />
όταν η πόρτα κάνει 4 έως 5 κύκλους λειτουργίας, το μέγιστο, ανά<br />
ημέρα (1 κύκλος λειτουργίας ισοδυναμεί με 1 άνοιγμα και 1 κλείσιμο).<br />
»»<br />
από την χρήση μη γνήσιων ανταλλακτικών ή μη πιστοποιημένων<br />
εξαρτημάτων από τον κατασκευαστή<br />
»»<br />
από δολιοφθορά ή συντήρηση ή επισκευή από μη<br />
εξουσιοδοτημένο ή μη εξειδικευμένο τεχνικό προσωπικό<br />
»»<br />
Χρήση εξαρτημάτων ή/και ανταλλακτικών άλλης εταιρείας ή<br />
οποιαδήποτε άλλη παρέμβαση χωρίς την έγγραφη συγκατάθεση<br />
του κατασκευαστή.<br />
»»<br />
από προβλήματα του ηλεκτρικού δικτύου τροφοδοσίας<br />
»»<br />
από εσφαλμένη ερμηνεία των οδηγιών των εγχειριδίων<br />
»»<br />
από δολιοφθορά ή παρέμβαση ενός από τα εξαρτήματα<br />
ασφάλειας<br />
»»<br />
Ακούσια ή εκούσια, άμεση ή έμμεση αμέλεια, παράλειψη ή κακή<br />
χρήση (χειρισμός)<br />
»»<br />
σε προϊόντα που δεν φέρουν την ετικέτα του κατασκευαστή<br />
»»<br />
από φυσιολογική φθορά που προέρχεται από την έκθεση σε UV<br />
ακτινοβολία<br />
»»<br />
από τυχόν παραμόρφωση που προκαλείται από την έκθεση<br />
σκούρων χρωμάτων στο ηλιακό φως<br />
Το παρόν καταργεί κάθε προηγούμενο
ΙNSTALLATION DATE:<br />
_____________________________________________<br />
STAMP AND SIGNATURE OF THE TECHNICIAN:<br />
ΗΜΕΡΟΜΗΝΙΑ ΤΟΠΟΘΕΤΗΣΗΣ :<br />
__________________________________________________<br />
ΣΦΡΑΓΙΔΑ ΚΑΙ ΥΠΟΓΡΑΦΗ ΤΟΥ ΕΓΚΑΤΑΣΤΑΤΗ:<br />
CUSTOMER NAME & SIGNATURE:<br />
ΟΝΟΜΑΤΕΠΩΝΥΜΟ & ΥΠΟΓΡΑΦΗ ΤΟΥ ΠΕΛΑΤΗ<br />
WARRANTY CERTIFICATE<br />
(To be filled from costumer and sent to the<br />
manufacturer in a period of 30 days)<br />
DATE (today):________________________<br />
PURCHASE DOCUMENT DATE:_____________________<br />
MODEL:_____________ SERIAL N:____________________<br />
HEIGHT:_________mm x WIDTH:_________mm<br />
AUTOMATION: YES NO<br />
ΠΙΣΤΟΠΟΙΗΤΙΚΟ ΕΓΓΥΗΣΗΣ<br />
(Να συμπληρωθεί από τον πελάτη και να αποσταλεί<br />
στον κατασκευαστή εντός ενός (1) μήνα)<br />
ΗΜΕΡΟΜΗΝΙΑ(σήμερα):____________<br />
ΗΜ/ΝΙΑ ΕΚΔΟΣΗΣ ΠΑΡΑΣΤΑΤΙΚΟΥ:_______________<br />
ΜΟΝΤΕΛΟ: ______________________________________<br />
ΑΡΙΘΜΟΣ ΣΕΙΡΑΣ ΠΑΡΑΓΩΓΗΣ:___________________<br />
ΥΨΟΣ:__________mm x ΠΛΑΤΟΣ:__________mm<br />
ΑΥΤΟΜΑΤΗ: ΝΑΙ ΟΧΙ<br />
SURNAME / NAME / SIGNATURE (costumer):<br />
SURNAME / NAME / SIGNATURE (costumer):<br />
WARRANTY CONFIRMATION<br />
(To be filled from installator and sent to the<br />
manufacturer)<br />
DATE(today):_____________<br />
MODEL:___________<br />
SERIAL N:__________<br />
HEIGHT:__________mm x WIDTH:_________mm<br />
AUTOMATION: YES NO<br />
I certify that the installations was completed according to<br />
manufacturer’s manual of installation.<br />
SURNAME / NAME / STAMP & SIGNATURE (installator):<br />
ΕΠΙΒΕΒΑΙΩΣΗ ΕΓΓΥΗΣΗΣ<br />
(Να συμπληρωθεί από τον τεχνικό τοποθέτησης και να<br />
αποσταλεί στον κατασκευαστή)<br />
ΗΜΕΡΟΜΗΝΙΑ(σήμερα):____________<br />
ΜΟΝΤΕΛΟ: _________________<br />
ΑΡΙΘΜΟΣ ΣΕΙΡΑΣ ΠΑΡΑΓΩΓΗΣ:<br />
ΥΨΟΣ:__________mm x ΠΛΑΤΟΣ:__________mm<br />
ΑΥΤΟΜΑΤΗ: ΝΑΙ ΟΧΙ<br />
Επιβεβαιώνω πως η τοποθέτηση έγινε σύμφωνα με το εγχειρίδιο του<br />
κατασκευαστή.<br />
ΟΝΟΜΑΤΕΠΩΝΥΜΟ/ΣΦΡΑΓΙΔΑ & ΥΠΟΓΡΑΦΉ (τεχνικός<br />
τοποθέτησης):