September 2009

Create successful ePaper yourself
Turn your PDF publications into a flip-book with our unique Google optimized e-Paper software.
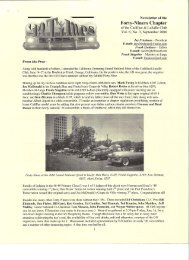
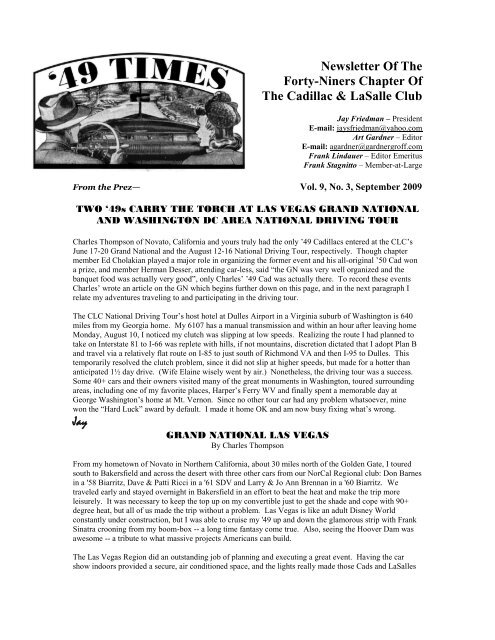
Newsletter Of The<br />
Forty-Niners Chapter Of<br />
The Cadillac & LaSalle Club<br />
Jay Friedman – President<br />
E-mail: jaysfriedman@yahoo.com<br />
Art Gardner – Editor<br />
E-mail: agardner@gardnergroff.com<br />
Frank Lindauer – Editor Emeritus<br />
Frank Stagnitto – Member-at-Large<br />
From the Prez— Vol. 9, No. 3, <strong>September</strong> <strong>2009</strong><br />
TWO ‘49s CARRY THE TORCH AT LAS VEGAS GRAND NATIONAL<br />
AND WASHINGTON DC AREA NATIONAL DRIVING TOUR<br />
Charles Thompson of Novato, California and yours truly had the only ‟49 Cadillacs entered at the CLC‟s<br />
June 17-20 Grand National and the August 12-16 National Driving Tour, respectively. Though chapter<br />
member Ed Cholakian played a major role in organizing the former event and his all-original ‟50 Cad won<br />
a prize, and member Herman Desser, attending car-less, said “the GN was very well organized and the<br />
banquet food was actually very good”, only Charles‟ ‟49 Cad was actually there. To record these events<br />
Charles‟ wrote an article on the GN which begins further down on this page, and in the next paragraph I<br />
relate my adventures traveling to and participating in the driving tour.<br />
The CLC National Driving Tour‟s host hotel at Dulles Airport in a Virginia suburb of Washington is 640<br />
miles from my Georgia home. My 6107 has a manual transmission and within an hour after leaving home<br />
Monday, August 10, I noticed my clutch was slipping at low speeds. Realizing the route I had planned to<br />
take on Interstate 81 to I-66 was replete with hills, if not mountains, discretion dictated that I adopt Plan B<br />
and travel via a relatively flat route on I-85 to just south of Richmond VA and then I-95 to Dulles. This<br />
temporarily resolved the clutch problem, since it did not slip at higher speeds, but made for a hotter than<br />
anticipated 1½ day drive. (Wife Elaine wisely went by air.) Nonetheless, the driving tour was a success.<br />
Some 40+ cars and their owners visited many of the great monuments in Washington, toured surrounding<br />
areas, including one of my favorite places, Harper‟s Ferry WV and finally spent a memorable day at<br />
George Washington‟s home at Mt. Vernon. Since no other tour car had any problem whatsoever, mine<br />
won the “Hard Luck” award by default. I made it home OK and am now busy fixing what‟s wrong.<br />
Jay<br />
GRAND NATIONAL LAS VEGAS<br />
By Charles Thompson<br />
From my hometown of Novato in Northern California, about 30 miles north of the Golden Gate, I toured<br />
south to Bakersfield and across the desert with three other cars from our NorCal Regional club: Don Barnes<br />
in a '58 Biarritz, Dave & Patti Ricci in a '61 SDV and Larry & Jo Ann Brennan in a '60 Biarritz. We<br />
traveled early and stayed overnight in Bakersfield in an effort to beat the heat and make the trip more<br />
leisurely. It was necessary to keep the top up on my convertible just to get the shade and cope with 90+<br />
degree heat, but all of us made the trip without a problem. Las Vegas is like an adult Disney World<br />
constantly under construction, but I was able to cruise my '49 up and down the glamorous strip with Frank<br />
Sinatra crooning from my boom-box -- a long time fantasy come true. Also, seeing the Hoover Dam was<br />
awesome -- a tribute to what massive projects Americans can build.<br />
The Las Vegas Region did an outstanding job of planning and executing a great event. Having the car<br />
show indoors provided a secure, air conditioned space, and the lights really made those Cads and LaSalles
sparkle. I was the only entry in my 48-49 judging class. There was a beautiful dark cherry maroon '48<br />
convertible, but it was entered as display only.<br />
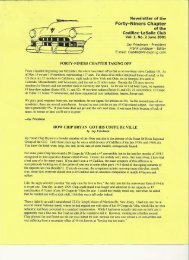
Las Vegas GN Indoor Show Field Showing Charles’ '49 Convertible<br />
Next To Ed Cholakian’s Original, 15,000 Mile 1950 Cadillac<br />
A Closer Look At Charles’ Convertible In Front Of Caesar’s Palace<br />
Scanning the April of 2008 list of 49ers and the list of people in attendance, I believe „49er chapter<br />
members attending besides me include Dan Fisher, Ed Cholakian, Frank Stagnitto, Herman Desser and<br />
Larry Brennan. There may have been others.
The photo on the previous page is the First Place award I won. Needless to say, I was thrilled even though<br />
the competition was absent. [Ed. Note: But, as can be seen in the top two photos, the award to Charles‟<br />
gorgeous convertible was richly deserved, regardless of competition.]<br />
I think everyone who drove or trailered a car across the Mojave Desert to Nevada could easily be named a<br />
winner just for that effort alone. I left only a small amount behind in the slot machines, and as evidenced<br />
by my thorough exhaustion upon arriving back at home, I can definitely state that I had a great time.<br />
A BETTER WAY TO REMOVE COUPE DOOR GLASS:<br />
IT WORKED FOR ME<br />
By Art Gardner<br />
My driver‟s side front door glass cracked, necessitating replacement. The 1948 Olds 98 and Cadillac<br />
Fisher Body Manual, pages 45-47, sets forth the procedure, which seemed lengthy and complicated. As I<br />
proceeded, I realized there is a simpler way, which worked on the front door of my 2-door Club Coupe and<br />
MAY work on other body styles, as well as sedan rear doors and cars with power-operated windows.<br />
Everything is done to the inside of the door with the door open. As there are lots of screws and small parts,<br />
I suggest using several containers to keep the loose parts organized according to the large parts they fasten.<br />
1. Remove the reveal molding at the top and sides of the window frame. Be careful not to lose the two<br />
small pieces of rubber at either end which prevent the garnish molding below from being scratched.<br />
2. Remove the inside door handles and window cranks. Although these can be removed with dental picks<br />
or other pointed tools, you will do better to use an inside handle removal tool. I recommend the pliers-type<br />
illustrated below. This one is made by the KD Company, but similar tools are made by other firms. The<br />
flat-type tool is inferior. (See the body manual for removing the switches on Hydro-lectric equipped cars.)<br />
3. Remove the arm rest if a front door.<br />
4. Remove the screws holding the garnish molding below the window to the door. Besides the visible<br />
screws, this molding is held to the door by: A. an L-shaped metal hook screwed to the door frame, and;<br />
B. the large heads (diameter: ¾ inch, 18 mm.) of screws which slide into slots in the back of the molding,<br />
whose shafts are screwed to the door frame. You have to twist the molding slightly to remove and reinstall<br />
it. To remove it, you push down on the back end and pull up on the front slightly to get it off the<br />
hook. Then, the molding is unlocked from the screw heads by pushing down on the molding while gently<br />
pulling it toward you. Later, when re-installing it, you hook the molding over the L-shaped hook with the<br />
rear of the molding pushed down to get the large heads of the screws into the keyholes. Once the heads are<br />
through the big openings in the keyholes, you pull up on the rear of the molding while keeping the front<br />
.
over the L-shaped hook. Pulling up on the back of the molding brings the heads into the narrower part of<br />
the keyholes and secures the molding in place, ready for the small finish screws to be installed. (There<br />
won‟t be a quiz.)<br />
5. Remove the screws holding the upholstered door trim panel to the door. This panel is also held to the<br />
door by several metal tabs that protrude upward and outward from an access panel in the inner door into the<br />
back of the trim panel. In addition, the trim panel is held to the door by tracks at the bottom and front side<br />
of the door which enclose the corresponding edges of the panel. To remove the panel, gently pull it up and<br />
toward the back of the door.<br />
6. As it is now visible, remove the large, square-ish access panel secured to the inner door with screws.<br />
7. Raise (or lower) the window so that two of the four screws that hold the window support channel to the<br />
window regulator lift arms are visible through the hole uncovered when the panel in paragraph 6 was<br />
removed. At the same time, the second two of the four screws should be visible in the small, round hole to<br />
the side of the square hole. See the arrows of letter “A” in the illustration below. Remove the four screws.<br />
8. Lower the glass all the way to the bottom of the door, slipping it past the regulator arms and out from<br />
the lower end of the window channels. If the channels are too long to release the glass, it may be necessary<br />
to unfasten the lower mount of the divider channel between the quarter window mechanism and the large<br />
window and move it slightly to loosen the glass.<br />
9. To make room through the slot at the top of the inner door for the window support channel under the<br />
glass, particularly the lower pieces through which screws attach it to the regulator and the rubber molding<br />
under the glass, you must now remove the inner beltline fuzzy strip carrier which runs along the length of<br />
the top of the door and is secured with a half dozen screws.<br />
10. With the glass now at the bottom of the door and free from the side window channels, it can be rotated<br />
45 degrees or so and eased out of the upper slot in the door.<br />
If the glass is removed this way, you don't have to remove the divider channel, which is how the Fisher<br />
Body Manual says to do it, thereby saving a ton of time and effort. Installation of the new glass (after<br />
setting it in the support channel) was simply the reverse.<br />
NEW PROCEDURE FOR TESTING GAS GAUGE TANK UNITS<br />
Chapter member Joe Foerster found a copy of, as he called it, “a snip” from the Nov.-Dec., 1948 Cadillac<br />
Serviceman‟s bulletin, as follows:
A PROCEDURE FOR TESTING gasoline gauge tank units, which included lowering the gasoline tank in<br />
order to make the tank unit accessible, was announced on page seven of the February, 1948 issue of THE<br />
CADILLAC SERVICEMAN. In order to shorten the period of time required to replace this unit, the<br />
factory Engineering Department now recommends that the following procedure be used, which omits<br />
lowering of the gasoline tank. This new procedure takes less time than that allotted for lowering the tank in<br />
the old procedure. The new method is as follows:<br />
1. Disconnect one of the battery cables.<br />
2. Using a standard 4" sheet metal saw, drill a 4" diameter hole in the body floor pan directly over the<br />
gasoline tank float unit.<br />
3. Disconnect the wiring from the tank unit.<br />
4. Remove the screws which fasten the tank unit to the tank.<br />
5. Lift out the tank unit. The float and arm will come away with it. Test the old tank unit against the dash<br />
unit. Failure may have been caused by poor ground.<br />
6. Set the new tank unit with gasket, float and arm in exactly the same position on the tank. Install all<br />
screws and tighten securely.<br />
7. Reconnect the wire to the binding post of the tank unit.<br />
8. Fabricate a sheet metal cover for the 4" hole in the body floor pan. Install this cover, seal with 3-M body<br />
sealer and secure it with at least six self-tapping screws.<br />
9. Connect the battery cable.<br />
Joe concludes, “Believe me. Once you've done this, you will wonder why the factory didn't punch a hole<br />
there in the first place”.<br />
A MASSACHUSETTS CONVERTIBLE<br />
Chris Crowley of Beverly MA owns the convertible pictured above. Chris writes that “we are replacing all<br />
of the original hydraulic hoses and lift cylinders. I‟m in dire need of a left (driver‟s side) window regulator<br />
assembly. It was missing when I acquired the car.”
REMOVING AN OUTSIDE FRONT DOOR HANDLE<br />
(The following resulted from an exchange of emails between David Mulvaney and Jay Friedman.)<br />
A special tool is not needed to remove an outside door handle on a '49 Cadillac. The outside door handles<br />
are attached to a 3 or 4 inch long square shaft that is perpendicular to the axis of the handle and which goes<br />
into the door. Inside the door, the male shaft goes into a square female hole in the door latch mechanism.<br />
This male shaft is held into the female hole by a lock screw that is, in turn, perpendicular to the axis of the<br />
shaft. On early '49s the screw has an ordinary slotted head. On later cars the screw is really a small bolt<br />
with a ¼ inch hex head.<br />
Let's assume it is a front door. (Sedan rear doors should be the same. Can anyone enlighten?) To access<br />
the screw/bolt, peel back the rubber weather-strip on the side of the door at a point slightly above the level<br />
of the door latch. In doing so, you will uncover a small hole in the door about a ½ inch in diameter.<br />
Shine a flashlight into the hole so you can see the screw head, which is 2 or 3 inches down inside the door.<br />
This will reveal whether the screw head requires a screwdriver or a ¼ inch socket. If it requires a ¼ inch<br />
socket, the hole is sometimes too narrow in diameter to admit the socket into the hole. If this is the case,<br />
enlarge the hole with a file or use a ¼ inch nut driver which has a narrower head than a socket.<br />
With one hand on the door handle, loosen the screw just enough to free the door handle and pull it out of its<br />
place. Do not loosen the screw any further, as it may come out of the threads in the door latch and fall to<br />
the bottom of the inside of the door. To retrieve it you would have to take apart the door or, if it is a slotted<br />
screw, replace it using a magnetic screwdriver, both of which procedures you obviously want to avoid.<br />
A SIXTY SPECIAL IN SYDNEY<br />
Robert Mitchell, of that lovely Australian city, owns the 60S shown below (and perhaps the horse behind it,<br />
too). Robert writes the car was owned by an elderly man who “lost interest in the car to the extent that it<br />
just sat from 1975 to 2000, though I would occasionally start it for him. The car was not preserved very<br />
well, with possums, cats and moths making a home for them-selves. Unfortunately, he passed away and I<br />
bought it from his estate. It‟s a complete, original car except for seat covers. The motor runs well and it<br />
has been converted to right hand drive. The window lifts are not working, it needs chrome work and there<br />
is surface rust on the body. I have not done a lot to it since I‟m working on other Cadillacs.”
MORE ON BIAS-PLY VS. RADIAL TIRES<br />
Members will recall that in the June ‟09 Times issue we had an article on the “never-ending” discussion<br />
regarding original bias ply vs. radial tires on a ‟49. Since then Dwight Smith and Dennis Akerman, both of<br />
the “Live Free or Die” state of New Hampshire, have written in with their views on this subject, as follows:<br />
Dwight says that his 2 cents worth is “At the start of the 2001 season I put a new set of bias ply tires on the<br />
car (49,217 miles) and I removed them at the end of the 2007 season (59,950 miles). During the 10,733<br />
miles I drove during this period, including a trip to Dearborn, MI, my car was difficult to steer when<br />
parking, and out on the road seemed to follow the grooves and cracks in the road. It was difficult to stay on<br />
course as the tires seemed to have a mind of their own. And my usual gas mileage was 15 mpg.<br />
At the start of the 2008 season I installed a set of American Classic P235/75R15 radial tires with 3 1/8"<br />
whitewalls. The change in handling was dramatic. Standing still steering is easier, and the car follows the<br />
path that I choose out on the open road. I ran the tires 1,547 miles in 2008 (including the 1,000 mile<br />
roundtrip to Cherry Hill) and averaged 18 mpg. I am totally pleased with the radial tires, both their<br />
appearance and handling abilities, and regret that I didn't buy them sooner.<br />
Dennis writes “I've now had a couple of years' experience with the Diamond Back radials I put on my '49<br />
6269. I can't say enough good things about them. They look authentic, they're quiet, and the car handles<br />
infinitely better than it did with bias ply tires. It is night and day, and for the better.<br />
NIFTY NEW YORK CLUB COUPE<br />
Pete Hoffman of Danville, New York owns the beautiful 6107 shown below. To jazz it up, he installed<br />
dual exhausts and wire wheels (from a „50s El Dorado?) As for its color, Pete writes, “It is Dartmouth<br />
Green but looks black”.<br />
ALL CADILLACS OF THE 40s & 50s NOW REPAIRING ’49 STUFF<br />
Chapter member Ed Cholakian, proprietor of AllCads, recently wrote to say they are now repairing master<br />
and single window Hydro-lectric switches as well as ‟49 Cad trunk handles. They also sell repaired and<br />
re-plated fender spears with yours as a trade-in, or they‟ll fix and re-plate yours. In addition, AllCads<br />
offers 49er‟s a 10% discount on Steele Rubber and have just about everything in stock for a 1949 Cadillac.<br />
Web Site: www.allcads.com; Email: info@allcads.com; Telephone: 800-808-1147; Fax: 703-733-1147.