DVD HOME CINEMA SYSTEM DVD HOME CINEMA ... - Philips
DVD HOME CINEMA SYSTEM DVD HOME CINEMA ... - Philips
DVD HOME CINEMA SYSTEM DVD HOME CINEMA ... - Philips

Create successful ePaper yourself
Turn your PDF publications into a flip-book with our unique Google optimized e-Paper software.
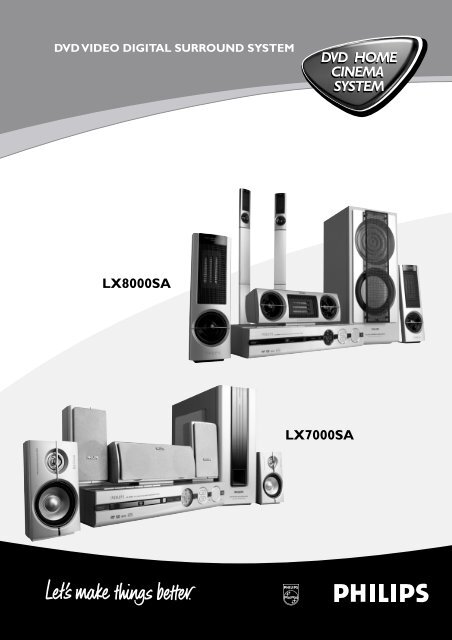
<strong>DVD</strong> VIDEO DIGITAL SURROUND <strong>SYSTEM</strong><br />
LX8000SA<br />
<strong>DVD</strong> <strong>HOME</strong><br />
<strong>CINEMA</strong><br />
<strong>SYSTEM</strong><br />
LX7000SA<br />
1
Hook Up<br />
Guide<br />
LX8000SA • LX7000SA<br />
a b c<br />
Front<br />
Speaker<br />
(Left)<br />
Connecting Speaker Cable<br />
0.31"<br />
(8mm)<br />
front<br />
right<br />
Rear Speaker<br />
(Left Surround)<br />
Surround<br />
right<br />
Centre Speaker<br />
Subwoofer<br />
+<br />
Centre<br />
SPEAKER <strong>SYSTEM</strong>S (8Ω)<br />
R L C SR SL<br />
FRONT CENTER SURROUND<br />
Recommended Speaker Setup<br />
VIEWING AREA<br />
+<br />
Front<br />
Speaker<br />
(Right)<br />
Rear Speaker<br />
(Right Surround)<br />
front<br />
left<br />
Surround<br />
left<br />
Helpful Hints:<br />
You can listen to normal TV<br />
broadcast channels through the<br />
home cinema sound system from<br />
such an audio connection.<br />
When listening to TV programmes,<br />
you have to set the <strong>DVD</strong> system<br />
to TV/AV mode in order for the<br />
sound to be heard.<br />
white<br />
red<br />
☞<br />
AUDIO OUT<br />
CDR<br />
DIGITAL<br />
OUT<br />
DIGITAL<br />
IN<br />
L<br />
R<br />
CENTER<br />
OUT<br />
WOOFER<br />
LINE OUT<br />
Helpful Hints:<br />
If your TV is not equipped with a<br />
SCART connector, connect your TV<br />
through the corresponding CVBS A<br />
or S-Video B output.<br />
Notes: On the TV<br />
- The CVBS jack may be labeled as Video,<br />
Composite or Baseband and is usually<br />
yellow.<br />
- The S-Video In jack may be labeled as<br />
Y/C, S-Video or S-VHS.<br />
AUX<br />
IN<br />
TV<br />
IN<br />
AUDIO<br />
A<br />
LINE<br />
OUT<br />
L<br />
R<br />
CVBS<br />
S-VIDEO<br />
VIDEO OUT<br />
AUDIO<br />
INPUT<br />
Speakers - +<br />
This Hook Up Guide shows the<br />
basic setup of your <strong>DVD</strong> home<br />
cinema system and the connections<br />
to your TV!<br />
subwoofer<br />
B<br />
☞<br />
Front Right (R) (FR) black red<br />
Front Left (L) (FL) black white<br />
Centre (C) black green<br />
Surround Right (SR) black grey<br />
Surround Left (SL) black blue<br />
FM 75 Ω<br />
SCART OUT<br />
12nc: 3139 115 21981<br />
MW<br />
FM/MW<br />
ANTENNA<br />
Connect the <strong>DVD</strong> system and subwoofer to the power outlets only after you have<br />
finished hooking up everything.
Quick Use<br />
Guide<br />
ö Turning on the power and listening to preset radio stations<br />
1 “AUTO INSTALL- PRESS PLAY” will appear on the display. If not, press and hold ÉÅ on the system.<br />
2 Press ÉÅ on the system again to start installing all available radio stations.<br />
3 Once completed, the last tuned radio station will play. Press 1 2 to select a preset radio station.<br />
To tune to a non-preset radio station, press S T briefly and repeatedly.<br />
ö Playing a disc<br />
1 With the <strong>DVD</strong> system’s power on, press DISC on the remote control.<br />
2 Turn on the TV power and set to the correct Video In channel or<br />
Audio/Video mode. The <strong>DVD</strong> system’s screen saver will show on the TV.<br />
The TV’s Video Input channel may be called AUX or AUXILIARY IN, AUDIO/VIDEO or A/V IN, EXT 1 or<br />
EXT 2, etc. These channels are often near channel 00. See your TV manual for details.<br />
3 Press OPEN/CLOSE on the system and load a disc, then press OPEN/CLOSE again to close<br />
the disc tray.<br />
4 Playback will start automatically. If not, press ÉÅ.<br />
If a disc menu appears, use 3 4 1 2 to make the necessary selection, then press OK. Or, use the numeric keypad on<br />
the remote control to select features. Follow the instructions given on the disc menu.<br />
5 During playback, you are able to change certain operations or features (for example, change the<br />
subtitle language, play in slow motion speed, etc.). Press <strong>SYSTEM</strong> MENU on the remote control,<br />
then use 3 4 1 2 to select your preferred options and press OK to confirm. To remove the menu<br />
bar, press <strong>SYSTEM</strong> MENU again.<br />
Please refer to the owner’s manual “Special <strong>DVD</strong>/VCD features” for more information.<br />
6 To stop playback, press Ç.<br />
Region Codes<br />
<strong>DVD</strong>s must be labeled for ALL regions or for Region 2 in order to play on this <strong>DVD</strong> system.<br />
ö Playing other equipment connected to your <strong>DVD</strong> system<br />
1 To use your <strong>DVD</strong> system’s home cinema surround capabilities, connect other<br />
equipment and select the correct input source.<br />
Please refer to the user’s manual “Connecting Additional Equipment” for more information.<br />
2 Turn on and/or press PLAY on the equipment to start playback.<br />
If necessary, connect the Video Output of the connected equipment (VCR or laser disc player) to<br />
TV for viewing purposes.<br />
Make sure your <strong>DVD</strong> system<br />
and TV are connected and<br />
turned on!<br />
LX7000SA /<br />
LX8000SA<br />
DIGITAL<br />
IN<br />
AUX<br />
IN<br />
TV<br />
IN<br />
Connect ...<br />
➜<br />
➜<br />
➜<br />
CD Recorder<br />
"DIGITAL OUT"<br />
VCR /<br />
Laser disc player<br />
"AUDIO OUT"<br />
Televeision<br />
"AUDIO OUT"<br />
Select input source<br />
from the remote<br />
control<br />
AUX/DI<br />
➜ Press to select "DI".<br />
AUX/DI<br />
➜ Press to select "AUX".<br />
TV/AV<br />
➜ Press .<br />
Detailed playback features and additional functions are described in the<br />
accompanying user’s manual.<br />
STANDBY-ON<br />
ECO POWER<br />
<strong>DVD</strong> VIDEO /SACD DIGITAL SURROUND <strong>SYSTEM</strong><br />
OPEN/CLOSE SOURCE<br />
SURROUND<br />
SOUND<br />
iR<br />
SENSOR<br />
POWER ON/OFF<br />
ALL<br />
VOLUME<br />
DISC<br />
<strong>SYSTEM</strong><br />
MENU<br />
1 2 3 4<br />
OK<br />
DISC 3<br />
OPEN/CLOSE<br />
2
Important Note<br />
Important notes for users in the U.K.<br />
Mains plug<br />
This apparatus is fitted with an approved 13 Amp plug.<br />
To change a fuse in this type of plug proceed as follows:<br />
1 Remove fuse cover and fuse.<br />
2 Fix new fuse which should be a BS1362 5 Amp, A.S.T.A.<br />
or BSI approved type.<br />
3 Refit the fuse cover.<br />
If the fitted plug is not suitable for your socket outlets, it<br />
should be cut off and an appropriate plug fitted in its<br />
place.<br />
If the mains plug contains a fuse, this should have a value<br />
of 5 Amp. If a plug without a fuse is used, the fuse at the<br />
distribution board should not be greater than 5 Amp.<br />
Note: The severed plug must be disposed of to avoid a<br />
possible shock hazard should it be inserted into a 13 Amp<br />
socket elsewhere.<br />
How to connect a plug<br />
The wires in the mains lead are coloured with the<br />
following code: blue = neutral (N),<br />
brown = live (L).<br />
¶ As these colours may not correspond with the colour<br />
markings identifying the terminals in your plug, proceed<br />
as follows:<br />
– Connect the blue wire to the terminal marked N or<br />
coloured black.<br />
– Connect the brown wire to the terminal<br />
marked L or coloured red.<br />
– Do not connect either wire to the earth terminal in<br />
the plug, marked E (or e) or coloured green (or green<br />
and yellow).<br />
Before replacing the plug cover, make certain that the<br />
cord grip is clamped over the sheath of the lead - not<br />
simply over the two wires.<br />
2<br />
Copyright in the U.K.<br />
Recording and playback of material may require consent.<br />
See Copyright Act 1956 and The Performer’s Protection<br />
Acts 1958 to 1972.<br />
This product complies with the radio<br />
interference requirements of the European<br />
Community.<br />
CAUTION<br />
Use of controls or adjustments or performance<br />
of procedures other than herein may result in<br />
hazardous radiation exposure or other unsafe<br />
operation.<br />
Laser<br />
Type Semiconductor laser GaAIAs<br />
Wave length 650nm<br />
Output Power 7mW<br />
Beam divergence 60 degree<br />
Italia<br />
DICHIARAZIONE DI CONFORMITA’<br />
Si dichiara che l’apparecchio LX8000SA, LX7000SA<br />
<strong>Philips</strong> risponde alle prescrizioni dell’art. 2 comma 1 del<br />
D.M. 28 Agosto 1995 n. 548.<br />
Fatto a Eindhoven<br />
<strong>Philips</strong> Consumer Electronics<br />
<strong>Philips</strong>, Glaslaan 2<br />
5616 JB Eindhoven, The Netherlands<br />
Norge<br />
Typeskilt finnes på apparatens underside.<br />
Observer: Nettbryteren er sekundert innkoplet.<br />
Den innebygde netdelen er derfor ikke frakoplet<br />
nettet så lenge apparatet er tilsluttet<br />
nettkontakten.<br />
For å redusere faren for brann eller elektrisk støt, skal<br />
apparatet ikke utsettes for regn eller fuktighet.<br />
DK<br />
Advarsel: Usynlig laserstråling ved åbning når<br />
sikkerhedsafbrydere er ude af funktion. Undgå<br />
utsættelse for stråling.<br />
Bemærk: Netafbryderen er sekundært indkoblet og<br />
ofbryder ikke strømmen fra nettet. Den indbyggede<br />
netdel er derfor tilsluttet til lysnettet så længe<br />
netstikket sidder i stikkontakten.<br />
S<br />
Klass 1 laseraparat<br />
Varning! Om apparaten används på annat sätt än i<br />
denna bruksanvisning specificerats, kan användaren<br />
utsättas för osynlig laserstrålning, som överskrider<br />
gränsen för laserklass 1.<br />
Observera! Stömbrytaren är sekundärt kopplad och<br />
bryter inte strömmen från nätet. Den inbyggda<br />
nätdelen är därför ansluten till elnätet så länge<br />
stickproppen sitter i vägguttaget.<br />
SF<br />
Luokan 1 laserlaite<br />
Varoitus! Laitteen käyttäminen muulla kuin<br />
tässä käyttöohjeessa mainitulla tavalla saattaa<br />
altistaa käyttäjän turvallisuusluokan 1 ylittävälle<br />
näkymättömälle lasersäteilylle.<br />
Oikeus muutoksiin varataan. Laite ei saa olla<br />
alttiina tippu-ja roiskevedelle.<br />
Huom. Toiminnanvalitsin on kytketty toisiopuolelle,<br />
eikä se kytke laitetta irti sähköverkosta.<br />
Sisäänrakennettu verkko-osa on kytkettynä<br />
sähköverkkoon aina silloin, kun pistoke on<br />
pistorasiassa.
Index<br />
English -------------------------------------------------------- 5<br />
Français ------------------------------------------------------ 30<br />
Español ------------------------------------------------------ 55<br />
Deutsch ----------------------------------------------------- 80<br />
Nederlands ----------------------------------------------- 105<br />
Italiano ----------------------------------------------------- 130<br />
Svenska ---------------------------------------------------- 155<br />
Dansk ------------------------------------------------------ 180<br />
Suomi ------------------------------------------------------ 205<br />
Português ------------------------------------------------- 230<br />
�������� -------------------------------------------------- 255<br />
Polski------------------------------------------------------- 283<br />
Русский --------------------------------------------------- 308<br />
INDEX<br />
3<br />
English<br />
Français<br />
Español<br />
Deutsch<br />
Nederlands<br />
Italiano<br />
Svenska<br />
Dansk<br />
Suomi<br />
Português<br />
∂ÏÏËÓÈο<br />
Русский Polski
4<br />
CAUTION<br />
VISIBLE AND INVISIBLE LASER RADIATION WHEN<br />
OPEN AVOID EXPOSURE TO BEAM<br />
ADVARSEL<br />
SYNLIG OG USYNLIG LASERSTRÅLING VED ÅBNING<br />
UNDGÅ UDSÆTTELSE FOR STRÅLING<br />
VARNING<br />
SYNLIG OCH OSYNLIG LASERSTRÅLNING NÄR<br />
DENNA DEL ÄR ÖPPNAD BETRAKTA EJ STRÅLEN<br />
VARO!<br />
AVATTAESSA OLET ALTTIINA NÄKYVÄLLE JA<br />
NÄKYMÄTTÖMÄLLE LASER SÄTEILYLLE. ÄLÄ KATSO<br />
SÄTEESEEN<br />
VORSICHT<br />
SICHTBARE UND UNSICHTBARE LASERSTRAHLUNG<br />
WENN ABDECKUNG GEÖFFNET NICHT DEM<br />
STRAHL AUSSETSEN<br />
ATTENTION<br />
RAYONNEMENT LASER VISIBLE ET INVISIBLE EN CAS<br />
D’OUVERTURE EXPOSITION DANGEREUSE AU<br />
FAISCEAU<br />
Manufactured under license from Dolby Laboratories.<br />
“Dolby”, “Pro-Logic” and the double-D symbol are<br />
trademarks of Dolby Laboratories. Confidential<br />
Unpublished Works. ©1992-1997 Dolby Laboratories, Inc.<br />
All rights reserved.<br />
Manufactured under license from Digital Theater Systems,<br />
inc. US Pat. No. 5,451,942 and other worldwide patents<br />
issued and pending. “DTS” and “DTS Digital Surround” are<br />
trademarks of Digital Theater Systems, Inc. 1996 Digital<br />
Theater Systems, Inc. All rights reserved.<br />
This product incorporates copyright protection technology<br />
that is protected by method claims of certain U.S. patents<br />
and other intellectual property rights owned by Macrovision<br />
Corporation and other rights owners. Use of this copyright<br />
protection technology must be authorized by Macrovision<br />
Corporation, and is intended for home and other limited<br />
viewing uses only unless otherwise authorized by<br />
Macrovision Corporation. Reverse engineering or<br />
disassembly is prohibited.<br />
The <strong>DVD</strong> VIDEO player is in conformity<br />
with the EMC directive and low-voltage<br />
directive.
Introduction and General<br />
Information<br />
Features ......................................................................................... 6<br />
Discs for playback ....................................................................... 6<br />
Player zone<br />
Supplied accessories ................................................................... 6<br />
Environmental information ....................................................... 6<br />
Installation..................................................................................... 6<br />
Maintenance ................................................................................. 6<br />
Functional Overview<br />
Top and Front panels.................................................................. 7<br />
Remote Control .......................................................................... 8<br />
Connections<br />
Connecting antennas .................................................................. 9<br />
MW Indoor Loop Antenna<br />
FM Indoor Antenna<br />
FM Outdoor Antenna<br />
Connecting the speakers ......................................................... 10<br />
Connecting a TV ........................................................................ 10<br />
Connecting additional equipment ......................................... 11<br />
Analogue audio connections<br />
Digital audio connections<br />
Replacing the centre speaker with the TV<br />
Preparations<br />
Setting up the surround sound system ................................ 12<br />
Placing the speakers<br />
Changing the volume level<br />
Setting up the subwoofer ........................................................ 12<br />
Inserting batteries into the remote control ....................... 12<br />
Switching on the system .......................................................... 13<br />
NTSC/PAL Setting .................................................................... 13<br />
System Setup (<strong>DVD</strong>) ......................................................... 13–15<br />
Setting the picture<br />
Setting the sound<br />
Setting the language<br />
Setting the features<br />
Access Control<br />
Child lock (<strong>DVD</strong>/VCD) ........................................................... 16<br />
Parental Level (<strong>DVD</strong>) ............................................................... 17<br />
Change Country (<strong>DVD</strong>) .......................................................... 17<br />
Change Code (<strong>DVD</strong>/VCD) ..................................................... 17<br />
Basic Functions<br />
Sound Control ........................................................................... 18<br />
Selecting the surround sound mode<br />
Selecting the digital sound effect<br />
Selecting the clear voice effect<br />
Volume control .......................................................................... 18<br />
Dimming the display screen .................................................... 18<br />
Contents<br />
Operations<br />
Discs information ...................................................................... 19<br />
Basic playback ..................................................................... 19–20<br />
Continue playback from the last stop point (<strong>DVD</strong>/VCD)<br />
Skipping to another track/chapter<br />
Fast Search<br />
Repeat play<br />
Repeat A-B<br />
Programme favourite tracks (Audio CD)<br />
Special <strong>DVD</strong>/VCD features .............................................. 21–23<br />
Changing subtitle language (<strong>DVD</strong>)<br />
Changing audio language<br />
Changing speaker surround output<br />
Advancing by frames<br />
Playing in slow motion<br />
Searching for a particular passage<br />
Viewing from another angle (<strong>DVD</strong>)<br />
Zooming in<br />
Moving to another title/chapter<br />
Playback from a selected point<br />
Favourite Track Selection - FTS<br />
Checking the contents of a <strong>DVD</strong><br />
Special VCD/SVCD features ................................................... 24<br />
Playback Control (PBC)<br />
Special SACD, MP3 and CD features .................................... 24<br />
Text information<br />
Special MP3-CD features ........................................................ 24<br />
Supported MP3-CD format<br />
Selecting a desired album/track<br />
Repeat play<br />
Radio Reception<br />
Plug and Play ............................................................................... 25<br />
Tuning to radio stations ........................................................... 25<br />
Presetting radio stations.......................................................... 25<br />
Automatic preset from a desired preset number<br />
Manual preset of favourite radio stations<br />
Listening to preset radio stations.......................................... 26<br />
Erasing a preset radio station................................................. 26<br />
Clock/Timer<br />
Clock setting .............................................................................. 26<br />
Timer setting .............................................................................. 27<br />
Deactivating the timer<br />
Activating the timer to the last preset time and source<br />
Sleep timer setting .................................................................... 27<br />
Specifications ............................................. 28<br />
Troubleshooting ...................................... 29<br />
CONTENTS<br />
5<br />
English
English<br />
Introduction and General Information<br />
6<br />
Features<br />
Your complete 7-piece 275-Watt (LX8000SA) or<br />
200-Watt (LX7000SA) <strong>DVD</strong> Digital Home Cinema System<br />
creates the same dynamic sound qualities that you find in<br />
full-fledged cinemas and incorporates some of the best<br />
features in home theatre technology.<br />
Features include:<br />
Built-in DTS and Dolby R Digital decoder,<br />
supporting Dolby R ProLogic and 3D sound<br />
Use the Home Cinema Audio System for a movie-theatre<br />
surround sound experience.<br />
Additional Equipment Connections<br />
Connect other audio and audio/visual equipments to the <strong>DVD</strong><br />
system so you can use the system’s surround sound speakers.<br />
Parental Level (only available in region 1 player)<br />
Set a ratings level so your children cannot watch a <strong>DVD</strong> that has a<br />
rating higher than you set.<br />
Child Lock<br />
Block specific <strong>DVD</strong>s from playing, regardless of how you set the<br />
Parental Level.<br />
Sleep Timer<br />
Enable the system to switch to standby mode automatically at a<br />
preset time.<br />
Plug and Play<br />
Store all available radio stations automatically when you<br />
turn on the power.<br />
Discs for playback<br />
Your <strong>DVD</strong> system is able to play :<br />
– All pre-recorded audio CDs<br />
– All finalised audio CDR and audio CDRW discs<br />
– All Video CDs, Super Video CDs,<br />
Super Audio CDs, and <strong>DVD</strong>s<br />
– MP3-CDs (CD-ROMs with MP3 tracks)<br />
Player zone<br />
<strong>DVD</strong> discs and players are designed with regional<br />
restrictions. Before playing a disc, make sure the disc is the<br />
same zone as your player.<br />
The region code for this <strong>DVD</strong> system is 2.<br />
2<br />
INTRODUCTION AND GENERAL INFORMATION<br />
Supplied accessories<br />
– a remote control with two AA batteries<br />
– an MW loop antenna and an FM wire antenna<br />
– an audio cable, Scart cable and centre out cable for<br />
connection with the TV.<br />
– four satellite speakers and one centre speaker, including<br />
five speaker cables<br />
– an active subwoofer, including a connection cable<br />
and a power cable<br />
– a power cable for connection with the main unit<br />
– five speaker brackets and five screws.<br />
– four mini speaker stands and eight screws (for model<br />
LX8000SA only)<br />
– one pair of speaker stands (for model LX8000SA only)<br />
– this instruction booklet<br />
If any item is damaged or missing, contact your retailer or<br />
<strong>Philips</strong>.<br />
Environmental information<br />
All unnecessary packaging has been omitted. We have tried<br />
to make the packaging easy to separate into three materials:<br />
cardboard (box), polystyrene foam (buffer) and<br />
polyethylene (bags, protective foam sheet).<br />
Your system consists of materials which can be recycled<br />
and reused if disassembled by a specialised company. Please<br />
observe the local regulations regarding the disposal of<br />
packaging materials, exhausted batteries and old equipment.<br />
Installation<br />
● Place the system on a flat, hard, and stable surface.<br />
● There must be sufficient room in front of the system for<br />
the drawer to open.<br />
● In a cabinet, allows about 10cm (4 inches) of free space all<br />
around the system for adequate ventilation.<br />
● Do not expose your system to extreme temperatures or<br />
humidity.<br />
Maintenance<br />
● When a disc becomes dirty, clean it with a<br />
cleaning cloth. Wipe the disc from the<br />
centre out, in a straight line.<br />
● Do not expose the system, batteries or<br />
discs to humidity, rain, sand or excessive<br />
heat (caused by heating equipment or<br />
direct sunlight). Always keep the disc tray closed to avoid<br />
dust on the lens.<br />
● Do not use solvents such as benzene, thinner, commercially<br />
available cleaners, or anti-static spray intended for color<br />
discs.<br />
● The lens may cloud over when the system is suddenly<br />
moved from cold to warm surroundings, making it<br />
impossible to play a disc. Leave the system in the warm<br />
environment until the moisture evaporates.
Top and Front panels<br />
STANDBY-ON<br />
ECO POWER<br />
SEARCH/PREV STOP/CLEAR PLAY/PAUSE SEARCH/NEXT<br />
PROG CLOCK/TIMER<br />
<strong>DVD</strong> VIDEO /SACD DIGITAL SURROUND <strong>SYSTEM</strong><br />
1 STANDBY ON / ECO POWER y<br />
– press to switch the system on or to standby mode.<br />
– hold down to switch the system to Eco Power<br />
standby mode.<br />
2 S SEARCH / PREV<br />
SEARCH / NEXT T<br />
– in Disc mode, press to skip to the previous/next<br />
chapter/track.<br />
– in Disc mode, hold down to fast reverse/forward the<br />
disc or skip to previous/next MP3 album.<br />
– in Tuner mode, to tune to a lower or higher radio<br />
frequency.<br />
– in Clock mode, to set the hours and minutes.<br />
– in TV/AV mode, to change <strong>Philips</strong> TV’s channel (on the<br />
remote control only).<br />
3 Ç STOP / CLEAR<br />
– in Disc mode, to stop playback or to clear a<br />
programme.<br />
– in Tuner mode, to stop programming or erase a preset<br />
radio station (on the system only).<br />
– in Clock mode, to exit clock setting or cancel a timer<br />
(on the system only).<br />
– in Plug and Play mode, to exit the operation.<br />
4 ÉÅ PLAY / PAUSE<br />
– to start or interrupt disc playback.<br />
– to start Plug and Play installation (on the system<br />
only).<br />
5 Disc Tray<br />
6 PROG<br />
– in Disc mode, to programme CD tracks or switch the<br />
VCD/<strong>DVD</strong> FTS (favourite track selection) on/off.<br />
– in Tuner mode, to programme preset radio stations.<br />
– in Clock mode, to select 12- or 24-hour clock mode.<br />
OPEN/CLOSE<br />
SOURCE<br />
Functional Overview<br />
1 2 3 4 2 5 6 7 8 9 0 ! @ # $ %<br />
SURROUND<br />
SOUND<br />
iR<br />
SENSOR<br />
VOLUME<br />
7 CLOCK / TIMER<br />
– press to view or set the clock.<br />
– hold down to set the timer.<br />
8 OPEN/CLOSE<br />
– to open or close the disc tray.<br />
9 SOURCE<br />
– to select the desired source or external input source<br />
(TV/AV, DISC, TUNER, AUX or DI [Digital In]).<br />
0 Display screen<br />
– displays current status of the system.<br />
! SURROUND<br />
– to select multichannel surround (Dolby Digital, DTS<br />
or Dolby Surround), 3D sound or stereo sound.<br />
@ SOUND<br />
– to select various sound effects : CONCERT, DRAMA,<br />
ACTION, SCI-FI, CLASSIC, JAZZ, ROCK or DIGITAL.<br />
# iR sensor<br />
– receives signals from the remote control.<br />
$ VOLUME<br />
– to adjust the master volume.<br />
% n<br />
– to connect headphones.<br />
The same functions can be accessed via the same<br />
buttons on the remote control (see next page)<br />
FUNCTIONAL OVERVIEW<br />
7<br />
English
English<br />
8<br />
Remote Control<br />
9<br />
^<br />
&<br />
*<br />
2<br />
4<br />
3<br />
!<br />
@<br />
(<br />
)<br />
Notes for remote control:<br />
1 First select the source you wish to control by<br />
pressing one of the source select keys on the<br />
remote control (for example DISC, TUNER).<br />
2 Then select the desired function (for example É,<br />
S , T).<br />
FUNCTIONAL OVERVIEW<br />
(ª<br />
(•<br />
($<br />
≥<br />
*<br />
(2<br />
(§<br />
(∞<br />
(≤<br />
(£<br />
<br />
¡<br />
^ DISC MENU (in Disc mode only)<br />
– to enter or exit the Disc menu.<br />
– to switch on/off Playback Control (PBC) mode while<br />
playback stopped.<br />
– to return to the PBC menu during playback.<br />
& <strong>SYSTEM</strong> MENU (in Disc mode only)<br />
– to enter or exit the system menu bar.<br />
* 3 4 1 2<br />
– in Tuner mode, to select a preset radio station<br />
number (1 or 2 ).<br />
– to select movement direction in the disc menu /<br />
system menu bar.<br />
( REPEAT<br />
– to repeat chapter, track, album, title or disc.<br />
) REPEAT A-B<br />
– to repeat a specific section on a disc.<br />
¡ SUBW +/-<br />
– to adjust the subwoofer’s volume level.<br />
REAR +/-<br />
– to adjust the rear (surround) speakers’ volume level.<br />
CENTER +/-<br />
– to adjust the centre speaker’s volume level.<br />
TV VOL +/-<br />
– to adjust <strong>Philips</strong> television’s volume level.<br />
SLEEP<br />
– to set the sleep (auto-off) timer function.<br />
£ DIM<br />
– to select a different brightness for the display screen.<br />
≤ VOICE<br />
– to enhance the surround and dialogue in multichannel<br />
mode.<br />
∞ MUTE<br />
– to enable or disable the sound output.<br />
§ RESUME<br />
– to continue disc playback after an interruption.<br />
≥ OK<br />
– to exit or confirm the menu selection.<br />
• Numeric Keypad (0-9)<br />
– in Disc mode, to enter a track/chapter number.<br />
– in Tuner mode, to enter a preset radio station.<br />
– in TV/AV mode, to enter a TV channel number.<br />
ª y<br />
– press to switch the system to standby mode.<br />
– hold down to switch the system to Eco Power<br />
standby mode.
IMPORTANT!<br />
– Before connecting the AC power cord to the<br />
wall outlet, ensure that all other connections have<br />
been made.<br />
– Never make or change any connections with<br />
the power switched on.<br />
– The type plate is located at the rear or bottom<br />
of the system.<br />
Connecting antennas<br />
MW Indoor Loop Antenna<br />
Connect the supplied MW loop antenna to the MW<br />
jack. Position the loop antenna to receive the clearest<br />
sound.<br />
MW<br />
+<br />
SPEAKER <strong>SYSTEM</strong>S (8Ω)<br />
R L C SR SL<br />
FRONT CENTER SURROUND<br />
Fix the claw<br />
to the slot<br />
+<br />
CDR<br />
DIGITAL<br />
OUT<br />
DIGITAL<br />
IN<br />
CENTER<br />
OUT<br />
WOOFER<br />
LINE OUT<br />
AUX<br />
IN<br />
TV<br />
IN<br />
AUDIO<br />
LINE<br />
OUT<br />
CVBS<br />
S-VIDEO<br />
AUDIO<br />
INPUT<br />
VIDEO OUT<br />
FM Indoor Antenna<br />
Connect the supplied<br />
FM antenna to the FM 75 Ω<br />
jack. Move the antenna in<br />
various directions until the<br />
clearest signal is received.<br />
Connections<br />
FM 75 Ω<br />
Note:<br />
– Keep the antenna as far away as possible from the TV, VCR<br />
or any radiation source to prevent unwanted noise.<br />
FM Outdoor Antenna<br />
For better FM reception, use a 75 Ω coaxial cable (not<br />
supplied) to connect the system to an outdoor FM antenna<br />
as shown.<br />
FM 75 Ω<br />
SCART OUT<br />
MW<br />
FM/MW<br />
ANTENNA<br />
MW<br />
FM/MW<br />
ANTENNA<br />
CONNECTIONS<br />
9<br />
English
English<br />
10<br />
Connecting the speakers<br />
Connect the supplied speaker systems using the supplied<br />
speaker cables by matching the colours of the jacks and<br />
speaker cables.<br />
1 Press up (or down) the clip on the speaker’s jack and fully<br />
insert the stripped portion of the speaker cable into the<br />
jack, then release the clip.<br />
8 mm<br />
a b c<br />
2 Connect the subwoofer’s AUDIO INPUT jack to the<br />
WOOFER LINE OUT jack and then connect the<br />
speakers as follows :<br />
Speakers - +<br />
Front Right (R) (FR) black red<br />
Front Left (L) (FL) black white<br />
Centre (C) black green<br />
Surround Right (SR) black grey<br />
Surround Left (SL) black blue<br />
(for model LX8000SA only)<br />
Before connecting the speakers;<br />
● Set up the speaker stands<br />
(refer to the accompanying<br />
“Installation Guide”) or/and<br />
mount the speakers onto the<br />
mini speaker stands as shown in<br />
the illustration.<br />
● Remove the protective cover<br />
only after the connection and<br />
installation of speakers are<br />
completed.<br />
Notes:<br />
– Ensure that the speaker cables are correctly connected.<br />
Improper connections may damage the system due to<br />
short-circuit.<br />
– For optimal sound performance, use the supplied speakers.<br />
– Do not connect more than one speaker to any one pair of<br />
+/- speaker jacks.<br />
– Do not connect speakers with impedance lower than the<br />
speakers supplied. Please refer to the SPECIFICATIONS<br />
section of this manual.<br />
CONNECTIONS<br />
+<br />
+<br />
Connecting a TV<br />
You must connect a TV to the <strong>DVD</strong> system in order to use<br />
the <strong>DVD</strong> system.<br />
IMPORTANT!<br />
There are various ways to connect the system to a<br />
TV (as shown in the illustration below). You only<br />
need to make ONE of the best connections,<br />
depending on the capabilities of your TV system.<br />
If your TV has a SCART input connector<br />
1 Use the supplied audio cables to connect the system’s<br />
AUDIO-TV IN (L/R) jacks to the corresponding<br />
AUDIO OUT jacks on the TV.<br />
2 Use the Scart cable to connect the system’s SCART<br />
OUT jack to the corresponding SCART VIDEO IN jack on<br />
the TV.<br />
If your TV has a S-Video input connector<br />
1 Use the supplied audio cables to connect the system’s<br />
AUDIO-TV IN (L/R) jacks to the corresponding<br />
AUDIO OUT jacks on the TV.<br />
2 Use the S-Video cable to connect the system’s<br />
S-VIDEO jack to the S-Video input jack on the TV.<br />
If your TV is not equipped with a SCART or<br />
S-Video input connector<br />
1 Use the supplied audio cables to connect the system’s<br />
AUDIO-TV IN (L/R) jacks to the corresponding<br />
AUDIO OUT jacks on the TV.<br />
2 Use the video cable (not supplied) to connect the system’s<br />
CVBS jack to the video input jack on the TV.<br />
Note: On the TV,<br />
– The S-Video In jack may be labeled Y/C, S-Video or S-VHS.<br />
– The CVBS jack is usually yellow and might be labeled<br />
Video In, Composite or Baseband.<br />
1<br />
CDR<br />
DIGITAL<br />
OUT<br />
CENTER<br />
OUT<br />
DIGITAL WOOFER<br />
IN LINE OUT<br />
AUX<br />
IN<br />
TV<br />
IN<br />
AUDIO<br />
2 2<br />
LINE<br />
OUT<br />
CVBS<br />
S-VIDEO<br />
VIDEO OUT<br />
FM 75 Ω<br />
SCART OUT<br />
2<br />
MW<br />
FM/MW<br />
ANTENNA
Connecting additional<br />
equipment<br />
You can connect other audio and audio/visual equipment to<br />
the <strong>DVD</strong> system in order to use the Home Cinema Audio<br />
System’s surround sound capabilities.<br />
IMPORTANT!<br />
– For connection to additional equipment, the<br />
audio/video cables are not supplied.<br />
– When making connections, make sure the<br />
colour of cables matches the colour of jacks.<br />
– Always refer to the instruction manual of the<br />
connected equipment to make an optimal<br />
connection.<br />
– Some <strong>DVD</strong>s have anti-copying devices, so you<br />
will not be able to record the disc through a VCR.<br />
Analogue audio connections<br />
For listening to the other equipment<br />
Connect the system’s AUX IN (R/L) jacks to the<br />
AUDIO OUT jacks on the other audio/visual device (such<br />
as a VCR, Laser Disc player or cassette deck).<br />
For recording<br />
Connect the system’s LINE OUT (R/L) jacks to the<br />
AUDIO IN jacks on the recording device (such as a tape<br />
recorder or CD recorder).<br />
+<br />
SPEAKER <strong>SYSTEM</strong>S (8Ω)<br />
R L C SR SL<br />
FRONT CENTER SURROUND<br />
+<br />
DIGITAL IN DIGITAL OUT<br />
CD recorder<br />
AUDIO OUT<br />
Digital audio connections<br />
For listening to the playback from the<br />
CD recorder<br />
Connect the system’s DIGITAL IN jack to the<br />
DIGITAL OUT jack on a CD recorder.<br />
Notes:<br />
– You cannot hear the SACD or MP3-CD playback if you use<br />
the digital connection.<br />
– If the audio format of the digital input does not match the<br />
capabilities of your <strong>DVD</strong> Home Cinema System, it will produce<br />
a strong, distorted sound or no sound at all.<br />
For recording<br />
Connect the system’s DIGITAL OUT jack to the<br />
DIGITAL IN jack on a CD recorder.<br />
Note:<br />
– If <strong>DVD</strong>s are encoded with anti-copy protection, digital<br />
recording is not possible.<br />
Replacing the centre speaker with the TV<br />
You can remove the centre speaker and redirect the sound<br />
through your TV system if the TV has a CENTER IN jack.<br />
Connect the CENTER IN jack of your TV to the<br />
CENTER OUT jack of your <strong>DVD</strong> system.<br />
Caution: Do not touch the inner pins of the jacks<br />
on the rear panel. Electrostatic discharge may<br />
cause permanent damage to the unit.<br />
CDR<br />
DIGITAL<br />
OUT<br />
DIGITAL<br />
IN<br />
CENTER<br />
OUT<br />
WOOFER<br />
LINE OUT<br />
AUX<br />
IN<br />
TV<br />
IN<br />
AUDIO<br />
LINE<br />
OUT<br />
VCR /<br />
laser disc player /<br />
cassette deck tape recorder /<br />
CD recorder<br />
CVBS<br />
S-VIDEO<br />
VIDEO OUT<br />
AUDIO IN<br />
FM 75 Ω<br />
SCART OUT<br />
Television<br />
MW<br />
FM/MW<br />
ANTENNA<br />
CENTER<br />
IN<br />
CONNECTIONS<br />
11<br />
English
English<br />
Preparations<br />
12<br />
Setting up the surround sound<br />
system<br />
You must connect all the speakers and set up the system<br />
properly in order to enjoy the Digital Cinema experience at<br />
home (refer to “Connections - Connecting the speakers”).<br />
You will have the feeling of being in the middle of the action<br />
because sound is coming from everywhere around you.<br />
The subwoofer can enhance the bass performance of your<br />
system dramatically.<br />
IMPORTANT!<br />
Please sit at your usual listening position in order<br />
to set up the speaker balance correctly.<br />
Placing the speakers<br />
To obtain the best surround effect, place the speakers as<br />
follows.<br />
1 Place the front left and right speakers at equal distances<br />
from the TV and at an angle of approximately 45 degrees<br />
from the listening position.<br />
2 Place the centre speaker above or below the TV so the<br />
centre channel’s sound is localised.<br />
3 Place the surround speakers at normal listening ear level<br />
facing each other or mounted on the wall.<br />
4 Place the subwoofer on the floor near the TV.<br />
Notes:<br />
– To avoid magnetic interference, do not position the front<br />
speakers too close to your TV.<br />
– If the rear surround speakers are installed farther away<br />
from the listening position than the front and centre speakers,<br />
it will weaken the surround effect.<br />
– All speakers should be securely installed to prevent<br />
accidents and improve sound quality.<br />
PREPARATIONS<br />
Changing the volume level<br />
You can change the speakers’ sound distribution to suit<br />
your surround sound needs, except for CDDA DTS disc.<br />
● Press CENTER +/- to adjust the level of the centre<br />
speaker.<br />
➜ “CEN XX” is displayed.<br />
● Press REAR +/- to adjust the level of the rear<br />
surround speakers.<br />
➜ “SL XX” or “SR XX” is displayed.<br />
Notes:<br />
– “XX” denotes the volume level between -6 to +6.<br />
– For CDDA DTS disc, please refer to “System Setup (<strong>DVD</strong>) -<br />
Setting the sound ( ) - Speakers” for changing the volume<br />
level of the centre speaker, rear speakers and subwoofer.<br />
Setting up the subwoofer<br />
1 Use the supplied subwoofer cable to connect the<br />
subwoofer’s audio input jack to the WOOFER LINE<br />
OUT jack of the <strong>DVD</strong> system.<br />
2 Connect the subwoofer’s AC power cable to the wall<br />
socket and switch on the power.<br />
➜ It will automatically switch on when receiving an audio<br />
signal input. If there is no audio signal input, it will switch off<br />
automatically.<br />
3 Set the phase polarity at the rear of the subwoofer at<br />
either 0o or 180o to determine better bass reproduction<br />
effect in your listening environment.<br />
4 Press SUBW +/- to adjust the volume level of the<br />
subwoofer (-6 to +6).<br />
➜ “SUB XX” is displayed.<br />
Inserting batteries into the<br />
remote control<br />
1 Open the battery compartment.<br />
2 Place the batteries in the<br />
compartment with the correct<br />
polarity as indicated by “+“ and “-“<br />
symbols.<br />
3 Close the cover.<br />
CAUTION!<br />
– Remove batteries if they are exhausted or will<br />
not be used for a long time.<br />
– Do not use old and new or different types of<br />
batteries in combination.<br />
– Batteries contain chemical substances, so they<br />
should be disposed off properly.
Switching on the system<br />
1 After completing all the connections, connect the AC<br />
power cord of the <strong>DVD</strong> system and subwoofer to the<br />
power outlet.<br />
● The first time you turn on power,<br />
"AUTO INSTALL - PRESS PLAY" may appear on the<br />
display screen. PressÉÅ on the system to start<br />
installation or press Ç to exit (refer to “Radio Reception -<br />
Plug and Play”).<br />
2 Press SOURCE button (or press TV/AV, DISC, TUNER<br />
or AUX/DI) to select the input source.<br />
➜ The selected source will be displayed.<br />
● For viewing a <strong>DVD</strong> or VCD, a TV needs to be connected<br />
(refer to “Connections - Connecting a TV”).<br />
Switch on the TV and set it to the correct video in channel<br />
(for example, EXT1, EXT2, AV1, AV2). Refer to your TV<br />
instruction manual for details.<br />
➜ The default screen appears on the TV.<br />
● You can connect other equipment to the <strong>DVD</strong> system in<br />
order to use the Home Cinema Audio System’s surround<br />
sound capabilities. For example, connect to a TV and select<br />
TV/AV as the input source or connect to a VCR and select<br />
AUX as the input source.<br />
IMPORTANT!<br />
– If your TV screen is only showing a black/white<br />
picture or the picture is completely distorted,<br />
please refer to “NTSC/PAL setting” or “System<br />
Setup (<strong>DVD</strong>) - TV system”.<br />
– If you do not get a proper picture or sound,<br />
please refer to “System Setup (<strong>DVD</strong>)” in order to<br />
change the pre-settings as necessary to<br />
accommodate your TV system or change to your<br />
preferred settings.<br />
NTSC/PAL setting<br />
Set the <strong>DVD</strong> system to NTSC or PAL, whichever matches<br />
your TV. The factory default setting is PAL. This setting is<br />
necessary if you connected the <strong>DVD</strong> system to a<br />
NTSC TV only.<br />
1 Press SOURCE or DISC<br />
to select disc mode.<br />
➜ Make sure that no disc is<br />
inside the disc tray.<br />
2 Hold down DISC on the<br />
remote control until the<br />
current setting (NTSC or<br />
PAL) appear on the display.<br />
3 If you want to change the setting, repeat step 2.<br />
☞<br />
System Setup (<strong>DVD</strong>)<br />
The system setup is carried out via the TV, enabling you to<br />
customise the <strong>DVD</strong> system to suit your particular<br />
requirement. If the options selected are not available on a<br />
disc, then the disc’s own preference will be used.<br />
To enter System Setup menu<br />
1 Press <strong>SYSTEM</strong> MENU then 4 to select icon from<br />
the menu bar on the TV screen.<br />
➜ Playback will stop.<br />
2 Use 34 1 2 to toggle through the functions (<br />
) and select your preferred option.<br />
3 Press OK to confirm a highlighted selection.<br />
4 To remove the menu, press <strong>SYSTEM</strong> MENU again.<br />
Setting the picture<br />
1en 1en 1 st<br />
TV Shape<br />
Black Level shift<br />
Video shift<br />
TV System Auto<br />
panscan<br />
On<br />
Colour settings 1 Personal<br />
Personal colour Settings...<br />
ö TV Shape<br />
Select the aspect ratio of the connected TV.<br />
If you have a normal TV and your <strong>DVD</strong> is<br />
formatted for wide screen viewing,<br />
select 4:3 letter box. Wide picture with black bands will be<br />
displayed on the upper and lower portions of the TV<br />
screen.<br />
If you have a normal TV and your <strong>DVD</strong> is not<br />
formatted for wide screen viewing,<br />
select 4:3 panscan (default setting). A picture is displayed<br />
on the whole TV screen (or “reformatted to fit your TV”).<br />
If you have a wide screen TV,<br />
select 16:9 (you must also set your wide screen TV to “full<br />
size”).<br />
PREPARATIONS<br />
13<br />
English
English<br />
14<br />
16:9<br />
(Wide screen)<br />
4:3 LB<br />
(Letter Box)<br />
4:3 PS<br />
(Pan Scan)<br />
Note:<br />
– The format you select must be available on the disc. If it is<br />
not, the settings for TV Shape will not affect the picture during<br />
playback.<br />
ö Black level shift (NTSC output only)<br />
Select On if you set the <strong>DVD</strong> system to NTSC and you are<br />
playing NTSC-compatible <strong>DVD</strong>s. This will improve the<br />
colour contrast and picture.<br />
ö Video shift<br />
Use this setting to move the picture on your TV to the left<br />
or right. The default setting is in the centre.<br />
ö Colour settings<br />
You can select one of the predefined sets of colour settings:<br />
Personal, Rich, Natural, Soft or Animation..<br />
ö Personal colour<br />
It allows you to define your own set of colour settings by<br />
adjusting : Saturation, Brightness and Contrast. Use 3 4<br />
keys to adjust the values of these settings, then press OK.<br />
PREPARATIONS<br />
ö TV System (NTSC/PAL conversion)<br />
This setting is applicable only if you used the CVBS or<br />
SCART jacks to connect the <strong>DVD</strong> system to a TV. Select<br />
the colour system that matches the connected TV.<br />
You do not need to change the setting if your TV is<br />
PAL-compatible. The factory default setting is PAL. It will<br />
change the video signal of a NTSC disc and playback in PAL<br />
format.<br />
If your TV is compatible with both NTSC and PAL,<br />
select AUTO.<br />
If your TV is NTSC-compatible,<br />
select NTSC. It will not support the PAL format <strong>DVD</strong>s and<br />
playback of a PAL <strong>DVD</strong> is not possible.<br />
Note:<br />
– Slight picture distortions may occur due to this conversion.<br />
This is normal.<br />
Setting the sound<br />
1en 1en 1 st<br />
Digital output<br />
Analogue output<br />
Night mode<br />
Karaoke vocal<br />
PCM output<br />
All<br />
Stereo<br />
On<br />
Off<br />
Speakers Settings...<br />
48 KHZ<br />
ö Digital output<br />
Digital output lets you specify the type of digital output<br />
available with the other equipment connected.<br />
Select All, if you have connected the <strong>DVD</strong> system’s<br />
DIGITAL OUT jack to an equipment that has a<br />
multichannel decoder.<br />
Select PCM only (default setting), if the other equipment is<br />
not capable of decoding multichannel audio.<br />
Select Off to deactivate the digital output.<br />
Note:<br />
– You cannot hear the SACD or MP3-CD playback if you use<br />
the digital connection.<br />
ö Analogue output<br />
Select Stereo, 3D sound (TruSurround) or Multi-channel<br />
to match your <strong>DVD</strong> home cinema system’s playback<br />
capability.<br />
This function can also be accessed via the<br />
SURROUND button on the remote control.
ö Night mode<br />
Select On to level out the volume, high volume outputs will<br />
be softened. For example, the disc will play at the same<br />
sound level throughout the movie.<br />
ö Karaoke vocal (not functional for this model)<br />
ö Speakers<br />
Allows you to select speaker settings, volume balance, delay<br />
time and to test the speaker settings.<br />
You can also adjust the volume balance via the<br />
SUBW +/-, REAR +/-, CENTER +/buttons<br />
on the remote control.<br />
Note:<br />
– Speaker settings are only active on the Multi-Channel Audio<br />
outputs for both <strong>DVD</strong> and SACD. Speaker settings will not be<br />
applied during playback in the SACD Stereo mode.<br />
1en 1en 1 st<br />
ö PCM Output<br />
If you connected the <strong>DVD</strong> system to an external<br />
equipment using the DIGITAL OUT jack, you may need to<br />
adjust the PCM output setting.<br />
Select 96 KHZ if the external equipment is capable of<br />
processing digital signal input with sampling rates of 96 kHz.<br />
Select 48 KHZ if the external equipment is incapable of<br />
processing 96 kHz digital signal input, and you need the<br />
system to convert sound to a standard signal with sampling<br />
rates of 48 kHz.<br />
Setting the language<br />
1en 1en 1 st<br />
Audio Language<br />
Subtitle<br />
Menu<br />
English<br />
English<br />
English<br />
ö Audio Language, Subtitle, Menu<br />
This is to select the audio language, subtitle language and<br />
the language used on TV screen menus or <strong>DVD</strong> menus that<br />
will always be used for every disc to be played back. The<br />
default setting is English.<br />
If the language selected is not available on the disc, the<br />
original language designated by each disc will be selected.<br />
Setting the features<br />
Access control<br />
Status window<br />
PBC<br />
Help text<br />
1en 1en 1 st<br />
Enter code...<br />
ö Access Control (see next page)<br />
ö Status window<br />
If you select On, the current status of the system will be<br />
displayed on the TV screen.<br />
ö PBC (Playback Control - VCD only)<br />
If you select On, when playing a video CD with playback<br />
control function, the PBC menu (if available) will appear on<br />
the TV screen for selection.<br />
If you select Off, the video CD will play automatically once<br />
it is loaded in the disc tray.<br />
This function can also be accessed via the<br />
DISC MENU button on the remote control.<br />
ö Help text<br />
If you select On, the help text will appear to describe the<br />
menu bar icons selected.<br />
On<br />
On<br />
On<br />
PREPARATIONS<br />
15<br />
English
English<br />
Access Control<br />
16<br />
Access Control contains the following features :<br />
Child lock<br />
Parental level<br />
Change country<br />
Change code<br />
IMPORTANT!<br />
– <strong>Philips</strong> denies any liability associated with<br />
unintended watching of discs. Make sure your<br />
discs play according to your Parental Controls<br />
settings before you allow children access to the<br />
player.<br />
– Some <strong>DVD</strong>s are not encoded with a rating<br />
though the movie rating is printed on the disc<br />
jacket. The rating level feature does not work for<br />
such discs.<br />
Child lock (<strong>DVD</strong>/VCD)<br />
Not all <strong>DVD</strong>s are rated or coded by the disc maker. You<br />
can prevent a specific <strong>DVD</strong> from playing by locking or<br />
unlocking the <strong>DVD</strong>, regardless of its rating.<br />
To lock/unlock the disc for viewing<br />
1 Press <strong>SYSTEM</strong> MENU, then press 4 four times to select<br />
from the menu bar.<br />
2 Press 2 to select Access control.<br />
3 Use the numeric keypad (0-9) to enter your 4-digit<br />
code. If necessary, enter the code a second time.<br />
4 Move to Child lock using 3 4.<br />
5 Press 2 then use 3 4 to select Ç (lock) or É (unlock).<br />
6 Press OK to confirm.<br />
➜ Now unauthorised discs will not be played unless the<br />
4-digit code is entered.<br />
7 To remove the menu, press <strong>SYSTEM</strong> MENU again.<br />
To enable disc playback after it has been<br />
locked<br />
1 Insert the disc.<br />
➜ The ‘child safe’ menu will appear.<br />
2 You will be asked to enter your 4-digit code for<br />
Play once or Play always.<br />
➜ If you select Play once, the current disc in the disc tray<br />
can be played.<br />
➜ If you select Play always, the disc will become<br />
authorised and can always be played, even if the Child Lock<br />
is set to Ç (lock).<br />
ACCESS CONTROL<br />
Notes:<br />
– The player memory can maintain 120 authorised (‘Child<br />
safe’) disc titles. A disc will be placed in the list when ‘Play<br />
Always’ is selected.<br />
– Each time a ‘child safe’ disc is played, it will be placed on<br />
top of the list. When the list is full, the last disc in the list will<br />
be replaced when a new disc is added.<br />
– Two-sided <strong>DVD</strong>s and multi-volume VCDs may have a<br />
different ID for each side or volume. In order to make the disc<br />
‘Child safe’, each side has to be authorised.<br />
To disable disc playback<br />
1 Insert the disc.<br />
➜ Playback starts automatically.<br />
2 Press 9 while { is visible.<br />
➜ The | will appear and the disc is now locked, and<br />
unable to play unless you enter the 4-digit code.
Parental level (<strong>DVD</strong>)<br />
(only available in region 1 player)<br />
This feature lets you set a playback limitation level. Some<br />
<strong>DVD</strong>s may have a parental level assigned to the complete<br />
disc or to certain scenes on the disc. The rating levels are<br />
from 1 to 8 and are country dependent. You can prohibit<br />
the playing of certain discs that are not suitable for your<br />
children or have certain discs played with alternative scenes.<br />
To set the parental level at which you<br />
want to restrict playback<br />
1 Press <strong>SYSTEM</strong> MENU, then press 4 four times to<br />
select from the menu bar.<br />
2 Press 2 to select Access control.<br />
3 Enter the 4-digit code. If necessary, enter the code a<br />
second time.<br />
4 Move to Parental level using 3 4.<br />
5 Press 2, then press 3 4 to select a rating from 1 to 8 for<br />
the <strong>DVD</strong> that is currently in the <strong>DVD</strong> player.<br />
6 Press OK to confirm.<br />
7 To remove the menu, press <strong>SYSTEM</strong> MENU again.<br />
Rating - NO PARENT<br />
If parental control is not activated, it will play all discs.<br />
Rating - 1 to 8<br />
If the player’s parental level is set below 8, only discs with a<br />
lower or equal level will play. For example, if the player is<br />
set to 5, only discs with ratings of 5, 4, 3, 2 and 1 will be<br />
played. Higher rated scenes will not be played unless an<br />
alternative that has the same rating or lower is available on<br />
the disc. For example, consider a disc that generally is<br />
suitable for most audiences, and it is rated at level 2 for the<br />
most part. However, in the middle, there are also scenes<br />
rated at 5 (not suitable for children).<br />
Rating explanations<br />
8 – Mature material; should be viewed only by<br />
adults due to graphic sexual material, violence,<br />
or language.<br />
7 – No children under age 17; not recommended<br />
viewing for children under age 17.<br />
6 – Parental Guidance - Restricted; recommended<br />
that parents restrict children under 17 from<br />
viewing or allow to view only when supervised<br />
by a parent or adult guardian.<br />
5 – Reserved.<br />
4 – Material is unsuitable for children under age 13.<br />
3 – Parental Guidance suggested.<br />
2 – Reserved.<br />
1 – General Audience; recommended as acceptable<br />
for viewers of all ages.<br />
Change Country (<strong>DVD</strong>)<br />
1 When disc playback is stopped, press <strong>SYSTEM</strong> MENU,<br />
then press 4 four times to select from the menu bar.<br />
2 Press 2 to select Access control.<br />
3 Enter the 4-digit code.<br />
4 Move to Change country using 3 4.<br />
5 Press 2, then press 3 4 to select a country.<br />
6 Press OK to confirm.<br />
Change Code (<strong>DVD</strong>/VCD)<br />
1 When disc playback is stopped, press <strong>SYSTEM</strong> MENU,<br />
then press 4 four times to select from the menu bar.<br />
2 Press 2 to select Access control.<br />
3 Enter the old 4-digit code.<br />
4 Move to Change code using 3 4, then press 2 to confirm.<br />
5 Enter the new 4-digit code.<br />
6 Enter the code a second time to reconfirm.<br />
If you forget your 4 digit code<br />
1 Select Access control.<br />
2 Press 9 four times when prompted for the 4-digit code.<br />
The system will automatically change back to the default<br />
code.<br />
3 Enter a new 4-digit code twice.<br />
ACCESS CONTROL<br />
17<br />
English
English<br />
Basic Functions<br />
18<br />
Sound Control<br />
IMPORTANT!<br />
– For proper surround sound, make sure you have<br />
followed the “Connections” and “Preparations”<br />
procedures fully.<br />
– The centre and surround speakers only operate<br />
when the system is set to surround sound mode<br />
and the source material being played is recorded<br />
or broadcast in Dolby Digital, DTS or Dolby<br />
surround sound.<br />
– Stereo broadcasts or recordings will produce<br />
some surround channel effects when played in a<br />
surround mode. However, mono (single channel<br />
sound) sources will not produce any sound from the<br />
surround speakers.<br />
Selecting the surround sound mode<br />
● Press SURROUND repeatedly to select : Multi-channel,<br />
3D Sound or stereo mode.<br />
➜ The availability of the various surround sound modes<br />
depend on the number of speakers used and the sound<br />
available on the disc. The available output modes are shown<br />
below.<br />
● When playing an SACD, press SURROUND to select:<br />
SACD multi channel or SACD stereo.<br />
Multichannel<br />
– Dolby Digital<br />
Dolby Digital (also known as Dolby 5.1) and MPEG Multichannel deliver a<br />
realistic and dynamic sound similar to theatre and cinema. It requires<br />
connection of all five speakers (front left/right, centre, surround left/right)<br />
and subwoofer for correct Dolby Digital sound reproduction. Each channel<br />
plays its own unique role in providing the right sound. Front left, centre<br />
and right join two surround speakers to reproduce high, mid and bass<br />
frequencies in five full-range channels of surround. Bass rumble, explosions<br />
and low frequency effects you feel are delivered through the subwoofer. A<br />
large number of <strong>DVD</strong> discs have been recorded in Dolby Digital.<br />
– DTS Surround<br />
DTS Surround is a cinema surround sound format that offers superior<br />
digital audio performance. DTS offers more clarity and definition especially<br />
for higher tones. The better sound quality is a result of the limited sound<br />
compression (3:1 instead of 11:1 for Dolby Digital) and the 20-bit<br />
resolution.<br />
– Dolby Surround<br />
The Dolby Surround system is a specially encoded two-channel analogue<br />
format that will produce sound through four speaker channels (front left,<br />
centre, front right, mono surround) when a Dolby Pro Logic Decoder is<br />
used. It is also compatible with stereo systems but the user will only have<br />
two-channel (front left & right) sound.<br />
– Matrix<br />
A new surround playback system that delivers five-channel surround<br />
sound (front left/right, centre, surround left/right and subwoofer).<br />
BASIC FUNCTIONS<br />
3D Sound<br />
A new surround playback system that delivers surround sound from only<br />
the two front speakers and a subwoofer.<br />
Stereo<br />
All sound is reproduced and played through the front left and right<br />
speakers. This enables standard stereo reproduction.<br />
Selecting the digital sound effect<br />
The digital sound effects allow you to select from various<br />
pre-set modes that control the frequency bands of sound<br />
to optimise certain musical styles. It greatly enhances the<br />
excitement and enjoyment of your favourite music.<br />
● Press SOUND repeatedly to select the available sound<br />
effect.<br />
When playing a <strong>DVD</strong>/VCD, select :<br />
– CONCERT, DRAMA, ACTION or SCI-FI<br />
When playing a CD/MP3-CD/SACD or in<br />
Tuner or Aux mode, select :<br />
– CLASSIC, JAZZ, ROCK or DIGITAL<br />
Selecting the clear voice effect<br />
The clear voice sound feature enhances the centre and<br />
surround sound speakers.<br />
● Press VOICE on the remote control to switch on or off<br />
the clear voice effect.<br />
Volume control<br />
Adjust VOLUME button (or press VOL +/-) to<br />
increase or decrease the volume level.<br />
For <strong>Philips</strong> TVs only<br />
● Press TV VOL +/- on the remote control to adjust the<br />
TV’s volume level.<br />
To listen through the headphones<br />
● Connect the headphones plug to the n socket at the<br />
front of the system.<br />
➜ The speakers will be muted.<br />
To switch off the volume temporarily<br />
● Press MUTE.<br />
➜ Playback will continue without sound and "MUTE" is<br />
displayed.<br />
● To restore the volume, press MUTE again.<br />
Dimming the display screen<br />
● Press DIM repeatedly to select different levels of<br />
brightness for the display screen.
Discs information<br />
<strong>DVD</strong>-VIDEO DISC<br />
TITLE 1 TITLE 2<br />
CHAPTER 1 CHAPTER 2 CHAPTER 1 CHAPTER 2 CHAPTER 3<br />
● <strong>DVD</strong> video discs may have one or more Titles, and each<br />
Title may have one or more Chapters.<br />
TRACK 2<br />
VIDEO CD<br />
TRACK 1<br />
INDEX 1 INDEX 2 INDEX 1 INDEX 2 INDEX 3<br />
● Video CDs may have one or more Tracks, and each Track<br />
may have one or more Indexes.<br />
● To make easy and convenient access, you can move<br />
between Tracks and Indexes.<br />
● Some Video CDs have Play Back Control (PBC), which is a<br />
predefined playback sequence stored on the disc (refer to<br />
“Special VCD/SVCD features”).<br />
SACD Disc Types<br />
Single layer Disc<br />
Dual layer Disc Hybrid layer Disc<br />
HD layer HD layer CD layer HD layer<br />
● Super Audio CDs contain only Tracks.<br />
● If SACD-text or CD-text is available on the disc, it will be<br />
displayed on both the TV screen and system’s front panel.<br />
● There are three types of Super Audio CDs : single-layer,<br />
dual-layer and hybrid discs.<br />
– The single layer disc may contain both information areas.<br />
– The dual layer disc may contain both information areas<br />
but a double amount of information can be stored on the<br />
disc thanks to the second layer.<br />
– The hybrid disc may contain not only both information<br />
areas but also a second, standard CD layer, making it<br />
playable on standard CD players.<br />
¶ On hybrid discs (with SACD and CD layers), the system will<br />
only play the SACD layer.<br />
● Audio CDs contain only Tracks.<br />
1<br />
AUDIO CD<br />
TRACKS<br />
2 3 4 5 6 7 8 9 10 11 12 ...<br />
Basic playback<br />
CAUTION!<br />
– Do not move the disc player during playback, as<br />
doing so may damage the <strong>DVD</strong> system.<br />
– Do not push on the disc tray or put any objects<br />
other than disc on the disc tray. Doing so may<br />
cause the disc player to malfunction.<br />
1 Press STANDBY ON /<br />
ECO POWER y to switch the<br />
system on.<br />
2 Press OPEN/CLOSE to open<br />
the disc tray.<br />
3 Load a disc with the label side<br />
facing up.<br />
4 Press OPEN/CLOSE again to<br />
close the tray.<br />
➜ There will be a short delay while the system identifies<br />
the disc and reads the menu from the disc.<br />
● Some discs will start playing automatically, and others will<br />
display the Disc Menu on the TV screen. If the menu is<br />
presented, use 341 2 to highlight your selection and press<br />
OK to confirm. To select a play option, use the numeric<br />
keypad (0-9).<br />
5 PressÉÅ to start playback.<br />
● For SACDs, VCDs and CDs, playback will stop at the end of<br />
the disc.<br />
Notes:<br />
– Your system will not play discs that have a region code<br />
different from the region code of your system.<br />
– If the inhibit icon (Ä) appears on the TV screen when a<br />
button is pressed, it means the function is not available on the<br />
disc you are playing.<br />
To interrupt playback<br />
1 PressÉÅ.<br />
➜ The picture freezes and the sound will be muted.<br />
2 To resume playback, pressÉÅ again.<br />
To stop playback<br />
● Press Ç.<br />
Operations<br />
POWER ON/OFF<br />
OPERATIONS<br />
19<br />
English
English<br />
Continue playback from the last stop<br />
point (<strong>DVD</strong>/VCD)<br />
● Press RESUME to resume playback from the point at<br />
which it stopped (it is only applicable for the last five<br />
<strong>DVD</strong>/VCD played).<br />
To cancel the resume mode and start<br />
playback from the beginning<br />
1 In stop mode, press Ç.<br />
2 PressÉÅ to start playback from the beginning.<br />
20<br />
Note:<br />
– Resume feature is also applicable to VCDs and SVCDs.<br />
– The resume option may not be available on some discs.<br />
Skipping to another track/chapter<br />
● Press S or T repeatedly during playback to skip<br />
backward or forward. Each press will take the disc to the<br />
beginning of the previous or next track/chapter.<br />
Note:<br />
– If the REPEAT function has been set, pressing S or<br />
T will replay the same track/chapter.<br />
To skip to the beginning of the current track/<br />
chapter during playback<br />
● Press S once.<br />
To go directly to any track/chapter<br />
● Use the numeric keypad (0-9) to enter the number of<br />
the desired track/chapter.<br />
Fast Search<br />
1 Hold down S or T about two seconds to fast<br />
reverse or forward the disc. Holding S or T again<br />
will increase the search speed.<br />
2 To resume normal play, pressÉÅ.<br />
OPERATIONS<br />
Repeat play<br />
You can only select the repeat play mode during playback.<br />
For <strong>DVD</strong> - Repeat chapter/title/disc<br />
● Press REPEAT repeatedly to select the following :<br />
➜ “REPEAT CHAPTER” – repeat the current chapter.<br />
➜ “REPEAT TITLE” – repeat the current title.<br />
➜ “REPEAT DISC” – repeat the entire disc.<br />
For SVCD/VCD/SACD/CD - Repeat track/disc<br />
● Press REPEAT repeatedly to select the following :<br />
➜ “REPEAT TRACK – repeat the current track.<br />
➜ “REPEAT DISC” – repeat the entire disc.<br />
To cancel the repeat mode<br />
● Press REPEAT repeatedly to select “REPEAT OFF”.<br />
Notes:<br />
– Repeat play might not work correctly with some <strong>DVD</strong>s.<br />
– For VCD, repeat play is not possible during PBC playback.<br />
Repeat A-B<br />
You can play a specific section in a chapter/track repeatedly.<br />
1 PressÉÅ to start disc playback.<br />
2 When the disc reaches the point at which you want<br />
repeated playback to begin, press REPEAT A-B.<br />
3 When the disc reaches the point at which you want to end<br />
the segment, press REPEAT A-B again.<br />
➜ The segment will now repeat continuously.<br />
4 To resume normal play, press REPEAT A-B again.<br />
Programme favourite tracks (Audio CD)<br />
You can play the contents of the disc in the order you want<br />
by programming the order of the tracks to be played. Up to<br />
20 tracks can be stored.<br />
1 While playback is stopped, press PROG to enter<br />
programme mode.<br />
➜ “X? PROGRAM” is displayed.<br />
2 Use S / T or the numeric keypad (0-9) to enter<br />
the track number you want.<br />
➜ If you attempt to programme more than 20 tracks,<br />
"PROGRAM FULL" is displayed.<br />
3 Press OK or PROG to store the track.<br />
● Repeat steps 2-3 to store other tracks.<br />
4 To start programme play, pressÉÅ.<br />
5 To stop playback or exit programme mode, press Ç once.<br />
6 To cancel the programme, press Ç again.
Special <strong>DVD</strong>/VCD features<br />
A number of operations can be carried out directly via the<br />
multiple menu bars on the TV screen without interrupting<br />
disc playback (except for Setup Menu ( ), see “System<br />
Setup (<strong>DVD</strong>)”).<br />
Access to the menu bar<br />
1 Press <strong>SYSTEM</strong> MENU.<br />
➜ The menu bar will be displayed across the top of the TV<br />
screen.<br />
From the left,<br />
User Preference Settings Subtitle Language <br />
Audio Language Smart Colour Sound mode<br />
From the left,<br />
Frame by Frame Slow Motion Scan Speeds<br />
Camera Angle Enlarge Picture<br />
From the left,<br />
Title Chapter Time Search<br />
Favourite Track Selection<br />
2 Use 1 2 to move through the menu bar.<br />
3 Use 1 2 34 to select your preferred option and press OK<br />
to confirm.<br />
4 To remove the menu, press <strong>SYSTEM</strong> MENU again.<br />
IMPORTANT!<br />
– Some operations may be different or restricted,<br />
depending on the disc format. Refer to the jacket<br />
or case of the disc you are playing.<br />
– Changing the Subtitle Language, Audio<br />
Language, Smart Colour and Sound mode from<br />
the menu bar are only applied to the current disc,<br />
it will not change the default preset at User<br />
Preference Settings.<br />
Changing subtitle language (<strong>DVD</strong>)<br />
This operation works only on <strong>DVD</strong>s with multiple subtitle<br />
languages.<br />
● Move in the menu bar and use 3 4 to select the<br />
desired language.<br />
Changing audio language<br />
This operation works only on <strong>DVD</strong>s with multiple audio<br />
language.<br />
● Move to in the menu bar and use 3 4 to select the<br />
desired languages.<br />
For VCD :<br />
● Press 3 4 to select the desired audio channels for sound :<br />
LEFT VOCAL RIGHT VOCAL STEREO<br />
LEFT VOCAL<br />
Note:<br />
– When the desired language is not selected even after<br />
pressing the button several times, it means the language is not<br />
available on the disc.<br />
Changing speaker surround output<br />
● Move to in the menu bar and use 3 4 to select the<br />
surround output to match your system’s playback capability:<br />
Multichannel, 3D Sound or Stereo.<br />
Advancing by frames<br />
1 Move to in the menu bar and press 4.<br />
➜ Playback will pause.<br />
2 Use 1 2 to select the previous or next picture frame.<br />
3 To resume normal play, press ÉÅ.<br />
Playing in slow motion<br />
1 Move to in the menu bar and press 4.<br />
2 Use 1 2 to select the required slow motion speed.<br />
(1 = reverse) –1, –1/2, –1/4, –1/8<br />
(2 = forward) +1/8, +1/4, +1/2, +1<br />
3 To resume normal play, press ÉÅ.<br />
Note:<br />
– The sound will be muted during slow-motion play.<br />
OPERATIONS<br />
21<br />
English
English<br />
22<br />
Searching for a particular passage<br />
1 Move to in the menu bar and press 4.<br />
2 Use 1 2 to select the required search speed.<br />
(1 = reverse) –32, –8 , –4<br />
(2 = forward) +4, +8, +32<br />
3 To resume normal play, press ÉÅ.<br />
Note:<br />
– The sound will be muted during certain fast reverse or<br />
forward search speeds.<br />
Viewing from another angle (<strong>DVD</strong>)<br />
Some <strong>DVD</strong>s include scenes recorded from different<br />
camera angles. The selections of angle depend on the disc<br />
format. Check the <strong>DVD</strong> disc case or disc menu for details<br />
and availability.<br />
● Move to in the menu bar and use 34 to select the<br />
desired angle.<br />
➜ Playback changes to the selected angle.<br />
Zooming in<br />
This function allows you to enlarge the picture on the TV<br />
screen and to pan through the enlarged image.<br />
1 Move to in the menu bar.<br />
2 Use 3 4 to activate the ZOOM function and select the<br />
required zoom factor: 1.33 or 2 or 4.<br />
To shift the enlarged picture on the TV screen<br />
3 Press OK to confirm the selection.<br />
➜ The panning icon appears on the screen.<br />
4 Use 1 2 3 4 to move the zoomed picture left, right, up<br />
and down.<br />
5 When OK is pressed, the picture will remain panned.<br />
6 To exit ZOOM mode, set the zoom factor to “Off” (zoom<br />
factor 1) in the menu bar.<br />
OPERATIONS<br />
Moving to another title/chapter<br />
Some discs may contain more than one title or chapter. If<br />
the disc has a title or chapter menu recorded on it, you can<br />
start playback from the selected item.<br />
1 Select (title) or (chapter) from the menu bar.<br />
2 Use 3 4 to select a desired title/chapter number.<br />
➜ Playback will start automatically.<br />
Note:<br />
– Selecting a title or chapter might not be possible on certain<br />
discs.<br />
Playback from a selected point<br />
This function allows you to start playing at any chosen time<br />
on the disc.<br />
1 Move to in the menu bar and press 4.<br />
➜ Playback will pause.<br />
➜ A time edit box appears on the screen, showing the<br />
elapsed playing time of the current disc.<br />
2 Enter hours, minutes, and seconds from left to right in the<br />
time edit box using the numeric keypad (0-9).<br />
➜ Each time an item has been entered, the next item will<br />
be highlighted.<br />
3 Press OK to start playback from the selected time on the<br />
disc.<br />
Note:<br />
– This option may not be available on certain discs.
Favourite Track Selection - FTS<br />
– The FTS function allows you to store your favourite titles<br />
and chapters (<strong>DVD</strong>) and favourite tracks and indexes<br />
(VCD) for a particular disc in the system memory.<br />
– FTS programme can contain up to 20 items (titles, chapters<br />
etc.).<br />
– A programmed FTS will be placed on top of the list when<br />
playback is activated. When the list is full, a new<br />
programme will replace the last programme on the list.<br />
– The programme can be selected and played at any time.<br />
To set up an FTS programme, access the<br />
FTS menu<br />
1 Press <strong>SYSTEM</strong> MENU.<br />
2 Move to in the menu bar and press 4.<br />
➜ The FTS menu appears.<br />
3 To remove the menu, press <strong>SYSTEM</strong> MENU again.<br />
FTS<br />
Title<br />
Chapter<br />
Program<br />
FTS<br />
Title<br />
Index<br />
Program<br />
<strong>DVD</strong><br />
VCD<br />
The following functions can be performed in<br />
the FTS menu:<br />
To store titles/tracks<br />
1 Press 4 to select Title.<br />
2 Use 1 2 to select the required title number and press OK<br />
to store.<br />
➜ The title number will be added to the list of the<br />
programme.<br />
● If you wish to store the entire Title, press OK.<br />
To store chapters/indexes<br />
1 At Title, use 1 2 to move to a desired title number, then<br />
press 4.<br />
➜ The title number will be marked and the highlight<br />
moves to the first available chapter number of this title.<br />
2 Use 1 2 to select the required chapter number, then press<br />
OK to store.<br />
➜ The title/chapter selection will be added to the list of<br />
the programme.<br />
To activate/deactivate the FTS programme<br />
● Move to FTS and use 1 2 to select On or Off.<br />
OR<br />
● Press PROG on the system to toggle between On and<br />
Off.<br />
To erase an FTS Programme<br />
1 Press 4 to select Program.<br />
2 Use 1 2 to select the required number and press OK to<br />
erase.<br />
To erase the entire FTS programme<br />
1 Press 4 to select Clear all.<br />
2 Press OK to erase.<br />
Checking the contents of a <strong>DVD</strong><br />
1 Press DISC MENU on the remote control.<br />
➜ If the current title has a menu, the menu will appear on<br />
the screen. Otherwise, the disc menu will be displayed.<br />
2 Use 1 2 34 to select the desired title or chapter, then<br />
pressÉÅ or OK.<br />
➜ The selected title or chapter starts playing.<br />
● To remove the menu, press DISC MENU again.<br />
Notes:<br />
– The details of operation might differ depending on the<br />
<strong>DVD</strong>.<br />
– Selecting a title or disc might not be possible on certain<br />
<strong>DVD</strong>s.<br />
OPERATIONS<br />
23<br />
English
English<br />
24<br />
Special VCD/SVCD features<br />
Playback Control (PBC)<br />
PBC playback allows you to play Video CDs interactively,<br />
following the menu on the display.<br />
To set PBC on/off<br />
● While playback is stopped, press DISC MENU to toggle<br />
between “PBC ON” and “PBC OFF”.<br />
When playing a disc with PBC,<br />
If PBC is set to Off<br />
● Once the disc is loaded in the disc tray, it will start playback<br />
automatically.<br />
If PBC is set to On<br />
● Once the disc is loaded in the disc tray, the PBC menu (if<br />
available) will appear on the TV screen for selection.<br />
● Pressing DISC MENU during playback will return to the<br />
PBC menu.<br />
Note:<br />
– If PBC is on, TIME SEARCH and REPEAT functions are not<br />
available.<br />
Special SACD, MP3 and CD<br />
features<br />
Text information<br />
● Some CD, SACD, or MP3-CD may contain text information<br />
(e.g. track name, album name, artist name, etc.) which will<br />
appear on the TV screen during playback.<br />
CD<br />
Special MP3-CD features<br />
Supported MP3-CD format<br />
– ISO 9660 format.<br />
– Maximum 30 characters.<br />
– Maximum nested directory is 8 levels.<br />
– Maximum album number is 32.<br />
– Supported VBR bit-rate.<br />
– Supported sampling frequencies for MP3 discs are :<br />
32 kHz, 44.1 kHz, 48 kHz.<br />
– Supported bit-rates of MP3 discs are: 96, 112, 128,<br />
256 (kbps).<br />
OPERATIONS<br />
Downloading MP3 files from the Internet or copying songs<br />
from your own legal discs is a delicate process.<br />
Sound<br />
Quality<br />
AM radio<br />
FM radio<br />
Near-CD<br />
CD-like<br />
CD*<br />
CD*<br />
Bit Rate<br />
32 kbps<br />
64 kbps<br />
96 kbps<br />
128 kbps<br />
256 kbps<br />
320 kbps<br />
Approximate Approximate total<br />
Reduction Ratio MP3-CD time<br />
40 : 1<br />
20 : 1<br />
15 : 1<br />
10 : 1<br />
5 : 1<br />
3 : 1<br />
40 hrs<br />
20 hrs<br />
15 hrs<br />
10 hrs<br />
5 hrs<br />
3 hrs<br />
Comment<br />
Sound quality significantly affected<br />
– not recommended.<br />
Balanced sound quality<br />
– compression rate<br />
Compression rate low<br />
– suggest to play CDs instead<br />
It is normal to experience an occasional “skip” while<br />
listening to your MP3 discs.<br />
Additional note for MP3 disc Playback<br />
– In compliance with the SDMI, digital-out is muted while<br />
playing MP3 discs.<br />
– Due to the recording nature of Digital Audio MP3<br />
(DAM), only digital audio music will play.<br />
– The disc reading time may exceed 10 seconds due to<br />
the large number of songs compiled onto one disc.<br />
– For multi-session discs with different formats, only the<br />
first session will be available.<br />
Selecting a desired album/track<br />
1 Hold down S / T to select a desired album.<br />
2 Press S / T briefly and repeatedly to select a desired<br />
track.<br />
● You can also use the numeric keypad (0-9) to enter<br />
your choice.<br />
➜ During playback, numbers are used for track selection.<br />
➜ While playback is stopped, numbers are used for Album<br />
selection.<br />
MP3<br />
Play<br />
Album Track Time<br />
4 --/--- -.--.--<br />
Audio Disc Mode<br />
● Only the following functions are possible for MP3 discs:<br />
– STOP / PLAY / PAUSE<br />
– SKIP NEXT / PREVIOUS<br />
– REPEAT (TRACK / ALBUM / DISC)<br />
Repeat play<br />
● Press REPEAT repeatedly to select the following :<br />
➜ “REPEAT TRACK” – repeat the current track.<br />
➜ “REPEAT ALBUM” – repeat the current album.<br />
➜ “REPEAT DISC” – repeat the entire disc.<br />
To cancel the repeat mode<br />
● Press REPEAT repeatedly to select “REPEAT OFF”.
Plug and Play<br />
Plug and Play allows you to store all available RDS stations<br />
and radio stations automatically.<br />
First time setup/power up<br />
1 When you turn on the power, "AUTO INSTALL - PRESS<br />
PLAY" is displayed.<br />
g Î ã<br />
ˇ ˇ ˇ ˇ ˇ<br />
2 PressÉÅ on the system to start installation.<br />
➜ "INSTALL TUNER" is displayed, followed by "AUTO<br />
PROGRAM".<br />
➜ The system will automatically store the radio stations<br />
with sufficient signal strength, starting from FM band and<br />
followed by MW band. Weak radio stations may be stored<br />
in later presets.<br />
➜ When all the available radio stations are stored or the<br />
memory for 40 presets are used, the last preset radio<br />
station (or the first available RDS station) will be played.<br />
3 If the first preset is an RDS station, the system will<br />
proceed to set the RDS clock.<br />
➜ "INSTALL TIME" is displayed, followed by "SEARCH<br />
RDS TIME".<br />
➜ When RDS time is read, "RDS TIME" is displayed and<br />
the current time will be stored.<br />
➜ If RDS station does not transmit RDS time within 90<br />
seconds, the programme will exit automatically and the<br />
display will show “NO RDS TIME”.<br />
● If the first preset is non-RDS station;<br />
➜ The programme will exit automatically.<br />
To reinstall the Plug and Play<br />
1 In standby mode, hold downÉÅ on the system until<br />
"AUTO INSTALL - PRESS PLAY" is displayed.<br />
2 PressÉÅ again to start installation.<br />
➜ All previously stored radio stations will be replaced.<br />
To exit the Plug and Play<br />
●ˇ Press Ç on the system. ˇ<br />
➜ If you do not complete the Plug and Play installation, the<br />
function will be restarted when you turn on the power<br />
again.<br />
Notes:<br />
– If no stereo frequency is detected during Plug and Play,<br />
"CHECK ANTENNA" will be displayed.<br />
– During Plug and Play, if no button is pressed within 15<br />
seconds, the system will exit Plug and Play mode.<br />
P<br />
„<br />
/<br />
Tuning to radio stations<br />
1 Press SOURCE to select TUNER mode (or TUNER on<br />
the remote control.<br />
2 Press TUNER again to select the desired band : FM or<br />
MW<br />
ˇ<br />
ô<br />
ˇ ˇˇˇˇ<br />
ˇ<br />
Ïñˇ<br />
q<br />
ˇˇˇˇ »˚ ˇˇˇˇ<br />
ˇˇˇˇˇˇˇˇ
ˇ<br />
English<br />
ˇ<br />
Radio Reception Clock/Timer<br />
26<br />
ˇˇˇˇ<br />
»˚ preset numbers of all other preset radio stations in<br />
the band with higher numbers also decrease by one.<br />
● Repeat steps 1–2 to erase other preset radio stations.<br />
RADIO RECEPTION / CLOCK/TIMER<br />
IMPORTANT!<br />
When in Eco Power standby mode, it is not<br />
possible to show the clock time or set the<br />
clock/timer function.<br />
Clock setting<br />
The clock can be set in either 12-hour or 24-hour mode<br />
("12:00 AM" or "00:00", for example).<br />
1 In standby mode, press CLOCK•TIMER once.<br />
● While in the active source mode (DISC or TUNER, for<br />
example), press CLOCK•TIMER twice.<br />
2 Press PROG repeatedly to select clock mode.<br />
➜ "12:00 AM" or "00:00" starts flashing.<br />
3 Press S or T to set the hours and minutes. To<br />
increase the speed, hold down S or T.<br />
4 Press CLOCK•TIMER again to store the setting.<br />
➜ The clock starts working.<br />
To exit without storing the setting<br />
● Press Ç on the system.<br />
To view the clock time in other source mode<br />
● Press CLOCK•TIMER.<br />
➜ The clock is displayed for a few seconds.<br />
➜ If the clock has not been set, "--:--" is displayed.<br />
Notes:<br />
– The clock setting will be cancelled when the power cord is<br />
disconnected or if a power failure occurs.<br />
– During clock setting, if no button is pressed within 90<br />
seconds, the system will exit clock setting mode automatically.
Timer setting<br />
The system can switch on to DISC or TUNER mode<br />
automatically at a preset time, serving as an alarm to wake<br />
you up.<br />
IMPORTANT!<br />
– Before setting the timer, ensure that the clock<br />
is set correctly.<br />
– The timer will always be switched on after it<br />
has been set.<br />
– The volume of the timer will increase gradually<br />
to minimum level 12 or the last tuned volume<br />
level.<br />
1 Hold down CLOCK•TIMER for more than two<br />
seconds to enter timer mode.<br />
➜ The clock timer and starts flashing.<br />
2 Press SOURCE repeatedly (or DISC or TUNER on the<br />
remote control) to select the sound source.<br />
➜ “DISC XX:XX" indicates the disc mode is selected.<br />
➜ “TUNER XX:XX” indicates the Tuner mode is selected.<br />
3 Press S or T to set the hours and minutes. To<br />
increase the speed, hold down S or T.<br />
4 Press CLOCK•TIMER to store the timer.<br />
➜ The set timer "XX:XX" and the selected source are<br />
displayed.<br />
➜ remains on the display.<br />
● At the preset time, the selected sound source will play.<br />
➜ If DISC source is selected, the timer will wake up by<br />
playing the first track of the disc or programmed track. If<br />
the disc tray is empty, it will switch to Tuner mode.<br />
➜ If Tuner source is selected, the timer will wake up by<br />
playing the last tuned radio station.<br />
Note:<br />
– During timer setting, if no button is pressed within 90<br />
seconds, the system will exit timer setting mode automatically.<br />
Clock/Timer<br />
Deactivating the timer<br />
1 Hold down CLOCK•TIMER for more than two<br />
seconds to enter timer mode.<br />
2 In timer mode, press Ç on the system to cancel the timer.<br />
➜ disappears from the display and "TIMER OFF" is<br />
displayed.<br />
Activating the timer to the last preset<br />
time and source<br />
1 Hold down CLOCK•TIMER for more than two<br />
seconds to enter timer mode.<br />
2 Press CLOCK•TIMER again to store the timer setting.<br />
➜ The last set timer information is displayed for a few<br />
seconds and is shown.<br />
Sleep timer setting<br />
The sleep timer enables the system to switch to standby<br />
mode automatically at a preset time.<br />
1 Press SLEEP on the remote control repeatedly to select a<br />
preset amount of time after which the system will shut itself<br />
off automatically.<br />
➜ The selections are as follows (time in minutes):<br />
15 30 45 60 90 120 OFF 15 …<br />
➜ "SLEEP XX" or "SLEEP OFF" is displayed. "XX" is the<br />
time in minutes.<br />
2 When you reach the desired length of time, stop pressing<br />
the SLEEP button.<br />
➜ The sleep timer is now set. Before the system switches<br />
to standby mode, a countdown of 10 seconds is displayed.<br />
"SLEEP 10" "SLEEP 9".... "SLEEP 1"<br />
"SLEEP"<br />
To check the remaining length of time after<br />
sleep timer is activated<br />
● Press SLEEP once.<br />
To change the preset sleep timer<br />
● Press SLEEP again while the remaining sleep timer is<br />
shown.<br />
➜ The display will show the sleep timer options.<br />
To deactivate the sleep timer<br />
● Press SLEEP repeatedly until "SLEEP OFF" is displayed,<br />
or press the STANDBY ON button.<br />
CLOCK/TIMER<br />
27<br />
English
English<br />
Specifications<br />
AMPLIFIER SECTION<br />
Output power<br />
LX8000SA ................................................................................. 5 x 35 W RMS<br />
LX7000SA ..................................................................................... 5 x 30 W RMS<br />
Total Harmonic Distortion ............................... 10% at rated power (1 kHz)<br />
Frequency Response .................................................. 100 Hz – 30 kHz / ±3 dB<br />
Signal-to-Noise Ratio ...................................................................... > 65 dB (CCIR)<br />
Input Sensitivity<br />
- Aux In ..................................................................................................................... 880 mV<br />
- Digital In .......................................................................................................... IEC 60958<br />
TUNER SECTION<br />
Tuning Range .......................................... FM 87.5 – 108 MHz (50 kHz steps)<br />
.......................................................................... MW 531 – 1602 kHz (9 kHz steps)<br />
26 dB Quieting Sensitivity ......................................................................... FM 20 dB<br />
26 dB Quieting Sensitivity .......................................................... MW 3162 µV/m<br />
Image Rejection Radio ................................................................................. FM 25 dB<br />
................................................................................................................................ MW 28 dB<br />
IF Rejection Ratio ............................................................................................ FM 60 dB<br />
................................................................................................................................ MW 24 dB<br />
Signal-to-Noise Ratio .................................................................................... FM 60 dB<br />
................................................................................................................................ MW 40 dB<br />
MW Suppression Ratio ............................................................................... FM 30 dB<br />
Harmonic Distortion ............................................................................FM Mono 3%<br />
......................................................................................................................... FM Stereo 3%<br />
...................................................................................................................................... MW 5%<br />
Frequency Response ............................................ FM 18 Hz – 10 kHz / ±6 dB<br />
Stereo Separation ......................................................................... FM 26 dB (1 kHz)<br />
Stereo Threshold ......................................................................................... FM 23.5 dB<br />
<strong>DVD</strong> SECTION<br />
Laser Type ................................................................................................ Semiconductor<br />
Disc Diameter .............................................................................................. 12cm / 8cm<br />
Video Decoding .................................................................................................. MPEG-2<br />
Video DAC ................................................................................................................ 10 Bits<br />
Signal System ............................................................................................... PAL / NTSC<br />
Video Format ..................................................................................................... 4:3 / 16:9<br />
Video S/N ...........................................................................................56 dB (minimum)<br />
Composite Video Output ................................................................ 1.0 Vp-p, 75 Ω<br />
S-Video Output ............................................................................. Y - 1.0 Vp-p, 75 Ω<br />
........................................................................................................... C - 0.286 Vp-p, 75 Ω<br />
SCART Video Output ...................................................... R/G/B - 0.7 Vp-p, 75 Ω<br />
Audio DAC........................................................................................... 24 Bits / 96 kHz<br />
Frequency Response ................................................. 4 Hz – 20 kHz (44.1 kHz)<br />
................................................................................................... 4 Hz – 22 kHz (48 kHz)<br />
................................................................................................... 4 Hz – 44 kHz (96 kHz)<br />
Digital Output ......................................................................................... SPDIF Coaxial<br />
SACD D/A converter ............................................................................................. DSD<br />
SACD cut-off frequency ................................................................................... 30 kHz<br />
MISCELLANEOUS<br />
Power Supply Rating.............................................................. 220 – 240 V / 50 Hz<br />
Power Consumption ........................................................................................... 160 W<br />
Eco Power Standby ........................................................................................... < 0.5 W<br />
Dimensions (w x h x d) ...................................390 mm x 73 mm x 360 mm<br />
Weight<br />
LX8000SA ................................................................................................................ 5.8 kg<br />
LX7000SA ................................................................................................................ 5.6 kg<br />
IR REMOTE CONTROL<br />
Effective Range.................................................................................................> 8 Meter<br />
Number of Keys .............................................................................................................. 45<br />
Battery (1.5V) ........................................................................................................ AA x 2<br />
28<br />
SPECIFICATIONS<br />
SPEAKERS (LX8000SA)<br />
Front speakers / Rear (surround) speakers<br />
System (front) ........................................................................................ 2-way shielded<br />
System (surround) ......................................................................... 2-way unshielded<br />
Impedance ........................................................................................................................ 6 Ω<br />
Speaker drivers ............................................. 3” woofer, 2” x 3” ribbon tweeter<br />
Dimensions (w x h x d) ..................................... 89 mm x 270 mm x 41 mm<br />
Weight ................................................................................................................ 0.4 kg/each<br />
Centre speaker<br />
System ........................................................................................................ 2-way shielded<br />
Impedance ........................................................................................................................ 6 Ω<br />
Speaker drivers .................................... 2 x 3” woofer, 2” x 3” ribbon tweeter<br />
Dimensions (w x h x d) ..................................... 286 mm x 95 mm x 67 mm<br />
Weight ............................................................................................................................ 0.9 kg<br />
SUBWOOFER (LX8000SA)<br />
Subwoofer (not magnetically shielded design)<br />
.......................................................................................... 6.5” with wOOx technology<br />
Output power ............................................................................... 100 W (4 Ω, DIN)<br />
THD ........................................................................................................... 10% at 100 Hz<br />
Reproduction frequency response.......................................... 30 Hz – 150 Hz<br />
Phase switch ............................................................................................................0 O , 180 O<br />
Input sensitivity (Subwoofer In) ..........................................................200 mVrms<br />
AC power .................................................................................... 220 – 240 V / 50 Hz<br />
Power Consumption ............................................... 53 W (at 1/8 Rated Power)<br />
Dimensions (w x h x d) ................................ 195 mm x 462 mm x 263 mm<br />
Weight ............................................................................................................................ 8.9 kg<br />
SPEAKERS (LX7000SA)<br />
Front speakers / Rear (surround) speakers<br />
System (front) ........................................................................................ 2-way shielded<br />
System (surround) ......................................................................... 2-way unshielded<br />
Impedance ........................................................................................................................ 6 Ω<br />
Speaker drivers ........................................................................ 3” full range, 1” piezo<br />
Dimensions (w x h x d) ..................................... 89 mm x 161 mm x 68 mm<br />
Weight ................................................................................................................ 0.4 kg/each<br />
Centre speaker<br />
System ........................................................................................................ 2-way shielded<br />
Impedance ........................................................................................................................ 6 Ω<br />
Speaker drivers ........................................................................ 3” full range, 1” piezo<br />
Dimensions (w x h x d) ..................................... 234 mm x 96 mm x 73 mm<br />
Weight ............................................................................................................................ 0.9 kg<br />
SUBWOOFER (LX7000SA)<br />
Subwoofer (not magnetically shielded design)............................................ 6.5”<br />
Output power .................................................................................. 50 W (4 Ω, DIN)<br />
THD ........................................................................................................... 10% at 100 Hz<br />
Reproduction frequency response.......................................... 30 Hz – 150 Hz<br />
Phase switch ............................................................................................................0 O , 180 O<br />
Input sensitivity (Subwoofer In) ..........................................................200 mVrms<br />
AC power .................................................................................... 220 – 240 V / 50 Hz<br />
Power Consumption ............................................... 53 W (at 1/8 Rated Power)<br />
Dimensions (w x h x d) ................................ 143 mm x 338 mm x 377 mm<br />
Weight ............................................................................................................................ 7.4 kg<br />
Specifications subject to change without prior notice
Troubleshooting<br />
WARNING!<br />
Under no circumstances should you try to repair the system yourself, as this will invalidate the warranty.<br />
Do not open the system as there is a risk of electric shock.<br />
If a fault occurs, first check the points listed below before taking the system for repair. If you are unable to<br />
solve a problem by following these hints, consult <strong>Philips</strong> service centre.<br />
Problem Solution<br />
No power. – Check if the AC power cord is properly connected.<br />
No picture. – Select the appropriate video input channel on the TV.<br />
– Check if the TV is switched on.<br />
– Check the video connection.<br />
Distorted or poor picture. – Sometimes a small amount of picture distortion may appear. This is not a malfunction.<br />
– Clean the disc.<br />
Completely distorted picture or – Make sure the NTSC/PAL setting at the <strong>DVD</strong> system matches the video signal of your<br />
black/white picture. television (see “System Setup (<strong>DVD</strong>) - Setting the pictures - TV system”).<br />
The aspect ratio of the screen – The disc can play only in the aspect ratio in which it was recorded.<br />
cannot be changed even though – Depending on the TV, it may not allow you to change the aspect ratio.<br />
you have set the TV shape<br />
No sound or distorted sound. – Adjust the volume.<br />
– Check that the speakers are connected correctly.<br />
– Replace the speaker cables.<br />
– Check the speaker settings.<br />
– If the system is in pause, slow motion or fast forward/reverse, press PLAY to resume normal<br />
playback.<br />
No sound is heard from the – Use the CENTER +/- or REAR+/- to adjust the volume level.<br />
centre or rear speakers. – Check that the centre or rear surround speakers are connected correctly.<br />
– Use surround mode.<br />
The <strong>DVD</strong> system does not – Insert a readable disc with the playback side facing down.<br />
start playback. – Check the disc type, colour system (NTSC or PAL) and regional code. Check for any scratches<br />
or smudges on the disc.<br />
– Press <strong>SYSTEM</strong> MENU to turn off the setup menu screen.<br />
– Cancel the parental control rating function or change the rating level.<br />
– Moisture has condensed inside the system. Remove the disc and leave the system turned on<br />
for about an hour..<br />
The <strong>DVD</strong> system does not respond – Disconnect the power plug from the outlet and insert again.<br />
when buttons are pressed.<br />
The language for the sound or – Multi-language sound or subtitle is not recorded on the <strong>DVD</strong>.<br />
subtitle cannot be changed when – Changing the language for the sound or subtitle is prohibited on the <strong>DVD</strong>.<br />
playing a <strong>DVD</strong>.<br />
No image is visible when a – Make sure the other equipment is connected correctly.<br />
function is selected. – Press the correct function button for the input source (TV/AV or AUX/DI, etc.).<br />
Considerable noise in radio – Tune in the correct frequency.<br />
broadcasts. – Connect the antenna.<br />
– Route all connection cables away from the antenna jacks and the antennas.<br />
– Fully extend the FM wire antenna. Position it for the best reception and secure it to a wall.<br />
– Connect an outdoor FM or MW antenna.<br />
– Adjust the direction and position for best reception.<br />
– Turn off the equipment causing the noise or move it away from the <strong>DVD</strong> system.<br />
– Place the antenna farther away from the equipment causing the noise.<br />
The remote control does not – Point the remote control at the remote sensor of the unit.<br />
function. – Reduce the distance to the system.<br />
– Remove any possible obstacles.<br />
– Replace the batteries with new ones.<br />
– Check that the batteries are loaded correctly.<br />
The display is dark. – Press DIM again.<br />
Low hum or buzz sound. – Place the <strong>DVD</strong> system as far as possible from electric devices with interference.<br />
Low bass response. – Check all speakers connections. Make sure you connected positive wires to + jacks and<br />
negative wires to - jacks.<br />
The disc tray cannot open and – Hold down PROG button on the system until “TRAY UNLOCK?” appears on the display,<br />
“TRAY LOCKED” is displayed. then hold down PLAY/PAUSE button on the system.<br />
TROUBLESHOOTING<br />
29<br />
English