Baxter (Model 9100) Installation Manual - CD DVD Duplication
Baxter (Model 9100) Installation Manual - CD DVD Duplication
Baxter (Model 9100) Installation Manual - CD DVD Duplication

You also want an ePaper? Increase the reach of your titles
YUMPU automatically turns print PDFs into web optimized ePapers that Google loves.
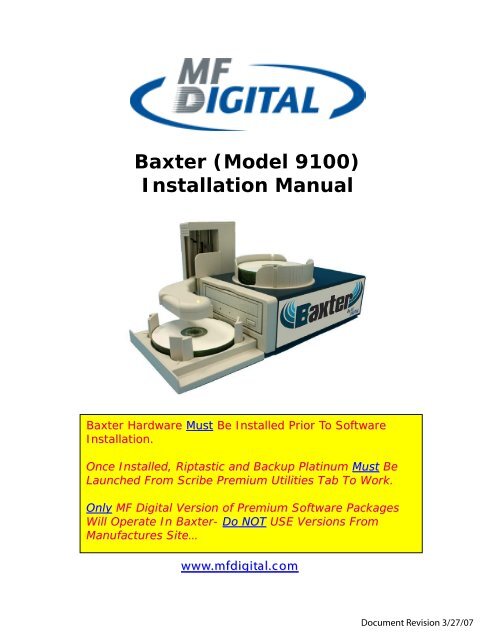
<strong>Baxter</strong> (<strong>Model</strong> <strong>9100</strong>)<br />
<strong>Installation</strong> <strong>Manual</strong><br />
<strong>Baxter</strong> Hardware Must Be Installed Prior To Software<br />
<strong>Installation</strong>.<br />
Once Installed, Riptastic and Backup Platinum Must Be<br />
Launched From Scribe Premium Utilities Tab To Work.<br />
Only MF Digital Version of Premium Software Packages<br />
Will Operate In <strong>Baxter</strong>- Do NOT USE Versions From<br />
Manufactures Site…<br />
www.mfdigital.com<br />
Document Revision 3/27/07
<strong>Baxter</strong> <strong>Installation</strong> <strong>Manual</strong><br />
Document Revision 3/27/07<br />
Quick Setup<br />
Step 1. Install the four pillars on the Input Bin<br />
Note: The bottoms of the Pillars have 2 different size posts, large and<br />
small. Place the pillars with similar posts diagonally across from each<br />
other into the corresponding holes.<br />
Step 2. Attach the Input Bin to <strong>Baxter</strong><br />
Step 3. Attach USB Cable to <strong>Baxter</strong> and your PC.<br />
Step 4. Connect the power adapter to <strong>Baxter</strong> and<br />
Plug in to outlet. Turn <strong>Baxter</strong> on.<br />
Step 5. Turn PC on.<br />
Step 6. Install <strong>Baxter</strong> Drivers<br />
Step 7. Install Scribe PC Software<br />
Step 8. Install Premium Utilities of your choice.<br />
2
<strong>Baxter</strong> <strong>Installation</strong> <strong>Manual</strong><br />
Document Revision 3/27/07<br />
1 Getting Started<br />
<strong>Baxter</strong> is the world’s smallest automated desktop loading<br />
system that could fit perfectly in any office space. Its<br />
patented tray enables users to duplicate 12cm, 8cm and<br />
business-card discs with one easy turn of the disc pillars.<br />
1.1 What’s In The Box<br />
Please ensure that carton is not damaged and the<br />
following items are included.<br />
<strong>Baxter</strong><br />
Input bin<br />
Output bin<br />
USB cable<br />
Power Cable<br />
Power Adapter<br />
<strong>Installation</strong> Disc<br />
3 <strong>Baxter</strong> Software <strong>CD</strong>s<br />
Remember to save all packing materials for future<br />
use.<br />
1.2 System Requirement<br />
Microsoft® Windows XP<br />
Pentium III 500Mhz (Minimum)<br />
64 MB RAM<br />
700 MB free disk space for <strong>CD</strong>, and 9 GB free<br />
disk space for <strong>DVD</strong>.<br />
At least 800x600 display with at least 16 Bit<br />
colors<br />
<strong>CD</strong>/<strong>DVD</strong> drive for installation<br />
Required USB 2.0 interface<br />
3
<strong>Baxter</strong> <strong>Installation</strong> <strong>Manual</strong><br />
Document Revision 3/27/07<br />
2 Hardware <strong>Installation</strong><br />
2.1 Front View<br />
1. Robotic Arm<br />
2. Status indicator<br />
Green: Ready<br />
Yellow: Burning<br />
Red: Error<br />
3. Output Bin<br />
4. <strong>CD</strong>/<strong>DVD</strong> Burner<br />
5. Input Bin<br />
6. Rejects – <strong>Baxter</strong> discards rejects over the<br />
top of (3) Output Bin<br />
2.2 Rear View<br />
1. Fan<br />
2. USB Connector<br />
3. AC IN – Power Inlet<br />
4. Power Switch<br />
4
<strong>Baxter</strong> <strong>Installation</strong> <strong>Manual</strong><br />
Document Revision 3/27/07<br />
2.3 Set Up<br />
Please follow the procedures to set up:<br />
Step 1: Install the four pillars on the Input bin<br />
Note: The bottoms of the<br />
Pillars have 2 different size<br />
posts, large and small.<br />
Place the pillars with<br />
similar posts diagonally<br />
across from each other<br />
into the corresponding<br />
holes.<br />
Step 2: Attach the Input bin to <strong>Baxter</strong><br />
Note: Before turning on the<br />
power, please make sure<br />
that you have tightly<br />
compressed the Input bin<br />
onto <strong>Baxter</strong><br />
Operating <strong>Baxter</strong> Without Input Tray May<br />
Void Warranty<br />
5
<strong>Baxter</strong> <strong>Installation</strong> <strong>Manual</strong><br />
Document Revision 3/27/07<br />
Step 3: Rotate the four pillars as shown in the<br />
pictures below to use 12cm, 8cm and card size<br />
medias for duplication.<br />
8 cm 12 cm Card Size<br />
Step 4: Connect your USB cable A-male end to<br />
<strong>Baxter</strong> USB slot and B-male end to your PC USB<br />
slot. Connect the power adapter and power cable<br />
together. Then connect the adapter end to the AC<br />
In on <strong>Baxter</strong> and plug in to an AC outlet.<br />
USB AC Power To AC<br />
Wall Outlet<br />
6
<strong>Baxter</strong> <strong>Installation</strong> <strong>Manual</strong><br />
Document Revision 3/27/07<br />
<strong>Baxter</strong> Driver <strong>Installation</strong><br />
After connecting the USB cable to <strong>Baxter</strong> and your PC, Turn on the<br />
power.<br />
You will receive a message “Found New Hardware” and the Hardware<br />
Wizard will start. (figure 1)<br />
figure 1<br />
Highlight the install software automatically button.<br />
The driver will be installed automatically.<br />
If the wizard does not find it automatically, You will be asked to point<br />
to the install file on the <strong>Baxter</strong> Inst allation <strong>CD</strong>. Select the file x:\<strong>Baxter</strong><br />
usb driver \MFD_<strong>Baxter</strong>.inf<br />
7
<strong>Baxter</strong> <strong>Installation</strong> <strong>Manual</strong><br />
Document Revision 3/27/07<br />
After the driver installation is co<br />
message (figure 2)<br />
mplete you will receive a complete<br />
figure 2<br />
Click Finish.<br />
Congratulations, <strong>Baxter</strong> has been installed.<br />
8
<strong>Baxter</strong> <strong>Installation</strong> <strong>Manual</strong><br />
Document Revision 3/27/07<br />
Install The Scribe PC Software Prior<br />
to Premium Utilities<br />
Installing the SCRIBE PC Software<br />
1. Insert the SCRIBE PC<br />
software <strong>CD</strong>.<br />
2. From the <strong>CD</strong> ROM drive o f<br />
the computer, click Install<br />
SCRIBE Software .<br />
3. Click Next (fig. 1).<br />
(fig. 1)<br />
4. Accept the license<br />
agreement and click Next<br />
(fig. 2).<br />
(fig. 2)<br />
5. Click Install (fig. 3).<br />
(fig. 3)<br />
6. Click Finish (fig. 4).<br />
9
<strong>Baxter</strong> <strong>Installation</strong> <strong>Manual</strong><br />
Document Revision 3/27/07<br />
Installing Riptastic<br />
(fig. 4)<br />
Riptastic must be installed using the<br />
installation wizard prior to Scribe Launch.<br />
Insert the Riptastic <strong>CD</strong>. and run the setup file from windows.<br />
You will receive the message “ Would you like to install Riptastic<br />
now (fig1)<br />
fig 1<br />
Click Yes to Install.<br />
The Install wizard will appear.<br />
10
<strong>Baxter</strong> <strong>Installation</strong> <strong>Manual</strong><br />
Document Revision 3/27/07<br />
Click Next.<br />
The License agreement screen will appear.<br />
Click I agree.<br />
Next you the Customer Information Screen will appear.<br />
11
<strong>Baxter</strong> <strong>Installation</strong> <strong>Manual</strong><br />
Document Revision 3/27/07<br />
Type your name and company information and click next.<br />
Select the directory for the installation and click next.<br />
The confirm installation screen will appear. Click Next to<br />
continue.<br />
12
<strong>Baxter</strong> <strong>Installation</strong> <strong>Manual</strong><br />
Document Revision 3/27/07<br />
After the program installs, you will receive an <strong>Installation</strong><br />
Completed message.<br />
Click the close button.<br />
The Riptastic <strong>Installation</strong> is complete. Launch Riptastic via<br />
Scribe Launch Tab. At startup install the supplied License<br />
number and Riptastic is ready to use.<br />
Software Questions Related to Riptastic<br />
Software, Please Visit<br />
http://www.riptastic.com/help/index.htm<br />
13
<strong>Baxter</strong> <strong>Installation</strong> <strong>Manual</strong><br />
Document Revision 3/27/07<br />
Installing The Backup Platinum Software<br />
Insert the Backup Platinum and run the setup file from windows.<br />
Backup Platinum must be installed using the<br />
installation wizard prior to Scribe Launch.<br />
The Welcome To Backup Platinum screen will appear.<br />
Click the Next button.<br />
You will receive the Read Me Screen.<br />
14
<strong>Baxter</strong> <strong>Installation</strong> <strong>Manual</strong><br />
Document Revision 3/27/07<br />
After reading, click the Next button.<br />
The license Agreement screen will appear.<br />
Highlight the I accept this agreement and click Next.<br />
The Choose Destination Folder will appear.<br />
15
<strong>Baxter</strong> <strong>Installation</strong> <strong>Manual</strong><br />
Document Revision 3/27/07<br />
Select the directory that you want to install Backup Platinum to<br />
and click next.<br />
The Start <strong>Installation</strong> Screen will appear.<br />
Click the Next button to continue.<br />
You will receive the <strong>Installation</strong> Complete message.<br />
16
<strong>Baxter</strong> <strong>Installation</strong> <strong>Manual</strong><br />
Document Revision 3/27/07<br />
Backup Platinum Has Been Installed.<br />
Launch Backup Platinum via Scri be Launch Tab. At startup<br />
install the supplied License number and Backup Platinum is<br />
ready to use.<br />
Software Questions Related to Backup Platinum<br />
Software, Please Visit<br />
http://www.backupplatinum.com/help-online.shtml<br />
17
<strong>Baxter</strong> <strong>Installation</strong> <strong>Manual</strong> Document Revision 3/27/07<br />
Important <strong>DVD</strong> Image Information<br />
If your <strong>DVD</strong> image file conforms to the UDF standard, but ends in the .ISO file<br />
extension, you will need to rename it .UDF before it can be used.<br />
* All .ISO images will not conform to .UDF standard so after converting .ISO to .UDF<br />
you must burn a single disc and check that disc thoroughly before duplicating.<br />
A simple browsing of the disc for proper folder structure is not sufficient. Consider<br />
a file compare or the opening of several key files.<br />
Troubleshooting<br />
1. If <strong>Baxter</strong>’s Arm Gets Stuck At the Bottom or The Top.<br />
See The Illustrations Below<br />
2. The Scribe PC program did not recognize <strong>Baxter</strong>.<br />
a. Check the power cable on the back of the <strong>Baxter</strong>.<br />
b. Make sure the power switch on <strong>Baxter</strong> is turned ON.<br />
c. Check the USB cable connection between <strong>Baxter</strong> loader and the host PC<br />
(page # 5).<br />
3. Scribe PC program did not recognize the drive.<br />
a. Press the eject button on the drive to check for power to the drives.<br />
b. Check the power cable connection on the back of the drive bay.<br />
c. Check if the Windows operating system recognized the drives by going to<br />
My Computer or Device Manager. Windows operating system must<br />
initialize the drives prior to executing the Scribe PC program.<br />
4. Failed to pick Discs. Sticky Discs<br />
<strong>Baxter</strong> will have difficulty picking discs that are stuck<br />
together static or discs of inferior quality.<br />
a. Fan Discs<br />
b. Use Discs not prone to stickiness<br />
18
How to reset <strong>Baxter</strong>’s Arm if it gets stuck.<br />
1. Turn off the power Remove the power cord<br />
and USB Cord from behind <strong>Baxter</strong>.<br />
2. Carefully, place <strong>Baxter</strong> on its side (label<br />
side).<br />
3. On the bottom on the arm assembly there<br />
are two phillips screws on the silver<br />
bracket. Remove the two phillips screws.<br />
4. The arm assembly has a hook and a slip<br />
notch that attaches to the drive base. You<br />
will need to push gently in an upwards<br />
motion to detach the arm assembly.<br />
5. Upon doing this, you will see a yellow<br />
ribbon cable. The cable is attached to a pin<br />
connection on the side of the drive base. It<br />
might be easier to disconnect it temporarily<br />
while performing the next few steps.
6. Taking the arm assembly in your hand,<br />
look for the small silver motor that has a<br />
white plastic gear.<br />
Using your finger, rotate this gear so that<br />
the arm moves either in an upward or<br />
downward direction.<br />
If you are holding the arm assembly as<br />
pictured, rotating the gear counter<br />
clockwise(pushing away from you) will<br />
cause <strong>Baxter</strong>’s arm to move down, rotating<br />
the gear clockwise (towards you) will<br />
cause <strong>Baxter</strong>’s arm to move up It is<br />
suggested to rotate this gear so the arm<br />
moves about an inch from where it was.<br />
7. Once the arm is in a satisfactory position,<br />
you can now (if disconnected) reconnect<br />
the yellow cable.<br />
8. As you reattach the arm assembly, be sure<br />
to tuck the yellow cable back in the cove of<br />
the arm assembly. The arm assembly as<br />
stated before is hooked to the drive base,<br />
after you have the arm assembly flush on<br />
the drive base, gently push downward to<br />
lock the hook & slip notch in place.<br />
9. Be sure to reinsert the two phillips screws<br />
on the silver bracket (below the arm<br />
assembly),<br />
Now the arm assembly is firmly connected.<br />
10. Reconnect the power cord and the USB<br />
cable.<br />
11. Turn on the <strong>Baxter</strong> Unit and see if the arm<br />
resets itself by hovering over the output<br />
tray.<br />
<strong>Baxter</strong>'s arm light should now be a solid<br />
green light.