TRADE OF VEHICLE BODY REPAIR - eCollege
TRADE OF VEHICLE BODY REPAIR - eCollege
TRADE OF VEHICLE BODY REPAIR - eCollege

Create successful ePaper yourself
Turn your PDF publications into a flip-book with our unique Google optimized e-Paper software.
<strong>TRADE</strong> <strong>OF</strong><br />
<strong>VEHICLE</strong> <strong>BODY</strong> <strong>REPAIR</strong><br />
PHASE 2<br />
Module 6<br />
UNIT: 3<br />
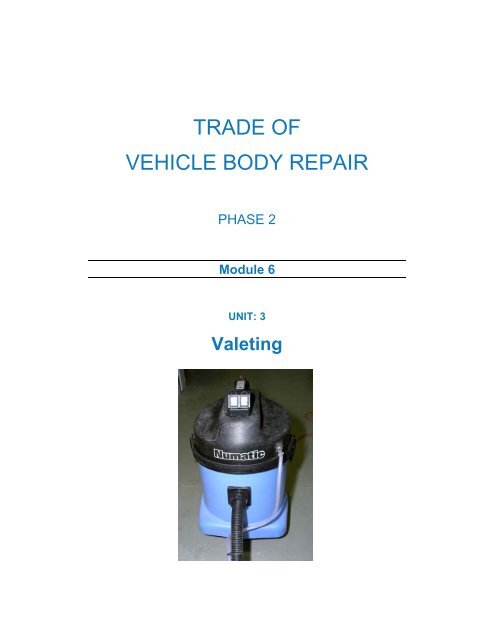
Valeting
Produced by FÁS Learning Innovation Unit<br />
In co-operation with<br />
Subject Matter Experts:<br />
Maurice Stack<br />
&<br />
CDX Global<br />
FENC – Further Education National Consortium<br />
© Foras Áiseanna Saothair 2006
Table of Contents<br />
Valeting ............................................................................................................................ 5<br />
Learning Outcome........................................................................................................ 5<br />
Exercise ..........................................................................................................................6<br />
Introduction.................................................................................................................... 7<br />
Vehicle Levels, Tyre Pressure, Spare Wheel, Car Jack, Tools and Valet<br />
Vehicles ............................................................................................................................ 8<br />
Safety in Relation to use of Electrical Appliances Toxic Materials........................8<br />
Safety in relation to use of electrical appliances........................................................9<br />
Oil Levels .....................................................................................................................10<br />
Water Levels ................................................................................................................10<br />
Tyre Pressure ...............................................................................................................11<br />
Tyre Tread and Contamination Legal Requirements.............................................12<br />
Premises, Equipment and Chemicals used in Cleaning and Valeting......... 13<br />
Steam Cleaning and Tar Removal.............................................................................13<br />
Cleaning Operation Shampoo Vacuum Cleaner.....................................................14<br />
Suitable Detergents and Polishes for use on a Motor Vehicle..............................17<br />
Cleaning and Valeting Process ..................................................................................18<br />
Information for Wet and Dry Use/Spray Extraction Vacuum Cleaners ............22<br />
Carry out Quality Control Check ............................................................................ 25<br />
Quality Control Check ...............................................................................................25<br />
Summary........................................................................................................................ 28<br />
Self Assessment............................................................................................................ 29<br />
Glossary of Terms ....................................................................................................... 33
Table of Figures<br />
Figure 1: Water and Oil Levels....................................................................................... 9<br />
Figure 2: Dip Stick ......................................................................................................... 10
Module 6– Unit 3<br />
Valeting<br />
Learning Outcome<br />
By the end of this unit each apprentice will be able to:<br />
• Check vehicle levels, tyre pressure, spare wheel, car jack and<br />
tools, valet vehicle to a quality standard ready for use.<br />
• Carry out quality control check<br />
Key Learning points<br />
• Safety in relation to use of electrical appliances toxic<br />
materials<br />
• Oil levels<br />
• Water levels<br />
• Tyre pressures<br />
• Tyre tread and contamination legal requirements<br />
• Steam cleaning and tar removal<br />
• Upholstery cleaning<br />
• Burnishing and polishing<br />
• Window cleaning<br />
• Tyre painting<br />
• Suitable detergents and polishes for use on a motor vehicle<br />
• Seat covers and floor mats<br />
• Tools check<br />
• Quality control check<br />
Training Resources<br />
• Classroom/workshop<br />
• Motor vehicle<br />
• Cleaning materials<br />
• Thread gauge<br />
• Tyre pressure gauge<br />
• Check list<br />
• Technical data<br />
Vehicle Body Repairs - Phase 2 5
Module 6– Unit 3<br />
Exercise<br />
1. Check vehicle fluid levels<br />
2. Check tyre pressure including spare, valet vehicle to a quality<br />
control check on vehicle before hand-over to the customer.<br />
3. Make out and record list of personal items in vehicle (book<br />
supplied). Do this check with at least one other member of<br />
Valeting team.<br />
List such items as spare wheel, jack, wheel brace, mats etc.<br />
This makes sure all items are returned to the proper vehicle,<br />
leave these items on a bench close to where Valeting is to be<br />
done.<br />
Check:<br />
• Engine oil level, if low, notify the instructor.<br />
• When engine is cold, coolant, top up to min. level only.<br />
• Windscreen washer level, top up as necessary.<br />
• Jet spray, clean nozzles if blocked and adjust direction<br />
of spray.<br />
• Top up if below min. level only.<br />
• Check all lights, report any malfunctions.<br />
Finally, when valet and check is complete, go through (check<br />
list) when satisfied with work done, valet team return personal<br />
items to vehicle, ticking off all items against original list taken.<br />
Vehicle Body Repairs - Phase 2 6
Module 6– Unit 3<br />
Introduction<br />
After repair work has been completed, the vehicle should be<br />
presented to the customer in a first class, clean condition. All<br />
repaired vehicles should be thoroughly inspected for quality control.<br />
The repairs should be guaranteed for a specific mileage or period, as<br />
required by the Code of Practice for the Motor Industry and by the<br />
VBRA Code. Many Insurance companies now make an allowance<br />
for valeting within their agreed repair price and this provides the<br />
opportunity for the bodyshop to produce a first class factory finish<br />
to both the exterior and interior of the repair.<br />
Vehicle Body Repairs - Phase 2 7
Module 6– Unit 3<br />
Vehicle Levels, Tyre Pressure, Spare<br />
Wheel, Car Jack, Tools and Valet<br />
Vehicles<br />
Safety in Relation to use of Electrical Appliances<br />
Toxic Materials.<br />
COSHH and the Bodyshop<br />
COSH, The Control of Substances Hazardous to Health Act 1988,<br />
carries the principle of protection of the employee, visitors, and the<br />
public at large into the next century and either enhances or replaces<br />
much of the legislation contained in the Factories Act of 1961 and<br />
some of the Health and Safety at Work Act of 1974.<br />
The dictionary definition of a cosh is ‘a bludgeon, a blunt weapon<br />
often made of hard rubber’. The new COSHH regulations are not<br />
intended to be used in this way. They do, in fact, lay down the<br />
essential requirements in a sensible step by step approach for the<br />
control of hazardous substances and for the protection of people<br />
exposed to them. These new regulations came into force on the 1 st<br />
October, 1989, and they cover virtually all substance hazardous to<br />
health. Only asbestos, lead, materials producing ionizing radiations,<br />
and substances below ground in mines are exempt, since they have<br />
their own legislation.<br />
COSHH does not place any new general duties on employers or<br />
employees, it simply sets out the principles which will allow the<br />
duties that should already exist to be complied with:<br />
• Assess the risk to health arising from the work being carried<br />
out, and to decide what precautions are needed.<br />
• Introduce appropriate measures to prevent or control the<br />
risk to health.<br />
• Inform, instruct and train employees about the risks, and the<br />
precautions that need to be taken to combat them.<br />
• Always check material safety data sheets. (M.S.D.S.)<br />
• If MSDS sheets are not available do not use product.<br />
• Cleaning the trim area and servicing the mechanical area<br />
hold their own individual hazards, which must be addressed<br />
and carefully considered.<br />
Vehicle Body Repairs - Phase 2 8
Module 6– Unit 3<br />
There are three ways in which hazardous substances can harm<br />
human tissue. First, by inhalation, whether it be dust, fumes, smoke<br />
or solid particles, which can be inhaled into the lungs and cause<br />
breathing difficulties. Secondly, ingestion, where harmful<br />
substances are taken into the body through the mouth due to the<br />
contamination of food, or contaminated hands being placed on or<br />
around the mouth. Thirdly, absorption, where harmful substances<br />
can be absorbed through the skin and via eye contact.<br />
It is essential, therefore, that we should prevent these occurrences<br />
from happening when employees are handling dangerous and<br />
hazardous substances during the course of their normal work<br />
procedures.<br />
Safety in relation to use of electrical appliances<br />
Never allow plugs or appliances to get wet. It<br />
may cause electrical shock<br />
Figure 1: Water and Oil Levels<br />
Vehicle Body Repairs - Phase 2 9
Module 6– Unit 3<br />
Oil Levels<br />
Figure 2: Dip Stick<br />
Water Levels<br />
Cooling system cap should never be opened when engine is hot.<br />
The expansion bottle should be filled to the full level only.<br />
Hot Liquid Warning Sign<br />
Water filler cap<br />
Vehicle Body Repairs - Phase 2 10
Module 6– Unit 3<br />
Tyre Pressure<br />
Always check window washer<br />
reservoir to make sure it is to the full<br />
mark and add detergent to gain a<br />
better cleaning power.<br />
Always maintain<br />
power steering fluid<br />
level at full mark.<br />
Tyre pressure indication chart is available on the B post of most<br />
vehicles. If not, see vehicle manual or contact dealer.<br />
Vehicle Body Repairs - Phase 2 11
Module 6– Unit 3<br />
Tyre Tread and Contamination Legal<br />
Requirements<br />
The legal minimum tyre tread is 0.6mm, which is also indicated by a<br />
high bump of rubber in the tyre tread track.<br />
Legal Tyre Tread Indication Mark<br />
Vehicle Body Repairs - Phase 2 12
Module 6– Unit 3<br />
Premises, Equipment and Chemicals<br />
used in Cleaning and Valeting<br />
When cleaning and valeting a vehicle it is essential to organise a<br />
standard method of working to ensure that nothing is inadvertently<br />
missed. The ideal premises and equipment should be set out in<br />
separate purpose designed working areas.<br />
The cleaning process should be undertaken in a wet bay with<br />
effective drainage, good lighting and adequate working space all<br />
round the vehicle when its doors are open. Compressed air and<br />
high pressure cold and hot water should be available.<br />
Valeting should be carried out in a well lit, dry bay with adequate<br />
working space all round the vehicle. Compressed air, electrical<br />
power points, warm water, a work bench and storage cupboards<br />
should all be available.<br />
Equipment, details are as follows:<br />
Steam Cleaning and Tar Removal<br />
• High pressure hot and<br />
cold washer, 70-100 bar<br />
(1000-1500 psi), with<br />
chemical throughput<br />
facility to ensure that<br />
engine cleaners and traffic<br />
film removers work<br />
quickly and effectively<br />
• Electric/air polisher, 1500-<br />
2000rpm, with polythene foam and<br />
lamb’s-wool polishing heads.<br />
Vehicle Body Repairs - Phase 2 13
Module 6– Unit 3<br />
• Fine grade, 100 percent cotton,<br />
polishing cloths and chamois.<br />
• Assorted upholstery<br />
brushes crevice<br />
tools.<br />
• Vacuum cleaner and/or shampoo<br />
vacuum cleaner.<br />
Cleaning Operation Shampoo Vacuum Cleaner<br />
• Release clip<br />
Vehicle Body Repairs - Phase 2 14
Module 6– Unit 3<br />
• Unclip vacuum hose and<br />
detergent hose<br />
• Lift up top of machine<br />
• Lift out filter housing<br />
• Lift out detergent reservoir<br />
Vehicle Body Repairs - Phase 2 15
Module 6– Unit 3<br />
Shampoo Vacuum Head<br />
Control Switch<br />
Carpet Tools<br />
• Hand pumped, pressurised sprays for dispensing engine<br />
cleaners and traffic film remover.<br />
• Trigger spray dispensers for interior cleaning, together with<br />
wheel, engine and carpet brushes.<br />
• Good quality chamois leather, sponges, polishing cloths (100<br />
per cent cotton, knitted stockinette type), steel wool, spatula,<br />
glass scraper, buckets, hot air gun (useful for removing PVC<br />
stickers, self adhesive design trims)<br />
Vehicle Body Repairs - Phase 2 16
Module 6– Unit 3<br />
Suitable Detergents and Polishes for use on a<br />
Motor Vehicle<br />
There are many manufacturers and suppliers of Valeting and<br />
cleaning chemicals. The wide range of Valeting and chemical<br />
cleaners available are broadly divided up as follows:<br />
• Exterior detergents and solvents<br />
• Interior detergents and solvents<br />
• Interior/Exterior rubber, PVC, plastic cleaners and<br />
conditioners<br />
• Glass cleaners, paints, lacquer and protectorants<br />
• Paintwork polishes and conditioners.<br />
Traffic Film Remover - Corrosive<br />
Vehicle Body Repairs - Phase 2 17
Module 6– Unit 3<br />
Always use PPE and full face mask when using these products and<br />
products like them. Make sure no contact is made with your skin.<br />
Cleaning and Valeting Process<br />
Prior to commencing work, check that the vehicle is ready. All<br />
body repairs, paintwork and mechanical work should have been<br />
completed. Be aware of areas which have been newly painted as<br />
they may be chemically or water sensitive. Individual chemical<br />
products carry their own instructions, and health and safety<br />
procedures must be adhered to at all times.<br />
Autoglym recommend the following step by step procedure for<br />
cleaning and valeting.<br />
Cleaning: Wet Bay<br />
• Remove spare wheel, rubber mats and wheel trims if fitted.<br />
• Protect engine air intake and sensitive electrical equipment<br />
(distributor cap, fuse box) with plastic sheet.<br />
• Apply degreaser to engine and compartment. Brush heavy<br />
soiling. Alternatively use hot pressure washer with<br />
appropriate detergent.<br />
• Apply degreaser to door apertures and edges. Brush heavy<br />
soiling. Alternatively use hot pressure washer with<br />
appropriate detergent.<br />
Vehicle Body Repairs - Phase 2 18
Module 6– Unit 3<br />
• Clean wheels, trim, spare wheel with alloy cleaner. Brush<br />
brake dust deposits. Treat bright metal and motifs. Rinse all<br />
items well.<br />
• Pressure wash engine compartment to remove degreaser.<br />
Commence with lower areas. Work methodically upwards.<br />
• Pressure wash door apertures and edges to remove<br />
degreaser. Carefully angle water jet away from the vehicle<br />
interior.<br />
• Apply traffic film remover to engine compartment. If<br />
necessary, sponge or brush to remove grime.<br />
• Pressure wash engine compartment to rinse away traffic film<br />
remover.<br />
• Pressure wash wheel arches to remove mud and debris.<br />
Plain water is normally adequate.<br />
• Pressure wash and rinse bodywork, grilles, tyres and mudflaps.<br />
Pay particular attention to difficult to polish areas<br />
behind bumpers.<br />
• Apply traffic film remover to rubber mats. Clean with highpressure<br />
washer.<br />
• Use air line to dry engine. Remove plastic sheeting. Check<br />
engine starting. Use water dispersant if necessary. Run<br />
engine to a drying.<br />
• Use air line and chamois leather to remove excess water<br />
from bodywork or trim strip which may trap water.<br />
Valeting: Dry Bay<br />
• Finish engine compartment. Lean loose wiring, plastic and<br />
paintwork with appropriate dressings.<br />
• Repaint deteriorated black areas. Use fine jet matt black<br />
aerosol or small spray gun.<br />
• Clear lacquer engine if required to enhance and preserve<br />
appearance. Close bonnet.<br />
• Before interior cleaning, remove all loose carpets, ashtrays<br />
and personal items to the bench.<br />
• Use glass scraper to remove all labels from windows.<br />
Residual adhesive can be removed with adhesive remover or<br />
hot air gun.<br />
• Remove all plastic labels from bodywork using hot air gun.<br />
Residual adhesive can be removed with adhesive remover.<br />
• Vacuum clean all interior surfaces. Slide front seats forward.<br />
Use brushes with vacuum nozzle to clean crevices and air<br />
vents.<br />
Vehicle Body Repairs - Phase 2 19
Module 6– Unit 3<br />
• Clean luggage compartment first. Use interior cleaner by<br />
spraying and wiping clean with cloth rinsed frequently.<br />
Check body channels and rubbers.<br />
• Wash interior. Start with headlining and use interior cleaner.<br />
Heavily soiled carpets or seats may require shampoo vacuum<br />
treatment.<br />
• Removed carpets should be thoroughly brushed, vacuumed<br />
and washed on the bench. Use shampoo vacuum if<br />
necessary. Allow to dry.<br />
• Tools and jack should be cleaned, and repainted if necessary.<br />
Wash out ashtrays.<br />
• Plastic coated fibreboard may be painted or stained to cover<br />
damage or scrape marks. Check body sides for tar and top<br />
surfaces for industrial fall out. Use appropriate cleaner<br />
before polishing.<br />
• Restore paintwork. Start with roof panel. Use paint<br />
renovator with polisher, or appropriate cleaner/polish.<br />
Hand polish small areas, corners, edges.<br />
• Apply protective wax coating by hand, ensuring total<br />
coverage of all panels. Leave polish applied at this stage.<br />
• Clean all external body rubber and plastic mouldings with<br />
appropriate dressings.<br />
• Check all door apertures and rubber seals. Polish door<br />
aperture paintwork with clean cloth. Treat rubber seals with<br />
appropriate dressing.<br />
• Check all wheels. If required, clean with steel wool and<br />
thinners. Protect tyres with dressing or mask. Respray<br />
wheels and clean tyres.<br />
Window Cleaning<br />
• Glass cleaning. Lower side windows. Clean top edges<br />
completely. Close windows. Polish outside first, then<br />
inside. Clean surrounding seals and mirrors.<br />
• Interior plastic can be dressed to enhance and protect<br />
appearance.<br />
Tools Check<br />
• Replace all carpets, mats, spare wheel, ashtray, tools, wheel<br />
trims.<br />
Vehicle Body Repairs - Phase 2 20
Module 6– Unit 3<br />
Seat Covers and Floor Mats<br />
• Check interior for remaining imperfections. Check under all<br />
seats, glove box, door pockets. Finally vacuum clean. Place<br />
protective paper on floor mats, and seat covers if seats are<br />
slightly wet.<br />
Burnishing and Polishing<br />
• Remove polish. Methodically check all edges, valances,<br />
glasses, lights, grilles. Crevices and motifs may be lightly<br />
brushed to remove polish.<br />
Tyre Painting<br />
Paint tyres with tyre paint to give new look.<br />
Checklist<br />
• Check exterior mirrors, all glass and surrounding seals.<br />
Check reverse of interior mirror.<br />
• Check polish smears, wheel arch edges, front and rear lower<br />
pillars, side sills, door handles, grilles. Touch in stone chips.<br />
• Check windscreen wiper arms and blades, air grilles.<br />
Vehicle Body Repairs - Phase 2 21
Module 6– Unit 3<br />
• Check all light lenses, motifs, number plates and spot lights.<br />
• Check door edges and apertures, engine and luggage<br />
compartment, body channels and seals.<br />
• Check control pedals and foot wells, especially under front<br />
seats.<br />
• Check instrument glasses, switches, control levers, interior<br />
air vents.<br />
Information for Wet and Dry Use/Spray<br />
Extraction Vacuum Cleaners<br />
Caution<br />
Read the instruction manual before using the appliance.<br />
Warning<br />
As with all electrical equipment, care and attention must be<br />
exercised at all times during use, in addition to ensuring that routine<br />
and preventative maintenance is carried out periodically to ensure<br />
safe operation. Failure to carry out maintenance as necessary,<br />
including the replacement of parts to the correct standard could<br />
render this equipment unsafe and the manufacturer can accept no<br />
responsibility in this respect.<br />
Caution<br />
This machine is not suitable for picking up hazardous or explosive<br />
dust. You should contact your local distributor if you require a<br />
machine capable of performing these tasks. Ensure that the<br />
filtration system fitted to the machine is suitable for the material<br />
being collected.<br />
Note<br />
This machine is also suitable for commercial use, for example in<br />
hotels, schools. Hospitals, factories, shops and offices other than<br />
normal housekeeping purposes.<br />
Do<br />
• Use filter at all times when using ‘dry’.<br />
• Keep tour machine clean.<br />
• Keep your filters clean.<br />
Vehicle Body Repairs - Phase 2 22
Module 6– Unit 3<br />
• Regularly clean the water level limiting float safety valve and<br />
examine for signs of damage and correct operation.<br />
• Keep hoses and tubes clear.<br />
• Replace any worn or damaged parts immediately.<br />
• Regularly examine the power cord for damage, such as<br />
cracking or ageing. If damage is found, replace the cord<br />
before further use.<br />
• Only replace the power cord with the correct Numatic<br />
approved replacement part.<br />
• Empty dust container frequently.<br />
• Keep diffuser filter (where fitted) clean.<br />
• When using the power outlet use only Numatic approved<br />
accessories.<br />
• The accessory plug must be removed from the socket outlet<br />
before cleaning or maintaining the appliance.<br />
Spray Extraction Machines Only….<br />
Don’t<br />
• Use only approved cleaning preparations.<br />
• Use defoamer if necessary.<br />
• Use steam cleaners or pressure washers to clean the machine<br />
or use in the rain.<br />
• Immerse in water for cleaning.<br />
• Attempt machine maintenance or cleaning unless the power<br />
supply plug has been removed from the supply outlet.<br />
• Allow any inexperienced repairs. Call the experts.<br />
• Use wet if float valve is not functioning or fitted.<br />
• Use to suck up hot ashes or lighted cigarette ends.<br />
• Suck up liquid before emptying dirt from the container.<br />
• Suck up dirt before emptying liquid from the container.<br />
• Run the machine over the power cable during operation as a<br />
hazard may occur.<br />
• Try to un-reel the cable with one pull or pull on the cable to<br />
unplug the machine from the power supply.<br />
Spray Extraction Machines Only…<br />
• Over-wet carpet, upholstery or fabrics.<br />
• Walk on clean carpets until dry.<br />
• Spray onto people or animals.<br />
Vehicle Body Repairs - Phase 2 23
Module 6– Unit 3<br />
Caution<br />
If foam/liquid comes out, switch off immediately. Allow the<br />
accumulated liquid to drain our through the discharge grille, check<br />
the float assembly to ensure correct operation, reassemble the<br />
machine. Immediately upon start up there will be a certain amount<br />
of liquid issuing from the discharge grille which will be the residue<br />
of liquid still within the power head. This will be quickly discharged<br />
after which the machine should function normally.<br />
Liquid ejected from the machine could be hazardous as a result of<br />
its temperature, pressure or chemical content.<br />
Vehicle Body Repairs - Phase 2 24
Module 6– Unit 3<br />
Carry out Quality Control Check<br />
Quality Control Check<br />
External □ De-Taring<br />
□ Wheels<br />
□ Hub Caps<br />
□ Tyres<br />
□ Bumpers<br />
□ Trims<br />
□ Handles<br />
□ Mirror Heads<br />
□ Mud Flaps<br />
□ Wheel Arches<br />
□ Polish<br />
Internal □ Dash<br />
□ Fascia<br />
Vehicle Body Repairs - Phase 2 25
Module 6– Unit 3<br />
□ Console<br />
□ Pedals<br />
□ Vinyl, plastic<br />
□ Door Steps<br />
□ Door Seals<br />
□ Door Jams<br />
□ Seats<br />
□ Carpet<br />
Glass □ Inside<br />
□ Outside<br />
Mirrors □ Inside<br />
□ Outside<br />
Engine □ Washed<br />
□ Conditioned<br />
Boot □ Carpet<br />
Vehicle Body Repairs - Phase 2 26
Module 6– Unit 3<br />
□ Spare Wheel<br />
□ Tool Kit<br />
Windscreen wash bottle (filled)<br />
Paper floor mats<br />
Disposable seat covers (if wet)<br />
Tow hitch<br />
Vehicle Body Repairs - Phase 2 27
Module 6– Unit 3<br />
Summary<br />
On completion of a Valeting job, it should presented to the<br />
customer is a first class, clean condition. All repaired vehicles<br />
should be thoroughly inspected for quality control.<br />
This ensures that when the customer sees the vehicle for the first<br />
time it should make an impression on them. This in turn will give<br />
the business a good name and reputation.<br />
Vehicle Body Repairs - Phase 2 28
Module 6– Unit 3<br />
Self Assessment<br />
Questions – Module 6. Unit 3<br />
1. What is the first step with regards to personal belongings when<br />
valeting?<br />
2. What do you do if engine oil is low?<br />
3. What is the best method of removing stubborn stickers from<br />
body work?<br />
4. What needs to be protected when power washing engine bay?<br />
5. Electrical equipment for valeting should never get?<br />
Vehicle Body Repairs - Phase 2 29
Module 6– Unit 3<br />
6. Do you need to cover your skin when using<br />
detergents/chemicals?<br />
7. When is it safe to check cooling system levels?<br />
8. Why are disposable seat covers fitted after valeting?<br />
9. What is a quality control check?<br />
10. What is the last and final check before returning vehicle to<br />
customer?<br />
Vehicle Body Repairs - Phase 2 30
Module 6– Unit 3<br />
Answers to Questions 1-10. Module 6. Unit 3<br />
1.<br />
2.<br />
3.<br />
4.<br />
5.<br />
Collect, itemise and store safely?<br />
Report to instructor and top up<br />
Hot air gun<br />
Air intake and sensitive electrical equipment<br />
Wet<br />
Vehicle Body Repairs - Phase 2 31
Module 6– Unit 3<br />
6.<br />
7.<br />
8.<br />
9.<br />
10.<br />
Yes<br />
When you are sure its cold<br />
To keep clean<br />
It is a check to see if all work carried out is up to standard<br />
The last and final check is make sure all belongings are returned<br />
to the vehicle<br />
Vehicle Body Repairs - Phase 2 32
Module 6– Unit 3<br />
Glossary of Terms<br />
A pillar<br />
The first pillar supporting the roof adjacent to the windscreen.<br />
Abrasive<br />
A substance used for wearing away a surface by rubbing.<br />
Accelerator<br />
A constituent of synthetic resin mix which hastens a reaction.<br />
Acetone<br />
(CH3COCH3) A liquid hydro-carbon capable of dissolving twenty-<br />
five times its own volume of acetylene gas at atmospheric pressure.<br />
Activator/Hardener<br />
A chemical which will cause a curing process,<br />
the highly toxic ingredient of two-pack paints.<br />
Active Safety<br />
Features that help to prevent an accident<br />
happening.<br />
Adhesion<br />
Joining together of two components, as of paint to a substrate or<br />
one component to another.<br />
Air-fed mask<br />
Painter’s breathing equipment with an independent air supply.<br />
All-metal construction<br />
Generally this applies to those body shells of both private cars<br />
and light commercial vehicles in which the construction in the form<br />
of steel pressings assembled by welding, thus forming a fabricated<br />
unit.<br />
Vehicle Body Repairs - Phase 2 33
Module 6– Unit 3<br />
Alloy<br />
A mixture of two or metals with, or without, other metallic or nonmetallic<br />
elements.<br />
Anti-corrosion<br />
A treatment or construction that prevents or delays the formation<br />
of rust on ferrous metal.<br />
Arc eye<br />
The effect of an arc welding flash on the eye.<br />
Automated<br />
An action that is carried out by machinery without human<br />
intervention.<br />
B pillar<br />
The second pillar back from the screen.<br />
Backfire<br />
A term that can be defined as a momentary return of gases<br />
indicated in the blowpipe by a pop or loud bang, the flame<br />
immediately recovering and burning normally at the blowpipe.<br />
Backhand welding<br />
Sometimes classified as ‘rightward welding’ and applies to a<br />
technique in which the flame is directed backwards against the<br />
completed part of the weld.<br />
Back light<br />
A central window in the rear panel of the driving cab, or the rear<br />
window of a saloon body.<br />
Billet<br />
An oblong piece of metal having a square section.<br />
Binder<br />
A resin or cementing constituent of a compound.<br />
Vehicle Body Repairs - Phase 2 34
Module 6– Unit 3<br />
Blending-out<br />
A spraying action where newly applied paint is encouraged to blend<br />
with the original finish.<br />
Blowpipe<br />
A tool used for welding, known as a welding torch.<br />
Body sill<br />
The panel directly below the bottom of the doors.<br />
Bonnet<br />
The metal cover over the engine compartment.<br />
Boot<br />
This is a compartment provided in the car body which takes the<br />
luggage and often spare wheel and fuel tank. It may be at the front<br />
or rear of the body depending upon the location of the engine.<br />
Booth<br />
An enclosed room with filtered air flow in which a car can be spray<br />
painted, usually now has heating when it’s called a booth/oven.<br />
Boot lid<br />
Shaped door panel for enclosing luggage boot.<br />
Bottom side<br />
The frame member of the base of the body extending along the full<br />
length of the main portion of the body.<br />
BS<br />
British Standard.<br />
Bulkhead<br />
A transverse support in a body structure.<br />
Bumping<br />
Reshaping metal with a hammer and dolly.<br />
Vehicle Body Repairs - Phase 2 35
Module 6– Unit 3<br />
Burnishing<br />
Polishing, generally using a gentle abrasive compound.<br />
Cant panel<br />
The curved section of the roof top running between the<br />
comparatively flat top and the rain drip or gutter.<br />
Cant rail<br />
The longitudinal framing of the roof at the joint.<br />
Carbon Dioxide (CO2) A heavy colourless and incombustible<br />
gas which results from the perfect combustion of carbon.<br />
Carbonising flame<br />
An oxy-acetylene flame adjustment created by an excess of<br />
acetylene over oxygen, resulting in an excess of carbon in the flame.<br />
Case hardening<br />
This is the process of hardening the outer case or shell of steel<br />
articles, which is accomplished by including additional carbon into<br />
the case of the steel by a variety of methods.<br />
Catalyst<br />
A chemical substance which brings about a chemical change to<br />
produce a different substance.<br />
Centre Pillar<br />
The centre vertical support of a four door saloon.<br />
Cellulose<br />
Sometimes called nitrocellulose, it’s a highly flammable quick drying<br />
paint.<br />
Clinching<br />
Joining materials by pressing two or more layers together into a<br />
locking shape.<br />
Vehicle Body Repairs - Phase 2 36
Module 6– Unit 3<br />
Cohesion<br />
The force by which particles in a substance are held together.<br />
Colour library<br />
Painter’s record of bodyshop formulated colours.<br />
Consumables<br />
Materials which are consumer, lost or destroyed by being used, e.g.<br />
sanding disks, masking tape, etc.<br />
Contamination<br />
The inclusion of unwanted substances in or under a paint film.<br />
Contour<br />
Shape or outline.<br />
Copper acetylide<br />
(Cu2C2,H2O) A spontaneously explosive and inflammable substance<br />
which forms when acetylene is passed through a copper tube.<br />
COSSH<br />
Control of Substances Hazardous to Health Regulations 1988.<br />
Curing<br />
The change of a binder from soluble fusion state to insoluble<br />
infusible state by chemical action.<br />
Daylight lighting<br />
Artificial lighting that is compensated to produce the same effect as<br />
daylight.<br />
De-mineralised Water<br />
Water from which mineral particles of all but the smallest size has<br />
been removed.<br />
Vehicle Body Repairs - Phase 2 37
Module 6– Unit 3<br />
De-nibbing<br />
The action of removing small dirt inclusions or other imperfections<br />
on a coat of paint.<br />
Deposited metal<br />
Filler metal from a welding rod or electrode which has been melted<br />
by a welding process and applied in the form of a joint or built up.<br />
Dinging<br />
Straightening damaged metal with spoons, hammers or dollies. In<br />
the early days ‘dingman’ was the name of a tradesman who worked<br />
on completed bodies removing minor imperfections without injury<br />
to the high gloss lacquer or varnish.<br />
Dinging hammer<br />
A special hammer used for dinging or removal of dents.<br />
Dirt Inclusions.<br />
Small particles of dust or fluff that have become embedded in the<br />
surface during painting.<br />
Door skins.<br />
Formed metal panels covering the outside of the doors.<br />
Door trim.<br />
The interior lining of a door.<br />
Drip moulding.<br />
A roof trough to direct water from door openings.<br />
Dry sanding.<br />
Literally, sanding bodywork without using water.<br />
Dust extraction.<br />
The removal of dust from a sanding tool by means of vacuum,<br />
often from a central extraction unit.<br />
Vehicle Body Repairs - Phase 2 38
Module 6– Unit 3<br />
Edge-to-edge finish<br />
Painting a panel or panels up to gaps, joins or trim so that no<br />
blending is necessary.<br />
Electrode.<br />
The usual term for the filler rod which is deposited when using the<br />
electric arc welding process.<br />
Electromagnetic spectrum.<br />
The radiation given off by the sun; the wavelengths range from<br />
Gamma rays (about a billionth of a millimetre long) to radio waves<br />
(which can be a kilometre long).<br />
Electrophoresis<br />
Also described as cataphoresis, particles of paint are attracted to a<br />
submerged car body by a flow of electric current.<br />
Electrostatic process<br />
The attraction of paint particles to an electrically charged car body.<br />
EN<br />
Standards that are being adopted in all parts of the European<br />
Union.<br />
EPA<br />
Environmental Protection Act.<br />
Etching<br />
An acidic action that cuts into the surface to improve adhesion.<br />
Expansion.<br />
The increase in the dimensions of metals due to heat.<br />
Extrude.<br />
To draw into lengths.<br />
Vehicle Body Repairs - Phase 2 39
Module 6– Unit 3<br />
Fender.<br />
American term for wing.<br />
Feathering<br />
Relating to paint preparation, it means sanding away all edges to<br />
provide a smooth, even surface.<br />
FEPA<br />
Federation of European Producers of Abrasives.<br />
Filler.<br />
Inorganic types used to extend low pressure resins, usually<br />
polyesters.<br />
Fillet weld.<br />
A weld in which two surfaces at right angles to one another are<br />
welded together.<br />
Firewall.<br />
Front bulkhead which separates the engine and components from<br />
the passenger carrying compartment.<br />
Flange.<br />
A reinforcement on the edge of a panel formed at approximately<br />
right angles to the panel.<br />
Flashback.<br />
Occurs when the flame disappears from the end of the welding tip<br />
and the gases burn in the torch.<br />
Flashing off<br />
The partial drying of paint to the point where it loses its wet gloss<br />
and looks matt.<br />
Flat.<br />
A panel is said to be ‘flat’ when insufficient shaping has caused<br />
uneven contours and so flat areas are obvious.<br />
Vehicle Body Repairs - Phase 2 40
Module 6– Unit 3<br />
Flatted<br />
Taking away the gloss finish of a paint with an abrasive.<br />
Formulation<br />
The ‘recipe’ which gives the mix of bases and tinters for making up<br />
a paint colour.<br />
Four-door.<br />
Denotes the type of saloon body having four doors.<br />
Galvanised<br />
Metal, usually steel, that is coated with a thin layer of zinc by either<br />
a hot dip or electrolytic process.<br />
GRP<br />
Glass Reinforced Plastic.<br />
Guidecoat<br />
A contrasting colour applied to primer filler to show material<br />
removal during sanding.<br />
Hardener.<br />
A chemical curing or hardening agent.<br />
Hardening.<br />
Heating to a critical temperature followed by a relatively rapid rate<br />
of cooling.<br />
Headlining.<br />
The cloth or other material used to cover the inner surface of the<br />
car roof.<br />
Heelboard.<br />
The vertical board or panel under the rear seat which forms the<br />
support for the seat cushion.<br />
Vehicle Body Repairs - Phase 2 41
Module 6– Unit 3<br />
Hinge pillar.<br />
A pillar on which the door is swung.<br />
Hood.<br />
American term for bonnet.<br />
HSS<br />
High Strength Steel.<br />
HVLP<br />
High Volume, Low pressure.<br />
Immersed<br />
Lowered beneath the surface, such as a car body in a tank of paint.<br />
Impregnated.<br />
The particles of one substance infused into that of another.<br />
Infra-Red<br />
A type of heater used to cure paints and fillers.<br />
Ingestion<br />
Taking in substances through the mouth.<br />
Isocyanates<br />
A highly toxic ingredient of the activator for two-pack (2K) paints.<br />
Key<br />
The removal of gloss from a surface using a fine abrasive so that<br />
other coatings can adhere to it.<br />
Lacquer/Clear coat<br />
A clear paint applied over the colour coat to give gloss and<br />
durability.<br />
Vehicle Body Repairs - Phase 2 42
Module 6– Unit 3<br />
Laminates.<br />
A material composed of a number of layers.<br />
Lay-up.<br />
Layers of glass fibres are laid on top of wet resin and then pressed<br />
down into the liquid resin.<br />
Leftward welding. This is known as ‘forehand welding’.<br />
MAGS<br />
Metal Arc Gas Shielded welding.<br />
Metallic and pearlescent<br />
Basecoats which contain particles to give special effects, basecoats<br />
uminium for metallic and mica for pearlescent.<br />
Metallic finishes<br />
Paints containing aluminium particles that reflect light.<br />
Metamerism<br />
The name used to describe the phenomenon where colour changes<br />
shade under different lighting, e.g. sodium vapour street lights.<br />
Microfiche<br />
Transparent film on which is printed minute lettering or<br />
illustrations which can be read under a viewer.<br />
Micron<br />
A millionth of a metre or one thousandth of a millimetre.<br />
MIG/MAG<br />
Metal Inert Gas/Metal Active Gas arc welding.<br />
MIRRC<br />
Motor Insurance Repair Research Centre (Thatcham)<br />
Vehicle Body Repairs - Phase 2 43
Module 6– Unit 3<br />
Mixing Scheme<br />
A motorised rack that holds cans of paint and stirs them.<br />
Moulding<br />
The resulting shape of a plastic material when it is removed from its<br />
mould.<br />
Mule skinner<br />
Rotary wire brush which has its wires embedded in resin.<br />
Nearside<br />
Viewed from the driver’s seat, this is the left hand side of the<br />
vehicle.<br />
Neutral flame<br />
A balanced flame, indicating perfect combustion of both gases<br />
oxygen and acetylene.<br />
Non-ferrous metals<br />
Metals which do not contain any ferrite or iron.<br />
Normalizing<br />
Heating to a high temperature to produce a refinement of the grain<br />
structure of a metal or alloy.<br />
OE<br />
Original equipment (of a car, fitted or applied at the factory)<br />
Offside.<br />
Viewed from the driver’s seat, this is the right-hand side of the<br />
vehicle.<br />
Original finish.<br />
The paint applied at the factory by the vehicle manufacturer.<br />
Oven<br />
A heated painting booth.<br />
Vehicle Body Repairs - Phase 2 44
Module 6– Unit 3<br />
Overbaked<br />
Relating to car production lines, this happens when the moving<br />
conveyor slows down or stops and the car body spends too long in<br />
the oven, resulting in excessively hard paint.<br />
Oxidization.<br />
Chemical reaction between oxygen and some other element<br />
resulting in oxides.<br />
Oxidizing flame<br />
A gas welding flame which has an excess of oxygen while burning.<br />
PA<br />
Polyamide.<br />
Paddle.<br />
A wooden shaped tool for spreading body solder.<br />
Paint Booth<br />
An enclosed and vented cubicle in which paint can be sprayed<br />
without contaminating the rest of the work area.<br />
Passive Safety<br />
Those measures that minimise the consequences of an accident.<br />
PBT<br />
Polybutylene terephalate (linear Polyester).<br />
PC<br />
Polycarbonate.<br />
PE<br />
Polyethylene.<br />
Penetration.<br />
Depth of fusion or weld penetration.<br />
Vehicle Body Repairs - Phase 2 45
Module 6– Unit 3<br />
Peroxide Bleaching<br />
A stain which passes through the topcoat from beneath, caused by<br />
poor measuring or mixing of two-pack fillers.<br />
PES<br />
Polyethersulphone.<br />
PET<br />
Polyethylene Terephthalate.<br />
PF<br />
Phenol-formaldehyde resin.<br />
Phosphate<br />
A paint containing zinc particles in sufficient quantity to delay or<br />
prevent rust formation.<br />
Pickle.<br />
To soak metal in an acid solution in order to free the surface of rust<br />
or scale.<br />
Pillar.<br />
A vertical support of a body frame.<br />
Pillar face.<br />
The front of a pillar visible when the door is opened.<br />
Plasticizer<br />
An additive that gives a paint film the flexibility of plastic.<br />
PMMA<br />
Clear Acrylic or Poly (methyl methacrylate).<br />
POM<br />
Polyoxymethylene; polyformaldehyde .<br />
Vehicle Body Repairs - Phase 2 46
Module 6– Unit 3<br />
Pot-Life<br />
The time during which mixed adhesive, filler and paint can be used.<br />
PP<br />
Polypropylene.<br />
PPE<br />
Personal Protective Equipment.<br />
PPO<br />
Modified polyphenylene oxide.<br />
PPS<br />
Polyphenylene Sulphide.<br />
Primary Colours<br />
Those of light are red, blue and green which together make white,<br />
pigments are magenta (a red), cyan (a blue) and yellow which, when<br />
mixed together, make black.<br />
Prototype<br />
An original model.<br />
PTFE<br />
Polytetraflouroethylene.<br />
Puddle<br />
The small body of molten metal created by the flame of a welding<br />
torch.<br />
PUR<br />
Polyurethane.<br />
PVC<br />
Polyvinyl Chloride.<br />
Vehicle Body Repairs - Phase 2 47
Module 6– Unit 3<br />
Quarter light<br />
The window directly above the quarter panel.<br />
Quarter panel<br />
The side panel extending from the door to the rear end of the body<br />
(including rear wing).<br />
Random Orbital<br />
Sanders so described have a plate or disc which moves in a<br />
constantly varying orbit, those with a round head also rotate and are<br />
known as dual action or DA sanders.<br />
Reinforcement<br />
Filler material added to plastics (resin) in order to strengthen the<br />
finished product.<br />
Return sweep<br />
Reverse curve.<br />
Roll-edge masking<br />
Masking which presents a gradually diminishing gap to paint spray<br />
which can help in avoiding sharp edges.<br />
Saloon.<br />
An enclosed body not having a partition between the front and rear<br />
seats.<br />
Scuttle panel<br />
The panel between the bonnet and the windscreen.<br />
Sensitised<br />
Heightened sensitivity – in the case of Isocyanates the slightest trace<br />
can provoke a reaction.<br />
SMA<br />
Styrene maleic anhydride.<br />
Vehicle Body Repairs - Phase 2 48
Module 6– Unit 3<br />
Sodium Azide<br />
A highly toxic constituent of airbag gas cartridges.<br />
Solid colours<br />
Paints which rely only on coloured pigments for effect.<br />
Solvent<br />
A liquid capable of dissolving a material.<br />
Spray-out card<br />
A special card that is painted with the mixed paint for comparison<br />
or a permanent record.<br />
Squab<br />
The rear seat-back construction.<br />
Stearate powder<br />
A dry lubricant applied by the makers to dry sanding abrasive.<br />
Stopper<br />
Usually a one-pack material that cures by evaporation.<br />
Sub-frame.<br />
Chassis-frame sections, usually situated at the front of a vehicle,<br />
which carry the engine and suspension components.<br />
Substrate<br />
The material that is painted.<br />
Subtractive mixing<br />
The mixing of pigment colours.<br />
Suspension<br />
Relating to paints, it refers to particles mixed in the paint and how<br />
well they are mixed.<br />
Vehicle Body Repairs - Phase 2 49
Module 6– Unit 3<br />
Swage.<br />
A raised form of moulding pressed into a piece of metal in order to<br />
stiffen it.<br />
Sweating.<br />
Uniting two or more metal surfaces by the use of heat and soft<br />
solder.<br />
Synthetic.<br />
A substance produced artificially.<br />
Synthetic paints<br />
Paints which contain a resin.<br />
Tacking off<br />
Wiping dust from a surface to be painted with a dust attracting<br />
cloth.<br />
TAGS<br />
Tungsten Arc Gas Shielded welding.<br />
Template.<br />
A form or pattern made so that other parts can be formed to<br />
exactly the same shape.<br />
Tensile strength.<br />
The resistance to breaking which metal offers when subject to a<br />
pulling stress.<br />
Thinner<br />
A solvent that reduces the viscosity of paint so that it may be<br />
sprayed and evaporates as the paint dries.<br />
TIG<br />
Tungsten Inert Gas arc welding.<br />
Vehicle Body Repairs - Phase 2 50
Module 6– Unit 3<br />
Topcoat<br />
The outer finishing coat; basecoat and clear finish may also be<br />
considered as topcoat.<br />
TPUR<br />
Thermoplastic polyurethane.<br />
Translucent coating<br />
A cloudy coat that permits some light rays to pass through the layer<br />
below.<br />
Transparent coating<br />
A clear coat that permits light rays to pass through to the layer<br />
below.<br />
Tunnel.<br />
A raised floor panel section for driveshaft clearance.<br />
Turret.<br />
American term for roof.<br />
Two-pack acrylic<br />
A resin based paint that hardens chemically with the addition of a<br />
hardener, usually written 2K and called a 2-pack.<br />
Viscosity cup<br />
A cup of measured size which also has a hole of measured size in<br />
the base to check paint viscosity by time.<br />
VOCs<br />
Volatile Organic Substances.<br />
Volatile<br />
Capable of readily evaporating.<br />
Wheel-arch<br />
Panel assembly for covering the rear wheels.<br />
Vehicle Body Repairs - Phase 2 51
FÁS Learning Innovation Unit<br />
Apt. 2<br />
43/49 Mespil Road<br />
Dublin 4