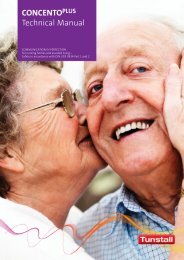
12. Verpackungsbeilagen 12.2 Zimmerleuchten, Flurdisplays 77 0180 10 Zimmerleuchte Universal, 3-teilig 77 0181 10 Zimmerleuchte Universal, 3-teilig, mit Türschild 77 0185 10 Zimmerleuchte Universal, 3-teilig, Glasdekor 19 078x xx Flurdisplays, einseitig 19 078x xx Flurdisplays, doppelseitig <strong>CONCENTO</strong> <strong>PLUS</strong> - <strong>Technisches</strong> <strong>Handbuch</strong>, 11/12 (Rev. 3.0), 00 8804 14 <strong>Technisches</strong> <strong>Handbuch</strong> Seite 96
<strong>Tunstall</strong> <strong>GmbH</strong>, Orkotten 66, D-48291 Telgte, www.tunstall.de Installationsanleitung D Installation Instructions GB Zimmerleuchte Universal, 3-teilig, Best.‐Nr. 77 0180 10 zur optischen Anzeige von allen Rufarten und Personalanwesenheit 1 sowie zusätzliche Anzeige für WC‐Ruf. Wandmontage. Zimmerleuchte Universal, 4-teilig, Best.‐Nr. 77 0180 00 wie 77 0180 10, jedoch zusätzlich mit Personalanwesenheit 2. Zimmerleuchte Universal, 2-teilig, Best.‐Nr. 77 0182 10 zur optischen Anzeige von Personalanwesenheit 1 und von Telefonruf. Wandmontage. Zimmerleuchte Universal, 1-teilig, Best.‐Nr. 77 0182 50 zur optischen Anzeige von allen Rufarten. Wandmontage. Achtung! Die LED‐Module sind mit elektrostatisch gefährdeten Bauteilen bestückt. Vermeiden Sie deshalb eine direkte Berührung. Montage Mounting 1* Einbaudose 2 Gehäuse‐Rückwand 3* Anschlussklemme (70 0807 07) 4 Leiterplatte mit LED‐Modulen 00 8802 56, 12/11 (Rev. 2.1) 5 Dekorrahmen 6 Befestigungsschrauben 7 Lichtkuppel mit Trenneinsatz * ist nicht im Lieferumfang enthalten. 1. Gehäuse‐Rückwand 2 mit den Schrauben der Einbaudose an der Einbaudose 1 festschrauben. Einbaurichtung beachten, siehe Markierung im Gehäuse. 2. Angeschlossene Anschlussklemme 3 in die eingebaute Buchse der Leiterplatte 4 stecken. 3. Leiterplatte 4 in die Gehäuse‐Rückwand 2 einsetzen (erst oben, dann unten). Dabei die beiden Löcher unten in der Leiterplatte 4 auf die Arretierungsstifte der Gehäuse‐Rückwand 2 stecken. 4. LED‐Module gemäß der folgenden Übersicht auf die Leiterplatte stecken. 5. Dekorrahmen 5 mit den Befestigungsschrauben 6 auf die Gehäuse‐Rückwand 2 schrauben. 6. Lichtkuppel mit Trenneinsatz 7 auf den Dekorrahmen 5 drücken bis sie einrastet. Farben der LED‐Module LED module colours Anschlusspunkt L1 L2 L3 L4 Anschlusspunkt L1 L2 L3 L4 77 0180 10 77 0180 00 rot: Rufe rot: Rufe grün: Personal 1 grün: Personal 1 kein LED‐Modul gelb: Personal 2 weiß: WC‐Ruf weiß: WC‐Ruf 77 0182 10 77 0182 50 kein LED‐Modul rot: Rufe grün: Personal 1 kein LED‐Modul weiß: Telefonruf kein LED‐Modul kein LED‐Modul kein LED‐Modul Demontage Dismantling Room lamp universal, 3 sections, order no. 77 0180 10 for optical signalling of all call types and staff presence 1 as well as additional display for WC call. Wall mounting. Room lamp universal, 4 sections, order no. 77 0180 00 as 77 0180 10, but additionally with staff presence 2. Room lamp universal, 2 sections, order no. 77 0182 10 for optical signalling of staff presence 1 and telephone call. Wall mounting. Room lamp universal, 1 section, order no. 77 0182 50 for optical signalling of all call types. Wall mounting. Attention! The LED modules include electrostatic sensitive components. Avoid touching. 1* Back box 5 Decorative frame 2 Pattress 6 Fixing screws 3* Connector (70 0807 07) 7 Light dome with insert module 4 Printed circuit board (PCB) with LED modules * not included with product delivery. 1. Fit the pattress 2 with the back box screws to the back box 1. For the correct mounting direction refer to the markings in the pattress. 2. Plug the pre-connected connector 3 into the socket on the PCB 4. 3. Put the PCB 4 into the pattress 2 (first the top, then the bottom). The two holes on the base of the PCB must fit onto the fixing pins of the pattress 2. 4. Plug the LED modules onto the PCB according to the following overview. 5. Fit the decorative frame 5 with the fixing screws 6 onto the pattress 2. 6. Press the light dome with the insert module 7 onto the decorative frame 5 until it locks in place. Connector L1 L2 L3 L4 Connector Lichtkuppel von oben und unten leicht zusammendrücken und dann abziehen. Compress and pull off the light dome. 77 0180 10 Zimmerleuchte Universal , 3‐teilig Room lamp universal, 3 sections 77 0180 00 Zimmerleuchte Universal, 4‐teilig Room lamp universal, 4 sections 77 0182 10 Zimmerleuchte Universal , 2‐teilig Room lamp universal, 2 sections 77 0182 50 Zimmerleuchte Universal, 1‐teilig Room lamp universal, 1 section 1 2 3 OBEN TOP <strong>Technisches</strong> <strong>Handbuch</strong> Seite 97 4 5 6 L1 L2 L3 L4 6 77 0180 10 77 0180 00 red: calls red: calls green: staff 1 green: staff 1 no LED module yellow: staff 2 white: WC call white: WC call 77 0182 10 no LED module green: staff 1 white: telephone call no LED module 7 77 0182 50 red: calls no LED module no LED module no LED module 1. 1. 2.
- Seite 1 und 2:
CONCENTO PLUS Technisches Handbuch
- Seite 3 und 4:
CONCENTO PLUS - Technisches Handbuc
- Seite 5 und 6:
1. Zur Sicherheit Lesen Sie dieses
- Seite 7 und 8:
1.4 Bestimmungsgemäße Verwendung
- Seite 9 und 10:
2.1 Systemübersicht Technikraum St
- Seite 11 und 12:
CONCENTO PLUS - Technisches Handbuc
- Seite 13 und 14:
2.4 ConLog PLUS Management Software
- Seite 15 und 16:
2.5.2 Gruppensprechen Gruppenbus CO
- Seite 17 und 18:
3. Raumtypen Auf den folgenden Seit
- Seite 19 und 20:
Pro Raum Pro Bett Im WC-Raum Termin
- Seite 21 und 22:
Pro Raum Pro Bett Im WC-Raum Displa
- Seite 23 und 24:
3.3 Dienstzimmer c+k Pro Raum Stati
- Seite 25 und 26:
3.4.2 Funktionsraum ohne Sprechen c
- Seite 27 und 28:
3.5.2 Stationsbad ohne Sprechen 19
- Seite 29 und 30:
Pro Raum Displaymodul oder Ruf-/Anw
- Seite 31 und 32:
Pro Raum Terminal SD6 P oder Termin
- Seite 33 und 34:
Pro Raum Displaymodul oder Ruf-/Anw
- Seite 35 und 36:
Pro Wohnung Pro Bett Im Bad / WC Be
- Seite 37 und 38:
4. Erforderliches Zubehör Für ver
- Seite 39 und 40:
5. Installationsbeispiele Im Folgen
- Seite 41 und 42:
CONCENTO PLUS - Technisches Handbuc
- Seite 43 und 44:
5.4 Betreutes Wohnen g (Potentialau
- Seite 45 und 46:
5.5.2 1‐Bett‐Zimmer mit WC Stat
- Seite 47 und 48: CONCENTO PLUS - Technisches Handbuc
- Seite 49 und 50: 6. Installationsablauf Arbeitsschri
- Seite 51 und 52: 7. Montageorte festlegen 7.1 Allgem
- Seite 53 und 54: 7.3 Empfehlungen für CONCENTO PLUS
- Seite 55 und 56: 7.3.3 Taster ÀÀ ÀÀÀÀÀ ÀÀÀ
- Seite 57 und 58: 8. Leitungen verlegen Beachten Sie
- Seite 59 und 60: CONCENTO PLUS - Technisches Handbuc
- Seite 61 und 62: 8.3.1 Erdung der Rufanlage CONCENTO
- Seite 63 und 64: 8. Leitungen verlegen 8.5 Gruppenbu
- Seite 65 und 66: CONCENTO PLUS - Technisches Handbuc
- Seite 67 und 68: 8.5.4 Stationsbus Gruppenbus GE Abs
- Seite 69 und 70: 9. Stromversorgung einschalten Vora
- Seite 71 und 72: 10. Rufanlage konfigurieren Bevor d
- Seite 73 und 74: 10.2 Auszuführende Konfigurationen
- Seite 75 und 76: 11. Funktionsprüfung Hinweis! Wenn
- Seite 77 und 78: CONCENTO PLUS - Technisches Handbuc
- Seite 79 und 80: 11.2.1.1 WCs zum Zimmer prüfen WC-
- Seite 81 und 82: 12. Verpackungsbeilagen Jedem Gerä
- Seite 83 und 84: 12.1 Raumterminals 19 0700 20 Termi
- Seite 85 und 86: Terminal SD6 P, Best.-Nr. 19 0700 2
- Seite 87 und 88: Terminal SD6 P, Best.-Nr. 19 0700 2
- Seite 89 und 90: Tunstall GmbH, Orkotten 66, 48291 T
- Seite 91 und 92: Tunstall GmbH, Orkotten 66, 48291 T
- Seite 93 und 94: Displaymodul, Best.-Nr. 19 0700 80
- Seite 95 und 96: Displaymodul, Best.-Nr. 19 0700 80
- Seite 97: Ruf-/Anwesenheitskombination Bus (R
- Seite 101 und 102: Tunstall GmbH, Orkotten 66, D-48291
- Seite 103 und 104: Flurdisplay, Best.‐Nr 19 0781 xx
- Seite 105 und 106: Flurdisplay, dopppelseitig, Best.
- Seite 107 und 108: Tunstall GmbH, Orkotten 66, 48291 T
- Seite 109 und 110: Tunstall GmbH, Orkotten 66, 48291 T
- Seite 111 und 112: Tunstall GmbH, Orkotten 66, 48291 T
- Seite 113 und 114: Tunstall GmbH, Orkotten 66, 48291 T
- Seite 115 und 116: Tunstall GmbH, Orkotten 66, 48291 T
- Seite 117 und 118: 12. Verpackungsbeilagen 12.4 Ruftas
- Seite 119 und 120: Ruftaster mit Steckvorrichtung, Bes
- Seite 121 und 122: Tunstall GmbH, Orkotten 66, 48291 T
- Seite 123 und 124: Tunstall GmbH, Orkotten 66, 48291 T
- Seite 125 und 126: Tunstall GmbH, Orkotten 66, 48291 T
- Seite 127 und 128: Tunstall GmbH, Orkotten 66, 48291 T
- Seite 129 und 130: Tunstall GmbH, Orkotten 66, 48291 T
- Seite 131 und 132: Tunstall GmbH, Orkotten 66, 48291 T
- Seite 133 und 134: Tunstall GmbH, Orkotten 66, 48291 T
- Seite 135 und 136: 12. Verpackungsbeilagen 12.6 Netzge
- Seite 137 und 138: Netzgerät USV, Bestell-Nr. 77 3400
- Seite 139 und 140: Netzgerät USV, Bestell-Nr. 77 3400
- Seite 141 und 142: Netzgerät USV, Bestell-Nr. 77 3400
- Seite 143 und 144: Netzgerät, Best.-Nr. 77 3401 00 Da
- Seite 145 und 146: 3. Inbetriebnahme Netzgerät, Beste
- Seite 147 und 148: Netzgerät USV 60, Bestell-Nr. 77 3
- Seite 149 und 150:
Netzgerät USV 60, Bestell-Nr. 77 3
- Seite 151 und 152:
Netzgerät USV 60, Bestell-Nr. 77 3
- Seite 153 und 154:
Batteriesatz für USV 60, Bestell-N
- Seite 155 und 156:
Batteriesatz für USV 60, Bestell-N
- Seite 157 und 158:
13. Programmiertabellen, Checkliste
- Seite 159 und 160:
Programmiertabelle Terminalkonfigur
- Seite 161 und 162:
Programmiertabelle Gruppenzusammens
- Seite 164:
Informieren Sie sich umfassend zum