Rolltec Plus G/S 500
Rolltec Plus G/S 500
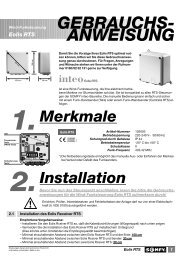
Rolltec Plus G/S 500

Erfolgreiche ePaper selbst erstellen
Machen Sie aus Ihren PDF Publikationen ein blätterbares Flipbook mit unserer einzigartigen Google optimierten e-Paper Software.
83100311 H1.qxd 20.06.01 09:17 Seite 47<br />
Automatic mode Introduction<br />
Push the selector switch to (A), all the way to the left until you hear<br />
the “click”, in order to activate the automatic mode.<br />
The automatic mode is now activated and the roller shutter will move<br />
up and down at the programmed times. Regardless of the programmed<br />
times, it is still possible to move the roller shutter up and<br />
down by pressing the up or down button and the programming<br />
remains unaffected.<br />
If you press the up or down button longer than 2 seconds, the roller<br />
shutter moves up or down.<br />
Simply press the opposite button to stop the motion, i.e.:<br />
· press the down button, if the roller shutter is moving up,<br />
· press the up button, if the roller shutter is moving down.<br />
The roller shutter will only move up or down again after the up or<br />
down button has been pressed.<br />
By simply pushing the selector switch to manual mode (H), the automatic<br />
mode can be interrupted for an extended period of time.<br />
After selecting automatic mode again, the Vestamatic <strong>Rolltec</strong> <strong>Plus</strong><br />
G/S <strong>500</strong> roller shutter control will execute the last pending command<br />
from the automatic mode. The last pending command will also be executed<br />
when resetting after power failure.<br />
- 45 - G<br />
Basic functions General<br />
After the installation has been completed correctly (for instructions<br />
please see pages 67 to 74), you can start programming.<br />
Important: Please note that the Vestamatic <strong>Rolltec</strong> <strong>Plus</strong> G/S <strong>500</strong><br />
roller shutter control cannot be programmed in case of<br />
power failure.<br />
Carefully pull to remove the cover cap and press the reset button with<br />
the delivered adjustment tool or something else suitable.<br />
Pressing the reset button will activate the default times preprogrammed<br />
by the manufacturer.<br />
· Current time – 0ß8:0ß0<br />
· Up time – 0ß6:0ß0<br />
· Down time – 2ß0:0ß0<br />
On the following pages, you will find instructions how to customize<br />
these times to your personal requirements.<br />
G<br />
- 46 -