User manUal . prma donna 2 + da vinci + da vinci Bat - JN Kites
User manUal . prma donna 2 + da vinci + da vinci Bat - JN Kites
User manUal . prma donna 2 + da vinci + da vinci Bat - JN Kites

Erfolgreiche ePaper selbst erstellen
Machen Sie aus Ihren PDF Publikationen ein blätterbares Flipbook mit unserer einzigartigen Google optimierten e-Paper Software.
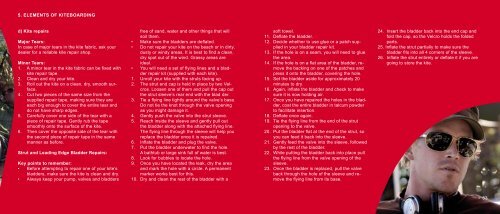
5. ELEMEntS OF KItEBOArDIng<br />
d) Kite repairs<br />
Major tears:<br />
In case of major tears in the kite fabric, ask your<br />
dealer for a reliable kite repair shop.<br />
Minor tears:<br />
1. A minor tear in the kite fabric can be fixed with<br />
kite repair tape.<br />
2. Clean and dry your kite.<br />
3. Roll out the kite on a clean, dry, smooth surface.<br />
4. Cut two pieces of the same size from the<br />
supplied repair tape, making sure they are<br />
each big enough to cover the entire tear and<br />
do not have sharp edges.<br />
5. Carefully cover one side of the tear with a<br />
piece of repair tape. Gently rub the tape<br />
smoothly onto the surface of the kite.<br />
6. Then cover the opposite side of the tear with<br />
the second piece of repair tape in the same<br />
manner as before.<br />
Strut and Leading Edge Bladder repairs:<br />
Key points to remember:<br />
• Before attempting to repair one of your kite’s<br />
bladders, make sure the kite is clean and dry.<br />
• Always keep your pump, valves and bladders<br />
free of sand, water and other things that will<br />
soil them.<br />
• Make sure the bladders are deflated.<br />
• Do not repair your kite on the beach or in dirty,<br />
dusty or windy areas. It is best to find a clean,<br />
dry spot out of the wind. Grassy areas are<br />
ideal.<br />
• You will need a set of flying lines and a bladder<br />
repair kit (supplied with each kite).<br />
1. Unroll your kite with the struts facing up.<br />
2. The strut end cap is held in place by two Velcros.<br />
Loosen one of them and pull the cap out<br />
the strut sleeve’s rear end with the blad der.<br />
3. Tie a flying line tightly around the valve’s base.<br />
Do not tie the knot through the valve opening<br />
as you might <strong>da</strong>mage it.<br />
4. Gently push the valve into the strut sleeve.<br />
5. Reach inside the sleeve and gently pull out<br />
the bladder along with the attached flying line.<br />
The flying line through the sleeve will help you<br />
replace the bladder once it is repaired.<br />
6. Inflate the bladder and plug the valve.<br />
7. Put the bladder underwater to find the hole.<br />
A bathtub or large sink full of water is best.<br />
8. Look for bubbles to locate the hole.<br />
9. Once you have located the leak, dry the area<br />
and mark the hole with a circle. A permanent<br />
marker works best for this.<br />
10. Dry and clean the rest of the bladder with a<br />
5. KItEBOArDIng ELEMEntS<br />
soft towel.<br />
11. Deflate the bladder.<br />
12. Decide whether to use glue or a patch supplied<br />
in your bladder repair kit.<br />
13. If the hole is on a seam, you will need to glue<br />
the area.<br />
14. If the hole is on a flat area of the bladder, re-<br />
move the backing on one of the patches and<br />
press it onto the bladder, covering the hole.<br />
15. Set the bladder aside for approximately 20<br />
minutes to dry.<br />
16. Again, inflate the bladder and check to make<br />
sure it is now holding air.<br />
17. Once you have repaired the holes in the bladder,<br />
coat the entire bladder in talcum powder<br />
to facilitate insertion.<br />
18. Deflate once again.<br />
19. Tie the flying line from the end of the strut<br />
opening to the valve.<br />
20. Put the bladder flat at the end of the strut, so<br />
you can feed it back into the sleeve.<br />
21. Gently feed the valve into the sleeve, followed<br />
by the rest of the bladder.<br />
22. While putting the bladder back into place pull<br />
the flying line from the valve opening of the<br />
sleeve.<br />
23. Once the bladder is replaced, pull the valve<br />
back through the hole of the sleeve and remove<br />
the flying line from its base.<br />
24. Insert the bladder back into the end cap and<br />
fold the cap, so the Velcro holds the folded<br />
parts.<br />
25. Inflate the strut partially to make sure the<br />
bladder fits into all 4 corners of the sleeve.<br />
26. Inflate the strut entirely or deflate it if you are<br />
going to store the kite.<br />
> 53