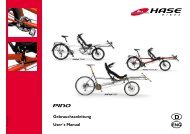
Pino Anleitung (Mit Rahmentrennung) deutsch ... - Hase Bikes
Pino Anleitung (Mit Rahmentrennung) deutsch ... - Hase Bikes
Pino Anleitung (Mit Rahmentrennung) deutsch ... - Hase Bikes

Sie wollen auch ein ePaper? Erhöhen Sie die Reichweite Ihrer Titel.
YUMPU macht aus Druck-PDFs automatisch weboptimierte ePaper, die Google liebt.
Rund ums Fahren<br />
Riding your <strong>Pino</strong><br />
<strong>Pino</strong> parken<br />
<strong>Mit</strong> dem als Zubehör erhältlichen <strong>Hase</strong>-Zweibeinständer können<br />
Sie das <strong>Pino</strong> sicher abstellen. Der Ständer ist so ausgelegt,<br />
dass er Belastungen mit Gepäck und Fahrern aushält. Wir<br />
empfehlen den Zweibeinständer besonders dann, wenn Sie<br />
Kinder mitnehmen. So können Sie das Kind anschnallen, ohne<br />
die Gefahr einzugehen, dass das <strong>Pino</strong> kippt.<br />
14<br />
Achtung!<br />
Bocken Sie das <strong>Pino</strong> immer über beide Ständerfüße auf,<br />
so dass sie gleichmässig belastet werden. Beim Aufbocken<br />
über einen Ständerfuß besteht Bruchgefahr.<br />
Kinder mitnehmen<br />
Für die <strong>Mit</strong>nahme von Kindern ist das <strong>Pino</strong> wegen der liegenden<br />
Position bestens geeignet. Für Kinder, die mit ihren<br />
Beinen bei der kürzesten Einstellung des Rahmens die Pedale<br />
nicht erreichen, bieten wir ein zusätzliches, verschiebbares<br />
Kindertretlager (Seite 27, „Zubehör montieren“) und Kindergriffe<br />
an. So können Kinder ab ca. 1 m Größe aktiv mittreten.<br />
In Verbindung mit einer Kupplung und dem Kinderanhänger<br />
Trets können Sie ein weiteres aktiv mittretendes Kind mitnehmen.<br />
<strong>Pino</strong> auf Auto-Fahrradträger transportieren<br />
Sie können das <strong>Pino</strong> auf einem herkömmlichen Fahrraddach-<br />
oder Heckgepäckträger transportieren.<br />
Reduzieren Sie die Gesamtlänge (siehe nächster Abschnitt).<br />
Nehmen Sie die Sitzbespannung ab. Entfernen Sie vor dem<br />
Transport alle Teile, die sich während der Fahrt lösen<br />
könnten. Stellen Sie das <strong>Pino</strong> auf den Fahrradträger. Fixieren<br />
Sie beide Räder und den Rahmen. Vergewissern Sie sich, dass<br />
das <strong>Pino</strong> sich nicht lockern kann.<br />
Rahmenlänge für Transport reduzieren<br />
Sollte es notwendig sein, das <strong>Pino</strong> im Auto, Zug oder einem<br />
anderen Fahrzeug zu transportieren, dann können Sie die Gesamtlänge<br />
verkürzen, indem Sie den Vorbau ganz einschieben.<br />
1. Markieren Sie (z.B. mit einem wasserfesten Filzstift) die<br />
Position des Vorbaus im Hauptrahmen auf der Unterseite<br />
des Rohres. Es erleichtert die ursprüngliche Einstellung<br />
wiederherzustellen.<br />
2. Stellen Sie den Rahmen auf die kürzeste Länge ein. Beschreibung<br />
finden Sie im Kapitel „Rahmenlänge einstellen“<br />
auf Seite 9.<br />
Parking the <strong>Pino</strong><br />
The <strong>Pino</strong> can be parked securely using the HASE Double<br />
Kickstand available as an accessory. The kickstand is designed<br />
to support the weight of the luggage and riders when the tandem<br />
is parked. We especially recommend the Double Kickstand<br />
when the front rider is a child. This feature allows you<br />
to help the child get onto the seat and fasten the safety belt<br />
with no danger of tipping.<br />
Caution!<br />
For <strong>Pino</strong>s with a Double Kickstand: Always ensure that<br />
the <strong>Pino</strong> is resting evenly on both legs of the kickstand<br />
when parked. If the <strong>Pino</strong> is supported by a single leg of<br />
the kickstand, the leg may break.<br />
Transporting children<br />
The recumbent position of the front seat is ideal for children.<br />
If the child’s feet do not reach the pedals when the front<br />
boom is fully inserted (shortest frame setting), we offer an<br />
additional, repositionable Children’s Crankset (see also page<br />
27, “Installing accessories”) and Children’s Grips. With this<br />
crankset, children as small as 1 meter (3’ 3”) in height can<br />
pedal in the front seat. An additional child can be transported<br />
(and pedal along) by hitching a Trets trailer to the <strong>Pino</strong>.<br />
Transporting the <strong>Pino</strong> on a car rack<br />
The <strong>Pino</strong> can be transported with a standard roof or rearmounted<br />
bicycle carrier. Reduce the frame length (see next<br />
section). Remove the seat cover. Remove all parts that could<br />
become loose during transport. Place the <strong>Pino</strong> on the car<br />
rack. Secure the two wheels and the frame. Ensure that the<br />
<strong>Pino</strong> cannot become loose during transport.<br />
Reducing frame length for transport<br />
The <strong>Pino</strong> can be adjusted to its most compact state for transportation<br />
by car, train, or other vehicle by fully inserting the<br />
front boom.<br />
1. Mark (for example, with a permanent marker) the position<br />
of the front boom in the main frame on the bottom<br />
of the tube. This makes it easier to reassemble the bicycle<br />
with its original dimensions.<br />
2. Adjust the frame to its shortest length. For more information,<br />
see “Adjusting the frame length” on page 9.<br />
<strong>Pino</strong> 11/09-D-ENG<br />
8/09