Manual Plena - Extranetinnova.com
Manual Plena - Extranetinnova.com
Manual Plena - Extranetinnova.com

Erfolgreiche ePaper selbst erstellen
Machen Sie aus Ihren PDF Publikationen ein blätterbares Flipbook mit unserer einzigartigen Google optimierten e-Paper Software.
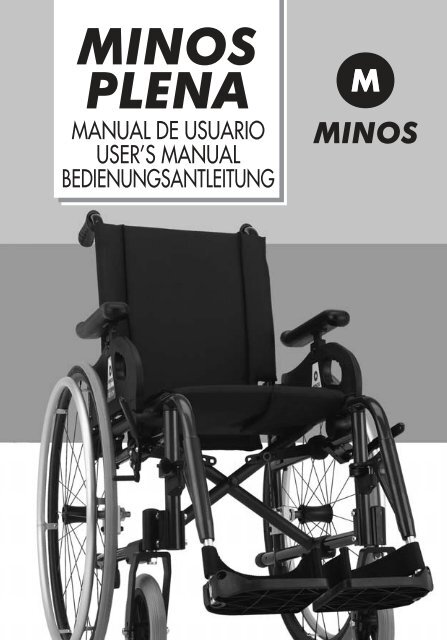
MINOS<br />
PLENA<br />
MANUAL DE USUARIO<br />
USER’S MANUAL<br />
BEDIENUNGSANTLEITUNG
ÍNDICE<br />
Introducción 2<br />
Información importante antes de usar la silla 2<br />
Componentes Silla de Ruedas Minos <strong>Plena</strong> 4<br />
Transferencias a y desde la silla 4<br />
Apoyabrazos 5<br />
Advertencias seguridad y funcionamiento 5<br />
Plegado y desmontaje para transporte en el coche 7<br />
Controles y mantenimiento 8<br />
Reparaciones y sustitución de piezas 8<br />
Reciclaje y embalaje 8<br />
Minos <strong>Plena</strong> 8<br />
Accesorios y opciones 11<br />
Medidas y datos generales 14
PLENA<br />
MANUAL DE USUARIO<br />
Introducción<br />
GRACIAS por elegir una silla de ruedas de MINOS. Somos una empresa<br />
joven pero que contamos con una gran experiencia en el sector.<br />
La silla de ruedas que Usted acaba de adquirir es fruto de esa experiencia.<br />
Estamos seguros que la calidad, durabilidad y diseño de la silla no le<br />
van a decepcionar.<br />
Lea detenidamente este manual de uso y mantenimiento.<br />
Si tiene cualquier pegunta, pida al profesional que le aconsejó en la<br />
<strong>com</strong>pra de la silla de ruedas que le aclare sus dudas.<br />
Normativa<br />
Las sillas Minos cumplen la Directiva de Medical Devices (1998) que<br />
exigen la certificación bajo la normativa ISO 7176-8.<br />
MINOS<br />
Pol. Industrial Sangroniz<br />
SELLO DISTRIBUIDOR<br />
Iberre Kalea 7<br />
48150 Sondika<br />
Vizcaya – España<br />
Tfno : + 34 94 453 32 30<br />
Fax: + 34 94 453 30 01<br />
Email pedidos@minos97.<strong>com</strong><br />
www.minos.es<br />
Garantía de por Vida<br />
Las Sillas Minos Irati tienen garantía de por vida en chasis<br />
y cruceta<br />
INFORMACIÓN IMPORTANTE<br />
ANTES DE USAR LA SILLA DE RUEDAS<br />
Como desembalar la silla de ruedas Minos<br />
Las sillas de ruedas Minos vienen embaladas y protegidas en su propia<br />
caja de cartón.<br />
Para desembalar la silla tire hacia arriba de la tapa superior o utilice<br />
la ayuda de un alicate para quitar las grapas.<br />
Sacar la silla de la caja<br />
Una vez abierta la caja y sacada la silla fuera de la caja de embalaje,<br />
la silla de ruedas se encontrará plegada. En una de las asas hay una<br />
bolsita que contiene el manual de instrucciones que Usted esta<br />
leyendo.<br />
2
Numero de serie<br />
Cada silla viene con una pegatina<br />
con el número de serie en la caja de<br />
embalaje y en chasis de la silla. Con<br />
el fin de poder identificar, la fecha de la venta, el lote y a que<br />
establecimiento fue realizada dicha venta.<br />
Desplegar la silla<br />
Empuje hacia fuera los tubos que soportan la<br />
tapicería del asiento teniendo cuidado que no<br />
queden atrapados los dedos entre el tubo y el<br />
chasis. Asegúrese que los tubos del asiento descansan<br />
sobre los apoyos.<br />
La biela<br />
Su función es mantener el chasis paralelo en<br />
las operaciones de plegado y desplegado. A<br />
su vez permite mantener la silla plegada.<br />
Colocar los reposapiés<br />
Coloque cada reposapiés, de forma<br />
perpendicular al chasis en el orificio señalado<br />
en la foto. Una vez colocados, gire 90º grados hasta<br />
que quede anclado. Para desmontarlos hay que<br />
presionar la palanca, girar 90º cada reposapiés hacia<br />
el exterior y extraerlos.<br />
Presión de los neumáticos<br />
Asegúrese que los neumáticos conservan la presión<br />
re<strong>com</strong>endada en los laterales de la cubierta. Está<br />
señalada en el mismo neumático de la rueda. La<br />
presión re<strong>com</strong>endada es aproximadamente 2.5 kg.<br />
Efectividad del freno de estacionamiento<br />
Compruebe que los frenos funcionan correctamente.<br />
El freno se acciona empujando la palanca hacia delante. Para soltar<br />
el freno tire de la palanca hacia atrás, el propio muelle del freno lo<br />
mantendrá separado de la rueda.<br />
Es re<strong>com</strong>endable accionar el freno para sentarse o salir de la silla de<br />
ruedas.<br />
IMPORTANTE: La función de los frenos no es reducir la velocidad de<br />
la silla. No accione el freno mientras la silla esté en movimiento<br />
3
PLENA<br />
MANUAL DE USUARIO<br />
COMPONENTES SILLA DE RUEDAS<br />
1<br />
9<br />
10<br />
11<br />
14<br />
4<br />
3<br />
15 12<br />
13<br />
6<br />
2<br />
7<br />
5<br />
8<br />
1 Asidero de empuje.<br />
2 Respaldo.<br />
3 Apoyabrazos abatible, desmontable y<br />
4<br />
regulable en altura.<br />
Espuma del apoyabrazos regulable en altura.<br />
5<br />
Eje desmontable rápido de la rueda.<br />
6<br />
Rueda trasera.<br />
7<br />
Aro de propulsión de aluminio.<br />
8<br />
Cruceta plegable.<br />
9<br />
Reposapiés abatibles y desmontables.<br />
10 Paleta del reposapiés.<br />
11 Talonera.<br />
12 Horquilla de la rueda delantera.<br />
13 Rueda delantera.<br />
14 Asiento acolchado con bolsillo.<br />
15 Freno de estacionamiento.<br />
TRANSFERENCIAS A Y DESDE LA SILLA<br />
En primer lugar accione el freno de estacionamiento. No utilice los<br />
reposapiés para realizar ningún tipo de apoyo. Habitualmente deberá<br />
Usted abatir el apoyabrazos hacia atrás y realzar la transferencia<br />
lateral o frontal de acuerdo con los consejos del técnico, terapeuta<br />
ocupacional o fisioterapeuta. No realice la transferencia sin la supervisión<br />
de un asistente hasta que aprenda a realizarla con soltura.<br />
EL WC<br />
La bañera<br />
Aproximación lateral<br />
Aproximación frontal<br />
Transferencia a una silla<br />
Aproximación frontal<br />
Aproximación lateral<br />
Trasferencia de<br />
una cama a la silla<br />
Aproximación lateral<br />
Aproximación frontal<br />
Aproximación frontal<br />
4
APOYABRAZOS<br />
Abatible<br />
Para quitarlo debe Usted presionar el gatillo y tirar de él hacia atrás.<br />
Para realizar la transferencia puede dejarlo en esa posición o bien<br />
desmontarlo totalmente con un simple giro hasta liberar el bulón y<br />
extraerlo de su alojamiento.<br />
Para liberar el bulón hay que hacer coincidir el saliente del eje, con<br />
la ranura del orificio.<br />
Regulable en altura<br />
Para ello necesita Usted una llave allen y una fija.<br />
Utilícela para soltar el tornillo de fijación y tire de<br />
apoyabrazos hasta alcanzar la altura deseada. Vuelva<br />
a apretar el tornillo con la llave allen.<br />
ADVERTENCIAS DE SEGURIDAD Y FUNCIONAMIENTO<br />
Componentes<br />
Todos los elementos y partes de la silla de ruedas son originales y no<br />
deben ser sustituidos por otros estándares que se puedan encontrar<br />
en el mercado. El uso de algún <strong>com</strong>ponente ajeno a Minos anularía<br />
inmediatamente la garantía de la silla. Consulte a su distribuidor<br />
antes de realizar el cambio de cualquier <strong>com</strong>ponente.<br />
Apoyabrazos y reposapiés<br />
Asegúrese que el apoyabrazos y el reposapiés están bien anclados.<br />
No debe Usted nunca levantar la silla por los apoyabrazos o reposapiés<br />
ya que el usuario podría resultar herido o dañarse la estructura<br />
de la silla. Asimismo no se ponga nunca de pie sobre el<br />
reposapiés. Asegúrese que el reposapiés está a la altura<br />
adecuada respecto al suelo para que no choque con el<br />
!<br />
mismo.<br />
Autopropulsar la silla<br />
Para los modelos con rueda trasera de 600 mm.<br />
Ayúdese del aro de propulsión situado en las ruedas<br />
traseras<br />
Pendiente leve<br />
Manténgase erguido y ayúdese del aro de<br />
propulsión para avanzar.<br />
Cuesta leve<br />
Incline la espalda levemente hacia delante y ayúdese del<br />
aro de propulsión para avanzar.<br />
5
PLENA<br />
MANUAL DE USUARIO<br />
Dar la vuelta<br />
Ayúdese de los dos aros de propulsión girándolos en<br />
sentido contrario.<br />
Plano inclinado (posición lateral)<br />
Mantenga el costado del cuerpo ligeramente<br />
inclinado hacia la el plano superior de la pendiente<br />
Girar<br />
Mantenga fijo el aro de propulsión situado en el<br />
lado hacia el que quiere girar y ayúdese del otro aro<br />
de propulsión.<br />
Frenado de las ruedas<br />
La función de los frenos no es reducir la velocidad de<br />
la silla. No accione el freno mientras la silla esté en<br />
movimiento.<br />
Centro de gravedad<br />
La silla esta diseñada para que el centro de gravedad este situado<br />
delante del eje de giro de la rueda trasera. Este diseño permite mayor<br />
agilidad en la maniobrabilidad de la silla y evita que la silla vuelque.<br />
Ruedas antivuelco (opcional)<br />
La función de este dispositivo de seguridad es evitar<br />
que la silla de ruedas vuelque hacia atrás. Se le re<strong>com</strong>ienda<br />
el uso en todo momento de las ruedas antivuelco.<br />
Inclinarse hacia delante o hacia<br />
atrás<br />
Estas maniobras podrían causar el vuelco de la silla,<br />
por lo tanto se re<strong>com</strong>ienda que en ningún caso<br />
realice movimientos bruscos. Si necesita inclinarse<br />
hacia atrás su espalda debe apoyarse en todo momento<br />
en el respaldo y las ruedas delanteras deben estar orientadas<br />
hacia delante. Si necesita inclinarse hacia delante, centre las ruedas<br />
delanteras, accione el freno de estacionamiento y no se incline más<br />
allá del apoyabrazos.<br />
Caída de la silla<br />
Si se cae de la silla colóquese de frente<br />
a la misma y ayúdese de sus extremidades<br />
superiores para colocarse correctamente<br />
en la silla y de otra persona para que<br />
levante la silla.<br />
6
Rampas y obstáculos<br />
Antes de disponerse a intentar salvar un obstáculo o subir una<br />
pendiente deberá Usted haber practicado dicha maniobra con un<br />
técnico, terapeuta ocupacional u otro profesional sanitario. No lo<br />
intente nunca solo las primeras veces. Haga que algún a<strong>com</strong>pañante<br />
observe las maniobras hasta que adquiera la destreza necesaria. No<br />
intente subir o bajar por pendientes de más del 10% sin asistencia.<br />
Franquee los obstáculos con las dos ruedas a la vez (ya sean las<br />
delanteras o las traseras si prefiere atacar el obstáculo de espaldas).<br />
Asegúrese que las paletas del reposapiés no choquen con el suelo al<br />
salvar desniveles.<br />
90º<br />
Plegado silla de ruedas<br />
Tenga cuidado con los dedos al plegar y desplegar<br />
la silla. Tire hacia arriba longitudinalmente de<br />
la tapicería del asiento para plegarla y empuje<br />
los tubos sobre los que descansa el asiento para<br />
desplegarla.<br />
Neumáticos<br />
Asegúrese que los neumáticos conservan la presión re<strong>com</strong>endada en<br />
los laterales de la cubierta. El correcto inflado de los neumáticos es<br />
fundamental para la maniobrabilidad de la silla. Además el correcto<br />
inflado afecta también al agarre del freno de estacionamiento.<br />
Uso en la calle<br />
Asegúrese en todo momento que sus maniobras son observadas en<br />
todo momento por los viandantes y muy especialmente por los<br />
vehículos si tiene que cruzar la calzada. Cruce la calzada por los lugares<br />
indicados para ello.<br />
PLEGADO Y DESMONTAJE PARA TRANSPORTE EN COCHE<br />
Para transportar la silla de ruedas en el coche puede elegir dos<br />
opciones<br />
- Plegada en el hueco existente entre los asientos traseros y<br />
el respaldo delantero<br />
7
PLENA<br />
MANUAL DE USUARIO<br />
- Plegada en el maletero del coche, si lo desea puede extraer<br />
las ruedas traseras con el eje de desmontaje rápido y los<br />
reposapies (ver en accesorios y opciones <strong>com</strong>o realizar el<br />
procedimiento).<br />
CONTROLES Y MANTENIMIENTO<br />
GENERAL<br />
INITIAL<br />
WEEKLY<br />
MONTHLY<br />
REGULARLY<br />
• La silla se cierra y se abre fácilmente<br />
• La silla rueda correctamente en línea recta<br />
FRENOS<br />
• No interfieren con los neumáticos al rodar<br />
• Se accionan fácilmente<br />
• Cumplen su función de freno de estacionamiento<br />
• No presentan holguras<br />
CRUCETA<br />
• Compruebe que están alineadas<br />
• Las cuatro ruedas están sobre el suelo<br />
APOYABRAZOS<br />
• Quedan bien encajados y se abaten y desmontan con facilidad<br />
RUEDAS TRASERAS<br />
• No hay movimiento lateral excesivo al hacerlas girar en vacío<br />
• Comprobar tensión de los radios<br />
• Comprobar el estado de los rodamientos<br />
RUEDAS DELANTERAS<br />
• Comprobar la sujección a la horquilla<br />
• Comprobar el estado de los rodamientos<br />
CUBIERTAS<br />
• Macizas: <strong>com</strong>probar que no existen grietas<br />
• Neumáticas: <strong>com</strong>probar el nivel de inflado y estado de la cubierta<br />
LIMPIEZA<br />
• Limpiar la tapicería del respaldo y asiento con agua y jabón<br />
REPARACIONES Y SUSTITUCION DE PIEZAS<br />
Para reparaciones y sustitución de piezas acérquese al establecimiento<br />
donde <strong>com</strong>pró la silla y le informarán de la opción mas correcta para<br />
sus necesidades.<br />
RECICLAJE Y EMBALAJE<br />
El cartón en que viene embalada la silla de ruedas es 100%<br />
reciclable, por favor deposítelo en un contenedor de cartón.<br />
SILLA MINOS PLENA<br />
Silla de aluminio autopropulsable por el usuario.<br />
Ajuste el freno según el tipo de rueda neumática o maciza.<br />
Afloje los dos tornillos de la abrazadera, ajuste el perfil para que<br />
actúe la zapata freno en el neumático y vuelva a apretar los tornillos.<br />
Las dos posiciones de la horquilla delantera. Sirven para colocar<br />
las ruedas de 8, 6 y 5 pulgadas y poderlas colocar en ambas posiciones.<br />
8
En la parte superior de la horquilla existen dos tornillos con cara<br />
hexagonal excéntrica en el lado de la horquilla. Si se aflojan los<br />
tornillos y varía la posición del hexágono excéntrico se consigue un<br />
diferente ángulo de inclinación de la horquilla de forma que al variar<br />
la altura de la rueda trasera se pueda poner la horquilla perpendicular<br />
al suelo.<br />
La rueda delantera se cambia con una llave allen.<br />
Desenrosca, extrae el tornillo y cambia la rueda. A<br />
continuación vuelve a realizar la operación a la inversa.<br />
No apriete en exceso para no deformar el plástico.<br />
En el chasis trasero hay una serie de<br />
orificios con pasos de 15 mm para<br />
ajustar la altura de la rueda trasera.<br />
Para cambiar la posición soltar la tuerca,<br />
el tornillo y variar la posición del cojinete al nuevo orificio.<br />
Añadir freno tambor a la Minos <strong>Plena</strong><br />
Extrae la rueda trasera, se quita el cojinete, atornilla al plato axle el<br />
soporte para anclaje del portazapatas, y ajusta el kit que se suministra.<br />
Ajusta la nueva rueda trasera en el tambor. En la parte superior de<br />
asa coloque el prolongador del puño y en la parte delantera coloque<br />
la maneta del freno. Ajusta el cable y la funda<br />
Minos <strong>Plena</strong> con freno tambor<br />
Como se acciona y suelta el freno<br />
La silla tiene dos manetas una en cada una de las asas del respaldo.<br />
Para accionar el freno apriete ligeramente las manetas hasta que<br />
haga resistencia de frenado. Para bloquear el freno tiene un gatillo<br />
en la misma maneta que enclava el freno. Cuando el cable que va de<br />
la maneta al regulador de frenada esta destensado obliga a hacer un<br />
mayor recorrido al presionar la maneta de freno. Es conveniente que<br />
este cable este suficientemente tenso.<br />
(no en exceso ya que frenaría la silla) para obtener una presión de<br />
frenada adecuada. El regulador de frenada nos permite ajustar la<br />
tensión del cable. Para tensar el cable hay que quitar la rueda trasera,<br />
apretar el regulador de frenada, mover la posición del regulador de<br />
tensión y volver a soltar. Tensar correctamente este cable permite<br />
que la maneta mantenga la misma capacidad de freno.<br />
9
PLENA<br />
MANUAL DE USUARIO<br />
10
ACCESORIOS Y OPCIONES<br />
Eje de desmontaje rápido<br />
Presione el botón de desmontaje rápido e introduzca<br />
<strong>com</strong>pletamente el eje en el orificio hasta que quede<br />
bien encajado. Para extraer la rueda presione el botón<br />
de accionamiento del desmontaje rápido y tire de<br />
la rueda hacia fuera.<br />
Para ajustar el eje, sujete con una llave fija el extremo inferior del<br />
eje y con otra llave fija regule la tuerca autoblocante a la posición<br />
deseada.<br />
Ruedas antivuelco<br />
Son una opción pero se re<strong>com</strong>iendan para evitar el<br />
vuelco de la silla hacia atrás. Para colocarlas introduzca<br />
el tubo del antivuelco en la parte posterior del tubo<br />
del chasis. La distancia de la rueda al suelo se regula<br />
con un sistema de pinza bloqueo. Para desmontar el<br />
antivuelco quite la pinza bloqueo.<br />
Pisador<br />
En la parte inferior trasera de la silla existe un tapón.<br />
Para colocar el pisador, quita el tapón, e introduzca<br />
el eje del pisador. Para fijar la posición del pisador<br />
una vez alineados los orificios del chasis y del eje del<br />
pisador se unen con una tuerca y un tornillo.<br />
Otra opción es colocar el pisador con pinza bloqueo que no necesita<br />
ningún tipo de herramienta.<br />
Ruedas ascensor<br />
En la parte inferior trasera del chasis hay un<br />
orificio, introduce el eje de la horquilla de la<br />
rueda ascensor y atornilla.<br />
Sustitución tapicería fija por ajustable en<br />
tensión<br />
Extrae los apoyabrazos laterales. Suelta los dos<br />
tirafondos situados en la parte superior trasera<br />
del respaldo y se extrae la tapicería standard.<br />
Suelta los tornillos que fijan el tapizado del asiento<br />
y se sustituye por el asiento ajustable en tensión.<br />
Coloca de nuevo los tornillos, aloja la cruceta en<br />
los apoyos y tensa los belcros sin deformar la posición del asiento de<br />
la cruceta. Después coloca el tapizado que se adhiere con unos belcros.<br />
11
PLENA<br />
MANUAL DE USUARIO<br />
Tensa el respaldo en la posición de la silla con las cunas apoyadas<br />
para no deformar la posición de la silla. La tapicería en tensión nunca<br />
debe tensarla excesivamente para no alterar el mecanismo de la silla.<br />
Asiento inodoro<br />
Suelte los tornillos de sujetan la tapicería del asiento. Coloque un<br />
tornillo que va incorporado al asiento inodoro en la parte delantera<br />
derecha de la cruceta. El inodoro tiene un orificio en el puente<br />
delantero derecho que se aloja en ese tornillo y hace de fijación.<br />
Reposapiés elevable en altura<br />
Para elevar el reposapies tire hacia arriba hasta<br />
la altura deseada, el reposapies se autobloquea a<br />
diferentes alturas. Para bajar el reposapies presione<br />
la palanca situada en el extremo superior y empuje<br />
hacia abajo.<br />
El apoyagemelos es basculante y se regula con la maneta lateral. Para<br />
ajustar en altura el reposapies, suelte la maneta lateral y ajuste a<br />
la altura deseada.<br />
Soporte amputado<br />
Tiene dos tornillos y cuatro tuercas en la parte inferior<br />
de la plataforma que permiten variar la posición del<br />
soporte según se desee.<br />
Se puede regular en altura y en inclinación.<br />
Respaldo reclinable con pistón<br />
de gas<br />
La operación de reclinado del respaldo mas sencilla<br />
es cuando la persona este sentada en la silla. Al<br />
accionar las dos manetas el mismo peso de la<br />
espalda nos ayudara a buscar la posición deseada. Para elevarlo<br />
accionar nuevamente las manetas y la potencia del pistón nos ayudara<br />
a elevar nuevamente a la persona.<br />
Si no actúa el pistón de gas tensar o destensar el regulador del cable<br />
situado en la parte superior de la maneta.<br />
Inclinación máxima 40º, se re<strong>com</strong>ienda utilizar ruedas antivuelco.<br />
12
Respaldo reclinable manual<br />
Para reclinar el respaldo tire de los gatillos hasta<br />
desenclavar el alojamiento y desplácelo hasta la<br />
inclinación deseada.<br />
Inclinación máxima 60º, se re<strong>com</strong>ienda utilizar<br />
ruedas antivuelco.<br />
Apoyabrazos largo<br />
Extrae el apoyabrazos lateral, soltando el tornillo<br />
y vuelve a introducir el nuevo modelo ( largo). Se<br />
fija en la posición de altura deseada.<br />
Asas ajustables en altura<br />
Afloje las manetas de las asas situadas en la parte<br />
superior del respaldo, ajuste a la altura deseada<br />
y vuelve a apretar.<br />
NOTA IMPORTANTE: Nunca aflojar mas de dos<br />
vueltas la maneta ya que se caerá la tuerca interior y desajusta el<br />
sistema.<br />
Cinturón de seguridad<br />
Se ajusta mediante un belcro y un<br />
clip con unas bridas en la parte<br />
trasera del asa respaldo.<br />
Extensión cabecero<br />
Introduzca la extensión entre el tapizado del respaldo<br />
y las asas respaldo hasta que toque con el<br />
tapizado del respaldo.<br />
Kit de reacondicionamiento Contiene respaldo<br />
y el asiento, la rueda delantera y el apoyabrazos<br />
regulable en altura.<br />
13
PLENA<br />
MANUAL DE USUARIO<br />
MEDIDAS Y DATOS GENERALES<br />
Dimensiones<br />
Anchura asiento<br />
Altura asiento<br />
Profundidad<br />
Altura respaldo<br />
Altura reposabrazos<br />
Anchura total<br />
Altura total<br />
Longitud total<br />
Anchura plegado<br />
Minos <strong>Plena</strong><br />
36, 40, 44, 48, 51 cm.<br />
50 cm.<br />
42 cm.<br />
47 cm.<br />
Ajust. 20-27 cm.<br />
51, 55, 59, 63, 66 cm.<br />
94 cm.<br />
89 cm.<br />
65 cm.*<br />
31 cm.<br />
Peso<br />
Peso<br />
Peso máximo del usuario<br />
15 Kg.*<br />
125 Kg.**<br />
* Sin reposapies<br />
* Puede sufrir variaciones en función<br />
de sus <strong>com</strong>ponentes<br />
** Minos <strong>Plena</strong> 51 Max. 140 Kg.<br />
14
INDEX<br />
Introduction 16<br />
Important information befote using the 16<br />
wheelchair<br />
Minos <strong>Plena</strong> Wheelchair parts 18<br />
Getting in and out of the chair 18<br />
Armrest 19<br />
Safety and operation 19<br />
Folding and unfolding for the car transport 21<br />
Controls and maintenance 22<br />
Repairs and spares 22<br />
Recycling and packaging 21<br />
Minos <strong>Plena</strong> Wheelchair models 22<br />
Accessories and options 25<br />
Dimensions and general information 28
PLENA<br />
USER MANUAL<br />
Introduction<br />
THANK YOU for choosing a MINOS wheelchair. Our <strong>com</strong>pany is young<br />
but we have broad experience in the sector.<br />
The wheelchair you have just bought is the product of our experience.<br />
We are sure that the quality, durability and design of the chair will<br />
not disappoint you.<br />
Please read this manual for the use and maintenance of the chair<br />
carefully.<br />
If you have any questions, please ask the professional who re<strong>com</strong>mended<br />
the purchase of the wheelchair.<br />
Standard<br />
Minos wheelchairs <strong>com</strong>ply with the Medical Devices Directive (1998),<br />
which requires certification under the ISO 7176-8 standard.<br />
MINOS<br />
Pol. Industrial Sangroniz<br />
DISTRIBUTOR’S STAMP<br />
Iberre Kalea 7<br />
48150 Sondika<br />
Vizcaya – Spain<br />
Tel.: + 34 94 453 32 30<br />
Fax: + 34 94 453 30 01<br />
E-mail: pedidos@minos97.<strong>com</strong><br />
www.minos.es<br />
Lifetime Guarantee<br />
Minos Irati wheelchairs have a lifelong guarantee for the<br />
sideframe and crossbar.<br />
IMPORTANT INFORMATION BEFORE USING THE WHEELCHAIR<br />
Como desembalar la silla de ruedas Minos<br />
How to unpackage your Minos wheelchair<br />
Minos wheelchairs are packaged and protected in their own cardboard<br />
box.<br />
To unpackage the chair, pull upwards on the top cover or use a set<br />
of pliers to remove the staples.<br />
Taking the chair out of the box<br />
Once the box is open and the chair is out, you will see that the<br />
wheelchair is in folded position. On one of the handles, there is a<br />
bag containing the instruction manual you are reading.<br />
16
Serial number<br />
Each chair <strong>com</strong>es with a sticker<br />
containing the serial number on the<br />
packaging box and the sideframe.<br />
The serial number identifies the date of sale, batch and establishment<br />
to which the chair was sold.<br />
Unfolding the chair<br />
Push the tubes that support the seat upholstery<br />
outwards, taking care not to trap your fingers<br />
between the tube and the frame. Make sure that<br />
the seat tubes rest on the supports.<br />
The function of the push rod is to keep the<br />
sideframe parallel when folding and unfolding<br />
the chair. It also keeps the chair in folded<br />
position.<br />
Fitting the footplates<br />
Fit each footplate perpendicular to the sideframe<br />
in the hole shown in the photo. Once fitted, turn it<br />
90° until it is fastened in position. To remove the<br />
footplates, press the lever, turn each footplate 90°<br />
outwards and pull them out.<br />
Tyre pressure<br />
Make sure that the tyres have the pressure re<strong>com</strong>mended<br />
on the tyre walls. It is marked on the tyre<br />
itself. The re<strong>com</strong>mended pressure is approximately<br />
2.5 kg.<br />
Check that the brakes work correctly.<br />
applied by pushing the lever forwards. To release the brake, pull the<br />
lever backwards. The brake spring will keep it separated from the<br />
wheel.<br />
We re<strong>com</strong>mend you apply the brake when getting in or out of the<br />
wheelchair.<br />
IMPORTANT: The brakes are not to be used to slow down the chair.<br />
Do not apply the brake while the chair is moving.<br />
17
PLENA<br />
USER MANUAL<br />
WHEELCHAIR PARTS<br />
9<br />
10<br />
11<br />
14<br />
4<br />
3<br />
15 12<br />
13<br />
6<br />
2<br />
1<br />
7<br />
5<br />
8<br />
1<br />
2<br />
3<br />
Push handle.<br />
Backrest.<br />
Armrest release mechanism for folding,<br />
removing and adjusting the height of the<br />
armrest.<br />
Height-adjustable padded armrest.<br />
Quick-release wheel axle.<br />
Rear wheel.<br />
Aluminium handrim.<br />
Folding crossbar.<br />
Folding, removable footrests.<br />
4<br />
5<br />
6<br />
7<br />
8<br />
9<br />
10 Footplate.<br />
11 Heel strap.<br />
12 Front wheel fork.<br />
13 Front wheel.<br />
14 Padded seat with pocket.<br />
15 Parking brake.<br />
GETTING IN AND OUT OF THE CHAIR<br />
First of all apply the parking brake. Do not use the footplates for<br />
support. Fold the armrest backwards and get in or out of the chair<br />
sideways or from the front, as re<strong>com</strong>mended by the technician,<br />
occupational therapist or physiotherapist. Do not get in or out of the<br />
chair without the supervision of an attendant until you learn to do<br />
it easily.<br />
The WC<br />
The bathtub<br />
Side approach<br />
Front approach<br />
Transfer to a chair<br />
Front approach<br />
Side approach<br />
Transfer from the bed<br />
to the wheelchair<br />
Side approach<br />
Front approach<br />
Front approach<br />
18
ARMREST<br />
Folding or removing the armrest<br />
To remove the armrest, press the locking mechanism and pull the<br />
armrest backwards. To get in or out of the chair, leave the armrest<br />
in this position or remove it <strong>com</strong>pletely by simply turning it to release<br />
the pin and then pulling it out.<br />
To release the pin, the tab on the shaft must coincide with the groove<br />
in the hole.<br />
Adjusting the height<br />
To adjust the height, you need an Allen key and a<br />
spanner. Use the tools to unscrew the locking bolt<br />
and pull on the armrest until it is at the desired<br />
height. Fasten the bolt using the Allen key.<br />
SAFETY AND OPERATION<br />
Parts<br />
All the wheelchair parts and elements are originals and must not be<br />
replaced by other standard parts available on the market. The use of<br />
any part that is not an original Minos part renders the chair guarantee<br />
null and void. Please consult your distributor before changing a part.<br />
Armrest and footrest<br />
Make sure that the armrest and footrest are securely fastened in<br />
position. Do not lift the chair by the armrest or footrest under<br />
any circumstances, since this could injure the user or damage<br />
the structure of the chair. Never stand up on the footrest.<br />
Make sure that the footrest is at the correct height from !<br />
the floor so that it does not <strong>com</strong>e into contact with it.<br />
Pushing the chair yourself<br />
For models with the 600 mm rear wheel.<br />
Use the handrim fitted to the rear wheels.<br />
Slight gradient<br />
Keep your back straight and use the handrim to move<br />
forward.<br />
Gentle hill<br />
Bend your back forwards slightly and use the handrim<br />
to move forward.<br />
19
PLENA<br />
USER MANUAL<br />
Turning round<br />
Use both handrims, turning them in opposite directions.<br />
Sloping flat (side position)<br />
Keep the side of the body slightly angled<br />
towards the higher part of the slope.<br />
Turning<br />
Hold the handrim on the side towards which you<br />
want to turn still and use the other handrim to turn.<br />
Wheel brakes<br />
The brakes are not to be used to slow down the chair.<br />
Do not apply the brake while the chair is moving.<br />
Centre of gravity<br />
The chair has been designed with the centre of gravity in front of<br />
the axis of rotation of the rear wheel. This makes it easier to manoeuvre<br />
the chair and prevents it from tipping over.<br />
Anti-tip wheels (optional)<br />
The function of this safety device is to prevent the<br />
wheelchair from tipping over backwards. We re<strong>com</strong>mend<br />
the use of anti-tip wheels at all times.<br />
Leaning forwards or backwards<br />
These movements could tip the chair over. Consequently,<br />
we re<strong>com</strong>mend you make no sharp movements<br />
under any circumstances. If you need to lean<br />
backwards, keep your back against the back of the<br />
chair at all times and make sure the front wheels<br />
are pointing forwards. If you need to lean forwards,<br />
centre the front wheels, apply the parking brake and do not lean<br />
beyond the armrest.<br />
Falls from wheelchair<br />
If the chair tips over, position yourself<br />
in front of it and use your upper members<br />
to get in the correct position in the chair.<br />
Then ask another person to lift up the<br />
chair.<br />
20
Ramps and obstacles<br />
Before trying to over<strong>com</strong>e an obstacle or go up a slope, make sure<br />
you have practised the manoeuvre with a technician, occupational<br />
therapist or other health-care professional. Do not try it on your own<br />
the first time. Have an attendant watch your manoeuvres until you<br />
acquire the necessary skill. Do not try to go up or down gradients of<br />
more than 10 per cent without help. Go over obstacles with both<br />
wheels at the same time (front wheels or rear wheels if you prefer<br />
to address the obstacle going backwards). Make sure that the footplates<br />
do not hit the floor when going up or down steps.<br />
90º<br />
Folding the wheelchair<br />
Take care not to trap your fingers when folding<br />
and unfolding the chair. Pull upwards along the<br />
length of the seat upholstery to fold it and push<br />
the tubes on which the seat rests to unfold it.<br />
Tyres<br />
Make sure that the tyres have the pressure re<strong>com</strong>mended on the tyre<br />
wall. Correct tyre pressure is essential for the manoeuvrability of the<br />
chair. The correct pressure also affects the hold of the parking brake.<br />
Street use<br />
Make sure at all times that your manoeuvres can be seen by passersby,<br />
especially by vehicles if you have to cross the road. Cross the road<br />
at the appropriate place.<br />
FOLDING AND UNFOLDING THE CHAIR FOR CAR TRANSPORT<br />
To transport the wheelchair in the car, choose one of the following<br />
two options:<br />
- Place the folded chair in the area between the rear seats and<br />
the backrests of the front seats.<br />
21
PLENA<br />
USER MANUAL<br />
- Place the folded chair in the car boot. If you prefer, you can<br />
remove the rear wheels with the quick-release axle and the<br />
footplates (see ACCESSORIES AND OPTIONS for the corresponding<br />
procedure).<br />
CONTROLS AND MAINTENANCE<br />
GENERAL<br />
INITIAL<br />
WEEKLY<br />
MONTHLY<br />
REGULARLY<br />
• The chair can be folded and unfolded easily<br />
• The chair travels correctly in a straight line<br />
BRAKES<br />
• They do not interfere with the tyres during movement<br />
• They can be applied easily<br />
• They fulfil their parking brake function<br />
• They have no play<br />
CROSSBAR<br />
• Check for alignment<br />
• The four wheels are on the ground<br />
ARMRESTS<br />
• They are fitted correctly and can be folded and removed easily<br />
REAR WHEELS<br />
• There is no excessive lateral movement when they are turned<br />
with the chair empty<br />
• Check the tension of the spokes<br />
• Check the state of repair of the bearings<br />
FRONT WHEELS<br />
• Check that they are correctly fastened to the fork<br />
• Check the state of repair of the bearings<br />
TREADS<br />
• Solid: check that there are no cracks<br />
• Tyres: check the pressure and state of repair of the tread<br />
CLEANING<br />
• Clean the upholstery on the seat and backrest using soap and water<br />
REPAIRS AND SPARES<br />
For repairs and spares, visit the establishment where you bought the<br />
chair and they will advise you on the best option for your requirements.<br />
RECYCLING AND PACKAGING<br />
The cardboard in which the wheelchair is packaged is 100%<br />
recyclable. Please dispose of it in a rubbish container<br />
especially for cardboard.<br />
MINOS PLENA<br />
Self-propelled aluminium wheelchair.<br />
Adjust the brake according to the type of tyre, solid or pneumatic.<br />
Loosen the two clamp bolts, adjust the section for the brake<br />
shoe to work on the tyre and tighten the bolts.<br />
22
The two positions of the front fork are for fitting 8-, 6- and<br />
5-inch wheels in either of the two positions.<br />
At the top of the fork there are two screws with off-centre hexagonal<br />
faces on the fork side. If the screws are loosened and the position of<br />
the off-centre hexagon is altered, a different angle of inclination of<br />
the fork is achieved. By changing the height of the back wheel, the<br />
fork can be positioned perpendicular to the ground.<br />
The front wheel can be changed using an Allen key.<br />
Unscrew and remove the bolt and the wheel. Then go<br />
through the same steps in reverse. Do not overtighten<br />
the bolt so as not to damage the plastic.<br />
The rear frame has series of holes<br />
15 mm separated for varying the<br />
height of the seat. To change the position,<br />
unscrew the nut and bolt and change the position<br />
of the bearing to the new hole.<br />
Converting an Minos <strong>Plena</strong> in a Minos <strong>Plena</strong> with Drum Brake<br />
Remove the rear wheel, remove the wheel axle, fit into the wheel<br />
axle the drum brake support and fix the drum brake kit. Fit the new<br />
rear wheel on the drum. At the top of the handle, fit the grip extension<br />
and mount the brake handle on the front. Adjust the cable and the<br />
sleeve.<br />
How to apply and release the brake<br />
The chair has two brake handles: one on each backrest handle. To<br />
apply the brake, squeeze the handles gently until the brake slows<br />
down thechair.To release the brake, the handle has one release<br />
mechanism that unlock the brake. When the cable that runs from<br />
the handle to the brake regulator is slack, the travel of the brake<br />
handle will increase. The cable should be sufficiently tight (not too<br />
tight, since that would brake the chair)so as to obtain the correct<br />
braking pressure.<br />
23
PLENA<br />
USER MANUAL<br />
24
ACCESSORIES AND OPTIONS<br />
Quick-release axle<br />
Press the quick-release button and insert the axle<br />
fully into the hole until it is correctly in position. To<br />
remove the wheel, press the quick-release button<br />
and pull the wheel outwards.<br />
To adjust the axle, fasten the lower end of the axle with a spanner<br />
and use another spanner to adjust the self-locking nut to the desired<br />
position.<br />
Anti-tip wheels<br />
These wheels are optional, but they are re<strong>com</strong>mended<br />
to prevent the chair from tipping over backwards.<br />
To fit them, insert the anti-tip tube into the rear of<br />
the frame tube. The distance between the wheel and<br />
the ground is adjusted using a clamp system. To remove<br />
the anti-tip wheels, remove the clamp.<br />
Stepping pad<br />
The lower part of the rear of the chair has a stopper.<br />
To fit the tread, remove the stopper and insert the<br />
tread in the tread axle. To fasten the position of the<br />
tread once the holes in the frame and in the tread<br />
axle are in line, attach these parts together using a<br />
nut and bolt.<br />
The tread can also be fitted using a clamp, with no need for tools.<br />
Small wheels for lifts<br />
At the bottom of the rear of the frame, there<br />
is a hole. Insert the lift wheel fork axle in the<br />
hole and fasten the bolt.<br />
Replacing fixed upholstery with adjustable<br />
upholstery<br />
Remove the side armrests. Unscrew the two bolts<br />
at the top of the backrest rear and remove the<br />
standard upholstery. Remove the bolts that fasten<br />
the seat upholstery and replace it with the adjustable seat.<br />
Replace the bolts, position the crossbar on the supports and tighten<br />
the hook and loop fasteners without deforming the crossbar seat<br />
25
PLENA<br />
USER MANUAL<br />
position. Then fit the upholstery using the hook and loop fasteners.<br />
Tighten the backrest in the chair position and make sure that the<br />
tubes rest on the tube cradle supports so as not to deform the position<br />
of the chair. The upholstery should never be over-tightened so as not<br />
to affect the chair mechanism.<br />
Commode seat<br />
Remove the bolts that fasten the seat upholstery. Fit the bolt in the<br />
<strong>com</strong>mode seat on the front right-hand side of the crossbar. The<br />
<strong>com</strong>mode pan has a hole on the front right bridge that fits on to the<br />
bolt and holds it in place.<br />
Height-adjustable elevating footrest<br />
To raise the footrest, pull it upwards to the desired<br />
height. The footrest automatically locks in position<br />
at different heights. To lower the footrest, press<br />
the lever on the upper end and push down.<br />
The calf support tilts and is adjusted with the handle on the side.<br />
To adjust the height of the footrest, release the side handle and<br />
adjust to the desired height.<br />
Stump support<br />
It has two bolts and four nuts at the bottom of the<br />
platform so that the support position can be varied<br />
as required.<br />
Both the height and angle can be adjusted.<br />
Reclining backrest with gas<br />
piston<br />
This makes it easier to recline the backrest when<br />
the person is sitting in the chair. By pressing the<br />
two handles, the weight of the person’s back helps<br />
find the desired position. To raise it, press the two handles again and<br />
the power of the piston helps raise the person.<br />
If the gas piston does not work, tighten or loosen the cable regulator<br />
located on the top of the handle.<br />
Maximum inclination: 40°. The use of anti-tip wheels is re<strong>com</strong>mended.<br />
26
<strong>Manual</strong> reclining backrest<br />
To recline the backrest, pull the release mechanisms<br />
until it <strong>com</strong>es out of position and move it to the<br />
desired angle.<br />
Maximum inclination: 60°. The use of anti-tip<br />
wheels is re<strong>com</strong>mended.<br />
Long armrest<br />
Remove the side dust guard by unscrewing the<br />
bolt and fit the new model (long). Fit at the desired<br />
height.<br />
Height-adjustable handles<br />
Unscrew the handles on the top of the backrest,<br />
adjust to the desired height and fasten the handles<br />
back in position.<br />
IMPORTANT: Do not loosen the handles more than two turns, since<br />
the interior nut will <strong>com</strong>e off and unadjust the system.<br />
Safety belt<br />
The safety belt is adjusted using a<br />
hook and loop fastener and a clip<br />
with flanges at the rear of the<br />
backrest handle.<br />
Headrest extension<br />
Insert the extension between the backrest<br />
upholstery and the backrest handles until it <strong>com</strong>es<br />
into contact with the backrest upholstery.<br />
Reconditioning kit. This contains the backrest<br />
and seat, 2 front wheels and 2 height-adjustable<br />
armrests.<br />
27
PLENA<br />
USER MANUAL<br />
DIMENSIONS AND GENERAL INFORMATION<br />
Dimensions<br />
Seat width<br />
Seat height<br />
Depth<br />
Backrest height<br />
Armrest height<br />
Total width<br />
Total height<br />
Total length<br />
Width in folded position<br />
Minos <strong>Plena</strong><br />
36, 40, 44, 48, 51 cm.<br />
50 cm.<br />
42 cm.<br />
47 cm.<br />
Adjustable from 20-27 cm.<br />
51, 55, 59, 63, 66 cm.<br />
94 cm.<br />
89 cm.<br />
65 cm.*<br />
31 cm.<br />
Weight<br />
Weight<br />
Maximum user weight<br />
15 Kg.*<br />
125 Kg.**<br />
* Without footplates<br />
* May vary according to parts<br />
** Minos <strong>Plena</strong> 51 Max. 140 kg<br />
28
INHALTSVERZEICHNIS<br />
Einleitung 30<br />
Wichtige information – Bitte vor der Benutzung 30<br />
des Rollstuhls lesen<br />
Minos Trendy: Teile des Rollstuhls 32<br />
Einsteigen in den Rollstuhl und Verlassen 32<br />
des Rollstuhls<br />
Armlehnen 33<br />
Sicherheit und Bedienung 33<br />
Falten und Öffnen des Rollstuhls beim 35<br />
Transport im Auto<br />
Kontrolle und Wartung 36<br />
Reparaturen und Ersatzteile 36<br />
Recycling der Verpackung 36<br />
Minos Trendy-Modelle 36<br />
Zubehör und Optionen 39<br />
Allgemeine Informationen 42
TRENDY<br />
BEDIENUNGSANLEITUNG<br />
Einleitung<br />
VIELEN DANK dass Sie sich für einen Rollstuhl von MInos ’97 entschieden<br />
haben. Unsere Firma ist zwar noch jung, hat aber intensive Erfahrung<br />
auf diesem Gebiet. Der Rollstuhl für den Sie sich entschieden haben,<br />
ist ein Ergebnis dieser Erfahrung. Wir sind sicher, dass Sie mit Qualität,<br />
Haltbarkeit und dem Design Ihres Rollstuhls zufrieden sein werden.<br />
Bitte lesen Sie diese Bedienungs- und Wartungsanleitung für den<br />
Rollstuhl sorgfältig durch. Sollten Sie Fragen haben, kontaktieren Sie<br />
bitte einen Fachhändler, idealer weise den Fachhändler, der Ihnen<br />
diesen Rollstuhl empfohlen hat.<br />
Standard<br />
Minos Rollstühle erfüllen die Anforderungen der Richtlinie für Medizinprodukte<br />
(1998) welche die Zertifizierung nach DIN EN ISO 7176-<br />
8 erfordert.<br />
MINOS<br />
Pol. Industrial Sangroniz<br />
STEMPEL DES FACHHÄNDLERS<br />
Iberre Kalea 7<br />
48150 Sondika<br />
Bizcaya – Spain<br />
Tel.: + 34 94 453 32 30<br />
Fax: + 34 94 453 30 01<br />
Email: pedidos@minos97.<strong>com</strong><br />
www.minos.es<br />
Lebenslange Garantie<br />
Wir gewähren für Minos Alu Rollstühle eine lebenslange<br />
Garantie auf den Rahmen und die Kreuzstrebe<br />
WICHTIGE INFORMATION – BITTE VOR DER BENUTZUNG DES<br />
ROLLSTUHLS LESEN<br />
Auspacken des Rollstuhls<br />
Die Verpackung in einem stabilen Karton schützt den Rollstuhl vor<br />
Beschädigungen. Zum Auspacken ziehen Sie den Deckel des Kartons<br />
nach oben oder entfernen Sie die Klammern mit einer Zange.<br />
Entnehmen des Rollstuhls aus dem Karton<br />
Entnehmen Sie nun den gefalteten Rollstuhl aus dem Karton. Die<br />
Bedienungsanleitung befindet sich in einer Tüte an einem der beiden<br />
Schiebegriffe oder im Karton für die Beinstützen.<br />
30
Seriennummer<br />
Jeder Rollstuhl hat ein Typenschild<br />
mit der Seriennummer auf dem<br />
Karton und auf dem Seitenrahmen.<br />
Das Typenschild identifiziert den Produktionszeitraum, die Chargennummer<br />
und den Hersteller oder Importeur.<br />
Entfalten des Rollstuhls<br />
Drücken Sie auf die Rohre, auf denen das Sitzpolster<br />
angebracht ist. ACHTUNG: Achten Sie<br />
darauf, dass Sie sich nicht die Finger zwischen<br />
den Rohren und dem Rahmen einklemmen. Die<br />
Rohre müssen auf den Aufnahmen aufliegen.<br />
Hilfsscheren<br />
Die Hilfsscheren an der Kreuzschere sorgen<br />
dafür, dass die Seitenrahmen beim Falten und<br />
Entfalten immer in einer parallelen Position<br />
bleiben und dass der Rollstuhl in einer gefalteten<br />
Position stabil bleibt.<br />
Anbringen und Abnehmen der Beinstützen<br />
Setzen Sie jede Beinstütze nach außen abgewinkelt<br />
in die dafür vorgesehene Öffnung ein (siehe Foto).<br />
Anschließend drehen Sie die Beinstütze um 90° bis<br />
sie einrastet. Um die Beinstütze abzunehmen, drücken<br />
Sie auf den Hebel, drehen die Beinstütze um 90°<br />
nach außen und ziehen sie heraus.<br />
Reifendruck (Luftbereifung)<br />
Vergewissern Sie sich, dass die Reifen den richtigen<br />
Druck haben. Der empfohlene Reifendruck ist auf<br />
der Wand des Reifens angegeben.<br />
Überprüfen Sie die korrekte Funktionsweise der<br />
Bremse.<br />
Um die Bremse festzustellen, drücken Sie die Bremshebel nach vorne;<br />
um sie zu lösen, ziehen Sie die Bremshebel nach hinten. Eine Feder<br />
sorgt dafür, dass die gelöste Bremse nicht mit dem Reifen in Berührung<br />
kommt.<br />
Wir empfehlen, die Bremse festzustellen, wenn Sie in den Rollstuhl<br />
einsteigen oder aus dem Rollstuhl aussteigen.<br />
WICHTIG: Die Bremsen dürfen nicht benutzt werden, um den Rollstuhl<br />
abzubremsen. Sie dürfen nicht eingesetzt werden, solange der Rollstuhl<br />
in Bewegung ist.<br />
31
7<br />
TRENDY<br />
BEDIENUNGSANLEITUNG<br />
9<br />
10<br />
11<br />
14<br />
3<br />
15<br />
4<br />
12<br />
TEILE DES ROLLSTUHLS<br />
13<br />
6<br />
2<br />
1<br />
5<br />
8<br />
1 Schiebegriffe<br />
2 Rückenlehne<br />
3 Seitenteil, rückschwingbar und abnehmbar<br />
4 Gepolsterte Armauflage, höhenverstellbar<br />
5 Herausnehmbare Schnellspannsteckachse des Rades<br />
6 Hinterrad<br />
7 Aluminium-Greifreifen<br />
8 Kreuzschere, faltbar<br />
9 Beinstützen, abschwenkbar und abnehmbar<br />
10 Fußplatte, hochklappbar<br />
11 Fersenband<br />
12 Vorderradgabel<br />
13 Vorderrad<br />
14 Gepolsterte Sitzbespannung mit Tasche<br />
15 Feststellbremse<br />
EINSTEIGEN IN DEN ROLLSTUHL UND VERLASSEN DES ROLLSTUHLS<br />
Stellen Sie zuerst die Feststellbremse fest. Stellen Sie sich beim<br />
Einsteigen und Aussteigen nicht auf die Fußplatten. Schwingen Sie<br />
die Armlehnen zurück, um seitlich in den Stuhl einzusteigen oder ihn<br />
zu verlassen. Sie können aber auch von vorne in den Rollstuhl einsteigen<br />
oder ihn nach vorne verlassen. Folgen Sie dabei den Empfehlungen<br />
Ihres Technikers oder Ergo- oder Physiotherapeuten. Stellen<br />
Sie sicher, dass Sie immer die Unterstützung einer Begleitperson beim<br />
Einsteigen in den Rollstuhl oder beim Verlassen des Rollstuhls haben,<br />
bis Sie diese Übung sicher beherrschen.<br />
Für das WC<br />
Für die Badewanne<br />
Seitlicher Einstieg<br />
Einstieg von vorne<br />
Transfer in den Rollstuhl<br />
Seitlicher Einstieg<br />
Einstieg von vorne<br />
Transfer vom Bett in<br />
den Rollstuhl<br />
Seitlicher Einstieg<br />
Einstieg von vorne<br />
Einstieg von vorne<br />
32
ARMLEHNEN<br />
Rückschwingen oder Abnehmen der Armlehne<br />
Um die Armstütze zu entfernen, drücken Sie auf den Verriegelungshebel<br />
und ziehen Sie die Armlehne nach hinten. Um in den Rollstuhl<br />
einzusteigen oder ihn zu verlassen, können Sie die Armstütze in dieser<br />
Position belassen oder komplett entfernen. Sie können die Armstütze<br />
komplett entfernen, indem Sie durch eine einfache Drehbewegung<br />
den Stift herausziehen. Um den Stift zu entfernen, muss der Schaft<br />
des Stiftes mit der Rille in der Öffnung übereinstimmen.<br />
Höhenverstellung<br />
Für die Höhenverstellung benötigen Sie einen Inbusschlüssel<br />
und einen Schraubenschlüssel. Benutzen<br />
Sie die Werkzeuge um die Schraube zu lösen und<br />
bringen Sie die Armstütze in die gewünschte Position.<br />
Danach befestigen Sie den Stift wieder mit dem<br />
Inbusschlüssel.<br />
SICHERHEIT UND BEDIENUNG<br />
Ersatzteile für den Rollstuhl<br />
Alle Rollstuhlteile und Elemente sind Originalteile und dürfen nicht<br />
durch Ersatzteile von anderen Marken, die erhältlich sind, ersetzt<br />
werden. Sollte irgendein anderes Ersatzteil als ein Original Minos-<br />
Ersatzteil verwendet werden, erlischt die Garantie für den Stuhl. Bitte<br />
beraten Sie sich mit Ihrem Händler, bevor Sie ein Ersatzteil auswechseln.<br />
Arm- und Beinstützen<br />
Stellen Sie sicher, dass Arm- und Beinstützen fest am Stuhl<br />
angebracht sind. Heben Sie den Rollstuhl auf keinen Fall an<br />
den Arm- oder Beinstützen an, denn dies könnte zu Verletzungen<br />
des Benutzers oder zur Beschädigung des Rollstuhles<br />
führen. Stellen Sie sich nicht auf die Beinstützen.<br />
!<br />
Stellen Sie sicher, dass die Beinstützen den richtigen Abstand zum<br />
Boden haben, so dass sie den Boden nicht berühren können.<br />
Selbstfahrer<br />
Rollstühle mit Hinterrad 24“ oder 22“<br />
Benutzen Sie einen zum Hinterrad passenden Greifreifen.<br />
Leichtes Gefälle<br />
Halten Sie den Rücken gerade und benutzen Sie die<br />
Greifreifen, um vorwärts zu fahren.<br />
Leichte Steigung<br />
Beugen Sie den Rücken leicht nach vorne und benutzen<br />
Sie die Greifreifen, um vorwärts zu fahren.<br />
33
TRENDY<br />
BEDIENUNGSANLEITUNG<br />
Wenden<br />
Benutzen Sie beide Greifreifen und drehen Sie sie in die<br />
entgegen gesetzte Richtung.<br />
Neigung (seitliche Position)<br />
Lehnen Sie Ihren Körper leicht gegen den<br />
Hang.<br />
Drehung<br />
Halten Sie den Greifreifen auf der Seite, auf die Sie<br />
sich drehen möchten und benutzen Sie den anderen<br />
Greifreifen, um sich zu drehen.<br />
Feststellbremse<br />
Die Bremse ist nicht geeignet, um den Rollstuhl abzubremsen.<br />
Setzen Sie die Bremse niemals ein, wenn<br />
sich der Rollstuhl noch in Bewegung befindet.<br />
Schwerpunkt<br />
Der Rollstuhl wurde so konstruiert, dass sich der Schwerpunkt auf<br />
den Vorderachsen befindet, wenn der Stuhl gedreht wird. Dies<br />
erleichtert die Bewegung des Rollstuhls und bewahrt ihn davor,<br />
umzukippen.<br />
Antikippräder (optional)<br />
Die Funktion dieses Zubehörs dient dazu, den Rollstuhl<br />
davor zu bewahren, rückwärts umzukippen. Wir empfehlen<br />
daher, den Rollstuhl immer mit Antikipprädern<br />
zu bestellen.<br />
Vor- oder Zurücklehnen im Rollstuhl<br />
Diese Bewegungen könnten zu einem Umkippen<br />
des Rollstuhls führen. Daher empfehlen wir, ruckartige<br />
Bewegungen zu vermeiden. Sollten Sie sich<br />
nach hinten lehnen müssen, lehnen Sie Ihren Rücken<br />
gegen den Rücken des Rollstuhls und beachten Sie,<br />
dass die Vorderräder nach vorne zeigen. Sollten Sie sich nach vorne<br />
lehnen müssen, zentrieren Sie die Vorderräder, benutzen Sie die<br />
Feststellbremse und lehnen Sie sich nicht über die Armlehnen.<br />
Umkippen des Rollstuhls<br />
Sollte der Rollstuhl umfallen, verlagern<br />
Sie Ihr Gewicht nach vorne und versuchen<br />
Sie die richtige Position im Rollstuhl<br />
einzunehmen. Danach bitten Sie eine<br />
andere Person, den Rollstuhl aufzurichten.<br />
34
Rampen und Hindernisse<br />
Bevor Sie versuchen ein Hindernis zu überwinden oder einen Hang<br />
hochzufahren, sollten Sie dies zuvor mit einem Techniker, Physiooder<br />
Ergotherapeuten üben. Auf keinen Fall sollten Sie es beim ersten<br />
Mal alleine versuchen. Eine Hilfsperson sollte bei Ihnen sein, bis Sie<br />
diese Übung sicher beherrschen. Versuchen Sie nicht, ohne Hilfsperson<br />
Steigungen von mehr als 10 Prozent nach oben oder unten zu<br />
bewältigen. Überwinden Sie Hindernisse immer mit 2 Rädern gleichzeitig<br />
(Vorderräder oder Hinterräder, falls Sie es bevorzugen, ein<br />
Hindernis rückwärts zu bewältigen). Beachten Sie, dass die Fußplatten<br />
nicht den Boden berühren, wenn Sie über Stufen oder Bordsteine<br />
fahren.<br />
90º<br />
Falten des Rollstuhls<br />
Achten Sie darauf, sich nicht die Finger einzuklemmen,<br />
wenn Sie den Rollstuhl falten oder<br />
öffnen. Ziehen Sie die Sitzbespannung nach oben,<br />
um den Rollstuhl zu falten und drücken Sie die<br />
Stützrohre des Sitzes auseinander, um den Rollstuhl<br />
zu öffnen.<br />
Bereifung<br />
Beachten Sie, dass die Räder immer den empfohlenen Reifendruck<br />
haben, der auf der Wand des Reifens angegeben ist. Der richtige<br />
Reifendruck ist die Voraussetzung für eine optimale Manövrierfähigkeit<br />
des Rollstuhls. Der korrekte Reifendruck bedingt ebenfalls, dass die<br />
Feststellbremse einwandfrei funktioniert.<br />
Benutzung öffentlicher Straßen und Wege<br />
Achten Sie darauf, dass jedes Ihrer Manöver von Passanten erkannt<br />
werden kann, besonders auch von Autofahrern, falls Sie die Straße<br />
überqueren wollen. Überqueren Sie die Straße nur an geeigneten<br />
Stellen.<br />
FALTEN UND ÖFFNEN DES ROLLSTUHLS BEIM TRANSPORT IM AUTO<br />
Um den Rollstuhl im Auto transportieren zu können, wählen Sie bitte<br />
eine der beiden Optionen:<br />
- Transportieren Sie den gefalteten Rollstuhl in dem Raum<br />
zwischen Rücksitz und der Rückenlehne des Vordersitzes.<br />
35
TRENDY<br />
BEDIENUNGSANLEITUNG<br />
- Transportieren Sie den gefalteten Rollstuhl im Kofferraum<br />
Ihres Autos. Wenn Sie möchten, können Sie die Hinterräder<br />
des Rollstuhls entfernen, indem Sie auf den Schnellspannknopf<br />
drücken, die Steckachse herausziehen. Zusätzlich sollten Sie<br />
die Beinstützen abnehmen.<br />
KONTROLLE UND WARTUNG<br />
ALLGEMEIN<br />
ANFANGS<br />
WÖCHENTLICH<br />
MONATLICH<br />
REGELMÄßIG<br />
• Der Rollstuhl kann einfach gefaltet und geöffnet werden<br />
• Der Rollstuhl fährt immer geradeaus<br />
BREMSEN<br />
• Die gelösten Bremsen haben keinen Kontakt zu den Reifen<br />
• Die Bremsen können leicht festgestellt werden<br />
• Die Bremsen erfüllen ihren Zweck als Feststellbremsen<br />
• Die Bremsen haben kein Spiel<br />
KREUZSCHERE<br />
• Die Seitenrahmen sind parallel ausgerichtet<br />
• Alle 4 Räder haben Bodenkontakt<br />
ARMLEHNEN<br />
• Die Armlehnen sind korrekt angebracht und können einfach zurück<br />
geklappt und entfernt werden<br />
HINTERRÄDER<br />
• Es gibt kein übermäßiges seitliches Spiel, wenn der leere Rollstuhl gedreht wird<br />
• Überprüfen Sie die Spannung der Speichen<br />
• Überprüfen Sie den Zustand der Radaufnahmen<br />
VORDERRÄDER<br />
• Überprüfen Sie den korrekten Sitz in der Vorderradgabel<br />
• Überprüfen Sie den Zustand der Radaufnahmen<br />
ACHTUNG<br />
• Überprüfen Sie, dass die festen Teile des Rollstuhls keine Risse aufweisen<br />
• Überprüfen Sie regelmäßig den Zustand der Reifen und deren Profil<br />
REINIGUNG<br />
• Sitz- und Rückenpolster können mit Wasser und Seife gereinigt werden<br />
REPARATUREN UND ERSATZTEILE<br />
Im Fall von Reparaturen oder wenn Sie Ersatzteile benötigen, kontaktieren<br />
Sie bitte den Fachhändler, von dem Sie den Rollstuhl bezogen<br />
haben. Er wird sich bemühen, Ihre Wünsche bestmöglich zu erfüllen.<br />
RECYCLING DER VERPACKUNG<br />
Der Karton in dem der Rollstuhl geliefert wurde ist zu 100%<br />
wieder verwertbar. Er kann in einem Altpapiercontainer<br />
entsorgt werden.<br />
MINOS TRENDY<br />
Leichtgewichts-Aluminium Rollstuhl mit Greifreifen-Antrieb<br />
Passen Sie die Feststellbremse an die Luft- oder pannensichere<br />
Bereifung an. Lösen Sie die Klammern und versetzen Sie den Bremsschuh<br />
so, dass die Bremse fest auf dem Reifen anliegt. Dann wird der<br />
Bremsschuh wieder befestigt.<br />
36
Die beiden Aufnahmen in der Vorderradgabel passen in beiden<br />
Positionen zu 8"-, 6"- und 5"-Rädern.<br />
Im oberen Teil der Gabel sind zwei Sechskantexzenterschrauben auf<br />
der Gabelseite vorhanden. Bei Lockerung dieser Schrauben ändert<br />
sich die Gabelneigung so, dass bei Veränderung der Höhe des Hinterrades<br />
die Gabel senkrecht zum Boden eingestellt werden kann.<br />
Der Hinterrahmen verfügt über Aufnahmen (15 mm),<br />
um die Sitzhöhe verstellen zu können. Um die richtige<br />
Sitzhöhe einzustellen, wählen Sie die entsprechende<br />
Aufnahmeaus.<br />
Das Vorderrad kann in eine der beiden<br />
Aufnahmen der Vorderradgabel eingesetzt<br />
werden. Ziehen Sie die Achsschraube<br />
nicht zu fest an, um eine Beschädigung<br />
der Kunststofffelge zu vermeiden.<br />
Nachrüstung des Minos Trendy mit einer Trommelbremse<br />
Nehmen Sie das Hinterrad ab und entfernen Sie die Achse. Setzen<br />
Sie die Trommelbremse in die Achsaufnahme ein und montieren Sie<br />
das neue Hinterrad mit der Trommelbremse. Montieren Sie die<br />
Verlängerung der Schiebegriffe und die Bremshebel. Stellen Sie die<br />
richtige Länge des Bowdenzuges ein. Das Nachrüsten des Minos<br />
Trendy mit einer Trommelbremse darf nur von einem Fachhändler<br />
durchgeführt werden.<br />
Feststellen und Lösen der Bremse<br />
Der Rollstuhl hat an jedem der beiden Schiebegriffe einen Bremshebel.<br />
Der Bremshebel wird nach oben gezogen, bis der Rollstuhl verlangsamt<br />
wird oder komplett zum Stillstand kommt. Um die Bremse wieder zu<br />
lösen, wird die Verriegelung wieder entriegelt. Wenn der Bowdenzug<br />
der Bremse zu locker ist, hat der Bremshebel zuviel Spiel. Er darf auch<br />
nicht zu kurz sein, da der Rollstuhl sonst gebremst wird. Für die<br />
richtige Einstellung und Bremswirkung muss die Länge des<br />
Bowdenzuges richtig eingestellt werden.<br />
Die Spannung des Bowdenzuges kann mittels der Einstellschraube justiert<br />
werden. Zur Einstellung wird das Hinterrad abgenommen, die<br />
Einstellschraube gelöst, die richtige Länge eingestellt und die Einstellschraube<br />
wieder fixiert. Die richtige Einstellung der Länge des Bowdenzuges ist<br />
wichtig, um jederzeit eine optimale Bremswirkung zu erzielen.<br />
37
TRENDY<br />
BEDIENUNGSANLEITUNG<br />
38
ZUBEHÖR UND OPTIONEN<br />
Schnellspann-Steckachse<br />
Drücken Sie den Knopf der Steckachse und führen<br />
Sie die Achse komplett in die Aufnahme ein, bis sie<br />
in der richtigen Position ist. Um das Rad abzunehmen,<br />
drücken Sie ebenfalls auf den Knopf der Steckachse<br />
und ziehen das Rad komplett heraus.<br />
Um die Achse einzustellen, fixieren Sie das untere Ende der Achse<br />
mit einem Schraubenschlüssel, und bringen Sie die Mutter mit einem<br />
anderen Schraubenschlüssel in die gewünschte Position.<br />
Antikippräder<br />
Die Antikippräder sind optional erhältlich. Wir empfehlen<br />
aber, sie zu benutzen, um zu verhindern, dass<br />
der Rollstuhl nach hinten umkippen kann. Zur Befestigung<br />
wird das Rohr der Antikippräder in das<br />
hintere Rahmenrohr gesteckt. Die Distanz zwischen<br />
dem Antikipprad und dem Boden wird durch eine<br />
Klammer eingestellt. Zum Abnehmen des Antikipprades wird die<br />
Klammer entfernt.<br />
Ankipphilfe<br />
Der untere Teil des Rahmens ist mit einem Stopfen<br />
verschlossen. Um die Ankipphilfe zu befestigen, wird<br />
der Stopfen entfernt und die Ankipphilfe in das<br />
Rahmenrohr eingesteckt. Die Ankipphilfe wird mit<br />
einer Mutter und einer Schraube fixiert.<br />
Ohne Werkzeug kann die Ankipphilfe auch mit einer Klammer befestigt<br />
werden.<br />
Transportadapter<br />
An der Unterseite des Rahmens befindet sich<br />
eine Öffnung in die kleine Rollen (Transportadapter)<br />
eingesetzt und mit einer Schraube<br />
befestigt werden können.<br />
Ersetzen der festen Polsterung durch eine<br />
verstellbare Polsterung<br />
Entfernen Sie die Armlehnen. Entfernen Sie die<br />
oberen Schrauben auf der Rückseite des Standard-<br />
Rückenpolsters und nehmen Sie das Standard-<br />
Polster ab. Entfernen Sie die Schrauben des Sitzpolsters<br />
und ersetzen Sie ihn durch einen einstellbaren Sitz. Stellen<br />
Sie den Rollstuhl nun so ein, dass die Seitenrahmen parallel sind und<br />
39
TRENDY<br />
BEDIENUNGSANLEITUNG<br />
die Stützrohre des Sitzes in den Aufnahmen aufliegen. Die Polsterung<br />
darf nicht zu fest eingestellt werden, um die Funktionsfähigkeit des<br />
Rollstuhles nicht zu beeinträchtigen.<br />
Toilettensitz<br />
Entfernen Sie die Schrauben, mit dem das Sitzpolster befestigt ist.<br />
Befestigen Sie den Toilettensitz mit diesen Schrauben vorne rechts<br />
an der Kreuzschere. Die Toilettenpfanne hat am Bogen vorne rechts<br />
eine Öffnung die zu der Schraube passt und die Toilettenpfanne in<br />
der richtigen Position hält.<br />
Höhen- und winkelverstellbare Beinstütze<br />
Um die Beinstütze zu verstellen, ziehen Sie diese<br />
bis zur gewünschten Höhe. Die Beinstütze rastet<br />
automatisch in verschiedenen Höhen ein. Um die<br />
Beinstütze nach unten zu stellen, drücken Sie den<br />
Hebel am oberen Ende und drücken Sie die Beinstütze nach unten.<br />
Die Wadenplatten können geklappt und mit dem seitlichen Griff<br />
verstellt werden. Um die Höhe der Fußstützen zu verstellen, lösen<br />
Sie den seitlichen Griff und stellen Sie die gewünschte Höhe ein.<br />
Amputationsbeinstütze<br />
Die Amputationsbeinstütze hat 2 Schrauben und 4<br />
Muttern an der Unterseite, so dass die Beinstütze wie<br />
gewünscht eingestellt werden kann. Sowohl die Höhe<br />
als auch der Winkel können eingestellt werden.<br />
Rückenverstellung durch Gasdruckfeder<br />
Die Gasdruckfeder vereinfacht es<br />
den Rücken zu verstellen, wenn eine Person in dem<br />
Stuhl sitzt. Indem Sie auf die 2 Griffe drücken, wird<br />
mit Hilfe des Gewichtes des Patienten die<br />
gewünschte Position erreicht. Um den Rücken wieder aufrecht zu<br />
stellen, drücken Sie ebenfalls auf die beiden Griffe und die Gasdruckfeder<br />
hilft, den Rücken wieder gerade zu stellen.<br />
Sollte die Gasdruckfeder nicht funktionieren, ziehen Sie die Einstellschraube<br />
an der Oberseite des Griffes entweder an oder stellen Sie sie<br />
etwas lockerer ein.<br />
Die maximale Neigung beträgt 40°. Antikippräder werden empfohlen.<br />
40
Manuelle Rückenverstellung<br />
Entriegeln Sie den Öffnungsmechanismus, um den<br />
Rücken zu verstellen und bringen Sie ihn in die<br />
gewünschte Position.<br />
Die maximale Neigung beträgt 60°. Antikippräder<br />
werden empfohlen.<br />
Lange Armlehnen<br />
Tauschen Sie die Desk-Seitenteile durch die langen<br />
Seitenteile aus und stellen Sie diese in der<br />
gewünschten Höhe ein.<br />
Höhenverstellbare Schiebegriffe<br />
Lösen Sie die Stellschrauben oben am Rücken,<br />
stellen Sie die gewünschte Höhe ein und ziehen<br />
Sie die Stellschrauben wieder an.<br />
WICHTIG: Lockern Sie die Griffe nicht mehr als 2 Umdrehungen,<br />
da sonst die innere Mutter herausgedreht wird und damit der<br />
Rollstuhl instabil wird.<br />
Sicherheitsgurt<br />
Der Sicherheitsgurt wird mit einer<br />
Schlaufe am Rückenrohr befestigt.<br />
Rückenverlängerung<br />
Führen Sie die Verlängerung zwischen dem Rückenpolster<br />
und den Schiebegriffen ein, bis die<br />
Verlängerung das Rückenpolster berührt.<br />
Ersatzteil Kit. Dies beinhaltet Rücken- und Sitzpolster,<br />
2 Vorderräder und 2 höhenverstellbare<br />
Armlehnen.<br />
41
TRENDY<br />
BEDIENUNGSANLEITUNG<br />
ABMESSUNGEN UND ALLGEMEINE INFORMATIONEN<br />
Abmessungen Minos <strong>Plena</strong><br />
Sitzbreite<br />
36, 40, 44, 48, 51 cm.<br />
Sitzhöhe<br />
50 cm.<br />
Sitztiefe<br />
42 cm.<br />
Rückenlehne<br />
47 cm.<br />
Armstütze<br />
Verstellbar von 20-27 cm.<br />
Gesamtbreite<br />
51, 55, 59, 63, 66 cm.<br />
Gesamthöhe<br />
94 cm.<br />
Gesamtlänge<br />
Gesamtbreite (gefaltet)<br />
89 cm.<br />
65 cm.*<br />
31 cm.<br />
Gewicht<br />
Gewicht des Rollstuhls<br />
Maximal zulässiges<br />
Gesamtge-wicht<br />
des Benutzers<br />
15 Kg.*<br />
125 Kg.**<br />
* Ohne Armlehnen<br />
** Minos Trendy 51 Max. 140 Kg.<br />
42
POLIGONO INDUSTRIAL SANGRONIZ<br />
IBERRE KALEA 7<br />
48150 SONDIKA (BIZKAIA)<br />
ESPAÑA<br />
TEL: +34 94 453 32 30<br />
FAX: + 34 94 453 30 01<br />
E-mail: pedidos@minos97.<strong>com</strong><br />
http: //www.minos97.<strong>com</strong>