Manual Plena - Extranetinnova.com
Manual Plena - Extranetinnova.com
Manual Plena - Extranetinnova.com

Sie wollen auch ein ePaper? Erhöhen Sie die Reichweite Ihrer Titel.
YUMPU macht aus Druck-PDFs automatisch weboptimierte ePaper, die Google liebt.
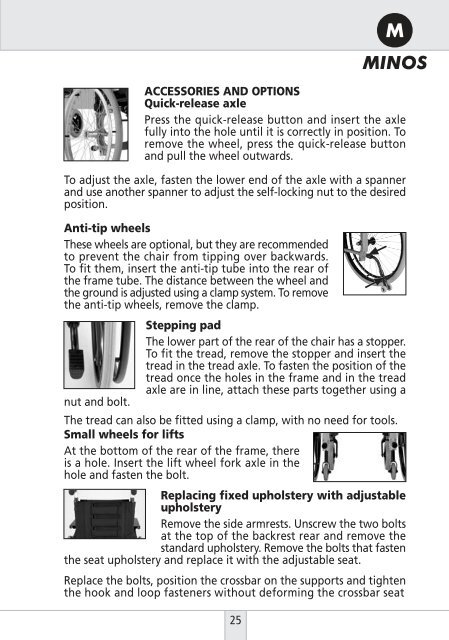
ACCESSORIES AND OPTIONS<br />
Quick-release axle<br />
Press the quick-release button and insert the axle<br />
fully into the hole until it is correctly in position. To<br />
remove the wheel, press the quick-release button<br />
and pull the wheel outwards.<br />
To adjust the axle, fasten the lower end of the axle with a spanner<br />
and use another spanner to adjust the self-locking nut to the desired<br />
position.<br />
Anti-tip wheels<br />
These wheels are optional, but they are re<strong>com</strong>mended<br />
to prevent the chair from tipping over backwards.<br />
To fit them, insert the anti-tip tube into the rear of<br />
the frame tube. The distance between the wheel and<br />
the ground is adjusted using a clamp system. To remove<br />
the anti-tip wheels, remove the clamp.<br />
Stepping pad<br />
The lower part of the rear of the chair has a stopper.<br />
To fit the tread, remove the stopper and insert the<br />
tread in the tread axle. To fasten the position of the<br />
tread once the holes in the frame and in the tread<br />
axle are in line, attach these parts together using a<br />
nut and bolt.<br />
The tread can also be fitted using a clamp, with no need for tools.<br />
Small wheels for lifts<br />
At the bottom of the rear of the frame, there<br />
is a hole. Insert the lift wheel fork axle in the<br />
hole and fasten the bolt.<br />
Replacing fixed upholstery with adjustable<br />
upholstery<br />
Remove the side armrests. Unscrew the two bolts<br />
at the top of the backrest rear and remove the<br />
standard upholstery. Remove the bolts that fasten<br />
the seat upholstery and replace it with the adjustable seat.<br />
Replace the bolts, position the crossbar on the supports and tighten<br />
the hook and loop fasteners without deforming the crossbar seat<br />
25