Instructions for use - Hotpoint
Instructions for use - Hotpoint
Instructions for use - Hotpoint

Erfolgreiche ePaper selbst erstellen
Machen Sie aus Ihren PDF Publikationen ein blätterbares Flipbook mit unserer einzigartigen Google optimierten e-Paper Software.
Installation<br />
GB<br />
! This instruction manual should be kept in a<br />
safe place <strong>for</strong> future reference. If the washing<br />
machine is sold, transferred or moved, make<br />
sure that the instruction manual remains with<br />
the machine so that the new owner is able to<br />
familiarise himself/herself with its operation<br />
and features.<br />
! Read these instructions carefully: they<br />
contain vital in<strong>for</strong>mation relating to the safe<br />
installation and operation of the appliance.<br />
Unpacking and levelling<br />
Unpacking<br />
1. Remove the washing machine from its<br />
packaging.<br />
2. Make sure that the washing machine has<br />
not been damaged during the transportation<br />
process. If it has been damaged, contact the<br />
retailer and do not proceed any further with<br />
the installation process.<br />
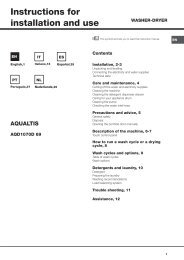
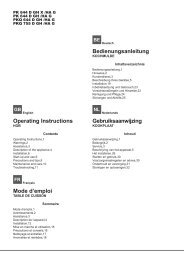
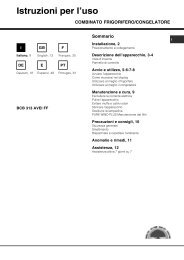
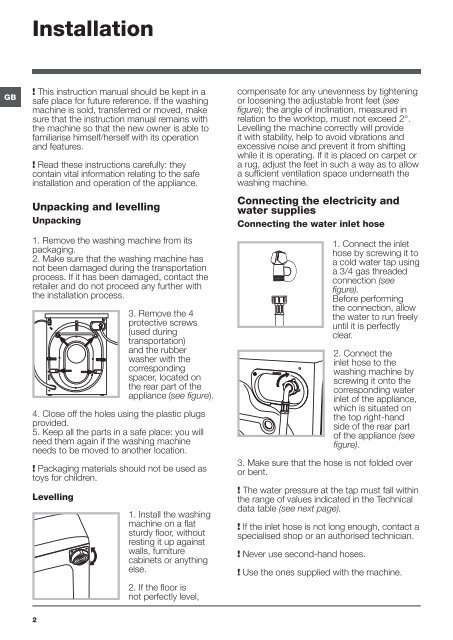
3. Remove the 4<br />
protective screws<br />
(<strong>use</strong>d during<br />
transportation)<br />
and the rubber<br />
washer with the<br />
corresponding<br />
spacer, located on<br />
the rear part of the<br />
appliance (see figure).<br />
4. Close off the holes using the plastic plugs<br />
provided.<br />
5. Keep all the parts in a safe place: you will<br />
need them again if the washing machine<br />
needs to be moved to another location.<br />
! Packaging materials should not be <strong>use</strong>d as<br />
toys <strong>for</strong> children.<br />
Levelling<br />
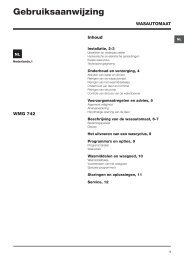
1. Install the washing<br />
machine on a flat<br />
sturdy floor, without<br />
resting it up against<br />
walls, furniture<br />
cabinets or anything<br />
else.<br />
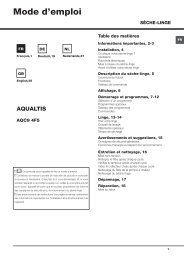
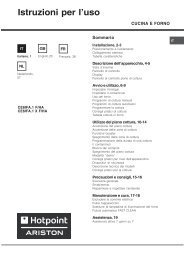
2. If the floor is<br />
not perfectly level,<br />
compensate <strong>for</strong> any unevenness by tightening<br />
or loosening the adjustable front feet (see<br />
figure); the angle of inclination, measured in<br />
relation to the worktop, must not exceed 2°.<br />
Levelling the machine correctly will provide<br />
it with stability, help to avoid vibrations and<br />
excessive noise and prevent it from shifting<br />
while it is operating. If it is placed on carpet or<br />
a rug, adjust the feet in such a way as to allow<br />
a sufficient ventilation space underneath the<br />
washing machine.<br />
Connecting the electricity and<br />
water supplies<br />
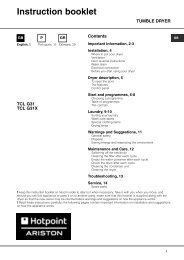
Connecting the water inlet hose<br />
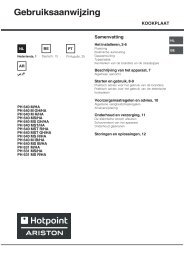
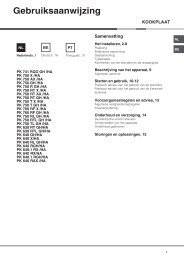
1. Connect the inlet<br />
hose by screwing it to<br />
a cold water tap using<br />
a 3/4 gas threaded<br />
connection (see<br />
figure).<br />
Be<strong>for</strong>e per<strong>for</strong>ming<br />
the connection, allow<br />
the water to run freely<br />
until it is perfectly<br />
clear.<br />
2. Connect the<br />
inlet hose to the<br />
washing machine by<br />
screwing it onto the<br />
corresponding water<br />
inlet of the appliance,<br />
which is situated on<br />
the top right-hand<br />
side of the rear part<br />
of the appliance (see<br />
figure).<br />
3. Make sure that the hose is not folded over<br />
or bent.<br />
! The water pressure at the tap must fall within<br />
the range of values indicated in the Technical<br />
data table (see next page).<br />
! If the inlet hose is not long enough, contact a<br />
specialised shop or an authorised technician.<br />
! Never <strong>use</strong> second-hand hoses.<br />
! Use the ones supplied with the machine.<br />
2